How to Repair Shrinking Crown Molding
The podcast crew discuss causes and solutions to a listener's problem with a scarf joint that expands during the colder months.
In this clip from Podcast Episode 153, the Fine Homebuilding crew responds to this question from podcast listener Steve:
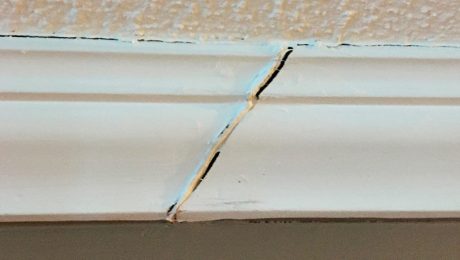
“I replaced some crown molding in my hallway, maybe two years ago. The stock was from the orange big box store, and is finger-jointed and came preprimed. I’m in Massachusetts, so pretty humid summers and dry, cold winters. When I installed it (probably in the spring, if I remember correctly), the scarf joint was reasonably tight, and I filled it with a painter’s caulk (Alex Plus). It’s about a 40-ft. run of crown, so there are two joints in the run. Once the heating season arrived, the lower indoor humidity caused the molding to shrink along its length, resulting in some ugly open joints (yeah, I know the molding is installed upside down).
I’ve tried reapplying the caulk, and using a more elastic caulking (Big Stretch), but it still opens up during the heating season.
What’s the trick to getting these joints to stay tight during all seasons? Thoughts I’ve had:
- I could try reinstalling during the winter, when the moldings are already shrunken from the lower humidity (maybe this will cause the joints to slide by each other when the lengths swell in summer?)
- I could try reinforcing the joint with a biscuit or dowel
- Maybe the issue is due to the cheap quality of the moldings
- Maybe I should have primed the back sides of the moldings, to minimize moisture absorption/loss during seasonal changes in humidity
Watch to hear what Patrick McCombe, Matthew Millham, and Rob Wotzak have to say, including:
- Why the the way the scarf joint was cut may be the problem
- Why Matt would use a biscuit joiner to fix the issue
RELATED LINKS








View Comments
Can you link a video or article on cutting the scarf joint as Patrick describes?
Whenever I put a scarf joint in crown, I glue and nail a piece of wood on the back (perhaps 1 x 3), extending about a foot onto each side of the joint. The edges may have to be angle cut to clear the wall or ceiling.
I think the guy on the right in the video alluded to this method.