Podcast 441: Screws vs. Nails, Insulation Behind Board Sheathing, and Details for a New Build
Andrew, Ian, and Patrick hear from listeners about hanging cabinets on steel studs and heating workshops before taking listener questions about screws versus nails, insulating a brick house with board sheathing, and construction details for a new build.
Follow the Fine Homebuilding Podcast on your favorite app. Subscribe now and don’t miss an episode:
 |
Help us make better episodes and enter for a chance to win an FHB Podcast T-shirt:
www.finehomebuilding.com/podcastsurvey
Ben and Greg share their thoughts on how to hang cabinets on steel studs. Sean tells us how to keep a shallow well flowing in cold weather. David says if your shop is cold, work harder. Jim wants to know the pros and cons of screws and nails for attaching strapping or furring. Ryan asks how to insulate his brick house with board sheathing. Chris is wondering about the construction details for his new build.
 Editor Updates:

- Ian’s lumber and building material cost index
- Andrew’s basement remodel
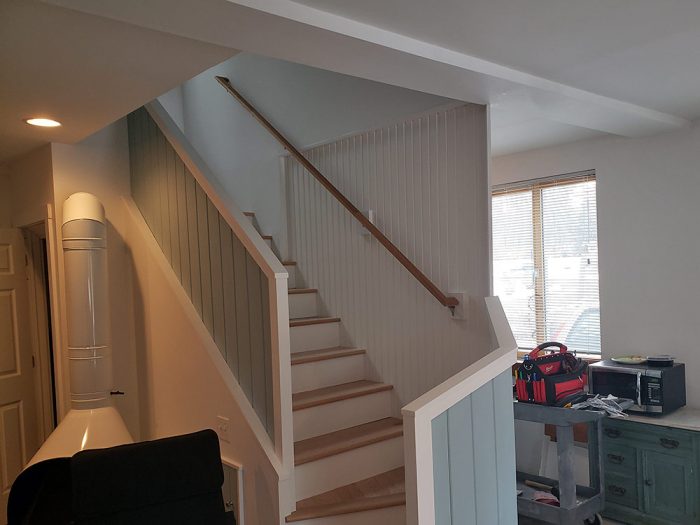
- Patrick’s regrettable railing
Listener Feedback 1:
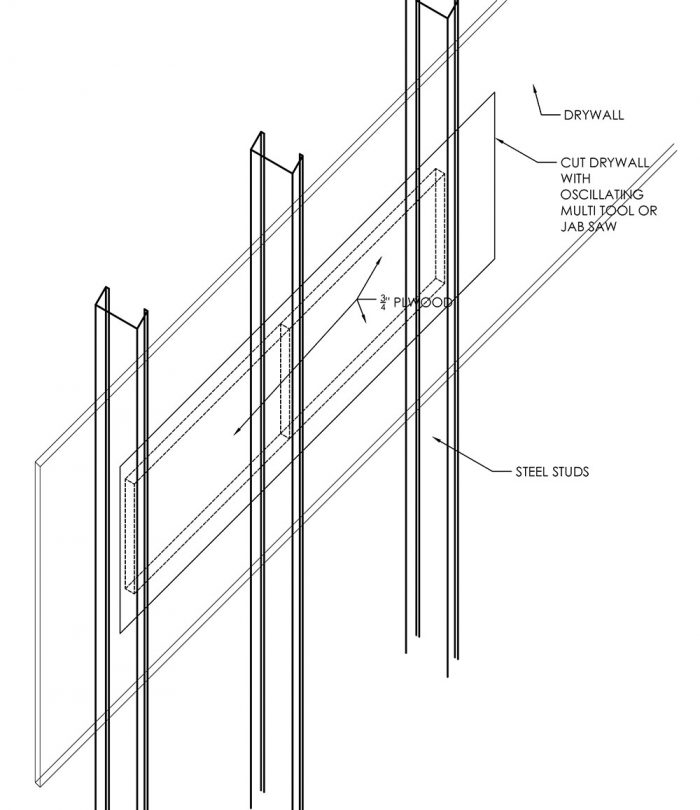
I was listening to the podcast and had to write in to tell you guys the easy and correct way to hang cabinets on steel studs. On new builds, myself or the contractor installs either 2 X material or 3/4″ plywood bands of backing in between the steel studs for the cabinets to screw into before drywall is hung. If we go into an existing space I’ll cut out an area of drywall that will be covered by the cabinets (or the bed ledger that the original podcast question was about) and put plywood blocking between the studs, screwed through the face of the flange and through the edge of the stud beside, then re install the drywall. If it’s an exterior wall I’ll cover the joint with (Canadian) tuck tape for air control, and then I have a full run of backing to attach the cabinet or whatever item that needs to be attached to the wall and I’m never really relying on any screw holding into the steel studs as the plywood backing is clamping to the drywall.
Drawing attached for reference.
Hope this can help some people out!
Related link:
Listener Feedback 2:
Greg in West Marin, California writes: Hi Patrick and Crew, I just finished listening to the last podcast and the question about steel studs. I had two thoughts; the first: who are the people who have time to watch the YouTube of this? I usually listen to the podcast when I’m in my van either on my way from one job to another or to get materials at the orange box store at night so I can keep working when the sun isn’t shining…
The second, and more relative thought, was finding it ironic that they talk about how to use the steel studs came after a discussion about how easy it is to repair drywall. Why not just rip out the whole drywall and either insert solid wood into the steel studs or sister them with regular studs, and then drywall it back up? It’s almost always easier to patch big drywall sheets than little tiny squares. I’ve seen homeowners spend hours with 20 minute mud trying to pass around broken drywall around it outlet box. Much quicker to just take out a chunk in between the studs, sister and some blocks to screw the drywall in so you’re not trying to cram two rows of screws on the one side, and have a nice stable piece of drywall to refinish and lots of space to share your blood compound to.
Sorry about any typos; I am dictating this to Siri while I am driving from one job to do an estimate on another…
PS, yes, my therapist talks to me about work life balance also.
Related link:
Listener Feedback 3:
David from YouTube writes: If you have a small wood shop and need to heat it when you are I it, then you have too little insulation.
Listener Feedback 4:
Sean writes: Hi FHB Podcast, I have some feedback and suggestions regarding the comment about the freezing well pit. Sorry for the length, but I think this could help a lot of people. My grandmother lives in an extremely rural area with no municipal water and has wells on her property. Her well pump house is a small 4’ x 8’ brick box maybe 3 feet tall. It is not insulated, and she has always worried about it freezing during cold weather. She is in her 90s and is tough as nails, but always walked out in the freezing weather to check on the pipes in the middle of the night which required moving the 100+ pound cover.
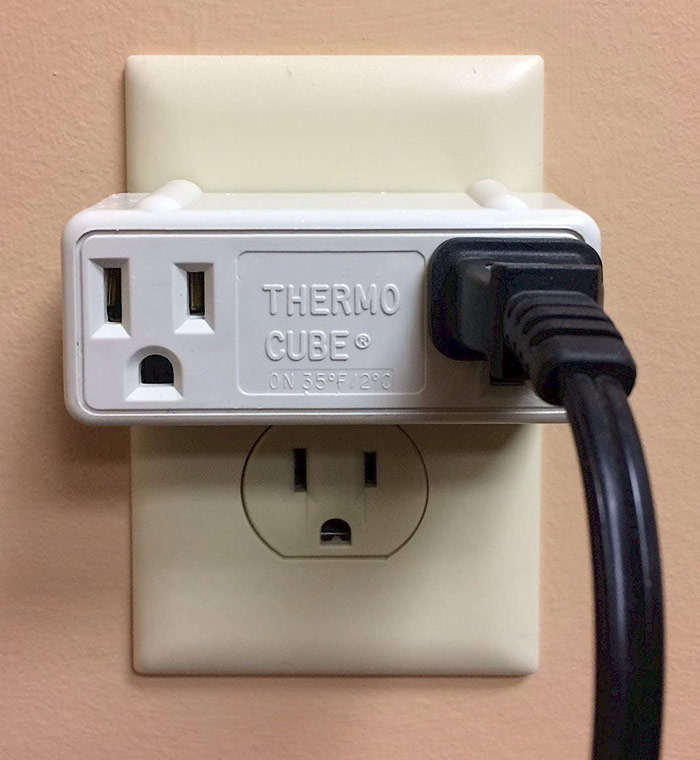
It has 2 receptacles, so I plugged 2 separate halogen lights on opposite sides of the pump house. This adds redundancy but also more heat output. Now, all my grandmother must do is look out her window and see if the light is on when it is cold at night. Because it is temperature controlled, the halogens run for very short periods of time, and the same 2 halogen bulbs have been working flawlessly for over 6 years now. I found the halogen bulbs far more robust and economical than heating bulbs.
On a related note, my mother moved into a new house recently with an exterior water heater which concerned me with the Austin freezing and massive loss of external tankless water heaters. I plan on wrapping pipe-heating cables around the interior of the tankless heater away from anything combustible. I will plug that heater cord into a thermostatic outlet. When she knows it will be below freezing outside, all she will need to do is run an extension cord from a nearby outlet and plug in the outlet to it. Provided she does not lose power, this will run and ensure the tankless heater pipes never freeze.
This could also easily be adapted to battery powered ac adapters as the pipe heater cords draw only 42 watts per hour with a 6’ cord (21 watts for a 3’ cord). Even with a 4-amp hour 18v battery, this would provide a few hours of continuous runtime to get through the night as it would likely not be running continuously due to the 35 on and 45 off temperature settings. In extreme off grid settings, a small solar panel and car battery could likely run this virtually indefinitely depending on the space and halogen lights.
Hope this helps anyone who has freezing concerns.
Thanks,
Sean, JD, MBA
Related links:
- Well Water Line
- Podcast 435: Insulating Block Walls, Stucco Without a Drainage Space, and Mystery Floor Drains
Question 1: What is the best practice to fasten furring strips to the wall and ceiling?
Jim writes: FHB Podcast Crew, I’m writing to you again with another question. I really appreciate all the help you have given every time I’ve sent you a question. I’m in the process of remodeling our master suite & family room where the interior was gutted to the studs, re-insulated with mineral wool, Intello Plus installed as my vapor retarder, and doing final prep for drywall. The Intello Plus install recommends furring out the wall & ceiling after Intello is installed which I believe is done to protect it during drywall installation, since the intent was to make the assembly as air tight as possible.
My question is what is best practice to fasten the furring strips to the wall and ceiling? I’ve read online that screws are best used when the load will be in the same direction as the screw but if the load is in shear, then best to use a nail. So, should I use screws on the ceiling and nails on the wall? Am I overthinking this? I’ve been accused of that many times! I’ve spent a lot of time and money on this project so just want to ensure I am doing everything correctly to avoid any issue down the road.
Thanks again Jim
Related links:
Question 2: Is a double stud wall with dense-packed cellulose the right approach for my wall assembly?
Ryan in Seattle writes: Hi FHB podcast team, love the podcast: you’ve transformed my long commute into an amazing applied/graduate school experience in building science. We all appreciate your work! I’m remodeling my 1930’s-era home in Seattle. The home has 2×4 walls w/ lath and plaster, 3/4″ board sheeting, a black plastic-like WRB (remember, 1930’s) and brick veneer. I’ve been a builder and remodeler for years, but am less experienced w/ energy retrofitting brick-clad homes (most houses around here are not brick). The home has NO insulation in the walls and a very thin layer of batt in the attic. I’m vaulting the ceiling, and installing rigid foam ventilation in the new 2×12 rafters, and will add a layer of rigid foam on top when I redo the roof to get ready for solar/all electric/net zero. My goal is to get the home to ‘pretty good house’ recommendations of 20/40/60 insulation levels, but am trying to be realistic/efficient. My question is about my planned wall assembly: to get to R40-ish in my walls, I was planning on a double stud wall w/ dense-packed cellulose, but have some concerns.
I’ve read Martin’s Musing of an Energy Nerd, and have read everything I can find on Fine Homebuilding and GBA, and am familiar w/ concerns about double-stud moisture issues on the interior of cold exterior sheeting in homes where exterior doesn’t have rigid foam or rainscreen – am also familiar w/ some arguments (ex: Ben Bogie) that these concerns are overblown and that with good air sealing and attention to details, the double stud/dense packed cellulose wall performs just fine. This article from building science was also urging away from double stud, but all of the provided alternatives either call for exterior rigid foam or interior spray foam.
I’m planning to leave the brick veneer in place, and am wondering if you have any recommendations for the wall assembly, especially how to address these possible moisture concerns from the interior only. I want to stay away from spray foam for ecological & cost concerns… should I:
1. go ahead w/ the double stud wall w/ dense-packed cellulose and taped/painted drywall as my air barrier?
2. leave the existing 2×4 and lath/plaster in place and blow in cellulose?
3. some version of Lstiburek’s double stud wall w/ a layer of plywood in the middle of my double stud wall to reduce air/vapor control?
4. some other idea that I’m not considering?
Thanks again, the podcast is super focused, helpful, positive, and we all look forward to it!
Related links:
- A Case for Double-Stud Walls
- Expert Session: Everything You Need to Know About Double-Stud Walls
- Is a “Pretty Good House” Good Enough?
Question 3: Would replacing the Zip R6 with an equivalent polyiso would have the same net effect?
Chris writes: Greetings, Ian, congrats on your promotion. You must have a passion for home-building and remodeling if you are able to take on more work 9-5 and do the podcast, AND respond so thoughtfully to listener questions. I have a pile of questions regarding insulation and other topics; I will list them below. Let me know if it is more appropriate to send new questions through the [email protected] email address. I don’t intend to fill your respective inboxes with marginal questions. Also, I am an FHB All-Access member now, so if there is a resource, I can access to answer these questions, please let me know; happy to dig in.
I’m feeling pretty good with my plan for the above-grade envelope. I think I have my control layers in planned for the upcoming build:
Exterior walls: Vinyl siding > rain screen (1×3 treated furring) > Fully taped Zip-R6 > Open Cell Foam between 2×6 studs > drywall > vapor retardant paint + air sealing.
Roof/Attic/Ceiling: Asphalt shingles > Fully taped Zip Sheathing > Trusses > Vented attic (with baffles) > 16″ blown cellulose > drywall > ceiling paint + air ceiling
One question resulting: I have heard Zip-R sheathing can be in short supply. My architect suggested selecting an alternative rigid foam for the builder to use in the event that the Zip R6 is unavailable. Given that the exterior of the Zip is the WRB, the foam should remain inside the sheathing. My understanding is that the attached foam is polyiso, which is the “keep it warm” insulation. I’d imagine replacing R6 with an equivalent polyiso would have the same net effect. Yes?
Other questions RE: Below-grade insulation.
• Since it is a new build, shouldn’t I insulate the exterior basement continuously? As opposed to interior insulation
• Insulated under the basement slab – with what? My current thought is rigid foam at least R-10 (completely arbitrary)
• Insulate the basement walls – My understanding is that it may be best to insulate outside of the foundation with rigid foam. Interior finished areas could be supplemented with cavity insulation.
• A drop ceiling seems like a no brainer within the finished section, right?
• Fresh concrete releases a lot of water (not to mention joint compound, etc) – How can we permit the basement concrete and other materials to release their moisture within the finished sections while avoiding moisture issues?
Hope you had a great weekend!
Related links:
END NOTES:
 |
 |
Check out our latest Project Guide: Siding & Exterior Trim!
Check out our FHB Houses:
Visit the Taunton Store • Magazine Index • Online Archive • Our First Issues • All Access
Help us make better episodes and enter for a chance to win an FHB Podcast T-shirt: www.finehomebuilding.com/podcastsurvey

If you have any questions you would like us to dig into for a future show, shoot an email our way: [email protected].
If we use your question we’ll send you a FHB Podcast sticker!
FHB Podcast T-shirts!
Represent your favorite podcast! Available in several styles and colors. Made from 100% cotton. Find the Podcast t-shirt and more cool products in the Fine Homebuilding Store.
This episode of the Fine Homebuilding podcast is brought to you by JOBBER.

If you run a home service business like – painting, contracting, lawn care or cleaning, your to-do list is endless. From hiring staff to mountains of paperwork, not to mention, doing the actual work that pays the bills! Jobber is a mobile and online app that helps you organize your business and look professional. With Jobber, you can quote jobs, schedule your crew, invoice and get paid all in one place. Try it free today at JOBBER.com.
Fine Homebuilding podcast listeners can now get 20% off anything in the Taunton store, including Insulate & Weatherize.
Use the discount code FHBPODCAST to take advantage of this special offer.
We hope you will take advantage of a great offer for our podcast listeners: A special 20% off the discounted rate to subscribe to the Fine Homebuilding print magazine. That link goes to finehomebuilding.com/podoffer.
The show is driven by our listeners, so please subscribe and rate us on iTunes or Google Play, and if you have any questions you would like us to dig into for a future show, shoot an email our way: [email protected]. Also, be sure to follow Fine Homebuilding on Instagram, and “like” us on Facebook. Note that you can watch the show above, or on YouTube at the Fine Homebuilding YouTube Channel.
The Fine Homebuilding Podcast embodies Fine Homebuilding magazine’s commitment to the preservation of craftsmanship and the advancement of home performance in residential construction. The show is an informal but vigorous conversation about the techniques and principles that allow listeners to master their design and building challenges.
Other related links
-
- All FHB podcast show notes: FineHomebuilding.com/podcast.
- #KeepCraftAlive T-shirts and hats support scholarships for building trades students. So order some gear at KeepCraftAlive.org.
- The direct link to the online store is here.
