
Evolving an Energy-Efficient Envelope
In replacing a failed wall assembly, this builder chose wood-fiber insulation as the thermal layer in a high-performance retrofit.
As the planet heats up and building codes continue to improve, leading-edge builders are paying more attention to energy efficiency, comfort, and indoor-air quality. At my design-build firm, we are starting to take on more energy retrofits that address these issues. Many of them involve adding a layer of insulation outside the sheathing. Continuous exterior insulation (CEI) makes sense for a variety of reasons. It’s not only an effective way to improve the R-value of an existing wall, but it also offers a chance to make a house more durable and resilient by keeping the sheathing warmer and drier, thereby heading off condensation, mold, rot, and, ultimately, building failures.
In fact, in the latest edition of the International Residential Code (IRC), continuous exterior insulation is a pathway to meeting code in certain cold climate zones. Put simply, if you’re a builder and you haven’t worked with exterior insulation yet, you likely will soon.
Here in Portland, Ore., we are in a mixed humid climate (4C) where CEI isn’t currently required by code. As a high-performance design-build firm, however, we include CEI on all of our new-home projects. We have found this to be the most cost-effective, efficient way for our team to produce a high-performance wall that will stand the test of time.
This article focuses on retrofitting an existing home with CEI. As an industry, we have more or less figured out how to create new homes that require net-zero energy, at a diminishing premium over code-built approaches. Existing homes are a bigger challenge. Turning a ’73 Chevy Nova into a Tesla isn’t easy.
Despite the difficulty, we can’t ignore the impact that existing buildings have on our environment. According to the Global Alliance for Buildings and Construction, to achieve net-zero carbon in the building sector by 2050, we must retrofit 3% of the existing building stock to zero energy each year. With the annual renovation rate at far less than 1%, we have work to do to meet our climate goals. While there are few win-win situations in life, retrofits can be one of them. Not only do they help the planet, but they help clients save money on energy and maintenance, and they create a more comfortable, healthful indoor environment.
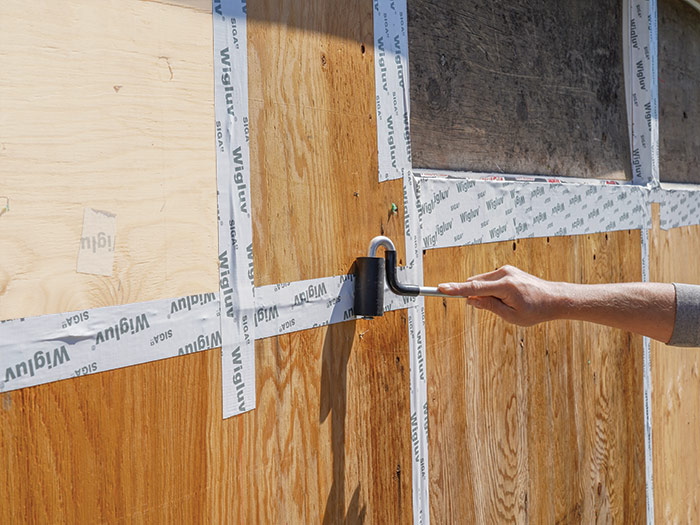
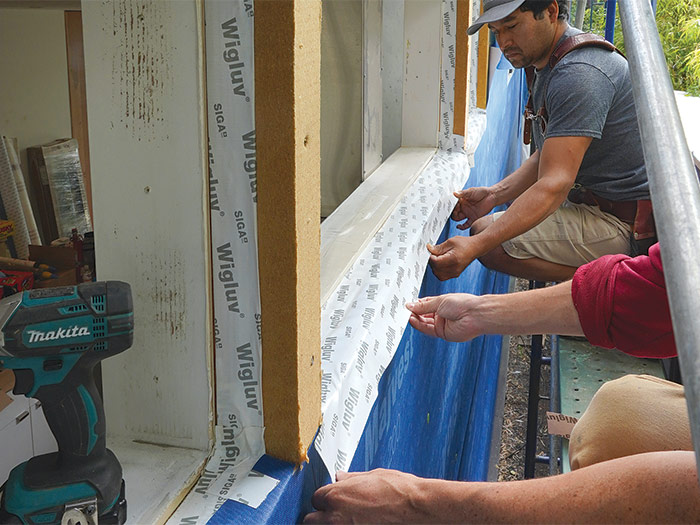
Creating the air-and-vapor control layers
We decided to use the sheathing as the primary air barrier in the updated assembly. We completed it by taping the plywood seams and using liquid-applied Prosoco products in transition areas that would have been complicated to tape. The sheathing is the least permeable part of the wall assembly, so it also serves as the vapor-control layer.
When does exterior insulation make sense?
Without tearing off interior finishes, it can be difficult to add or improve insulation in existing homes. That’s where CEI comes in, but it isn’t the right solution for every retrofit project. It’s hard for a homeowner or builder to justify tearing off perfectly good siding and tossing it in a landfill just to add more insulation. In some cases, improving a home’s lighting, plug loads, mechanical systems, air-sealing, and attic insulation, and/or adding solar panels are more impactful and cost-effective ways to improve energy efficiency.
However, when the siding is in need of replacement, or it has to come off for a large-scale renovation, you have an excellent opportunity to improve the performance of the entire wall. While adding CEI, you can also upgrade the air barrier, windows, and flashing, and add a rainscreen gap at the same time. My firm is often approached by clients whose homes are experiencing myriad issues related to poor craftsmanship, with the major water, mold, and rot issues that follow. In many of these cases the siding must come off, which makes adding CEI and improving the building envelope attractive options.
Over the last decade, our team has employed CEI across all sorts of homes—certified Passive Houses, zero-energy homes, and numerous retrofits. We’ve installed it on modern designs and vintage Craftsman homes with equal success, integrating both flangeless European windows and flanged domestic windows into the thicker walls. We’ve also installed various types of exterior insulation, depending on the situation at hand: stone wool (Rockwool), wood fiberboard, cork, and various types of foamboard, such as XPS, EPS, and GPS (graphite impregnated expanded polystyrene).
No one approach covers all situations, especially when it comes to retrofits, which are almost always more challenging than new construction. The complexity multiplies when it comes to CEI, from the type selected to how it is installed and integrated into the building envelope, windows, foundation, and more. I’d love to say that the key considerations come up in a particular order, but they are more like a circle than a straight line, and often are interrelated.
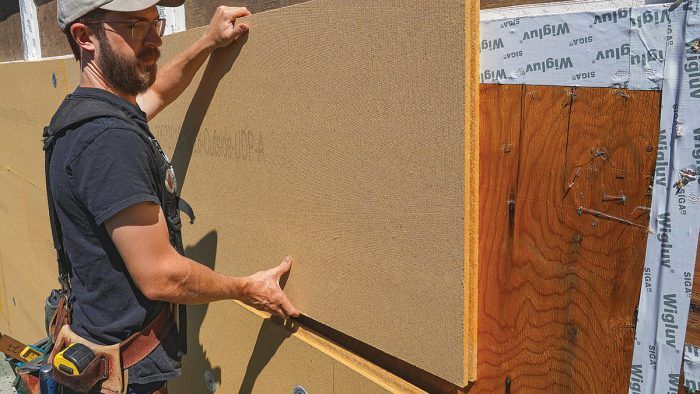
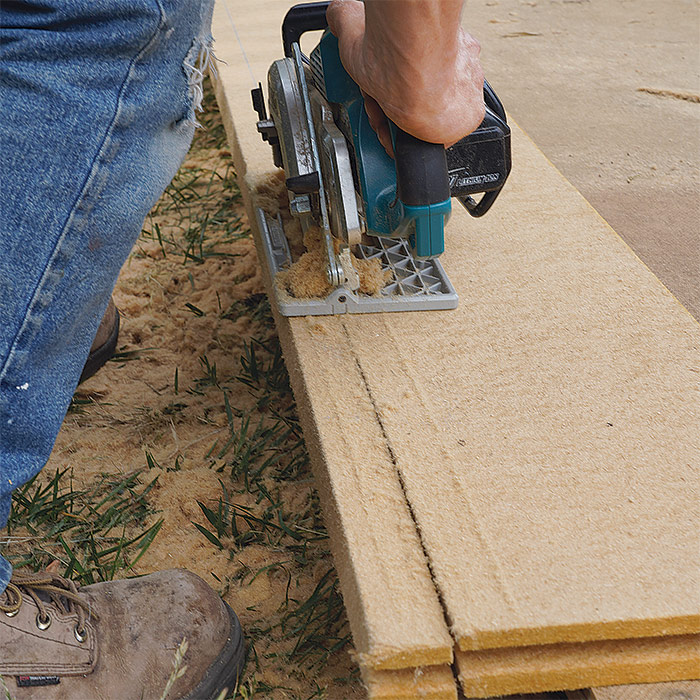
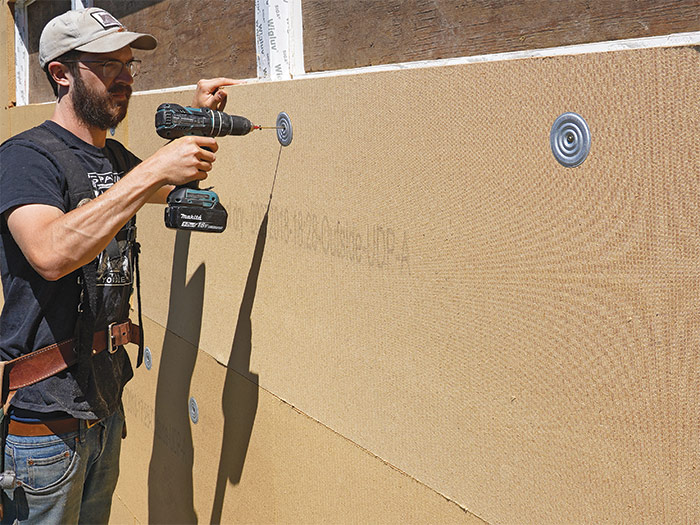
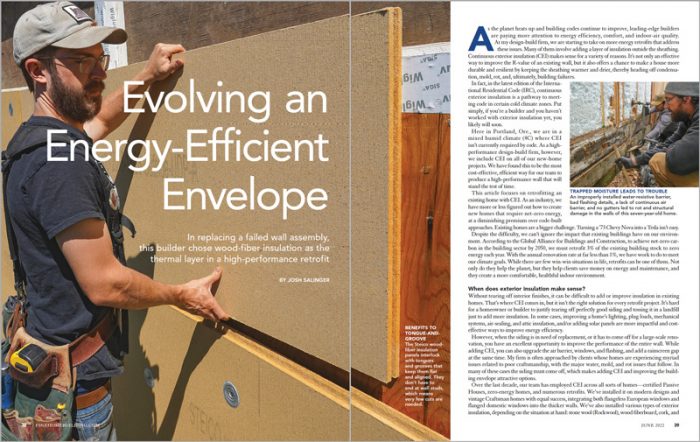
Installing wood-fiber insulation
Because of its R-value, low embodied carbon, availability, and ease of installation, we chose Steico wood fiberboard for the exterior insulation.
Choosing the right exterior insulation
One of the primary decisions is the insulation material you plan to use and how much of it you need. That discussion often starts with a target R-value, but other factors come into play as well, including cost, availability, ease of installation, climate zone, water and UV exposure, and your drying strategy for the wall. At our firm, up-front carbon emissions are another key consideration.
All exterior insulation materials are designed to be water-resistant, but that capability varies by material and may influence your decision on where to place the water-resistive barrier (WRB). The spun mineral fibers in Rockwool, for example, are coated in oil, helping them shed water beautifully, allowing the WRB to be placed behind the insulation.
The permeability of the insulation is another consideration. To prevent damage to any wall assembly, you need to control the water vapor diffusing in and out of it. This factors into your overall drying strategy. In a hot, humid environment, for example, you might want to prevent vapor entering the wall from outside air and condensing on the cooler interior. Conversely, in mixed or cold climates, you might want water vapor to escape while keeping your vapor-control layer from getting cold and causing condensation.
The compressivity of the insulation is another important factor. If it’s relatively squishy, you’ll have to take additional steps to prevent a wavy exterior when installing flashings, battens, and siding. If you’re using Rockwool, for example, which compresses easily, you’ll need to run a laser or a long board along the wall to make sure your rainscreen battens are staying in plane, and you may need to choose a fastener (like Heco-Topix Therm screws) that can move the battens slightly in and out.
When it comes to cost, foam-insulation products are generally the most affordable. There are also fire considerations; stone wool is very fire-resistant, whereas some types of foam are highly flammable. Fastener cost comes into play as well. Thicker insulation means longer fasteners, and longer fasteners can add significantly to the cost of a project. If you’re in a cold climate, for example, and aiming for high levels of comfort and performance, you might be shooting for as much as R-20 or more, which could require panels (in one or more layers) that exceed 4 in. or more in thickness.
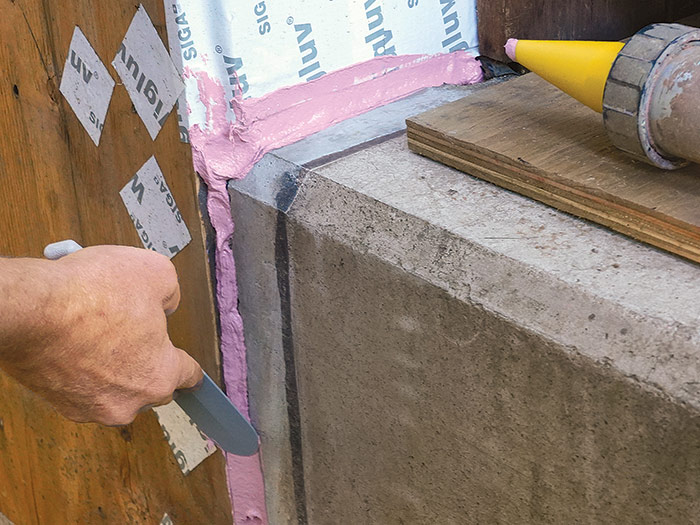
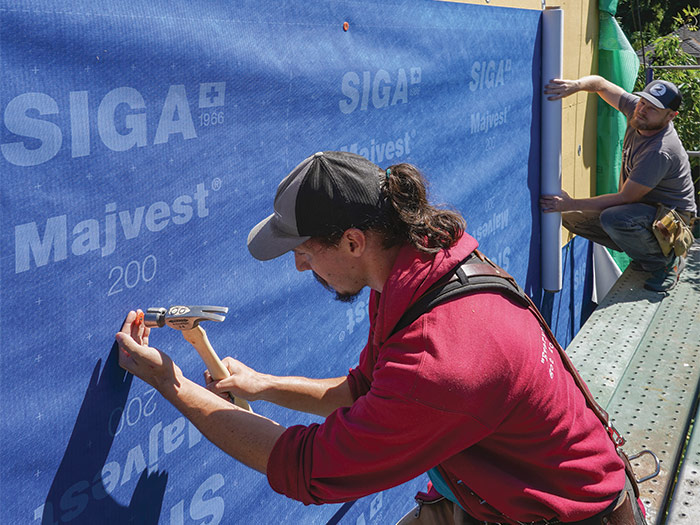
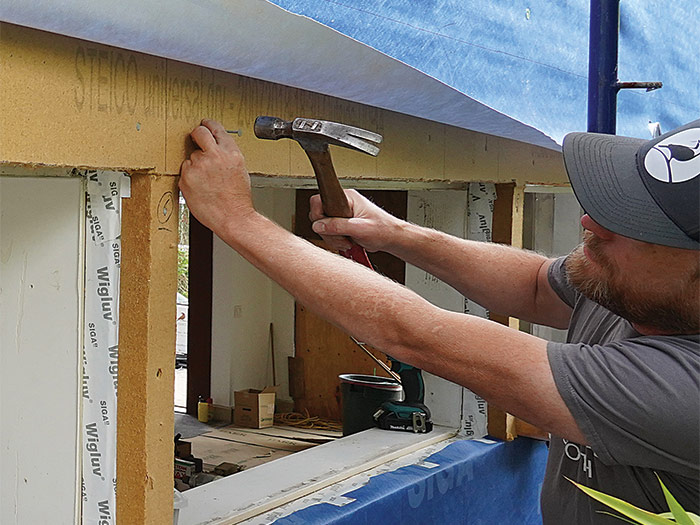
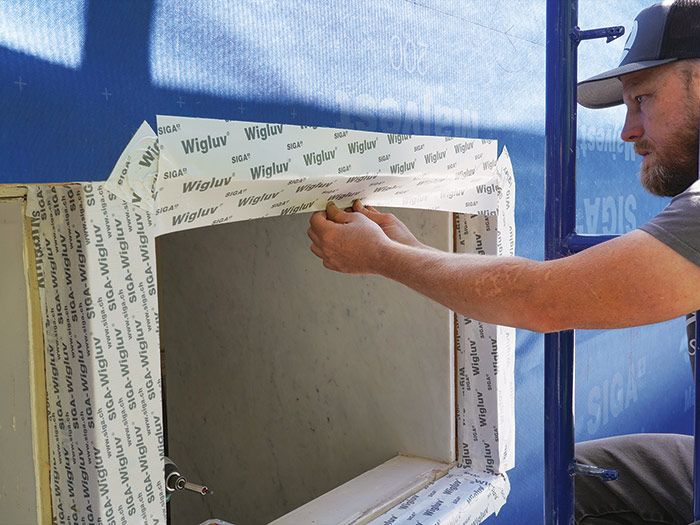
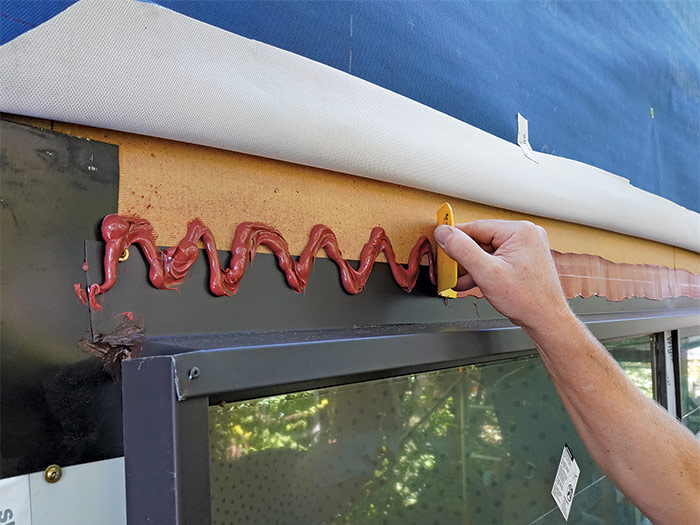
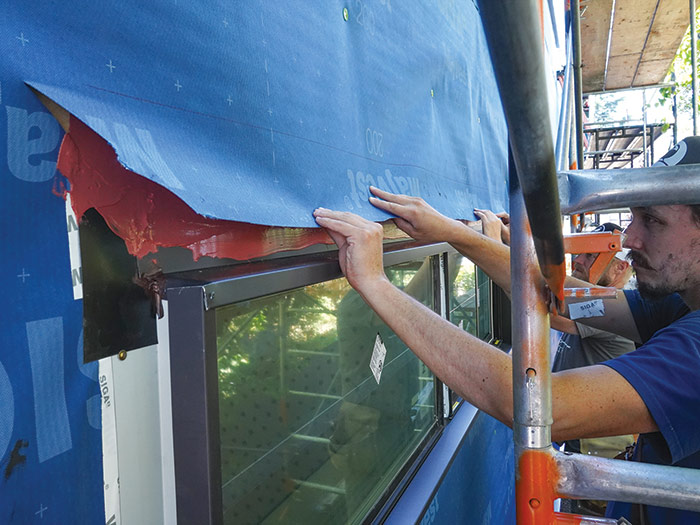
Completing the air and water barriers
We used a combination of tape and both liquid-applied and metal flashings integrated with the water-resistive barrier to complete the control layers, keeping out water and air around windows and doors.
 |
 |
 |
 |
 |
 |
Mind your control layers
Another major choice builders face is how to include the four critical control layers in the new wall assembly. Terms for these vary, but they are the bulk-water control layer, or water-resistive barrier (WRB), the air barrier, the vapor-control layer, and the thermal layer (insulation).
Two or more of these layers can be present in a single component, but all must be accounted for. For example, in a typical code-built, 2×6 wall, the painted drywall acts as the air barrier, the inside of the sheathing (the least-permeable part of the assembly) as the vapor control, the insulation as the thermal layer, and a membrane mechanically attached to the sheathing as the WRB.
When adding CEI to an existing wall, you are potentially altering the critical control layers and how they relate to each other. For example, the WRB and the air barrier can be placed outside the CEI or between the CEI and the sheathing, or they can be split up, with the air barrier inside the CEI and the WRB outside it. In still other cases, such as with Zip System, the sheathing can act as an all-in-one WRB, air barrier, and vapor-control layer, provided you are comfortable with the water-shedding properties of your CEI.
In general, our firm prefers to place the air barrier at the sheathing plane, buried between the CEI and the framing, where it is less likely to be compromised by siding installation, environmental damage, or interior work. Also, we don’t use the CEI as the air barrier. Although there are insulation products that won’t allow air to pass through, the air barrier can typically be placed more efficiently and effectively at the sheathing layer or included in the WRB.
In the home shown here, we taped the seams of the sheathing to create the air barrier, installed the exterior insulation, and then placed the WRB and flashings outside it. You could also create the air barrier by sealing the sheathing with a membrane or liquid-applied product such as the Prosoco system.Window position is another major consideration
When you add CEI, you either have to leave the windows at the sheathing plane or move them outward, creating “innies” or “outies.” That decision can be informed by the design of the windows (flanged or flangeless), aesthetics, client wishes, energy considerations such as thermal bridging and solar gain, and durability factors such as protection from weather.
The innie-outie decision affects the control layers. For example, if your project team doesn’t have experience installing flangeless windows, it may make sense to choose flanged windows and put the WRB outside the CEI to allow for a more typical window and flashing install.
If you choose the “outie” approach, do not simply nail a box made of framing lumber onto the sheathing to create a nailing surface for the window, flashing, and trim, as the solid lumber will create a major thermal bridge. In this scenario, a product called ThermalBuck is an excellent option, furring the nailing surface out to the plane of the CEI with a dense foam extrusion that creates a thermal break but won’t deform when you nail through it. The company’s website offers great options for integrating the product into various scenarios.
On the house featured here, which has flanged “outie” windows, the clients wanted to keep the interior finishes intact, meaning we needed to maintain the dimensions of the existing rough openings, precluding the use of ThermalBuck. That led us to choose Steico wood fiberboard as our CEI, which created the thermal break we needed. To manage the slight squishiness of the fiberboard and keep it from deforming when we screwed on the windows, flashing, and trim, we set nails flush with its exterior surface.
If you leave the windows flush with the outside of the sheathing, flangeless units are typically your best bet. Those are less familiar to builders in North America, but they aren’t that tough to install. They are attached with clips on the interior side or screws driven through the window frame.
“Innie” windows require a window buck of some kind, which extends the opening to the new exterior plane and provides a rigid surface for attaching the windows, flashings, and exterior trim.
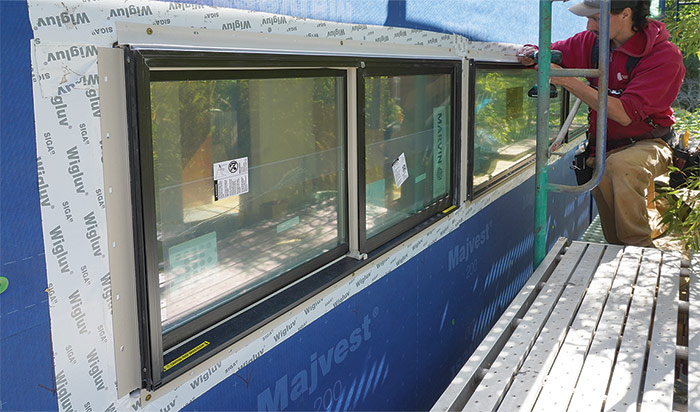
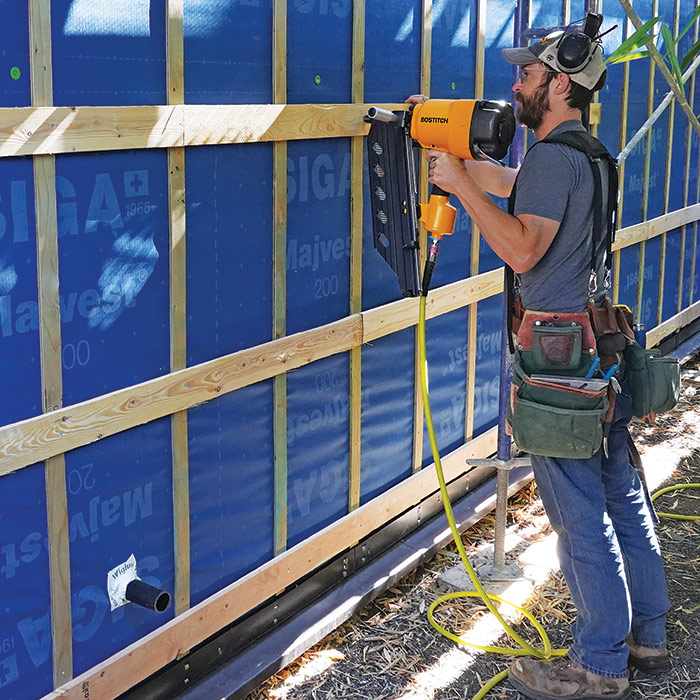
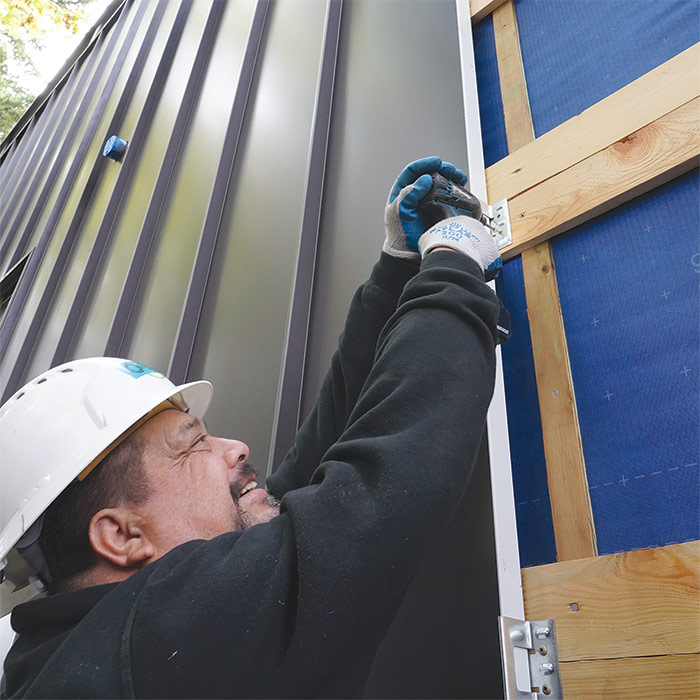
A rainscreen and sliding finish the job
We install a rainscreen on every house we build. Here, we added vertical and horizontal battens to hold the standing-seam metal siding. To prevent future water damage, we also added a low-profile gutter system that maintains the original design aesthetic.
 |
 |
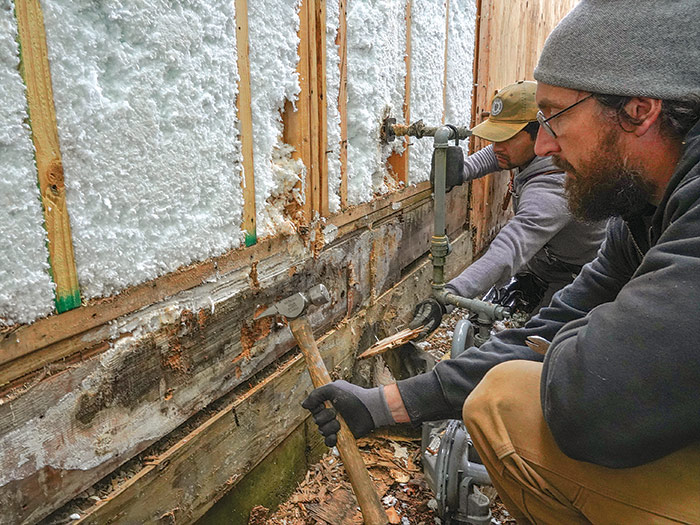
Case study: Repairing damage and improving performance
The project photographed for this article is a seven-year-old home in a dense neighborhood of northeast Portland. Due to poor design and poor workmanship, this relatively pricey, relatively new home, clad with metal and stucco, had significant water intrusion and the beginnings of structural failure.
The home has a modern aesthetic, with no eaves and no gutters in the original design. Instead, the standing-seam metal roof had simply been wrapped over the edge to connect with the same material used as siding. This sent water directly onto the sides of the building. Worse yet, the flashings around the windows, doors, and other penetrations had been poorly installed, directing the cascade of water into the walls. The house already had CEI in the form of paper-faced polyiso foamboard, but it was poorly installed and set in metal C-channels, which neatly trapped the intruding water, quickly leading to major damage.
All of the metal siding and flashings, and most of the windows and doors, had to be removed and replaced. With the siding off, we had a fair amount of rotten and moldy sheathing to replace, as well as a rotted shear-wall assembly and rotten sections of rim joist as well.
The homeowners also wanted to upgrade the home to zero-energy. So we replaced the existing foamboard with wood fiberboard to improve the wall’s energy performance and help prevent condensation in the wall cavities. We choose wood fiberboard based on a number of factors, including embodied carbon, availability, ease of installation, permeability, and R-values. Rockwool was a close second, beating the wood-based product on cost but losing on availability and embodied carbon. If we were in a fire-prone area, however, Rockwool would have won the day.
By choosing a vapor-open insulation, we were able to make the interior side of the plywood sheathing—the least permeable part of the wall—the vapor-control layer in our assembly. On top of the wood-fiber insulation, we placed a Siga Majvest WRB for bulk-water control, then a cross-hatched rainscreen system and new standing-seam metal siding, which maintained the home’s existing aesthetic. By sealing the seams of the sheathing with Siga Wigluv tape, we placed the air barrier under the CEI, making this critical layer durable and airtight. Toward the end of the whole project we also cut back the edge of the roof and installed a gutter system that’s consistent with the original aesthetic.
Retrofitting CEI onto an existing building presents a unique opportunity to improve performance, durability, comfort, and interior air quality. At the same time, it’s more challenging than incorporating it into new construction.
A wide variety of approaches can be successful. The most important thing to keep in mind is the four critical control layers of a high-performing wall. Address those and you’ll have a successful project.
– Josh Salinger owns Birdsmouth Design-Build, a high-performance residential building firm in Portland, Ore.
From Fine Homebuilding #307
RELATED STORIES

