Podcast 465: Design Software, Siding Nails, and Basement Insulation
Andrew, Kiley, and Patrick hear from listeners about ground-source heat pumps and air leaks before taking questions about design software, installing pine siding on a tiny house, and the right nails for cedar lap siding.
Follow the Fine Homebuilding Podcast on your favorite app. Subscribe now and don’t miss an episode:
 |
Help us make better episodes and enter for a chance to win an FHB Podcast T-shirt:
www.finehomebuilding.com/podcastsurvey
Jeff explains his ground-source heat pump. Andy reminds listeners that energy improvements can have unintended consequences. Paul is looking for reasonably priced design software. Mark asks for guidance on siding his tiny house. Jim wants to know what nails are good for cedar siding. Another Mark requests help with his basement insulation strategy.
Editor Updates:
- Andrew dishwasher repair
- Kiley’s Wet & Forget, AC
- Jeff’s auto repairs
- Patrick’s leaky water heater
Listener Feedback 1:
Jeff, from north of Atlanta, writes: Hey Patrick, I like mine: works well, cool in summer, warm in winter. Was pretty much on my own with install as no one around here, north of Atlanta, seemed prepared to talk about them, less yet get involved in an install. In 2016, I had a 35 yr old system. Forced air, 2- 2 ton AC’s and 2 natural gas fired furnaces. The AC was not up to task but the furnaces poured out heat when fed gas. We were ready to ditch both.
About the only part of your frequent advice that sank in was how much fun it could be to rent a backhoe and dig some stuff up. Realizing that the ground loop was the biggest fright for most folks, I did some reading on design and methods. Most costs seemed to be labor & with the freedom to “roll the dice,” I ordered 5000 ft of 1″ geothermal tubing @ $0.40 a foot, $1k of fittings & shipping and a backhoe for a week for $1k. Six weeks later I had five ground loops buried in the side yard, pressure tested & terminated in the crawl space.
With that part successfully completed, what remained was a “more normal” install of a) purchase heat pumps and b) attach to air ducts. All problems that would have been expected & foreseeable to an expert in fact ensued. Subsequently added a 3rd heat pump to the same loop system to provide “pre-heat” water for domestic hot water and limited floor heat. In rough figures, the replacement of the existing system (estimate) $9k. GSHP system $17k less $5k rebate. Net ~$12k. (Plus one of the best prolonged work-outs of my life.)
More later spent on water-to-water heat pump and under-floor system. No, I’m not an engineer, just an over-educated, now old, farm kid.
Not sure I want to be recommending this to others, as maybe could get in over your head pretty quickly. OTH you have a bunch of correspondents whose heads seem way further in the air than mine. Don’t know that there is anything here you can use, but after years of shaking my head at some of the podcast advice and nodding my head appreciatively at the sagacity of other gems, I felt personally invited to respond to this one.
Thanks for all you do, Jeff
Related Links:
Listener Feedback 2:
Andy of FRS Builders LLC, writes: The listener that wrote in about his moldy attic stairs in episode 459 after doing some air sealing brought up an interesting point and something I don’t think we think about enough when doing these energy retrofit projects.
I’ve created a similar problem in my 70s ranch. In my situation, we have a massive chimney in the center of our home. It’s roughly 12′ long and 4′ wide servicing one fireplace in the basement, one in the living room, one in the dining room, a wood stove in the unfinished part of the basement and a gas furnace. The fireplaces each have two 8×16 clay flue pipes while the wood stove and furnace each have a single 8″x8″ clay flue. We didn’t have a chimney cap so when it rained, we had to put buckets in the fireplaces to catch the water that would come in. We don’t use the fireplaces so I sealed the flue opening at the top of the chimney with XPS foam and canned spray frost then formed up some concrete blocks that would cap the chimney. Once the concrete cured, I removed the forms, put a kirf on the underside to create a drip edge and installed the caps over the chimney with mortar. I didn’t cover the furnace or wood stove flue.
This solved the water intrusion issue and stopped a ton of air leakage but created a new condensation issue. We have a cold storage room under our front porch that is accessed through a door in the finished part of the basement. The cold storage room is cinder block on all sides with a suspended slab ceiling. The joint between the CMUs and metal that the slab rests on is now the leaky spot and gets so much condensation that it almost rains in there now. This wasn’t an issue before sealing the chimney.
All that to say that when we start sealing up older homes, we need to be aware that it will likely cause issues somewhere else in the home. I don’t feel like most of the government-run energy audit programs educate their customers about this. I speculate that the issue is more of a lack of education on the auditors part. As a contractor when we work on older homes, I always do my research to determine how the work I may be doing on a home will affect the home as a system. Just my $0.02 keep up the good work on the podcast, I look forward to it every Friday.
Related Links:
Listener Feedback 3:
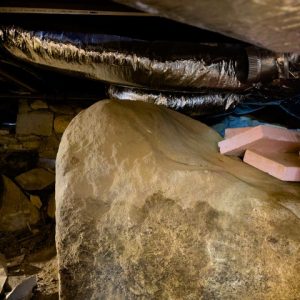
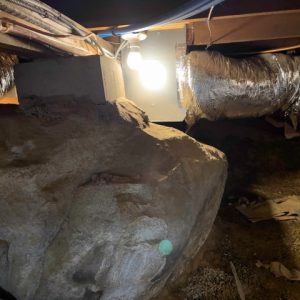
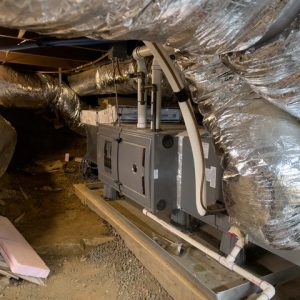
Mark writes: I heard you read my question and you wanted to see photos of the boulders in my basement. The random pieces of pink rigid insulation you see are what I put down under my knees when crawling around to keep the small pebbles from destroying my kneecaps.
 |
 |
 |
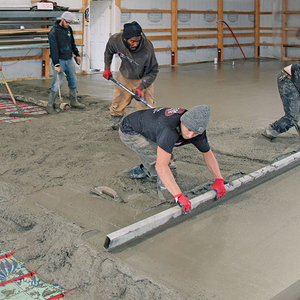
I will get the portable cement mixer if you promise to carry the 80lb. bags up the 22 stairs from street level into the basement and do the pour ;}
Question 1: Is there an affordable home drafting software I can use for my deck plans?
Paul in central California writes: Hi there, I’m a capable DIY-er currently planning to replace a rotted deck on my home. The project will, of course, require me to submit a plan to the county here in central California to get approved for a permit. While the county hasn’t specified how elaborate my plans need to be, I am assuming they will want to see how deep I plan to make my footings, the size and spacing of my beams, the sorts of Simpson ties I plan to use and, generally, how I intend to keep the entire structure from collapsing into an ugly heap of broken boards and big lawsuits. In other words, something better than a crayon sketch but not as good as an architectural blueprint.
I spent a few hours with my father’s old 3-sided drafter’s ruler drawing out my vision on binder paper the other evening, but I couldn’t escape the feeling that I’m doing this the hard way. After all, we have software for this now, don’t we? Of course, we do. Yet sadly, it seems that the minimum price for anything useful is 4-figures plus, as if I’m some retired stockbroker drawing up his 4th vacation home on the Riviera to impress his cocktail party listeners with his Renaissance Man skills. Is there really no home drafting software that mortals can afford? This isn’t my first project, nor will it be my last. I don’t need AutoCAD, but I do need something to help me remember where I planned to put the electrical outlets, where I need to put the studs and where the HVAC vents are going to go. I need drawings not just for the permit, but to visualize my space, help me estimate costs, guide subcontractors and to identify potential problems before they cost me real money. Good drawings are vital in construction but are so expensive to make.
Help me, Patrick and friends. Help me.
Love the show, and thank you!
Related Links:
- Chief Architect
- Home Designer Software by Chief Architect
- Home Designer Software — Overview Video
- SketchUp
- How to Produce Deck Plans
- The Complicated Path from Decking to Dirt
- A Homeowner’s Guide to Deck Permits
Question 2: What sort of building wrap and fasteners should I use with ZIP sheathing on my tiny home?
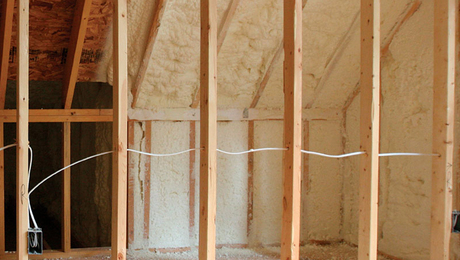
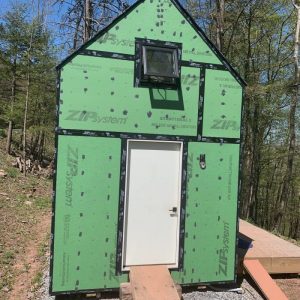
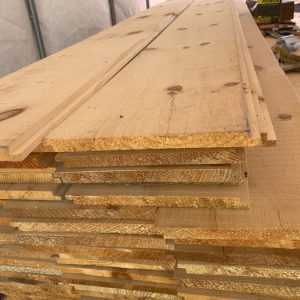
Marc in Hunter NY writes: Hello All, Going to install 1×12 shiplap siding on a tiny home in Hunter, NY. It is a 200sf box with 12/12 gable roof and no overhangs. Would like to install the siding vertically and plan to use corrugated signboard strips (same idea as cora-vent SV-3) installed horizontally to act as the rainscreen. Walls are insulated already with 2lb spray foam and sheathed with Zip sheathing and tape but has sat out the winter exposed and we feel it best to cover with a new Weather Resistive Barrier (WRB) like Tyvek or similar.
 |
 |
A couple of questions:
Suggestion on building wrap-type overtop of Zip sheathing? Perhaps simple layer of #15lb tar paper – something with high permeability so as not to conflict with Zip sheathing? What sort of fasteners should we use as they end up being exposed? We are thinking of using 2.5″ exterior torx deck screws. Nailing would be much faster – what nails if we go that route? The pine boards at 11.5″ wide, I am concerned about expansion/contraction/cupping. Across the width of the board do we fasten it just once to allow it to move or 2-3 times to restrain it from cupping?
I prefer installing it horizontally to shed water better but may prefer vertical. Appreciate any advice on the above or anything else regarding installation and fastening suggestions. Thanks in advance.
Related Links:
- Choosing a Mechanically Fastened WRB
- How to Install Clapboard Siding
- Better Board-and-Batten Siding
- Installing ZIP System Sheathing: Fastening
Question 3: Is there a big difference between ring-shank and spiral-shank nails?
Jim writes: My 30+ year old house is sided with 1/2″ bevel red cedar clapboards. Over the years I have had to re-nail some cupped boards. My local lumber yard recommended 5d 1 3/4″ smooth shank galvanized nails. I have more to re-nail on the west side, which gets lots of sun and weather. I have read that ring shank or spiral shank nails should be used for a better hold.
A lot of the butt joints are not aligned on studs so long nails may not be of much benefit.
Is there a big difference between ring shank and spiral shank nails?
2″ 6d spiral or ring shanks sound ok?
Thank You
Related Links:
Question 4: What is the best way to insulate the inside of basement walls for the best air quality?
Mark from Mass writes: I am struggling with what is the best or preferred way to insulate the inside of my basement walls. In order of priority, I am interested in air quality first and cost last, while meeting code. Apologies for the essay.
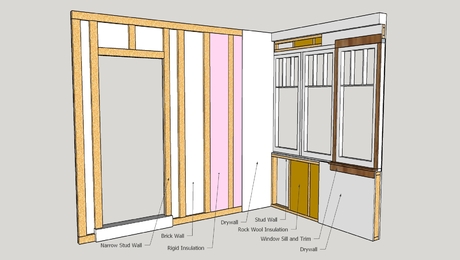
It’s a 1920s house with poured concrete basement (dry with no water/dampness issues). It’s a few miles west of Boston (zone 6) which I think means continuous R15, R 19 cavity, or R13 cavity + R5 continuous).
Actually Zone 5 – Approx. 43′ x 34′ unfinished basement
– Rim joists have already been insulated with 2″ iso. using local MassSave program.
– To save money, I am planning on doing the insulation and framing myself and will sub out electrical and drywall. I will probably use metal studs but have not decided yet.
– I will be pulling permits. The final finished space will be considered ‘finished storage’ rather than ‘finished living space’ as it is just under the height requirement.
So, it seems like I have several options to meet code:
– 3″ of XPS (R 5/inch) stuck to wall
– 4″ of EPS (R4/inch) stuck to the wall
– Some combination of XPS or EPS stuck to the wall (min. 2” as a vapor barrier?) + R15 mineral wool in the cavity (R15 seems to be most common in local box store)
– Sprayfoam a little over 2″ to the wall (R7/inch)
– Ball park costs of each seem to be in the region of $2-3K (using new materials). I would consider them fairly comparable in terms of the overall project cost and it would not sway me one way or another.
(I’m not considering fiberglass batt because of potential mold issues.)
Questions:
– Are my assumptions/options correct and am I missing any?
– Which one should I do and are there any pros/cons to each?
– The spray foam is the easiest option as I write the check and it is ready for framing, but I am concerned about air quality (first) and environmental impact (second). Are there any greener spray foam options available now?
– The XPS is an easy DIY option and there is a local place to buy used/seconds which reduces the environmental impact. But are there long-term air quality issues to consider about XPS and any concerns about buying ‘used’?
– How much XPS or EPS would I need to stick to the wall so that it is acceptable as a vapor barrier? I think 2″ but wanted to check.
– I need to look into EPS more as I think this is the most air quality and environmentally friendly option. Are there issues with water wicking with EPS? The need to put 4″ on the wall is also giving me cause as it pushes out the wall the most.
– The EPS/XPS mineral wool option is bottom of my list just because it is (slightly) more work but it pushes out the wall the least. Should I give it more thought?
– I have not looked into poly iso. Maybe that is a better option that I have missed?
Thanks to anyone that read this far!!
Related Links:
- Three Ways to Insulate a Basement Wall
- Impact of Spray Foam on Indoor Air Quality
- XPS Makers Announce More Planet-Friendly Formulations
Check out one of our Project Guides: Siding & Exterior Trim!
Check out our FHB Houses:
Visit the Taunton Store • Magazine Index • Online Archive • Our First Issues • All Access
Help us make better episodes and enter for a chance to win an FHB Podcast T-shirt: www.finehomebuilding.com/podcastsurvey

If you have any questions you would like us to dig into for a future show, shoot an email our way: fhbpodcast@taunton.com.
If we use your question we’ll send you a FHB Podcast sticker!
FHB Podcast T-shirts!
Represent your favorite podcast! Available in several styles and colors. Made from 100% cotton. Find the Podcast t-shirt and more cool products in the Fine Homebuilding Store.

Fine Homebuilding podcast listeners can now get 20% off anything in the Taunton store, including Pretty Good House.
Use the discount code FHBPODCAST to take advantage of this special offer.
We hope you will take advantage of a great offer for our podcast listeners: A special 20% off the discounted rate to subscribe to the Fine Homebuilding print magazine. That link goes to finehomebuilding.com/podoffer.
The show is driven by our listeners, so please subscribe and rate us on iTunes or Google Play, and if you have any questions you would like us to dig into for a future show, shoot an email our way: fhbpodcast@taunton.com. Also, be sure to follow Fine Homebuilding on Instagram, and “like” us on Facebook. Note that you can watch the show above, or on YouTube at the Fine Homebuilding YouTube Channel.
The Fine Homebuilding Podcast embodies Fine Homebuilding magazine’s commitment to the preservation of craftsmanship and the advancement of home performance in residential construction. The show is an informal but vigorous conversation about the techniques and principles that allow listeners to master their design and building challenges.
Other related links
-
- All FHB podcast show notes: FineHomebuilding.com/podcast.
- #KeepCraftAlive T-shirts and hats support scholarships for building trades students. So order some gear at KeepCraftAlive.org.
- The direct link to the online store is here.


