Podcast 473: Heat Rising, Removing Chimneys, and Undersized Nailer Nails
Ian, Andrew, and Patrick hear from listeners about design software and building costs before taking questions about heat flow, removing a chimney, and the right nails for sheathing.
Follow the Fine Homebuilding Podcast on your favorite app. Subscribe now and don’t miss an episode:
 |
Help us make better episodes and enter for a chance to win an FHB Podcast T-shirt:
www.finehomebuilding.com/podcastsurvey
Dack and John have thoughts on learning design software. Dave thinks building costs are unlikely to go down. Sean reminds us about Sanden heat-pump water heaters. Ian wants to clarify how heat flows. Will wonders if he should remove his chimney. Drew asks if the commonly available nails for nailers satisfy code requirements. Ben wonders how he should fix his bouncy floor and sinking foundation.
Editor Updates:
- Ian’s landscaping/gardening
- Andrew’s basement framing
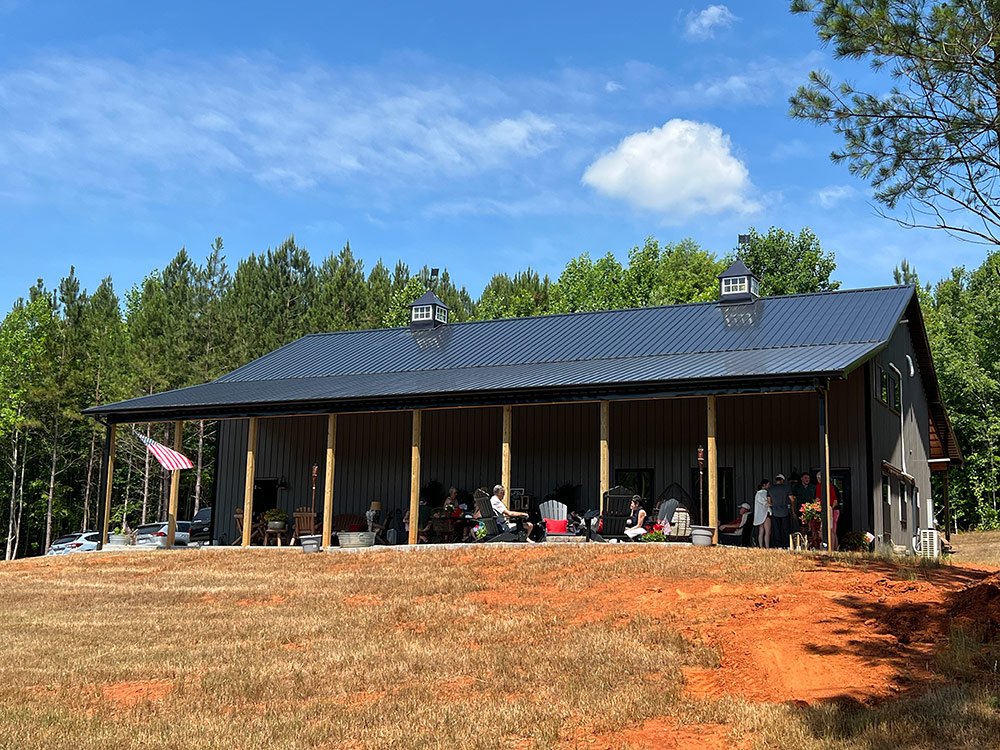
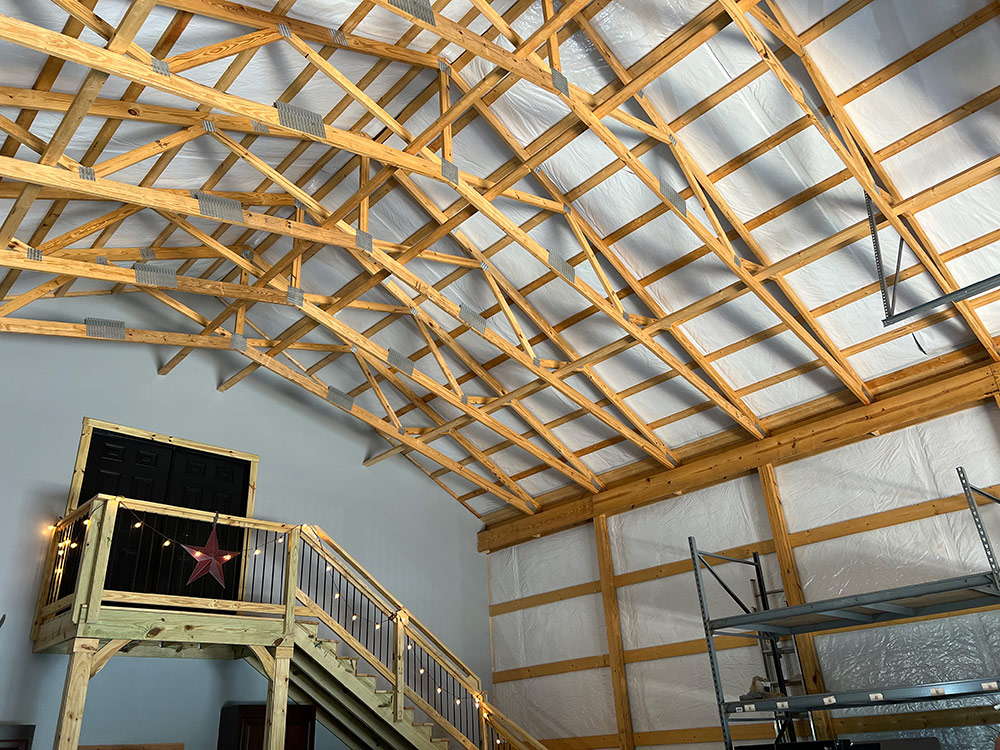
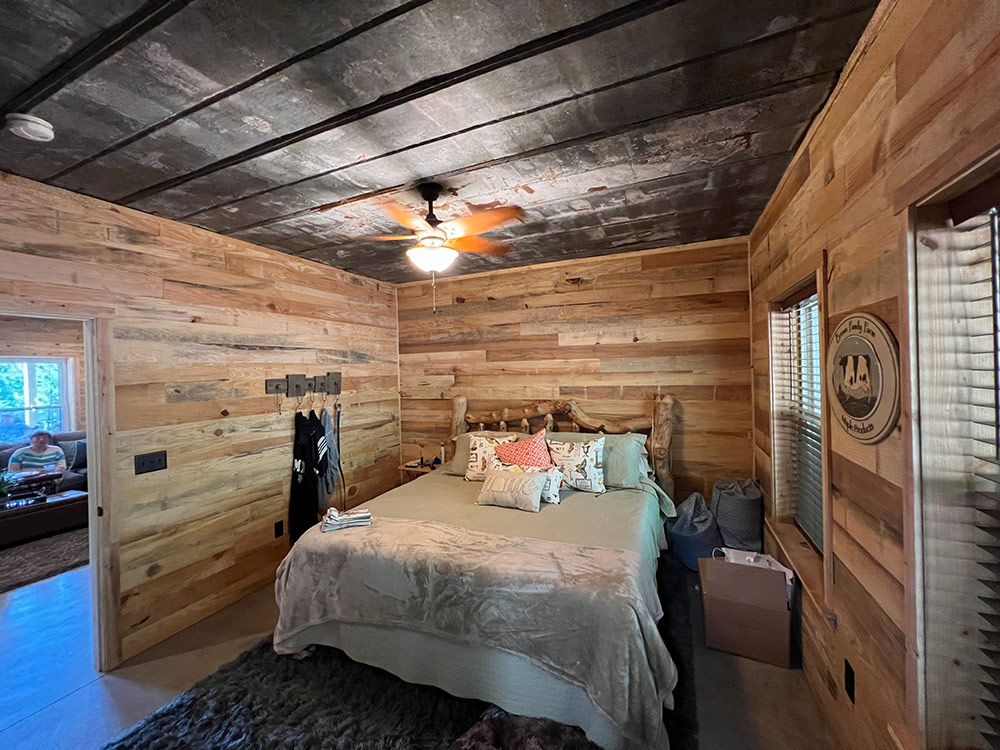
- Jeff’s barndominium wedding
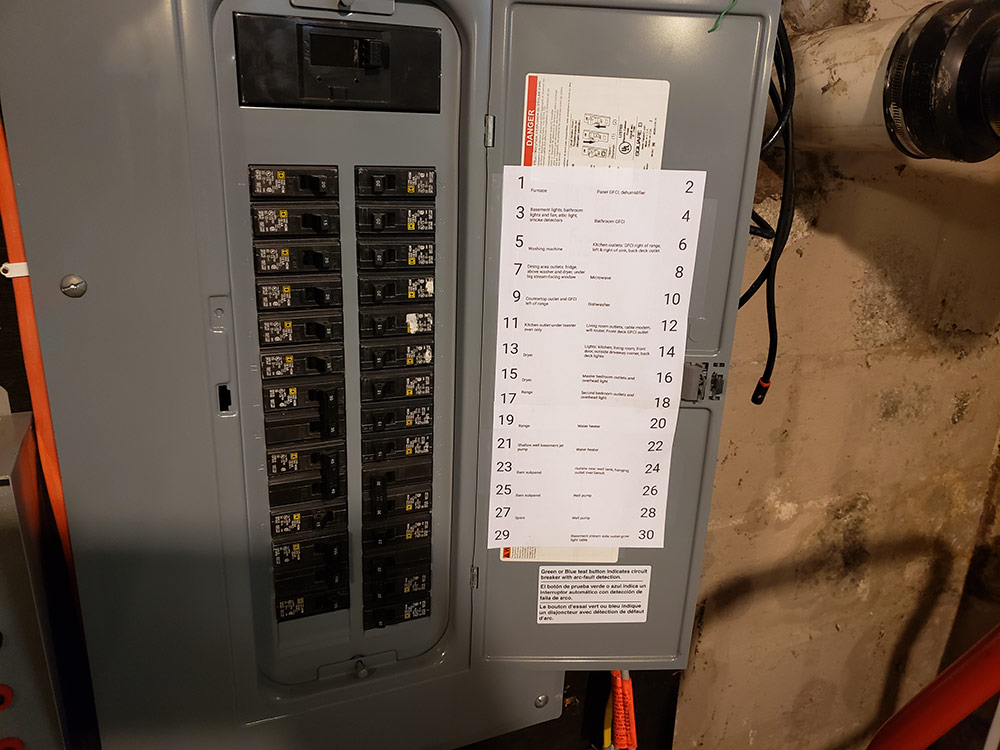
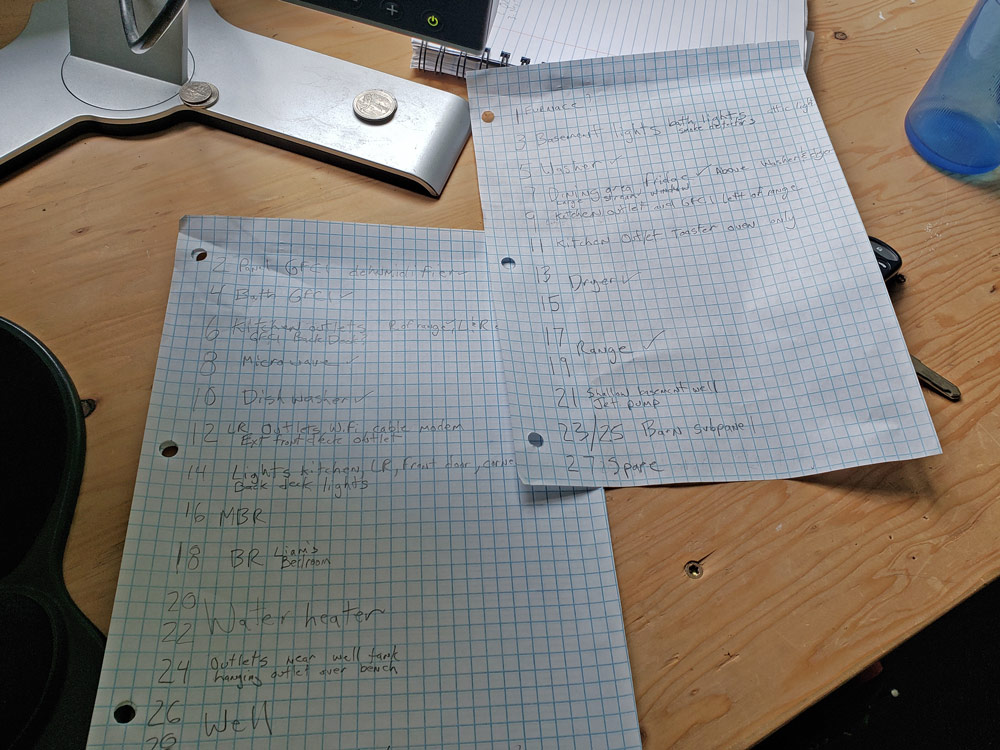
- Patrick’s electric panel labeling
 |
 |
 |
 |
 |
 |
Listener Feedback 1:
Dack writes: Hello FHB Podcast: Regarding the SketchUp discussion in Episode 465, here is something for listeners (and perhaps Patrick) to consider: Take a SketchUp course at a technical college. I took one this spring at Hennepin Tech here in Minneapolis, and in this case a 1-year subscription to SketchUp Pro was included in the course price of $450. So, the instruction was 150 bucks. While I ended up learning a lot more from YouTube, it was super valuable for learning the basics, and the assignments ended up being a lot of fun. Just a thought.
Listener Feedback 2:
John writes: Hello Fine Homebuilding podcast crew, I thought I would chime in on the design software question Paul raised in episode 465. Here’s my twisted journey to a process that works for me.
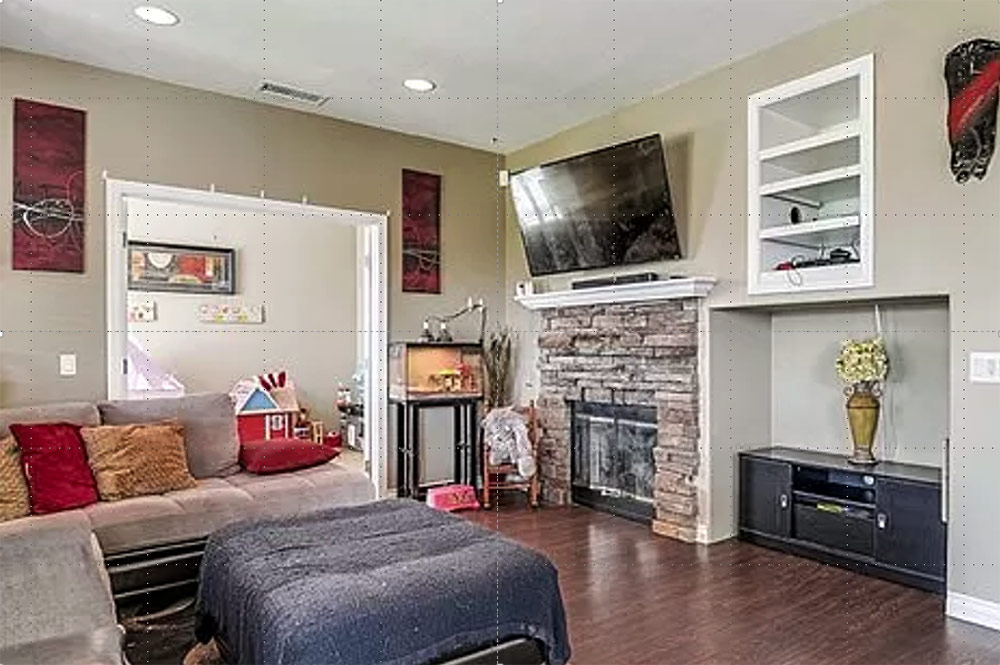
In 2019 my daughter bought a home with the intent of reconfiguring a hallway to create a laundry room and address a questionable design concept from 1999–the idea of building a massive cavity into a wall for the “big screen” TVs is a huge waste of space that hasn’t aged well.
Like Paul, we started the design process the old fashion way; paper pencil and a drafting board. Well, we sucked at accurately measuring room dimension. It was going to take forever to simply create the “as built” plan and the cost of erasers and paper was getting excessive.
SketchUp 2017 looked like a reasonable alternative to paper and pencil. It’s free (still is) and there are lots of YouTube how-to videos available. Forget that notion. I’m surprised you didn’t hear me yell nooo, when it was brought up on the podcast. SketchUp is a volume editing program. You essentially create 3d objects and place them next to each other. A fine tool for modeling components and assemblies. In my option, architectural visualization is not in its wheelhouse. I could make it work but free does not justify the hours required to coax something out of the tool. Time isn’t really free. What to do?
We thought we got lucky when we discovered the city had the builder’s plan on file. We filed the appropriate forms, the city requested permission from the architect to release the plans, and two weeks later we had the “as built” drawing. Outstanding, we’ll make some copies, annotate the changes and get on with it. Nope, the plans are copyrighted, we would need to redraw them otherwise the city would reject the permit request. Back to square one, but at least we had accurate dimensions to create the drawing.
Surprise, the builder’s plan indicated there was a sheer wall where we planned to place a door. Time to find a structural engineer.
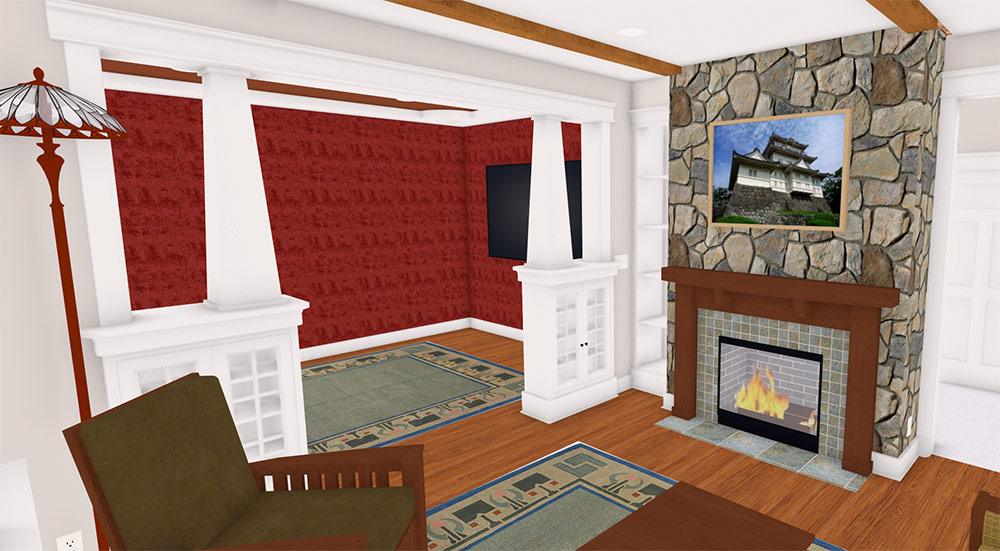
Pressure was on to find a tool to create required drawings for a permit. Considered taking a class at the local community college. Most classes provide student license to install a copy of the software at home and there’s an instructor to ask question if I needed help with the tool. If the next semester hadn’t been a couple months off, I would have gone that way. Instead, I paid the $500 and bought Home Designer Pro and haven’t looked back. Within one week, I was able to create the “as built” drawing, develop a number of potential design options, create renderings for my daughter to review, select an option, and create baseline drawings. The drawings were passed to the structural engineer and he provided the drawing for new sheer wall and required Simpson connectors.
While the structural engineer was doing his thing, I spent a couple long weekends reading and sorting out what I need to do to meet new California Title 24 energy requirements and was able to extract what I needed to callout on the drawings–who writes these requirements and can they get any more confusing? Covid shutdown hits, the city planning office all but shuts down, no one available to ask questions, and plans have to be submitted via a dead drop–call a number and leave the package by the door. As a testament to the Home Designer Pro capability to generate construction documents the permit was approved with only one minor change to add a note. Making the correction wasn’t any harder than adding a line of text and pressing print.
My current tool chain is:
- Model with Home Designer Pro (see image 1)
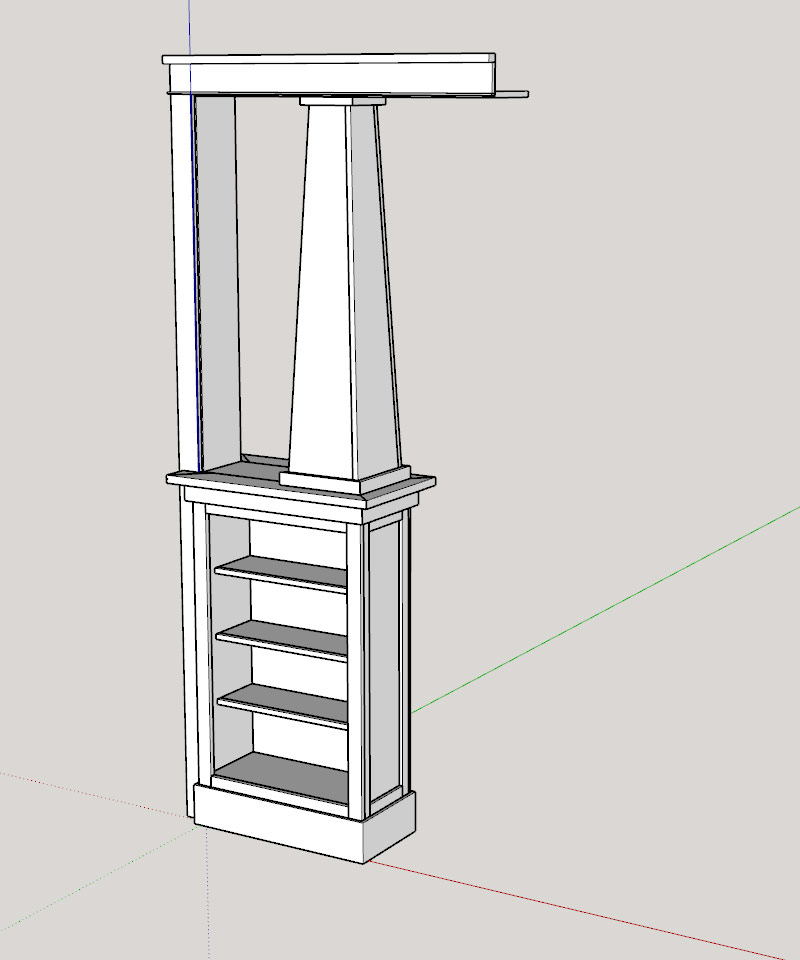
- Develop cabinet and trim drawings with SketchUp 2017 (see image 2)
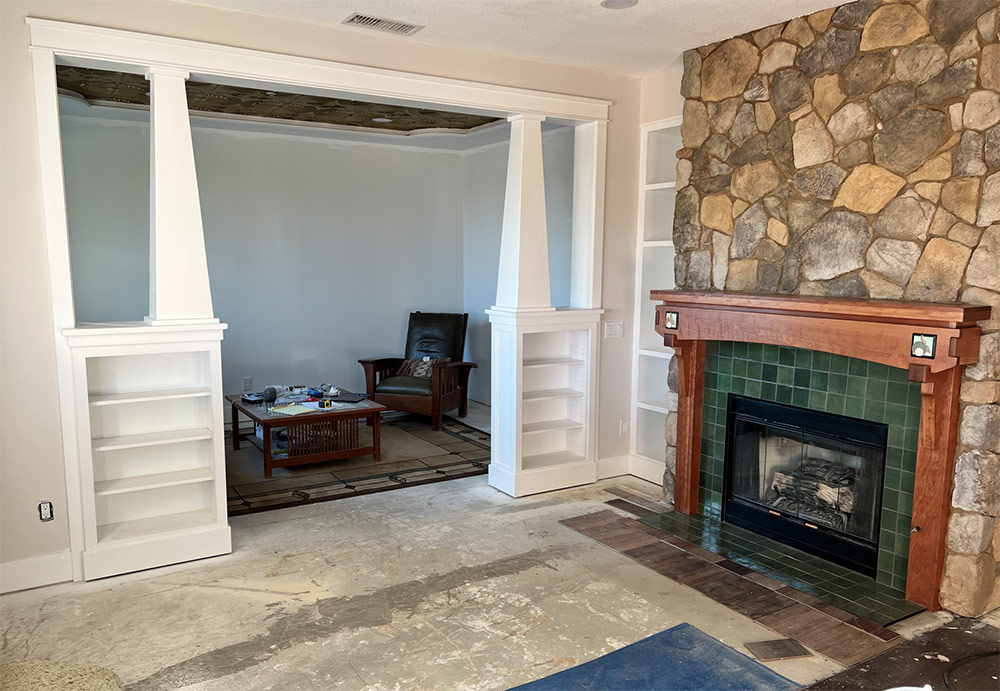
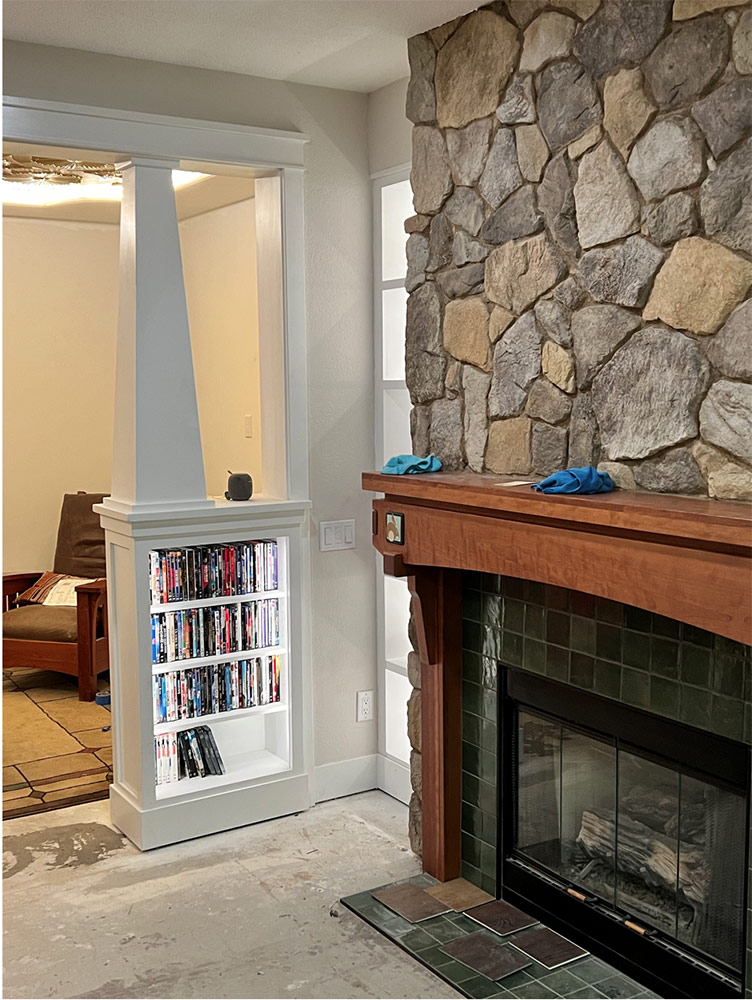
- Build (see image 3)
I’ll continue using Home Designer Pro to flesh out design ideas and use SketchUp to develop shop drawings for trims and cabinets but I may move to Solidworks because it’s so much more intuitive and capable. A bit long winded but it’s been quite an adventure.
 |
 |
 |
 |
 |
Related Links:
Listener Feedback 3:
Dave writes: Hi Patrick and Friends! I thoroughly enjoyed the last bunch of podcasts I have listened to. I got a little behind during the pandemic as I usually listen while driving to and from the job site, so I have been catching up as the bonkers busy winter gives way to the bonkers’er busier spring and summer building season which is in full swing now.
I have been thinking about the current state of things, cost-wise. I was speaking with a real estate person who told me they are seeing new construction in Vermont clocking in at $500 per sq ft! My jaw broke into a lot of little pieces it hit the floor so hard! And apparently this is for entry level ho-hum housing. So, a middle of the road 1400 sq ft new house sells for $700K!? Say it ain’t so.
If you’ll permit me a personal anecdote, this got me thinking about contractor honesty. When hopeful clients ask me if I think prices will come down next year or the year after that, I usually say, “No. Probably not. Or at least not much. But in a year or two you will be used to the new cost and it won’t feel as bad to pay so much.” I get looks of dismay at this, so I continue, “Remember when gas was (fill in the blank)? And then it was (fill in the blank, but minus 15 cents)? It felt better, right? Still super expensive, but better?” All of a sudden at this point in the conversation they understand human psychology a little more like how I understand it and they say, “well, that’s a very honest answer!” We share a little laugh and discuss their hopes and dreams for their project some more, because if we didn’t, we’d just be crying…
You all are doing a great job with the podcast… keep it up!
Cheers, and good luck to us all!
Dave Black Cat Builders
p.s. If you’re wondering if I land any of these jobs, the answer is almost always yes. I don’t know why… And I have only had two projects apply the brakes due to rising costs. I don’t understand any of it… honestly….
Related Links:
- Will the Costs of Residential Building Go Back Down?
- A Better Way to Budget in Residential Construction
- Why I Stopped Giving Free Estimates
Listener Feedback 4:
Dave writes: Hi FHB Podcast, I am writing in response to Nate’s comment about upgrading to a heat pump for hydronic heating.
I know a lot of passive house builders are using the Sanden SanCO2 split heat pump water heater. The tank is stainless steel and sits inside while the actual heat pump is outside. It is not like the “typical” heat pump water heaters with everything stacked in one “unit.” They make some large models too, up to 119 gallons.
Apparently, this device can get up to the 175-max temp. Since the heat pump is outside, you gain some efficiencies for by not dumping the cold air back into the room and can leverage the temperature differentials. Candidly, these units are expensive, would require some additional engineering as the water would need to be recirculated and not just dumped down the drain like typical hot water is. I’m also not sure how expensive this would be to operate compared to the options mentioned on the show. It might be possible to do an integration of the hot water heater at the same time which would be helpful with lowering energy costs of a normal gas or electric water heater.
No matter what Nate does, ALWAYS check for tax incentives.
Thanks. Sean, JD, MBA
Question 1: Is “heat rises” an accurate statement about the flow of heat?
Ian writes: People use the old yarn of “well, heat rises” to explain or justify their view on an HVAC topic. Knowing from my class with Joe Lstiburek that heat moves from warm to cold (and moisture moves from wet to dry) I did find myself unable to explain that while, yes, a heated mass of air does indeed rise by its lower density, heat in the thermodynamic sense moves in all directions. I found the article above to be a pretty good simplified explanation of the ways and the reasons behind how heat is transferred and thought that this could be a good podcast question/feedback/topic.
LMK what you think and I can put more notes together.
Related Links:
- The Stack Effect
- How it Works: Heat Transfer Through Insulation
- High-Tech Heating and Cooling Systems
Question 2: Should I remove my existing chimney, bring it down below the roofline, or insulate the part inside the house to separate it from the rest of the living space?
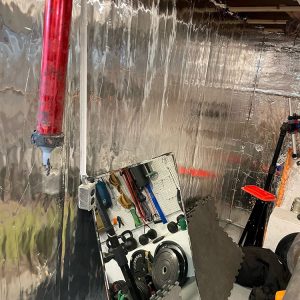
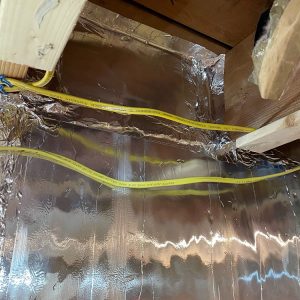
Will from outside Boston writes: Hi Podcast crew, In your last episode about insulating a basement in a house in zone 5 outside of Boston you failed to mention Thermax which is a foiled faced ISO. As long as you leave a capillary break at the floor (couple of inches of canned spray foam in my case) this can be a good choice. I did this with my 1915 Bungalow which is also outside of Boston. I loaded up a U-Haul with 3.5” second hand sheets and have been insulating an hour here and there for over a year. Most of my time has been spent redoing a poor rim joist job done by an insulation contractor which I vetted but still was not up to par.
Side-note: I have been dealing with essentially every single subject that you guys talk about on the podcast from electrification, gutting, oil boiler and radiators, whole-home ductless heat pump, ducting an ERV in an old house myself using a CERV2 With a whole home in-line Aprilaire dehumidifier, solar, radon, air sealing etc, . happy to discuss any other all of it.
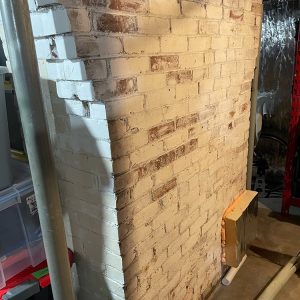
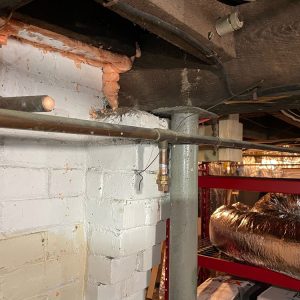
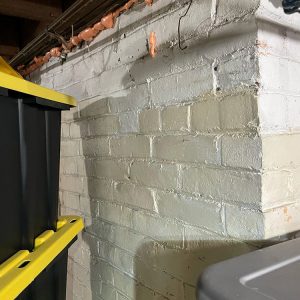
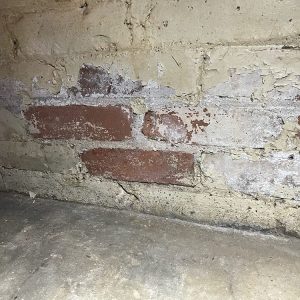
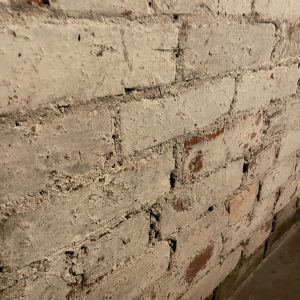
Here’s one question though: I switched my oil boiler tanked gas hot water heater for a heat pump hot water heater and ductless heat pumps. I still have to cap one of the flues. The other one is used for a woodstove in case the electricity goes out. I’ve been debating whether I should completely gut the chimney for more room in our house, chuck down the chimney below the roofline and put a chase chimney in and or insulate this chimney with the extra Thermax I have laying around. There is some spalling on the brick which mostly is where the old boiler sat. This chimney is insulated without a vapor barrier likely does contribute to increased moisture in my basement given this is likely put in before the rat slab was placed down.
 |
 |
 |
 |
 |
 |
 |
 |
Related Links:
- Brick Chimneys Are Incompatible With Airtight Homes
- Dealing With Fireplaces and Energy Efficiency
- Is My Abandoned Chimney Hurting My Energy Efficiency
Question 3: What size fasteners should I use for a 21-degree nail gun?
Drew writes: Hello FHB Crew, My question is about general floor or wall sheathing. I know the IRC is generally a minimum standard. Though in table 602.3 for wood panel structural connections it lists “8d” 2 1/2 x .131 nails for 3/8” to 1/2” OSB. I have never seen these in a east TN big box store and rarely 2 3/8. Inspections are mostly up to the AHJ but what fasteners for 21° guns? Upsize to 3” x .131 or something like that since going under the code isn’t acceptable. Switching to a paper tape or coil nailer isn’t really an option?
Thanks for your help.
Question 4: How do I replace 2×6 floor joists and fix breaking parts of my foundation?
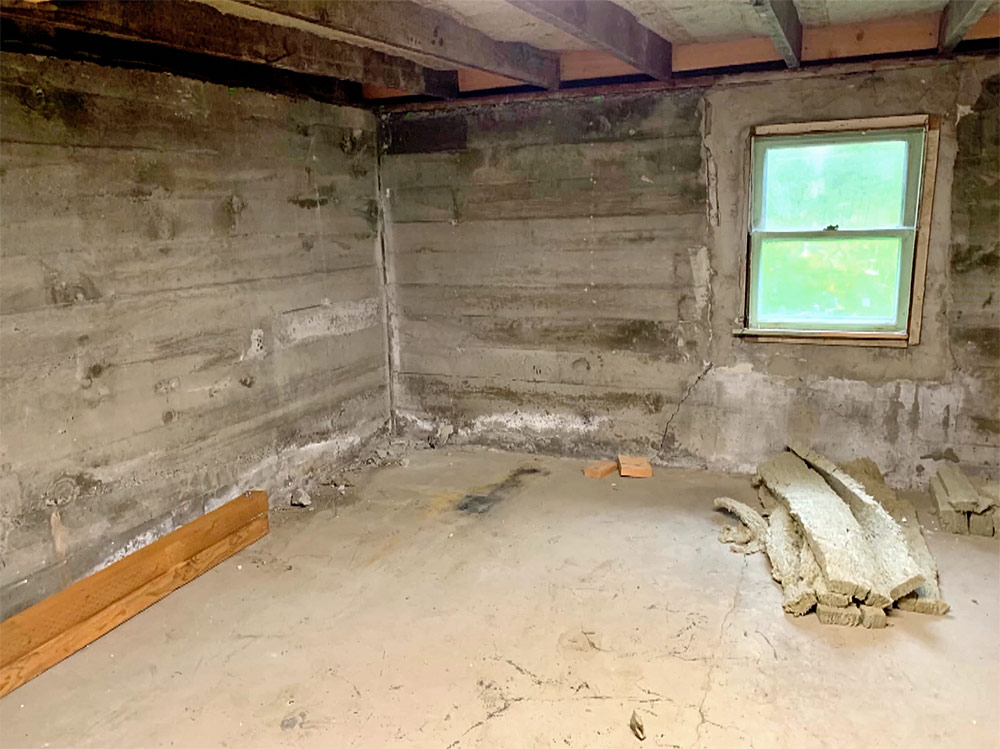
Ben from climate zone 4C (Portland, OR), writes: I heard in a recent episode that you needed questions, so I figured I’d send over mine. First, some context. My house is a 1945 1.5-story with a walkout basement. The half story is really due to a finished attic room that’s only tall enough because there’s a 20″ step in every floor plane where what presumably was a carport was enclosed and incorporated into the house as an add-on. Probably in the 60s.
The basement is only 6′, which is not tall enough to finish by code, but the one room on the daylight side at the landing of the stairs IS actually considered “finished” sqft because the main floor floor joists above this area are a series of sistered 2x6s spanning almost 12′ instead of the 2x14s that the rest of the main floor floor joists are. ? Needless to say, the kitchen/dining above is pretty bouncy.
The lot is sloped toward the backyard (about 20%) and over the years the house foundation (poured concrete on the uphill side except where the carport was, and stick framed with stem wall on the daylight side) has significant vertical cracks in at least 2 places on each face. Almost certainly due to the backyard side of the house sinking – the whole house slopes about 4″ front-to-back (24-32′ span) but don’t worry, between this and the bounce in the kitchen/dining you find your sea legs pretty quickly. When I dug an exploratory hole on the exterior, I never found a footing, just the bottom of the 2′ stem wall, so that probably explains the sinking.
My questions.
1. How would you go about replacing the frighteningly inadequate 2×6 joists (about 16′ of them) with joists that match the rest of the floor system (2×14)? (Note: from reading the span tables in the code books, I only need 2×12 but matching the rest makes transitions easier and reduces the need for shims.) The center wall has 2×14 on the other side so I can rest one end of the joists on that and lap them, but on the exterior, I will need to support the house while I trim down all of the exterior wall studs 8″ and install a new top plate / rim joist. It seems straightforward until I realize that the supports will likely be in the way of installing the new joists. It feels only slightly less complicated than the Towers of Hanoi.
2. What would you do with the foundation pieces that are breaking off and floating away like pieces of an iceberg? I’ve talked to almost a dozen different companies and foundation experts and received almost a dozen different answers, so I figure I could use a few more. Some want to drive piles in to lift and stabilize it, but with the cracks, it’s not well waterproofed (though I haven’t seen running water through it yet). The basement slab is cracked as well and needs replacing (again, also sloped 4″), but at this point, I figure I should dig out an extra 18″ to get the height I need to finish it. My current favorite plan is to jack up the whole house, excavate it, and start fresh. Only one side of it is below grade so I figure it’s half as much work as a full basement. This would give me a chance to provide actual exterior waterproofing and insulation, but I feel like I need to fix the floor joist system before the house is even safe enough to lift.
Happy to send along photos, but thanks for all the hard work on the podcast: it’s a go-to of mine on longer drives and mind-numbing projects like painting.
Related Links:
- 6 Ways to Stiffen a Bouncy Floor
- How to Repair a Butchered floor Joist
- Contractor’s Guide: Retrofitting a Foundation
- Cracked Foundation
END NOTES:
Check out the Members-0nly Aftershow Podcast.
Check out one of our Project Guides: Siding & Exterior Trim!
Check out our FHB Houses:
Visit the Taunton Store • Magazine Index • Online Archive • Our First Issues • All Access
Help us make better episodes and enter for a chance to win an FHB Podcast T-shirt: www.finehomebuilding.com/podcastsurvey

If you have any questions you would like us to dig into for a future show, shoot an email our way: fhbpodcast@taunton.com.
If we use your question we’ll send you a FHB Podcast sticker!
FHB Podcast T-shirts!
Represent your favorite podcast! Available in several styles and colors. Made from 100% cotton. Find the Podcast t-shirt and more cool products in the Fine Homebuilding Store.
This episode of the Fine Homebuilding podcast is brought to you by Andersen Windows.


Fine Homebuilding podcast listeners can now get 20% off anything in the Taunton store, including Pretty Good House.
Use the discount code FHBPODCAST to take advantage of this special offer.
We hope you will take advantage of a great offer for our podcast listeners: A special 20% off the discounted rate to subscribe to the Fine Homebuilding print magazine. That link goes to finehomebuilding.com/podoffer.
The show is driven by our listeners, so please subscribe and rate us on iTunes or Google Play, and if you have any questions you would like us to dig into for a future show, shoot an email our way: fhbpodcast@taunton.com. Also, be sure to follow Fine Homebuilding on Instagram, and “like” us on Facebook. Note that you can watch the show above, or on YouTube at the Fine Homebuilding YouTube Channel.
The Fine Homebuilding Podcast embodies Fine Homebuilding magazine’s commitment to the preservation of craftsmanship and the advancement of home performance in residential construction. The show is an informal but vigorous conversation about the techniques and principles that allow listeners to master their design and building challenges.
Other related links
-
- All FHB podcast show notes: FineHomebuilding.com/podcast.
- #KeepCraftAlive T-shirts and hats support scholarships for building trades students. So order some gear at KeepCraftAlive.org.
- The direct link to the online store is here.


