Podcast 487: Cedar Closets, Conditioning a Woodshop, and Regional Construction Jargon
Travis, Ian, and Patrick hear from listeners about wet versus dry air, micro toppings for concrete, and good fences before taking questions about vapor retarders for a cedar closet, heating and cooling a woodshop, and regional differences in construction terms.
Follow the Fine Homebuilding Podcast on your favorite app. Subscribe now and don’t miss an episode:
 |
Help us make better episodes and enter for a chance to win an FHB Podcast T-shirt:
www.finehomebuilding.com/podcastsurvey
Dan has more on the buoyancy of dry air. Ron suggests micro cement to stop water vapor. Tess shows off her beautiful fence. Ryan asks how to detail a cedar closet. Hans asks for help conditioning his woodshop. Joseph asks why builders have different construction terms for the same thing.
Editor Updates:
- Travis’s upcoming events: Midwest Building Science Symposium
- Ian’s yard layout
- Jeff’s yardwork
- Patrick’s blower door test
Listener Feedback 1:
Dan in Arizona writes: I was just listening to podcast 479 and my jaw dropped during Steven’s discussion. I must report a seriously erroneous statement. Contrary to what was said, moister air is absolutely less dense than drier air; just try an internet search for “air density calculator relative humidity” for example.
To restate the internet reference more quantitatively (if that is helpful). The reason is simple: for normal pressures the number of molecules in a volume of gas at a given pressure and temperature is fixed n= PV/RT (P= pressure, V= volume, R= gas constant, T= absolute temperature). From chemistry class, Avogadro’s number of molecules (one mole) that is in 22.4 liters at STP (Standard temperature and pressure). Molecular number is the weight in grams of 1 mole of molecules.
Water molecules have a molecular weight of about 18- H2O ((H) 2@ 1 each + O 1 @ 16 each)). Air is mostly Nitrogen- N2 28 (2 @ 14) with mostly some Oxygen O2 32 (2 @16) for an equivalent dry air molecular weight of 29. Adding water at relative mass of 18 gms/mole displaces an equal number of air molecules at approximately 29 gms/mole. The psychrometric chart that was noted shows the weight of water increasing but what is missing is that air is being displaced with the addition of water since the total number of molecules must remain constant. Since the water molecules are lighter, the net effect is a density reduction.
Yes I am a retired engineer who worked in aerospace but with no direct home construction experience. I did get a Mechanical Engineering Master’s specializing in diffusion processes (Momentum, Heat and Mass Transfer- vapor transfer, radiation, convection and conduction) and probably would have gone into the building industries if those options had really existed in the 70’s.
I am in the process of trying to lessen our electric bills (solar installed in 2021, some double pane windows installed this spring). The house is 1965 brick house with an attic space and shallow hipped roof. I had a blower door test performed and it was 13.4 ACH50. I know there is some insulation on the attic floor and over the ducts but obviously lots of leaks. Would like to attack the air-leakage problem but it is not clear who to talk with for a systems solution. As there doesn’t seem to be an energy audit function in Arizona. I will try again when we get below 90 F (November).
Thanks for the podcast, I need all the air sealing help I can get!
Related Links:
Listener Feedback 2:
Ron writes: I enjoyed your recent conversation on options for moisture-sealing a basement wet concrete floor and wanted to throw out one other option: Microcement floor finish and sealer. With this option, the floor needs to be cleaned, but no primer or complicated prep. The floor needs to be wetted down before application, so an already wet floor isn’t a problem. Any damage to the concrete can be repaired first, and heavy things can be rolled on the finished floor. I think the cost is under $1 per SF for materials and it will be beautiful, finished and useful. There are three components needed: Microcement— coverage up to 300 SF per bag. Added colorant and the clear sealer.
I’d be interested in hearing your thoughts.
Listener Feedback 3:
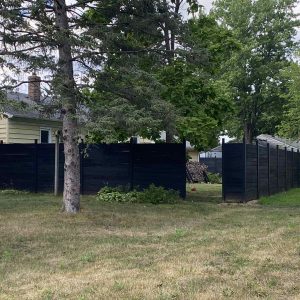
Tess writes: Hey FHBpodcast, I couldn’t have been more amused by the variety of cast and community responses given to my email on Episode 430 about the bathroom remodel. While I haven’t convinced my husband that we can do the bathroom remodel ourselves, we did agree that a backyard fence project was within our capabilities. Because somehow that sounded easier. 220 feet and thirty-three 42-inch-deep post holes later… I have a lot of opinions about concrete. ?
To back us up to the start, here’s how we launched this project. The goal was a modern-looking fence that’ll need minimum maintenance. After seeing a friend’s 8-foot fence posts twist within the first month of being installed, we knew we wanted a higher-quality product that would look great (and straight) years later. Luckily my neighbor mentioned Slipfence as an option he was considering and we knew immediately this would meet our aesthetic needs. The posts are aluminum with channels that fit standard 6-foot deck boards in either a horizontal or vertical format. We chose the horizontal to fit with the modern look we’re adapting the house to.
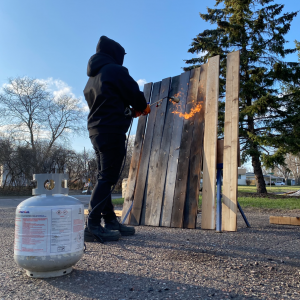
Next came the moment where one decision tripled the amount of work the fence would take: instead of taking the easy way and staining the 6-foot deck boards black… we decided to do our fence in the Japanese style of yakisugi (sometimes referred to as shou sugi ban). The main benefits of this traditional technique is it gives the wood incredible resistance to the elements and durability. Claims of yakisugi producers say the wood should last 50-100 years with regular oiling every 10 years. At the time we couldn’t find anyone who produced yakisugi in the board size we needed. This meant I now had an excuse to buy a flame thrower.
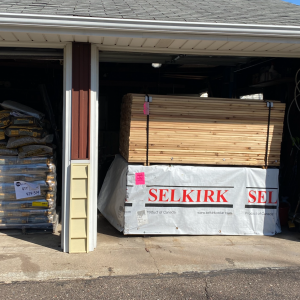
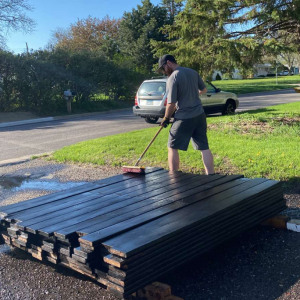
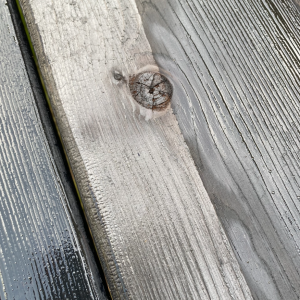
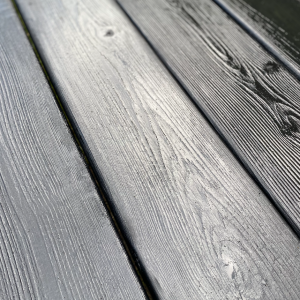
Here’s how we did the yakisugi: we bought 500+ 6-foot untreated cedar deck boards and in batches of 60 set them up vertically on a homemade stand in our driveway. Our best results were stacking the boards three deep and twenty wide. This minimized the amount of setup time and helped limit the number of boards knocked off the stand by wind. For anyone attempting this at home, I’d recommend the IdealGas Single-Head Heating Torch as the enclosed nozzle keeps the electrical starter from melting a hundred boards in. The wood goes through a process of 1) first-char on both sides, 2) brushed both side with water and an acrylic-bristle broom to remove the first layer of loose char, then 3) second-char on both sides, followed by 4) two coats of alkyd oil per side. What baffles me is that for the past five months the attendants at the gas station never questioned how we could be going through two 15 lb propane tanks every two hours on the weekends.
 |
 |
 |
 |
 |
 |
 |
 |
For any yakisugi purest listening to this podcast, yes we are aware that we didn’t do the traditional flue method. Living in the suburbs of Minneapolis that seemed like too good a reason for someone to call the fire department on us. Even so, I was nervous and kept checking Nextdoor to see if anyone wrote about the crazy millennials down the street with a flame thrower. But what we found is this project actually had a very positive reaction from our neighbors. It gave them an excuse to stop by on their walks, ask questions, and cheer us on! Which was much needed as we transitioned into the digging phase of the project.
Knowing your audience, I’m going to make the assumption that most know the process of installing a fence. If not, they should check out your article series (Install a Vinyl Fence) on the topic as it was very helpful for us. For this message, I’ll just bring up a few of the nuances specific to our project.
 |
 |
 |
 |
 |
 |
 |
 |
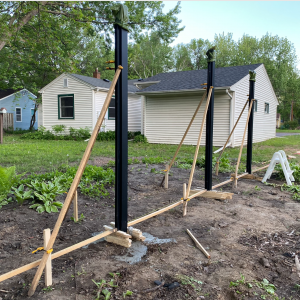
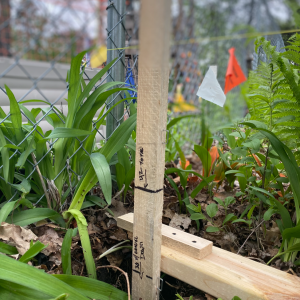
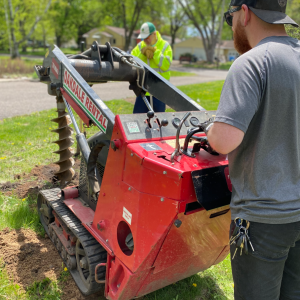
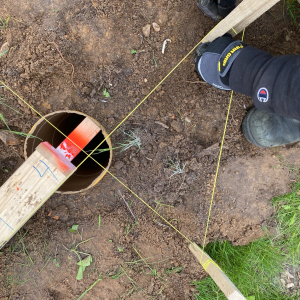
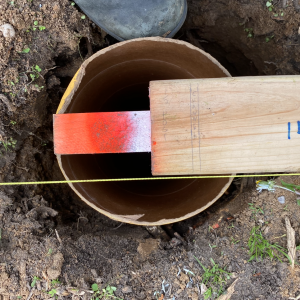
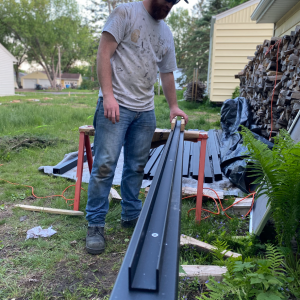
The best decision we made on this whole project was to rent a Toro Dingo auger. In one weekend we were able to dig all 33 holes, place sonotubes in them and cap them with plastic plates. The sonotubes and the plates kept water out so the holes didn’t collapse. This way we could do concrete and posts for three or four holes a night after work which was our only option as non-professional builders. As we live in Minnesota, in order to prevent heaving we needed to go 42 inches deep for our post holes. The only catch was the Dingo only dug 36 inches deep, which meant I had to follow the rig with a manual post hole digger to remove the last 6 inches of dirt. We followed this with a base of gravel, then we chose to float the hollow posts in the concrete by pre-installing the vertical wood channels and using those to level the fence post by post. I’m not sure this was the best method, but it did prevent us from having to cut uneven post heights later on.
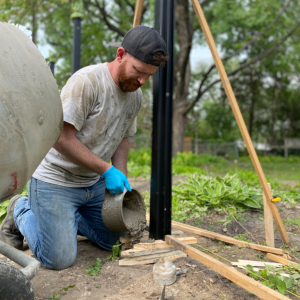
We ran into some issues with the consistency of the concrete as following the Quickcrete instructions ended with too dry a consistency. The method we landed on that worked best was 1) fill the hole halfway up with concrete 2) float the post, then 3) fill the rest of the hole. This made sure we could still adjust the posts side-to-side since we were very dependent on making sure each post was exactly 6 ft apart and that the post would go as low as we needed it to into the concrete. I still have nightmares about the two holes I had to dig concrete out of by hand because the post wouldn’t go deep enough. You’ll notice in the photos that we were using a pitcher to scoop the mixture into the holes. Because of our floating method, we often didn’t have more than a 3×3 inch opening to put concrete through. By the end of this project, I’ll need a whole new set of kitchen utensils as my measuring cups, bowls, and tongues have all been needed to get us out of a pinch.
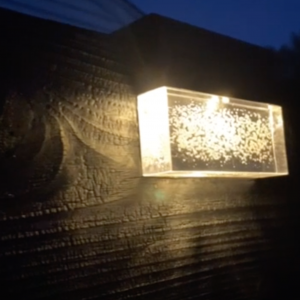
Today we’re at the point where all the sections are filled and we’re now going back and adjusting the stacks to be flush and removing boards that are too bowed or crooked. After that, we’ll install the cap rail, solar-powered lights, and lastly the gates. Two human gates and then a 9-foot utility gate. Why do I have the sneaking suspicion the gates are going to be the hardest part of this job?
Anyways, always happy to be the free entertainment for this crew. Maybe the bathroom remodel will look like a breeze after we finish the fence.
Tess
P.S. Pictures include my husband Josh, my dad Scott, and my 80 lb fluffball Sisu.
Related Links:
Question 1: Should I install a layer between cedar and plaster in my closet?
Ryan writes: This may be a little too niche, but here goes: I’d like to install aromatic cedar in a closet we have in our house. Currently the walls are covered in plaster and lathe that’s in pretty poor shape, and there’s fiberglass insulation on the outside of the wall (attic crawl space with an uninsulated roof). The space where the closet is, is a conditioned space. Should something be installed between the cedar and the plaster? The house it far from airtight, so I’m not worried about an air barrier, but I was thinking perhaps 15# felt?
Thanks in advance, Ryan
Related Link:
Question 2: What’s the best way to heat and cool a workshop space in climate zone 6?
Hans writes: Fine Homebuilding crew, I am finally writing to say thank you for addressing my question in episode 253 on how to insulate my interior roof when using exterior insulation. I haven’t gotten to attempt any solutions that were discussed as life, a new role at work, and a new project, but I do like Ian’s practical and effective suggestion of using kraft faced batts if I can suppress my desire to over-complicate the simple things.
It was also very cool to hear the shared interest from the podcast crew in my small home project as I think most of my friends and family are sick of hearing about all of the building science stuff. So let me know when the podcast hits the road to tour the many builds of fellow listeners in the Wisconsin area so I can make sure to be stocked up on some of the local craft beers for when you visit my continual worksite.
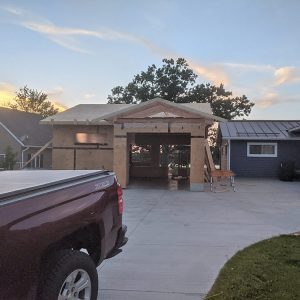
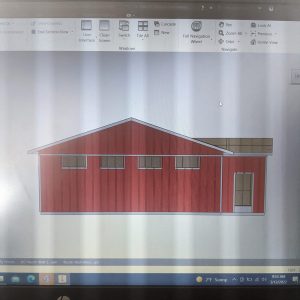
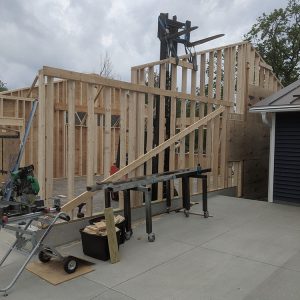
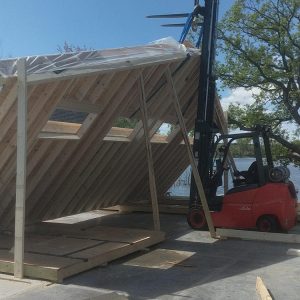
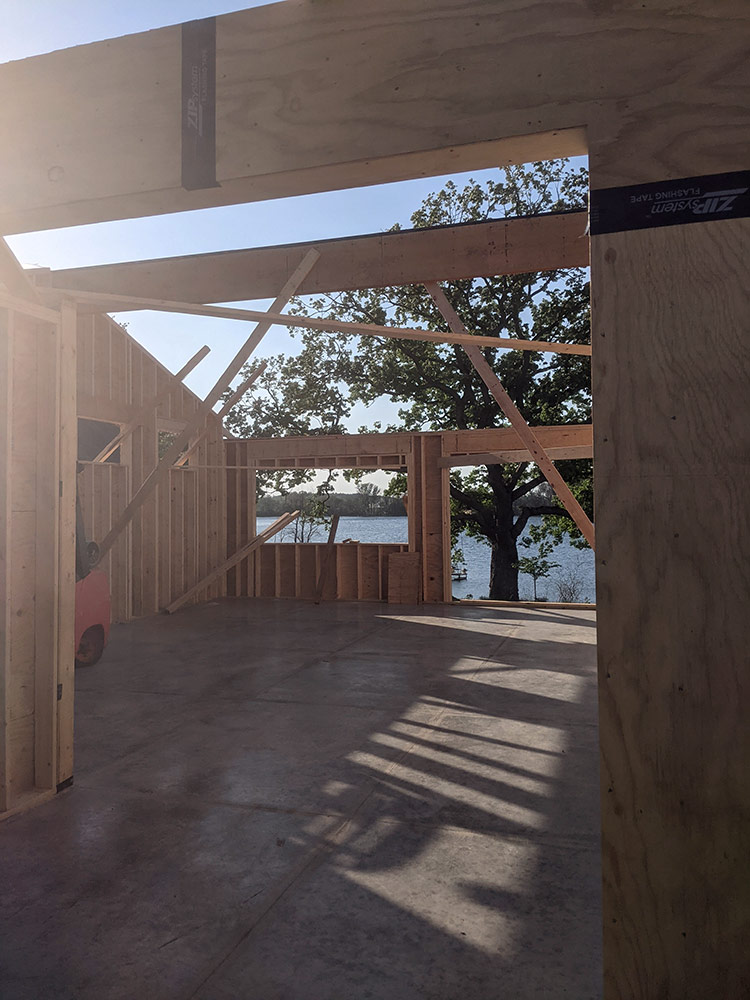
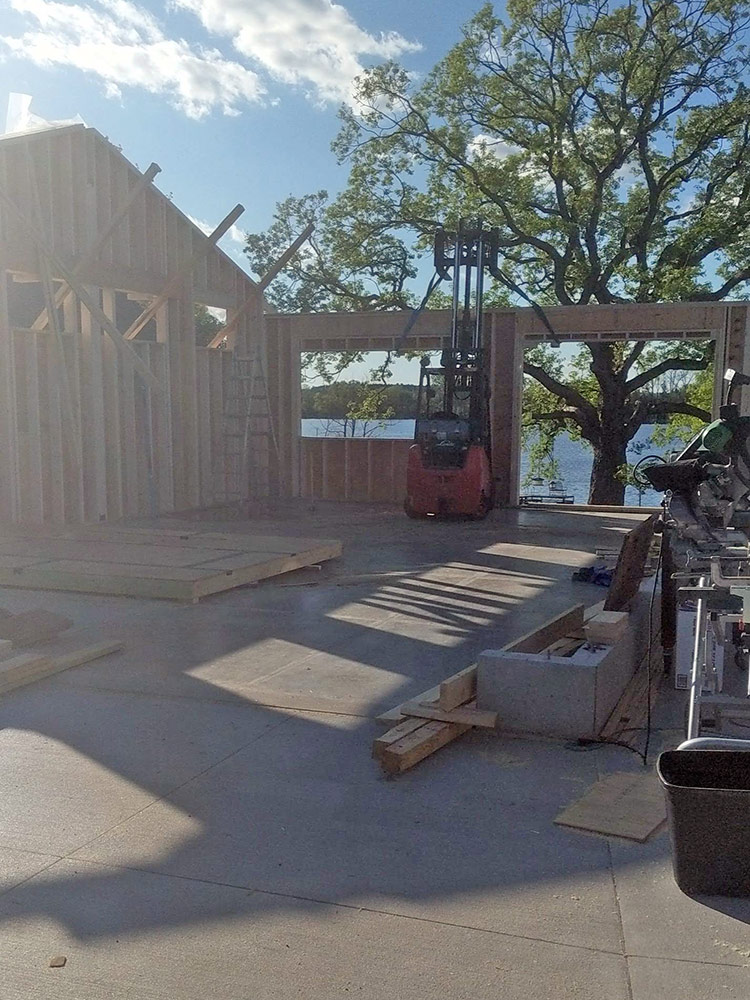
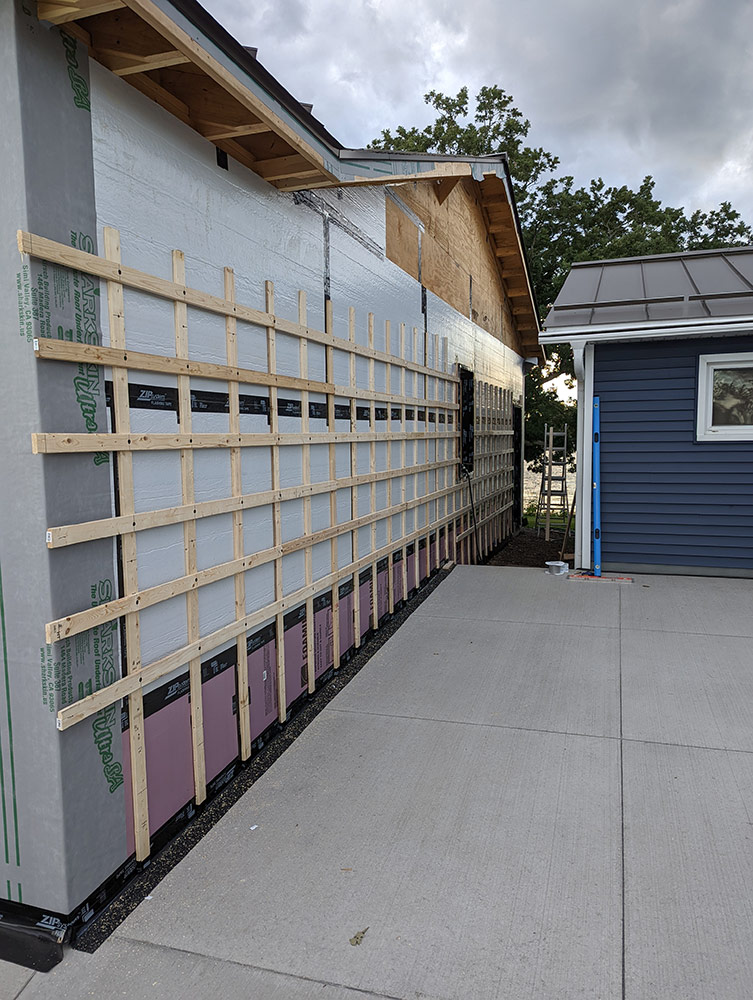
As I mentioned, I haven’t gotten to finishing my own home as I have been working on building a “simple” (exterior insulation and strapping, cathedral ceiling) 26′ x 32′ detached workshop with my dad on his property. (This will serve as the future cabinet shop for finishing my house so it does have a good return on investment for putting off my own projects) See attached photos of this build, this is all pretty much just a 2-man crew working after work and weekends. The bought and borrowed equipment shown in the photos has made a huge difference in getting this far.
Enough rambling, my question is what would be the best way to heat/cool this space (climate zone 6) throughout the year considering it will be a dedicated hobby woodshop and maybe a bit of welding?
 |
 |
 |
 |
 |
 |
 |
 |
I was pushing for a single head hyper heat minisplit with some sort of supplemental heat for the real cold days, but my dad, through getting in touch with some local HVAC contractors, has slowly been steering away from that idea. The contractors have said they don’t like minisplits in general or that the dust in the shop could be detrimental to the minsplit and make it fail early. So, he is leaning more toward a traditional furnace and ac at this point. Downside to this is losing floor space in the not large shop. The goal for climate control will be to keep it workable year-round, so between 50-70 degrees.
I couldn’t find much saying that minisplits are super problematic in a woodshop, but I am interested to hear your input. Any other tips on air filtration or if you think an air exchanger is useful/necessary would be welcome as well as this will hopefully be as airtight of a garage as you can get with two garage doors on it.
Sorry for the essay and thanks in advance for any tips or ideas.
Related Links:
Question 3: Why is there so much variation in construction jargon?
Joseph in Gunnison County, CO writes: Hallo! My name is Joey and I’m a builder in the Colorado mountains. I’ve consistently run into conflicts (no punches [violence is never the answer]) when it comes to construction terms from jurisdiction to jurisdiction. Even a small distance from Breckenridge to Gunnison, industry pros use wildly different terms meaning the same thing. Why is it that there seems to be three to four different terms for essentially the same item? Is this regional? Or just confusion?
END NOTES:
Members-only Aftershow Podcast 487: Travis updates us on this year’s Midwest Building Science Symposiums and Travis and Ian explain why the Midwest might be the toughest climate for a high-performance home.
Check out one of our Project Guides: Siding & Exterior Trim!
Check out our FHB Houses:
Visit the Taunton Store • Magazine Index • Online Archive • Our First Issues • All Access
Help us make better episodes and enter for a chance to win an FHB Podcast T-shirt: www.finehomebuilding.com/podcastsurvey

If you have any questions you would like us to dig into for a future show, shoot an email our way: fhbpodcast@taunton.com.
If we use your question we’ll send you a FHB Podcast sticker!
FHB Podcast T-shirts!
Represent your favorite podcast! Available in several styles and colors. Made from 100% cotton. Find the Podcast t-shirt and more cool products in the Fine Homebuilding Store.
This episode of the Fine Homebuilding podcast is brought to you by Andersen Windows.

Professional builders know the value of a durable and versatile construction adhesive. Say no to second guessing quality, say yes to Loctite’s strongest adhesive, PL Premium Max. Equally effective for interior and exterior use, PL Premium Max can be applied in all but the most extreme weather conditions and bonds to all common building materials. It offers 20 minutes of working time and cures solid in 24 hours, with no air bubbles for maximum durability. Whether you’re framing a custom home, upgrading to granite kitchen counters, or adding rigid foam and comfort to an existing basement, PL Premium Max is the right adhesive for the job. Say yes to Loctite’s strongest construction adhesive. Visit Loctiteproduct

Fine Homebuilding podcast listeners can now get 20% off anything in the Taunton store, including Pretty Good House.
Use the discount code FHBPODCAST to take advantage of this special offer.
We hope you will take advantage of a great offer for our podcast listeners: A special 20% off the discounted rate to subscribe to the Fine Homebuilding print magazine. That link goes to finehomebuilding.com/podoffer.
The show is driven by our listeners, so please subscribe and rate us on iTunes or Google Play, and if you have any questions you would like us to dig into for a future show, shoot an email our way: fhbpodcast@taunton.com. Also, be sure to follow Fine Homebuilding on Instagram, and “like” us on Facebook. Note that you can watch the show above, or on YouTube at the Fine Homebuilding YouTube Channel.
The Fine Homebuilding Podcast embodies Fine Homebuilding magazine’s commitment to the preservation of craftsmanship and the advancement of home performance in residential construction. The show is an informal but vigorous conversation about the techniques and principles that allow listeners to master their design and building challenges.
Other related links
-
- All FHB podcast show notes: FineHomebuilding.com/podcast.
- #KeepCraftAlive T-shirts and hats support scholarships for building trades students. So order some gear at KeepCraftAlive.org.
- The direct link to the online store is here.








View Comments
Heating and cooling a shop. Check out Jay Bates YouTube channel for adding more filters to a mini split. https://youtu.be/S_Li3Z7F8tE
I'm also looking at mini split units that have ceiling mount systems. They cost a bit more, but filtering and maintenance seems to be much easier.
Mitsubishi makes some really good ones from what I hear. Look for "HORIZONTAL-DUCTED" units.
One model is "Senville SENA-12HF/ID Concealed Duct Mini Split Air Conditioner Heat Pump 12000 BTU"
This one is not as good as the Mitsubishi models, but much cheaper.