Perfect Scribing for 5 Types of Tasks
Tools and techniques for tight-fitting trim.
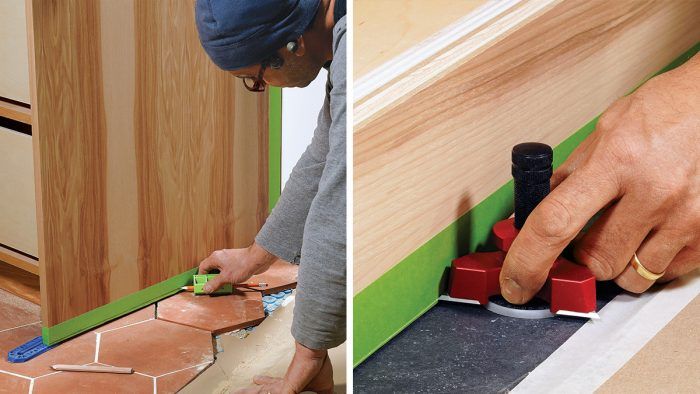
Synopsis: The cleanest way to fit cabinets and trim to existing elements is by scribing. Scribing is transferring the profile of one object to another with a crisp, clear line, and then removing the material right up to that line but no further. Stefan Straka, a woodworker, trim carpenter, and cabinetmaker, goes over the tools and techniques for a number of scribing projects, including baseboard and toe kicks, cabinet panel ends, and irregular surfaces.
When your straight-edged cabinets and accurately milled trim travel from the workshop to the job site, they encounter a much less precise environment. The goal is to blend the new elements seamlessly into the existing home, with gap-free transitions that highlight the quality work.
The cleanest way to fit cabinets and trim to existing elements—whether they be wavy walls, sloped floors, or irregular stone and tile surfaces—is by scribing. While there are times when it’s acceptable to cover gaps with moldings or caulk, I avoid those measures when I can, opting for the clean intersections of carefully scribed work.
Scribing involves fitting one surface at a time. When the cabinetry or trim component is trapped on multiple sides, such as when dropping a countertop into a closed space, templating is necessary. I’ll cover templating techniques in a follow-up article.
Scribing 101
Scribing, when done well, is transferring the profile of one object to another with a crisp, clear line, and then removing the material right up to that line but no farther. It often helps to bevel the scribed edge past 90°, making it easier to fine-tune the fit afterward.
Scribing tools create the necessary offset in various ways, with some using a pencil for marking and others a knife. While you can use a standard compass for scribing, or improvise a one-off tool with a sharp pencil and a small block of wood, I prefer a dedicated scribing tool. No matter what I am planning to scribe, I begin with a full survey of the existing surfaces. If they are wildly irregular or out of plumb, scribing will require removing more material, so I factor that in to what I’m building and how I plan to install it.
The Best Tools for Precise ScribesThingamejig Scribing Tool
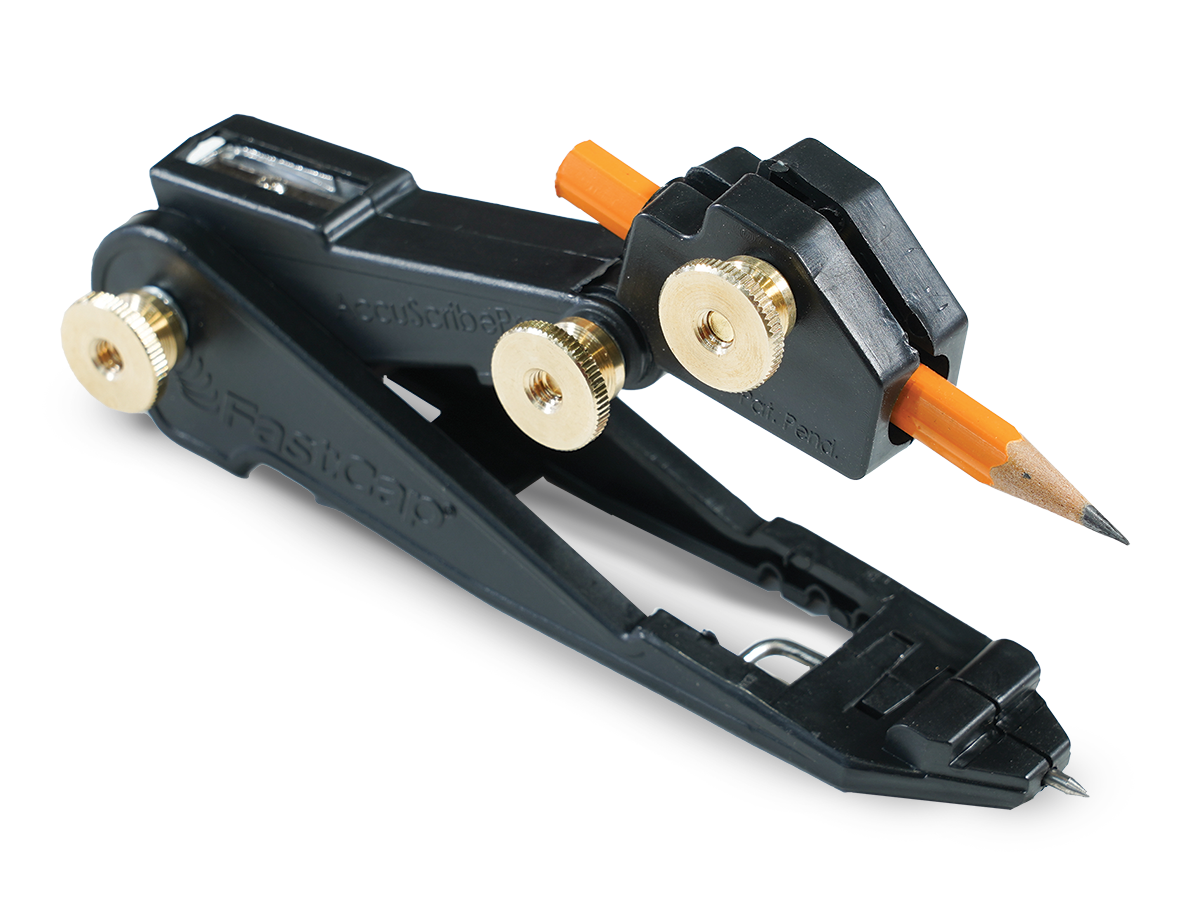
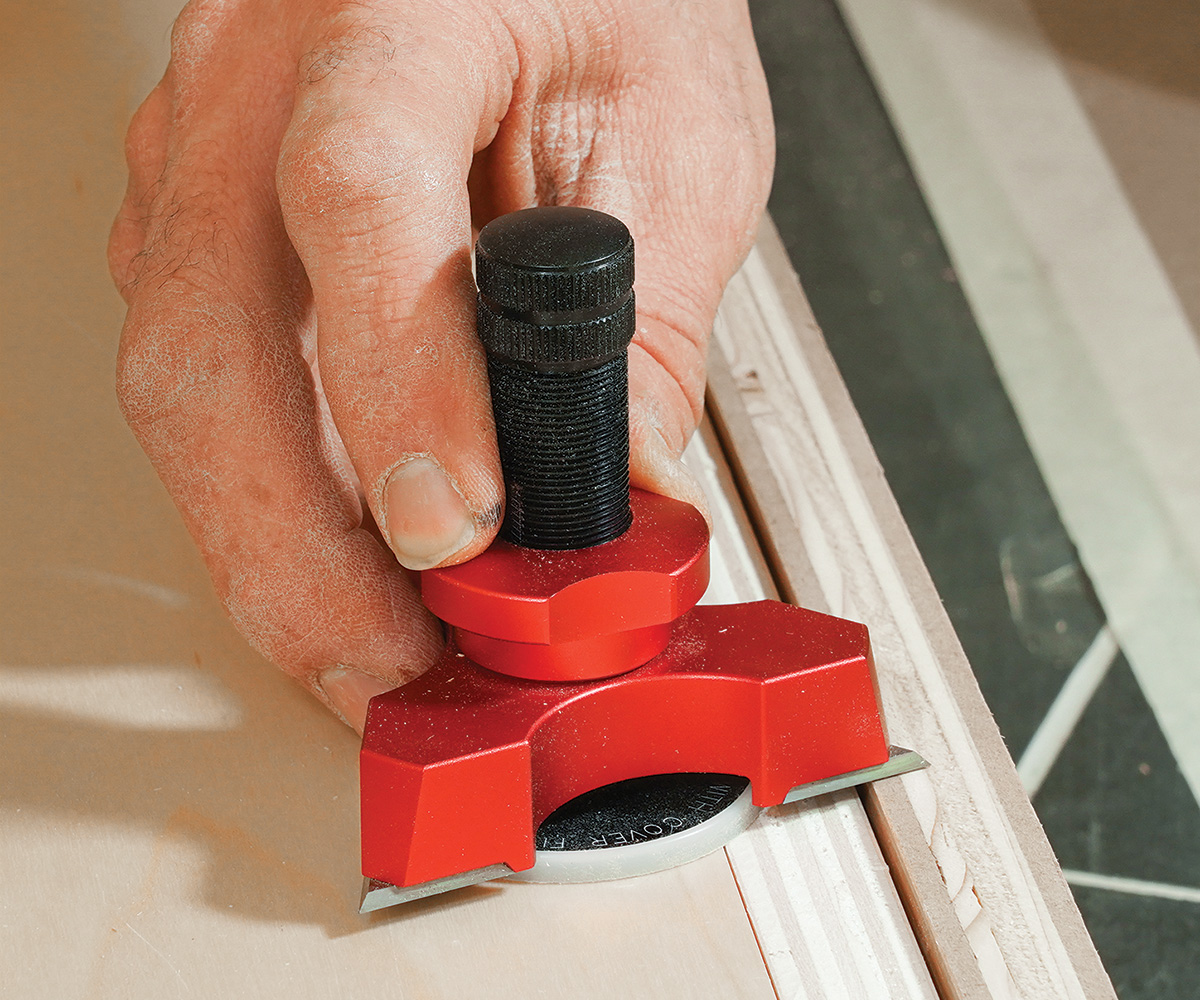
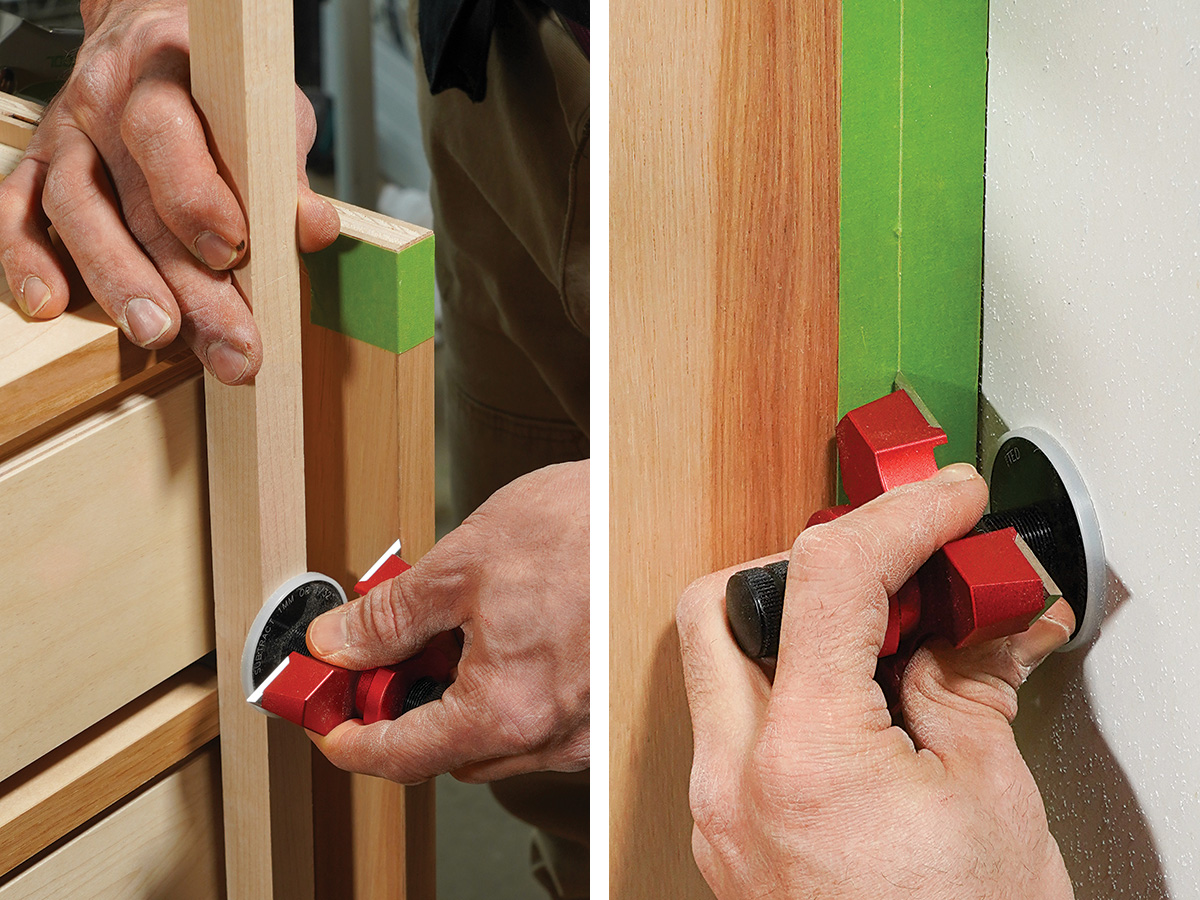
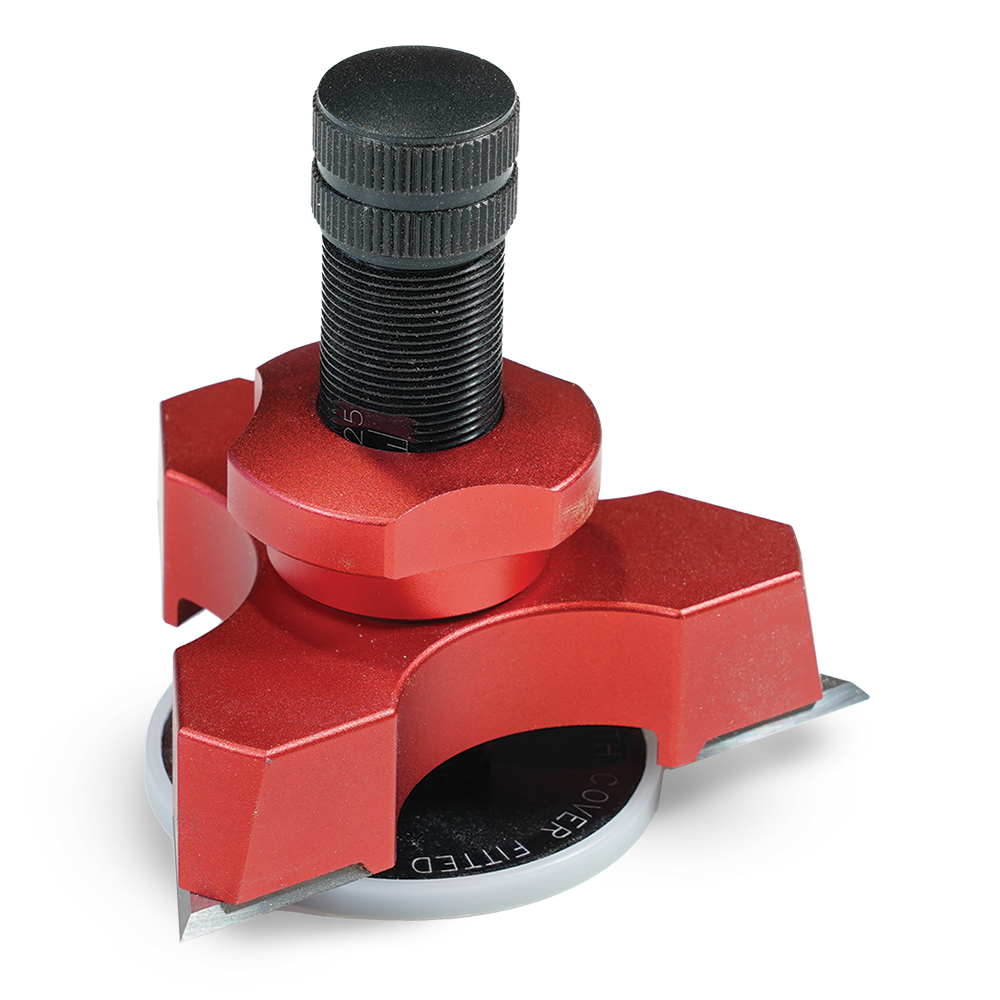 Price: $90 This is the best scribing tool I’ve found, and I use it almost exclusively for my cabinet installations. It’s not cheap, but I highly recommend it for professionals who scribe regularly. The tool is machined from solid aluminum, with a broad, nonmarring foot that rides surfaces smoothly and accurately. The lockable marking head spins on accurate threads, with a laser-cut ruler to indicate the scribing gap, and three carbide marking knives that incise a very clean line. Rather than marking workpieces directly, I use this tool in conjunction with painter’s tape, cutting through the tape and peeling away the waste to create an extremely accurate, easy-to-see line. FastCap AccuscribePrice: $16 If the Thingamejig is too much of an investment, go with Fastcap’s Accuscribe. It has a compass design, with a wide, flat bottom edge that stays relatively stable on most surfaces, and an articulated pencil arm that can be adjusted and locked to create any gap needed. |
Marking comes first
The actual process begins by placing the object against the wall, ceiling, or floor, or whatever you are scribing to, and making sure it is in the same level or plumb alignment as it will be in its final position. Next, you note the offset between where it is and where it will end up, and set your scribing tool to the same distance.
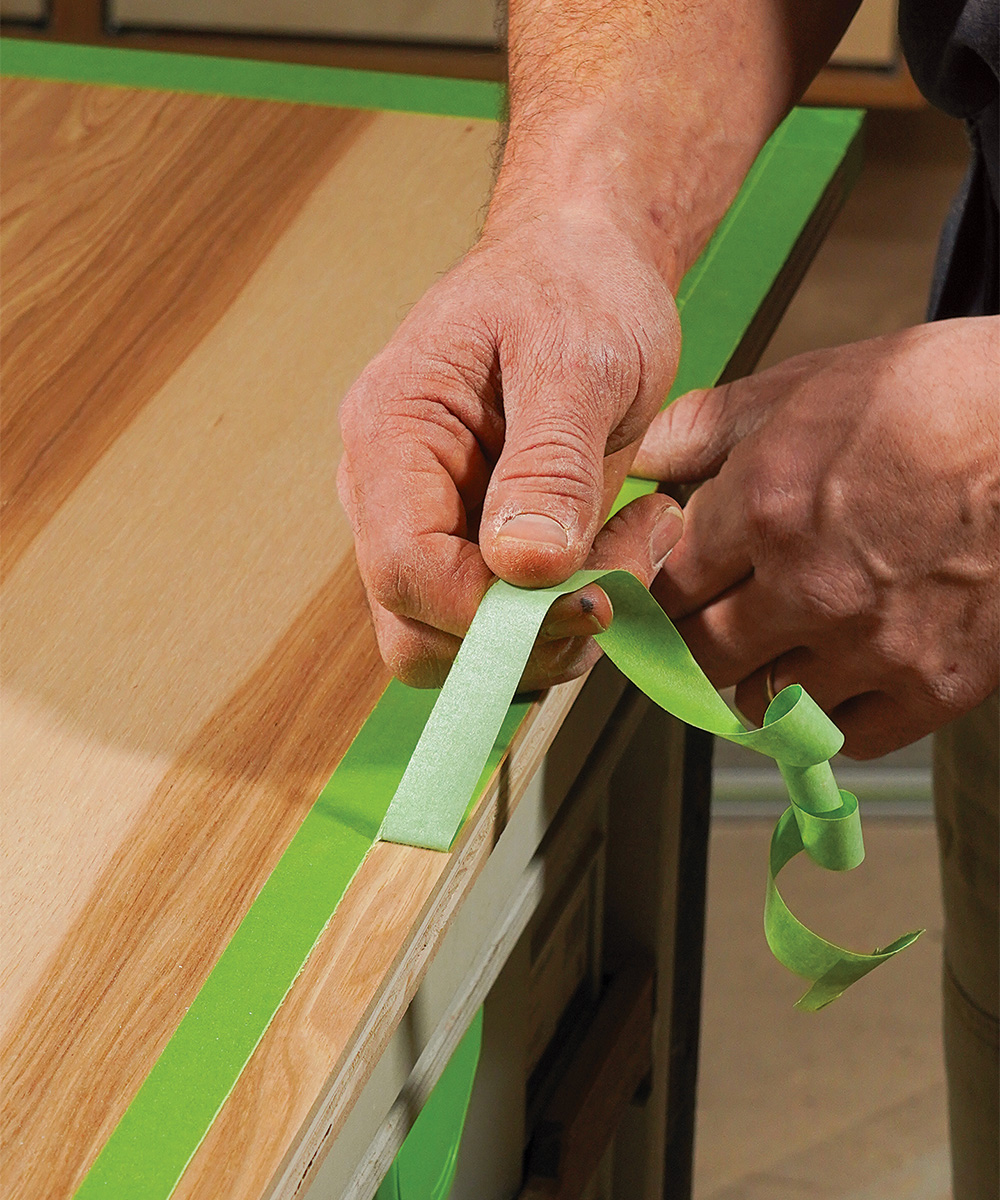
Before positioning the workpiece for scribing, I protect the surface to be scribed with light-green, low-tack painter’s tape. I scribe in two main ways—with a pencil and with a knife—and the tape is indispensable for each. If I’m using a sharp pencil, the tape protects the workpiece, makes the line easier to see and follow, and makes it easy to redraw if I get it wrong. Most often these days, however, I use a knife-based scribing tool instead of a pencil. The knife cuts the tape cleanly, which I then peel away on the waste side to create a perfect trim line. When it comes time to remove material up to the line, the tape also minimizes splintering.
Toe kick teaches the basics
Scribing a toe kick is a great way to hide an out-of-level floor underneath a bank of level cabinets. I set my cabinet boxes on a separate, level base, scribing and attaching the toe-kick molding before placing the cabinets on top. I use the Thingamejig scribing tool, combined with light-green, low-tack painter’s tape.
Prepare for scribing
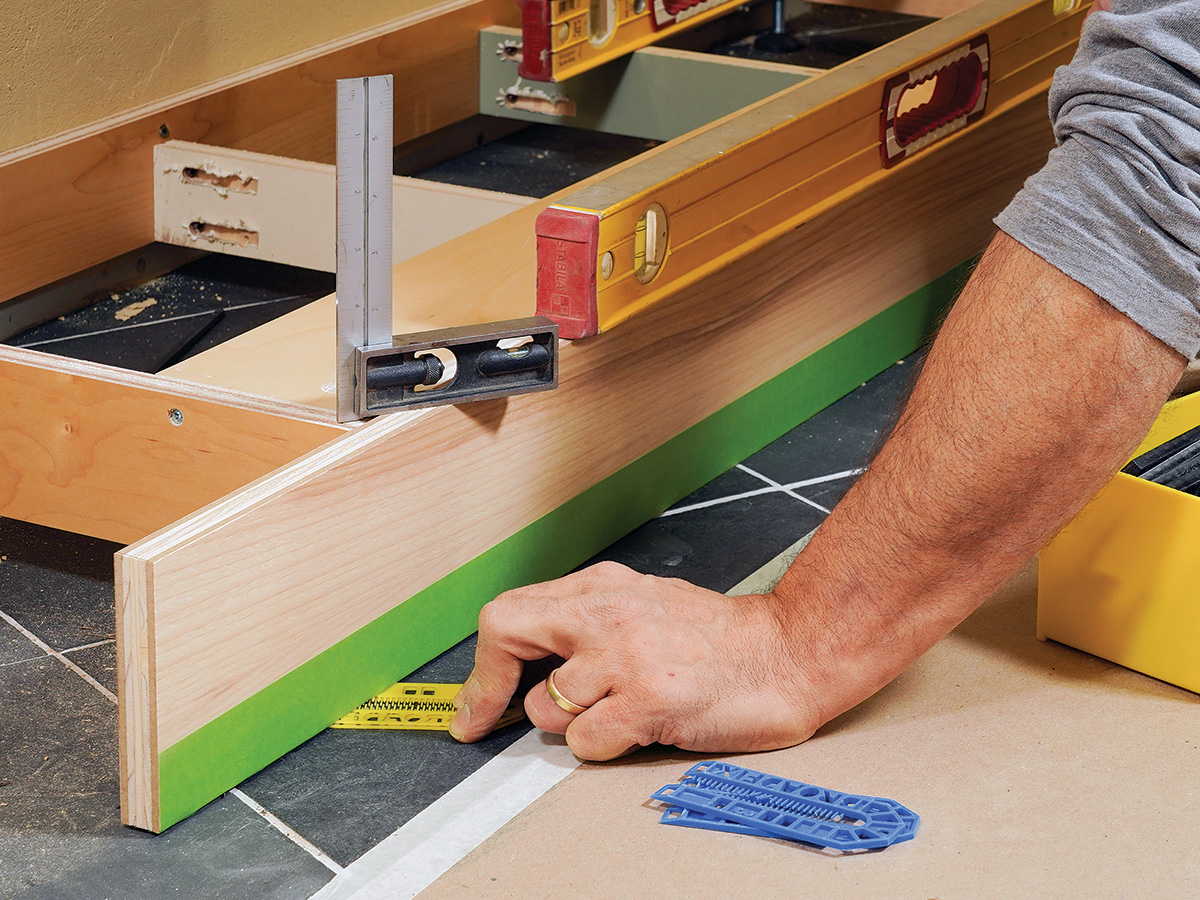
Cut the toe kick a little wider than necessary, add painter’s tape to the lower edge, and then shim up the strip until it’s level with the base with a consistent overlap along the top edge.
Set the scribe tool
Use the offset between the cabinet base and toe kick to set the offset on the scribing tool. After setting the Thingamejig, I lock the small red knob.
Scribe the bottom
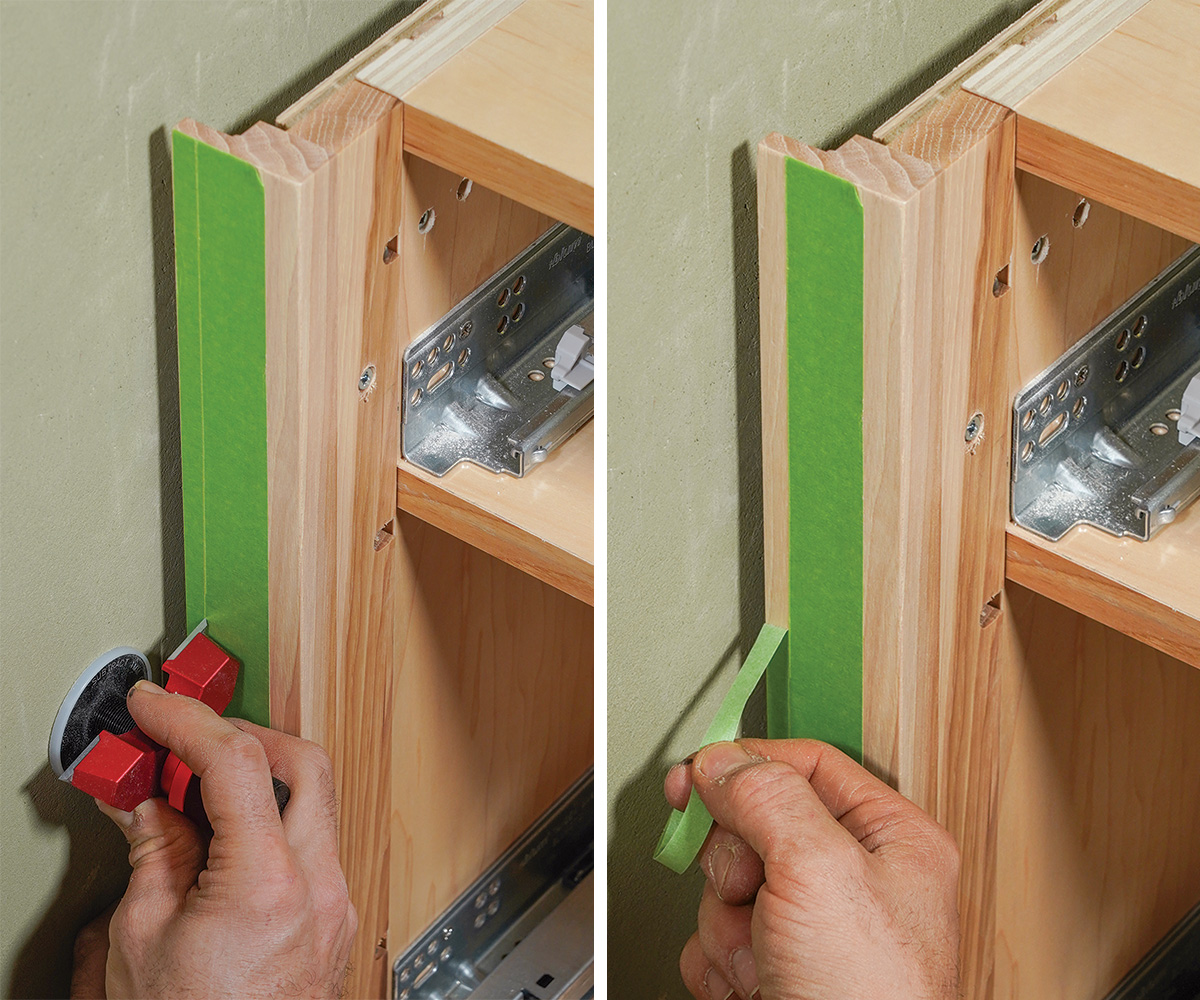
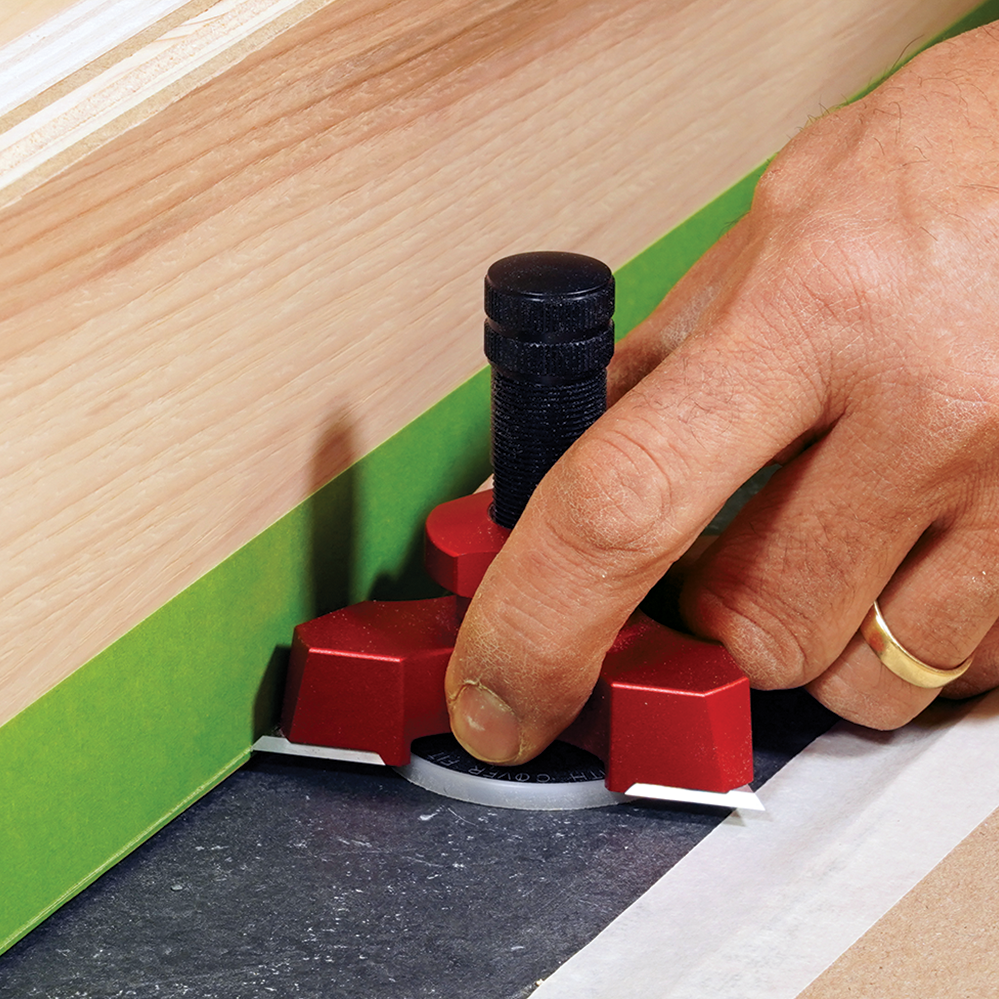
The Thingamejig slides smoothly along the tiled floor, and the sharp carbide knife cuts the tape cleanly.
 |
 |
Peel the tape
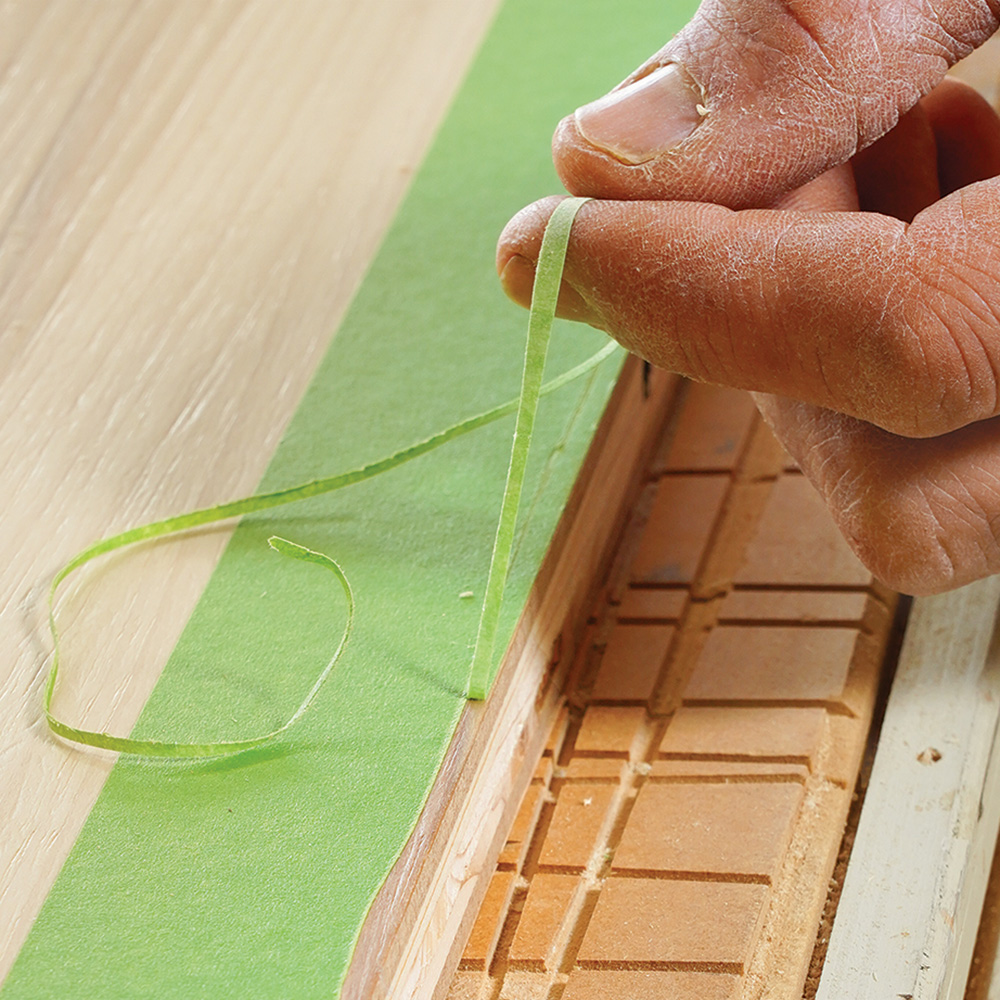
Peel away the tape on the waste side of the cut to reveal a sharp, highly visible line.
Trim on track
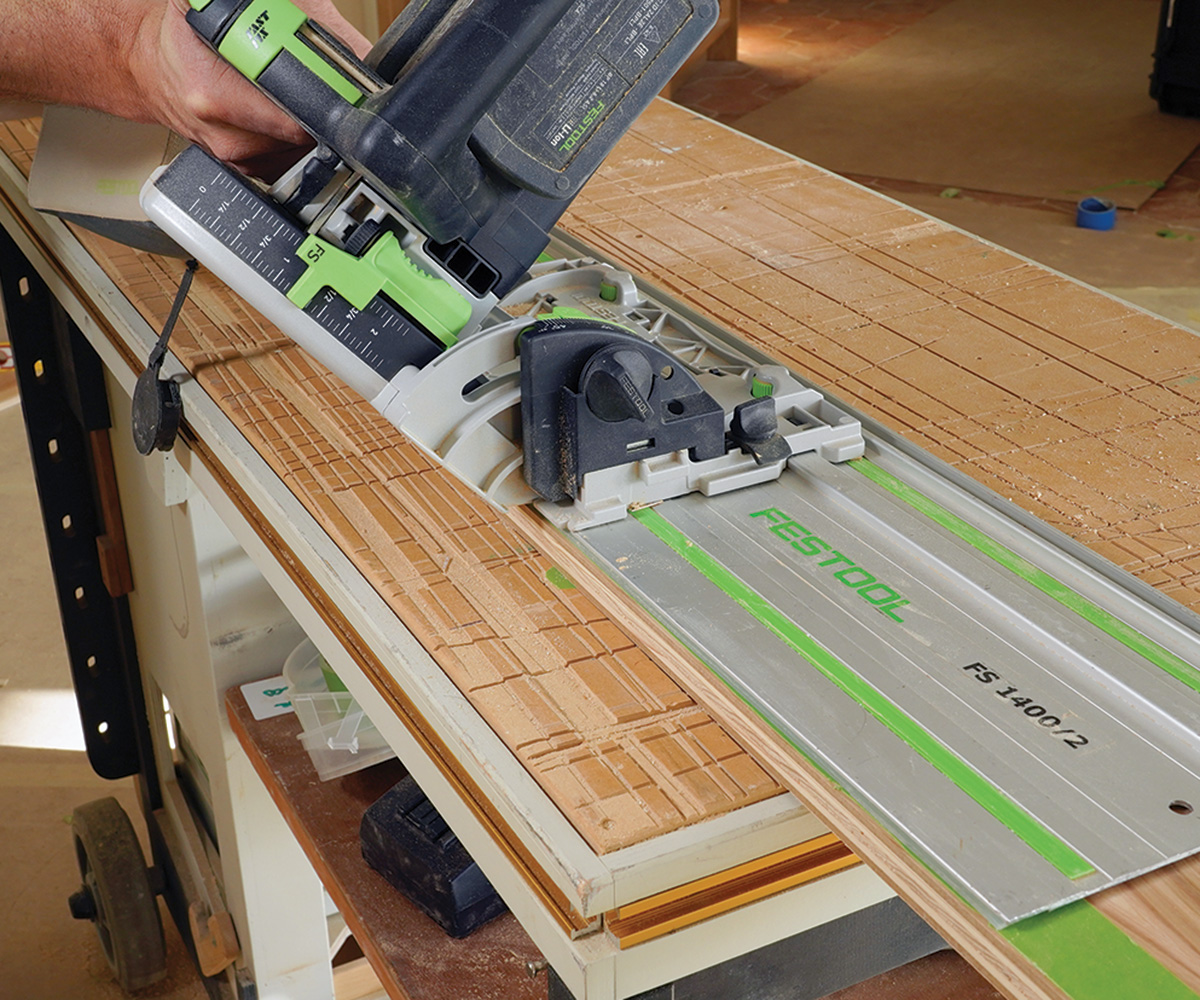
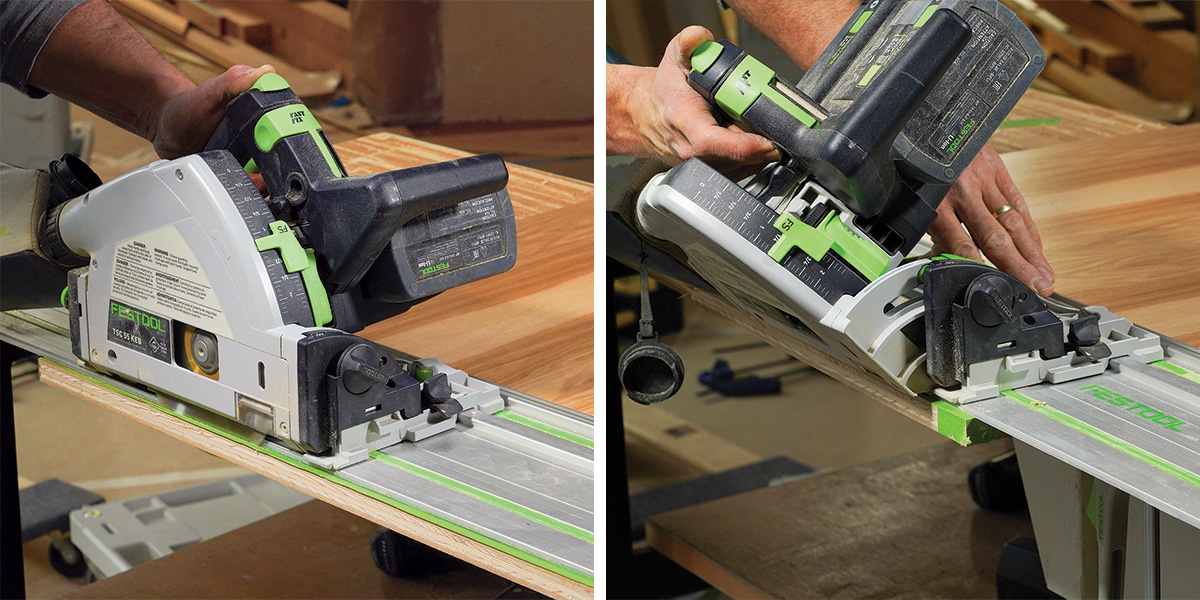
A track saw is the best tool for trimming. The track stays put without clamps, and you can reposition it as necessary for curved lines. Bevel the saw over to 30° to 45°, and stay just a hair away from your tape line as you cut.
Refine the line
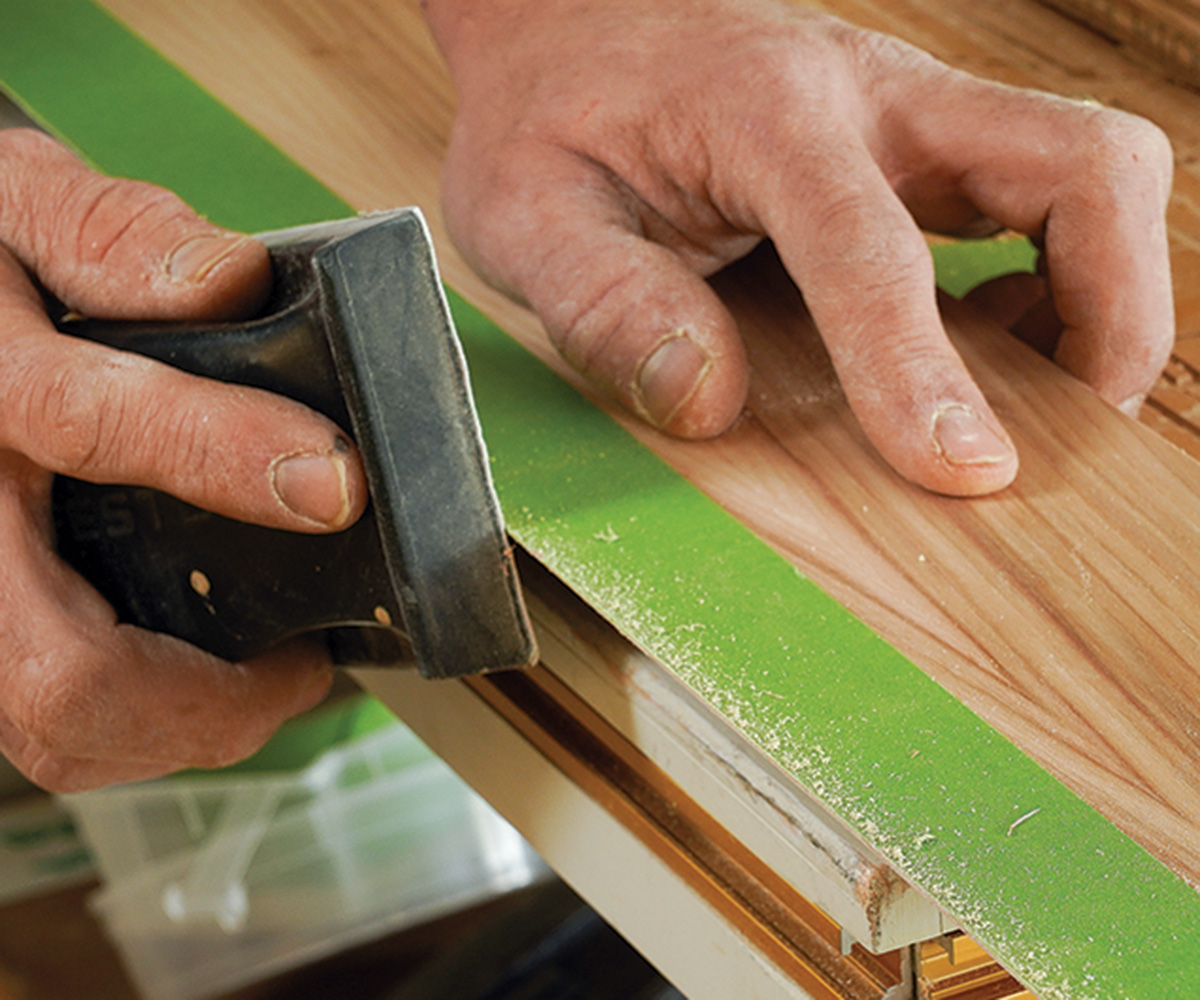
The track saw leaves a knife edge that’s easy to refine with a sanding block or block plane. The tape helps prevent chipping.
Attach the toe kick
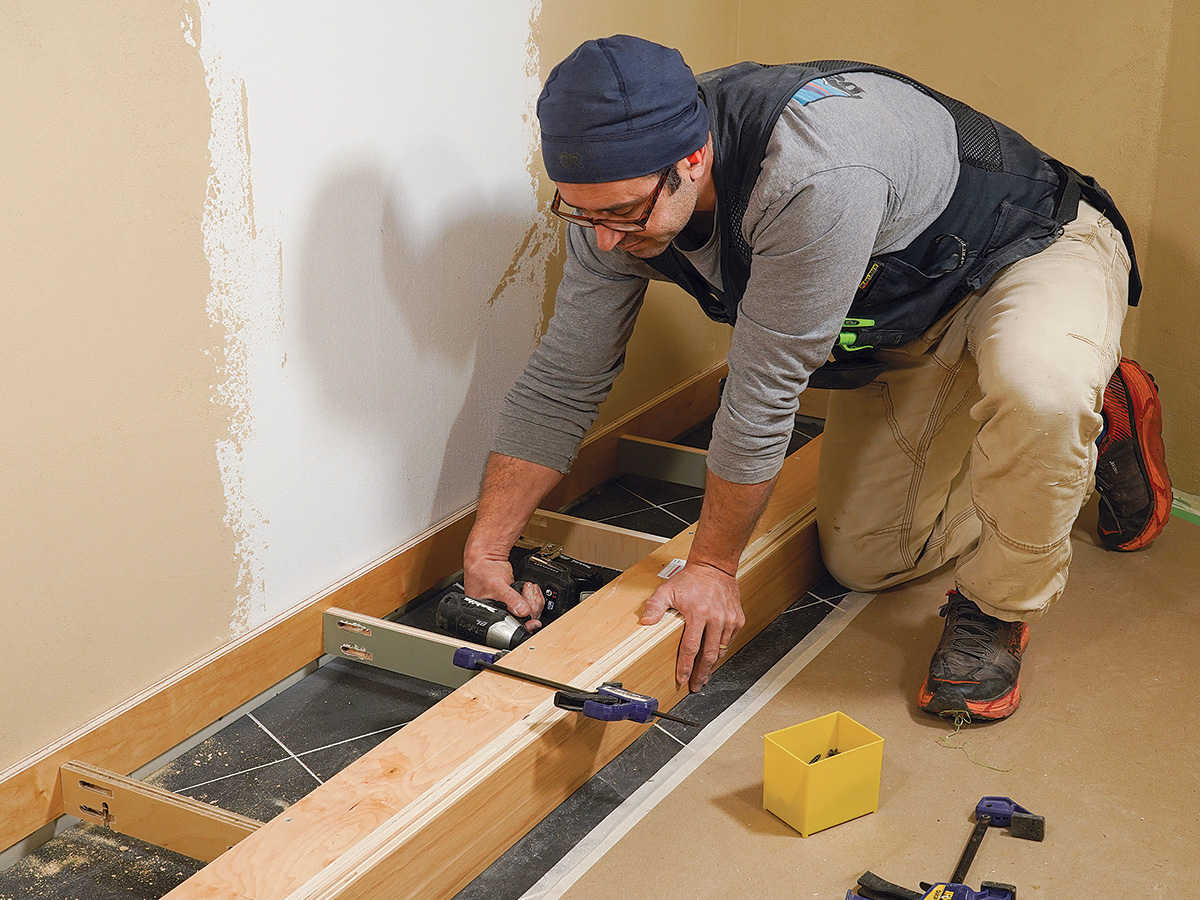
The top edge should line up nicely with the top edge of the base without any obvious gaps at the floor. Attach the strip by driving screws from inside the base.
Waste removal is next
The next step is to remove the material up to the line, leaving a clean edge. This is where a track saw is indispensable. When possible, I bevel the saw over to a 30° to 45° angle for these cuts, leaving a knife edge that’s easy to refine with a few quick strokes of a block plane and/or sanding block.
Like many cabinetmakers, I used to use a belt sander for this material removal, but my new approach is faster, more precise, and far less dusty. Where the end of the scribed component will be visible, I stop the angled cut before the end, and transition to a square one. Where lines curve, I stop the cut and reposition the track, plunging down into a new one.
If I’m careful with my track-saw cuts, the sharp edge doesn’t need much sanding or planing. If it’s bumping up against drywall, I’ll often push it into the surface to close the few last gaps.
When necessary, I also use a power planer to remove material, or a right-angle grinder, fitted with a carbide-coated grinding wheel (4-1/2-in., coarse, Kutzall Extreme), and occasionally a random-orbit sander.
End panels are scribed one edge at a time
Like many custom cabinetmakers, I apply separate, finished panels to exposed ends. These must be scribed to the floor and wall and then trimmed flush with the top edge of the cabinet. After banding the front edge of the panel, cut it large enough to account for scribing and trimming, and don’t forget the necessary reveal at the front edge.
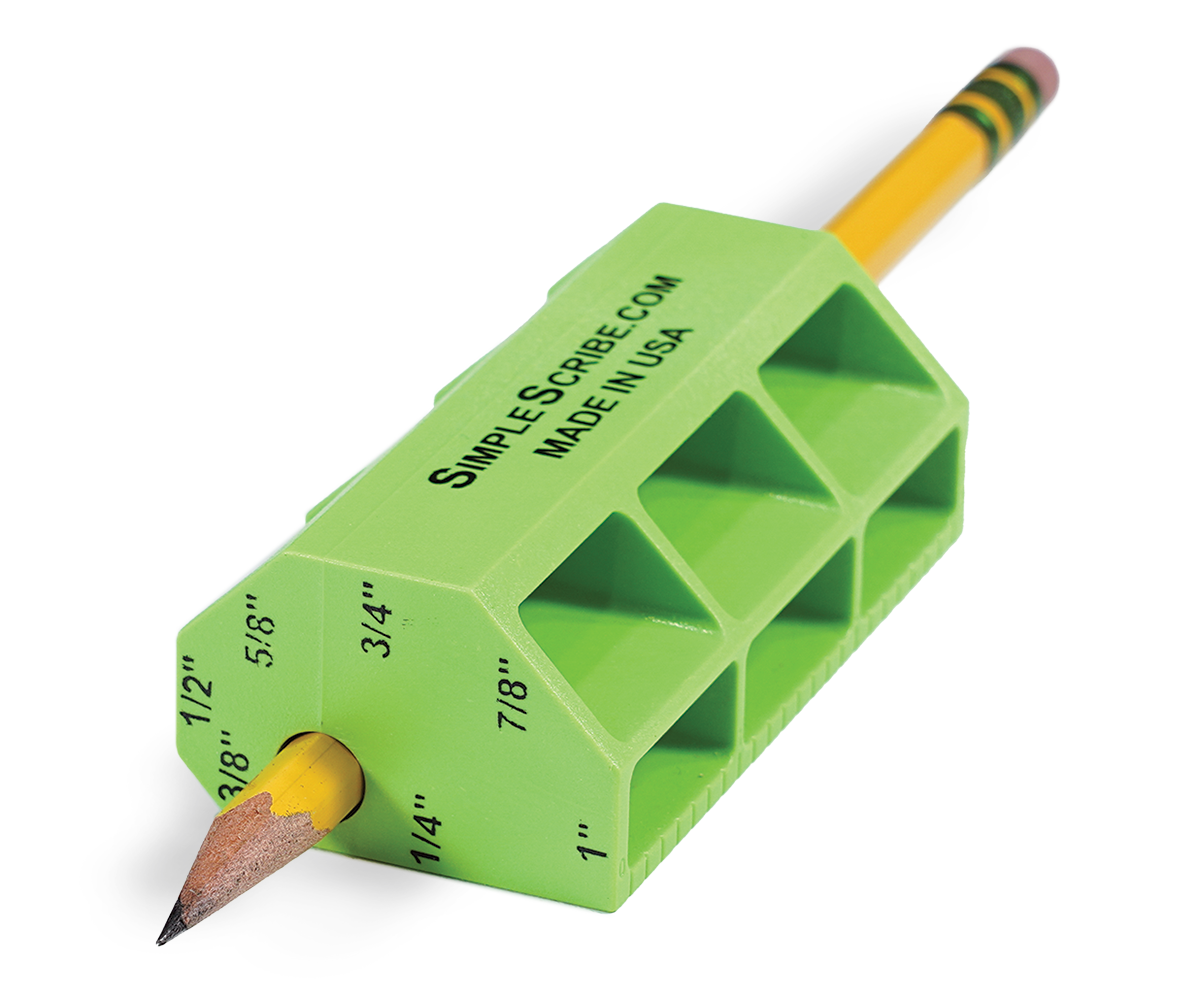
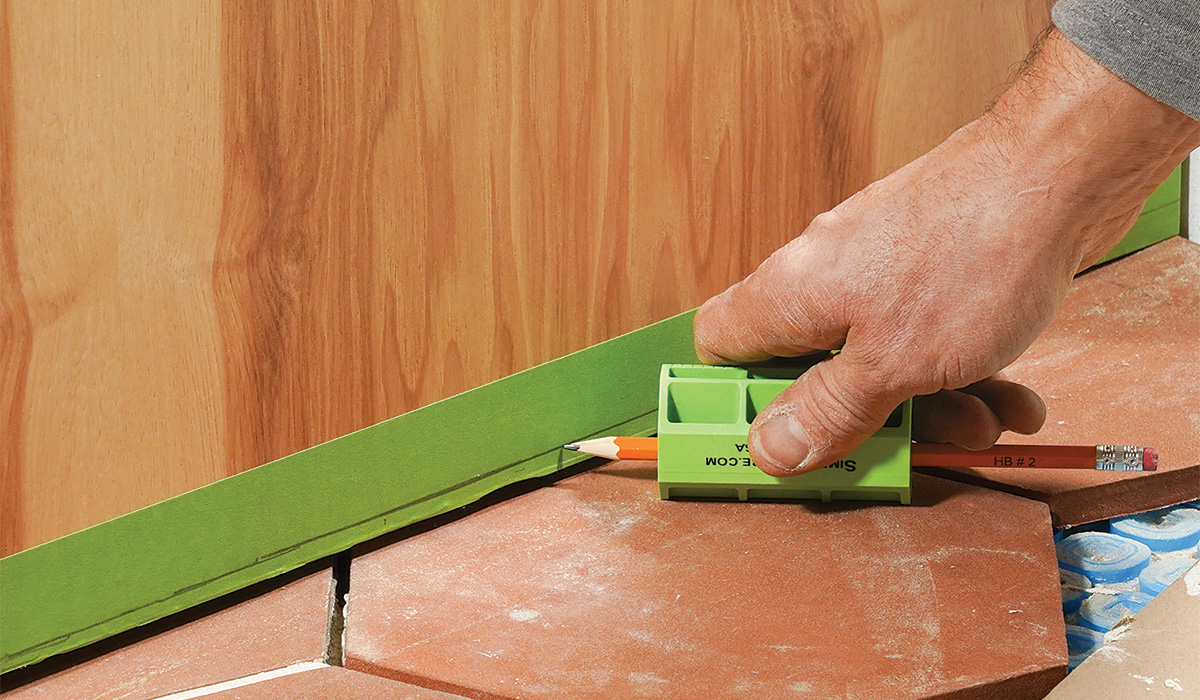
Another tool to considerSimple ScribePrice: $12 For woodworkers and DIYers who only install cabinets and trim once in a long while, the Simple Scribe is a nice step up from a compass or a one-off block of wood. Flipping it onto different sides creates a small range of regular offsets. It rides surfaces nicely, and its plastic body holds a pencil firmly. |
Start at the bottom
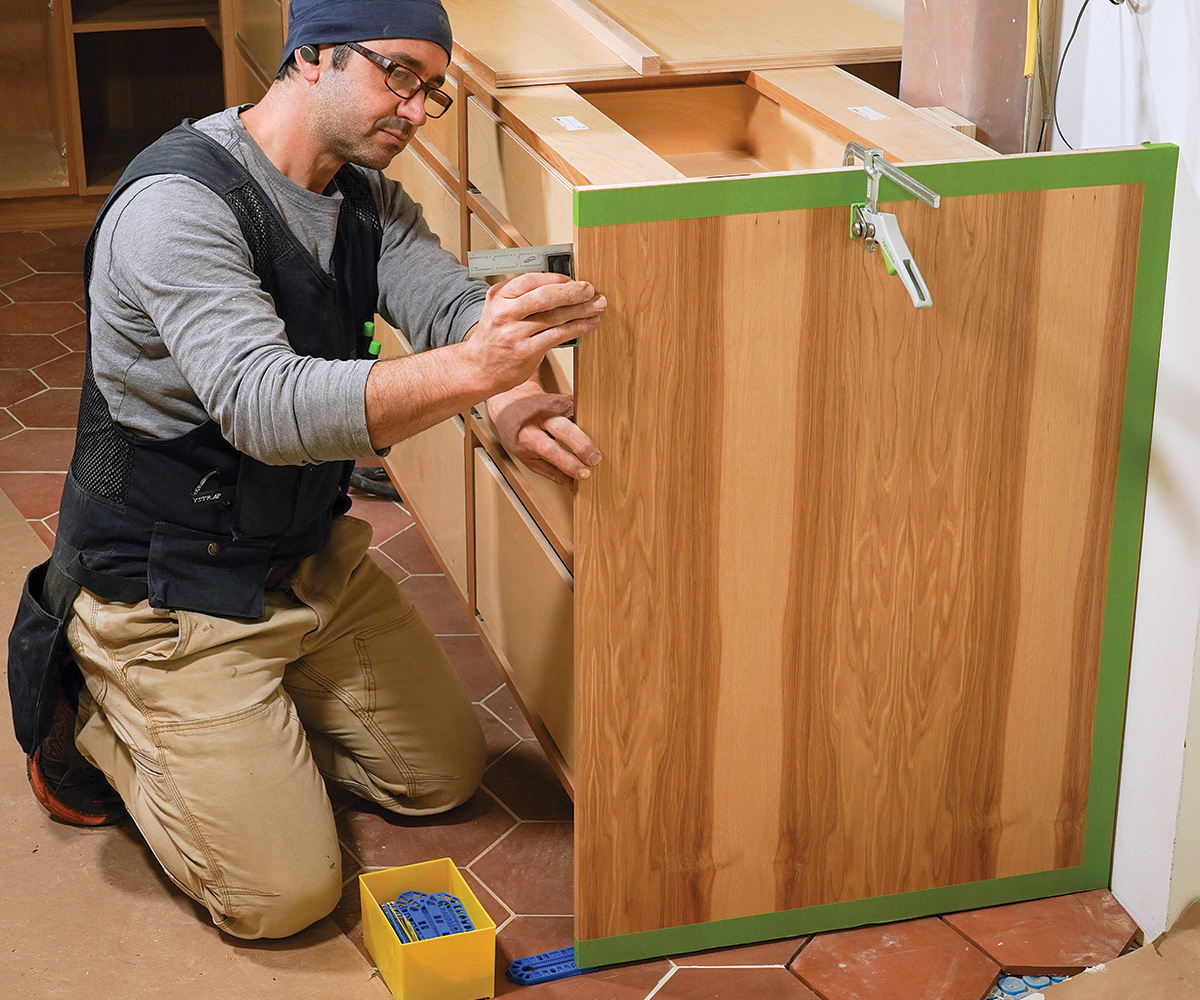
Tape all three edges to be scribed, shim the bottom until the reveal is even at the front edge, and clamp the panel in that position.
Scribe the bottom edge
Here the Simple Scribe is set to clear the highest corner of the bottom edge. The green tape makes the pencil line more visible.
Make two cuts
On scribing tasks like this, with a visible front edge, start with a square cut and then cut the rest of the edge with a 45° cut to achieve a knife-sharp edge.
Trim the transition
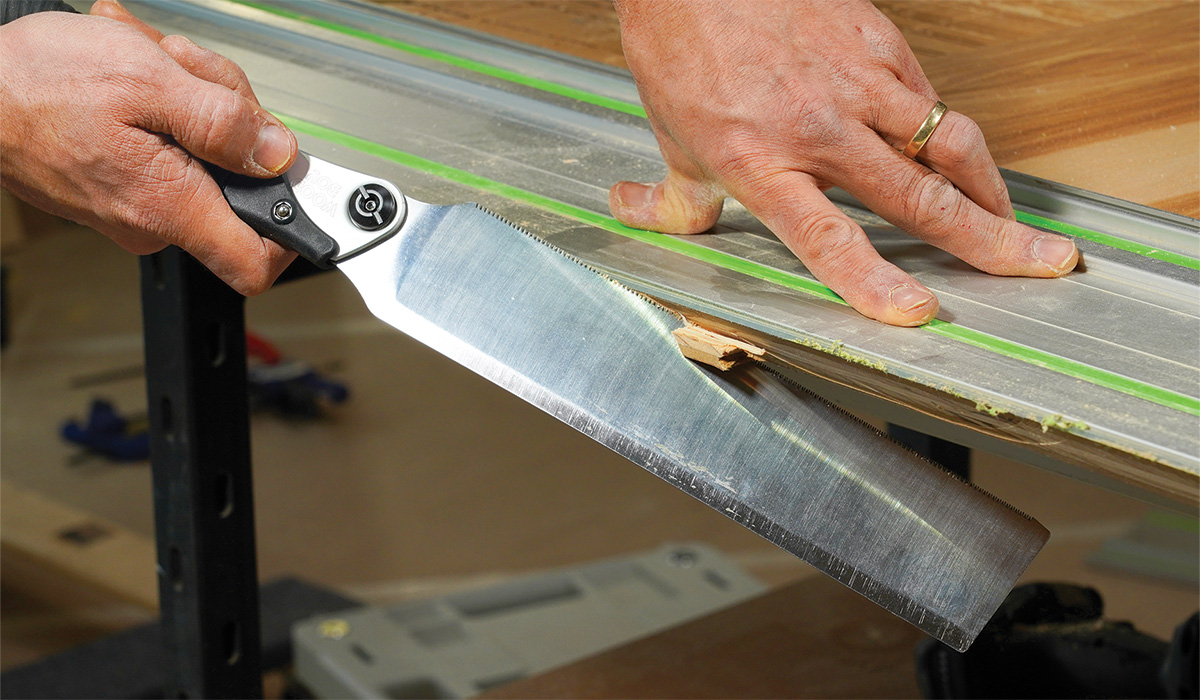
Use a handsaw to trim the leftover triangle between the two plunge cuts.
Recheck the reveal
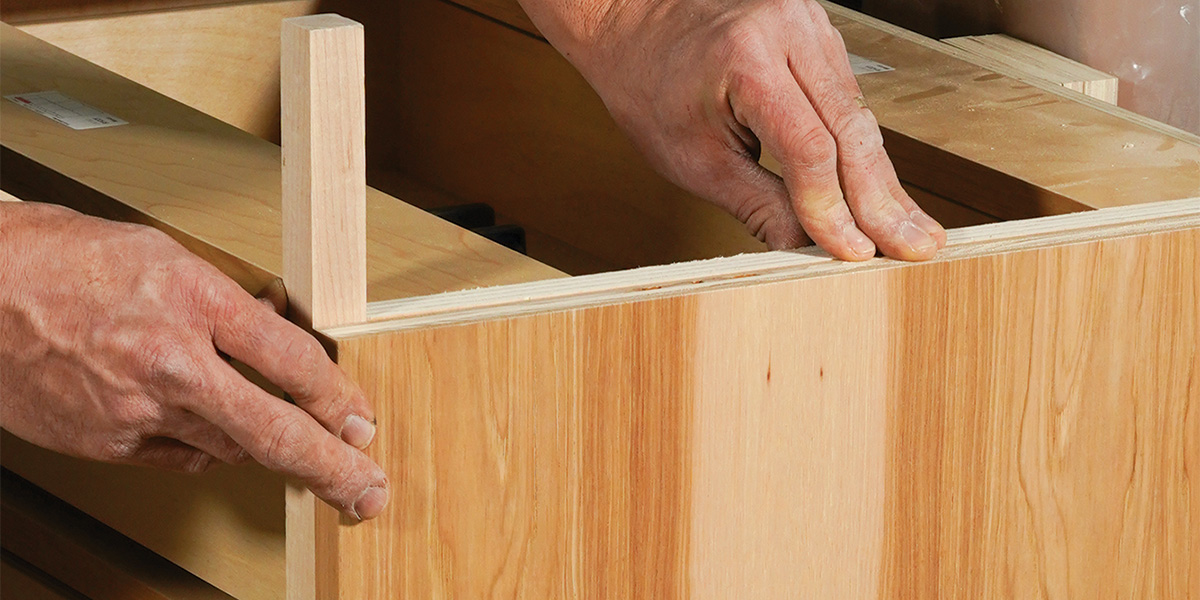
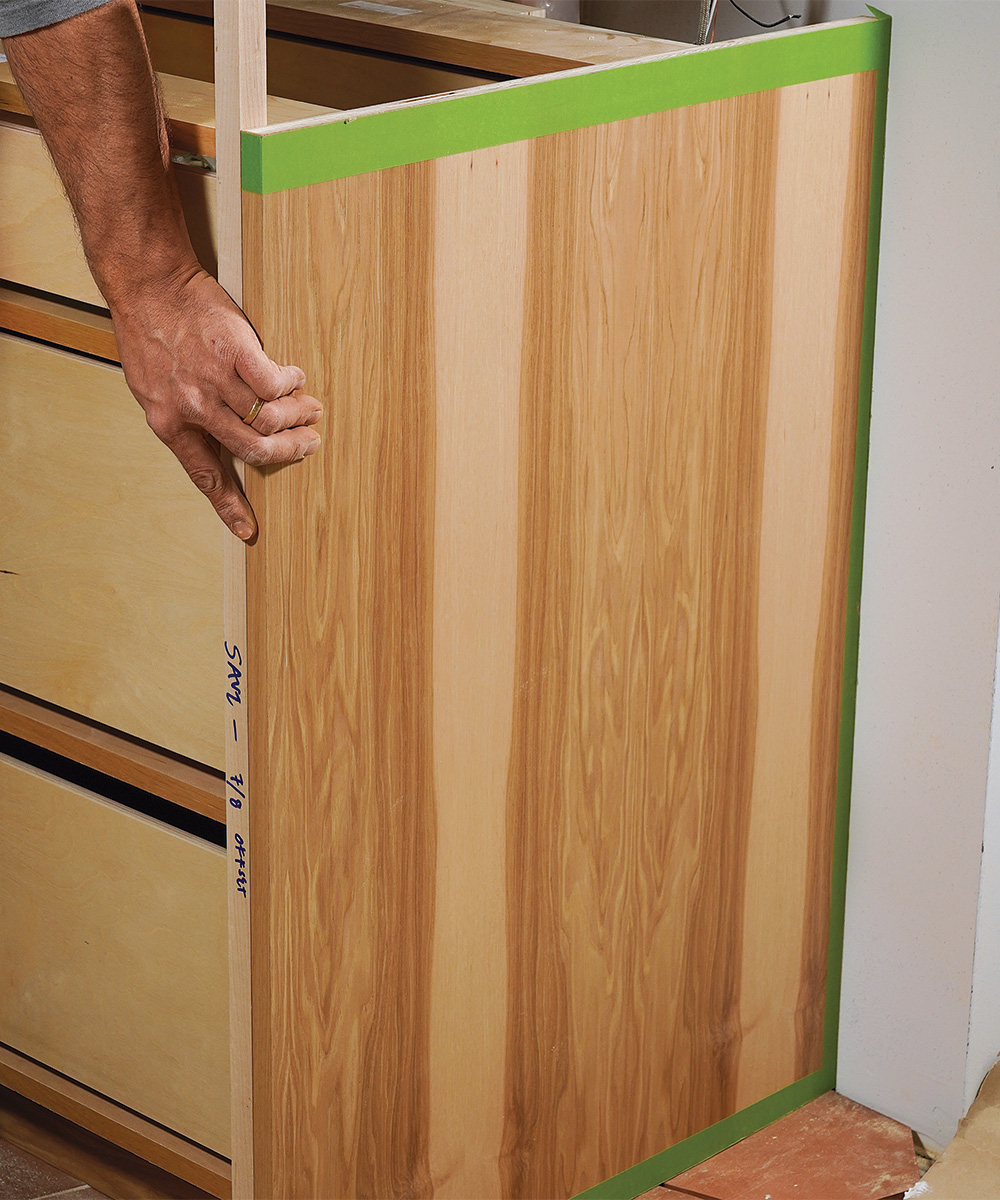
Rip a stick that represents the door or drawer thickness plus the 1/8-in. gap behind them, and measure off that stick to make sure the panel is plumb.
Set and scribe the back edge
Use the same stick to set up your scribe tool. You’ll need a fully adjustable tool here, like the Thingamejig or Accuscribe. The Thingamejig slices the tape cleanly, but a pencil would also work.
Trim the back edge
Peel away the tape and make a 45° cut to the line with your track saw, repositioning the track as necessary to stay close to the line. Refine the edge with a sanding block and/or block plane.
 |
 |
Check the front edge
The front edge should be flush with the 7/8-in.-thick stick. If it isn’t, adjust the back edge.
Mark the top edge
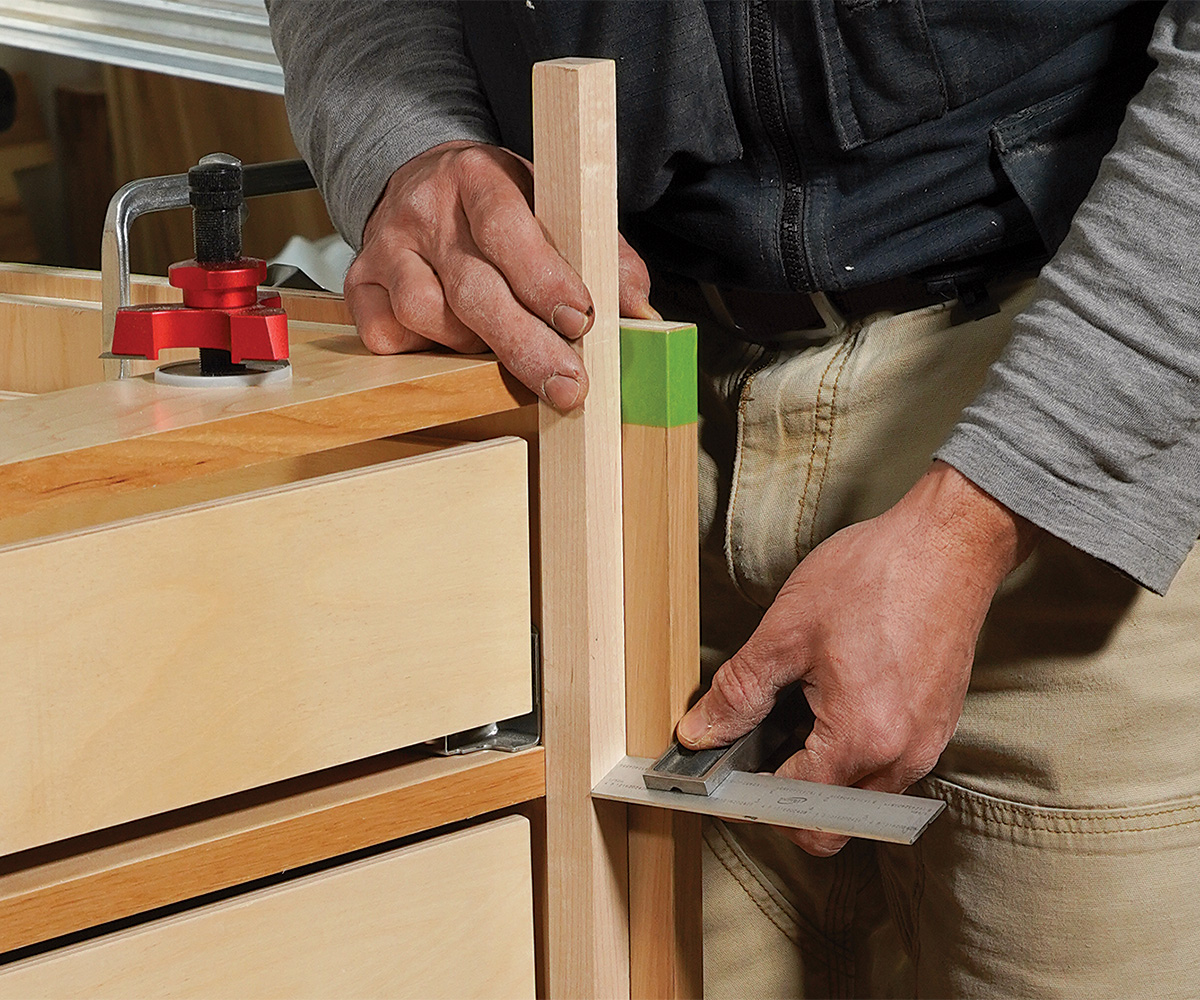
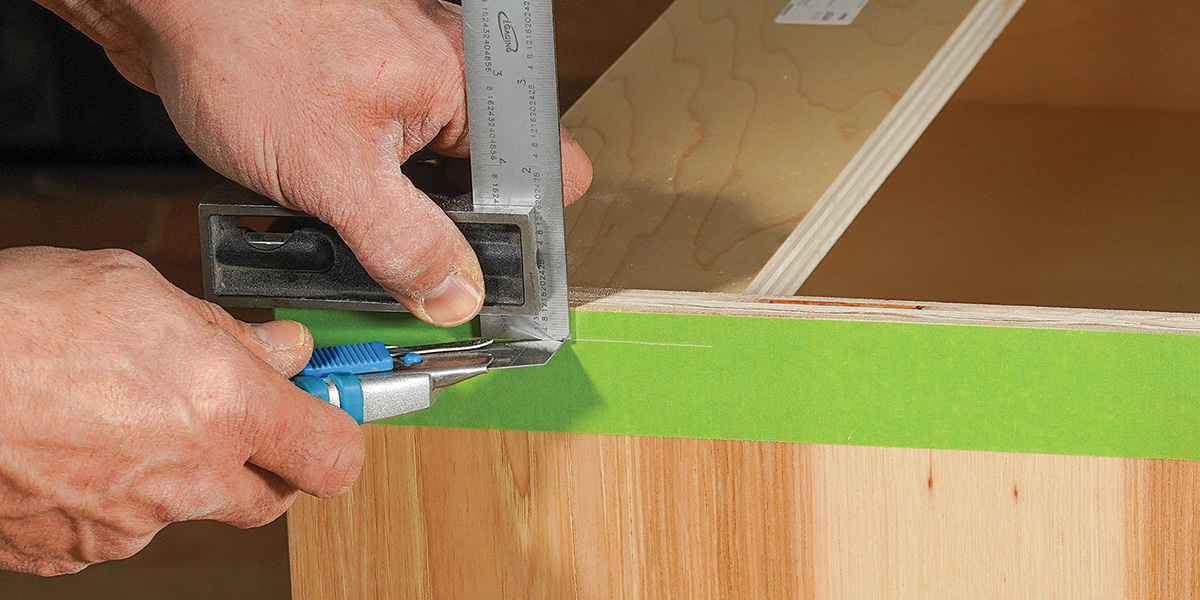
Measure the overlap at the top edge with a combo square. Then place it on the outside of the panel to mark the cut.
Cut and check
Set the panel in place to check that it’s flush with the top edge of the cabinet, and then screw it on from the inside.
Final placement
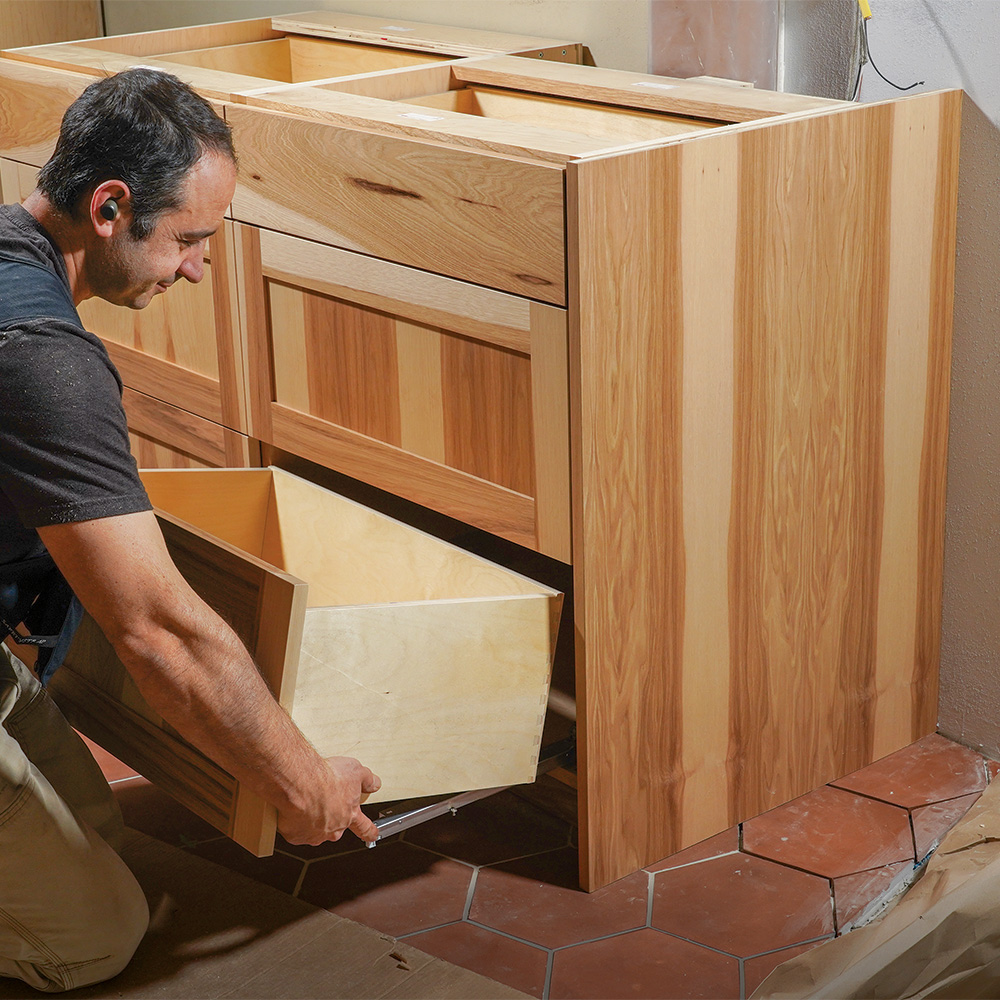
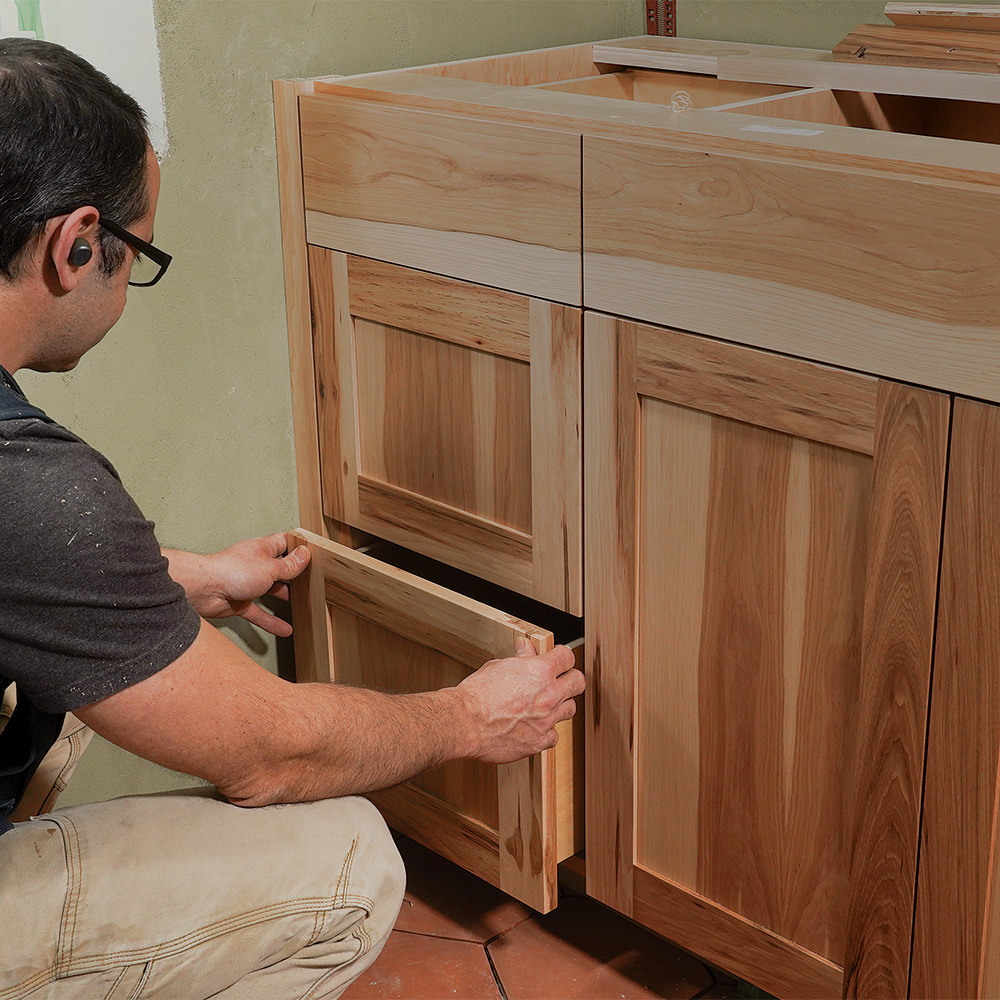
The drawers are flush with the front edge of the panel, and the cabinets are ready for their countertop. (The panel is removed and reset after the tile is grouted.)
Base trim teaches the basics
Fitting base trim and its close cousin, the toe kick, are two straightforward scribing tasks. In both cases, you’re working to eliminate gaps at the floor while keeping the trim board level.
I set my cabinets on a separate, level base, which is shallower than the cabinet boxes, creating a toe-kick area beneath. The front of the base is then covered with the finished toe-kick molding strip that matches the cabinets. The goal is to scribe the toe kick to the floor while its top edge ends up flush with the top edge of the cabinet base, and it’s much easier to get a tight fit without the cabinets in place.
After leveling the base, I cut the toe kick extrawide, leaving enough material to make up for the slope or irregularity of the floor. Then I shim the toe kick so the overlap at the top of the base is even all the way across. That overlap becomes the setting on the scribing tool. From there I follow the scribing methods outlined above. After removing the waste material, I attach the toe kick by driving screws from inside the
cabinet base.
Scribing base trim to the floor is a lot like scribing a toe kick, but with base trim you have to consider the whole room, including the trim along adjacent walls, and do whatever is necessary to make the whole run work. If the floor is sloped significantly and you try to level the first piece of trim independently, you might have to remove too much material from adjacent pieces to get everything to line up. In this case, you’ll need to set the pieces intentionally out-of-level to make the whole room work.
End panels are fit on all sides
Custom cabinetry is usually built with unfinished ends, which cabinetmakers then cover with a separate, finished panel that’s easier to scribe to the floor and wall. These cosmetic panels can also be applied to the sides of islands or stand alone to hide the side of a fridge. They are made to match the style of the cabinetry and left extra large to accommodate the scribing process.
To make sure the panel not only ends up flush with the wall and floor, but also the top edge of the cabinet (or lower edge for upper cabinets), you’ll need to trim three edges. You can address the edges one at a time with standard scribing techniques without needing to make a template.
I always start by scribing the bottom edge of the panel, keeping its front edge aligned with the cabinet as I do. Trimming the bottom edge first also brings the panel close to its final height before you scribe its back edge to the wall. Once those edges are gap-free, trim the top edge flush with the top of the cabinet.
Scribe strip solves inside corners
Avoiding a gap where a run of cabinets meets a wall usually requires a scribe strip at the inside corner. Rather than attaching the strip to the cabinet before setting it in place and relying on math to determine the scribing offset, I use an L-shaped scribe strip that can be scribed and attached after the cabinets are set.
Attach a plywood strip
A piece of 1/2-in.-thick plywood will hold the L-shaped scribe strip while it’s being scribed. Set the overlap of this strip a little shorter than 1-1/2 in.
Attach the scribe strip temporarily
The return leg of this scribe strip is 3/4 in. thick, so that’s how far it is from its final position. Set your scribing tool to match this measurement and scribe the strip.
Trim to the line
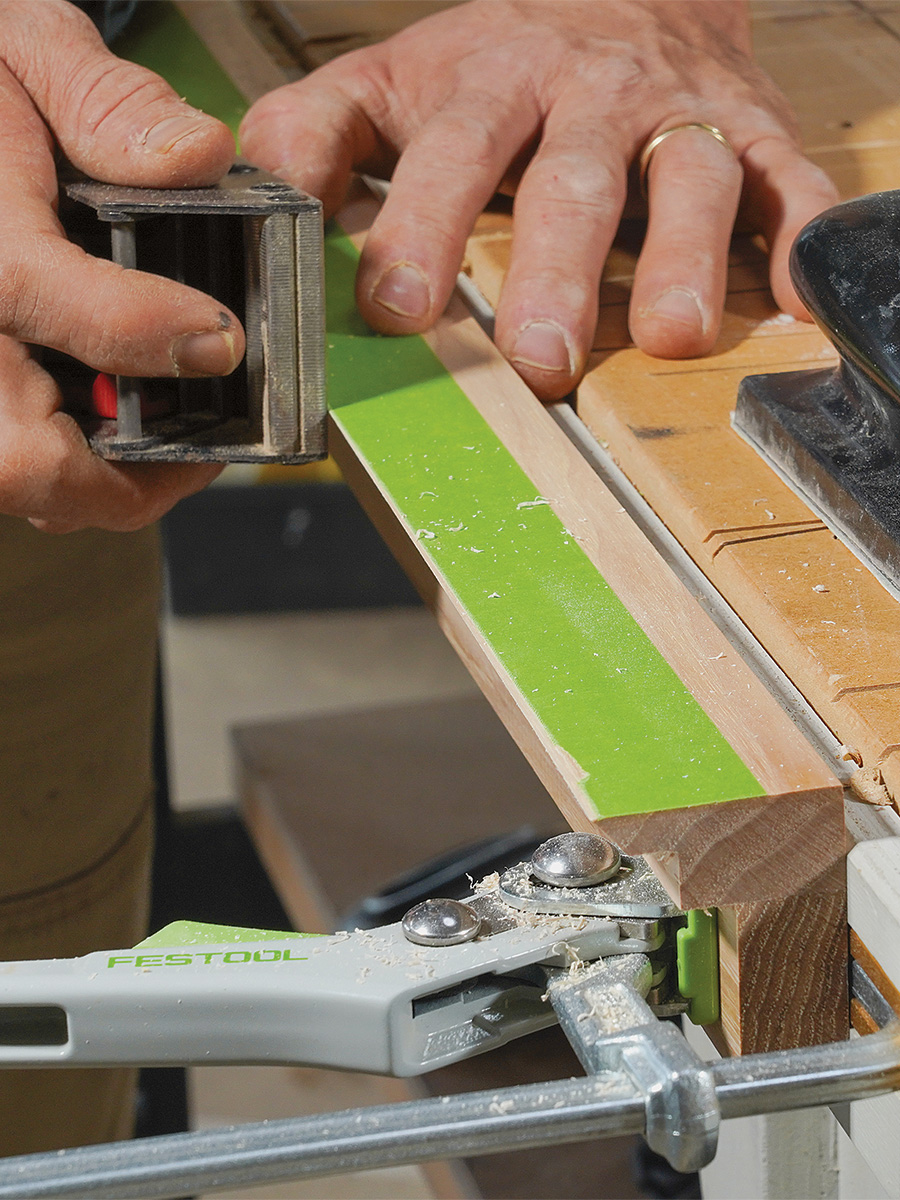
Make a 45° cut with the track saw, repositioning the track as necessary and staying just a hair away from the line. Then use a block plane and sanding block to trim the knife edge up to the tape line.
 |
 |
A tight fit
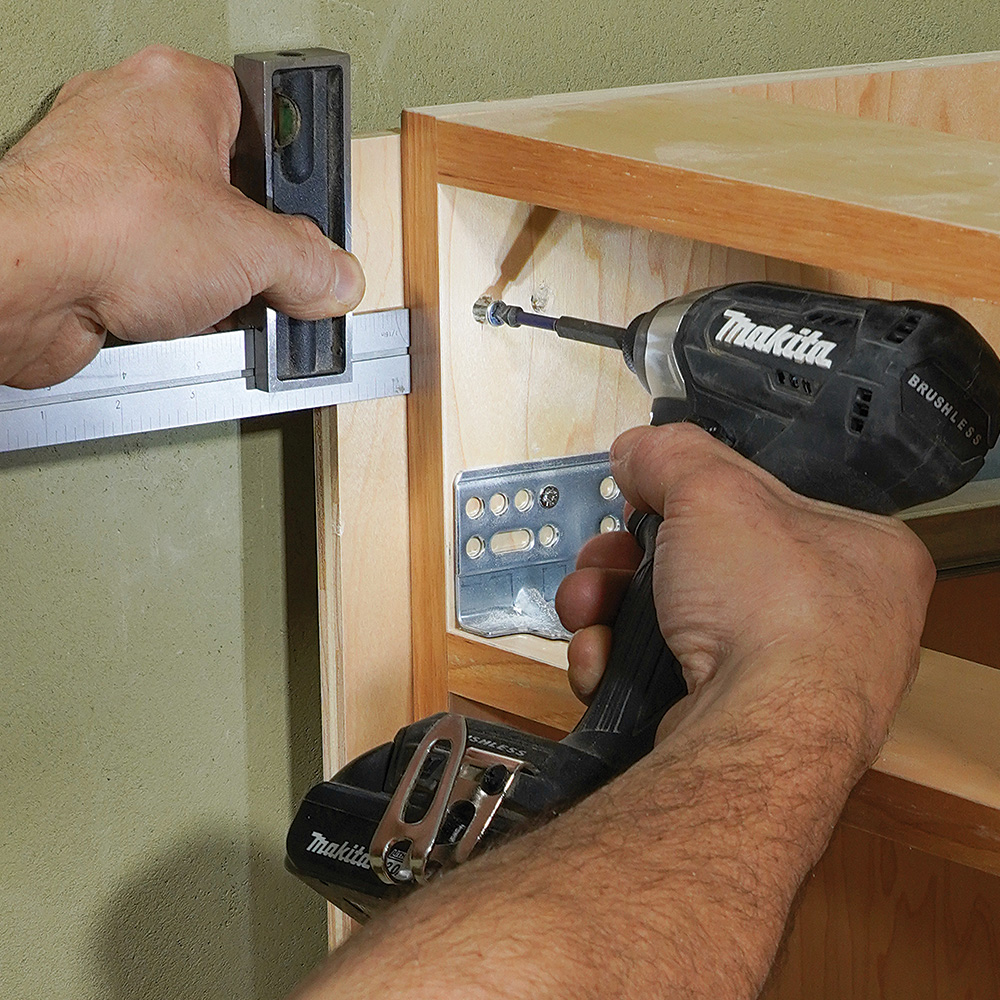
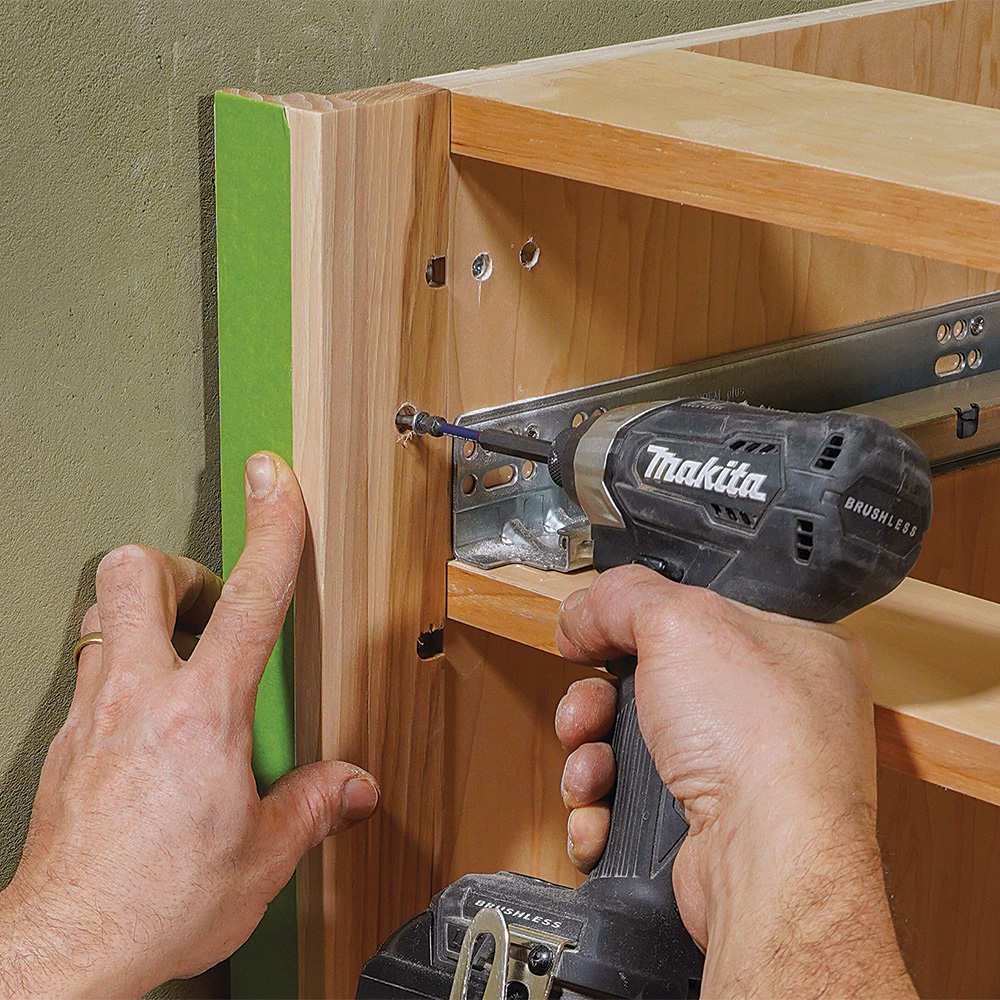
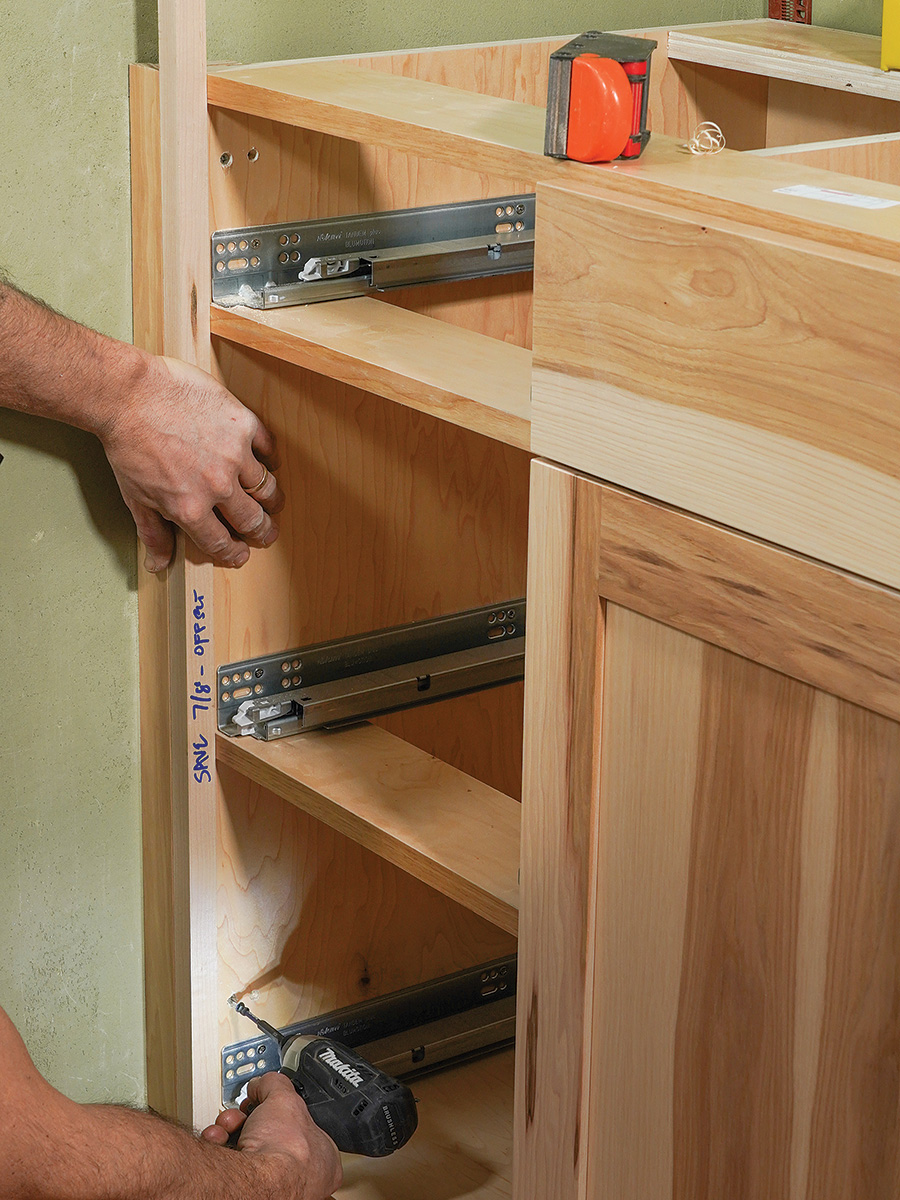
I use a 7/8-in.-wide gauge strip to set the reveal as I attach the scribe strip, driving screws through the same holes used earlier.
Perfect results
The scribe strip hugs the wall with no gaps, lines up flush with the front of the drawers or doors, and gives doors the clearance they need to swing freely.
Add-on strip closes corners
Another common scribing situation arises where the inside end of a cabinet meets the wall. For cabinets with full-overlay doors and drawers, the usual method here is to attach a scribe strip—made from the same material as the rest of the cabinetry—between the cabinet and the wall. The gap that accommodates the scribe strip also allows the innermost door to swing out freely.
In the past, I would attach the strip to the cabinet first, and then slide the cabinet partway into position, with the strip bumped against wall, to do the scribing. But that required some measuring and math to determine the offset of the scribing tool and the final desired position of the cabinet (or multiple cabinets in the run). It also involved sliding around the finished base and box(es), which isn’t great for large cabinets.
My method for scribing these strips allows me to set the end cabinet in place permanently before adding the strip. This way I know the true scribing distance and can ensure that the cabinet is in its final position, plumb and level. It also ensures that the opposite end of the run ends up flush with the base. What makes this possible is an L-shaped scribe strip, which I attach temporarily for scribing and fitting, and then screw permanently to the outside of the cabinet.
Here’s how the process works: After the cabinet is set, I screw a piece of plywood to the outside edge, creating a way to attach the scribe strip for marking and fitting. It places the strip about 1-1⁄2 in. forward of its final location, but that’s close enough for an accurate scribe.
Once the strip is scribed and fit, I remove the plywood strip and screw the actual scribe strip in its place. For the full-overlay doors and drawer fronts in the cabinet job shown here, I set the strip 7/8 in. proud of the cabinet—using a simple gauge strip—so it ends up flush with the drawer and door faces.
Contour gauge handles irregular surfaces
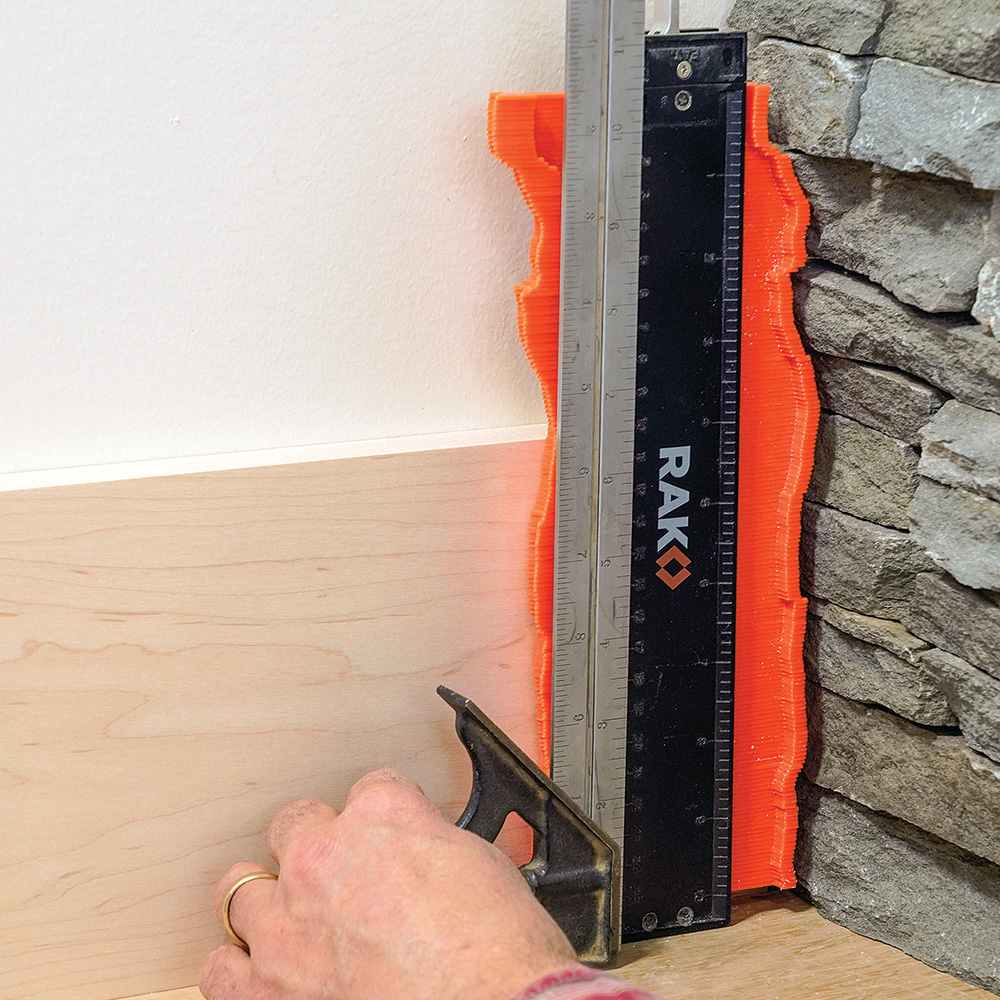
For irregular surfaces that are difficult to follow with a standard scribing tool, a contour gauge can be very helpful. Rak’s Contour Shape Duplicator ($25) has thin teeth for accurate duplication, with 2 in. of working distance for deep profiles. The locking latch is easy and effective to use.
Square the gauge
To ensure an accurate transfer, use a combo square to make sure the gauge is plumb. Push all of the points against the irregular surface and use the small top latch to lock them firmly in place.
 |
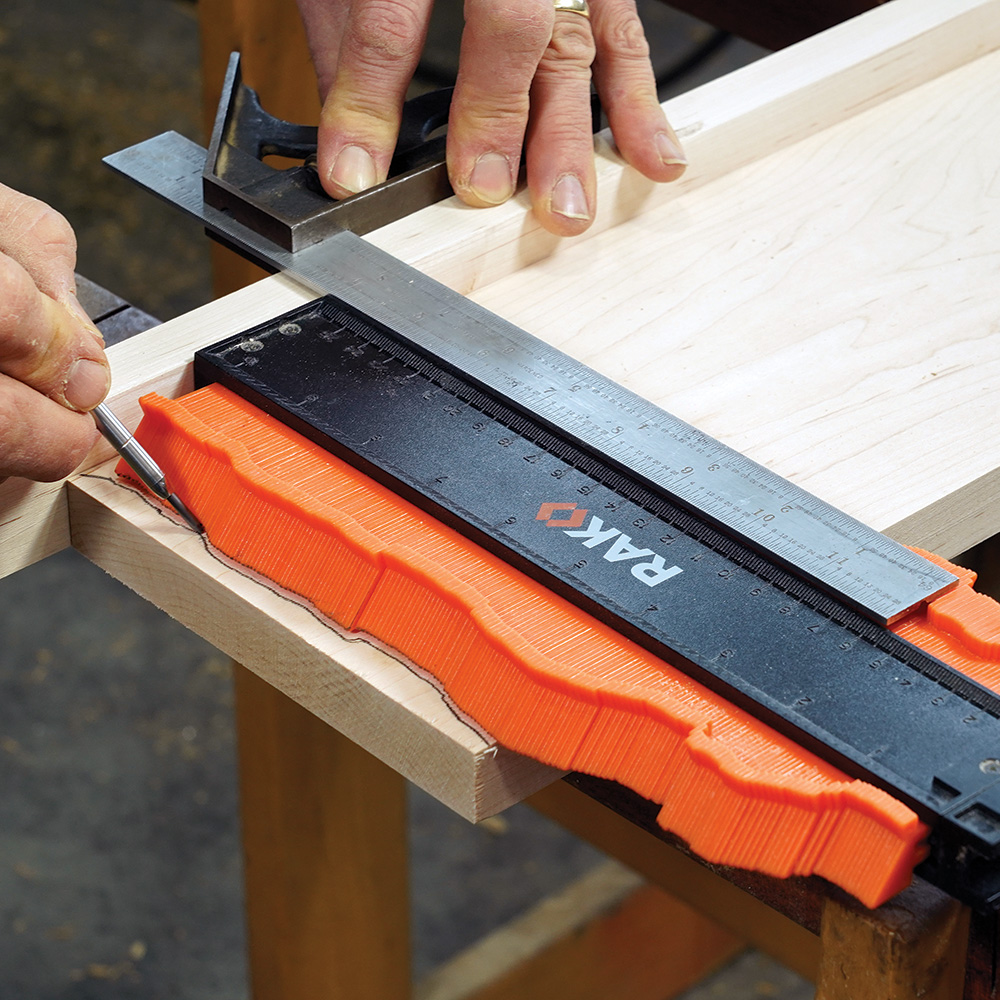 |
Transfer the profile
Square the gauge to the trim board and run a sharp pencil along the profile.
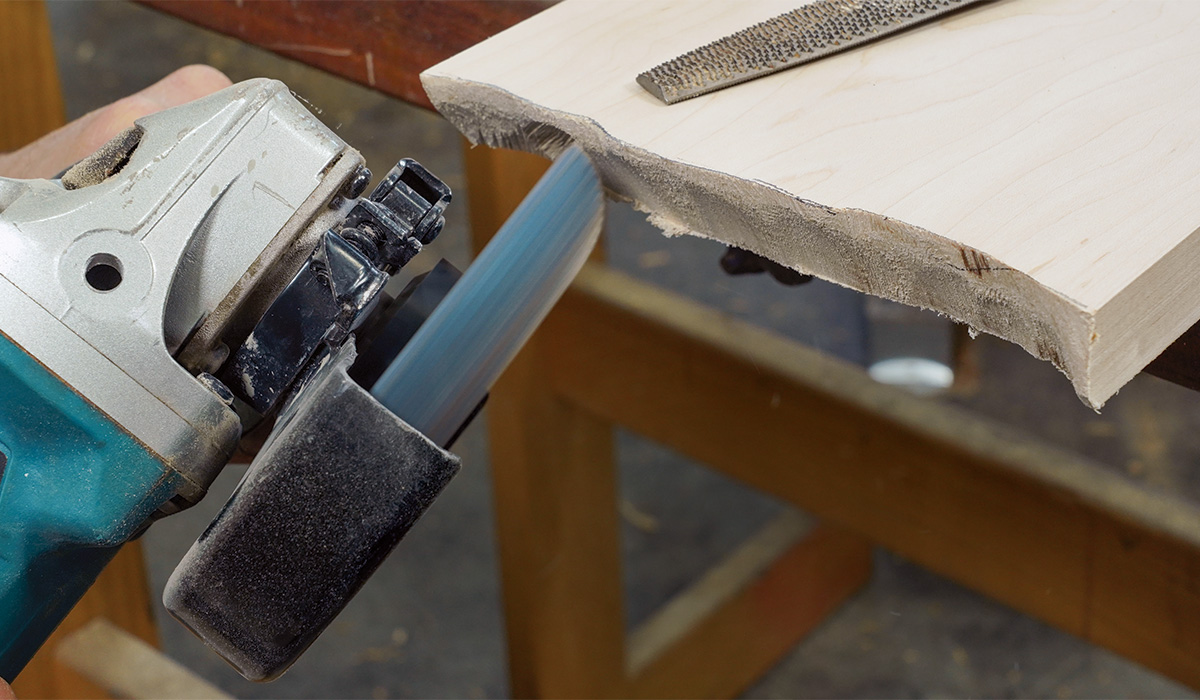
Back-bevel the edge
Relieve most of the material behind the line, and then creep up to it. An angle grinder is the perfect tool for the job here. Fitted with a coarse, carbide-coated wheel from Kutzall, the grinder cuts quickly.
 |
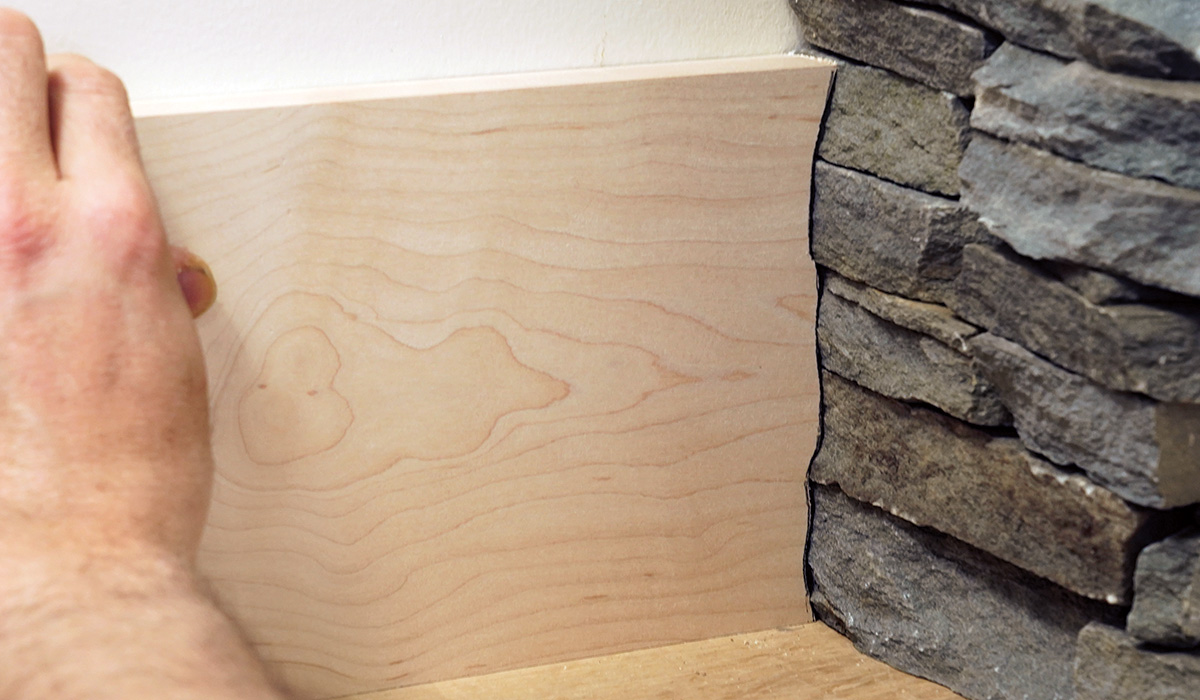 |
Check the fit
The contour gauge delivers a hand-fit look, marrying the wood and stone beautifully.
Contour gauge copies weird shapes
When dealing with very irregular objects, like thick clay tile or a stone fireplace, I try to scribe the finished workpiece itself when possible to save time. If you only encounter these wildly irregular surfaces once in a blue moon, you can get by with a basic scribing tool like the Accuscribe. The challenge is keeping the tool level while moving it across the bumpy shapes. Change its orientation, and you’re changing the offset, which will create gaps.
To avoid this issue, I use a contour gauge. The gauge makes things easier, capturing the entire profile at once with a high degree of accuracy. All you have to do is make sure it’s square to the molding (or whatever you’re scribing) throughout the process.
These basic tools and techniques will handle most scribing situations. With a little creativity, you can handle the rest.
Stefan Straka is a woodworker, trim carpenter, and cabinetmaker who recently emigrated to Nelson, New Zealand, from Bellingham, Wash.
Photos by Asa Christiana.
From Fine Homebuilding #310
RELATED STORIES

