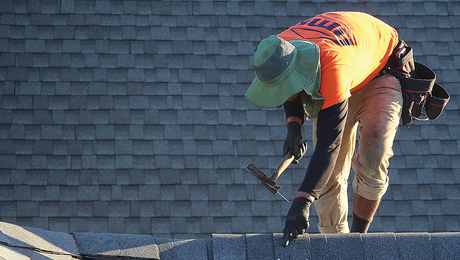
Reshingling an Old Roof Sheathed in Boards
Should the plank sheathing be reinforced with a layer of OSB before the new shingles are installed?
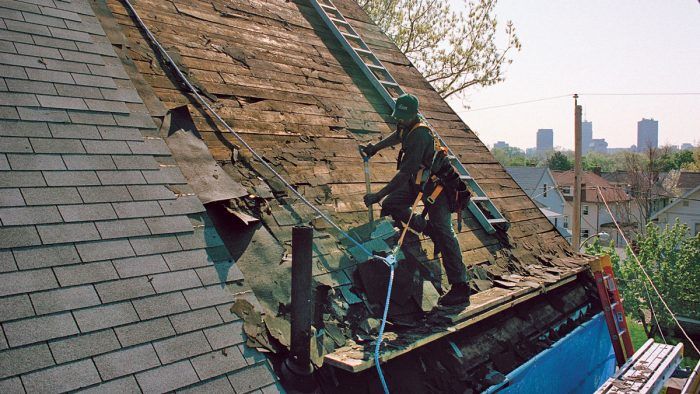
Jeff_40 owns a house built at a time when the roof was sheathed in boards, not plywood or OSB. Now it’s time to reroof the house, and Jeff is getting mixed advice from two friends on how to approach the job.
“One of them says I need to put down some 3/8-in. OSB on top,” Jeff writes in this recent Q&A post. “The other is saying as long as I measure and make sure the nailing strip on the shingles doesn’t line up with the gap it will be good.”
The problem doesn’t appear to be a structural weakness in the existing sheathing, but rather the chance that shingle nails will find the gap between boards rather than penetrate solid wood.
Jeff would rather not spend an extra $600 for the OSB if he doesn’t have to. But, he adds, “I don’t want to have a leaking roof, either.”
He says he’ll be using a self-adhering membrane over the sheathing. Does he need a new layer of OSB as well? That’s the issue for this Q&A Spotlight.
Be careful about added weight
Unclemike42 suggests that Jeff skip the new layer of sheathing simply because it will mean additional weight on the roof.
A layer of 3/8-in. OSB weighs about 1.2 lb. per sq. ft., says Oldhand. Some basic checking on rafter sizes and spans should tell Jeff whether the added weight is going to be a problem.
Judging from a photo that Jeff has provided, Oldhand guesses the sheathing is comprised of square-edged boards rather than shiplap planks.
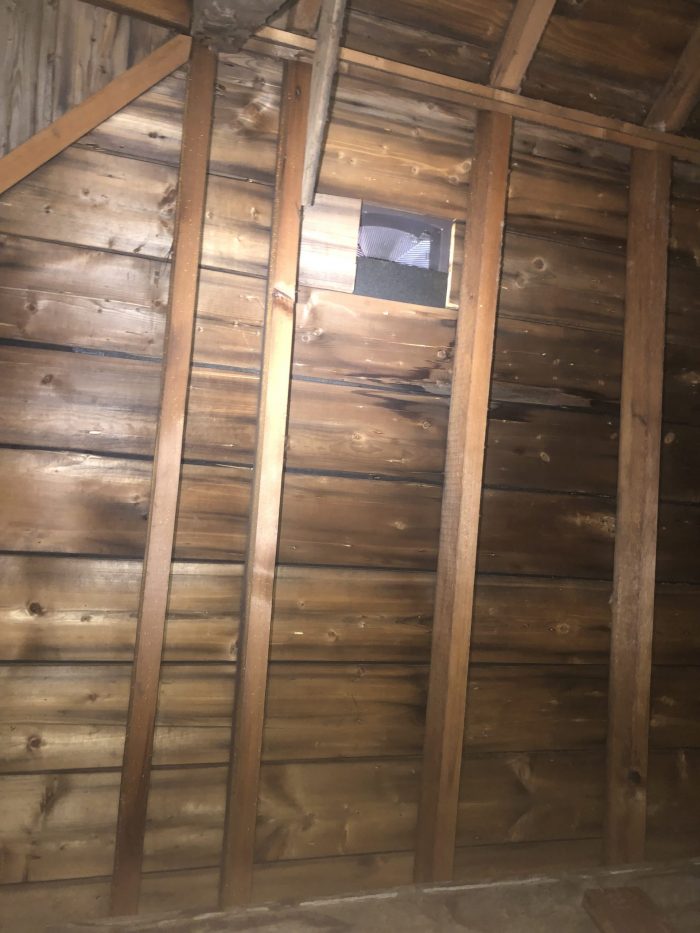
“If so and you can miss all the cracks with nails it’ll be OK,” he writes. “But any nail in a crack will most likely work back out and eventually through the shingles into plain air. Missing all those cracks might or might not be reasonably achievable.”
Oldhand adds that there could be warranty issues with the shingles if they are installed over square-edged decking.
Use story poles to place nails
If nail placement is critical to avoid gaps, Mistered1957 suggests making story poles for each section of the roof to make sure that nails hit solid wood while leaving a 5-in. reveal on the shingles, which would be standard.
“If you have a problem,” he says, “either adjust the reveal for all the shingles to achieve the desired outcome on that section of roof, or consider nailing a ‘problem row’ a bit higher than normal, but just enough to nail into solid wood.”
Nailing high, however, is problematic on a steep-pitch roof, Mistered adds: “We’ve all seen architectural shingles on a steep pitch roof that have the top lamination of the reveal falling off… Check the manufacturers’ specifications and installation instructions, and specifically look at the width of the nailing zone to see how much leeway is available to you. Pick a shingle product with the largest nailing zone.”
Consider hand-nailing the shingles
It may be old-school, but Sawdust_Steve wonders why Jeff just doesn’t nail the shingles on by hand. He’d know instantly whether the nail hit solid wood or found a crack. “It’s a little more work,” Sawdust says, “but worth the piece of mind.”
Oldhand doesn’t think much of the idea.
“I hope this isn’t just my ego talking but I disagree,” he says. “Back 100 years ago when I did a little roofing with a hatchet it was 7/8-in. nails. You tapped lightly to set and finished with a sharp blow. You carried four nails in your off hand, lined up between the fingers to finish a shingle, then you position the next one. It set the nail whether it hit a crack or a good board.”
Oldhand isn’t sure whether it’s a lot more work to hand-nail the shingles, but he adds, “I’ve done a bit of roofing in my old age that I couldn’t have done back in the day.”
Our expert’s opinion
We asked FHB editorial adviser Mike Guertin for his thoughts. Here’s what he had to say:
I have to speculate that there are many thousands of asphalt-shingle roofs installed over solid plank decks like Jeff_40’s house. If care is taken that no fasteners are driven into the space between the roofing planks or within 1/2 in. of the edge of a roof plank, then chances are the shingles will perform just fine.
The trick is orienting the shingle’s nailing zone so it doesn’t overlap the no-nail zone on the roof deck (the width of the gap between boards plus 1/2 in. on either side of the gap). On this roof, that zone looks like it may be 1-1/2 in. or more given the wide gaps between boards. Different brands and sizes of roof shingles have different shingle exposures, ranging from 5 in. all the way up to 6 in. It’s possible to reduce the exposure on shingles by a little bit if you do reduce the exposure by more than 1/2 in.; be sure to contact the shingle manufacturer to find out whether you will need to do additional hand-sealing with roof cement to avoid shingle blow-offs in high winds.
I recommend selecting a shingle with a wide nailing zone that does not exceed the common-bond area of the shingle. This bears a little explanation. The common bond is the horizontal area where the upper layer of a laminated shingle overlaps the lower layer. Most manufactures have a fairly narrow common bond area—5/8 in. to 3/4 in. Traditionally, this was the area where manufacturers required the nails to go—the nail zone. Nails placed in the common bond go through both the upper layer and lower layer of the shingle.
But over the years, some manufacturers extended their nail zone above the common bond area so nails on those shingles only go through through a single layer (the upper layer) of the shingle. The shingle manufacturers who have the extended nail zone sometimes have a reduced wind-speed rating when the nails are driven in the upper portion of the extended nail zone above the common bond or an increased wind-speed rating when nails are placed in the narrow common bond. Only two manufacturers of laminated shingles that I know of have wider common bond areas—Atlas and Malarkey. Theirs are about 1-3/4 in., which gives you a pretty good nailing zone. (For more detailed information, see this article about roof shingles.)
Now for the bad news. I checked the roof-deck requirements of several major shingle manufacturers. The manufacturers’ instructions govern building code compliance and warranty conditions so they should be followed. Most instructions that I checked allow their shingles to be installed over a solid-wood-plank roof deck, provided that the boards are nominal 1 in. thick (3/4 in.) but no greater than 6 in. nominal width (5-1/2 in.). It looks like Jeff_40’s roof planks are 8 in. wide so they would not meet this requirement. Other manufacturers require roof planks be installed tightly together without a gap. Jeff_40’s planks have gaps between them.
This is where real-world conditions meet code and warranty limitations. And where you have to decide what is required from a code-compliance perspective and whether preserving the warranty is important to you in the event you need to file a claim in the future. Start by calling the shingle manufacturer’s technical line and reviewing the existing roof deck with them. Ask whether they will approve the installation over the existing roof deck, or would structural panels be required over the planks. Some companies require 3/8-in. plywood or 7/16-in. OSB. Plan to check with a few companies; perhaps one will accept the existing roof deck.
If preserving the warranty doesn’t matter to you and you live in an area where building codes are enforced, I recommend talking with the code official and asking whether installing shingles out of compliance with the code and the manufacturer’s instructions is OK. The answer may inform whether you install the shingles over the existing roof deck or install a layer of structural panels.
And if you don’t care about the warranty and there is no code enforcement then you can do as you see fit. I’ve decided to go this route on a few reroofs over the years and have been fortunate that there has not been a problem with the shingle performance.
Scott Gibson is a contributing writer at FHB and Green Building Advisor. Mike Guertin is a Rhode Island builder and a frequent contributor to Fine Homebuilding. Reader comments may have been edited for clarity.
RELATED STORIES
Fine Homebuilding Recommended Products
Fine Homebuilding receives a commission for items purchased through links on this site, including Amazon Associates and other affiliate advertising programs.
Shingle Ripper
Fall Protection
Roof Jacks
