Podcast 501: Unventing an Attic, Holey Roof Sheathing, and the Cost of New Builds
Lead times for windows, the right grout for the job, being an owner-builder, and the condition of sheathing after multiple reroofs.
Follow the Fine Homebuilding Podcast on your favorite app. Subscribe now and don’t miss an episode:
 |
Help us make better episodes and enter for a chance to win an FHB Podcast T-shirt:
www.finehomebuilding.com/podcastsurvey
Austin asks about the aftershow. Connor reports that he’s getting new-construction windows faster. Bryan gives us a crash course on choosing the right tile grout. Doug says don’t wait too long before becoming an owner-builder. Mike Guertin asks about plugging the vents in his low-slope built-up roof. Will wonders how many times you can install shingles before you have to replace the sheathing. Alex needs a bigger house for his family but has sticker shock when he prices a new build. Patrick shares a New York Times story discussing what new bathrooms cost nationwide and what you get back at resell.
Editor Updates:
- Mike’s Arizona project house
- Andrew’s Midwest Building Science Symposium experience
- Patrick ponders a deep-energy retrofit
Listener Feedback 1:
Austin writes: Austin from Columbus, here again. I keep meaning to write in to say you should specify where to find the aftershow! I’m a subscriber, but I listen through the Apple Podcast app. So, when you started talking about the aftershow, I kept thinking, “They keep mentioning this aftershow, but where can I hear it?” I finally decided to wander over to the podcast page, and dug around a little bit until I found it. Let’s tighten it up. ?
I love it by the way!
Related Links:
Listener Feedback 2:
Connor writes: Hi Patrick et al, I’m a GC in eastern Oregon, primarily working on remodels and renovations. I recently put in an order to 7 vinyl single-hung windows, lead time was only 4-5 weeks. Other items such as doors have had similarly short lead times. The supply chain gears seem to be moving quickly here in the high desert. Keep on air sealing!
Listener Feedback 3:
Bryan writes: Dear Patrick, Brian, and Ian, I am writing in regards to your discussion in podcast 485 where you were discussing epoxy mortars and grouts. Ian asked for some feedback on differences and why some seem to like one over the other.
Just a little background on me to preface my opinions on the subject. I was hired by a neighbor in 1999 at 18 to be a helper doing mostly tile and hardwood floors. I learned quickly and was running a crew a few months later (this wasn’t my first “construction” job; I was hired at 14 to be a helper installing cedar fences which meant I pretty much just dug post holes all summer, then I worked a couple summers doing HVAC control wiring for Trane, sort of under the radar since I was only 15-16 years old, then a summer doing landscaping work). Anyway, I fell in love with tile and hardwood flooring and ended up leaving my pre-med studies and enrolled in a Building Construction/Construction Management degree. Before finishing school, I started my own business doing tile and hardwood. Things got rough through the recession in 08-09 and I eventually took a job for a company as a drafter/project manager designing automated material handling systems, which I am still at. I enjoy my job but tile and hardwood and home construction still hold a special place in my heart. I wouldn’t be surprised if I ended up building custom houses someday.
Anyway, back on topic, epoxy mortars are not very common now mostly because modified thinsets have gotten so good. There are a few special cases where epoxy mortars are needed but I have never encountered that in the residential market, usually it is a special case in commercial construction where some sort of a chemical resistance is needed. There are modern modified thinsets that will successfully stick to pretty much anything you would want to stick tile to and they are less expensive and easier to use than epoxy mortar.
Grout is a whole different animal and all the options have valid use cases. Books could be written with all the options that exist today. I would group them into 3 categories: portland based, Epoxy Based, Acrylic.
Within portland based there are a lot of really great options and you do get what you pay for. The nicer/more expensive options are better and bridge the gap in performance with the other grouts. These are also maybe the easiest to use. Like all portland products, excessive water is what causes the most problems with this grout. Too much when mixing and too much when cleaning during the install will cause problems, or ruin it. Newer grouts are better at resisting staining and efflorescence but should still be sealed.
The biggest draw to epoxy based grouts is the stain resistance. They are a bit harder to use and quite a bit more expensive than portland based. I have used them a lot and I do/did charge more when doing epoxy. I have never seen an issue caused by excessive water during the cleaning process but the cleaning process is more work. You also have a pot life that you are working with and when working alone it can be tough to mix it, spread it, clean it, before it gets too hard. If it fires off before you get it properly cleaned, life is not fun. I always feel a lot of added stress when using epoxy. Epoxy doesn’t need to be sealed.
Acrylic grouts are newer to the scene and seem to be a mix between epoxy and portland. They typically come pre-mixed in a bucket and are activated by air. So, they stay wet in a closed bucket and start to dry once they are spread. This grout needs to be worked in small areas at a time. 3-4 sqft spread, wash, move to next area. They are also sensitive to water until fully cured which most ask for a week or more. Too much water during cleaning or after and there can be major issues. I find these pleasant to work with if you can follow directions. If you try to use it like portland grout it won’t go well. These grouts also cost more than portland grouts but do offer better stain resistance and don’t need to be sealed.
In my own house I have used all three types of grout and have no problem with any of them for any application. Some people think the epoxy and acrylic type grouts look a little like plastic, you can tell them apart when looking close but I don’t find it that big of a deal. Epoxy and acrylic can be a little harder to use on walls and ceilings because they tend to be a little more fluid and want to fall out or slump. More could be said but hopefully that gives you a little to think about. Unless there is a specific need I am looking for I generally go to the higher performance portland grouts first.

I attached a picture of the shower I did in my house last year; we started building our home right about when the pandemic hit. Talk about a wild ride with cost increases and supply issues! I wish I would have encountered the podcast before we started, I have learned a ton about energy efficiency that I could have applied to the house before drywall went up. I think I found the podcast right about the time drywall went up. Love the podcast and still find residential construction to be my passion.
Related Links:
Listener Feedback 4:
Doug writes: Hi Guys, I enjoyed the 485 aftershow discussion on being an owner-builder. In my one-time experience, a house is ready to move in if you have the CO and can live with the unfinished projects. We moved in a week after I got the CO. The only cabinets were bases needed for the sinks and dishwasher. There was also a tall cabinet next to the stove for the wall oven. No drawers or shelves. I was required to have doors on the bathrooms and since I wanted to build all interior doors myself, I bought the cheapest hollow-core doors I could find. The next months were spent building cabinets and doors.
As when to start building it depends on your situation but if possible do it before you are too old. I was 61 when I started and often wished I were 50 again. We made the decision to start in the spring of 2010. The economy was still shaky but we felt somebody needed to start spending again. The advantage this timing gave me was that subcontractors were available within days not weeks. I could call the local lumberyard in the morning and have 2x4s delivered that afternoon. Whenever you start, plan on it taking longer and costing more than you expected.
I have really liked the aftershow conversations.
Keep the discussion going, Doug
Related Links:
Question 1: What are the pros and cons of blocking off roof ventilation in a low-slope roof?
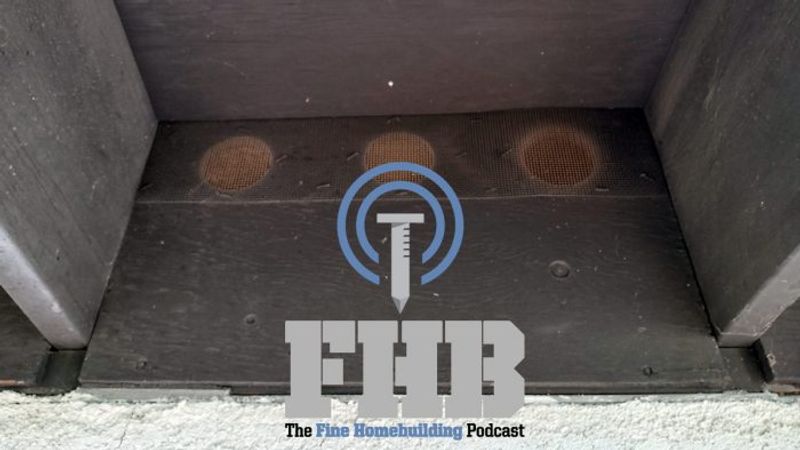
Mike Guertin writes: Hey FHB Podcast. I finally have a question for the crew. It’s about air sealing. I’m hoping you have some thoughts on the upsides and downsides of blocking off roof ventilation in a very low-slope roof in the desert Southwest. I’m sharing a video but the audio is poor due to the wind so here’s a rundown of the structure and my ideas for you to comment on.
The roof assembly is framed with 2×10 rafters that are filled with fiberglass batts and the kraft-face vapor retarder is facing towards the roof sheathing. There is no ventilation space or vent baffles other than gaps here and there left during installation. The insulation in the spots where I cut into the ceiling appears in good condition (clean and dry) but it’s installed poorly (voids & not touching all sides of the rafter bays).
 |
 |
 |
 |
I doubt there’s much exterior ventilation air moving from the intake vents through the insulation and out the exhaust vents since the stack effect is minimal on a low-slope roof. So, there may be little benefit to sealing the vents up from an insulation performance perspective. But I think there may be an advantage to sealing up the roof vents from an interior air leak perspective. By blocking the vents, I may reduce air leakage from the interior and out the vents. There are concealed air bypasses from the living space into some of the rafter bays. I can feel drafts at electric boxes in interior walls on windy days so I know there’s communication between the interior wall cavities and the exterior – most likely through those roof rafter vents. Ideally those leaks should be sealed to prevent air movement, but without an attic to access the ceiling there’s no way to seal leaks up between drywall and top plates and through gaps around wires and pipes in top plates. Since it will be nearly impossible to seal up leaks from inside, I may be able to tighten up the house by blocking the vents.
Summer temperatures are 100 – 110 highs x 75 lows and winter temperatures are mid 60’s for highs and mid 30’s for lows. Humidity is generally low. The roof is a BUR (built-up-roofing) membrane so there’s no vapor or air transmission through it. The house was built in ’79 and shows no moisture problems in the roof assembly.
Hoping you’all may have thoughts as to the benefit or downside to blocking the vents. As an aside, I’m sharing a short video of the heating and air conditioning systems installed on the roof. I was shocked many years ago seeing houses in the Southwest with ductwork running on top of the roof. In northern climates we’ve been promoting installing ductwork within the living space or a conditioned attic instead of an unconditioned attic for years. Imagine the energy penalty of running ducts entirely on the exterior of the building. This house has an evaporative cooling system (AKA ‘swamp cooler’) and a ‘package’ heat pump with both coils inside one box (think a big window air conditioner sitting on the roof). Once I remove evaporative cooler and its ductwork, I’ll seal up the remaining ducts. There is fiberglass panel insulation inside the sheet metal ducts but it’s fairly minimal. Adding insulation on the outside of the ducts may be a project for next year.
Related Links:
- Night Sky Radiation
- Attic-Ventilation Strategies
- To Vent or Not to Vent?
- 4 Tips to Building an Efficient House in a Hot Climate
- Guide to Low-Slope Roofing
Question 2: How many times can you reshingle over OSB sheathing with asphalt shingles?
Will in South Carolina writes: First let me say I love the podcast. After months of listening to you all mention Zip tape in almost every episode, I seem to have this subconscious desire to replace my stock of duct tape for Zip tape! Just kidding… sort of.
My real question is how many times can you reasonably re-shingle over OSB sheathing with asphalt shingles?
I live in South Carolina (if that matters somehow) and my home was built in 2001. It’s a custom single story traditional with a relatively high pitch, again, if it matters. It originally had 3-tab architectural shingles and was re-roofed in 2020 with OC architectural 3-tab shingles. As my luck would have it, this past May, a monster hail storm blew through and basically my whole neighborhood was re-roofed. My roof has significant signs of damage that I saw with my drone and my roofer confirmed by climbing it. There are no leaks but the lifespan has definitely taken a hit and will likely need to be re-roofed in the very near future.
Given the number of penetrations required by the first and second roof, is there a rule of thumb on how many times a roof can be reshingled over OSB? I know this is an exaggeration but the amount of debris in my attic from the last re-roofing felt like I had lost 2-3 sheets in fragments. At some point, it seems like there wouldn’t be enough “purchase”.
On behalf of my wife and friends, they thank you for adding both “purchase” and “Zip tape” to my vocabulary.
Thanks in advance!
Related Links:
- Installing Asphalt Shingles Over an Existing Shingle Roof
- Seal Rake-Edge Shingles to Reduce Blow-offs
- Replacing a Roof: How to Strip Old Shingles and Patch Sheathing
Question 3: What are some reasonable cost-cutting measures?
Alex Silver Spring, MD writes: Hello FHB podcast gang, I would appreciate the hosts perspective on a possible project of mine. I purchased my home in October of 2018. It’s a small 750 sq ft 1920’s bungalow with a 650 sq ft walkout basement, three beds and two baths. We purchased it with the intention of doing an addition but because of local ordinances we would have to bring the entire house up to code and doing so would cost as much or more than re-building the house.
So we talked to an architect who had stock plans and he gave the architectural drawings to a builder who he worked with locally. The builder thought he could build the 2,100sq ft house for around 350k – 400k. Based on those numbers we worked with the architect to make some minor changes, removing the soaking tub in the MB and relocating the range out of the island, paid for engineering and design of a basement, and did a survey. 25k later with the plans in hand we went back to the builder who started a quote. When he passed the 850K mark he let us know that the build was going to end up in the 900k range. At that point we put the project on hold.
The architect came back to us with another builder recommendation. We talked to him and he thought he could build the home for 650k with an additional 50k for utility connections amortized over 30 years. We eliminated the patio and deck, substituted the wood burning fireplace for a gas direct vent, moved the air barrier from the roof to the second-floor ceiling, spray foam on the top side of the drywall ceiling followed by fluffy stuff, no finished basement, no basement bath, plywood and wire lath vs. block masonry for stone veneers, plan on using the front closet as a utility chase eliminating the attic HVAC, $5 light fixtures for the basement, and no built-ins around the fireplace.
Finishes were architectural asphalt shingles, hardie siding, zip panel sheathing, hardwood floors, paint grade doors and trim.

The second builder’s bid was $660k for the house, 50k for the utilities, and $120k builder’s fee. It was the builders fee that caught us by surprise. I’m not sure what else to eliminate from the build that could reduce the overall cost. The second builder thought that zip sheathing was actually cheaper than OSB. Can the great minds of the FHB podcast come up with some reasonable cost cutting measures?
Both of these builders build custom multi-million-dollar homes with the architect. Should I look for another builder?
I’m not trying to hire the cheapest person in town but the max we can afford to spend on the build is 650k. Are we delusional to think a 2,100sq ft home could be built for that price? For the money spent we could purchase a much larger home with a bigger yard. We’re emotionally invested in the location. We like our neighbors, attached to the location, and my wife doesn’t want to leave the neighborhood. I also built a two-car garage in the backyard with my 70 year old father (50k fully finished with a heat pump… it’s really a woodshop).
In the meantime, we continue to save and keep our eye out for a new-to-us home but people around us tend to own their homes for 20+ years. My neighbor’s house has actually been owned by the same family since it was originally built 100 years ago.
Love the podcasts. Keep up the great work.
Related Links:
- Is This Basement Worth Remodeling?
- Micro-additions Make Home Upgrades Affordable
- 11 Essential Remodeling Strategies
Question 4: Is that bathroom remodel worth it?
From the New York Times: A study by House Method, a website that provides guides and information for homeowners, examined the value of bathroom remodels to help answer the question. To put it simply: For a gut bathroom renovation, the answer is usually yes. In 2022, the study reports, the average full bathroom remodel costs $26,574, for which homeowners can expect a return on investment upon resale of roughly 60 percent — about $15,944. In all 50 states, an average bathroom makeover increased a home’s resale value by more than enough to pay for the renovation.
Many factors contribute to the expected return on investment. The scope of the renovation is one: If you spend $2,000 to lay down new tile, your return may be only hundreds of dollars, while a full remodel will cost much more but put more money in your pocket when you sell. So it may make sense to do more than less, especially if your bathroom is old. You could replace just the faucets, but it won’t add value if your mint green 1940s porcelain tiles make potential buyers want to rip the room down to the studs. (Of course, if you just moved in and completed a stylish renovation, your efforts may not increase your rate of return if you sell 30 years down the line.)
Then again, it’s not as simple as spending as much as you can afford. The other major contributor to return on investment, the study found, was geography. Costs vary from place to place, so you could spend a lot more for the same result depending on where you live, lowering your return.
State — Avg. Cost — Return on Investment
Maine — $25,517 — 89% (highest)
Kansas — $23,913 — 43% (lowest)
California — $34,911 — 74% (highest bath cost)
Highest ROI
Maine, Hawaii, Delaware, Tennessee, Washington, Alabama, California, Wyoming, Indiana, Florida
Lowest ROI
Kansas, Nevada, Michigan, Utah, Pennsylvania, New Jersey, Maryland, New Mexico, Kentucky, Iowa
Related Links:
END NOTES:
Members-only Aftershow Podcast 501: In the episode, Mike describes how he built a portfolio of single-family rental properties with good tenants one house at a time. He explains options for raising the funds and how being handy can make it more profitable to be a landlord.
Check out one of our Project Guides: Siding & Exterior Trim!
Check out our FHB Houses:
Visit the Taunton Store • Magazine Index • Online Archive • Our First Issues • All Access
Help us make better episodes and enter for a chance to win an FHB Podcast T-shirt: www.finehomebuilding.com/podcastsurvey

If you have any questions you would like us to dig into for a future show, shoot an email our way: [email protected].
If we use your question we’ll send you a FHB Podcast sticker!
FHB Podcast T-shirts!
Represent your favorite podcast! Available in several styles and colors. Made from 100% cotton. Find the Podcast t-shirt and more cool products in the Fine Homebuilding Store.
| Fine Homebuilding podcast listeners can now get 20% off anything in the Taunton store, including Pretty Good House.
Use the discount code FHBPODCAST to take advantage of this special offer. |
 |
“Finally, knowledgeable people talking about building reasonably-sized, high-performance houses for normal people with real budgets!” — DanD, VA, 8/19/22, Amazon.com review |
We hope you will take advantage of a great offer for our podcast listeners: A special 20% off the discounted rate to subscribe to the Fine Homebuilding print magazine. That link goes to finehomebuilding.com/podoffer.
The show is driven by our listeners, so please subscribe and rate us on iTunes or Google Play, and if you have any questions you would like us to dig into for a future show, shoot an email our way: [email protected]. Also, be sure to follow Fine Homebuilding on Instagram, and “like” us on Facebook. Note that you can watch the show above, or on YouTube at the Fine Homebuilding YouTube Channel.
The Fine Homebuilding Podcast embodies Fine Homebuilding magazine’s commitment to the preservation of craftsmanship and the advancement of home performance in residential construction. The show is an informal but vigorous conversation about the techniques and principles that allow listeners to master their design and building challenges.
Other related links
-
- All FHB podcast show notes: FineHomebuilding.com/podcast.
- #KeepCraftAlive T-shirts and hats support scholarships for building trades students. So order some gear at KeepCraftAlive.org.
- The direct link to the online store is here.


