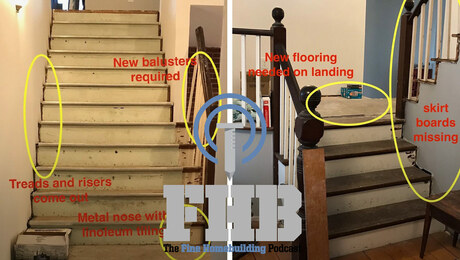
Podcast 515: The Best of the Fine Homebuilding Podcast, Volume 4
Our favorite clips from episodes 155 to 200
Follow the Fine Homebuilding Podcast on your favorite app. Subscribe now and don’t miss an episode:
 |
 |
Help us make better episodes and enter for a chance to win an FHB Podcast T-shirt:
www.finehomebuilding.com/podcastsurvey
The editors discuss air trapped in a toe-kick heater, safely air-sealing can lights, fixing a droopy and abused staircase, lime-washing a crumbling stone foundation, and much more in these clips from episodes 155-164.
Question from Episode 155: How do I remove air trapped in a hydronic heating system?
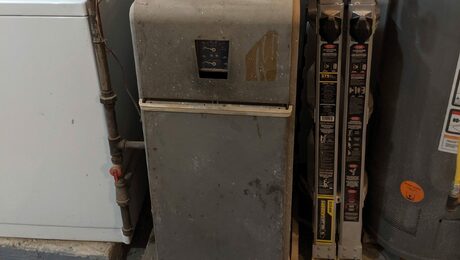
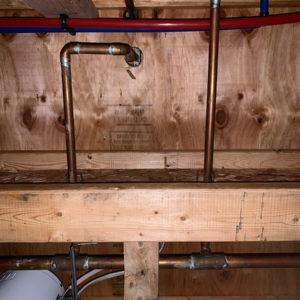
Monish writes: Hello Justin and Company: I am a regular listener to your podcast and congratulate you on the fine job you guys do. It’s very practical and informative. I am from Midland Park,NJ – and a homeowner & home-self-maintainer. I have a question about my hydronic heating system. We had an addition put up about 2-3 years ago and we added a extra zone to the baseboard heating system. This zone consists of a toe-kick heater installed in parallel with 1/2″ pipes to the zone’s 3/4″ baseboard pipe. The kick heater is installed using 3/4″ to 1/2″ diverter valves – both inlet and outlet.
The problem: every so often the toes kick heater gets air bubbles, and water stops circulating, thus making it useless. I have to uninstall a cabinet drawer and bleed the air from the heater to get it operational. Remedies: the zone air vent was installed on the return side of the system, so I installed one on the supply side at the highest point near the heater unit. I still get air once in a while. Please suggest a more permanent fix.
 |
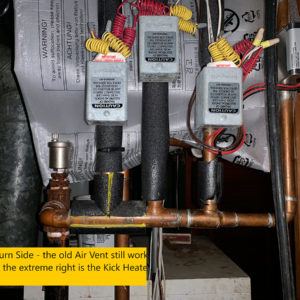 |
Professional plumber Mike Lombardi responds: Toe space heating units don’t always require 2 Venturi or scoop tees. Usually, when the unit is above the heat loop piping, one Venturi tee is enough. I prefer for a single Venturi tee to be mounted on the return side of the unit with the branch connection facing sideways (horizontal); air bubbles travel along the top of the water flow and won’t be as likely to enter the toe heater through the horizontal branch. Mount a standard reducing tee on the supply end of the toe space heater, again with the branch connection horizontal.
Infiltrating air comes from several sources, and entrained O2 takes several weeks of repeated heating to be released from fresh water. Non barrier pex tubing should not be used in closed hydronic heating systems. O2 can pass through non barrier pex and cause flow problems and worse – continuous and rapid corrosion of all ferrous heating system components.
Circulator location is important. Circulating pumps mounted on the system return piping pumping towards the expansion tank (even through the boiler) will create a pressure drop while running and can cause the fill valve to add water, especially if the valve is located behind the circ; fresh water = more 02. The boiler automatic fill valve should always be connected at the expansion tank. Circulator pressure drop can also cause automatic vents to open in reverse and suck air into the system. Circulators work best on the supply piping “pumping away ” from the expansion tank.
The standard two chamber air scoops that mount on the supply piping above the boiler are often incorrectly installed. They work best when located 18″ or more from the transitional elbow (from vertical to horizontal). This distance gives any O2 a chance to escape turbulence & rise to the top of the flow where it can ” burp ” at the automatic vent.
Some tips for air elimination and improving flow: Purge with pressure at or above 20 psi. Raise the boiler temp to 200 degrees or higher when purging. Higher temps reduce the size of air pockets and bubbles – smaller bubbles equals better flow. It can help to add a shot glass or so of Dawn dish detergent to your system after the initial purge; it will have a positive effect on the boiler fluid surface tension and improve flow.
Related Links:
Question from Episode 156: Improving the air-seal on my caulked can lights?
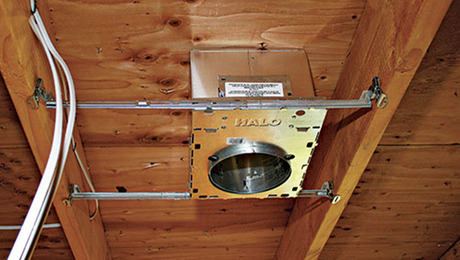
Chris from Connecticut writes: Hey Guys, Five years ago we moved into our current house in Connecticut (a Cape) and I added eight can lights with LED retrofit screw in bulbs in the living room via access through the second story floor which I cut open, and the holes I drilled in the ceiling. By this point I had read about all of the convoluted ways to try to safely air seal can lights and I promptly disregarded them all in favor of caulking the trim kit to the ceiling drywall. So far as I can tell with a smoke stick they are airtight, and I needn’t worry about these bulbs dying for a little while yet, so why the hell isn’t everyone doing this?.
Related Links:
- Air-Sealing Can Lights Safely
- Recessed Can Lights
- How Do You Air-Seal Recessed Can Lights That You Can’t Access From Above?
Question from Episode 157: How can I fix my droopy and abused stairs?
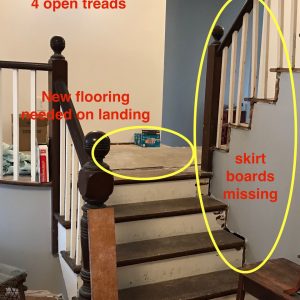
Jeff from York Maine writes: Hi guys, I love the podcast and all of the tips and advice you have. I continuously learn new things from listening to your podcasts and enjoy it a lot! Keep up the good work!! My question involves a set of stairs in an old house. We are currently in the process of renovating a historic home in Maine. Built in 1892, the house was previously carved up into apartments, and in so doing the staircase was half buried in a wall to separate apartment units. Further, the staircase was tiled with linoleum at one point and metal edges were affixed to the front of each tread. Subsequently, industrial carpet was glued on top of the treads and risers. All of this occurred many years ago, and the staircase was definitely showing signs of distress!
To make matters worse, we found that the beam that the staircase was anchored to was cut at some point leaving the stairs floating and secured to nothing. As a result of that the stairs were drooping about 3 inches on the left side and felt very “squishy.” We fixed the structural problems and installed a new beam, and properly secured and leveled the staircase. Now however, we are into the finish of the stairs, and this is where my question comes in. The treads and risers will all need to be replaced due to the previous abuses suffered. The skirt boards were mostly all removed a long time ago, and the floor on the landing is half gone already so will also need to be replaced.
 |
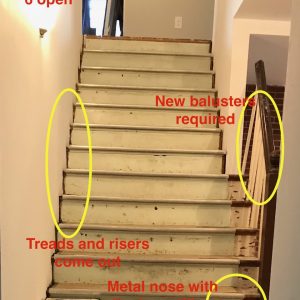 |
I have been looking and studying the various ways of installing stairs and skirts, and I am looking for what you would suggest as the best way to finish these stairs. They will be non-carpeted so everything will show. I am trying to choose the best method to do this right, and am trying to decide on the method to use to re-finish the stairs. The 3 methods I am choosing between are:
1) Set the skirt boards in place first, then use a jig to cut treads and risers to fit exactly in the space and butt up against the skirt board hopefully with no gaps.
2) Set the treads and risers first in place and then scribe the skirt board to match the profile of the stairs thus hiding all imperfections (in theory) after cutting the profiles perfectly.
3) Routing the risers and treads into the skirt and shimming and gluing them into the skirt after install to close gaps.
Given that this is an historical house, and this is the main staircase in the house that will be on display from here forward, I would like to do this the right way. I am curious whether you have any thoughts or suggestions on this task? Perhaps there is another method that I have not considered yet?
Thanks for any insight or advice!
Related Links:
- Shop-Built Housed-Stringer Stairs
- Staircase Renovation
- Remodeling a Stair
- Clever Fix for a Sagging Floor
- Building Stairs Book
Question from Episode 158: Should we lime-wash our crumbling stone foundation?
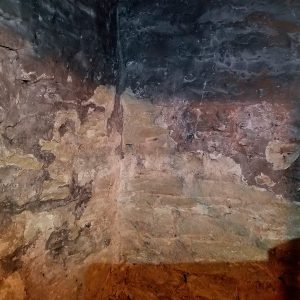
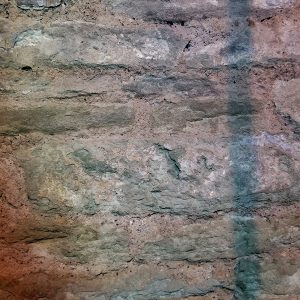
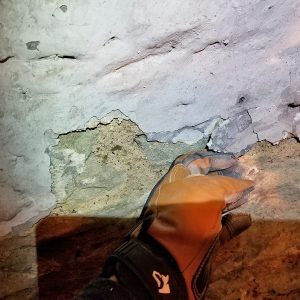
Aaron and Sandy from Pittsburgh write: Greetings, I have recently found your podcast and I love it! I’m binging through old episodes, but in the interim I have a question about my basement. My wife and I are restoring a 130 year old Victorian townhouse in Pittsburgh’s historic Allegheny West neighborhood. The house is generally in great shape and I think we can get another century or two out of it with proper maintenance. One project we would like to tackle is making the basement more useful and more comfortable. We have NO intention of making the basement a finished living space now or in the future, but a small workshop and additional storage would be great.
I plan to insulate the rim joist per your Nov/Oct 2013 article: How to Insulate Rim Joists, and I should also mention that we have no water issues (a small miracle for Pittsburgh). The big project is going to be the walls — we have a stone foundation, with what we believe to be lime mortar (see pictures). The walls easily shed dust and debris when touched, and to complicate matters it seems sections of the walls have been painted/sealed/encapsulated in the past (the black stuff on the upper half of the walls in some pictures).
 |
 |
 |
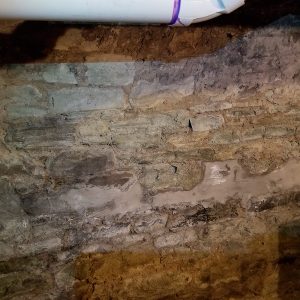 |
We’ve read that old foundations need to breath and sealing the walls will be bad for the long term stability of the foundation. We’ve also read that lime washing could be a viable solution.
So our questions are:
- Is some amount of disintegration normal for old stone foundations? Or should we be concerned about a larger issue?
- Will lime washing reduce interior foundation degradation, or will it merely brighten the space?
- If we lime wash, should we chisel out some of the mortar first and re-point? This would be a lot of work, but probably something we’d only need to do once in our lives
- If we lime wash do you recommend a product and or procedure?
- Any general tips and tricks for making old basements more useful? (less dusty/dirty)
Best Regards from the Steel City!
Related Links:
- Building Science Corp.: Understanding Basements
- Lime Plaster & Lime Stucco
- Basic Principles for Preparing and Applying Limewash
Question from Episode 164: If you were to choose a house from any style/era what would it be and why?
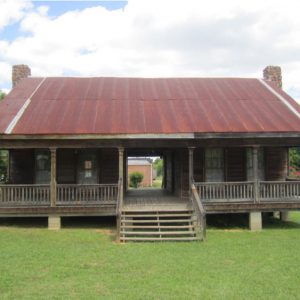
Ryan writes: Afternoon guys, I’m about to begin the search for another house. Trying to narrow down the search leads to my question: If you were to choose a house from any style/era what would it be and why? The thought of a new well built house is great but I don’t know if I can justify all of those resources bring poured into a new house when there are other homes out there that are vacant.
Thanks!
We’re actually a little up in the air. Currently we live in Western Washington but we’re considering moving back home to New England- northeastern CT. My wife is very partial to the Craftsman style homes we saw all over California and that’s what she would prefer if that aids at all in the discussion.
 |
 |
 |
 |
 |
Related Links:
Check out our latest Project Guide: Siding & Exterior Trim!
Check out our FHB Houses:
Visit the Taunton Store • Magazine Index • Online Archive • Our First Issues • All Access
Help us make better episodes and enter for a chance to win an FHB Podcast T-shirt: www.finehomebuilding.com/podcastsurvey

If you have any questions you would like us to dig into for a future show, shoot an email our way: fhbpodcast@taunton.com.
If we use your question we’ll send you a FHB Podcast sticker!
FHB Podcast T-shirts!
Represent your favorite podcast! Available in several styles and colors. Made from 100% cotton. Find the Podcast t-shirt and more cool products in the Fine Homebuilding Store.

Fine Homebuilding podcast listeners can now get 20% off anything in the Taunton store, including Pretty Good House.
Use the discount code FHBPODCAST to take advantage of this special offer.
We hope you will take advantage of a great offer for our podcast listeners: A special 20% off the discounted rate to subscribe to the Fine Homebuilding print magazine. That link goes to finehomebuilding.com/podoffer.
The show is driven by our listeners, so please subscribe and rate us on iTunes or Google Play, and if you have any questions you would like us to dig into for a future show, shoot an email our way: fhbpodcast@taunton.com. Also, be sure to follow Fine Homebuilding on Instagram, and “like” us on Facebook. Note that you can watch the show above, or on YouTube at the Fine Homebuilding YouTube Channel.
The Fine Homebuilding Podcast embodies Fine Homebuilding magazine’s commitment to the preservation of craftsmanship and the advancement of home performance in residential construction. The show is an informal but vigorous conversation about the techniques and principles that allow listeners to master their design and building challenges.
Other related links
-
- All FHB podcast show notes: FineHomebuilding.com/podcast.
- #KeepCraftAlive T-shirts and hats support scholarships for building trades students. So order some gear at KeepCraftAlive.org.
- The direct link to the online store is here.

