Podcast Episode 523: Digital Shower Valves, DIY Foam Outsulation, and Air-Sealing Stem Walls
The crew hear from listeners about DIY foam outsulation and chemical sensitivity before taking questions about digital shower valves, wonky concrete floors, and insulating stem walls.
Follow the Fine Homebuilding Podcast on your favorite app. Subscribe now and don’t miss an episode:
 |
Help us make better episodes and enter for a chance to win an FHB Podcast T-shirt:
www.finehomebuilding.com/podcastsurvey
Kerry explains how he improved his Cape’s energy performance. Andy has thoughts on chemical sensitivities. Stephen shares how engineered trusses and I-joists behave in a fire. Steve asks if remote shower valves save energy. Andrew wonders how he should air-seal and insulate a stem foundation wall with a framed wall on top.
Editor Updates:
- Mike: Tucson AZ home office and doors
- Andrew: Connecticut visit
Listener Feedback 1:
Kerry writes: Hello FHB Podcasters, On a recent episode you had a discussion about adding exterior insulation to an existing home. I have a couple of comments and photos for you from my experience doing this to my own house.
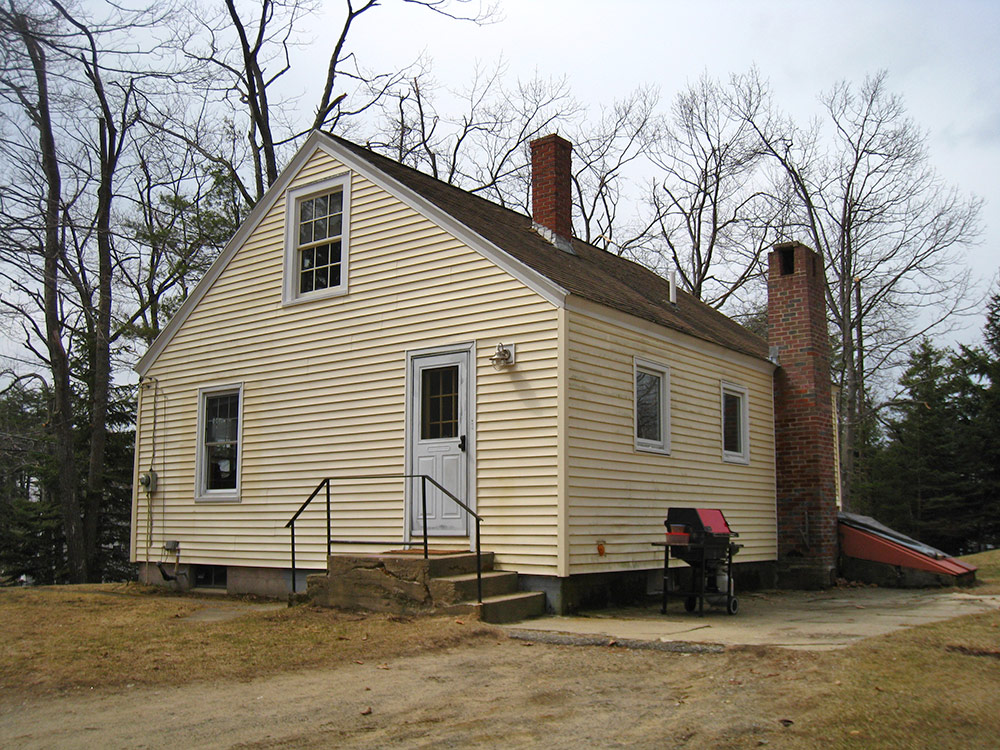
My 1947 Cape style house in MA was fairly original when I moved in. I don’t remember it having any insulation in the rafters, but possibly there were the same 2″ FG batts I’ve found in the walls. When I moved in I was cash strapped and only installed R20 FG in the rafters, kraft faced and no vent space. There was no condensation issue from normal use, but a leaky plumbing vent caused a lot of summer steam on drywall at the peak at one point until I found this source. Anyhow, as expected by the science and my personal past experience, R20 was not even close to enough to limit solar gain summer discomfort, though providing enough heat seemed to be good enough for winter comfort.
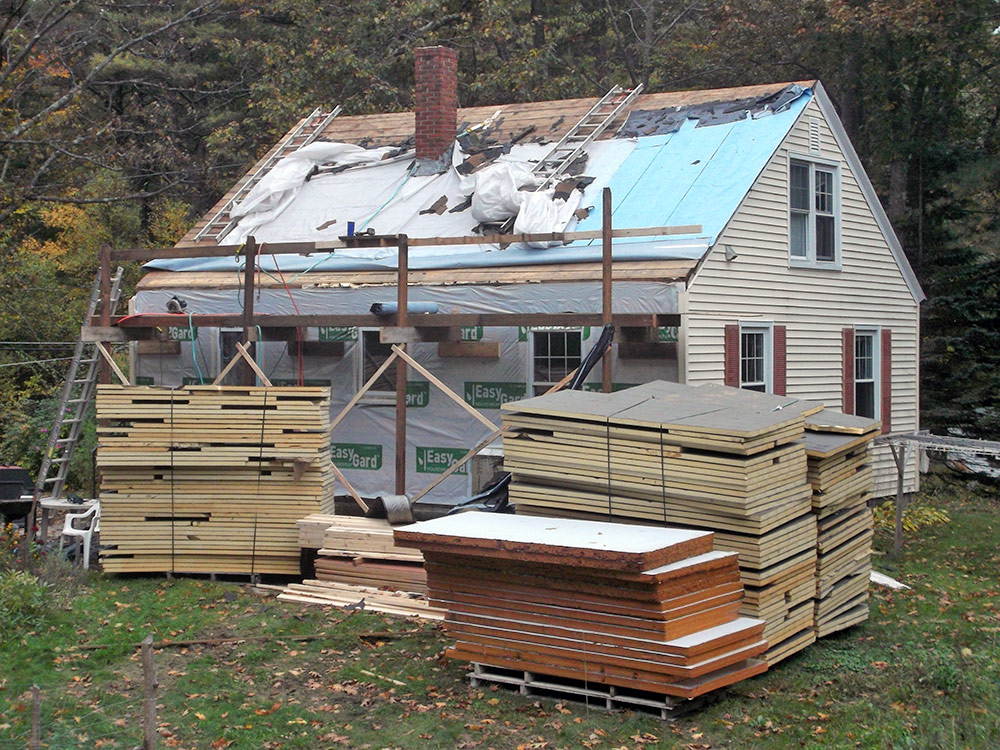
When my asphalt roofing was so old that it grew flora and leaked, I bought used foamboard, plywood, 2x4s and new asphalt roofing to solve my problems. The first note is that I literally got a full 52′ trailer truck load of reclaimed 2″ polyiso for $3600. It was 9 pallets full truck height. It required a long chain and a Bobcat with forks to unload. It was enough to add 8″ to the roof and 6″ to my walls for about $2,000 less than new Polyiso would have cost for the roof alone. Not that this is a house with 950 SF of living space, a 24 x 28 footprint, and no dormers, so the house is small and simple.
 |
 |
 |
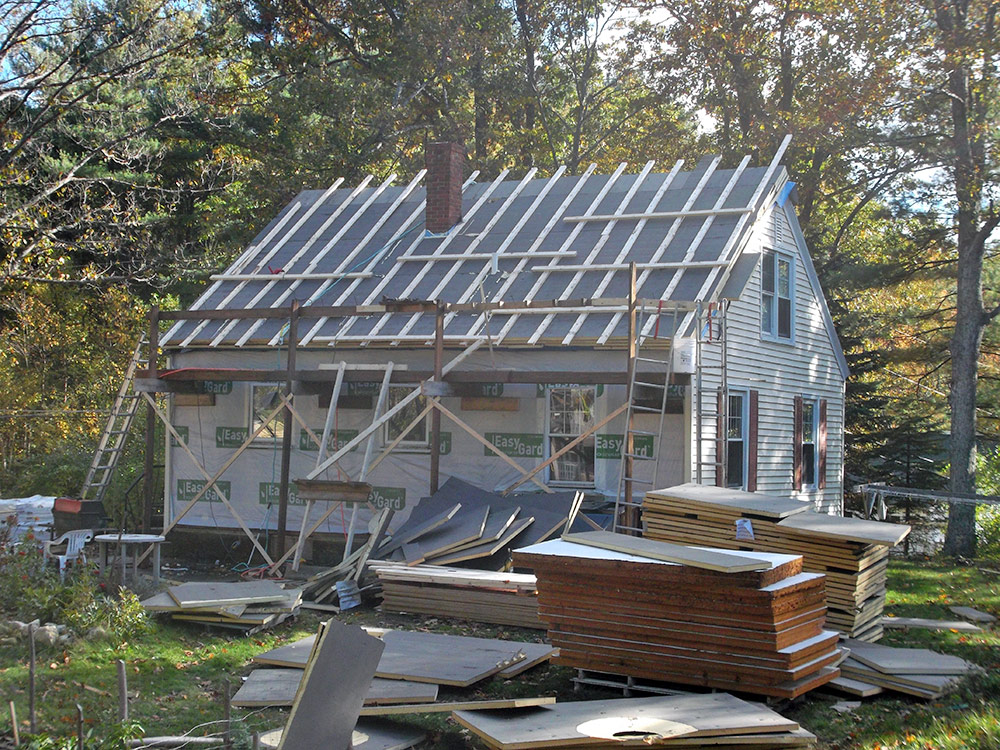
I installed ice and water shield on the original roof sheathing plane for an air and weather barrier so the roof would be waterproof while I picked away at the project alone. I left flaps of it extended around the roof edges to connect to a wall air barrier in the future. One of the strangest things I experience is that which was mentioned on the podcast. Using 13″ screws through 8″ of foam board and 2×4 strapping on the flat to sandwich it was possibly the most challenging part. A percentage of screws missed the rafters. I am pretty dang good with feeling out plumb and level, but between the tiny tolerance for screw angle and non-straight rafters it was impossible to have perfect shooting. My house was built by the homeowner in 1947 and the house is not particularly level, square and straight.
Locating the rafters was a trick. I found the centers of the rafters top and bottom, and drove 13″ headlok screws into them to flag their location. I could butt the foam board to these screws and snap a line. Somehow, and honestly to my surprise, it worked really well unless the rafters weren’t straight. You’ll see in my photos that sometimes I swear the rafter would disappear! I could not find it. Perhaps there was a rounded top edge that deflected the screw or there was a curve or I don’t know what, but there were frustrating moments that defied logic. Big note here— on this project and on walls that I have exsulated, I use the sheathing as an air barrier which the fasteners penetrate. Therefore, I leave any screws in place that miss the framing and drive another to hit the framing. The screws plug the holes that would otherwise be air and water leaks. I started my project with repairing the misses by drilling a bigger hole through the 2x strapping and foam board in order to insert a foam gun and seal the hole with spray foam. I soon got annoyed by this extra tedium and started to leave the fasteners in place. Second note, I still have a full, sealed bucket of 13″ screws of which I cannot rid myself!
Another point to address the structural issue you posed. My educated guess is that my new roof assembly is stronger than pre-retrofit. I’ve done the equivalent of moving the flanges of an I-joist farther apart. There should be less roof deflection with 8″ of foam board added between the 2×4 strapping/plywood combination and the 2×6 rafter. Isn’t a 12″ SIP panel stronger than a 6″ SIP?
The final assembly is vented on top of the foam with the 2×4 strapping which helps to keep the assembly dry should there ever be a leak, and also, why not? Frankly, adding this R40 on the roof of a cape is the best thing one can do to make those awful second floor rooms livable without shocking amounts of AC and heat. A wise, old friend who has been in the high-performance world since the 1970s recently noted that it can be tough to sell high-performance building envelopes because there is no way to communicate the experience of living in one of these homes. He said that he has literally designed hundreds of high-performance buildings and not one customer has regretted the extra insulation and triple glazed windows. However, many people do experience discomfort with code-built homes that they assume is a normal part of living in our Northeast winters.
Related Links:
- A New Take on Insulating a Roof
- Insulating Unvented Roof Assemblies
- Retrofitting Foam Insulating on a Roof
- Insulate a Cape Roof to Avoid Ice Dams
Listener Feedback 2:
Andy writes: Hi FHB Podcast Crew, I heard the question about chemical sensitivities on the last podcast. What the builders have been saying about control through air-sealing and mechanical ventilation makes sense. However, listening to the segment, some other analogous advice from builders came to mind about locating bathroom vent fans directly above showers–that is, practicing effective source control. In this sense, reducing compounds that might offgas and/or are known to be harmful seems pretty reasonable. As far as quantifying what level of exposure is harmful, that is a long and winding road in the USA. We only just mandated that new chemicals should be reviewed before being produced or imported in 2016 amendments to the Toxic Substances Control Act. In the original 1976 Act, it was assumed that anything currently in use was safe until proven harmful. Naturally, things like asbestos weren’t banned until a decade of research went through, and the ban was overturned in just two years, even though the court overturning the ban stated that it was a carcinogen at any exposure level.
Between 1976 and 2016, the EPA regulated the use of fewer than 10 of the 86,000 registered chemicals used in commerce. Unfortunately, the 2016 amendments are not that effective either. It places the burden on obtaining necessary data for evaluation on the EPA, lacks rigorous and logical adjustments to evaluations to account for vulnerable populations and non-acute exposures, and preempts state action in some cases. A recent review showed that the first ten evaluations performed by the EPA after the 2016 amendments were scientifically and medically inadequate: Toxic Substances Control Act (TSCA) Implementation: How the Amended Law Has Failed to Protect Vulnerable Populations from Toxic Chemicals in the United States.
In short, at the personal level, the best thing one could do is to use products that are 1) unlikely to be a source of harmful chemicals and 2) have been evaluated by more stringent and scientifically sound methodologies, such as the European Union’s Registration, Evaluation, Authorisation and Restriction of Chemicals (REACH).
Some people might say that chemical sensitivities aren’t a concern for the average person, and that might be true. However, (I’m stealing this directly from a talk by Ty Newell):
1. We don’t design houses to withstand an average day of weather for good reasons–we typically use 99% winter design temperatures and 1% summer design temperatures when sizing HVAC systems, for example.
2. We don’t design 5’7″ doorway heights, even though that’s the average person’s height in the USA–the standard door height is 13″ taller.
Averages reduce populations to a one-dimensional metric that doesn’t tell the whole story about heterogeneity in present and past conditions and attributes. Every single person, at one stage or more stage in their life, is guaranteed to not be an average person. Children (who love to put all kinds of building materials in their mouths) and the elderly are especially universal examples of vulnerable subpopulations. And becoming more vulnerable to chemicals could happen to anyone at any time in their life. Once it happens, it’s very difficult to remedy even if the paths are known and the person has specialized knowledge and skills for how to achieve that path, as demonstrated by the person who wrote in about the original question. He has the exact skill-set necessary to build a custom residence to reduce his symptoms, and apparently it took him two decades to get somewhat back to normal. This isn’t meant as a slight against him, but rather to illustrate just how debilitating being “unlucky” could be in our current design paradigm.
If you are interested in getting an overview of indoor air quality, it might be worth looking up IAQ Radio and interviewing their host on the Pro Talk podcast. I don’t have the professional judgment to say whether or not they’re a good resource, but they’ve interviewed Allison Bailes and Joe Lstiburek. I assume this is how the YouTube algorithm recommended their channel to me.
Related Links:
- 10 Toxic Building Material Ingredients and Recommended Alternatives (GBA)
- Helping People With Multiple Chemical Sensitivity (GBA)
Listener Feedback 3:
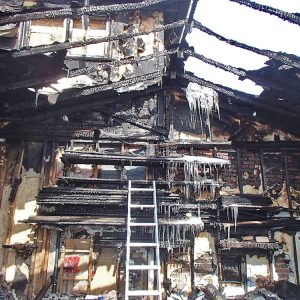
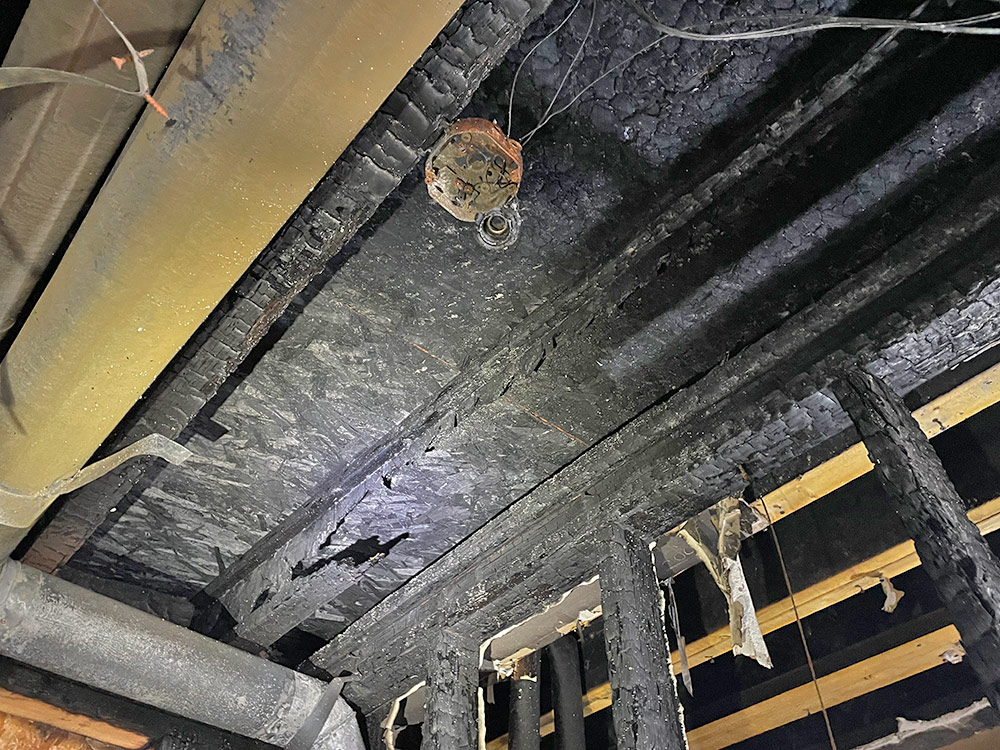
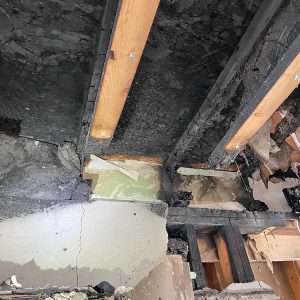
Doug writes: Hi FHB Crew, Love the show and figured I’d help backup your comments in episode 513 regarding the potential failure of metal truss plates during a fire. I am a Structural Engineer in Ontario Canada specializing in the assessment of damaged buildings for Insurance companies. This includes fires, explosions, high winds, snow load collapses, vehicle impacts, and any number of other ways people manage to damage a building. I have seen hundreds of fire damaged houses with trusses and I can assure you the metal plates do not simply fall off during a fire. Typically, by the time you need to worry about the metal plates, the fire has already consumed the wood truss members and the roof sheathing above. I have attached some photos and you might be surprised of how badly roof trusses can be burnt without completely collapsing.
 |
 |
 |
 |
Your comments regarding I-joists were also spot on. The larger ratio of surface area to their cross-sectional width, compared with traditional solid lumber, means the I-joist webs are more likely to be burnt through. This can make the floor at a much higher risk of collapse.
The goal with any fire is to get the people out safely, everything else can be replaced. Even if the structure is saved, the smoke and water do so much damage that most houses I see with structural damage end up being gutted back to the studs to ensure the odour has been properly remediated. I would focus on fire safety and maybe having a good insurance policy before worrying about how well the framing is going to stand up in a fire.
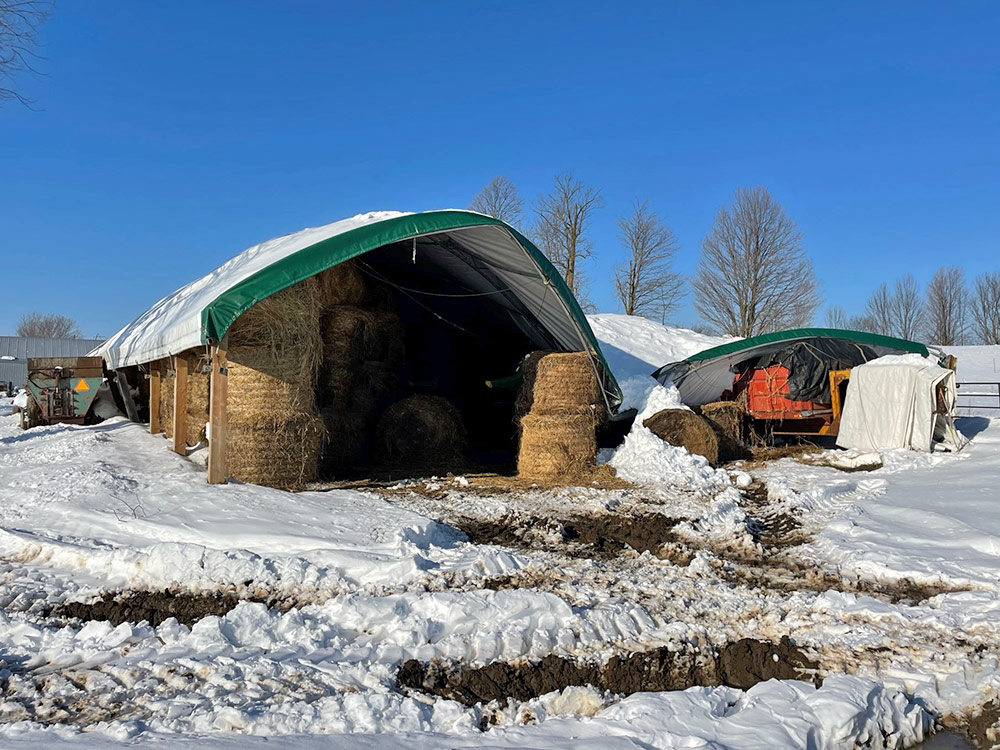
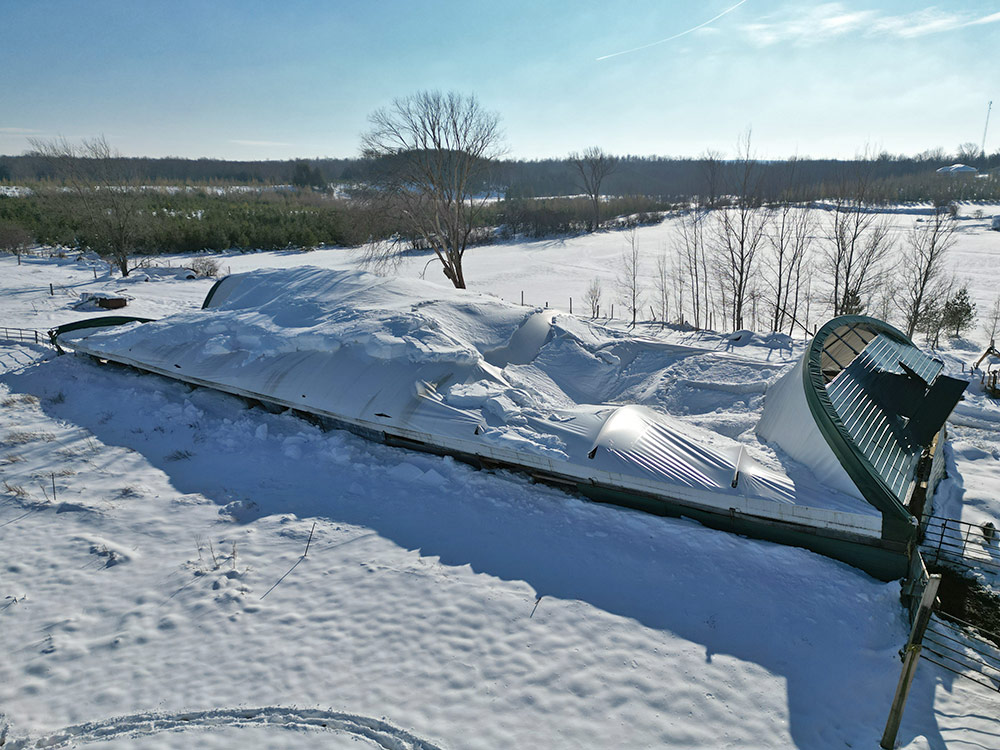
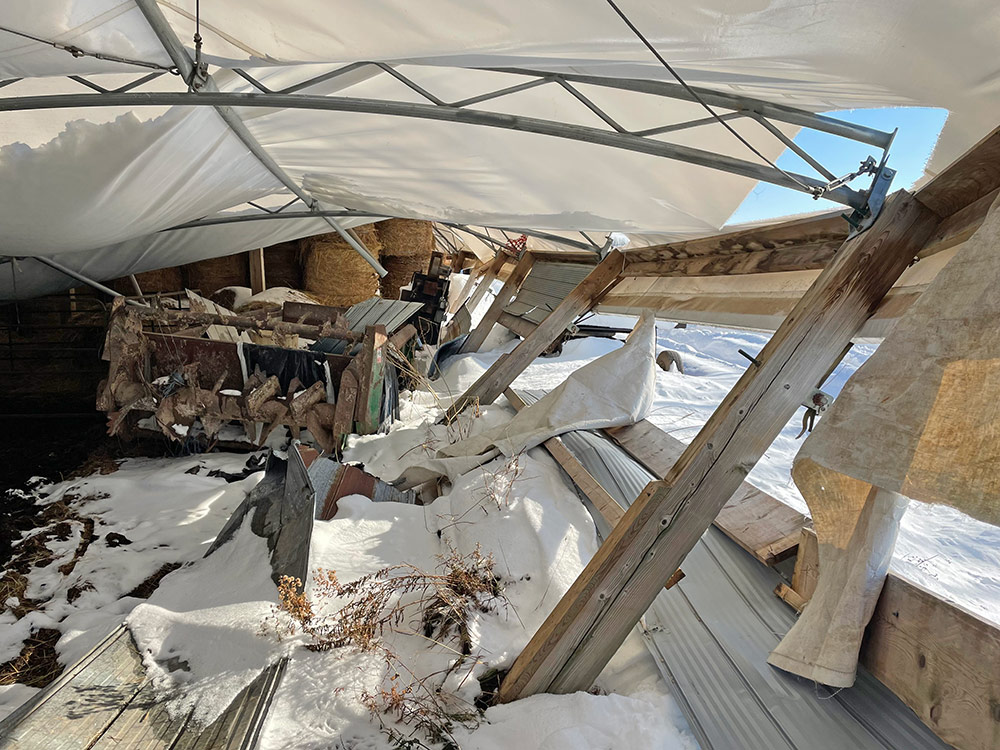
Keep up the good work! I’m on my way to this season’s first structural collapse from snow.
 |
 |
 |
Related Links:
Question 1: How do I efficiently install a digital shower valve?
Steve writes: I avidly listen to your show so that I can be an ‘educated client’ of designers, GC and tradespeople, while building. I retired this year after managing hardware and software engineering teams in Silicon Valley since ’95. My wife and I have purchased 2 acres in northwest Arkansas, and are just wrapping design development with the architects. Thinking about how digital technology can be applied to MEP, I was struck by what seems like a missed opportunity.
The advent of digital shower valves like Kohler Anthem mean the valve can be remote from the control. Can we put the valve quite close to the fixtures, and reduce the lag in temperature change? For that matter, why do recirculation lines usually loop off in the floor, rather than run up the last 6′ to the primary fixtures? Branching the recirc line close to the valve would save a small but significant amount of water. Perhaps more importantly, with both valve and recirc branch close to the fixture the shower becomes more responsive. Is there a code or other installation requirement that mandates a distance between shower fixture and valve?
Related Links:
Question 2: Thoughts on leveling a slab
Barbara writes: Hi Patrick! Happy Thanksgiving! I’ve got the mouse-proofing done at the corrugated edges. Spray foam, wire mesh, and flex seal. While I wait for the spray foam contractor to come spray the corrugated steel surfaces I will work on the floor and the plate glass windows. I want to level the slab but my brother and father think I’m being ridiculous. There’s one place that drops quickly by 1 1/2”. And it’s stained with rat doings that pressure washing didn’t budge. I want to build it up with sand topping mix and finish with self-leveler. My brother (with civil engineer credentials) agrees this will work, if I use a lot of bonder. He just thinks it’s too much work. But I’m envisioning a floor where I will roll perfectly in a high-end desk chair. If I drop a small finding from jewelry making, I can spot it easily on my clean and attractive floor. I will have white Corian workbenches! The whole space in there is meant to be a sparkling contrast to the live edge heartwood posts and rough framing and patinated steel of the structure.
It’s ok if nobody understands my artistic vision. I’m just a little insulted that they think I don’t deserve a level floor in the place where I’ll be working to earn a living for the rest of my life. I mean, it’s a one-day job. So, I hired a man to bring a barrel mixer and lift all those 60-pound bags for me and we will get it done. He came for two days to help me put up the frame and screw on the ceiling so he already knows what I’m trying to do. Maybe next week.
Hope you have a good holiday and get lots of projects done!
Related Link:
Question 3: What is the best roofing material for a new, low-slope roof?
Steve writes: Question on low slope roofs (new construction)- what is your preferred roofing material- modified bitumen, soldered metal, BUR membrane, or something else entirely? the slope is 3:12 if that affects the answer.
Related Links:
Question 4: How do I waterproof existing basement walls?
Andrew in Vancouver, British Columbia writes: Hi there, Thank you so much for this valuable resource! I became a GBA member only recently and have been busily devouring all the incredible information and insights shared here as I undertake an insulation upgrade to our home’s existing basement walls. I think I’ve gleaned the best approach from the many posts and drawings shared here, but I haven’t found reference to my specific situation. We are in Vancouver, British Columbia (US climate zone 4) and have a 1968 “Vancouver Special” (simple 2 story home typically built as slab on grade but in our case 2.5’ below grade). We have 7.5’ high basement ceilings, but the bottom 2.5’ of the wall is the concrete foundation stem wall, atop which sits the insulated stud assembly for the upper 5’ of the wall. We’ve been having moisture and mold issues and are taking steps to remediate by fixing some cracks in the foundation wall; addressing moisture diffusion (applying a chemical vapor barrier (silicate – PIM+, followed by epoxy) to the slab and foundation walls, and addressing condensation by improving wall insulation and eliminating the significant thermal bridging happening between the lower foundation wall and the interior drywall.
For this last task, I’m wondering if anyone has advice on how I should approach insulating this wall section given the awkward part foundation wall / part insulated stud wall configuration. I’ve attached a diagram showing the existing condition and my proposed changes which involve ripping out the existing furring strips, attaching a continuous layer of 1” rigid foam against the concrete stem wall and all the way up to the ceiling, reattaching 1×3” wood furring strips (or considering metal furring strips to minimize future moisture / rot issues?), and then hanging the new non-paper faced drywall.
My main questions are: Do I need to consider any additional exterior wall treatments for moisture/air barrier beyond caulking and foaming up cracks and holes? Presumably I want the wall to be able to breathe to the outside so caulking cracks followed by Roxul batts should be adequate? Should I extend the 1” rigid foam all the way to ceiling so as to have a wall assembly with a continuous layer of taped and sealed rigid foam acting as vapor barrier in lieu of poly sheeting? Since I’m rebuilding the furring framing to accommodate this in the lower wall section, it seems like I might as well do it all the way up. Or alternately I could just install a poly vapor barrier in this upper wall section? One of my key questions is: if I do the continuous rigid foam from slab to ceiling, do I need a poly vapour barrier anywhere if I’m diligent about sealing the continuous layer of rigid foam?
Many thanks GBA community for any advice and assistance!
Related Links:
END NOTES:
Podcast 523: Members-only Aftershow: Tools and Products Invented by Tradespeople — Mike, Andrew, and Patrick talk about tools made by folks working in the trades that offer a better way to do things.
Check out one of our Project Guides: Siding & Exterior Trim!
Check out our FHB Houses:
Visit the Taunton Store • Magazine Index • Online Archive • Our First Issues • All Access
Help us make better episodes and enter for a chance to win an FHB Podcast T-shirt: www.finehomebuilding.com/podcastsurvey

If you have any questions you would like us to dig into for a future show, shoot an email our way: [email protected].
If we use your question we’ll send you a FHB Podcast sticker!
FHB Podcast T-shirts!
Represent your favorite podcast! Available in several styles and colors. Made from 100% cotton. Find the Podcast t-shirt and more cool products in the Fine Homebuilding Store.
| Fine Homebuilding podcast listeners can now get 20% off anything in the Taunton store, including Pretty Good House.
Use the discount code FHBPODCAST to take advantage of this special offer. |
 |
“Finally, knowledgeable people talking about building reasonably-sized, high-performance houses for normal people with real budgets!” — DanD, VA, 8/19/22, Amazon.com review |
We hope you will take advantage of a great offer for our podcast listeners: A special 20% off the discounted rate to subscribe to the Fine Homebuilding print magazine. That link goes to finehomebuilding.com/podoffer.
The show is driven by our listeners, so please subscribe and rate us on iTunes or Google Play, and if you have any questions you would like us to dig into for a future show, shoot an email our way: [email protected]. Also, be sure to follow Fine Homebuilding on Instagram, and “like” us on Facebook. Note that you can watch the show above, or on YouTube at the Fine Homebuilding YouTube Channel.
The Fine Homebuilding Podcast embodies Fine Homebuilding magazine’s commitment to the preservation of craftsmanship and the advancement of home performance in residential construction. The show is an informal but vigorous conversation about the techniques and principles that allow listeners to master their design and building challenges.
Other related links
-
- All FHB podcast show notes: FineHomebuilding.com/podcast.
- #KeepCraftAlive T-shirts and hats support scholarships for building trades students. So order some gear at KeepCraftAlive.org.
- The direct link to the online store is here.


