FHB Logo Facebook LinkedIn Email Pinterest Twitter X Instagram Tiktok YouTube Plus Icon Close Icon Navigation Search Icon Navigation Search Icon Arrow Down Icon Video Guide Icon Article Guide Icon Modal Close Icon Guide Search Icon Skip to content
Subscribe
Log In
  • How-To
  • Design
  • Tools & Materials
  • Restoration
  • Videos
  • Blogs
  • Forum
  • Magazine
  • Members
  • FHB House
  • Podcast
Log In

Fine Homebuilding Project Guides

Decks

Guide Home
  • Design & Planning
  • Tools & Materials
  • Footings & Foundations
  • Framing a Deck
  • Installing Decking
  • Installing Railings
  • Deck Stairs
  • Custom Details
  • Finishes, Repairs, and Maintenance
  • Complete Deck Builds
How-To

5 Steps for Flashing a Deck Ledger

A multilayered approach keeps water out of the house at this critical connection.
By Mike Guertin Issue 313 - Feb/March 2023
  • X
  • facebook
  • linkedin
  • pinterest
  • email
  • add to favorites Log in or Sign up to save your favorite articles

Synopsis: Editorial advisor and seasoned deck builder Mike Guertin points out that the building codes give requirements for deck-flashing materials, but offer little guidance about how to accomplish the process of flashing the ledger. In this article, he walks through his ledger-flashing strategy step by step, and includes recommendations for types of membrane and rigid flashing, strategies for scoring flashing tape, and details about integrating with the water-resistive barrier for a fully waterproof assembly.


I’ve dismantled many old decks in preparation for building new ones. In several cases water that leaked around insufficient ledger flashing or through holes in the flashing caused the rim joists to deteriorate. Fortunately the rot on those homes was limited and didn’t lead to any deck collapses. But given more time, the water leaks and decay could have led to the ledgers loosening and not being able to support the deck.

There’s no single right way to flash a deck ledger to prevent water from leaking into the house. Because of the different climatic conditions in different regions, the risk can be different. A flashing approach that works in the arid Southwest that receives less than 12 in. of rain per year—where occasional water that leaks by or through the flashing likely dries quickly—probably won’t work in a more humid climate that receives 30 in. to 40 in. of rain.

Ledger flashing and the code

The 2021 International Residential Code (IRC) gives little direct guidance on deck-ledger flashing. Footnote “a” under table R507.9.1.3(1) reads, “Ledgers shall be flashed in accordance with Section R703.4 to prevent water from contacting the house band joist.” But the only additional information in section R703.4 is this: “… corrosion-resistant flashing shall be applied shingle-fashion in a manner to prevent entry of water into the wall cavity or penetration of water to the building structural framing components.”

The IRC goes on to note that self-adhered membranes and fluid-applied membranes shall comply with certain standards. Section R507.2.4 describes the minimum standard for flashing material as corrosion-resistant metal at least 0.019 in. thick, or approved nonmetallic material (meaning approved by the local building official). And the flashing must be compatible with the deck framing and decking materials. These sections of the code focus on the objective—use flashing to prevent water from entering the wall—but they offer little about how to accomplish it.

A method for a damp climate

In the Northeast where I live and do most of my work, we typically receive over 40 in. of rain annually. My strategy for waterproofing the ledger is installing a redundant flashing system that uses self-adhering flashing tape and rigid cap flashing. This technique prevents water from leaking into the house along the top, sides, and bottom of a deck ledger.

The last line of defense in this system (and the first layer to be applied), is a sheet of self-adhering flashing tape or roofing underlayment bonded to the wall sheathing behind the ledger position. Next is a second layer of flashing tape that attaches to the wall above the ledger and then wraps over the top of the ledger. Finally, a rigid metal or plastic cap flashing sits on top of the ledger and the flashing tape to shed the bulk of the water.

This rigid flashing protects the flashing tape from UV-light exposure and covers the clearance space between the top of the deck boards and the bottom of the siding. The recommended clearance height for siding above the ledger varies with the type of siding, ranging from 1 ⁄ 2 in. for red-cedar shingles to 2 in. or more for red-cedar lap siding and some fiber-cement brands.

Importantly, this flashing system integrates with the water-resistive barrier (WRB) of the house. This method works for both new construction and renovation, and it works whether the deck attaches to the house at grade level or above. I recently had the opportunity to install and flash a ledger for an above-grade deck on an existing home, and this is how I did it.


STEP 1: Peel back the layers

I start by removing the siding from the wall in the area where the ledger will be installed, at least 8 in. above the ledger location, 2 in. below, and 3 in. from each end. The steps for removing the siding will vary depending on the type of siding, but the most important factor is taking care not to damage the housewrap or water-resistive barrier (WRB) above the top of the ledger location. This section of the WRB is needed to lap over the ledger flashing near the end of the process.
Cut back the WRB
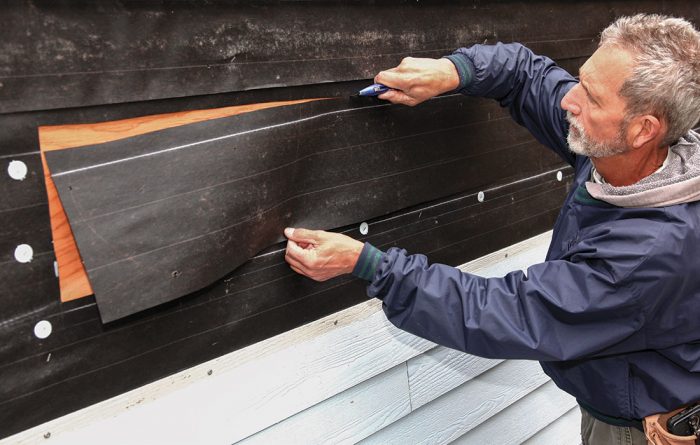
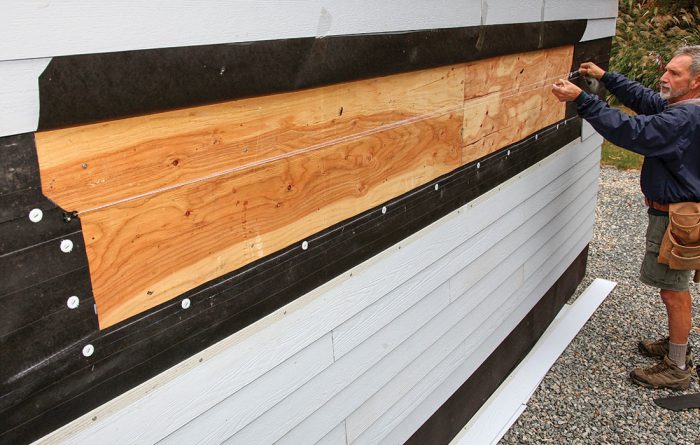
Cut back the WRB. Snap a chalkline to indicate the position of the ledger and add cap staples around the perimeter to keep the WRB in place prior to cutting. Then cut the WRB about 1 ⁄ 2 in. up from the bottom snapped line and about 2 in. above the top line. Remove that section of WRB.
Snap a line
Snap a line. Slit the WRB as you would a window head flashing, making a head flap about 6 in. high, and tack or tape the flap up and out of the way. Then snap a chalkline an inch up from the top position of the ledger.

STEP 2: Prep and protect the wall

With the WRB out of the way, I apply strips of self-adhering membrane to the wall sheathing behind the ledger. On this ledger I used wide flashing tape; strips from a roll of waterproof roof underlayment work as well. The membrane strips must be at least 3 in. wider than the ledger so they can be installed with at least 1 in. above the top of the ledger and 2 in. below. To make the strips easier to handle by myself, I cut them into 5-ft. to 6-ft. lengths. I leave a portion of the release liner on the bottom strip; at a later stage, the cladding under the ledger will tuck behind this last strip of flashing tape.
Score and peel
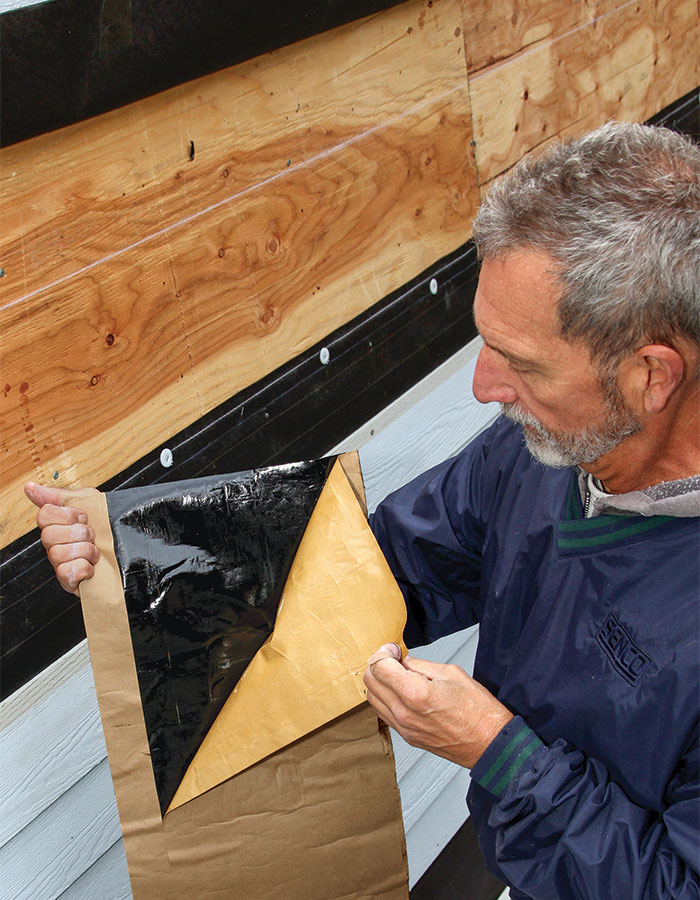
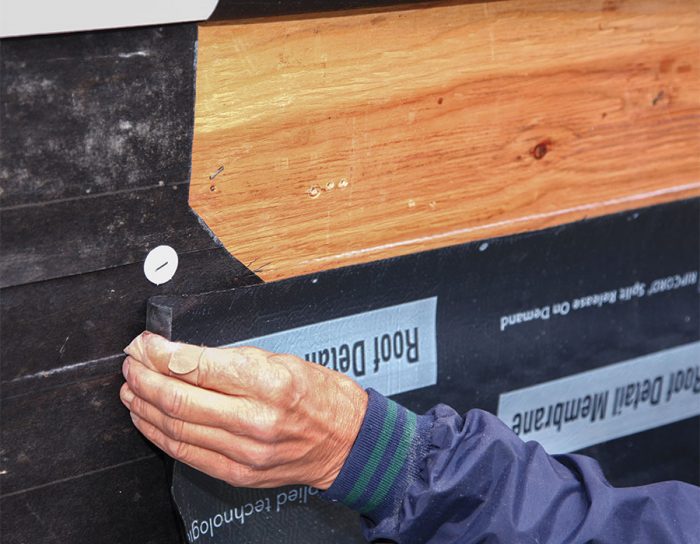
Score and peel. Score the release liner 2 in. from the bottom of a section of flashing tape, then peel the liner off the wider top section.
Follow the chalkline
Follow the chalkline. Align the top of the flashing tape with the snapped line and start bonding the flashing tape 3 in. to 4 in. beyond the end position of the ledger.
Burnish with a J-Roller
Burnish with a J-Roller. Work down the wall in sections until the entire area of the ledger is covered (but leave the release liner on the lowest flap). Overlap successive pieces of tape by at least 4 in., and use a J-roller to help adhere the tape to the wall. When working in cold temperatures, you may need to coat the sheathing with a bond-improving primer.

Scoring flashing tape

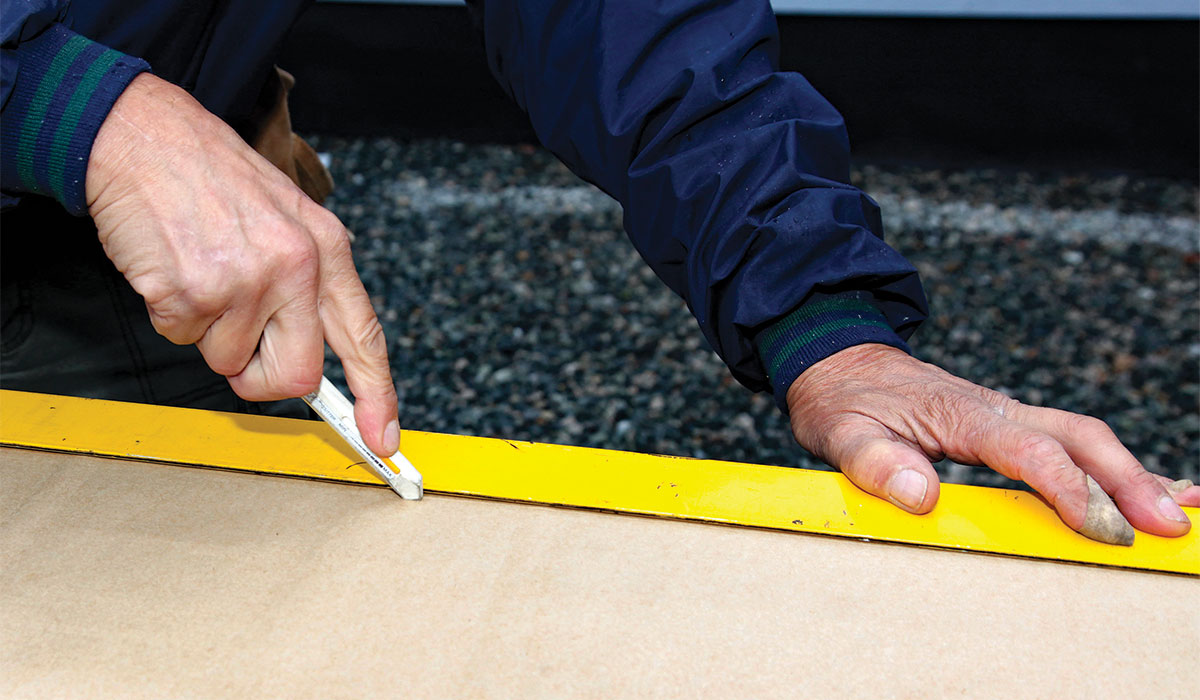
It’s easier to work with sticky flashing tape when a portion of the release liner is left on. This keeps the tape from getting stuck to itself or to surfaces other than where you want it. Scoring the release liner comes in handy in a couple of places when flashing a ledger: at the inside corner where the top of the ledger meets the wall and below the ledger where the siding tucks under the flashing tape. In order to remove the release liner in separate sections, it needs to be scored without cutting through the tape itself. The safest way I’ve found is to use a Top Sheet Cutter made by Olfa ($15); its blade extends a tiny amount and has a pressure adjustment that controls how deeply it cuts. Alternatively you can use a fresh, sharp blade in a utility knife using very light, even pressure. In either scenario, run the knife along a straight edge for an accurate cut. After cutting through the release liner, fold the tape along the score line to ensure the liner is cut through cleanly, and rescore any spots that didn’t cut through the first time. I recommend making a few test cuts on a scrap of flashing tape until you get a feel for the technique.

—M.G.


STEP 3: Install and flash the ledger

To guide the ledger installation, I re-snap the chalkline for the top edge of the ledger on top of the membrane I just installed. I partially drive a couple of screws under the bottom edge of the ledger to support it temporarily while I drive the attachment screws. To cap the top of the ledger and seal it to the wall, I use 9-in.- to 12-in.-wide flashing tape. This size lets me extend the tape at least 1 ⁄ 2 in. down the face of the ledger while spanning the 1-1 ⁄ 2-in. top of the ledger and still leaving 7 in. or more to continue up the wall. This wall coverage may seem excessive, but that height is needed for the WRB and siding to overlap properly. Remember that decking is usually 1 in. thick, and some siding types require at least a 2-in. clearance space between the decking surface and bottom of the siding course. So of the 7-in. wall leg of the flashing tape, only about 4 in. will be covered by the WRB and siding.
Position the ledger
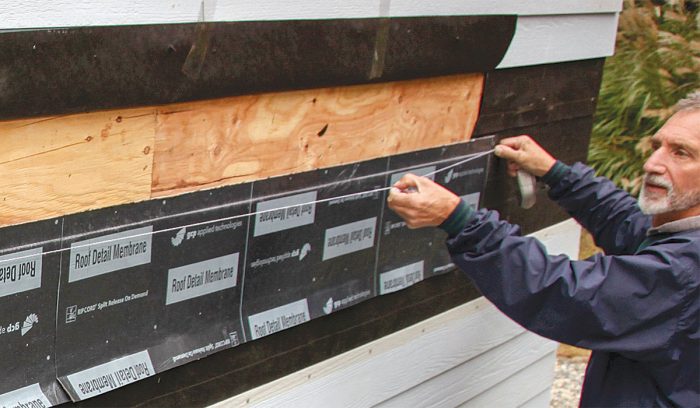
Position the ledger. After the flashing tape is adhered to the wall in back of the ledger position, re-snap a chalkline for the top of the ledger.
Attach the ledger
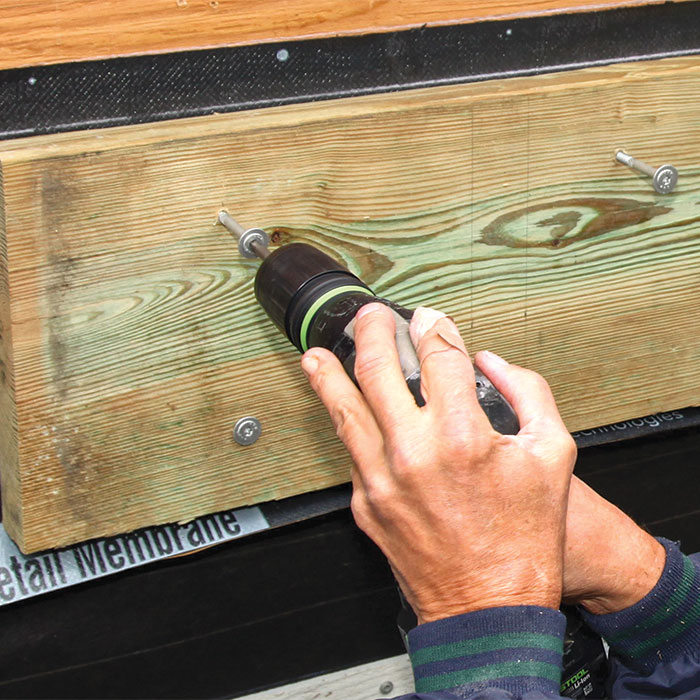
Attach the ledger. With the ledger sitting on a couple of screws to hold it in position temporarily, drive the fasteners to attach it to the wall as required.
Peel and stick
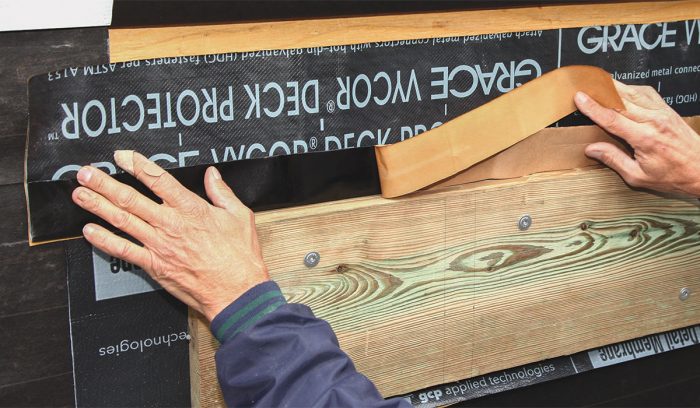
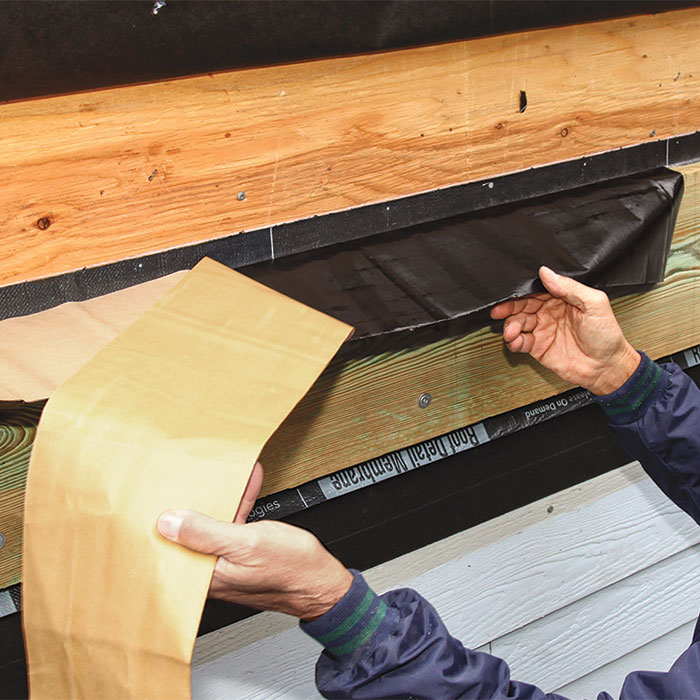
Peel and stick. Working with flashing tape 9 in. to 12 in. wide, score the release sheet about 2 in. from one edge. (I keep the length of the strips 3 ft. to 4 ft. long to make them easier to handle during installation.) Fold the tape at the score line and set the tape on top of the ledger and against the wall. Orient the first strip beyond the end of the ledger, extending about 1 in. past the membrane installed earlier, and peel the release liner off the narrow strip that will extend over the ledger.
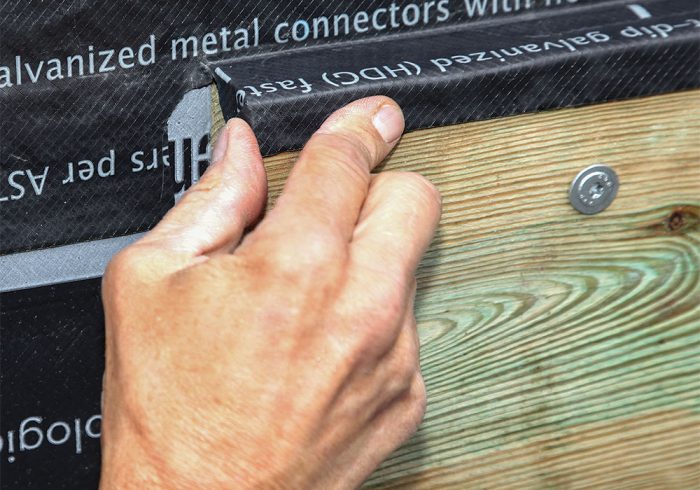
Get in the corner
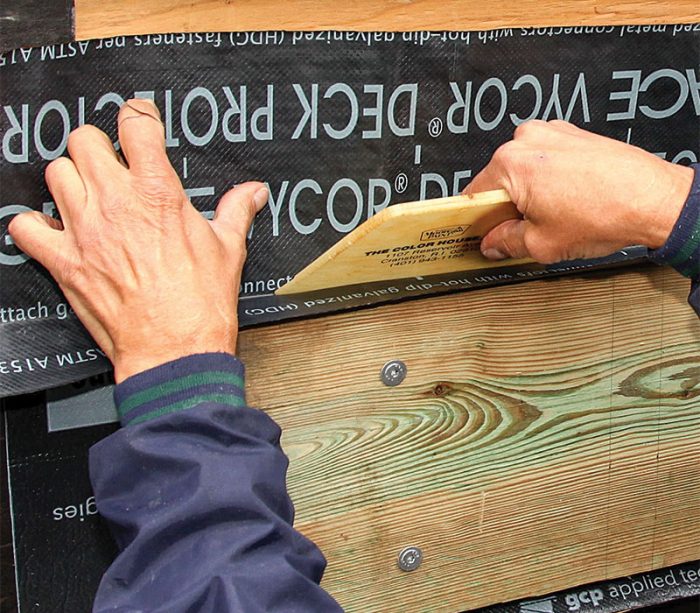
Get in the corner. Using a plastic spreader (a putty knife or the edge of a rafter square work well for this task), press the score line into the corner between the top of the ledger and the wall.
Wrap the top
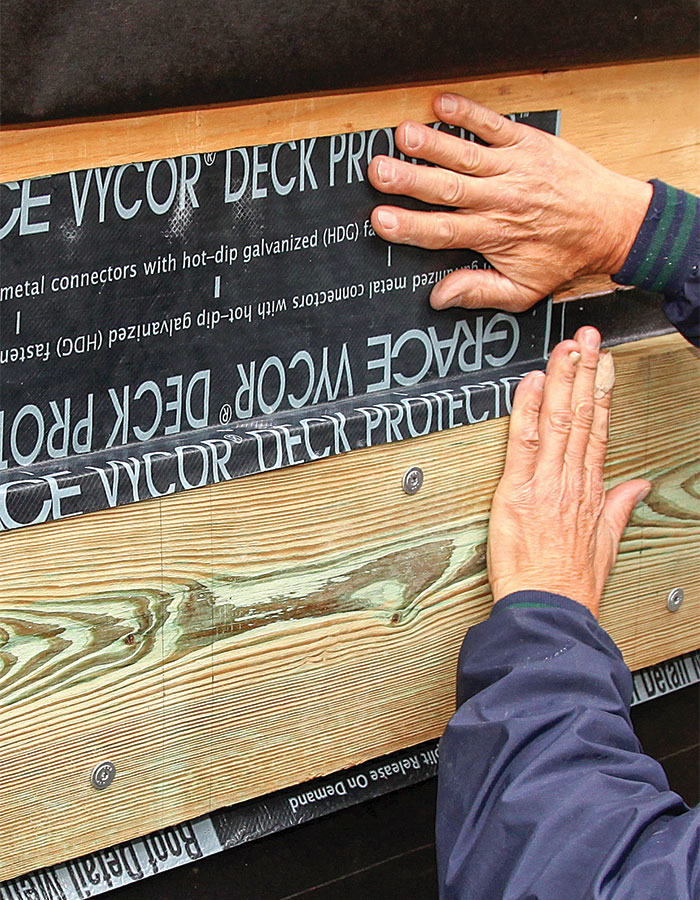
Wrap the top. With the tape tight to the corner, press the tape down to the top of the ledger and wrap the remainder over the face of the ledger.
Release the flashing tape
Release the flashing tape. Fold the upper section of tape down and peel off the release liner, then carefully lift the flashing tape onto the wall.
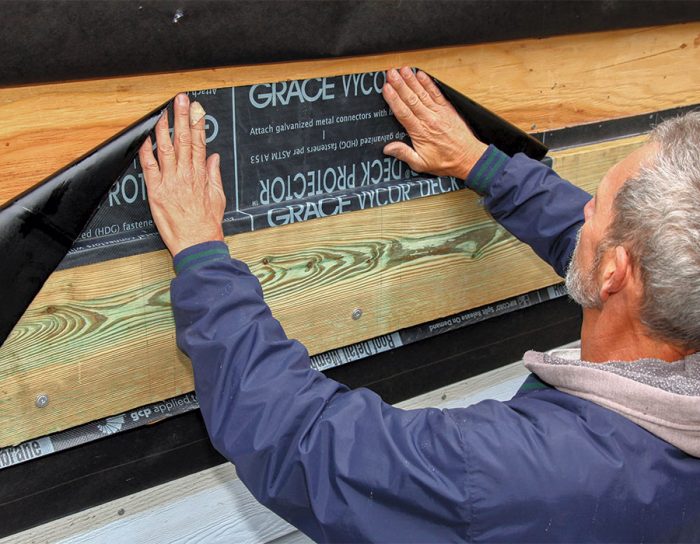
Press the tape
Press the tape. Adhere the tape to the wall starting in the center and working toward each end of the strip. Take care not to pull upward, which can leave an air space at the ledger-to-wall corner and may cause the tape to tear when the cap flashing and decking are installed.
Wrap the ends
Wrap the ends. Where the flashing tape wraps over the ledger at the ends, start with a diagonal relief cut a short distance from the corner where the top of the ledger meets the wall. Fold the membrane over the end of the ledger, stretching it down to seal the intersecting corner. Use the same technique to apply the additional strips of membrane along the top of the ledger, overlapping each previous piece by about 4 in.

STEP 4: Make and install rigid cap flashing

The IRC requires any metal flashing to be at least 26 ga. or 0.019 in. thick. Some of the stock cap flashing sold at box stores and lumberyards is only 0.011 in. thick and won’t meet the code requirements. But standard colored aluminum coil stock is usually 0.019 in. or slightly thicker, so that is my go-to material choice for making flashing. The upper leg of this deck-ledger flashing should be at least 7 in. wide. Some people just form a simple L-shaped flashing, leaving a wider ledger leg that extends straight out over the top of the deck joists instead of turning down the face of the ledger. If you choose this alternative, don’t let the joist leg extend beyond the gap in the decking planks; otherwise it can trap leaves and other debris that can be difficult to clean out.
Bend the stock
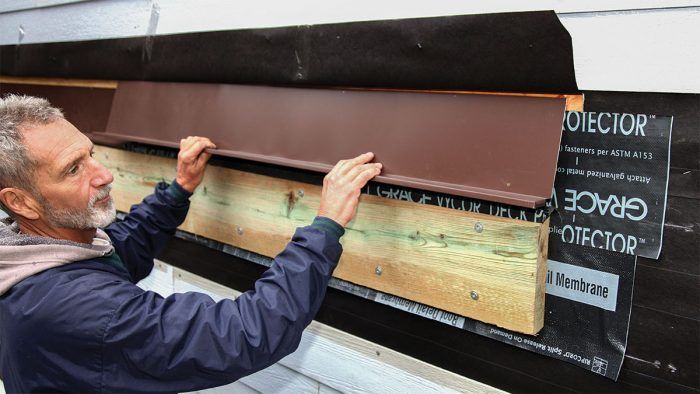
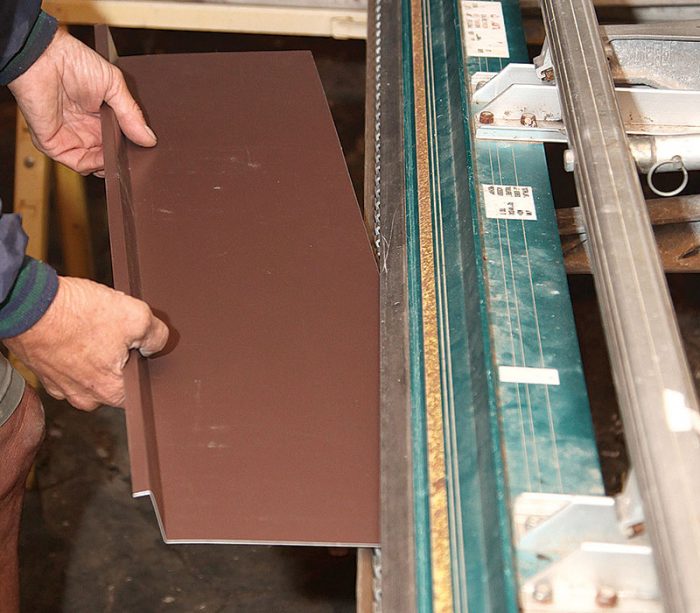
Bend the stock. I haven’t found preformed metal or plastic cap flashing with a tall enough back leg for my liking (at least 7 in.), so I bend my own on a metal brake.
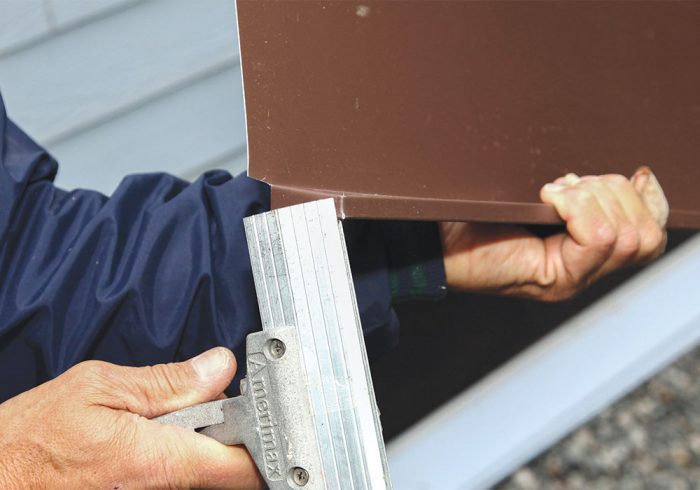
Form the return
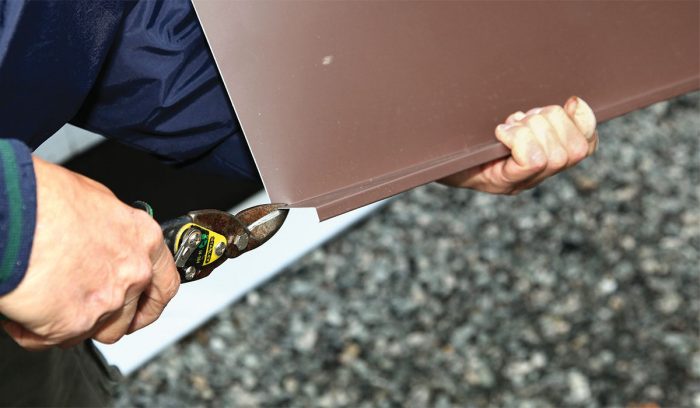
Form the return. To create an end return for the cap flashing, make ½-in. snips along both corner seams.
Create the corners
Create the corners. Fold the end section down to form a corner using a sheet-metal hand-seamer.
Nail the flashing
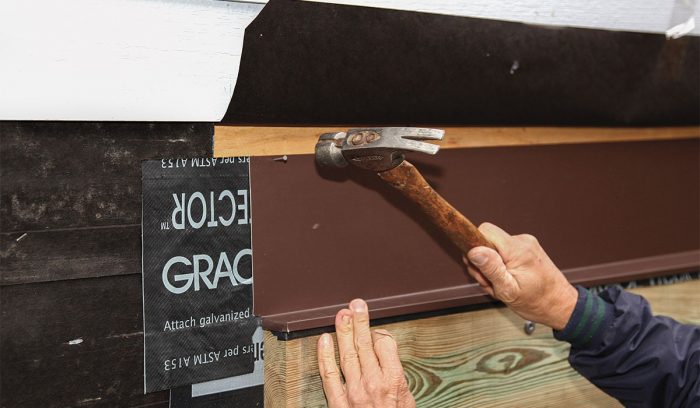
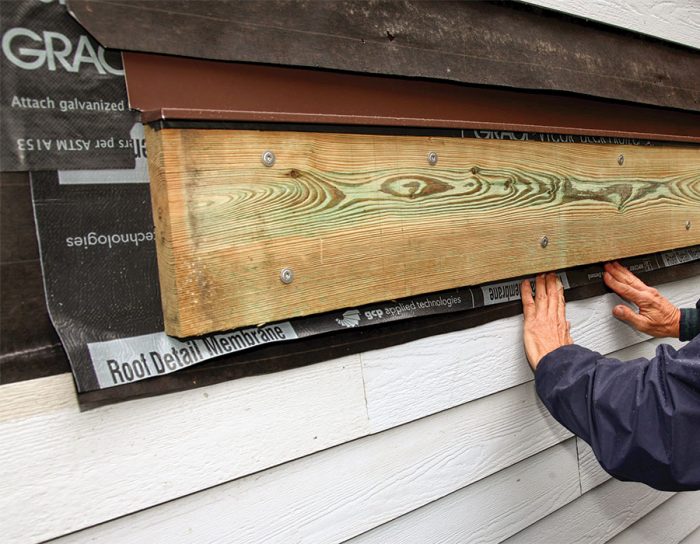
Nail the flashing. Attach the rigid flashing in place using roofing or siding nails driven along the top edge.
Lower the flap
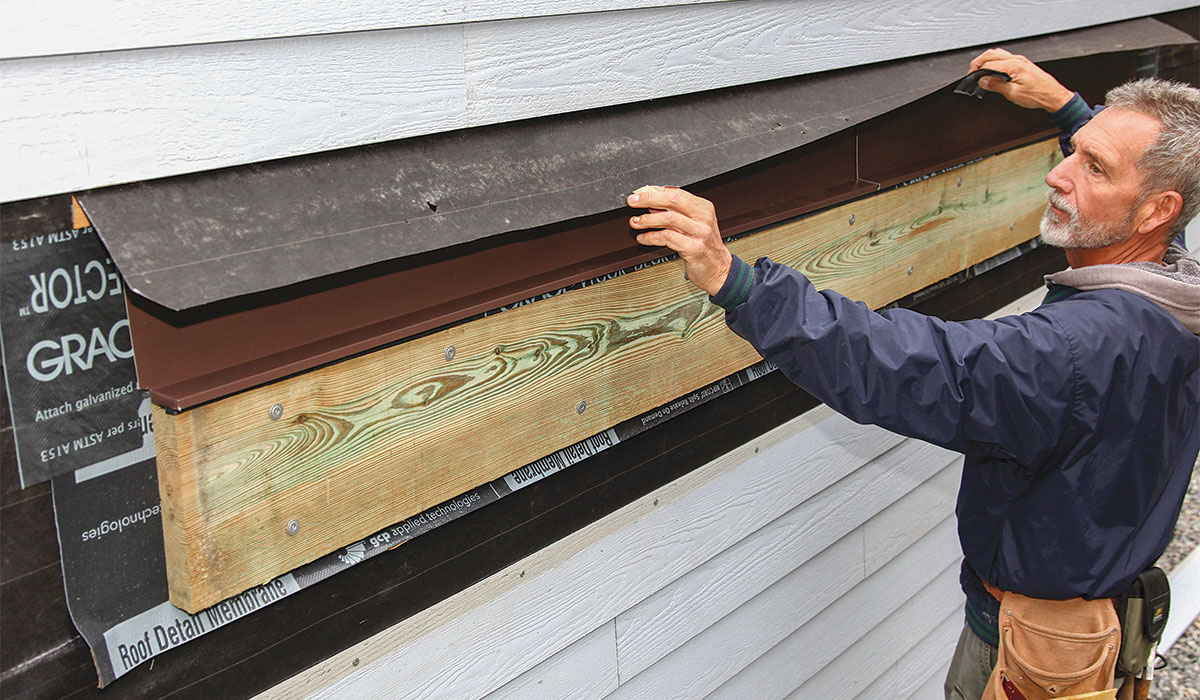
Lower the flap. When the rigid flashing is in place, fold the WRB flap down over it.
Tape the ends of the flap
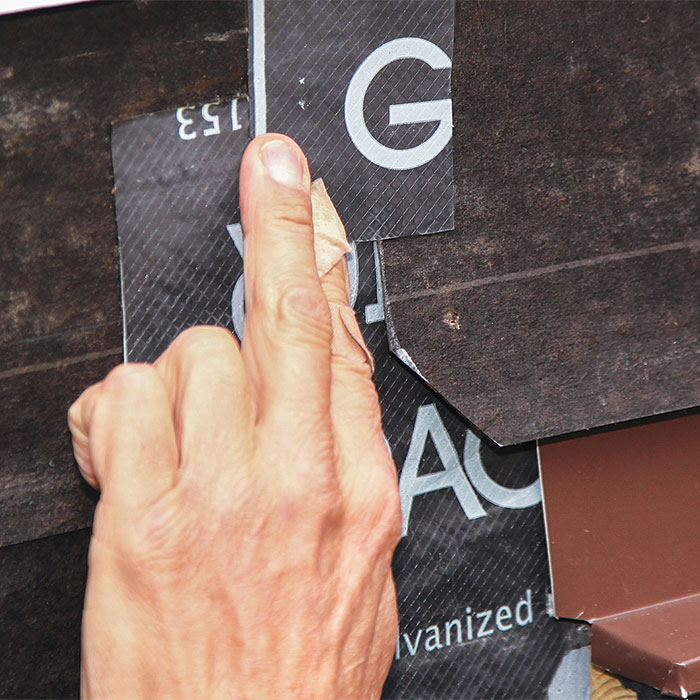
Tape the ends of the flap. Cover the slit on the sides of the WRB with small pieces of flashing tape to complete the waterproofing assembly.

STEP 5: Re-install the siding

For this project, the deck is above grade level, and siding covers the wall beneath the ledger. I first re-install the lap siding up to the next-to-last course below the ledger, and then fold the bottom flap of flashing tape (left unsecured in step two) down over the top of the siding to direct water away from the wall.
Re-side below the ledger
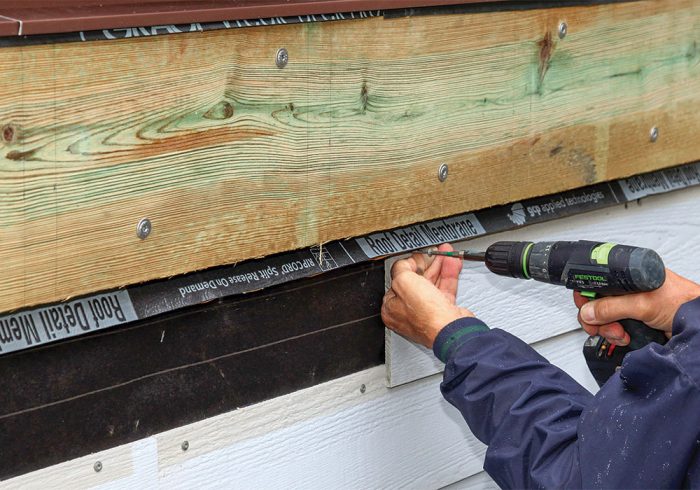
Re-side below the ledger. Reinstall the siding below the ledger, tucking the next-to-last course behind the bottom flap of flashing tape.
Flash below the ledger
Flash below the ledger. Ordinarily I would remove the release strip and adhere the flashing tape to the siding. In this case the flap did not extend down far enough to lap over the siding adequately, so I removed the release strip from the back of the flap and adhered a narrow strip of WRB to the flap.
Lap up the sides of the ledger
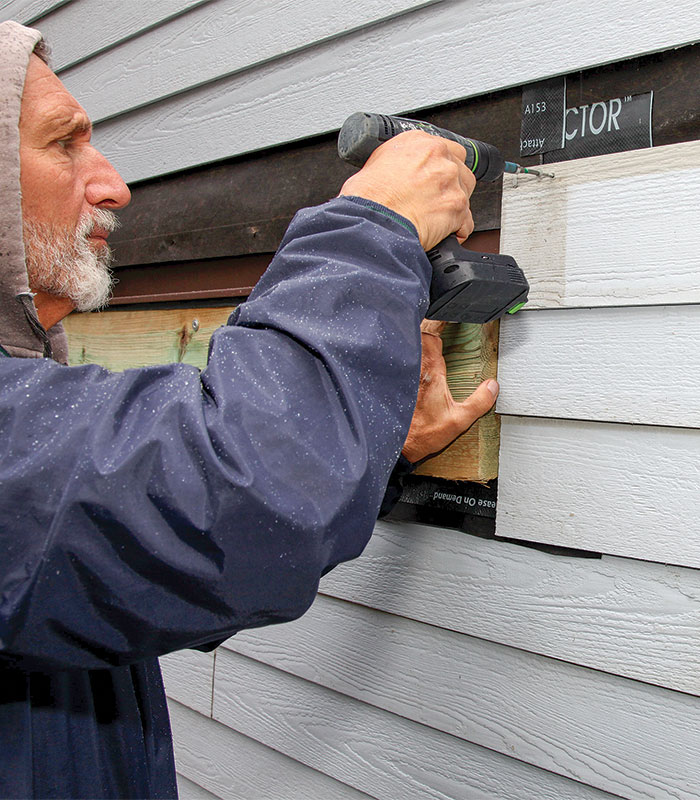
Lap up the sides of the ledger. Continue installing the siding up the sides and over the top of the flashing.
Re-side above the ledger
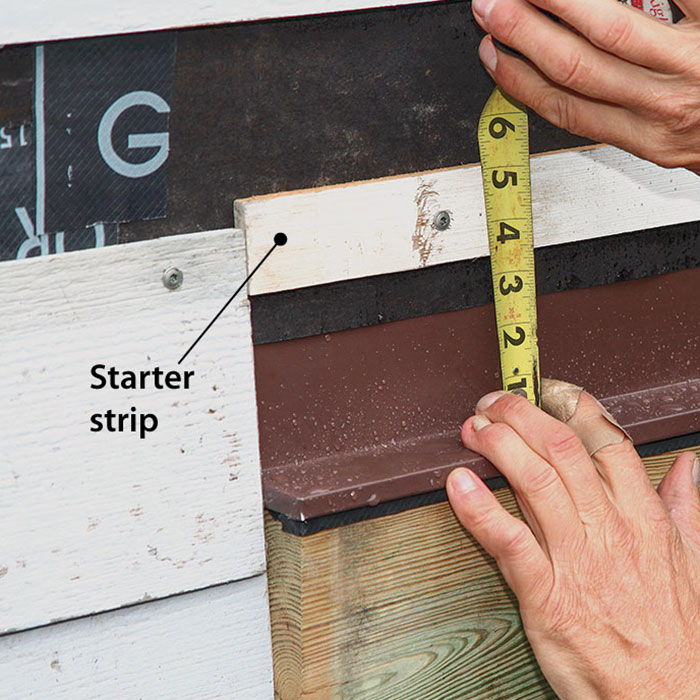
Re-side above the ledger. Be mindful that there needs to be proper clearance space above the decking for the first course of siding. Measure up to the starter strip for that course. On this project, omitting a siding course left 3 in. of space, just enough for the 1-in. decking and required 2-in. air space above the decking. Finish installing the siding above the ledger.
Trim the WRB above the ledger
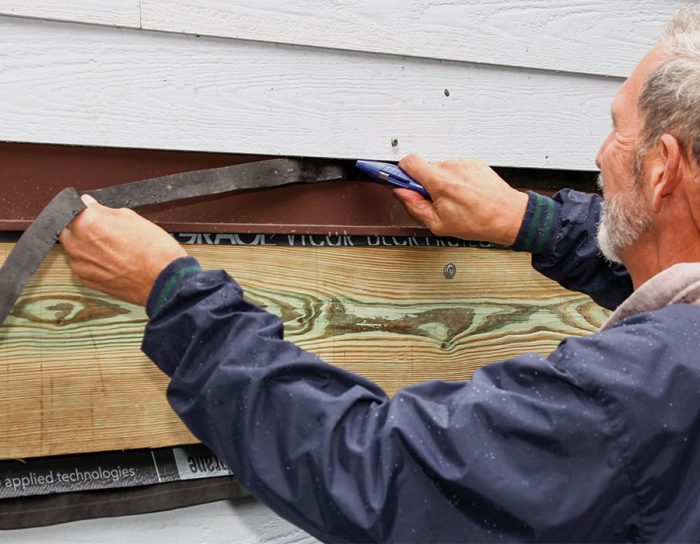
Trim the WRB above the ledger. To finish up above the ledger, slice and remove the WRB that extends down below the siding course above the ledger.
Trim the WRB below the ledger
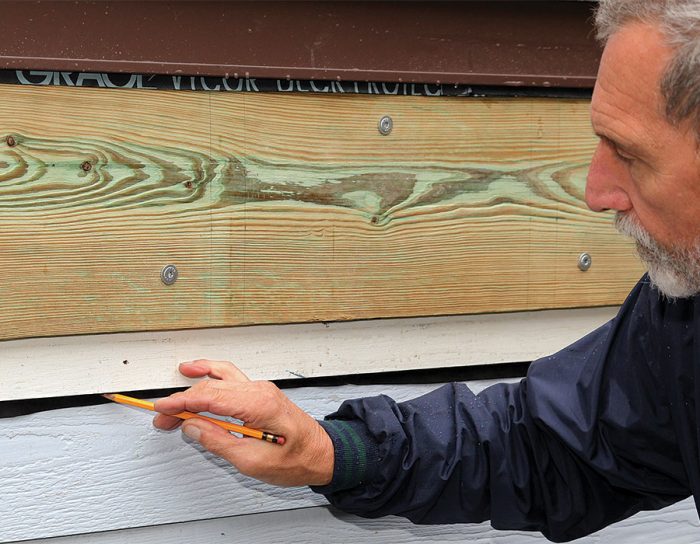
Trim the WRB below the ledger. Back down below the ledger, tack the last piece of siding or trim in place temporarily over the flap of flashing tape. Draw a line along the bottom of the trim to mark any tape that sticks out below the course.
Install the last piece of siding
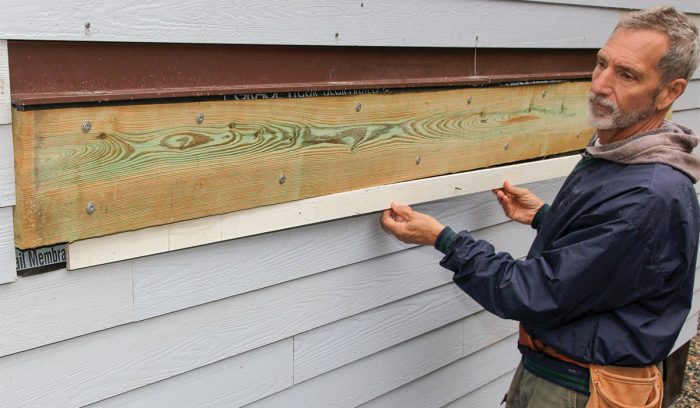
Install the last piece of siding. Remove the trim piece and cut off the excess flashing tape about 1 ⁄ 4 in. above the drawn line. Then install the trim piece below the ledger.

—Editorial advisor Mike Guertin lives and works in East Greenwich, R.I

Photos by Roe Osborn.

For more photos and details, click the View PDF button below:

From Fine Homebuilding #313


RELATED STORIES

  • Expert Session: Flashing a Deck Ledger
  • Deck Flashing
  • Flashing a Deck the Hard Way

Fine Homebuilding Recommended Products

Fine Homebuilding receives a commission for items purchased through links on this site, including Amazon Associates and other affiliate advertising programs.
N95 Respirator

PPE is a must, especially when cutting and sanding. We recommend you always have a box of respirator masks on the job site.
Buy at Amazon

Angel Guard Deck Demon

Demo has never been easier with the deck demon. The tool keeps the worker in an upright position and uses leverage to remove decking from framing, a must have tool for demo.
Buy at Amazon

MicroFoam Nitrile Coated Work Gloves

These gloves are comfortable and have a good grip, making for splinter-free work.
Buy at Amazon
View PDF
Previous: Flashing a Deck the Hard Way Next: Critical Deck-Framing Connections, Part 2: Beams and Support Posts

Guide

Decks

Chapter

Framing a Deck

Sign up for eletters today and get the latest how-to from Fine Homebuilding, plus special offers.

Signing you up...

This site is protected by reCAPTCHA and the Google Privacy Policy and Terms of Service apply.
See all newsletters
See all newsletters

View Comments

  1. margaretcika | Sep 23, 2023 06:49am | #1

    This is really an impressive work. Thx!

Log in or create an account to post a comment.

Sign up Log in

Become a member and get full access to FineHomebuilding.com

Decks

Decks

Hundreds of articles and videos by top deck-building pros on how to design and build a beautiful, sturdy, and safe deck

View Project Guide

View All Project Guides »

Become a member and get unlimited site access, including the Decks Project Guide.

Start Free Trial

Design & Planning
  • Basic Design Options
  • Generating Plans
  • Calculating Deck Loads
  • Code Compliance
Tools & Materials
  • Deck Building Tools
  • Foundation and Framing Materials
  • Decking Materials
  • Fasteners and Hardware
Footings & Foundations
  • Choosing a Foundation
  • Sizing and Laying Out Footings
  • Excavation
  • Pouring the Foundation
Framing a Deck
  • Framing Overview
  • Installing the Ledger
  • Setting Posts and Beams
  • Installing Joists
Installing Decking
  • Decking Basics
  • Installation Process
  • Adding Fascia and Other Decorative Elements
Installing Railings
  • Installing Deck Railing Posts
  • Building Wood Rails and Balustrades
  • Non-Wood Railing Options
  • Installing Nonwood Balustrades
Deck Stairs
  • Deck Stairs Overview
  • Laying Out, Cutting, and Installing the Stringers
  • Installing Treads, Risers, and Stair Railings
Custom Details
  • Benches, Planters, and Privacy Features
  • Pergolas
  • Lighting
Finishes, Repairs, and Maintenance
  • Deck Finishes
  • Cleaning and Refinishing
  • Inspection and Repair
Complete Deck Builds
  • Grade-Level Decks
  • Raised Decks

Fine Home Building

Newsletter Sign-up

  • Fine Homebuilding

    Home building tips, offers, and expert advice in your inbox.

  • Green Building Advisor

    Building science and energy efficiency advice, plus special offers, in your inbox.

  • Old House Journal

    Repair, renovation, and restoration tips, plus special offers, in your inbox.

Signing you up...

This site is protected by reCAPTCHA and the Google Privacy Policy and Terms of Service apply.
See all newsletters

Follow

  • Fine Homebuilding

    Dig into cutting-edge approaches and decades of proven solutions with total access to our experts and tradespeople.

    Start Free Trial Now
    • Facebook
    • Instagram
    • X
    • LinkedIn
  • GBA Prime

    Get instant access to the latest developments in green building, research, and reports from the field.

    Start Free Trial Now
    • Facebook
    • YouTube
  • Old House Journal

    Learn how to restore, repair, update, and decorate your home.

    Subscribe Now
    • Facebook
    • Instagram
    • X

Membership & Magazine

  • Online Archive
  • Start Free Trial
  • Magazine Subscription
  • Magazine Renewal
  • Gift a Subscription
  • Customer Support
  • Privacy Preferences
  • About
  • Contact
  • Advertise
  • Careers
  • Terms of Use
  • Site Map
  • Do not sell or share my information
  • Privacy Policy
  • Accessibility
  • California Privacy Rights

© 2025 Active Interest Media. All rights reserved.

Fine Homebuilding receives a commission for items purchased through links on this site, including Amazon Associates and other affiliate advertising programs.

  • Home Group
  • Antique Trader
  • Arts & Crafts Homes
  • Bank Note Reporter
  • Cabin Life
  • Cuisine at Home
  • Fine Gardening
  • Fine Woodworking
  • Green Building Advisor
  • Garden Gate
  • Horticulture
  • Keep Craft Alive
  • Log Home Living
  • Military Trader/Vehicles
  • Numismatic News
  • Numismaster
  • Old Cars Weekly
  • Old House Journal
  • Period Homes
  • Popular Woodworking
  • Script
  • ShopNotes
  • Sports Collectors Digest
  • Threads
  • Timber Home Living
  • Traditional Building
  • Woodsmith
  • World Coin News
  • Writer's Digest
Active Interest Media logo
X
X
This is a dialog window which overlays the main content of the page. The modal window is a 'site map' of the most critical areas of the site. Pressing the Escape (ESC) button will close the modal and bring you back to where you were on the page.

Main Menu

  • How-To
  • Design
  • Tools & Materials
  • Video
  • Blogs
  • Forum
  • Project Guides
  • Reader Projects
  • Magazine
  • Members
  • FHB House

Podcasts

  • FHB Podcast
  • ProTalk

Webinars

  • Upcoming and On-Demand

Podcasts

  • FHB Podcast
  • ProTalk

Webinars

  • Upcoming and On-Demand

Popular Topics

  • Kitchens
  • Business
  • Bedrooms
  • Roofs
  • Architecture and Design
  • Green Building
  • Decks
  • Framing
  • Safety
  • Remodeling
  • Bathrooms
  • Windows
  • Tilework
  • Ceilings
  • HVAC

Magazine

  • Current Issue
  • Past Issues
  • Magazine Index
  • Subscribe
  • Online Archive
  • Author Guidelines

All Access

  • Member Home
  • Start Free Trial
  • Gift Membership

Online Learning

  • Courses
  • Project Guides
  • Reader Projects
  • Podcast

More

  • FHB Ambassadors
  • FHB House
  • Customer Support

Account

  • Log In
  • Join

Newsletter

Get home building tips, offers, and expert advice in your inbox

Signing you up...

This site is protected by reCAPTCHA and the Google Privacy Policy and Terms of Service apply.
See all newsletters
See all newsletters

Follow

  • X
  • YouTube
  • instagram
  • facebook
  • pinterest
  • Tiktok

Join All Access

Become a member and get instant access to thousands of videos, how-tos, tool reviews, and design features.

Start Your Free Trial

Subscribe

FHB Magazine

Start your subscription today and save up to 70%

Subscribe

This is your last free article.

Don't miss another expert tip or technique from building pros. Start your free trial today.

Start your FREE trial

Already a member? Log in

We hope you’ve enjoyed your free articles. To keep reading, become a member today.

Get complete site access to expert advice, how-to videos, Code Check, and more, plus the print magazine.

Start your FREE trial

Already a member? Log in

Privacy Policy Update

We use cookies, pixels, script and other tracking technologies to analyze and improve our service, to improve and personalize content, and for advertising to you. We also share information about your use of our site with third-party social media, advertising and analytics partners. You can view our Privacy Policy here and our Terms of Use here.

Cookies

Analytics

These cookies help us track site metrics to improve our sites and provide a better user experience.

Advertising/Social Media

These cookies are used to serve advertisements aligned with your interests.

Essential

These cookies are required to provide basic functions like page navigation and access to secure areas of the website.

Delete My Data

Delete all cookies and associated data