Eliminating Efflorescence on Brick Below a Window
Missing or incorrect flashing under a brick sill causes these white salt deposits, which can damage brick over time. Here's how to fix that.

In 2013, I purchased a new home that has a brick facade. Last summer I noticed that on the brick under two of the windows, where the brick is angled, a white dust appeared and has been growing. I checked the caulking where the window meets the brick, and everything looks sealed up tight. Why is this occurring? Is the fix as simple as cleaning off the brick, or do I have larger issues I should be worried about?
—James Floyd via email
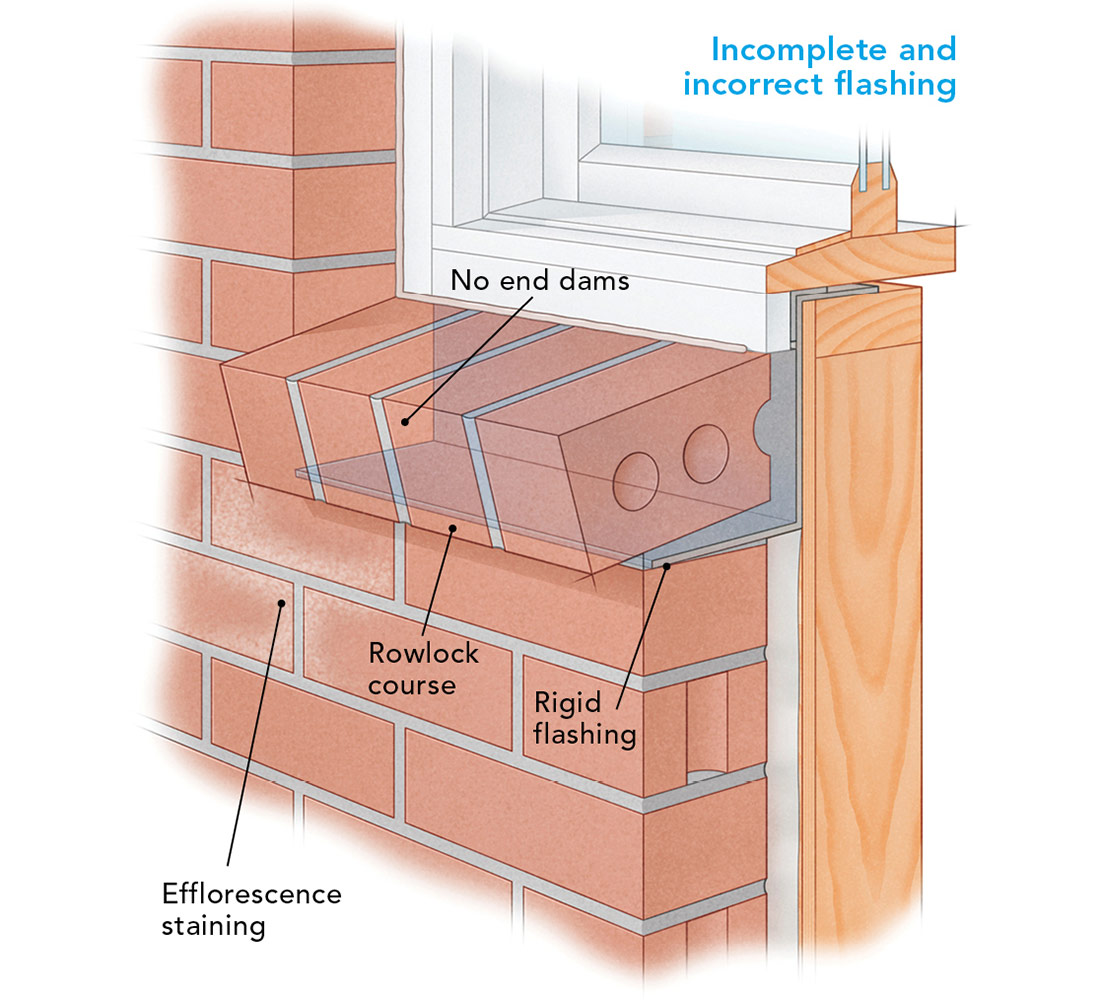
Steven Fechino, engineering and construction manager at Mortar Net Solutions, replies: Those angled bricks laid on their side are called a rowlock course. A sill made up of a rowlock course is designed and constructed to shed water away from the veneer. It’s likely that water is entering at the top of the rowlock course through hairline cracks and saturating the two or three courses of bricks below it. The cause could be incomplete or incorrect flashing details, which are allowing water infiltration and causing the white dust, called efflorescence, to appear. Efflorescence is an indication of active water passing through the masonry and depositing salt on the surface of the bricks when the moisture evaporates. This is more than a cosmetic problem—expanding salt crystals near the surface of the brick will create mechanical forces that can damage the surface of the brick over time. Cleaning the brick veneer with brick acid or water will not be a long-term solution to this problem. Here are a few of the more common flashing fails I’ve seen over the years:
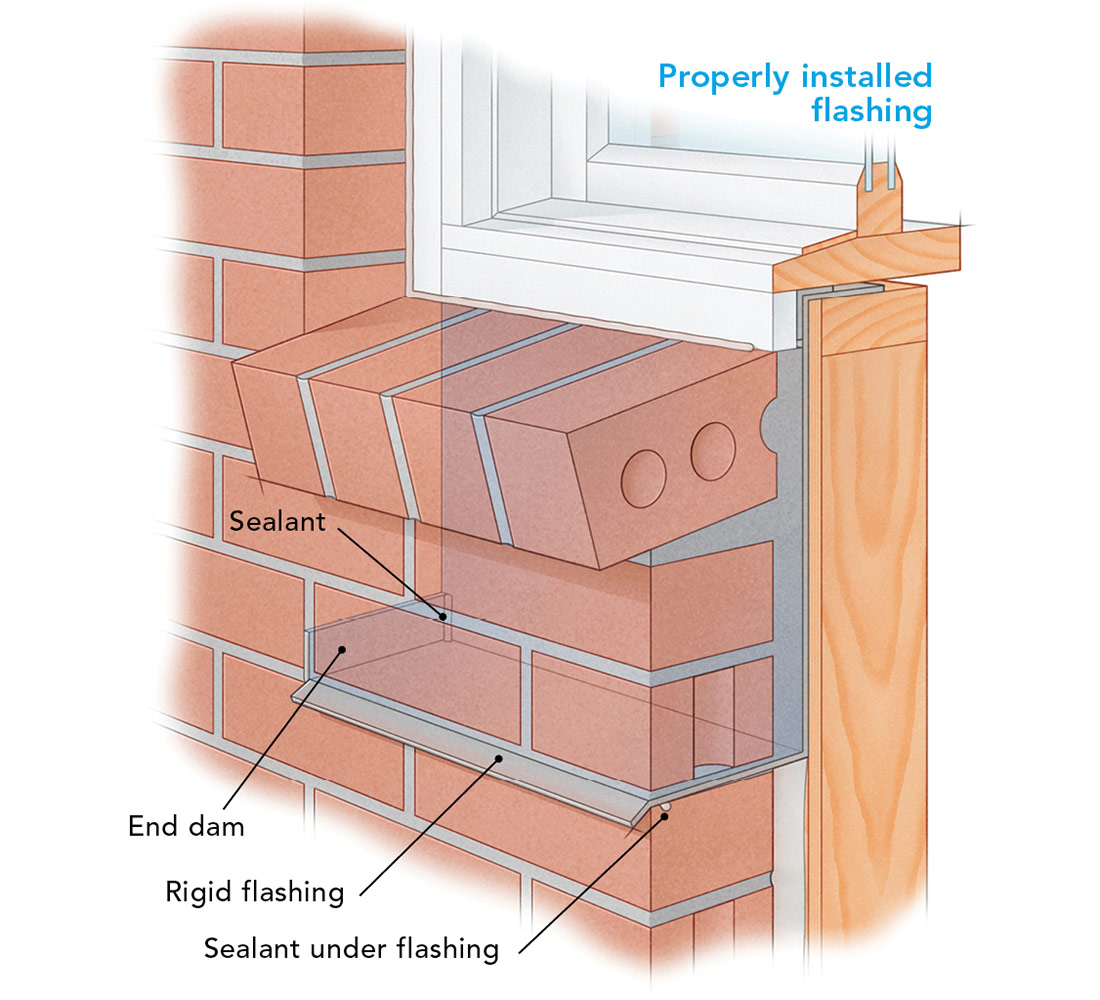
First, there is a real possibility that there is no flashing installed at all. There should be rigid flashing that runs up under the window, down the wall, and then out through a mortar joint to daylight. If installed correctly, this flashing will capture any water that finds its way between the window unit and brick and direct it back to the front of the veneer. It’s rare to find this flashing detail missing on commercial buildings, but unfortunately, it is more commonly neglected on residential projects.
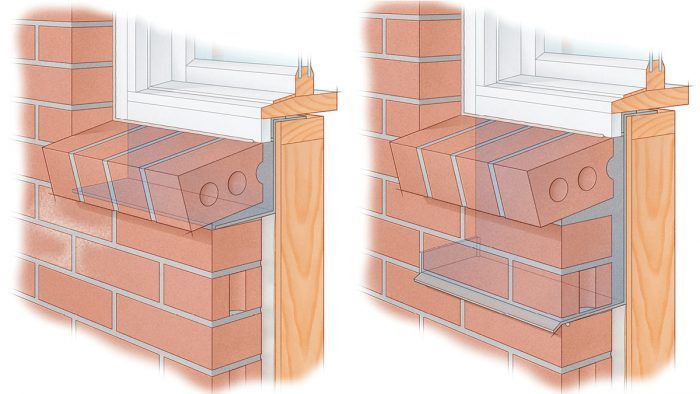
Another scenario is that there is flashing in place, but it’s been installed incorrectly. One common windowsill flashing mistake is to run the flashing directly below the rowlock course itself. When a rowlock course sits directly on the flashing, the mortar between the bricks is more prone to cracking during the normal moisture-related expansion and contraction that occurs during the freeze-thaw cycle. Industry standards advise that the flashing be placed at least one full course below the rowlock course, but I always recommend installing the flashing two courses below the rowlock course—this will ensure that the masonry above the flashing has enough mass to effectively handle the normal thermal cycles.
While installing the flashing directly under the rowlock course could compromise the integrity of their mortar joints, the flashing should still direct any unwanted water back outdoors—but only if the flashing was installed with a dam on either end. All properly installed flashings should have an end dam on the terminating sides of the flashing where it crosses the bed joint. End dams can be purchased and installed with sealant, or the mason can pull the end of the flashing up into the head joint. The end dams will prevent collected water from running off the end of the flashing into the wall cavity.
It can be difficult to know for sure if the flashing was installed under the rowlock, one course down, or not at all. Sometimes the flashing is visible, but often the masons leave it just shy of the surface, which is perfectly fine. If this is the case, you will likely see a hairline crack that runs the length of the mortar joint. Unfortunately, if there is no flashing on your wall or the absence of end dams is allowing water infiltration, the fix is to remove the rowlock and two additional courses and properly install the flashing. You may be able to reuse many of the same bricks, but if some get damaged, bring a sample to your local brick supplier for replacements. As with any brick repair, use Type N mortar, and I recommend you take the time to do a dried mortar color sample in order to find the best color match.
Drawings: Peter Wojcieszek
From Fine Homebuilding #313
RELATED STORIES


