FHB Logo Facebook LinkedIn Email Pinterest Twitter X Instagram Tiktok YouTube Plus Icon Close Icon Navigation Search Icon Navigation Search Icon Arrow Down Icon Video Guide Icon Article Guide Icon Modal Close Icon Guide Search Icon Skip to content
Subscribe
Log In
  • How-To
  • Design
  • Tools & Materials
  • Restoration
  • Videos
  • Blogs
  • Forum
  • Magazine
  • Members
  • FHB House
  • Podcast
Log In

Fine Homebuilding Project Guides

Foundations and Masonry Work

Guide Home
  • Concrete & Masonry Basics
  • Building Foundations
  • Waterproofing Foundations
  • Retrofits and Add-ons
  • Masonry in the Landscape
  • Brick

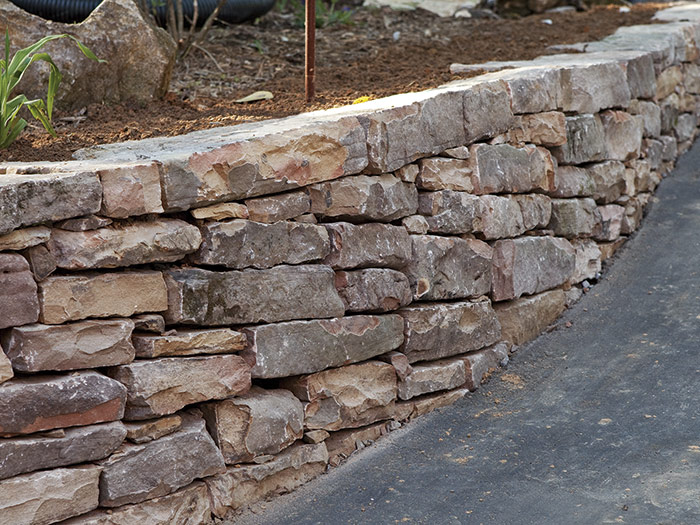
Setting the Stones for a Dry-Stack Retaining Wall

Get tips for choosing the right stones and fitting them properly to create an attractive and long-lasting garden wall.

By Cody Macfie
  • X
  • facebook
  • linkedin
  • pinterest
  • email
  • add to favorites Log in or Sign up to save your favorite articles

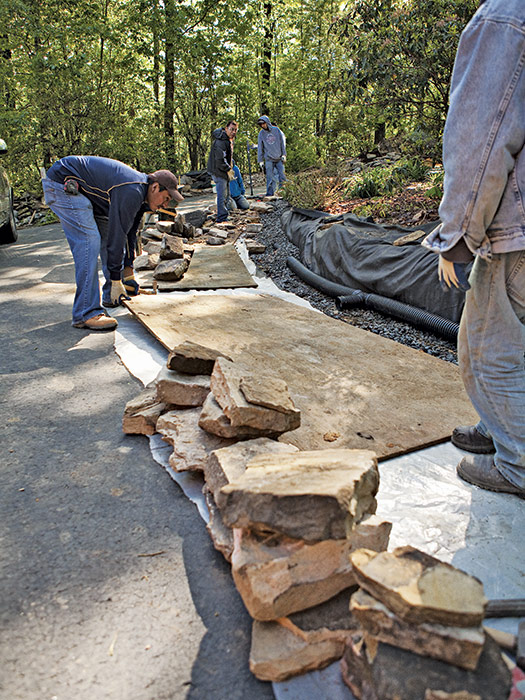
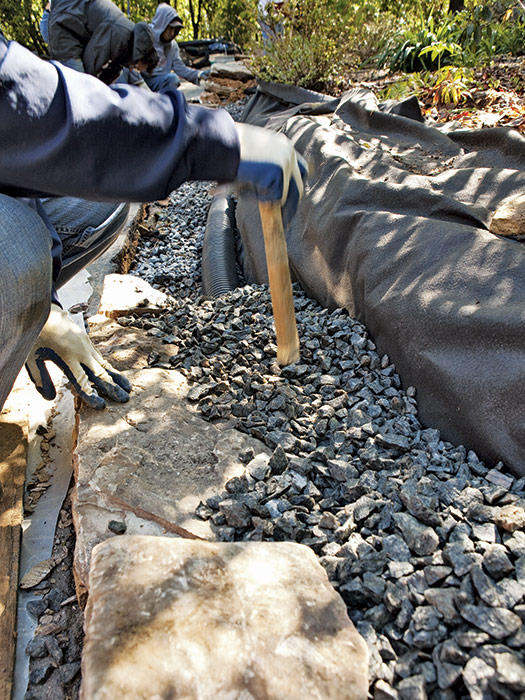
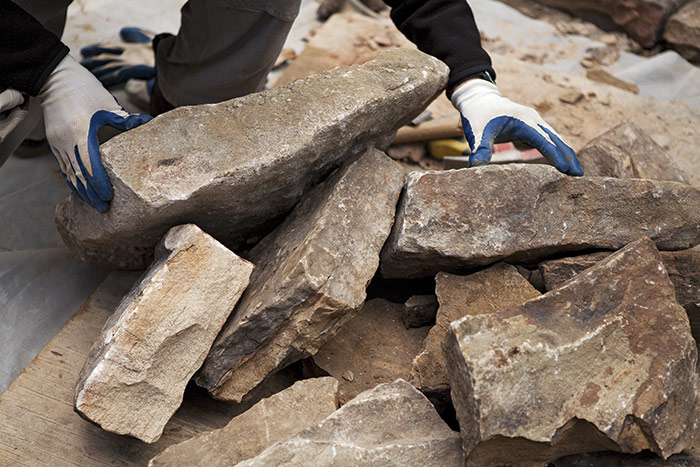
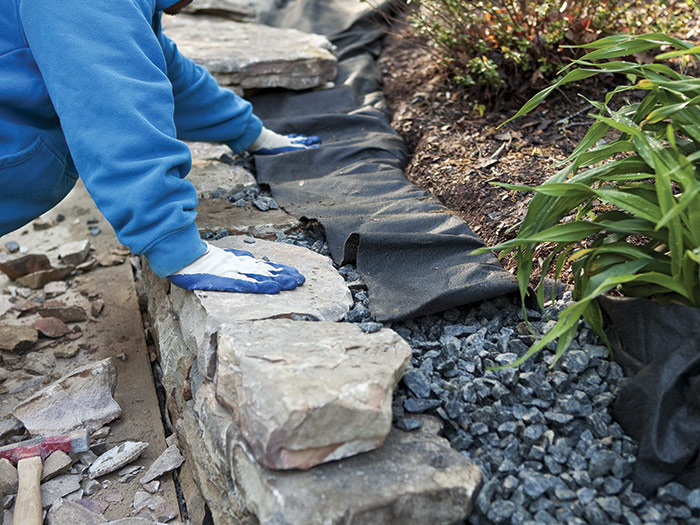
Before you start stacking stones, prepare the site by removing soil left from the excavation and set up a work area. Lay down plastic sheeting to protect driveways and patios 1. Lay out three sheets of plywood as well; pile unshaped stones on one, pile gravel on the second, and reserve the third one for shaping stones. Keep the work zones close together to minimize unnecessary movement.

Set up a zone
1. Set up a zone where there is enough room to work, keep materials close at hand, and have unobstructed access to the wall area.


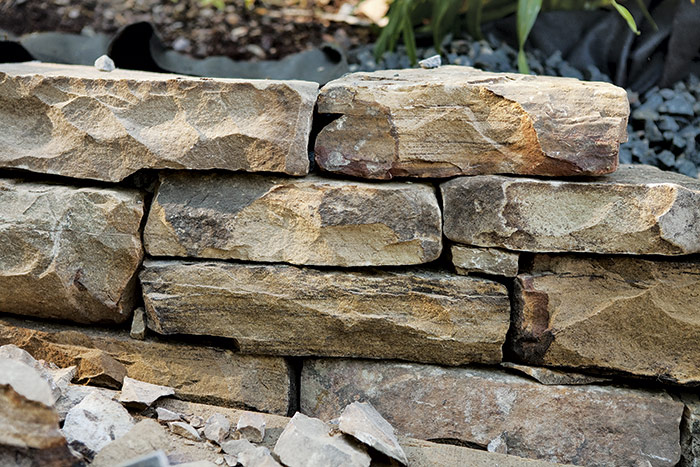
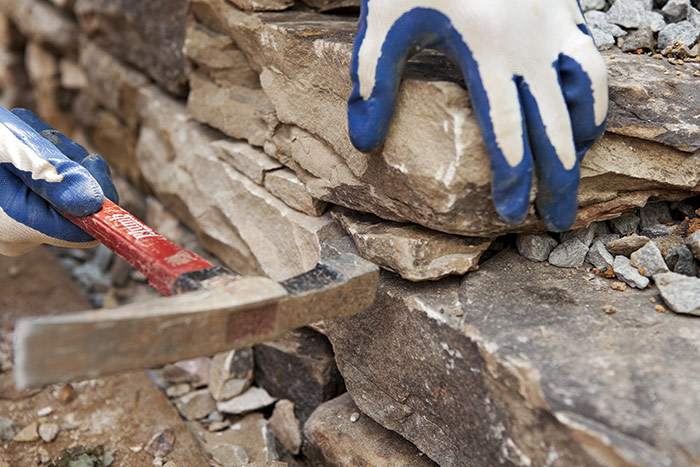
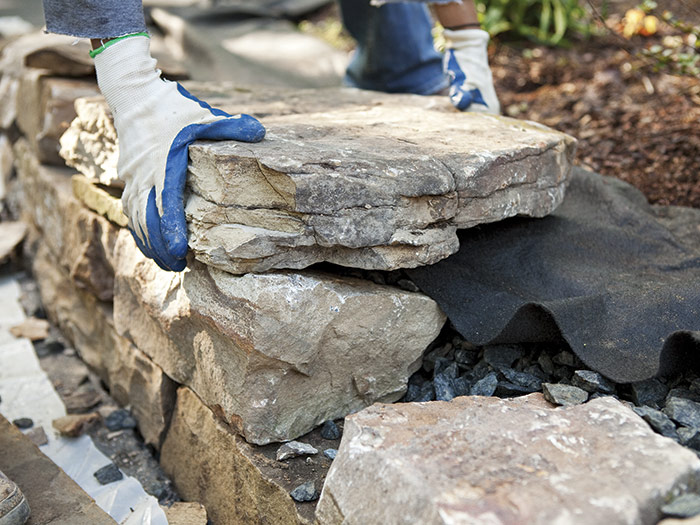
Use large stones, with the best edges facing out, for the bottom course; they will anchor the wall, both visually and structurally 2. Vary the stone heights to break long-running horizontal joints. Also, cross (or break) all vertical joints when possible. This is important for both structural and aesthetic reasons. The more often you cross the joints, the better the stones lock together and the better it will look 3.

Lay the first course
2. Lay the first course. Use larger stones to anchor the wall both visually and structurally.


break both horizontal and vertical joints
3. Cross, or break, both horizontal and vertical joints. Breaking joints makes the wall stronger and more visually appealing.


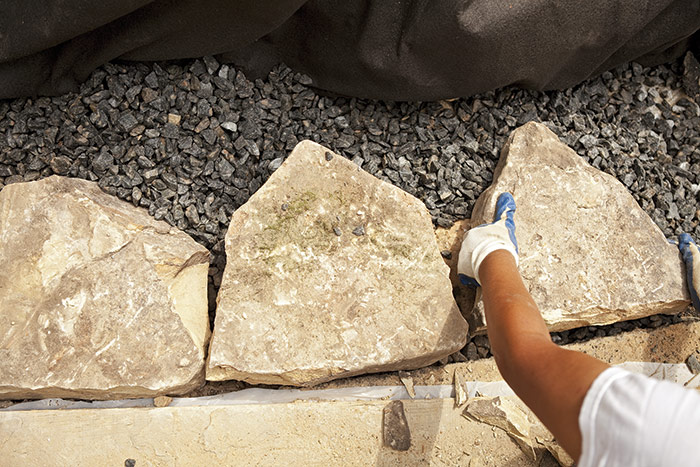
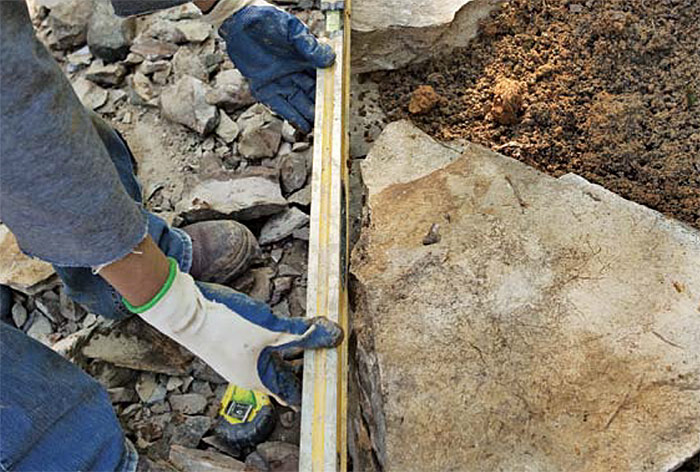
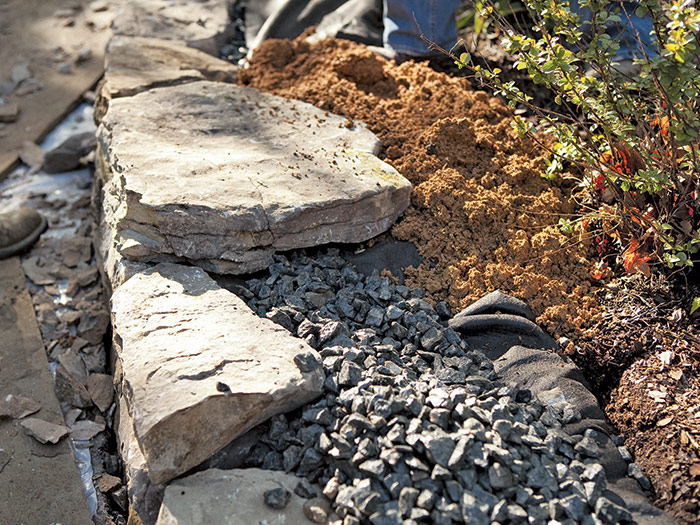
Once you lay a row of 9 or 10 stones, backfill with clean gravel 4. If any of the stones in the next course are wider than the previous course, the gravel will provide a level area large enough to accommodate them. Add enough gravel under stones that taper to ensure that the tops of the stones are level from back to front. This not only makes the wall stronger but also makes it easier to set the next row of stones. If a stone is not level from side to side, use the small shards left over from shaping stones to shim it 5. Shims are also good for filling small voids that are inevitable regardless of how carefully you shape the stones. However, don’t use shims as a substitute for shaping stones to fit.

Fill behind set stones
4. Fill behind set stones with gravel until it’s flush with the top course; settle the gravel with a hammer handle’s butt end.


Add shims
5. Add shims to level stones and to minimize transitions of small gaps between stones.


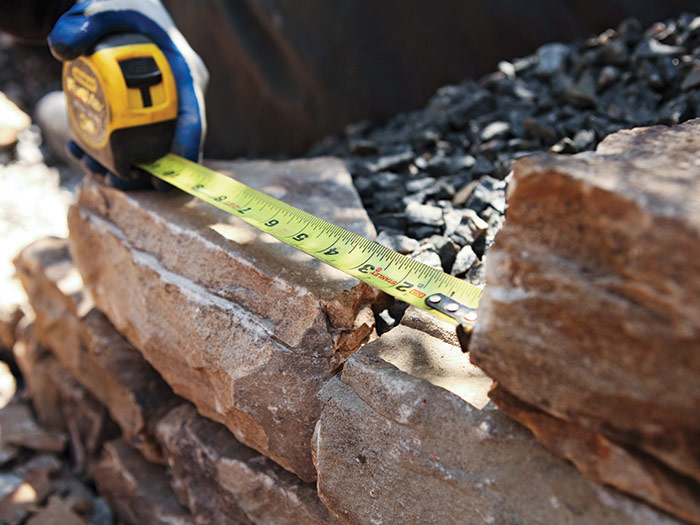
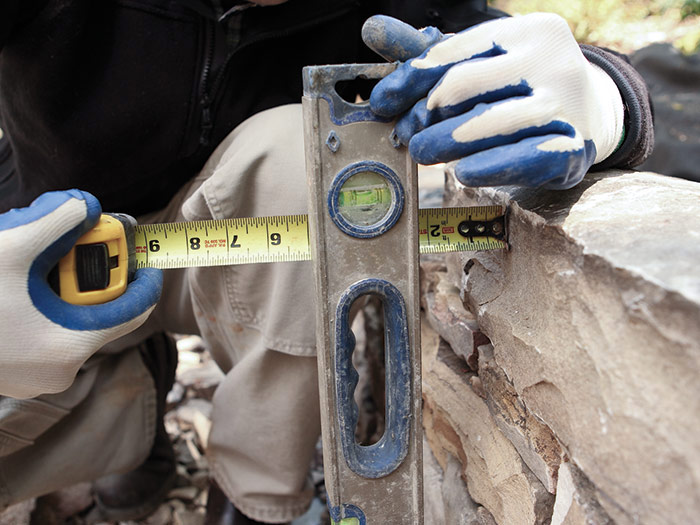
As you build the wall, keep a tape measure handy. Many novice wall builders try to judge size by eye alone. Using a tape measure also helps make it easier to see where the joints will cross 6.

find stones that need as little work
6. Use a tape measure to help find stones that need as little work as possible.


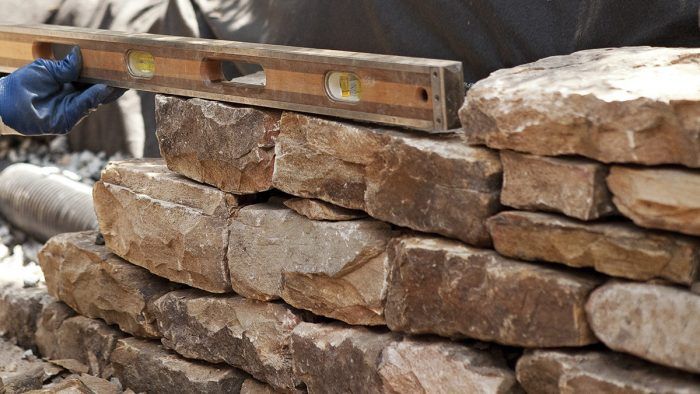
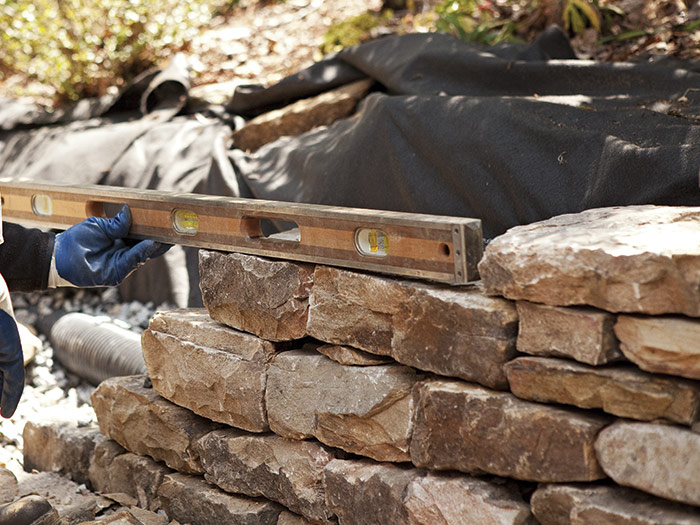
The other tool to keep on hand is a level. Periodically, check the coursework to keep the tops of the stones level 7. Even on sloped ground, keep the coursework level. Another reason to use a level is to maintain a batter (a slight backward tilt to the face of the wall). A 1-in.-per-foot batter is good for typical walls 8. Lastly, use the level to keep the face uniform 9. Even for a curved wall, eyeing the wall with a level is a good way to identify stones that are set too far in or out.

Level the stone tops
7. Level the stone tops. Stones will sit more securely over time if they are laid on a level surface.


Establish a pitch
8. Establish a pitch, or batter, to the wall face. The slight backward tilt helps prevent the soil behind the wall from pushing it over.


create a uniform face
9. Use levels and stringlines to create a uniform face. Sight along the wall often to check your work.


selecting stones
Efficient Stonework

The key to shaping stones efficiently is to select the right ones. If you look at the photo at right, two stones pop out. The first is the rectangular stone, at lower left. This stone, with its even, parallel faces, is almost ready to place despite being a little narrow; it will not require much work. The big stone that I’m resting my right hand on is irregular in shape, and worse, has a big bulge on the bottom face. A bulge like this is very difficult to remove, so I would set this stone aside. The stone upon which I have my left hand is marginal; before I spend much time with it, I would try to remove the bulge across its bottom. The stone in the middle is probably the best of the lot, with its wide rectangular shape and enough depth to add stability to the wall. By sharpening your eye when selecting stones, you’ll build more wall in less time. 


Setting Capstones

The height of the retaining wall is largely determined by the height of the bank against which you’re building. When the wall is a few inches below the bank, begin to anticipate how you will set the capstones.

Capstones will likely be of different thicknesses. Rather than trying to break them to the same thickness, adjust the top row of wall stones to accommodate the capstone variations. The goal, of course, is a flat, level row of capstones. You may have to test-fit stones several times before finding combinations that work 1. The height of your wall should be 1 in. to 2 in. below the edge of the bank, and the capstones should pitch forward slightly to allow water to flow over the wall during watering or heavy rain.

Test-fit capstones
1. Test-fit capstones to see whether they are large enough and if the previous course is the correct height given the cap’s thickness.


When you’re ready to set the capstones, fold the filter fabric to the wall, cut off any excess 2, and cover the fabric with gravel 3. Then set the capstones and backfill with soil 4.


Fold filter fabric over the gravel
2. Fold filter fabric over the gravel; trim it where it meets the back of the wall.


Fill behind the wall
3. Fill behind the wall stones with gravel until the gravel is flush with the top of the stones.


plan on having extra help
4. Capstones tend to be large; plan on having extra help on the day you plan to set them.


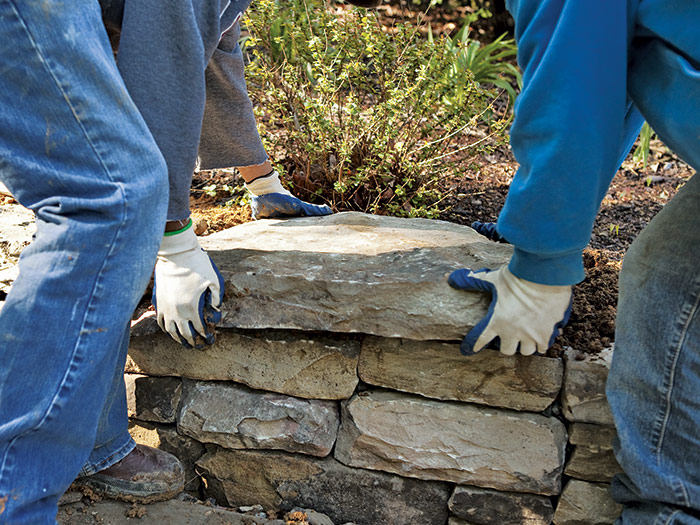
Capstones, in general, need only be deep enough to cover the top of the wall. However, periodically select a stone that spans from the front of the wall well into the bank 5. This will help keep the wall stable over time. In addition, frequently sight along the wall or check it with a level to ensure that the top leading edges are true 6.

Fill behind the capstones with soil

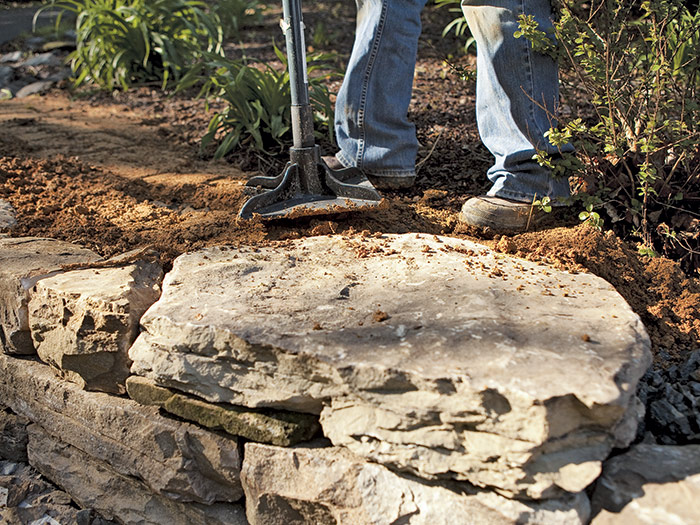
5. Fill behind the capstones with soil. Compact the soil to help it stay put until it is properly landscaped.

Align the top lead edge of the capstones
6. Align the top lead edge of the capstones. This helps give the wall an ordered and substantial appearance.


Masonry Complete

Excerpted from Masonry Complete (The Taunton Press, 2012) by Cody Macfie

Available at Amazon.com.

Previous: Adding a Drain Line for a Dry-Stack Retaining Wall Next: Building Dry Stone Walls

Guide

Foundations and Masonry Work

Chapter

Masonry in the Landscape

Sign up for eletters today and get the latest how-to from Fine Homebuilding, plus special offers.

Signing you up...

This site is protected by reCAPTCHA and the Google Privacy Policy and Terms of Service apply.
See all newsletters
See all newsletters

Log in or create an account to post a comment.

Sign up Log in

Become a member and get full access to FineHomebuilding.com

Foundations and Masonry Work

Foundations and Masonry Work

Trusted, comprehensive guidance from the pros for working with concrete and masonry

View Project Guide

View All Project Guides »

Become a member and get unlimited site access, including the Foundations and Masonry Work Project Guide.

Start Free Trial

Concrete & Masonry Basics
  • Choosing & Mixing Concrete
  • Concrete & Masonry Tools & Techniques
Building Foundations
  • Foundation Basics
  • Foundation Footings
  • Insulated Concrete Forms (ICFs)
Waterproofing Foundations
  • Waterproofing Strategies
  • Foundation Drains
Retrofits and Add-ons
Masonry in the Landscape
  • Patios, Walkways, and Driveways
  • Retaining Walls
  • Dry Stone Walls
  • Fire Pits
Brick

Fine Home Building

Newsletter Sign-up

  • Fine Homebuilding

    Home building tips, offers, and expert advice in your inbox.

  • Green Building Advisor

    Building science and energy efficiency advice, plus special offers, in your inbox.

  • Old House Journal

    Repair, renovation, and restoration tips, plus special offers, in your inbox.

Signing you up...

This site is protected by reCAPTCHA and the Google Privacy Policy and Terms of Service apply.
See all newsletters

Follow

  • Fine Homebuilding

    Dig into cutting-edge approaches and decades of proven solutions with total access to our experts and tradespeople.

    Start Free Trial Now
    • Facebook
    • Instagram
    • X
    • LinkedIn
  • GBA Prime

    Get instant access to the latest developments in green building, research, and reports from the field.

    Start Free Trial Now
    • Facebook
    • YouTube
  • Old House Journal

    Learn how to restore, repair, update, and decorate your home.

    Subscribe Now
    • Facebook
    • Instagram
    • X

Membership & Magazine

  • Online Archive
  • Start Free Trial
  • Magazine Subscription
  • Magazine Renewal
  • Gift a Subscription
  • Customer Support
  • Privacy Preferences
  • About
  • Contact
  • Advertise
  • Careers
  • Terms of Use
  • Site Map
  • Do not sell or share my information
  • Privacy Policy
  • Accessibility
  • California Privacy Rights

© 2025 Active Interest Media. All rights reserved.

Fine Homebuilding receives a commission for items purchased through links on this site, including Amazon Associates and other affiliate advertising programs.

  • Home Group
  • Antique Trader
  • Arts & Crafts Homes
  • Bank Note Reporter
  • Cabin Life
  • Cuisine at Home
  • Fine Gardening
  • Fine Woodworking
  • Green Building Advisor
  • Garden Gate
  • Horticulture
  • Keep Craft Alive
  • Log Home Living
  • Military Trader/Vehicles
  • Numismatic News
  • Numismaster
  • Old Cars Weekly
  • Old House Journal
  • Period Homes
  • Popular Woodworking
  • Script
  • ShopNotes
  • Sports Collectors Digest
  • Threads
  • Timber Home Living
  • Traditional Building
  • Woodsmith
  • World Coin News
  • Writer's Digest
Active Interest Media logo
X
X
This is a dialog window which overlays the main content of the page. The modal window is a 'site map' of the most critical areas of the site. Pressing the Escape (ESC) button will close the modal and bring you back to where you were on the page.

Main Menu

  • How-To
  • Design
  • Tools & Materials
  • Video
  • Blogs
  • Forum
  • Project Guides
  • Reader Projects
  • Magazine
  • Members
  • FHB House

Podcasts

  • FHB Podcast
  • ProTalk

Webinars

  • Upcoming and On-Demand

Podcasts

  • FHB Podcast
  • ProTalk

Webinars

  • Upcoming and On-Demand

Popular Topics

  • Kitchens
  • Business
  • Bedrooms
  • Roofs
  • Architecture and Design
  • Green Building
  • Decks
  • Framing
  • Safety
  • Remodeling
  • Bathrooms
  • Windows
  • Tilework
  • Ceilings
  • HVAC

Magazine

  • Current Issue
  • Past Issues
  • Magazine Index
  • Subscribe
  • Online Archive
  • Author Guidelines

All Access

  • Member Home
  • Start Free Trial
  • Gift Membership

Online Learning

  • Courses
  • Project Guides
  • Reader Projects
  • Podcast

More

  • FHB Ambassadors
  • FHB House
  • Customer Support

Account

  • Log In
  • Join

Newsletter

Get home building tips, offers, and expert advice in your inbox

Signing you up...

This site is protected by reCAPTCHA and the Google Privacy Policy and Terms of Service apply.
See all newsletters
See all newsletters

Follow

  • X
  • YouTube
  • instagram
  • facebook
  • pinterest
  • Tiktok

Join All Access

Become a member and get instant access to thousands of videos, how-tos, tool reviews, and design features.

Start Your Free Trial

Subscribe

FHB Magazine

Start your subscription today and save up to 70%

Subscribe

This is your last free article.

Don't miss another expert tip or technique from building pros. Start your free trial today.

Start your FREE trial

Already a member? Log in

We hope you’ve enjoyed your free articles. To keep reading, become a member today.

Get complete site access to expert advice, how-to videos, Code Check, and more, plus the print magazine.

Start your FREE trial

Already a member? Log in

Privacy Policy Update

We use cookies, pixels, script and other tracking technologies to analyze and improve our service, to improve and personalize content, and for advertising to you. We also share information about your use of our site with third-party social media, advertising and analytics partners. You can view our Privacy Policy here and our Terms of Use here.

Cookies

Analytics

These cookies help us track site metrics to improve our sites and provide a better user experience.

Advertising/Social Media

These cookies are used to serve advertisements aligned with your interests.

Essential

These cookies are required to provide basic functions like page navigation and access to secure areas of the website.

Delete My Data

Delete all cookies and associated data