Podcast 535: Air-Sealing Cape Houses, Smart Watches for Builders, and Repairing Spalling Concrete
The crew hears about extra time for DIY and minivans for work before taking questions about boosting the comfort and efficiency of Cape houses and fixing a spalling foundation.
Follow the Fine Homebuilding Podcast on your favorite app. Subscribe now and don’t miss an episode:
 |
Help us make better episodes and enter for a chance to win an FHB Podcast T-shirt:
www.finehomebuilding.com/podcastsurvey
Charles shares his thoughts on DIY timelines. Troy gives his pick for a versatile work vehicle. Riky suggests smart watches. Eric is ready to tighten his Cape’s second floor. Paul needs help insulating his attic. Mike shares his method for repairing spalling concrete.
Editor Updates:
- Mike: drywall knockdown texture
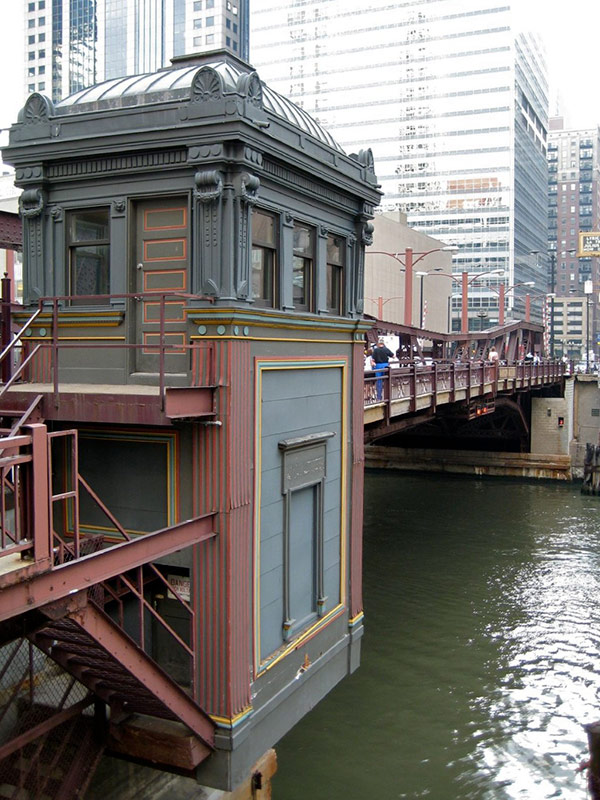
- Kiley: Chicago bridge houses
- Patrick: water filter
 |
 |
 |
 |
 |
Listener Feedback 1:
Charles writes: Hi folks, Reacting to Andrew’s comment about mental timelines for projects in #525 (re: Jeff’s question about building a house mostly solo in 6-9 months). A co-worker observed a rule to estimate DIY project timelines that I wanted to share. He says you should take the estimated time and double it, and then switch it to the next unit of time. For example, if you think the task will take two hours, it will actually take four days. If you initially think it’s a four-day project, it’s actually an eight-week project. And so forth. Hopefully there are limits to the rule and Jeff’s 9-month home build isn’t an 18-year endeavor, but I see DIY home projects around Minneapolis where that looks to be the case.
I think this holds up pretty well in real life, where you can’t spend all day on any task or when restarting a task involves hours of locating tools/materials or shop cleanup and re-organization to complete a single saw cut. For my own projects, it also aligns with the “done enough for now” completion milestone as the crew has discussed before. To get to “completely done,” most of my projects need a second application of the rule. The four-day project is “done enough for now” at 8 weeks, but “completely done” after about 16 months. Case (casing?) in point—lots of trim around my house is still awaiting its final topcoat of satin enamel years after install.
Keep up the good work! Charles
Related Links:
Listener Feedback 2:
Anthony in Troy, Michigan, writes: Happy 2023 FHB Crew!
While driving 20+ hours to Florida from Michigan and back for the Christmas break, I was binge-listening to your podcast and I heard a discussion about shopping for a vehicle that can haul goods, tools, building materials, and I have a few suggestions. The Dodge Grand Caravan, Chrysler Town & Country, and the Chrysler Pacifica minivans can all carry multiple 4×8 sheet goods flat on the bottom, with the rear door fully closed. This also is good for hauling large pieces of furniture, or anything you can carry in that space. Also, I’ve carried 12-ft.-long sticks of lumber and moldings with the hatch closed by having them sit up on the dash.
I got 311,000 miles out of my 2008 Grand Caravan before it was totaled in an accident. I would not hesitate buying another used one.
Related Links:
Listener Feedback 3:
Riky writes: Hi podcast team, Nothing smart-aleck to say here so I’ll just jump into it.
Like your other writer, I also like the Samsung watches (and Apple if you’re part of that platform), but Google and Fossil are pretty good as well. The one he listed is a couple years old, but it’s great and has good silicone protection available like he mentioned, or you can just get the hook-and-loop military-style protectors that just wrap around it.
As far as the watch choice, the Android operating system version changed recently. I would caution those that like Android watches that they should err toward something produced in the last 1.5 years to ensure you get the latest version of Android Wear (the smart-watch operating system) on it, which is so much better than the previous iteration. Apple is generally the same, but I find most people like the functionality of the Wear watches once they start using them more. Also, they actually look like watches.
More importantly, you were asking what it can do other than what they listed. Here’s my list of things that a smart watch can add to your day:
Outside of work
• Keeps you from looking at your phone constantly (great until you check your watch in front of people and they think you want to stop talking to them because you are bored)
• Set reminders and alarms very quickly (press and hold a button to open audio input and say what you want it to do, e.g. ‘remind me in 20 minutes to go to lunch’)
• Tracks sleep/REM to help set good hours of rest
• Wake up with vibrations to prevent waking partners
• Get weather updates on a tap or notification
• Heart-rate information quite quickly or constantly if there is a concern
• I’ve-fallen-and-I-can’t-get-up-like emergency services
• Flashlight on the wrist (great for middle of the night snacks)
• For my wife, press and hold while walking though a place she doesn’t trust to autodial emergency services if she lets go
• Find my phone noise and vibration ability
• Tap to pay if you forget your wallet or are out running (even some places use this for transit)
At site
• Phone calls via speaker or Bluetooth headphones (no phone needed)
• Play/stop music to headphones
• Task reminders and to-do lists on wrist
• Accessibility settings to read texts or notifications directly to Bluetooth earplug headphones when turned on (I imagine the speaker would get annoying so I don’t use it)
• Fall identification (on certain watches auto-notifies emergency services upon fall if not stopped)
• Arrhythmia identification (Apple watches only, I think)
• Calculator if needed
• Alarm for lunch!
Either way, there’s other things that might be more useful, but this is just what I use and have set up to use. The less I have to use my phone, the happier I’ll be.
Question 1: Is my insulation plan on the right track?
Eric in Peterborough, Ontario, writes: Hello Fine Homebuilding Podcast,
Bit of a long one here, with an Easter egg at the end 🙂 I really enjoy the podcast. The education, humor, and banter are great company on my 45-minute commute each day. Thanks for creating entertaining and engaging content that allows me to laugh and learn every time I listen.
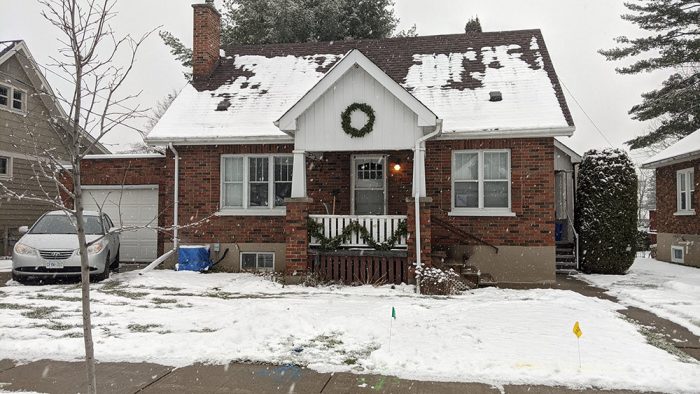
I’m happy to say my wife and I now own a 1200-square-foot, 1940s, brick, story-and-a-half home in Peterborough Ontario. Climate zone plug: Peterborough is primarily a heating region with our furnaces on from October to April to combat the -20˚C (-4˚F) winters, although summer can get up to 30˚C (86˚F), and we run our AC from June into September, aka climate zone 5.
We bought our home last year when the market was still crazy for buyers, and our biggest advantage was that we weren’t afraid of a fixer-upper. Upon moving in we had to replace the knob-and-tube wiring, old oil furnace, and complete plumbing system (the old lead and cast iron left a lot to be desired with sewer backups on a weekly basis and rusty sediment-filled water). For our next improvement, we are turning our attention to the second story, with the difficult-to-insulate vaulted ceilings. The extreme heat in the summer, drafts, ice damming, thermal bridging, and insufficient envelope, not to mention the outdated wood paneling from the 1970s, make the second story difficult to use as intended bedrooms.
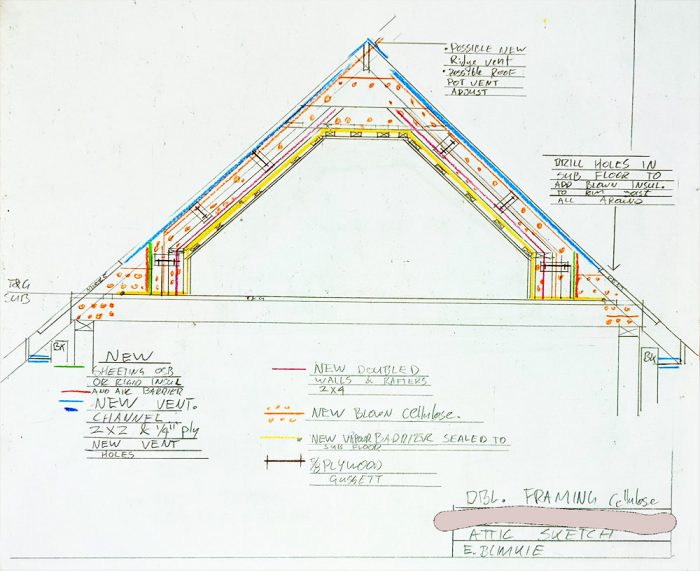
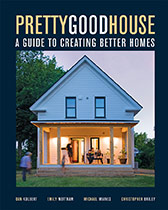 I decided to read Pretty Good House to give me some new ways of thinking about insulating the second story of our home. What a fantastic book! I highly recommend it to any of your listeners interested in modern conscientious design, environmentally smart building, and occupant quality of life. After reading it I thought of renovating our second story to have double-stud walls and double-vaulted ceiling rafters. These would be filled with blown-in cellulose. When I started drawing this out and talking to my wife, we realized double-stud walls and rafters would lose too much valuable square footage and headroom. I was also conscious that there is a lot of extra material cost and dead load, which this old house may not be intended for. We also thought a lot about whether the absolute best option may be too expensive and not pay off in energy savings in the time we live here. Reflecting on my past experience in the field, and through conversations with our dear carpenter friends, we discussed spray foam and the so-called “hot roof”—no continuous ventilation—method for vaulted ceilings. We also scrapped this thought as I’m not comfortable with the cost and global-warming potential of spray foam. I’m also a strong advocate for continuous ventilation throughout attics. Originally, before all of my research into the project, I was thinking the best plan was to add some continuous rigid insulation like mineral wool boards on the inside of our walls and the vaulted ceilings.
 |
 |
 |
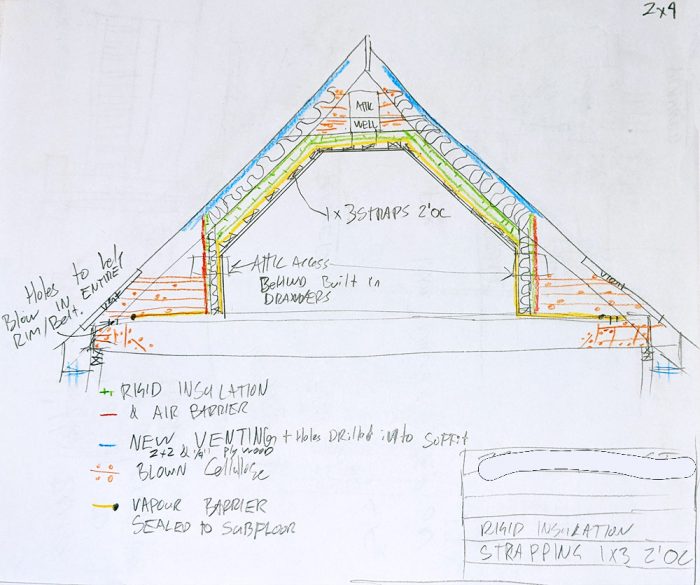 |
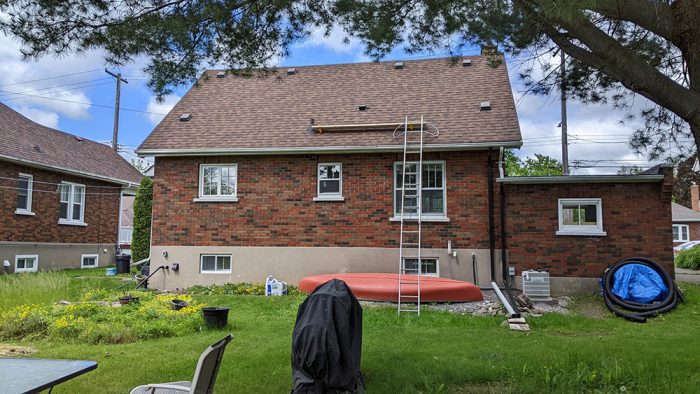
The attached images can give you a better view of this space we wish to renovate. The second story has two kneewalls about 4 ft. high on the long sides of the house, which create two small attics above the first story behind those walls. We have gable walls on the short ends of the house. There are 7-ft. vaulted ceilings on each side of our living space, and a 5-ft.-wide flat ceiling above our heads. It’s easy to see that this isn’t a simple box to renovate. As you can imagine, in the 1940s air barriers were not installed. I’ve witnessed lots of cardboard to hold insulation into the 4-ft. kneewalls. I have also seen what appears to be plywood behind the brick on the outside face of the gable-end wall studs. The roof is sheathed in rough pine.
I’m hoping to install continuous insulation and an air barrier to the outside of the 4-ft. kneewalls, and add a continuous ventilation channel of 2x2s and ¼-in. plywood on the underside of the rough pine roof deck in the vaulted ceiling. Also, new mineral wool batts in all cavities. We are thinking of mineral wool because I understand it’s hydrophobic, and there is some concern about moisture coming into the assembly from outside during our short cooling season. The inside of the vaulted ceiling and gable-end walls would then get mineral wool continuous insulation boards and strapping to accept drywall. Here in Ontario, our building code states 6-mil poly vapor barrier on the warm-in-winter side, so we will do our best job making that continuous throughout the many transitions. After reading more great articles and Pretty Good House, it occurs to me that a vapor-permeable barrier might be the best for this application for this old home. A vapor-permeable barrier would keep moisture inside the house during the winter, but also allow the cavity to dry inside during our cooling season. I haven’t seen much traction on vapor-permeable barriers here in Ontario, but I also haven’t done any research. Our three attics spaces—behind the kneewalls and above our heads—will get topped up with blown cellulose to around R60 and added vapor barrier where needed. I also hope to blow cellulose insulation into the rim-board area of the floor joists through holes in the subfloor. I keep reading great articles on these topics, like “A Warm Cap for a Vintage Cape” in FHB 312, but our roofing is fine and I would rather spend our money on the interior.
Questions:
• How would you and your team approach this story-and-a-half energy/comfort improvement?
• Is my concern about dead load with double-stud walls/rafters and modern R40 walls and R60 ceilings realistic? We have a 12-thick concrete foundation without a footing and some cracking above and below the basement windows.
• Is my consideration for moisture reaching the back side of my vapor barrier in summer realistic without an air barrier?
• Would cavities of mineral wood keep that moisture outside of the cavity so it can dry to the outside in summer?
• Continuous insulation on the inside, isn’t that unique?
• Is there another insulation that might lend itself to this project?
Thanks for reading
Eric the woodshop teacher from Peterborough
P.S. I’m looking into your listener’s question about combining construction classes with general classes. When I was doing my teaching practicum in 2016, I was at a school that combined Construction and English. At the time there was an incentive from Ontario’s Ministry of Education to fund the combination of such classes. The shop and the English teachers worked together to give students more links between the classes. A bit more reading and writing in shop class, and titles in English that related to construction/carpentry/plumbing/etc. Students were building projects in shop and then writing about them in English. The big advantage here was these students enrolled because they were successful in shop but struggled with English in past years. The teachers working together were able to link both curriculums and help the students succeed in both classes. Since 2016, I have not heard of this program again, so I don’t know what happened. I dug into the internet to try and find this programming but could not. I’ve reached out to that shop teacher, and I’m waiting to hear back.
Related Links:
- Air-Seal an Attic Series: Improving Attic Knee-Wall Insulation
- Insulate a Cape Roof to Avoid Ice Dams
- Podcast 308: PRO TALK With Eric Blimkie
Question 2: How should I replace my attic insulation?
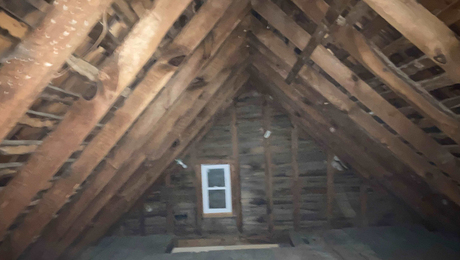
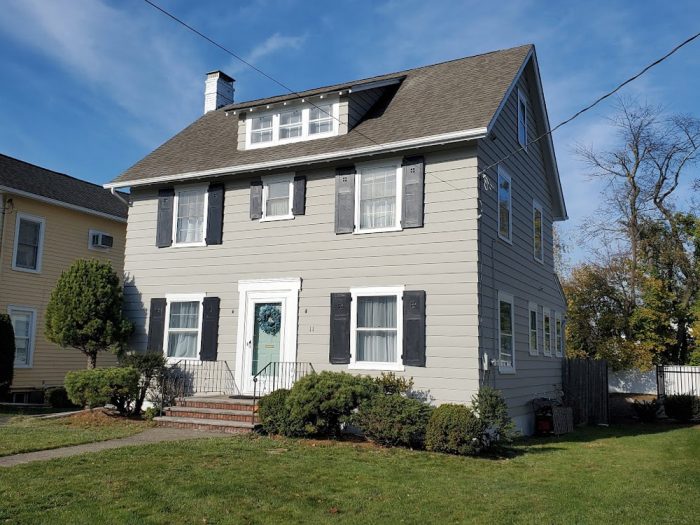
Paul in Caldwell, NJ, writes: Hi, I’m a regular listener to the FHB Podcast. I want to work on my attic insulation, but my house has a few details I’m not sure how to handle.
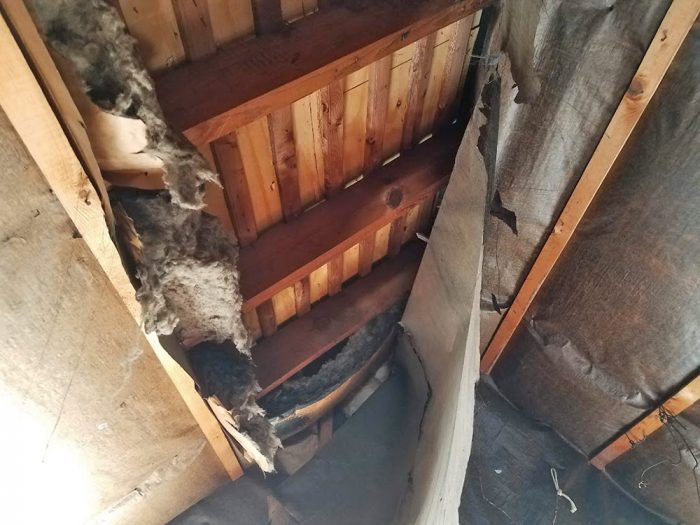
The insulation in my unfinished attic ceiling is falling down. How should I go about replacing it?
• My house has a ridge vent, but no soffit vents.
• The rafters are 2×6 on 20-in. centers.
• There is strapping between the rafters and the sheathing, I think from original cedar shingles.
 |
 |
1. Do I do anything to seal up the ridge vent since I’m not connecting it to soffit vents?
2. What product should I use to fill the 18-in. rafter bays? I can’t find an insulation roll in that width.
3. Do I need to use baffles? I’d rather not so I can fit thicker insulation, and I hope the strapping allows enough airflow below the roof deck. I’d rather not install soffit vents I don’t love the look and that’s just one more job I’m not interested in if I don’t really need to.
Thank you!
Built 1920, Steam Heat
Related Links:
Question 3: Do I need to demo my front steps?
A listener in Rochester, NY, writes: My house has vinyl siding and a stone foundation with a skim coating of concrete. A local mason built concrete entry steps that consist of two steps. He drilled away the skim coating of concrete covering the stone foundation and attached the step directly to the house. He did not build a foundation under the steps. The skim coating of concrete on one side of the steps has now crumbled away from the foundation creating an entry point for rodents. Short of jack-hammering the concrete steps out of there and starting over from scratch, is there any other possible solution to this? The house is located in Rochester, NY, and therefore subject to freeze and thaw cycles. Thank you.
Related Links:
END NOTES:
Podcast 535: Members-only Aftershow — Architectural Styles
Mike, Kiley, and Patrick talk about the difference between architectural style and building type, the way buildings can add or detract from landscapes and cityscapes, and how building have changed in recent decades.
Check out one of our Project Guides: Siding & Exterior Trim!
Check out our FHB Houses:
Visit the Taunton Store • Magazine Index • Online Archive • Our First Issues • All Access
Help us make better episodes and enter for a chance to win an FHB Podcast T-shirt: www.finehomebuilding.com/podcastsurvey

If you have any questions you would like us to dig into for a future show, shoot an email our way: [email protected].
If we use your question we’ll send you a FHB Podcast sticker!
FHB Podcast T-shirts!
Represent your favorite podcast! Available in several styles and colors. Made from 100% cotton. Find the Podcast t-shirt and more cool products in the Fine Homebuilding Store.
| Fine Homebuilding podcast listeners can now get 20% off anything in the Taunton store, including Pretty Good House.
Use the discount code FHBPODCAST to take advantage of this special offer. |
 |
“Finally, knowledgeable people talking about building reasonably-sized, high-performance houses for normal people with real budgets!” — DanD, VA, 8/19/22, Amazon.com review |
We hope you will take advantage of a great offer for our podcast listeners: A special 20% off the discounted rate to subscribe to the Fine Homebuilding print magazine. That link goes to finehomebuilding.com/podoffer.
The show is driven by our listeners, so please subscribe and rate us on iTunes or Google Play, and if you have any questions you would like us to dig into for a future show, shoot an email our way: [email protected]. Also, be sure to follow Fine Homebuilding on Instagram, and “like” us on Facebook. Note that you can watch the show above, or on YouTube at the Fine Homebuilding YouTube Channel.
The Fine Homebuilding Podcast embodies Fine Homebuilding magazine’s commitment to the preservation of craftsmanship and the advancement of home performance in residential construction. The show is an informal but vigorous conversation about the techniques and principles that allow listeners to master their design and building challenges.
Other related links
-
- All FHB podcast show notes: FineHomebuilding.com/podcast.
- #KeepCraftAlive T-shirts and hats support scholarships for building trades students. So order some gear at KeepCraftAlive.org.
- The direct link to the online store is here.


