5 Lessons from Building in a Cold Climate
A high-performance contractor shares the challenges of building in the cold Alaskan climate.
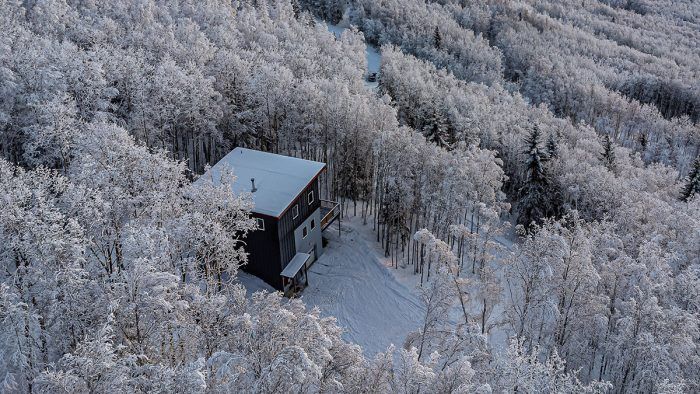
Synopsis: A builder in Fairbanks, Alaska describes five considerations when building in a cold climate. He details his go-to wall assembly, considerations for siding and windows, and maximizing daylight and efficiency in both the building and off-seasons.
At age 22, I packed up my pickup truck in Bar Harbor, Maine, and headed for the University of Alaska Fairbanks, where I planned to finish my bachelor’s degree in biological science at one of the best institutions for Arctic research. But college was just an excuse for the move. I was really looking for an adventure in the Last Frontier.
My initial impression of Fairbanks—a small city of just 30,000 people a six-hour drive north of Anchorage and 120 miles south of the Arctic Circle—was a bit underwhelming. It was dark. The air temperature was –40°F for the entire week of Thanksgiving, and cold snaps like that create a temperature inversion, which traps wood smoke and exhaust from cars and trucks, making air quality at ground level worse than a smoggy day in Los Angeles. About halfway through that first winter, if you had asked me if I would still be living near America’s coldest city more than 25 years later, I would have laughed.
From my place just north of Fairbanks there was not another house in sight, and among the few signs of “civilization” were the dogsled trails that crisscrossed the landscape. I eventually became captivated by the remoteness and the sense of true freedom. I also fell in love with the friendly people and how the frontier community sticks together in a way I hadn’t experienced before. There was always an adventure to be had and like-minded people to share it with. I learned that it’s true what they say about Fairbanks: “Once you’ve lived here, you’re not fit to live anywhere else.”
My building career began shortly after I earned my bachelor’s degree, though I wasn’t aware of it yet. One of my neighbors, who had been living in a modified school bus, managed to assemble a log-home kit with the help of a friend. I thought, “If they can do it, so can I.” I found my own piece of land that was cheap because it was ladened with permafrost. I cut down some trees and built a dry cabin (no running water) of my own, a 16-ft. by 24-ft. split-level structure with a shed roof. Like many eager but inexperienced DIYers in Alaska, I was creative with the construction. I placed six 55-gal. drums that had been cut in half on foamboard, filled them partially with gravel, and topped them off with concrete, creating my own version of a post-on-pad foundation. As for the rest of the building, I relied heavily on Do-It-Yourself Housebuilding: The Complete Handbook, a 1995 book by FHB contributor George Nash, and asked some builder buddies how to create a proper vapor barrier. Now I had my first house, owned it free and clear, and couldn’t be prouder.
A few years after that house was built, I entered grad school supported by a grant to study migratory birds. After defending my master’s thesis, I decided to subdivide my lot and build a “real house” with running water and a septic system. The design was flawed but the execution was top-notch for what I had and what I knew.
So at 32 I had completely finished my second house. At that point I thought I would spend the rest of my life as a wildlife biologist who also built houses. To legitimize the building side of that equation, I acquired my contractor’s license and soon found myself enjoying the building and renovation work more than the less lucrative wildlife consulting gigs. Still naive as a builder, completely inexperienced as a business owner, and nervous about “throwing away” my education, I decided to go all in on carpentry and construction. It was a tough decision, but I’ve never looked back.
5 considerations for cold-climate building
Like the indigenous Alaskans, who adapted to an extreme environment, today’s cold-climate builders must do the same. Whether it’s the available materials and technologies, demographics, or clients’ tastes and lifestyle preferences, we need to stay flexible, identify and analyze changes, check our processes and plans, and refine our strategies as we go.
1. A wall assembly that works
I wanted a system that was less labor-intensive and more budget-friendly than the double-stud-wall or continuous-exterior-insulation systems used on other high-performance homes in this area. It needed to suit the relatively arid environment and to use materials that are readily available locally. I also wanted it to be easily repeatable by my crew or framing subs and to make things easier on all of the subtrades. So I designed a wall assembly—in consultation with my insulator—that makes the most sense for my circumstances. The assembly also received a nod from a friend at the Cold Climate Housing Research Center (CCHRC), based in Fairbanks. Eventually a few other builders adopted the system, and some of my subs dubbed it the “Mike Knoche Wall.”
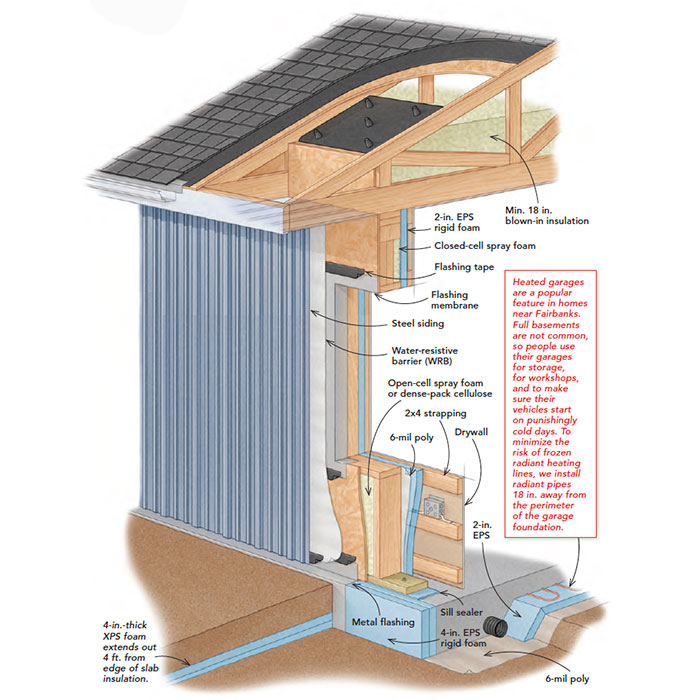
The wall itself starts with 2×6 framing, sheathed with OSB and filled with open-cell foam or dense-pack cellulose. A vapor barrier is installed on the inside, and sealant is applied at all corners, overlaps, and connections. Inside that, over the vapor barrier we install 2 in. of R-Tech EPS foamboard insulation, eliminating thermal bridges to the outside. The foamboard also protects the vapor barrier from drywall installers. I install horizontal 2×4 strapping on top of the foamboard to house electrical, which is stapled to the top edges of the strapping; the strapping also provides attachment for 5 ⁄ 8-in. drywall. Outside, the sheathing is wrapped with Tyvek and taped with Tyvek DuPont Flashing Tape at all edges and overlaps. Exterior penetrations and windows are also taped.
2. Smart temporary heat
From the minute that weight restrictions are lifted in June, drying in a house is a sprint, not a marathon. The goal is to have the joint compound drying in time for ambient temperatures to do the job. Contractors who get to tape, mud, and paint in August have an unmistakable grin on their faces—they won’t need temporary heat before the boilers are installed. But that scenario is the exception, not the rule.
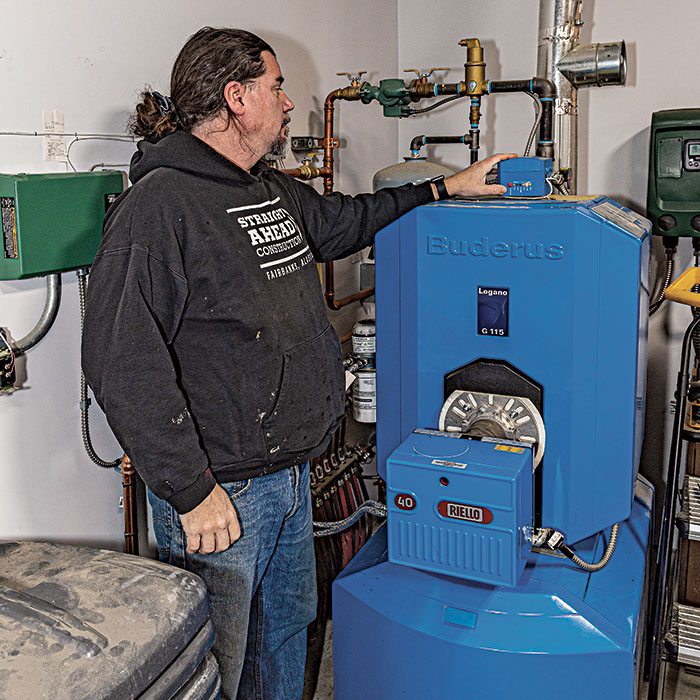
I use unit heaters as temporary heat in my new-construction projects until the boilers can be installed. The warm air is provided by a Modine unit heater that can crank 120,000 Btus. I connect the heater to the oil fuel line, pipe the exhaust into the boiler’s roof stack, and then install a thermostat. To spread the heat more evenly, I add a homemade manifold and two 6-in. improvised ducts that can send warm, dry air to various areas of the house. In a well-insulated home, the heater uses fuel pretty efficiently, especially compared to temporary electrical heat, which can generate staggering bills. One year, I had a few projects going at once and did not have a spare oil-fired heater, so we tried out electric heaters. That experiment resulted in a $1200-per-month electric bill.
Smaller pieces of equipment, such as generators, need to be stored in a place that has at least some protection from the cold. For larger equipment like skid steers, telehandlers, and excavators, cold-climate kits are important. Many kits include not only a block heater to keep the engine oil from freezing but also hydraulic oil heaters. Battery heating blankets are also common.
3. The right ventilation
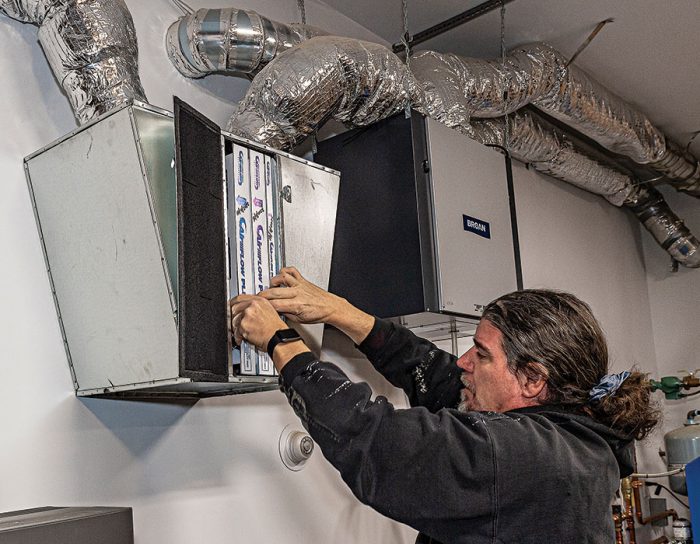
Hot, humid weather is not a concern in Alaska as it would be in a home located in a southern climate. That’s why we typically install heat-recovery ventilators (HRVs) instead of energy-recovery ventilators (ERVs). After a while, many homeowners turn off their HRVs, thinking they will save money on their utility bill. It’s critical that my clients understand the need to use their HRV. This conversation begins at our first meeting with an explanation of how to use it and the importance of the clean, healthy, fresh air it delivers, especially in a tightly built home. I also explain the potential consequences of not using the HRV, such as moisture buildup, which can lead to rot and the formation of black mold. I always tell my clients that ice buildup on windows is the first sign of a problem. As the saying goes, “Build tight and ventilate right.”
4. Resilient exteriors
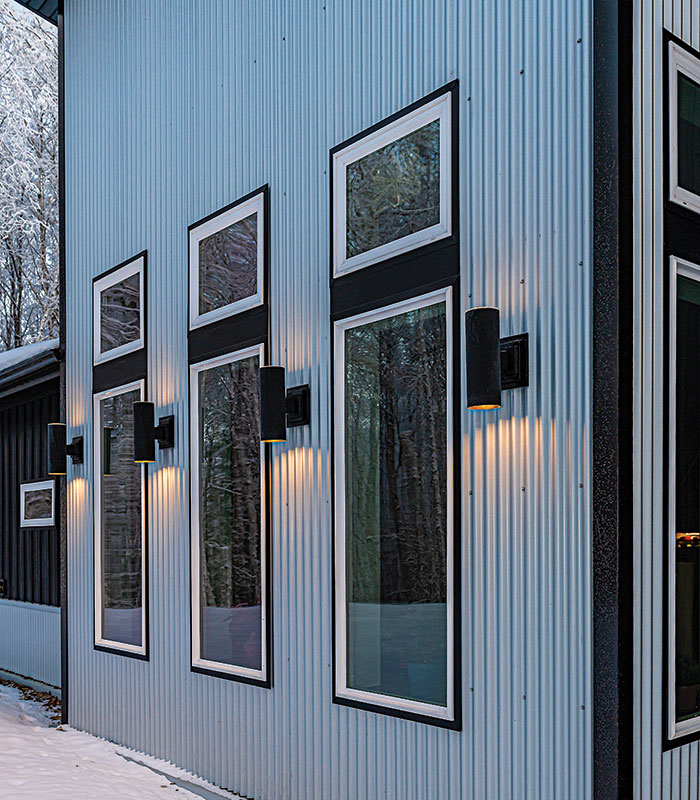
I usually side my homes with 5-rib steel panels or standing-seam panels. Rainscreens are not commonly employed on homes in Interior Alaska due to a combination of factors, including standard 2-ft. eaves and the Arctic Desert climate, which lacks driving rain. In Alaska, it’s important that gutters work properly, especially during the spring thaw, so that water is carried through the downspouts and away from the house. Roofs are stacked with snow in the winter, and leaf-packed gutters become solid ice. Water then cascades over the gutters in spring, where it lands on still-frozen ground, creating channels that can direct it back toward the house, where it can compromise the foundation, among other problems. Stainless-steel leaf guards are a big help.
5. Strategic fenestration
All my windows are triple-glazed, which helps maintain warm spaces in the winter months but also reduces passive heating from the low summer-sun angles. Whenever possible, I try to orient my homes in such a way that the living spaces face the south to capture every ray of light possible.
However, bedrooms located on the north side of the house get windows only large enough to meet egress building codes, because the lower thermal performance of a large window does not justify the minimal amount of natural light those rooms will receive in a given year.
The permafrost challenge
One of the biggest challenges of building in Fairbanks is permafrost. Soils of interior Alaska are characterized by “discontinuous permafrost.” At these latitudes, low-lying areas, ground with poorly drained soil, and land with northern exposure do not thaw annually. The permanently frozen soil can extend hundreds of feet into the earth around Fairbanks and thousands of feet down in areas farther north. Property ladened with permafrost is inexpensive, making it attractive for those looking for cheap housing. Good ground, on the other hand—that is, land without permafrost—is more expensive and can be found on south-facing slopes and areas where soil is well-drained.
Building on permafrost comes with major challenges. The main one is thawing. Vegetation and organic materials act as a natural insulating layer over permafrost. When they are removed in the process of clearing a lot, permafrost can degrade unpredictably and radically alter the landscape. The ground can settle, contours can form, trees can tip sideways, and ponds and lakes can appear from seemingly nowhere. Climate change also contributes to the unpredictable nature of permafrost thaw. The cabin featured in the documentary An Inconvenient Truth that was skewed 15° out of level? I skied by it for years and watched it sink.
Obviously, it would be folly to attempt to build a high-performance home on unstable ground, which is why I don’t do it. I always tell people that any money saved on buying cheap land could easily be spent trying to keep a house upright. But there was a time when I did some work on permafrost. To keep my crew busy between jobs, I would fix unlevel homes by raising them up with homemade airbags and adding to their pilings. The first foundation we adjusted was 19 in. out of level from the front door to one of the kid’s rooms at the back of the home. As the years went by, word spread that my crew knew how to rescue sinking homes and cabins. The sheer number of calls I received was staggering.
I’d visit homes where the owners had waited so long to confront the problem that the pad and posts were completely sunk into the soil, along with the untreated floor joists. A lot of people didn’t know what they were getting themselves into when they bought or built their homes and couldn’t afford our services. It was heartbreaking. Our work didn’t bring them the joy or happiness that a nice new bathroom or kitchen remodel would, but it often cost just as much. And due to the unpredictable nature of the thaw cycles, it’s impossible to warranty work on permafrost. When we finished a job, the client’s final outcome was just a level home, which might sink again. The work was also hard on my crew, so I quit doing it years ago. In fact, I have a page dedicated to the perils of permafrost on my website. I love putting shelter over people’s heads—a healthy, comfortable, durable house that suits their needs and improves their lives. So that’s all I do.
Don’t take water for granted
Private wells are not always used for rural homes near Fairbanks. It’s not uncommon for local well water to have high concentrations of arsenic and undesirable minerals. Also, homes near abandoned mines have experienced contamination or lower flow rates due to disturbances to the aquifer. For these reasons, many new homes are designed to accommodate 1500-gal. to 3000-gal. buried water tanks. While many people haul water in a 250-gal. to 500-gal. tank in their pickup, most residents with water tanks have their water delivered by tanker truck and pay about twenty times more for their water than homes in the Lower 48.
Striking a work/life balance
There are a number of elements to keep in mind when building in an extreme environment. I describe five important considerations in this article. But also important when building near the Arctic Circle is taking advantage of the off-season. For me, the key to surviving long, cold, dark winters is to avoid staying home for the entire season. Every year, I leave the state and head toward the equator. While basking in the warmer climate, I pore over drawings, respond to client communications, work to ensure my subs have what they need to perform efficiently during the short work season, and attend to whatever else needs attention in my business.
A healthy balance can actually be harder to maintain in the summer. At 64° latitude, it never gets dark from mid-May to the end of July. And as much as I love the endless summer nights in the Land of the Midnight Sun, it can be tempting to push too hard. The longer days seem to give people more sustained energy, so builders and crews become manic during this period, working long hours in an attempt to make hay before the long nights return. The yearly race and tendency toward overwork burns out builders and can stress both work and personal relationships. It’s important to make time for breaks.
Never stop learning
Building high-performance homes in this environment requires that I be educated in building science, know my processes, and align myself with trade contractors who share my values. Like many contractors in Alaska and elsewhere, I started my company with limited experience and no real business plan. To remedy that, I bought every book related to running a construction company, but I never could find the exact reference I was after, so I decided to create one myself by launching The Contracting Handbook podcast in May 2021.
At the time of this writing, I’ve just finished the third season, with over 120 episodes published on multiple platforms. The podcast is 100% independently recorded and produced out of my home in Fairbanks. I’ve interviewed over 70 guests from five countries; the podcast has been downloaded in more than 75 different countries, and it’s listed in the top 2% of all podcasts globally. The premise of the podcast is that we builders are all experts at how to build where we live in the world but that the business basics and experiences are more universal.
Now hear thisListen to our interview with Mike Knoche on episode 470 of the FHB Pro Talk podcast at FineHomebuilding.com/protalk |
—Mike Knoche is owner of Straight Ahead Construction in Fairbanks, Alaska.
Photos by Frank Stelges.
From Fine Homebuilding #315
RELATED STORIES
- Passive Solar Design
- Heat Pumps and Cold-Climate Applications: Designing for Comfort and Resiliency
- Airtightness and High-Performance Building
Fine Homebuilding Recommended Products
Fine Homebuilding receives a commission for items purchased through links on this site, including Amazon Associates and other affiliate advertising programs.
Anchor Bolt Marker

100-ft. Tape Measure
Smart String Line

