Caulking Tile Transitions
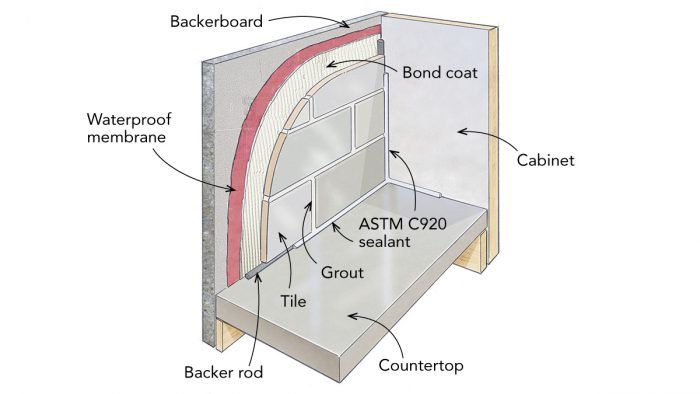
In places where tile transitions to cabinets or countertops, apply the proper sealant over backer rod.
On a couple of kitchen tile jobs years ago, I tried grouting the gap where the backsplash tile meets the countertop or wood sides of pantry cabinets, but over the years the grout has needed touching up every so often. Now I fill those gaps with kitchen- and bath-formulated caulk, but I often end up with a shabby-looking bead that detracts from the beauty of the whole project, or part of the bead will pull away from one side or the other. I’m preparing to install a tile kitchen backsplash for a customer, and I’m looking for a better solution.
—Lee Nelson, Spooner, Wis.
Donato Pompo, owner of Ceramic Tile and Stone Consultants, replies: Whether it’s a backsplash or any other tile application, all transitions of planes or different materials must have a “movement joint” per EJ171 of the Tile Council of North America’s (TCNA) Handbook for Ceramic, Glass, and Stone Tile Installation. The Natural Stone Institute (NSI) adheres to the same method for transitions in natural stone. A movement joint is made with a resilient material referred to as a sealant but also known as caulking. These joints are required at transitions between different materials or planes, where differential movements are expected.
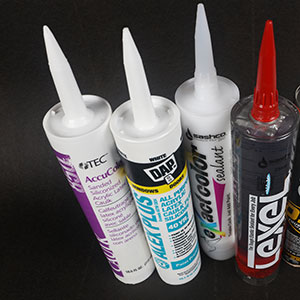
TCNA states that the sealant used on transitions must meet ASTM C920, which is typically a 100% silicone or a polyurethane material. Too often, installers use an acrylic-based caulk because it’s easier to use, cleans up with water, and is cheaper, but it does not perform well or last long. There are many manufacturers who produce ASTM C920 sealants—Laticrete, Mapei, Sika, Dow Corning, and GE, among others. Some sealants require primers, and some are not suitable for certain porous materials like natural stones. Check to see which sealant is recommended by the manufacturer of the tile or stone you’re installing. To meet the specified resilient physical properties and performance, both EJ171 and ASTM C920 prescribe that the sealant be installed over a closed-cell polyethylene foam backer rod (bond-breaker tape is another option) so that the sealant only contacts the backer rod and the edges of the tile or adjacent materials, not the substrate.
Apply painter’s masking tape tightly to both sides of the joint before adding a 1/4-in. bead of sealant, then tool the joint to a smooth, slightly concave finish to reduce the chances that the sealant will be damaged by objects on the counter or by regular cleaning. For a clean sealant joint with minimum cleanup, do not overfill the gap, and pull off the tape at an angle away from the joint. Work in small enough sections that you can complete the tooling and pull off the tape immediately after filling the joint.
Drawing: Dan Thornton
From Fine Homebuilding #317
RELATED STORIES
