Advice For Future Owner-Builders
An FHB senior editor shares what he learned when he and his wife decided to build their own house.
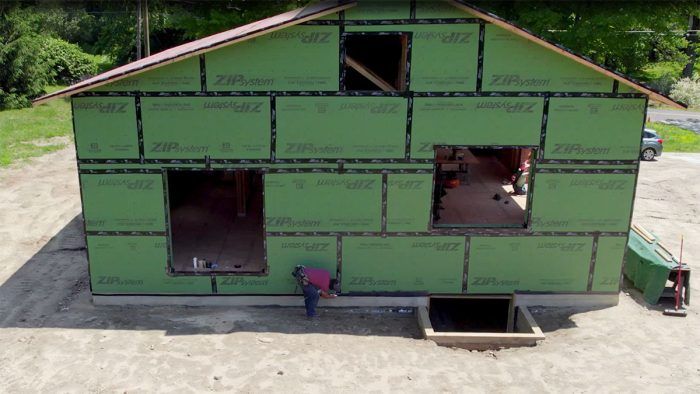
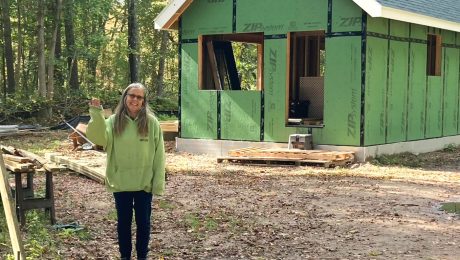
On a recent hiatus from full-time work, my wife, Amy, and I built a new home. With occasional help from friends and family, we designed the house and did all the things that carpenters do ourselves, and then some. We did consult with an architect, and we hired an excavator, a concrete contractor, a plumber, an electrician, and a few other notable subs. From conversations I’ve had here at FHB, I think the term “owner-builder” is generally used to describe what Amy and I have done, give or take some specifics.
Perhaps one of the most important factors in a project’s success is the owner-builder’s experience in the trades. Information today is at our fingertips, but watching YouTube won’t make it much easier to nail two boards together flush if you’ve never done it before. Despite my time as a building journalist, working here and there as a carpenter, and remodeling our last home, we still fell into gaps between our knowledge and our experience. If you’re planning to build your own home, I hope this essay will help you avoid wasted time, materials, and money, as well as long days doing things over again (though if our experience is telling, there will still be some of that).
Design within the budget
Our budget wasn’t extremely tight, but it was modest. We knew that keeping the size reasonable and the shape simple would make the home both more affordable and more buildable for us. With these thoughts in mind, we started sketching. Before long we had a basic schematic for a single-story, two-bedroom, two-bath home that made sense for us. The first iteration of the house was 32 ft. wide and 24 ft. long, and it had an insulated slab foundation.
We asked architect and FHB author Paul DeGroot to critique and refine our plans. Though the general layout didn’t change, by the time Paul was done, the house was 34 ft. wide by 38 ft. long and had a basement, half of which is finished. With a main-floor laundry, a mudroom space, a kitchen pantry, and a walk-in closet, this house would not be comfortable if it were any smaller. Paul saved us from mistakes that would be difficult and expensive to remedy.
Moreover, design is where the budget takes shape. There are some big-ticket items, like windows, that you can change at the last minute to save some money, but savings like these come at other costs—namely, quality and performance. In our experience, once you have plans and start building, cost savings are not easy to find. Know your budget and design within it—and include the cost of a design professional, if only as a consultant. It will be worth it.
Trust local professionals
If you’ve done your research, you may know some things that your subcontractors don’t, but proving how much you know to your subs may not be the best approach. Our approach was to ask a ton of questions. This was not to quiz our subs on their knowledge, but to uncover the tips they had up their sleeves. For example, our concrete contractor didn’t understand how dimple mats work and therefore thought they were a waste of money. So we sourced and installed all the foundation waterproofing ourselves. He did have an excellent idea for running the subslab insulation that spared us time and finicky details. Likewise, we asked our electrician to review our electrical schematic, and he showed us a few places where we were making potential mistakes. Though he added a few hundred dollars to the electrical budget, it would have cost a lot more to install new circuits after the house was complete.
I recommend using this same strategy with the building official. We started our project by taking a list of questions to the building department. The building inspector, who was generally easygoing, had a few pet peeves. We made sure to have a solid understanding of those aspects of the code before we returned with final plans. There were a few things I did out of the typical order on this project, so I scheduled extra inspections to make sure it was OK to move ahead. I think the building official appreciated the extra communication.
Be a belt-and-suspenders builder
Once you grasp the reasons for details like air-barrier continuity and kickout flashing, you can see that they make good sense. There is something implicit in them, though, that can be overlooked: They take skill to execute well. At the most fundamental level, a good house is built on good carpentry. An airtight house is easier to achieve if there aren’t big gaps between the mudsill and the foundation. Flashing and air-sealing details will be easier to execute if the rough openings are sized right and the windows installed well. Having never framed a new house before, we did some things that professionals may not have the time, or need, to do. We cut studs, assembled headers, and laid out plates before we’d even broken ground. This meant that we weren’t rushing when it came time to get the framing square, level, and plumb.
We chose construction details based as much on our skills and the building process as cost. For example, we framed and sheathed the top of a 2×8 ceiling for our air barrier, a method I learned in this magazine, even though it would have cost less to use a membrane or the drywall. We were sure the taped sheathing would be tight; I was less sure in our ability to install a membrane well or to hang airtight drywall. And I knew that raising the truss roof would be one of the most challenging parts of the build. Having what is essentially a floor to work on gave me faith that we’d be able to do it safely and well.
In all tricky areas, we took a belt-and-suspenders approach. We used roll-on waterproofing on the foundation, and a dimple mat. We air-sealed the mudsill while installing it, and the rim area while insulating it. We used Zip System sheathing on the roof, and the roofer’s recommended shingle underlayment. While too much “cheap insurance” can add up to a big line item in the budget, fixing things that you didn’t get right the first time is likely more expensive.
Keep the build moving
It’s important to be realistic about the timeline for a build. We chose to put everything but family aside, assuming the project would be all-consuming—and it was. Even so, there are a number of things that can slow down the schedule, including weather, the availability of subs, and material delays.
Weather has its biggest impact early in the build. Framing is a time to push a bit because not only will rain and snow slow you down, but they can also have other consequences. Lots of rain may mean having to pump out the basement. A wet subfloor can swell, making more work when it comes time to install flooring. And you’ll be spending time setting up and packing up your tools every day until you have a dry and locked building to store them in.
I’ve heard that subs can be less responsive to owner-builders than professionals, so we took a very proactive approach to communication. As soon as we knew we were going to build, we shared early plans and our timeline. Long before we broke ground, we started asking for the subs’ advice on products and sequencing. Every time the schedule changed, we let them know. In other words, we didn’t let them forget about us.
We were aware of supply-chain issues and long lead times, so we started ordering materials as soon as we had our building permit. Our framing package was on-site a couple months before the excavator was. We ordered windows and doors, plumbing, and electrical fixtures early too. We had a garage where we could store them; I know other owner-builders who put a PODS container on-site.
When determining what to do ourselves, we didn’t just consider our skills and costs; we also factored in time. The roof is the best example. We have a simple, walkable roof with just one plumbing-vent penetration and a radon-vent penetration. I’ve shingled roofs before and feel confident in my ability to do that work well. Still, the job would have taken us a couple of weeks. The roofers were done in an afternoon, and we used those two weeks to keep other work moving along.
Prepare to make mistakes
When I think about the mistakes we made, I feel fortunate that we were not hurt on the job. I can think of a few days that bruised my ego, though. The wind caught the very first wall we were attempting to raise, lifted it off the jacks, and threw it on the ground, while a brand-new set of wind hooks sat in my truck. My lack of experience with how little wind it takes to carry away a sheathed wall made me think that we didn’t need them on a relatively calm day.
We all make mistakes, but I have found some things that help to avoid them: a bit of time in the day to set up well for the particular work at hand; making sure you have all the right tools, whether you buy, rent, or borrow them; and not just reading magazines and watching videos, but talking through an unfamiliar process with an experienced builder. Ask questions like “What can go wrong?” and “What mistakes have you made?”
Our house will have flaws, and we’ll see them every day. No doubt we’ll be fixing mistakes in the years to come. And we built at an expensive time, so there may be little financial benefit in having built our own home. Still, this was the most rewarding six months of work in my life. I’m thrilled to be sitting in the house working on this essay right now. That Amy and I built it together makes it even better.
—Brian Pontolilo is a senior editor.
From Fine Homebuilding #319
RELATED STORIES
- From Brian’s House: Using Liquid Flash at a Wall-to-Foundation Connection
- 7 Things Your Home-Building Contractor Wishes You Knew
- The Self-Design Builder: Estimating Construction Costs
Fine Homebuilding Recommended Products
Fine Homebuilding receives a commission for items purchased through links on this site, including Amazon Associates and other affiliate advertising programs.

Not So Big House

100-ft. Tape Measure

Anchor Bolt Marker
