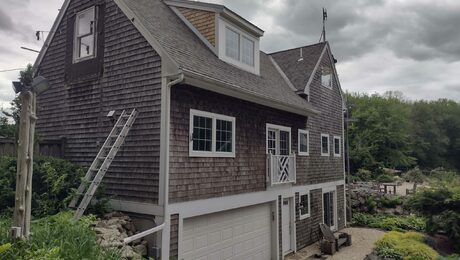
Podcast 601: Envelope Leaks, Rebuilding a Cabin, and Adding Water to Hydronic Heat
The crew hears from listeners about ICFs, remodeling a small kitchen, and affordable net-zero and then takes questions on rebuilding a cabin, leaks from wind-driven rain, and refilling hydronic heating systems.
Follow the Fine Homebuilding Podcast on your favorite app. Subscribe now and don’t miss an episode:
 |
Kevin shares a news story about low-cost ICFs. Mark describes remodeling his small kitchen. Justin weighs in on net-zero home builds. Jon asks about a very intermittent leak. Heath is rebuilding a termite-damaged cabin. Mark wonders about adding water to his hydronic heating system. Steven is planning a DIY cabin build.

The Sustainable Home Building Accelerator
This intensive, interactive online series of courses is designed to rapidly advance your knowledge of sustainable home design and construction. Whether you’re an architect, builder, or a homeowner, we’ll give you the information and confidence to design and build well-crafted, practical homes that maximize performance and comfort.
Over 11 hours of video. AIA Approved 10 HSW/LU Credits. Resnet 10 PD Credits.
When you purchase all three courses, you’ll receive access to a year of GBA Prime as well as a copy of the Pretty Good House book!
Remember the code PODCAST20 for any Fine Homebuilding courses.
Editor Updates:
- Mike: Tree removal
- Brian: Closet organization
- Patrick: Toilet replacement
Listener Feedback 1:
Kevin writes: Hello All,
Read this article in the Boston Globe recently—Habitat for Humanity tries building with foam to address housing crisis—and would be interested in your thoughts about it.
I’m sorry to have Pro Talk come to an end. I would hope management reconsiders, with maybe the possibility of quarterly Pro Talk releases. Or maybe pair up with Matt Risinger and the Build Show for some cross-promotion with his podcast.
Related Links:
- Pro TALK Podcasts
- An Introduction to Insulated Concrete Forms
- Insulated Concrete Forms: The Perfect Choice for Energy-Efficient Construction
- GBA.com: Comparing Wood and ICF Construction
Listener Feedback 2:
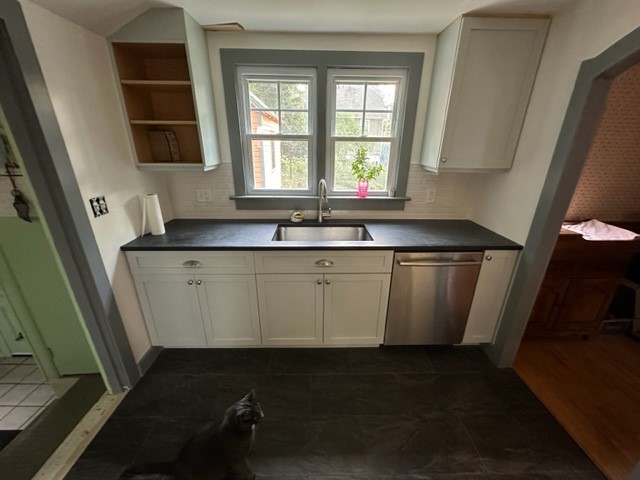
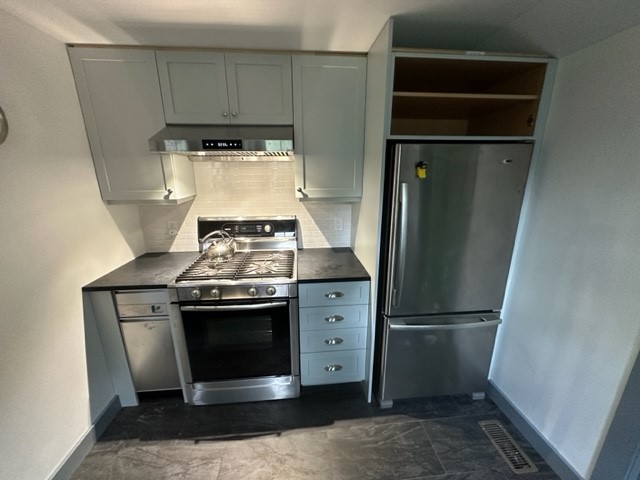
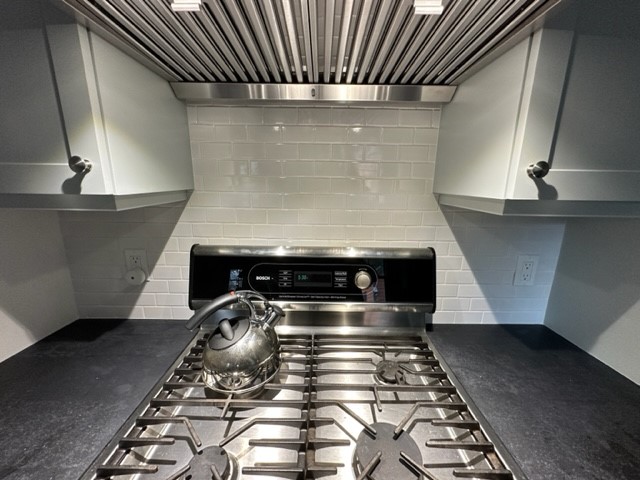
Mark writes: Well, it has been a very interesting process. We finally found a small kitchen remodeling company that took on our project. A single-person showroom/salesperson helped us pick out the cabinets and order them. She then recommended a small contractor service—3 to 4 guys—who did terrific, quality work.
We did have a few bumps along the way:
- Cabinets took longer to get than scheduled.
- Contractors stated they would not need town building permits because hardly any electrical or plumbing was altered. (They were wrong, and the town inspector busted them and put the project on hold for 10 days.)
- Two wall cabinets were sized wrong, and we’re still waiting for correct doors (you will see them missing in the attached photos).
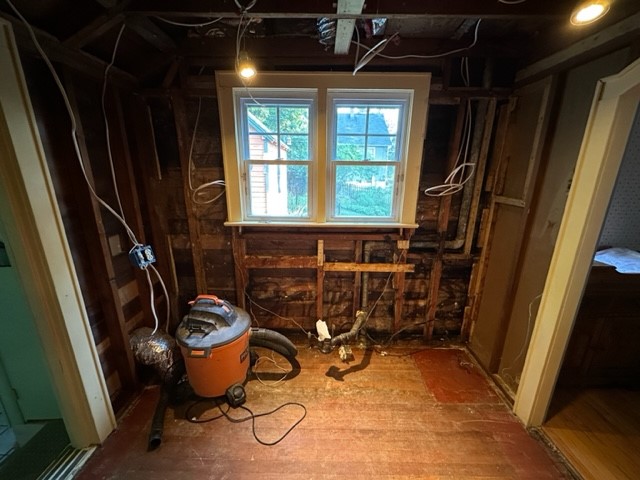 |
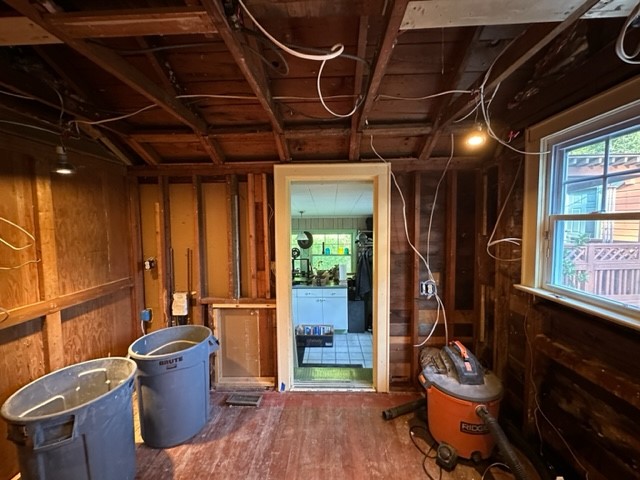 |
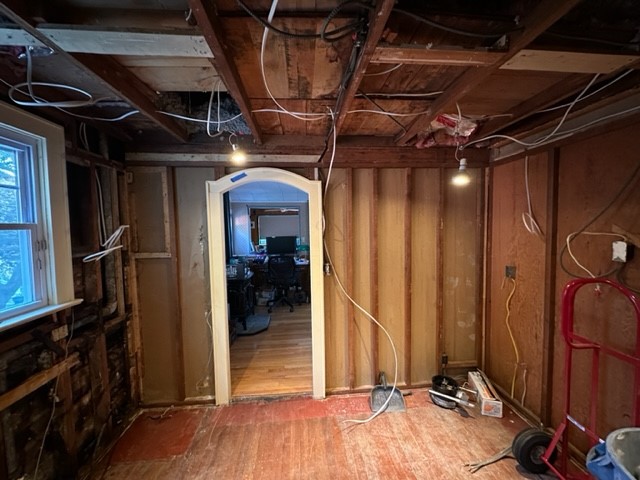 |
 |
 |
 |
The project started on July 11th, and more or less finished September 12th.
The cost was more than expected due to extra electrical work and the need for a certified electrician, as well as the floor needing leveling before porcelain tiles could be installed.
We are happy with the results. What seemed like a small project (because the kitchen is 12 ft. x10 ft.) was far more involved than expected.
The final total cost including cabinets was around $30,000.
Mark
PM ASKS: HOW DID THE CONTRACTOR GET CAUGHT WITHOUT PERMITS?
Our neighbor was having a porch rebuilt and their contractor had permits. The town inspector came by to check on them and saw my contractor bringing in some Sheetrock. (The dumpster in my driveway did not help.) The town did a stop work order and made them get plumbing, electric, and building permits.
It just passed final inspection last week.
Related Links:
Listener Feedback 3:
Justin writes: Hi FHB Podcast,
This is a response to your frequent discussion topic: “Can a net-zero house be built for $250,000?”
Only with someone building it for themselves.
I am attempting to build a more sustainably built, near-net-zero home for the affordable non-profit that I work for. Our budget for construction is around $230k. All labor will be provided by a local home builder and local subs. We did strike a partnership with the local community college, so they will provide some of the carpentry labor, which will reduce our final costs down from the $230k. Right now, we have about $30k in our land acquisition, which includes land cost and demo cost. So we’ll overshoot the $250k, and that doesn’t include putting on PV, which we won’t don’t do because we sell our houses to households with an income limit. It will be their choice as to whether or not to install PV. The loads for the house are minimized as much as possible. Our anticipated energy budget is about 7300 kWh for the year, and I think a 6.2-kWh array would satisfy those needs in our geographical area.
In a nutshell, we are building a 2-bedroom, slab-on-grade with 2 x 6s 16 in. o.c., Zip R12 continuous insulation and R21 batt cavity, R70 blown-in attic insulation, R20 subslab, R10 foundation insulation, and a goal of 1.0 ACH50 on the blower-door test. This will be all electric with heat pumps providing space heating via a ducted system and water heating, an ERV for fresh air needs, a duct chase above the 8-ft. ceiling (but inside the thermal envelope so ducts are in the conditioned space). We are required to provide backup heating, which will be achieved via a 5-kW electric resistance coil in the air handler, even though it may never be needed. The goals are to minimize roof penetrations and slab penetrations for long-term durability. It’s a simple 24×36 rectangle with no garage. The kitchen and bathroom share a 2×6 wet wall where all plumbing is supplied. I’m excited to see how the project goes, and I’ll send updates if interested throughout the process.
Related Links:
- Building a Zero-Energy Home for Less
- Affordable Net Zero
- GBA.com: Habitat for Humanity Chapter Commits to a Zero-Energy Future
- GBA.com: Building a Low-Cost Zero-Energy Home
Question 1: Do I need to worry about an occasional leak?
Jon in Cazenovia, NY, writes: Hello,
I am writing in response to the window flashing discussion in episode 597 to tell you about what I experienced after a heavy wind-driven rain episode earlier this spring. I noticed a decent-sized wet spot on my concrete basement floor with no appliances or water lines nearby, so I began following the drips of water. Looking up, I could see a drop coming from a register boot and determined it was coming from the floor above. There, I removed the register cover (located under the centerpoint of the window). I could see the smallest amount of water between the subfloor and the LVP flooring traveling along the outside of the register boot and dripping into the basement. I brought out my ladder and started spraying the siding with the hose to simulate a wind-driven rain episode so I could determine where I needed to remove the siding to correct the deficiency. After starting at the subfloor elevation and slowly working my way up the wall and window area to the soffit I wasted about an hour and a ton of water and was unable to replicate the issue. Several wind-driven rain storms later and still no leak. Do I call this a win, or worry about the wall cavity still filling with water, just not enough to make its way to the basement?
You were also asking about EV chargers: I purchased a Ford Lightning with standard battery (98 kWh) in October 2022 and have been using the included Ford Mobile Charger as my only means of charging. This is a 32-amp charger that has both a 120v and 240v plug option included. (It is no longer included with the vehicle purchase and costs $500). I installed a 50-amp circuit with a NEMA 14-50 receptacle because my intention is to eventually purchase a 40-amp home charger to be either plugged into this receptacle or hard wired. I have spent about $400 on the wire, conduit, breaker, and receptacle. For now, the setup I have works well and will charge the truck from 10% to 20% up to 100% (about 80 kWh) in about 12 to 13 hours. Looking back, I would recommend that people go with a 100-amp circuit installed to their garage to handle almost all future charging needs. Looking at the Silverado EV and Ram EV’s battery sizing—200 kWh and 229 kWh respectively—my 50-amp circuit with a 40-amp charger installed will not be able to deliver a full charge in the 12-to 13-hour window I would want. Although I would only have to charge once per week if I had the range of the Silverado/Ram and could let it charge for 24+ hours on the weekend, and the industry says it is healthier for the battery to have a slower charge. With that being said, you would not want to install a level 3 charger at home because this rapid charging should only occasionally be used. Let me know if you have any other questions on this. I’ve gone quite far down the rabbit hole!
Related Links:
- Fix for Poorly Installed Window Flashing
- GBA.com: FAQ: Flashing an Existing Window
- A Truck That Powers the Job
- Power Your Home with Bidirectional Charging
Question 2: Which comes first—reframing or re-siding?
@heath from Youtube writes:
I just bought a cabin that is 612 sq. ft. The living room and kitchen are on a concrete slab, have had termite damage, and had lap siding with no sheathing underneath. It’s down to studs now. In what order would you deconstruct this and rebuild? Start with reframing then siding, or siding first then reframing?
Related Links:
- 12 Restoration Blunders
- Is Adding Exterior Insulation When Re-Siding Your Home Worth the Cost?
- Updating a Cabin for Energy Efficiency
Question 3: Is it normal to need to add water to a hydronic system?
Mark writes:
An issue I am dealing with is having to add water to the hydronic system. The first week of March 2023—after eight months in our new house—the combination boiler threw an error code for “high/low pressure” and we had no domestic hot water. The HVAC contractor that did the installation came out and added some water to the system. We talked about the possibility of air in the system, and I watched the water-addition process, but I made no notes regarding the pressure reading before and after the water addition as I didn’t think this would turn into an ongoing issue. The last week of March 2023, the same error code appeared on the boiler and a group of four guys from the HVAC contractor stopped by on their way home from a seminar given by an equipment supplier. They didn’t have the needed tools to add water, but we discussed the process again and talked about adding a “system feeder” to keep the glycol/water mixture automatically topped off (specifically an Axiom DMF150 Pressure Pal). As a side note, there have been no penetrations into the floor slab to install anything since we have moved in, and I can see no readily visible signs of a leak in the mechanical room hydronic plumbing.
I obtained the needed female/female hose from the home store and added more water myself to restore proper functionality of the system. The HVAC contractor gave me an estimate for the system feeder of ~$1300 installed. I have had to add water three more times since then (a total of five additions). The more water I add each time, resulting in a higher system pressure on the gauge (staying within the boiler manufacturer’s recommendations of course), the longer it takes for a pressure fault to be set on the boiler. So I suspect there is a small but consistent leak somewhere in the system. In my online searching, I have found that water should not need to be added to a hydronic system unless there is indeed a leak. BUT, the fact that companies make devices to automatically add fluid to a hydronic system leads me to believe that this is not an uncommon occurrence.
How concerned should I be about a hydronic system that apparently has a small leak, and just how common is it to have a system feeder in a residential system?
FROM MIKE LOMBARDI:
Hi Patrick,
I wish I could give you a simple answer and solution, but no two systems are alike. I will try to help. New closed hydronic systems may need an occasional refill, usually in the first 6 to 12 weeks. Fresh water is laden with oxygen and other gases; repeated heatings in a closed system cause the dissolved oxygen to exit the water as a gas and hopefully leave the closed system via proper and properly located automatic vents or Microbubble air separators. Air is the enemy of all ferrous components, so removing it from closed-loop heating systems as quickly and effectively as possible is important.
As systems burp oxygen, the system pressure is reduced and more water is needed to maintain pressure. Systems with auto refill valves will add water to a pressure setpoint (typically 12 to 15 psi), and the venting cycle continues with the fresh water until a pressure equilibrium is finally reached (usually in 6 to 12 weeks). There are factors that complicate system pressure and venting:
- Incorrect near boiler and manifold piping.
- Location of auto air vents.
- Location of circulators.
- Lack of primary/secondary piping.
- Size and location of the compression tank.
- System size and operating temperatures.
- Control strategies.
- Non-oxygen barrier tubing.
My first suggestion for the homeowner would be to perform a system pressure test. Even new pipe, valves, fittings, and other components can have small leaks. If the pressure test holds, I would have an expert look at the overall system.
Related Links:
Question 4: Will a permanent wood foundation and concrete-free slab work for my cabin?
Steven writes: Hi Mike,
I’m a capable DIYer and planning a small cabin build in the Catskills for my family.
I’d like to use a permanent wood foundation (PWF) with a concrete-free slab, but I’m not sure if it’s suitable for my situation. The lot is sloping, so the basement will have a walkout on one side. On the opposite side from the walkout, the foundation wall will be backfilled about 4 1/2 ft. high. I’m concerned that a concrete-free basement slab (a layer of insulation covered by two layers of subfloor sheathing glued and screwed together) won’t be able to resist the soil pressure on the backfilled foundation wall. Do you think the concrete-free slab will resist the backfilled wall? And if not, are there any alternatives? Also, the cabin design has a couple of 8×8 posts carrying concentrated loads from the roof/ridge beam. Can the PWF ‘footing’ plate handle a concentrated load?
I like the idea of the PWF and concrete-free slab because they’re DIY friendly with my carpentry skill set. They can also be built in stages—on weekends and vacations—which can’t be done if you’re forming and pouring and finishing concrete.
Related Links:
- The ANSI/AWC 2021 Permanent Wood Foundation Design Specification (PWF)
- Podcast 565: Members-only Aftershow—Permanent Wood Foundations
- Three Types of Footings to Support Foundation Walls
END NOTE:
Podcast 601: Members-only Aftershow — Making New Builds More Affordable
The crew talks about what “house as a system” means and why it’s important to understand.
This episode of The Fine Homebuilding Podcast is brought to you by Loctite’s PL Premium Max

Indoor or out, PL Premium Max is our toughest construction adhesive. It can be applied in all weather conditions and bonds to any common building material.
Whether you’re framing a custom home, upgrading to granite counters, or fixing up your latest flea market find, PL Premium Max is the right adhesive for the job.
Say yes to a second chance. Say yes to Loctite.
Visit Loctiteproducts.com for more information.
Check out one of our latest Project Guides: Energy Retrofit!
Check out our FHB Houses:
Visit the Taunton Store • Magazine Index • Online Archive • Our First Issues • All Access

If you have any questions you would like us to dig into for a future show, shoot an email our way: [email protected].
If we use your question we’ll send you a FHB Podcast sticker!
FHB Podcast T-shirts!
Represent your favorite podcast! Available in several styles and colors. Made from 100% cotton. Find the Podcast t-shirt and more cool products in the Fine Homebuilding Store.
| Fine Homebuilding podcast listeners can now get 20% off anything in the Taunton store, including Pretty Good House.
Use the discount code FHBPODCAST to take advantage of this special offer. |
 |
“Finally, knowledgeable people talking about building reasonably-sized, high-performance houses for normal people with real budgets!” — DanD, VA, 8/19/22, Amazon.com review |
We hope you will take advantage of a great offer for our podcast listeners: A special 20% off the discounted rate to subscribe to the Fine Homebuilding print magazine. That link goes to finehomebuilding.com/podoffer.
The show is driven by our listeners, so please subscribe and rate us on iTunes or Google Play, and if you have any questions you would like us to dig into for a future show, shoot an email our way: [email protected]. Also, be sure to follow Fine Homebuilding on Instagram, and “like” us on Facebook. Note that you can watch the show above, or on YouTube at the Fine Homebuilding YouTube Channel.
The Fine Homebuilding Podcast embodies Fine Homebuilding magazine’s commitment to the preservation of craftsmanship and the advancement of home performance in residential construction. The show is an informal but vigorous conversation about the techniques and principles that allow listeners to master their design and building challenges.
Other related links
-
- All FHB podcast show notes: FineHomebuilding.com/podcast.
- #KeepCraftAlive T-shirts and hats support scholarships for building trades students. So order some gear at KeepCraftAlive.org.
- The direct link to the online store is here.


