Podcast 612: Water Pipes, Attic Air-Sealing, and the Durability of AeroBarrier
The crew hears from listeners about the Massachusetts stretch code, gaps in click-together flooring, and rainscreens for vertical siding.
Follow the Fine Homebuilding Podcast on your favorite app. Subscribe now and don’t miss an episode:
 |
Peter is navigating the Massachusetts stretch building code. Jim needs help choosing a domestic water pipe system. Wayne wants to tighten his attic. Adam asks about long-term tests of AeroBarrier.
 We’ve created a custom eLearning coupon for podcast listeners – code: PODCAST20
The Sustainable Home Building Accelerator
This intensive, interactive online series of courses is designed to rapidly advance your knowledge of sustainable home design and construction. Whether you’re an architect, builder, or a homeowner, we’ll give you the information and confidence to design and build well-crafted, practical homes that maximize performance and comfort.
Over 11 hours of video. AIA Approved 10 HSW/LU Credits. Resnet 10 PD Credits.
When you purchase all three courses, you’ll receive access to a year of GBA Prime as well as a copy of the Pretty Good House book!
Remember the code PODCAST20 for any Fine Homebuilding courses.
Editor Updates:
- Andres: Outdoor kitchen
- Patrick: Email the podcast with questions for Jeff
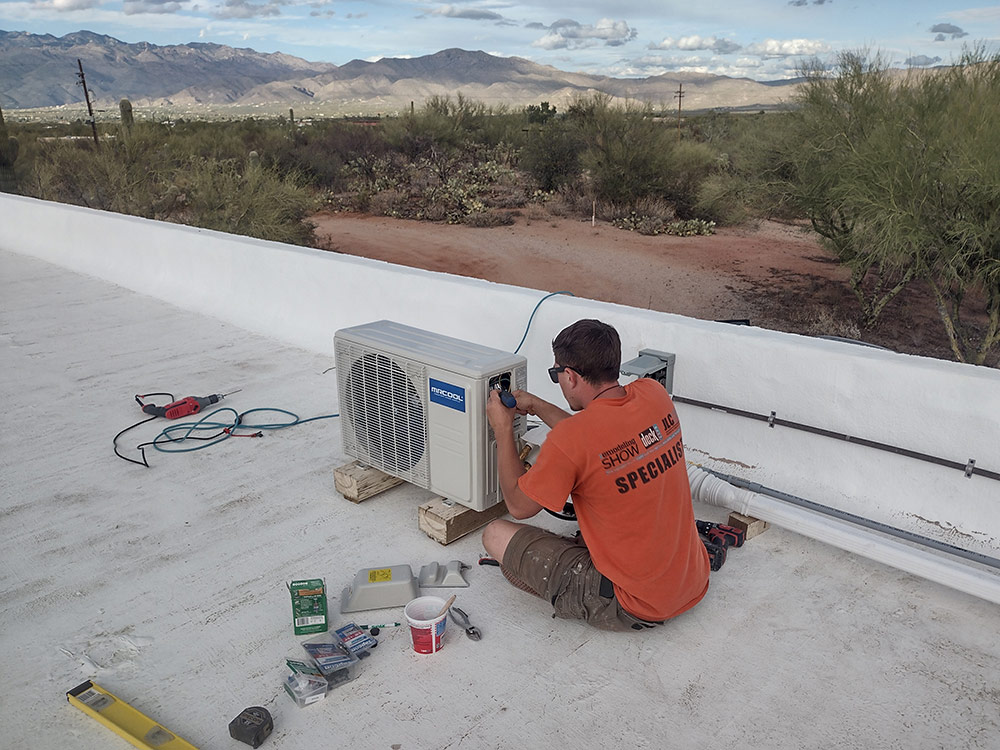
- Mike: Mr. Cool minisplit
Listener Feedback 1:
Peter writes: Hi Patrick.
Just listened to episode 606 on the new MA stretch energy code. Mike mentioned the ICC saying inspectors aren’t enforcing the new code, which is not the case in my experience. I’ve had the joy of being the first in my town to figure this out. The code is pretty simple to enforce by building inspectors. Does the proposed plan trigger the energy code? Yes or no. Then they need to see a proposed plan from a HERS rater ($1500-$2000 added to the budget) showing what needs to be done to hit the HERS 52 at the end, at which point they can issue the building permit. At the end of the project when the rater verifies the project hit the HERS 52 and all other building requirements are met (solar prewire, EV prewire) they can issue the occupancy certificate. Building inspectors probably won’t know the intricacies of getting to the HERS 52, but that’s not their problem, they just need to see the paper verifying.
Builders, homeowners, and HERS raters especially have the hard job to hit this energy code. Below are the recommendations from my HERS rater to get our original 2100sf addition and existing 1100sf 1951 cape house to comply. Essentially air seal meticulously (which to me was the scariest recommendation since in MA you’re probably dealing with old or really really old houses), lots of exterior insulation, and replace our perfectly good but old gas furnace and brand new but not terribly efficient gas hot water system with ASHP systems. Note that PV cannot be used to hit the HERS number, so that’s not money you can throw at the problem. I think for many people this will be a blip in their $1M+ budget. For others it will force them to cancel their project altogether, which is very unfortunate for their hopes/dreams/plans, potentially prices them out of the space they would like and still unable to afford a different house, creates less tax revenue for the town, and must have some economic impact since money isn’t being spent on materials and labor.
The third outcome I see is that some may reconsider what they really need from the project, adjust the scope and size, perhaps to just under 1000sf to avoid the code. Reworking plans may be cost prohibitive though, considering the costs of essentially going through preconstruction again. For us the code added about 70k to our budget (mostly materials aside from the ASHP) and I typically like to triple my materials costs to get a gauge on how much I might be paying if I wasn’t self-performing this work. 210k would be an impossible pill to swallow for most, even if you double it or leave it as is, those are large numbers. While reconsidering our project last spring I heard Steve Baczek say he will advise clients to build the house they will use 90% of the time.
That was good advice and made us think about what was really important – high performance, improved air quality inside, building a “pretty good house”, working towards electrification, fixing my previous bad building techniques – and what spaces we really wanted – a mudroom to take off dirty shoes and snow gear, a dining room to host the whole family, a larger room for our family to spend time together in. For us this code has been a royal pain and our situation is probably unique doing 99% of everything myself, but in the end, it was a good prompt to take a step back, reflect, and build the best house we know how to build (and can afford) as opposed to the biggest. And I’m having so much fun building the best house as opposed to the biggest. Thanks again for all the great work and content you all put out there!
“The existing building was modeled based on our field inspection completed on 2/10/23. The current home is at a HERS index of 99. We then created an updated building model with the proposed addition to construction specifications and code requirements for new construction, the combined building achieved a HERS index of 83. In order to reduce the HERS index to the required HERS index of 52 we made the following upgrades to construction specifications to the new and existing portions of the building.
- -ERV or HRV with 70% or better recovery efficiency
- -Electric Vehicle outlet
- -All new above grade walls to be R-20 with R-7.5 Continuous or better
- -All new Ceiling areas to be R-60
- -All New and Existing heating and AC to be upgraded to ASHP 10.5 HSPF/20 SEER or better
- -Existing Hot water heater to be upgraded to 50 Gallon ASHP with 3.57 EF minimum
- -All New window U values and SHGC to be upgraded to .27 U and .30 SHGC
- -All New foundation walls enclosing conditioned space be R-20 continuous
- -R-10 continuous insulation under new slabs
- -All Existing above Grade walls be updated to R-13 with R-7.5 Continuous or better
- -Combined Air Change per Hour be reduced to from 10.7 ach to 4.5 ach
- -The above path would generate an R&A rebate of $6,160.90 and Furnace replacement to ASHP rebate of $10,000.00. you could also apply for POS rebate for ASHP DWW of $750.00
Related Links:
- Dos and Don’ts of a Pretty Good House
- Reduce Embodied Carbons With Simple Forms
- Boston Leads Large U.S. Cities in Decarbonization Efforts Thanks to New Progressive Energy Code
Question 1: What are the different ways to connect PEX?
Jim writes: Hey everyone. Thanks for all the useful information you provide through these podcasts. As a homeowner/basic remodeler, I truly appreciate it. My wife and I just bought a single-story house in Ohio. She wants to renovate the kitchen and two bathrooms. Fortunately, the home has a full basement with exposed ceilings allowing me to see what currently exists and I have full access to run new pipes.
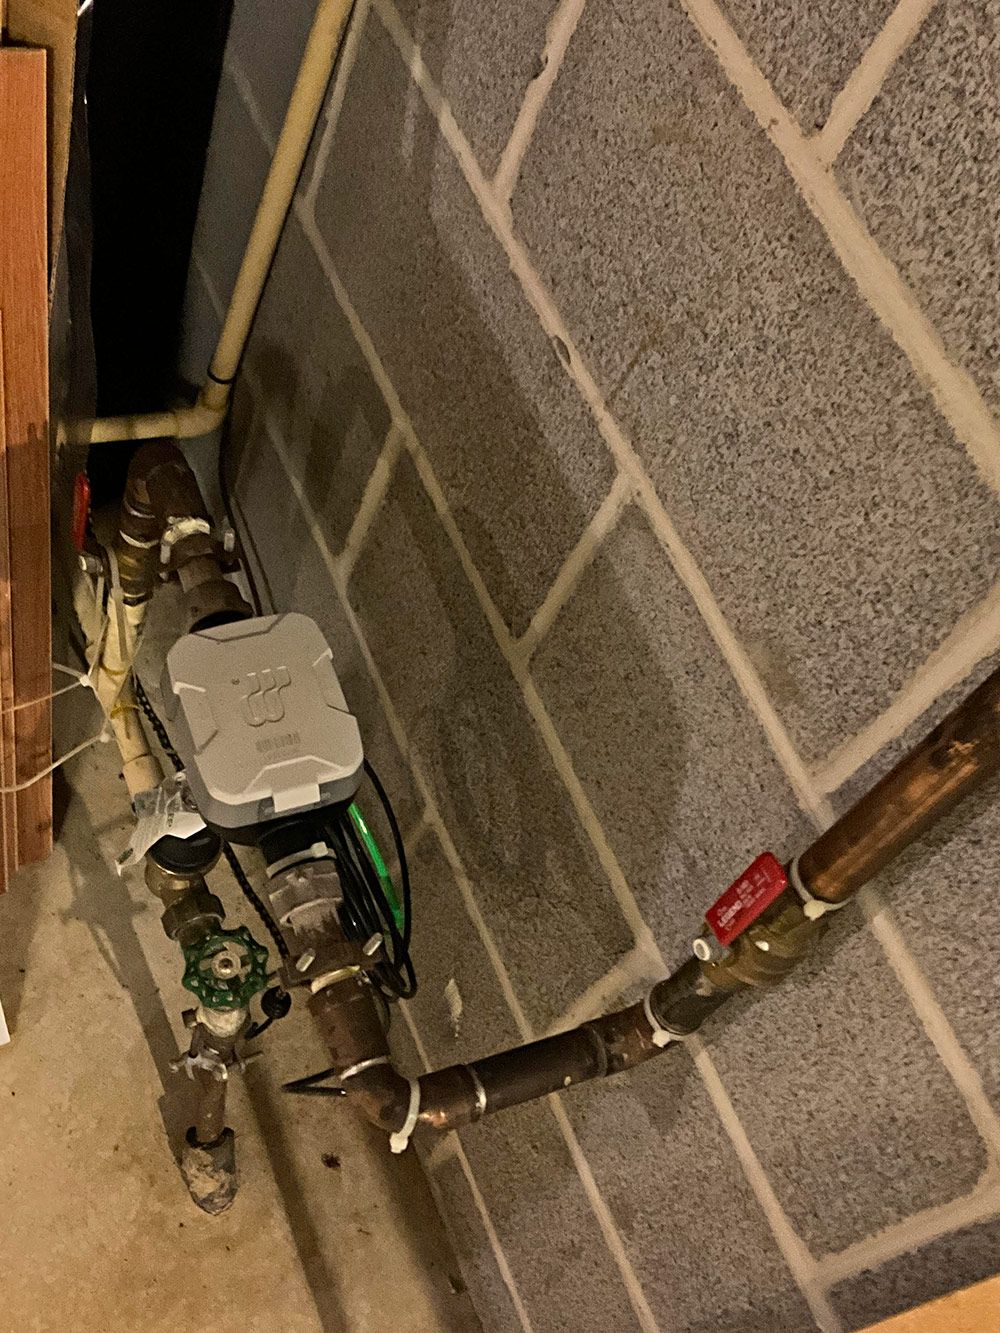
There’s not much pipe involved in the system and I plan to replace it all from the water main to the fixtures. I also plan to install a drain valve at the main to allow me to drain the entire supply system when we leave for the winter. What is the best way to do this? I planned on installing a 90 with a 3/4 ball valve off the supply line. I can then run a hose from the valve to the crock pot when draining the system.
I am somewhat familiar with CPVC. It is my understanding that it was predominately used many years ago and seems to have a stronghold in the trailer and prefab home markets. It’s easy to cut and glue. It also seems to have increased in popularity due to the cost of copper and people entering homes to steal the copper. My concern is as it ages, it gets brittle and can crack. I am also not a fan of CPVC valves. Can you provide me with your thoughts on the current versions of CPVC available in the market and the benefits/detriments of using it.
My intent is to use pex. I will be shutting the house off in the winter months, and I like the flexibility of the pex pipes in the event a freeze occurs (I will drain all the lines as best as I can). I am old-school and am used to using copper in solder. I do NOT want to use copper and solder for a variety of reasons.
When I go to all the stores to look at all the different methods to connect pex pipes, it seems overwhelming. I know a major issue with pex is the need for a tool (power or hand). I am a tool junkie and can easily justify the cost of the tool (power version) to the spouse given the cost savings of my doing the work. When looking at the different methods to connect pex, I see a few methods. They include:
- A tool which expands the pex pipe large enough to place the fitting inside the pipe. The pex pipe shrinks after a few minutes and a plastic expansion sleeve ring slides over the pex pipe to hold it in place.
- Pushing the pex pipe over a fitting and compressing a ring or sleeve over the pex pipe. I see a few versions of this.
- Pushing the pex pipe over a fitting and compressing a barb pinch clamp over the pex pipe.
- Push fittings.
Please let me know if my list is complete or if there are other methods to connect pex. At the outset, I prefer not to use push fittings for long term use. I prefer to use them on temporary repairs, but would appreciate your thoughts on the push fittings. The fittings costs are high. I expect using push fittings for an entire house would easily justify the cost of one of the tools for the other options.
I would appreciate your thoughts on the different methods of connecting pex. I am looking for the pros and cons of each. The ease of install, the durability of the connection, and the tools needed for the job. I am also curious as to whether these fittings are proprietary to a given manufacturer of tools or whether several manufacturers sell the same tool. I currently have the dewalt 20 v and milwaukee 12v platforms, so tools with those battery platforms are easier to justify, but not the only option. It seems that the milwaukee 12v platform has the most tools for plumbers. I will be working with 1/2 and 3/4 pipe.
Also, it appears pex has some manifolds with direct runs to all the fixtures. What are the benefits/detriments of this? If a manifold makes sense, where is the best place to install it? There is a 25-foot run from the main to where the circuts branch off the bathrooms and kitchen. Should a manifold be installed at the main or at the branch? I also see that I can make a 90 degree turn in pex without a fitting but need to insert the pipe inside a bracket to prevent a crimp in the pipe. Any tips/tricks in advance helps to make the job run smoother.
Finally, as I will renovate the rooms separately, what is the best way to connect the existing CPVC temporarily to the pex?
I know this is probably a long discussion. Hopefully, it helps with a topic that I expect many people have questions about.
Thanks so much.
Jim
Related Links:
- A Rundown of PEX-Connection Fitting Systems
- Choosing the Right Plumbing Valve
- Which Pipe Fitting Do You Need?
Question 2: What fire-rated material should I use to seal around electrical boxes?
Wayne in Enumclaw, Wa. writes:
I know you don’t get many questions concerning attic air sealing (HaHa) so I thought I would throw one out to you all. I have watched Mike’s series of videos on attic air sealing techniques on the FHB all access system. They are great but I am a bit confused by the material used to air seal the electrical boxes for lighting fixtures. Mike suggests that because the light fixture could produce heat, a fire-rated caulking should be used. It looked like this caulking followed ASTM E814 and UL 1479 as it showed up on the caulking tube in the video.
Is this caulking necessarily rated to withstand higher temperatures than “regular” caulking or the acoustical sealant, or does it possess what they call an “Intumescent” characteristic? This characteristic will result in the caulk swelling when confronted by smoke and fire to hopefully restrict the expansion of the fire or at least retard its progress.
Are the spray foams that are also called “fire block” or “fire stop” also rated to withstand higher temps than the “regular” foams?
I also have a wood stove stovepipe to seal around. Online resources suggest to fit sheet metal around the pipe and then use “fire resistant caulk” at the junction of the sheet metal and the stovepipe. I am thinking that “fire break” or “fire stop” caulk is not meant for this application? You would need to use a high temp silicone sealant like Rutland 500deg RTV?
I am going to replace my roof sheathing and shingles as part of this project and plan to make up some baffles to use based on Mike’s article “Roof Vent Retrofit From the Outside In“. My house is a basic rambler with exposed rafter tail trusses with no “raised heel”. I plan to butt these baffles up against new frieze blocking with Coravent RS-400 installed at the top of the blocks.
Appreciate your setting me straight on this topic.
Love the show, Long-time listener and All Access Member
Wayne
Related Link:
Question 3: Is AeroBarrier durable long term?
Cory writes: Hey Podpeople,
Long time listener first time writer. I’ve listened to hours of y’all while doing my best to seal and insulate my 1100sf, 1950’s ranch house in SE RI. Sealing and insulating the rim joist… annoying but not so bad. Trying to seal around the edge of my wind washed 1-4 pitch hipped roof… who knew hell was 10 feet above ground? And I’m about as small as male adults come these days (5’6, 120lb), which presents its own challenges to home projects… but that’s a question for another day.
My question is for Patrick since he seems so fond of aerobarrier. I’m curious as to the long-term durability of AB. As I’ve heard you all say many times “houses move”, I’m left wondering about the tenacity and ability of aerosolized acrylic on a gap left to seal long term. I looked on the website and saw a pdf of their testing which indicates they tested it on a 1/8th in gap… ok but what if the gaps are bigger than that? While I’ve seen videos and understand how the product builds on gaps to fill them, the last bit it fills, while small seems like it would be very thin and fragile. Have any of you heard of anyone testing this after a year or two of service? I wonder if the house it’s installed on would show the same BD #’s after the house has had time to settle and completely dry? I don’t know, but I feel like an ancylic tape or properly applied caulk would be a much more robust solution.
Which brings me to a second point. I found it a bit disheartening to hear you say you’d rather hire a third party to fix something that should be done right while in the framing and sheathing phase while it would seem the easiest and most cost-effective way to do it in the first place. I’ve heard you use call people hacks before, and putting the equivalent of a bandaid on a wound that requires stitches seems pretty hacky to me and definitely not “keeping craft alive“. I also found it funny that when you asked who wants to spend hours taping and caulking, the only one to raise their hand was the guy who actually did it for a living. As much as I enjoy listening and learning from all of you… sometimes I’m left shaking my head…
Take care and Happy Holidays,
Adam
From Ross MacPherson
I’m glad that the listener was able to see our durability testing report, this was an accelerated aging process that is pretty standard for material testing in the industry. This process exposed the seal to cycles of extreme high and low temperatures while flexing the material, simulating 50 years.
The sealant retains about 20% flexibility throughout its life which should be more than sufficient to accommodate the normal settling/shifting of a home. That is a great question about the larger gaps, the standardized testing uses specific criteria for gap size which is smaller than many of the gaps we seal.
When we think about how the sealant builds up on the gaps, it is important to know that during the seal process we are pressurizing the interior to 100-150 pascals (pa). A normal blower door test is done at 50pa. This increase in pressure is for multiple reasons but the byproduct is that as the sealant bridges the gap, the increased pressure breaks the weakest point and forces that sealant further into the gap. More sealant builds until it can finally withstand the pressures without yielding. The final thickness is sufficient to maintain the integrity of the seal during normal house movement.
We do have homeowners who continue to let us test periodically and from that subset, we have seen consistency with the original testing. We are always looking for more field data and welcome any homeowner who has had AeroBarrier installed to let us periodically test their home.
Regards,
Ross MacPherson
Application Engineer – Aeroseal Envelope
Related Links:
Podcast 612: Members-only Aftershow — Energy Improvements for Existing Houses
The crew discusses air-sealing with blower doors and how you can see air leaks with IR cameras. They discuss the pros and cons of different air-sealing methods, and what you can learn about your house’s performance without high-tech tools.
This episode of The Fine Homebuilding Podcast is brought to you by Loctite’s Tite Foam

Say no to inefficient and drafty. Say yes to Loctite Tite Foam.
When pros need to seal gaps too small for insulation but big enough to create a draft, they reach for Loctite’s TITE FOAM.
The high-density foam forms a tenacious bond to most common building materials, stays flexible to prevent cracking, and keeps air, moisture, and pests out of the house.
Whether you’re adding R value to the rec room, or finishing a boring basement, give that space a second chance with Loctite Tite Foam.
Visit LoctiteProducts.com for more information.
Check out one of our latest Project Guides: Energy Retrofit!
Check out our FHB Houses:
Visit the Taunton Store • Magazine Index • Online Archive • Our First Issues • All Access

If you have any questions you would like us to dig into for a future show, shoot an email our way: fhbpodcast@taunton.com.
If we use your question we’ll send you a FHB Podcast sticker!
FHB Podcast T-shirts!
Represent your favorite podcast! Available in several styles and colors. Made from 100% cotton. Find the Podcast t-shirt and more cool products in the Fine Homebuilding Store.
| Fine Homebuilding podcast listeners can now get 20% off anything in the Taunton store, including Pretty Good House.
Use the discount code FHBPODCAST to take advantage of this special offer. |
 |
“Finally, knowledgeable people talking about building reasonably-sized, high-performance houses for normal people with real budgets!” — DanD, VA, 8/19/22, Amazon.com review |
We hope you will take advantage of a great offer for our podcast listeners: A special 20% off the discounted rate to subscribe to the Fine Homebuilding print magazine. That link goes to finehomebuilding.com/podoffer.
The show is driven by our listeners, so please subscribe and rate us on iTunes or Google Play, and if you have any questions you would like us to dig into for a future show, shoot an email our way: fhbpodcast@taunton.com. Also, be sure to follow Fine Homebuilding on Instagram, and “like” us on Facebook. Note that you can watch the show above, or on YouTube at the Fine Homebuilding YouTube Channel.
The Fine Homebuilding Podcast embodies Fine Homebuilding magazine’s commitment to the preservation of craftsmanship and the advancement of home performance in residential construction. The show is an informal but vigorous conversation about the techniques and principles that allow listeners to master their design and building challenges.
Other related links
-
- All FHB podcast show notes: FineHomebuilding.com/podcast.
- #KeepCraftAlive T-shirts and hats support scholarships for building trades students. So order some gear at KeepCraftAlive.org.
- The direct link to the online store is here.
