Podcast Episode 632: DIY Dense-Pack, Wonky Doors, and Airtight Enclosure Penetrations
In this episode, listeners discuss outdoor lighting, air-barrier improvements, DIY insulation, and more.
Follow the Fine Homebuilding Podcast on your favorite app. Subscribe now and don’t miss an episode:
 |
Scott describes his DIY outdoor lighting. Justin gives an update on his air-barrier improvements. Steven shares some info on building in Cochise County, Arizona. Michael says ADUs are expensive. Sean wonders if he can do his own insulating. Brian asks how to fix an ill-fitting door. Edel asks for the best way to detail mechanical penetrations in a double-stud wall.
Editor Updates:
- Mike: Tree clearing
- Brian: Entryway built-in

__________________________________________________________________________
Listener Feedback 1:
Scott in Southwest Ohio writes:
Hi Patrick and Friends,
After building our house I wanted to add outdoor lighting, and I researched hiring it out vs. DIY. I had quotes of $5k to $10k from companies, which seemed like a lot. As luck would have it, I found a Better Homes & Gardens LED lighting kit at Walmart.
The kit came with a transformer, five pathway lights, and a couple spotlights. After some simple math, I determined the transformer had excess capacity, so I purchased some extra spotlights, a cable splitter, and longer-length cables. For under $150—plus not a lot of my time—I had a great solution. We are 7+ years later now, and over that time I had a transformer fail and I purchased a spare, along with some spare lights.
I have had a few lights fail and the finish is fading, but the system works just fine. If I could go back in time, I would have purchased two to three of these kits to have a lifetime supply of components. Every year I look at Walmart, but they have not sold another kit or anything like it.
I enjoy the podcast!
Scott
RELATED STORIES
__________________________________________________________________________
Listener Feedback 2:
Justin from Northeast Pennsylvania writes:
Well howdy once again Patrick and the gang,
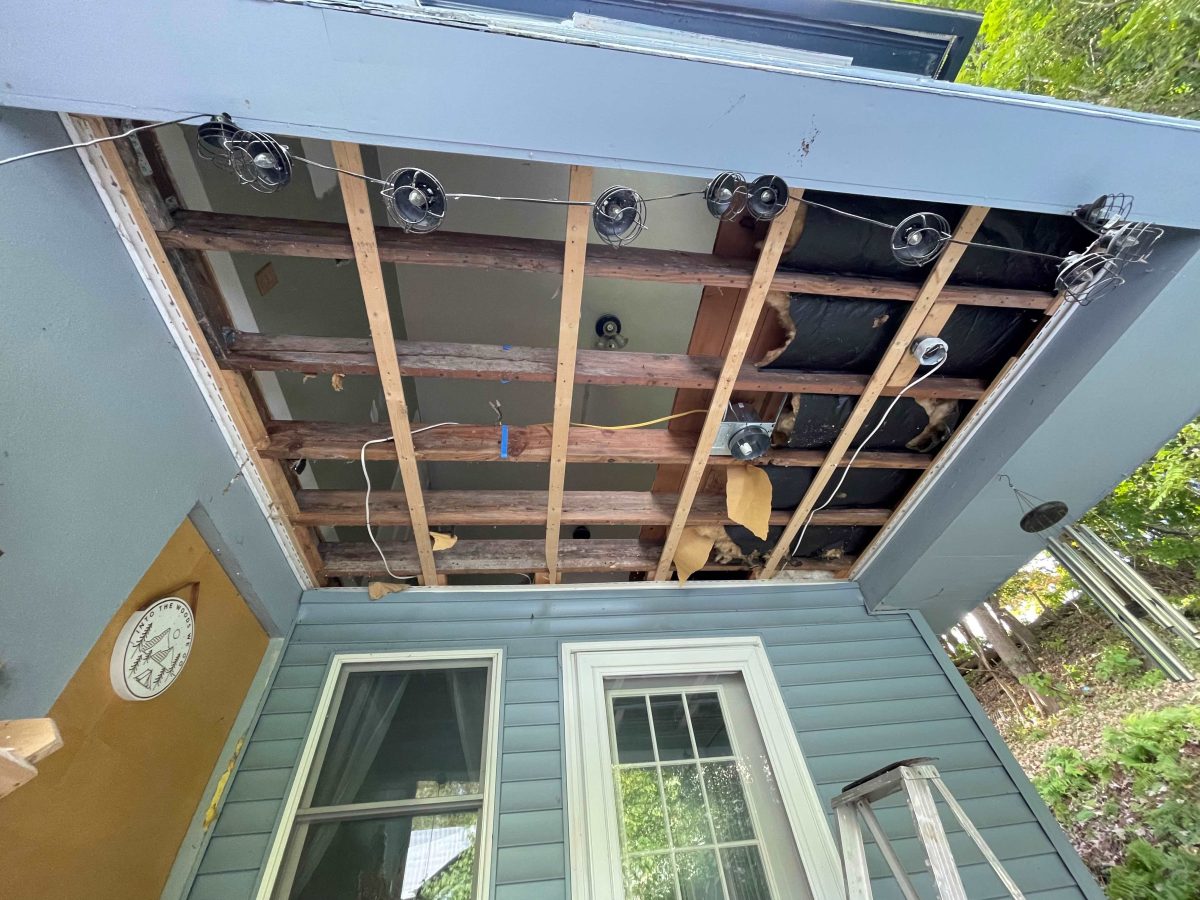
I have an update for you on my patio-ceiling/bedroom-floor project from episode 599. You may remember, I had a patio ceiling made from vented soffit that was leaking air into a portion of the bedroom floor above. I wanted to make it through most of the winter before discussing the success of my repair. I took your advice into consideration but still went with the overkill method of insulating/air-sealing. Despite this, I really appreciate all of your tips and reassurance. I would never have come up with my plan if I didn’t listen to 600+ episodes of the Fine Homebuilding Podcast.
As you can see in the pictures, my first layer under the framing was screwed and glued ZIP sheathing. I considered butting the rigid foam up against the framing with cap nails and then screwing the sheathing underneath, but I noticed that the sheathing right against the framing makes the assembly feel much more secure.
 |
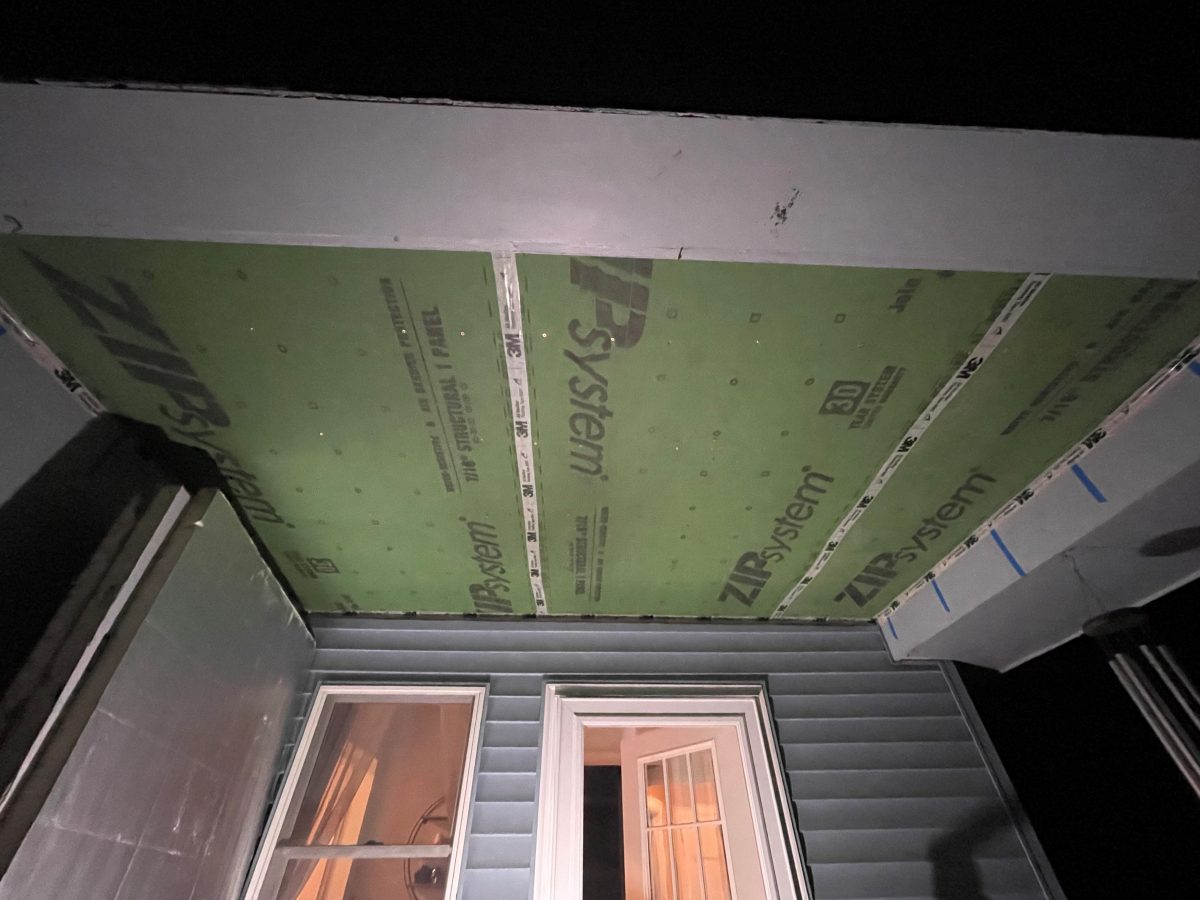 |
Then comes the overkill with 2-in. XPS.
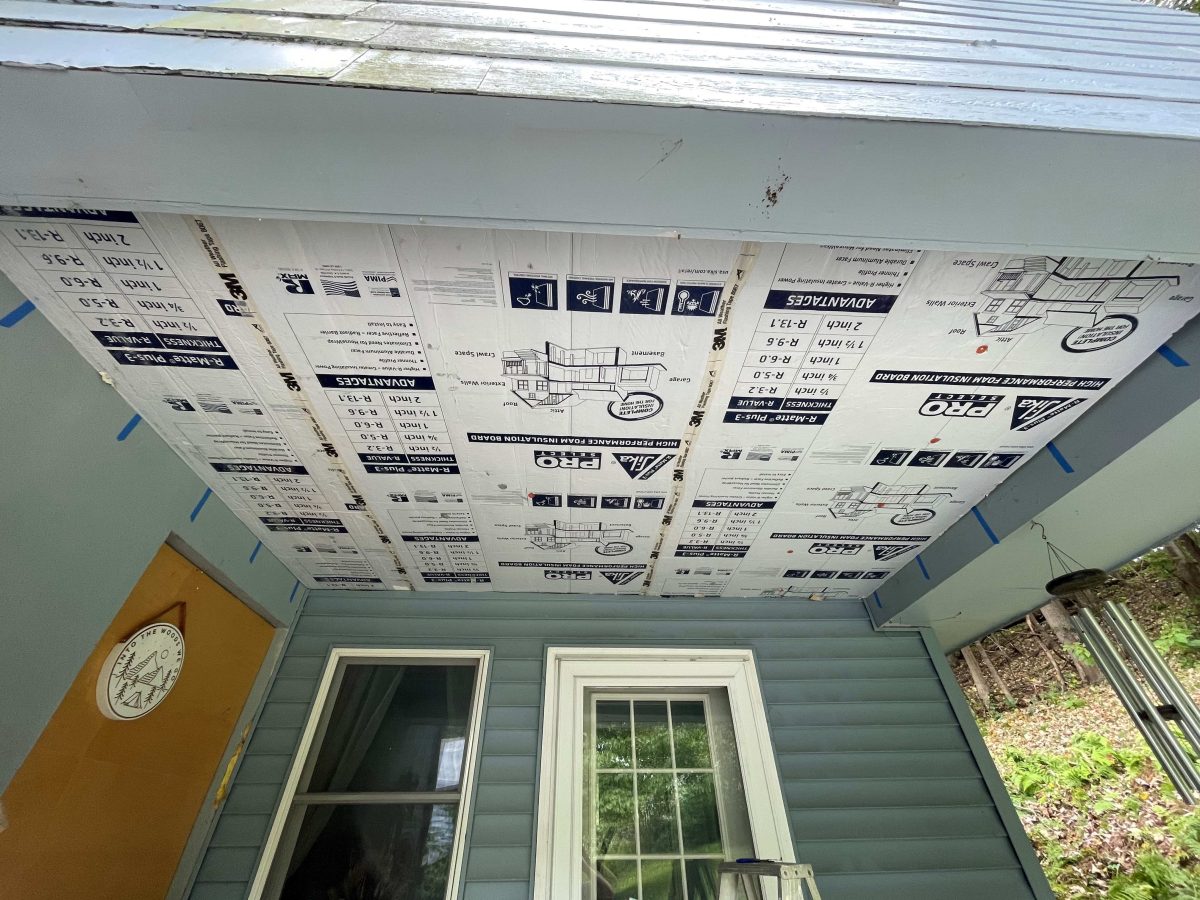
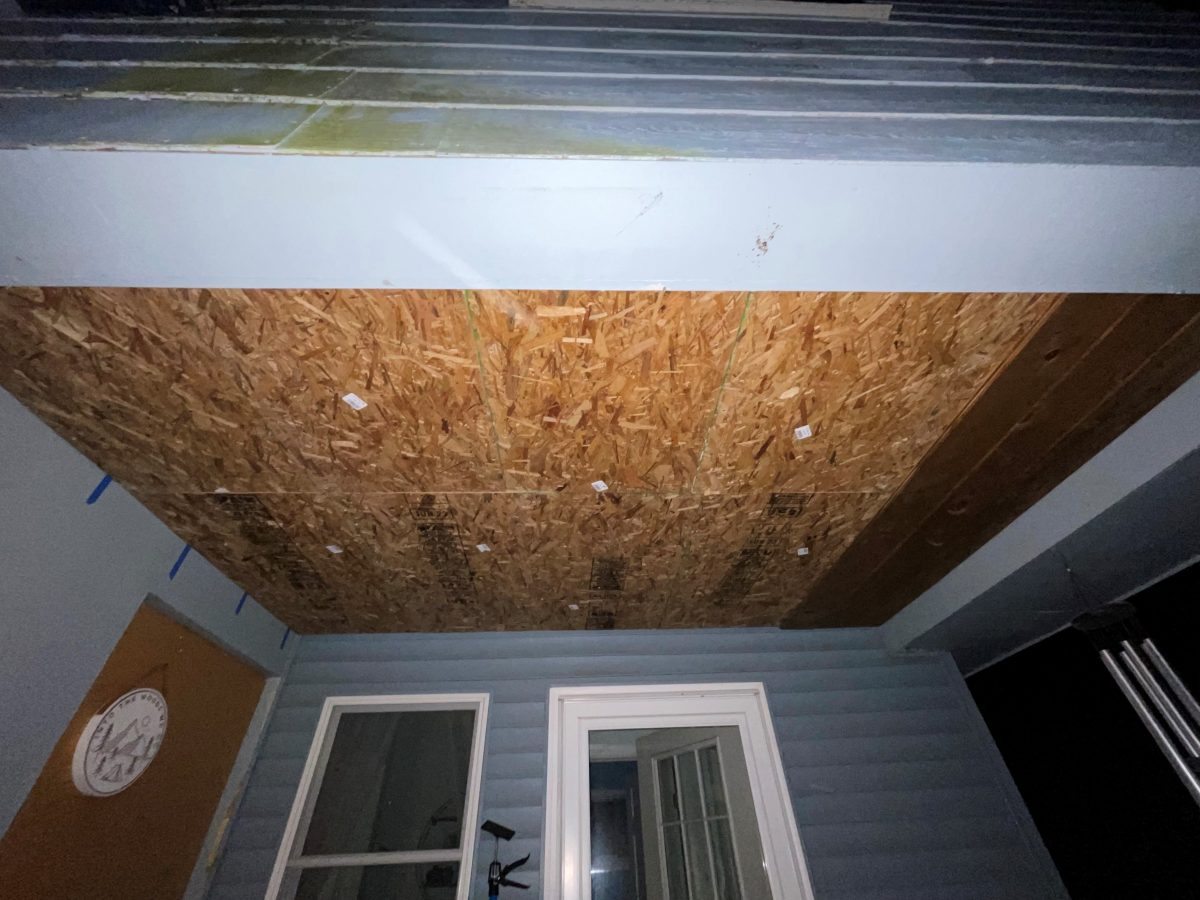
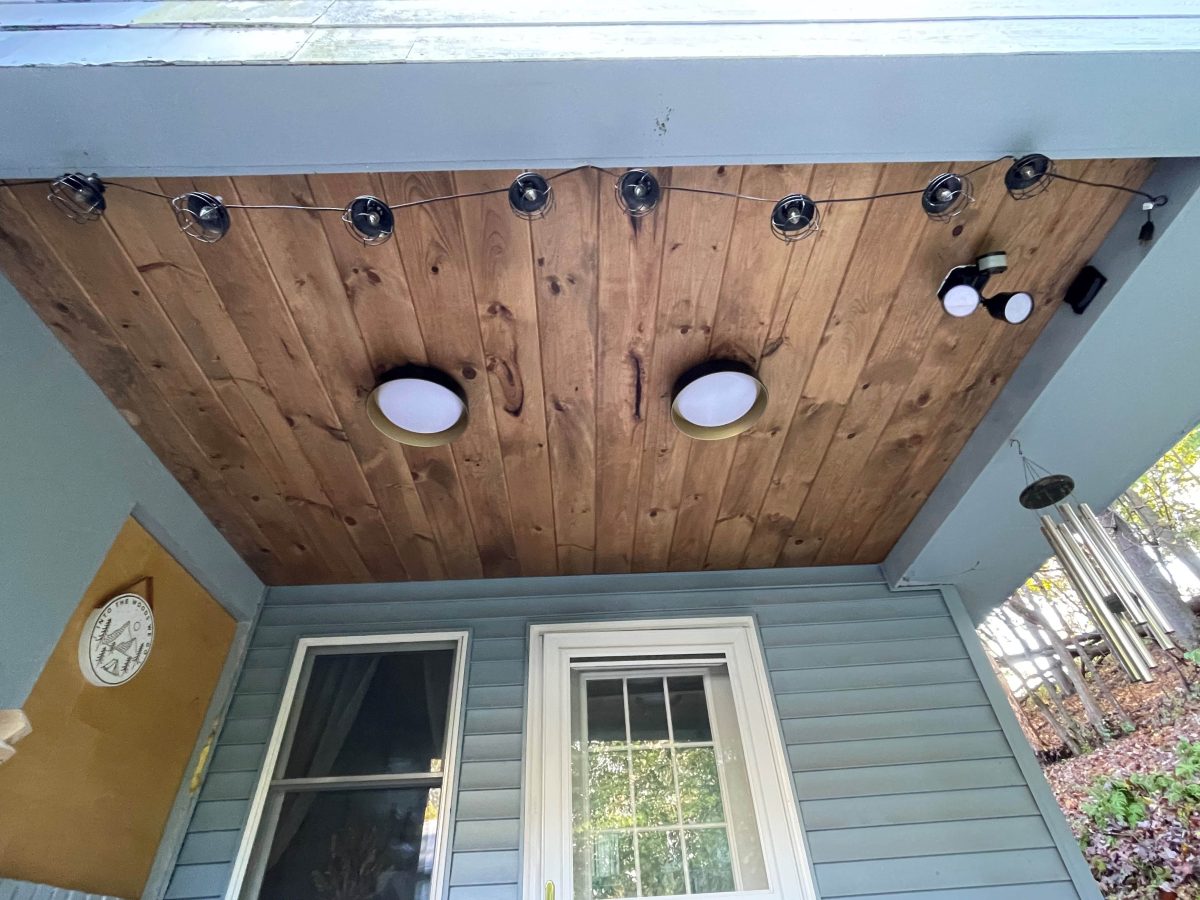
As the winter is coming to its close, I definitely noticed a difference in not only the temperature of the house, but also sound transmission. The rumbling of cars driving by was muted almost completely. I really have enjoyed all of the air-sealing and insulating adventures that I’ve gone through over the years and notice a very significant difference on comfort and my heating bill since the upgrade. However, as others have mentioned on the podcast, if you live in an old house with little to no insulation in the wall cavities, you can only get so far.
But wait, there’s more! I found two tips which might be useful to others:
- To hold the layers of sheathing and insulation in place, I used cheap $50/pair extendable lifts (cabinet jacks?). I’m not sure what to call them, but here’s a link to a similar product. (You can see what I used in the photo I sent where you’re looking down at the patio from the bedroom above.) They are cheaply made and are only good for light-duty use, but doing the work myself was impossible otherwise.
- I placed painter’s tape over the locations of the framing (as you can see in the photos). As I put each layer up, I was able to identify where the fasteners needed to go in.
Thanks as always for all the work that you do. My house would be freezing without all of you.
RELATED STORIES
__________________________________________________________________________
Listener Feedback 3:
Steven, who wants to build in Cochise County, Arizona, writes:
I listened to podcast 626 discussing my Cochise County opt-out question. I just wanted to follow up with some info that may help someone else.
- Land: The land has to be zoned RU4 and a minimum of 4 acres. Here, land costs about $2k to $6k for a rural 4 acres. Every year Cochise County sells OTC land between January and March, with a starting offer of $2k. These parcels are tax-delinquent properties that didn’t sell in August of the previous year. You get the land free and clear. If the land is subdivided, check the GIS (Geographic Information System) or the county office for surveys, and stay away from property with drainage easements.
- Septic: Septic permits are required, and a perc test is required.
- Water: If your land is not in the Douglas Active Management Area (AMA), you can drill your own well after submitting an intent to drill. The parcel must be less than 5 acres, residential use only, and no more than a 32-gpm well. Inside an AMA, you need a driller’s license.
- Buildings: You can build out of any material, such as hay or adobe, as long as you follow 2019 building codes. Smoke alarms are required. If you have water power and septic to a residential build, you can get a temporary occupancy permit to live in the finished portion of the home or get a temporary six-month RV permit to live in a RV during construction.
Thanks guys. Hope this may help someone else.
RELATED STORIES
__________________________________________________________________________
Listener Feedback 4:
Michael in Minnesota writes:
Hi folks,
Regarding the $300,000 small houses mentioned in podcast 625: we built a 600-square-foot ADU as part of a garage rebuild in southwest Minneapolis. People often ask what the construction cost was, expecting it to be low. I remind them a small dwelling has all the expensive rooms (kitchen, bathroom, mechanical) and few of the cheap ones (bedrooms, some Sheetrock, and a ceiling fixture). The per-square-foot cost of our ADU was well above similar-quality custom construction.
RELATED STORIES
_______________________________________________________________________
Question 1: Can I do my own dense-pack insulation, or do I need a pro?
Sean from Idaho asks:
Hey all,
I’m currently working my way through the early years of the podcast, and the whole team seems to agree that dense-pack cellulose is the way to go for insulating wall assemblies. I’ve looked at the FineHomebuilding.com resources and seen videos on the process as well. It seems like a great option, but one that requires an insulation crew and is not DIY friendly.
As an owner-builder about to break ground on a new build, my current plan is to use mineral wool batts in the wall’s 2×6 cavity—what most would agree is a very DIY-friendly approach—in combination with ZIP R-6 sheathing and a smart vapor membrane in CZ 6. Knowing that the crew on the podcast is very hands-on and DIY, I am curious to know if dense-packing cellulose is possible as a DIY, or if its installation truly does require the expertise and equipment of a professional. It doesn’t seem complicated, but perhaps I’m missing something. Or perhaps the blowing equipment is the detail preventing homeowners from trying this at home.
Thanks for the podcast.
RELATED STORIES
- Dense-Pack Cellulose Insulation Done Right
- Cellulose: The Perfect Insulation
- Dense-Pack Cellulose Coverage Chart
__________________________________________________________________________
Question 2: What’s the best fix for a door gap?
Brian from Oneonta, NY, asks:
Hi Patrick and team,
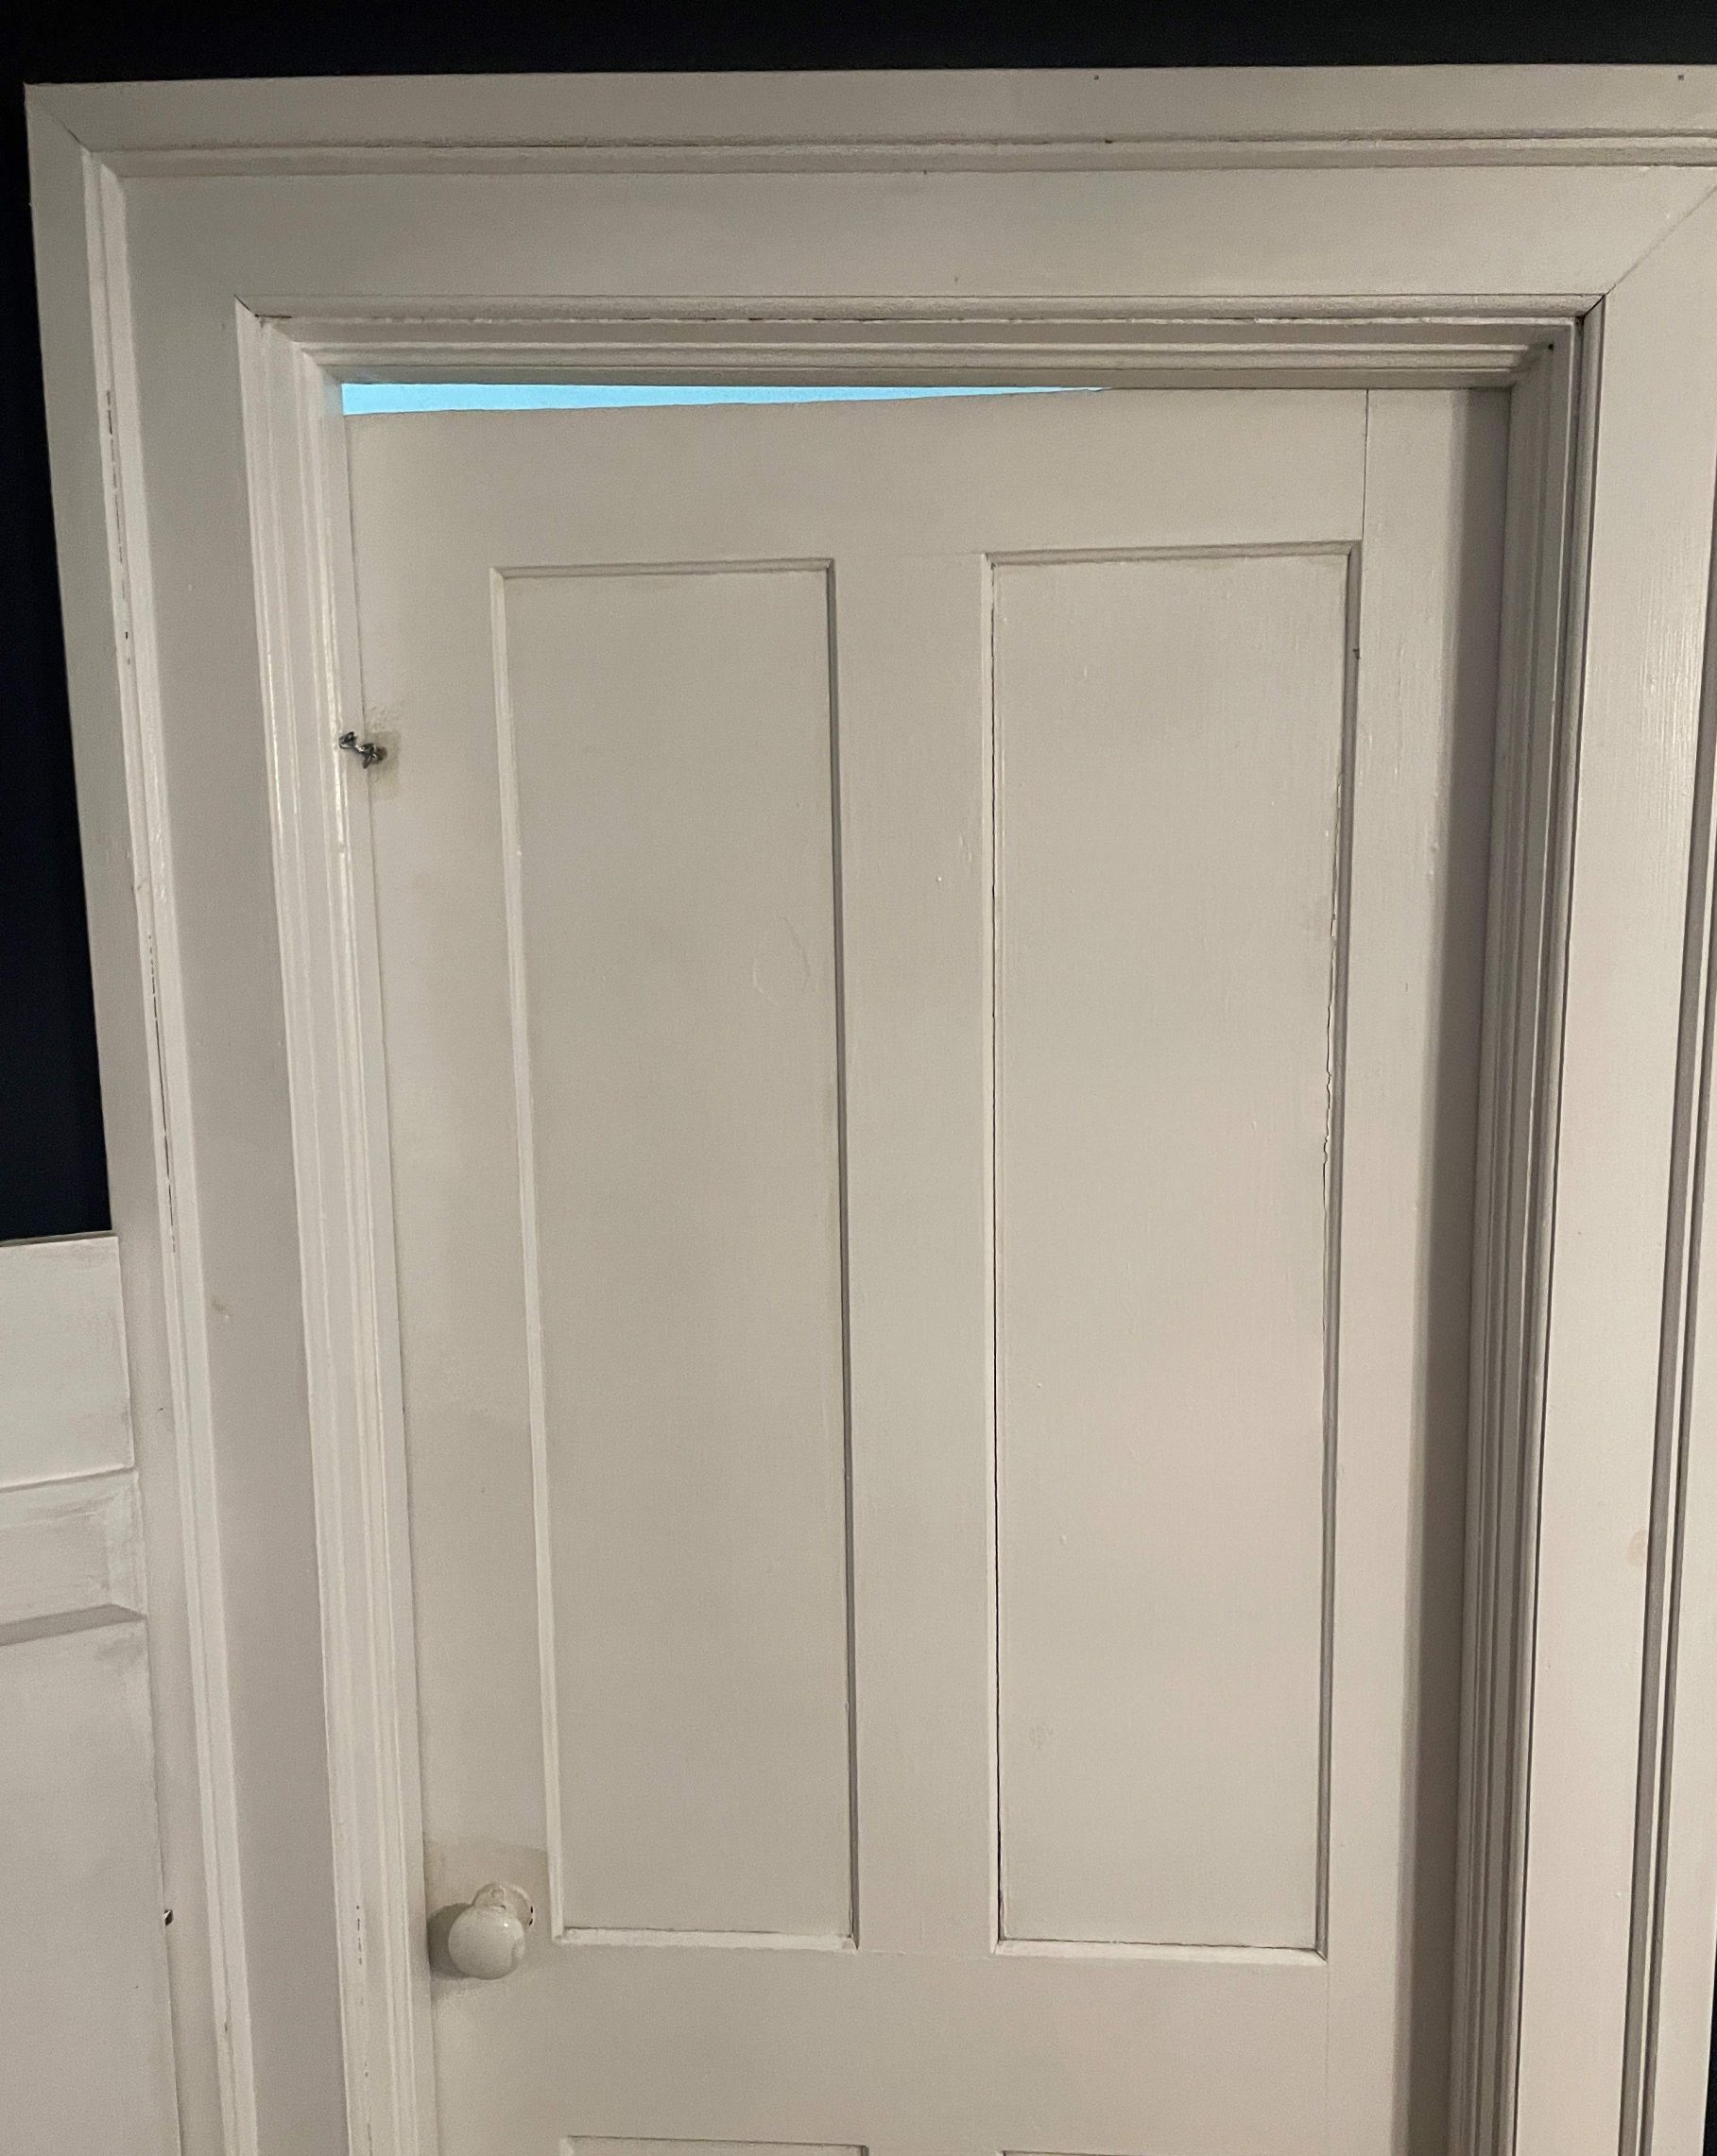
I’ve got an 1850s farmhouse with major settling. This particular door has a massive gap at the top. What do you think is the best fix?
__________________________________________________________________________
Question 3: What’s the best way to detail mechanical penetrations in a double-stud wall?
EdelMackey from Quebec asks on GBA.com:
Hello everyone,
I’ve been lurking for a while since I bought and read Pretty Good House.
I finally jumped in and decided to go for a PGH in Quebec/Canada (CZ 6).
My general contractor and building team so far have been very interested in the build, and we managed to get someone skilled enough to blow cellulose in our double-stud wall (R-4 2×6 in.-3.5 in.-2×4 in.). Now everyone else—plumber/ventilation guys/heat-pump people—have started poking holes everywhere.
I’ve been looking for some details about how to properly inspect and patch holes in this type of construction. Does anyone have some details about the common holes and good practices?
So far (although I’m probably missing a few):
- Intake and outake of our HRV
- Range-hood hole
- Plumbing vent
- HVAC holes to connect the exterior unit
- Electric wiring for exterior lighting
I intend to have a blower-door test soon and would like to future-proof the openings, since some contractors were not so familiar with a double-stud construction. Everyone has been really interested in the build and taking great care so far.
Thanks in advance for your support!
RELATED STORIES
- VIDEO: Penetrating Exterior Walls
- Detailed Assemblies for an Airtight Home
- A Case for Double-Stud Walls
_________________________________________________________________________________
Well, unfortunately that is all the time we have for today. Thanks to Mike, Brian, and Andres for joining me, and thanks to all of you for listening. Remember to send us your questions and suggestions to [email protected], and please like, comment, or review us no matter how you’re listening—it helps other folks find our podcast.
Happy Building!
The show is driven by our listeners, so please subscribe and rate us on iTunes or Google Play, and if you have any questions you would like us to dig into for a future show, shoot an email our way: [email protected]. Also, be sure to follow Fine Homebuilding on Instagram, and “like” us on Facebook. Note that you can watch the show above, or on YouTube at the Fine Homebuilding YouTube Channel.


