Podcast Episode 633: Window Leaks, Heated Footings, and Minimalist Builds
In episode 633 of the FHB Podcast we discuss topics like window leaks, heated footings, and minimalist builds.
Follow the Fine Homebuilding Podcast on your favorite app. Subscribe now and don’t miss an episode:
 |
Vic shows us a skinny new home. Kathryn shares the Green Upgrade Calculator. Anna says we missed a good leak detector. Chris is confused by a window leak. Evan suggests heated footings to prevent frost damage. Karl asks for input on his DIY new home.
Editor Updates:
- Mike: Building official training on PWFs
- Brian: Micro gardening
- Patrick: Yard sales and Stormville (NY) Flea Market
 |
 |
Please check out the BS* and Beer Building Science Symposium in Boston (September 10th & 11th) and Chicago (October 8th & 9th). Keep Craft Alive benefits from registration fees. Click here for more details.
And check out Justin’s GBA feature on linseed oil paint.
_________________________________________________________________________
Listener Feedback 1:
Vic writes:
Unfortunately, there are no air-sealing details in this news article!
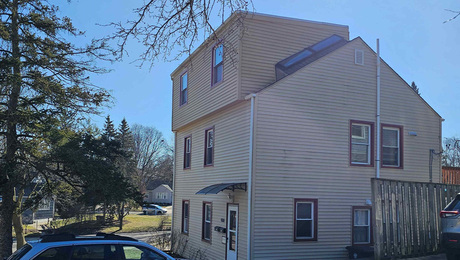
The housing market has been tough, but in D.C.’s Shaw neighborhood one home may be someone’s chance to get into a brand new single-family home. But there is a catch—it’s only 6 ft. wide.
Nady Samnang, CEO of a contractor based out of Virginia called Omnifics, said when he and his brother had the opportunity to acquire the small lot at 1738 Glick Ct. NW, they knew it would be a tight area to build on. However, they thought they could make it work on a 14- to 15-ft.-wide foundation.
“That original idea was supposed to be a four-level single family home,” Samnang said. Then, after work had begun, he said the city threw a new challenge their way—approving a structure that was 6 ft. wide, which is essentially the width of a driveway.
“We almost walked away at that point,” Samnang recalled.
But he said after talking with his brother and their team, they made the call to accept the challenge and got to work drawing up the plans for the 600-sq.-ft. home. He said with 45 ft. in length to work with, they decided they could build a two-story home that could fit a bedroom, kitchen, living room, and bathroom. The next struggle was constructing the home in the tiny lot.
RELATED STORIES
- Skinny Home in DC
- GBA.com: ADU Demonstrates Small-Home Living
- GBA.com Small House Sweet Spot
_________________________________________________________________________
Listener Feedback 2:
Kathryn writes:
Dear FHB Podcast,
I listened with interest to the question about the cost implications of a heat-pump water heater for Luray, Virginia. As it turns out, Pacific Northwest National Laboratory, Rocky Mountain Institute, and other partners just released the “Green Upgrade Calculator”, so you can figure out the lifetime cost and lifetime emissions of various energy upgrades. When I plugged in that zip code and footprint, I could compare a new resistance water heater (tanked) with a new heat-pump water heater (tanked). Looking just at the costs, the breakeven point is at about 3 years (though obviously mileage will vary depending on how much hot water you’re using and if you have demand response with your utility etc etc).
The upfront costs always seem really important when making a purchase, but for things like water heaters, they’re dwarfed by the yearly running costs. In this case, the annual costs were lowered by $311 per year (insert usual caveats here).
Anyway, I thought you might enjoy playing with this tool. It doesn’t get into the weeds too much, so I think it will be very helpful for people who don’t want to spend too much time agonizing over a decision.
Best wishes, Kathryn
RELATED STORIES
- DOE Water Heater Efficiency Rules
- Heat Pump Water Heaters 101
- GBA.com: RMI’s Green Upgrade Calculator
_________________________________________________________________________
Listener Feedback 3:
Anna writes:
The discussion about different water leak/flow monitors mentioned the Moen Flo Smart Water Monitor by name, and referenced other brand products as well. The “DIY-ability” of these monitors was also joked about (as in “not so much”). I use and love a different water monitor that is easily DIY—the Flume Smart Home Water Monitor. It’s $250, and it’s available on the Flume website and on Amazon.
It’s a two-part item—a battery-powered monitor that snugs up to the side of the meter in the box and a plug-in receiver on the house Wi-Fi. I have Flume monitors on three different rentals (for which I pay the utilities), and I’ve gotten alerts for running toilets, dripping kitchen sinks, and even a small main-line leak between the meter and the house that was losing 25 gallons a day. Flume data also supported my argument that a sudden $1,000 water bill was the meter, not a leak or running toilet!
The Flume doesn’t cut into any water lines, and it doesn’t shut anything off, but it’s so easy to install, the app is easy to use and interpret, and you can get minute-by-minute data on water use. I heartily recommend it.
Cheers,
Anna
RELATED STORIES
- GBA.com: Water Leak Detectors by Brian Pontolilo
- Smart Home Water-Line Leak Prevention
- Running Pipes through Walls, Ceilings, and Floors
_________________________________________________________________________
Question 1: What’s the best way to address a moisture problem with this window?
Chris from northern Vermont asks:
Hi Guys!
I’m a self-employed carpenter located in northern Vermont, but I began my career on the coast of southern Rhode Island. Being a one-man show, I built homes with various crews and general contractors and was fortunate to see lots of different methods and materials for different aspects of construction. I always took little pieces of all of my experiences that made the most sense to me and tried to them to get the best results.
Windows were one of the things that it seemed everyone had a different take on and pet peeves about how they were installed. Copper pans; clapboard with a tape product; tape the bottom flange; do not tape the bottom flange; flap the WRB over the tape on the top; just use tape, etc…Everyone had something they were set on, and they didn’t want to do it any other way.
One rainy windy day in Watch Hill, RI, I stood in front of a window and watched as the building sucked air and water in under an untapped bottom flange, and I thought to myself, “Wow, the house is a vacuum under a heavy wind.” It was then and there that I decided I’d barricade the water at the face of the window to make sure no water could ever get in from outside unless the window itself failed. That meant taping everything off and flashing it all down.
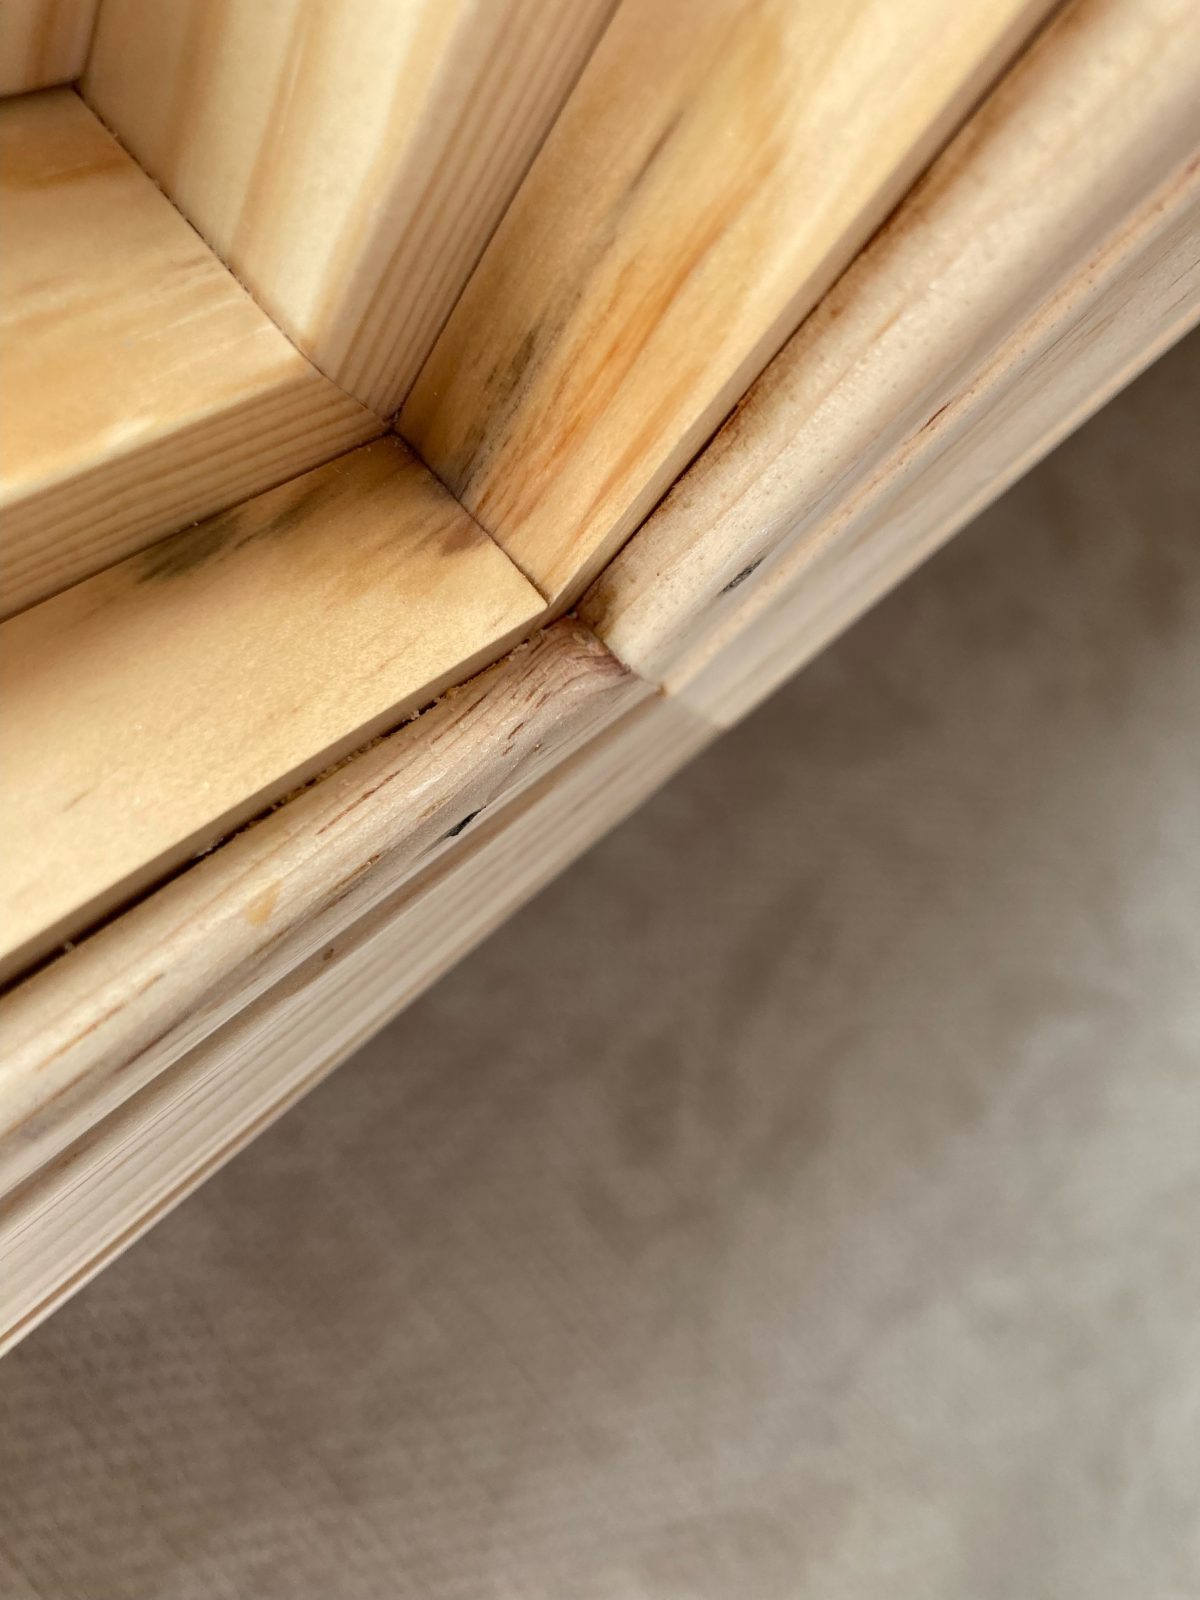
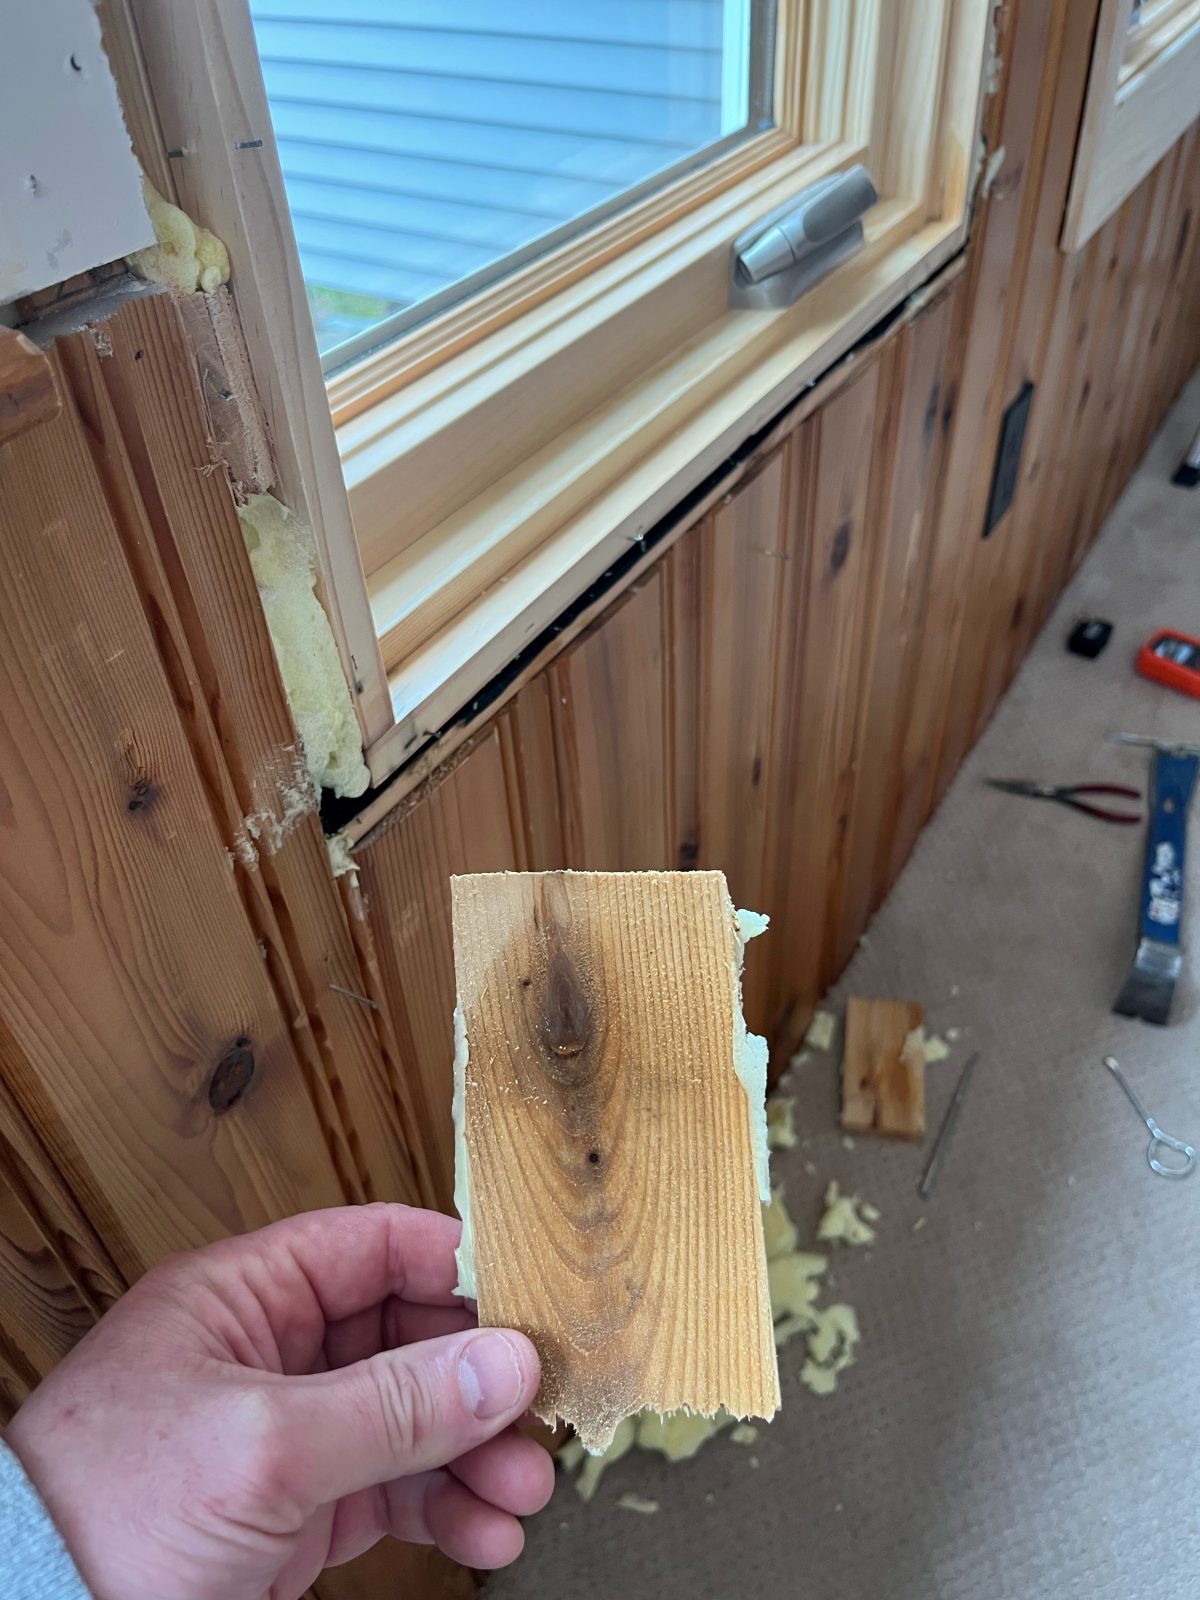
This was probably 10 years ago now, and I’m no longer on the coast of Rhode Island, but instead now near Lake Champlain in Vermont. I got a window-install job last summer at a house right on the lake, and I thought “Well, I’m just the guy for the job because I know what to do to keep wind-driven rain out of the window opening.” As it turns out, switching climate zones and working on existing homes is much different than new construction somewhere a little further south. I learned that the water outside doesn’t try as hard to get in the window opening as the water—or vapor—inside does.
 |
 |
My solution is going to be:
- Remove the siding and trim on the outside
- Inspect the flashing to make sure nothing changed
- Get that bottom flange opened up and flashed out
- Replace the cedar shims I had with plastic ones
- Reapply foam at the bottom
- Use Siga tape around the window to air-seal from the inside instead of just relying on the foam.
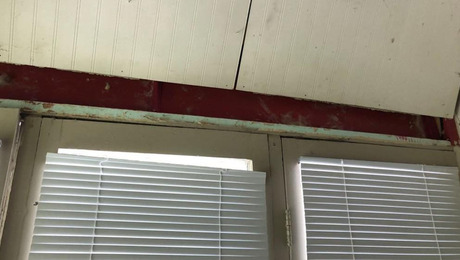
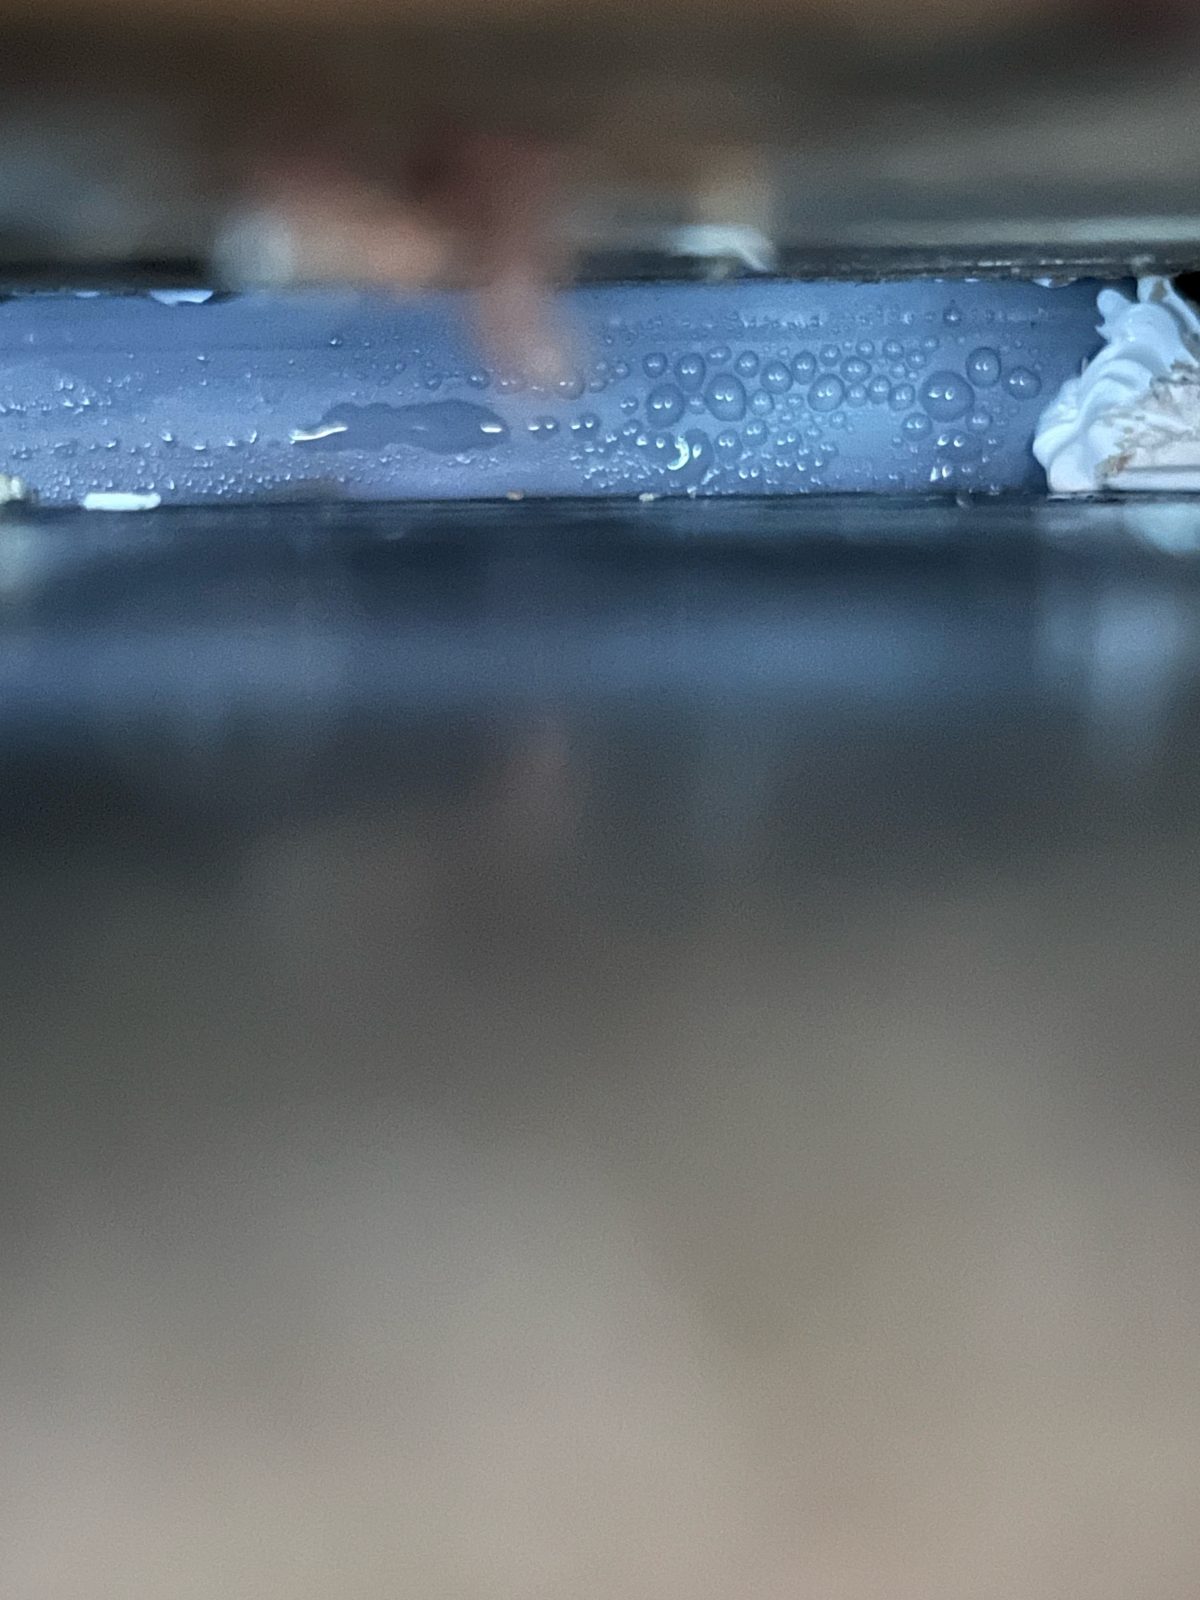
I don’t have many resources up here, as I’ve not been able to meet new builders or carpenters since I moved. I’m just wondering if you guys would have anything to add. I love the podcast, and thanks for reading, I’ve attached some photos so you can see what was going on; the bottom photo is the back side of the flange from the inside. Thanks again.
Chris
RELATED STORIES
- Flashing a Window with Jake Bruton
- Window Head Flashing by Mike Guertin
- Flash Windows in Five Different Walls
_________________________________________________________________________
Question 2: Do you think heated footings are a viable option?
Evan Bache-Wiig from Dallas asks:
Good afternoon!
I enjoyed your discussion of footing options in episode 628. A listener was asking how to do traditional Japanese footings in an area that gets hard winters.
When it comes to protecting a footing, would it be crazy to install some form of hydronic radiant heating in the soil around the footings to keep the soil from freezing during the winter? Has something like this been done before, or is it simply too much work? Is it simpler to just drill deeper holes for the footings?
Thank you for tolerating all of our lunatic building ideas.
Evan Bache-Wiig
RELATED STORIES
_________________________________________________________________________
Question 3: What do you think of my plan for a simple DIY house?
Karl from Northeast Minnesota asks:
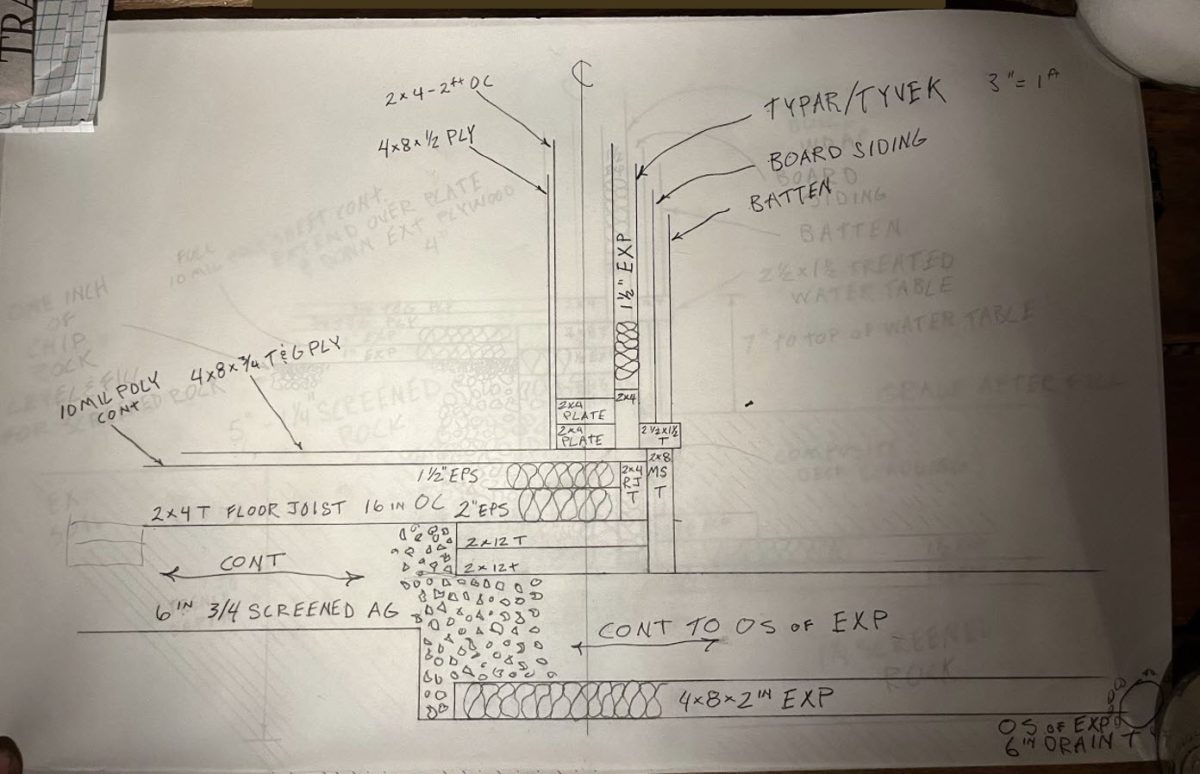
I recently started listening, and I am enjoying the podcast very much. Great work, and thank you!
My partner and I recently bought 20 acres in Northeast Minnesota (Climate Zone 3B). For the last couple years, we’ve mostly been living in a canvas wall tent on other people’s property. But now we have our own land! We like the simplicity of this lifestyle, and we’re saving money for our planned house build—a longtime dream of ours. The only thing that we plan on contracting out is site prep, to include scraping topsoil, removing tree stumps, and bringing in fill material. The rest of the labor will be done by us and our friends that we can get to help us out.
Even with all this time spent saving money, believe it or not, we aren’t rich. Our total budget for the build is $25kK Yes, you read that right. We do have another $20K that could also be used, but we would rather wait another year and try to save some more money instead of digging into that. All of the money is liquid. The land is in an area where code is not enforced, so we don’t have to worry about anyone telling us we can’t move in if it is not finished.
Currently, we plan on a shed-roof structure with a footprint of 16 ft. x 24 ft., with a single room and a 12-ft. x16-ft. lofted space. The foundation will be a gravel pad with a treated wood foundation. This will consist of 6 in. of 3/4-in. gravel for a capillary break. There will be two layers of PT 2x12s laid flat around the perimeter. There will be 2×4 sleepers in the gravel that will support 2-in. x 4-in. x 16-ft. boards that will be laid on edge at 16 in. o.c. and will connect the perimeter 2-in. x 12-in. GT acting as floor joists of sorts. In between the floor joists will be 3½ in. of EPS. Then we will lay down a 10-mil vapor barrier over it all. The floor will be comprised of two layers of ¾ tongue-and-groove plywood screwed to the sleepers. There will be 2 in. of subsoil XPS extending 4 ft. to the outside to make for a FPSF.
We are not planning on having any plumbing or electric. When the time and finances come, we plan on running some very simple electric (a couple receptacles, a couple lights, and a minisplit—nothing too fancy) via metal conduit on the interior walls. We have been tossing around the idea of putting in a rain barrel and plumbing a line inside just for doing dishes or anything where potable water is not necessary. This is not my main question here, but if you have thoughts on this, I would be curious to hear them.
The plan for the wall assembly is structural plywood sheathing on the inside (also to be used as the finished wall covering to save on cost), There will be NO vapor barrier on the inside. The 24-in.-o.c. 2×4 stud cavities will be filled with R11 fiberglass batts. Directly on the outside of the studs will be 1½ in. of XPS with horizontal 2×4 purlins running in between the XPS sheets. On the outside of all of that will be housewrap. Then, directly on top of the housewrap, will be rough-cut board-and-batten siding from our local sawmill. Boards will be 1 in. thick by 6 in. to 12 in. wide with 3-in. battens. The low wall will be a 10-ft. tall, and the high wall be roughly 16 ft. tall. The high wall will be southeast facing, with most of the windows on that wall.
The roof (all on a 4/12 pitch) will consist of: 2×12 rafters (16 in. o.c.); R-38 fiberglass batts; plywood sheathing; ice- and water-shield stick-and-peel; a rainscreen of furring-strip lattice; and corrugated metal roofing. Our heat source will be wood, at least until we get a minisplit. We are still working through ventilation without electricity, but we have been told about a method that utilizes a long pipe with many holes drilled into it that vents to the outside. The idea being that as outside air comes in through the pipe, it disperses more gradually through the holes, hopefully eliminating a direct cold draft on winter days. This is something that we are not married to and are open to other options.
So, is this doable? What would you change? Where would you focus time and money? Does the structure as a system seem sound? What am I overlooking? Any help is great!
Karl
RELATED STORIES
- GBA.com: Wood Foundation Assembly
- Frost-Protected Shallow Foundations
- A Strong Case for Wood Foundations
- BS* + Beer Show: Permanent Wood Foundations (PWFs)
_________________________________________________________________________
End Note
Well, unfortunately that is all the time we have for today. Thanks to Mike, Brian, and Andres for joining me, and thanks to all of you for listening. Remember to send us your questions and suggestions to fhbpodcast@finehomebuilding.com, and please like, comment, or review us no matter how you’re listening—it helps other folks find our podcast.
Happy Building!
The show is driven by our listeners, so please subscribe and rate us on iTunes or Google Play, and if you have any questions you would like us to dig into for a future show, shoot an email our way: fhbpodcast@finehomebuilding.com. Also, be sure to follow Fine Homebuilding on Instagram, and “like” us on Facebook. Note that you can watch the show above, or on YouTube at the Fine Homebuilding YouTube Channel.

