Framing and Flashing a Small Deck
Mike Guertin details the best way to build a durable deck frame.
Sponsored by Trex®
In this episode, builder Mike Guertin explains how to frame a freestanding deck frame. Tips include using structural screws to prevent the separation of joists from the rim board, and hurricane ties to secure joists to the beam and prevent uplift.
In addition, Mike installs blocking to prevent the joists from twisting and Trex® Protect Joist, Beam, and Rim Tape to help mitigate water penetration. Finally, Mike adds diagonal braces to help stabilize the freestanding deck.

Here’s the Transcript:
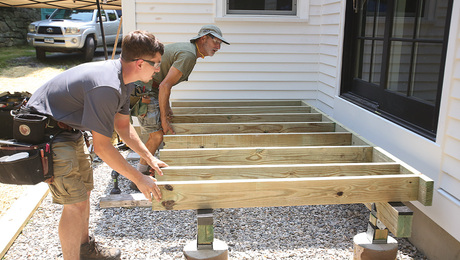
So we’re going to frame the landing. We’ve already got the parts cut, but because the rim board for the inside of the deck is going to be so close to the building, I need to pull it back a little bit. This way the nail gun and screw gun will fit in there. So I’m going to screw these 2xs on top of my beam to provide a small platform for the rim boards to rest on.
We already have the rim boards cut and marked out—marked out at 16 in. on center, which is the maximum spacing for the Trex® decking we’re using for residential installations. If we were doing commercial work, we’d be dialing that back to 12 in. on center.
Now I can set all the joists, and I’ll shoot them on. Those are only there to hold the joist in place. We do not need any joist hangers because joist hangers are merely a way to support the joist if it was being connected to a beam. But since the joist will be resting on top of a beam, no joist hangers are necessary.
Separation Safety
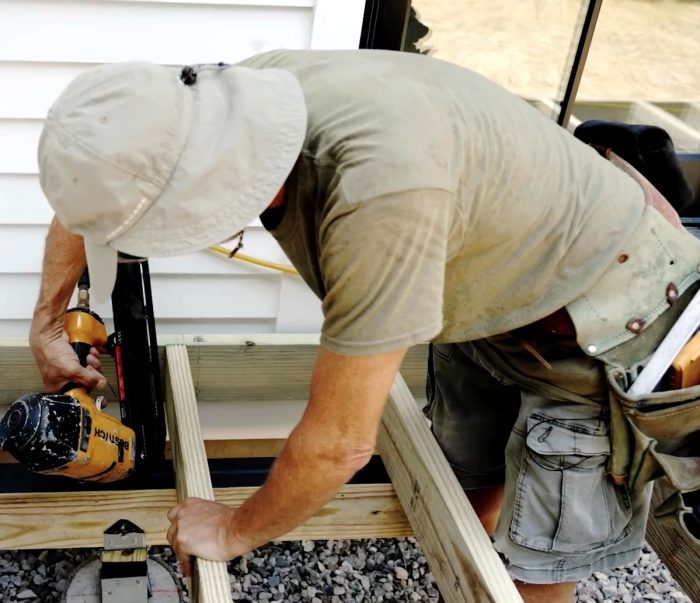
Over time, as the wood shrinks and people are walking on the deck, the rim board can separate a little bit from the joist. To avoid the rim board separating over time, we’re going to use structural screws on the deck frame in addition to nails. Because these are just 2x6s, I’m only going to put one structural screw right in the center. If I was going with 2×8, tens, or twelves, I’d most definitely put in two screws.
So you probably notice we’re using 2×6 joists. We had an inner rim of a 2×6, but we’ve got a 2×8 rim on the outside, which ordinarily doesn’t make sense. But because we’re going to be putting a riser board or a fascia board across the front, and the fascia board, the Trex is about maybe ½ to ⅝ in., we want to have full support behind it so we can fasten it at the bottom and fasten it at the top.
If we were using a 2×6, because we’ve got a 7-¼ in. rise, we’d end up with a hollow spot down at the bottom. But by using the 2×8 rim, we’re going to get full support behind there for fastening.
So we’re just toenailing down that joist into the beam with some 12-penny galvanized nails. Now the code only requires nails, but a lot of building inspectors want to see some mechanical ties, like some hurricane clips, which we will install just as a precaution to allay the concerns of the building official. But when you read a strict interpretation of the code, as far as I can tell, the nails alone provide adequate uplift resistance.
Now that the beam and the frame are locked in place, I can mark and cut the notches so that the end joist can drop down around the beam.
Hurricane-Tie Time
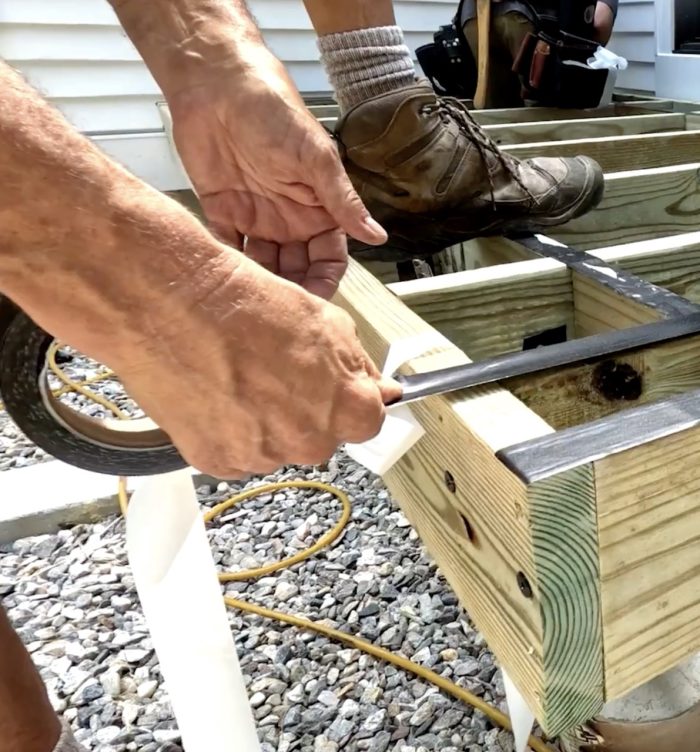
So we’re putting on hurricane ties. We need two pieces of tape, one on the joist and one on the beam. We’re using them to tie the joist to the beam, for the main purpose of joist uplift. So even though we nailed the joist down to the beam, by putting a piece of hardware there, we’re ensuring that it will be adequate and that the local inspector will not call into question whether or not we’ve adequately fastened the joist to the beam to prevent uplift when the opposite side cantilever is loaded with people stepping on it.
Blocking
So even though it looks like we’re done with the deck frame, we’re actually not. We still have some blocking to install. We need blocking over the beam to comply with the code. The intent there is to prevent the joist from rolling or twisting when they’re loaded, particularly on the cantilever end. We’re going to put solid blocks directly over the top of the beam to comply with the code, and then we’re going to install solid blocks for the border board as it returns back around the perimeter of the deck.
Border Board
So we’re going to have a border board that wraps around the corner. It will be mitered, and for the board that’s running this way, I need to have support for the deck board. If we had just had an end joist and we had the board down and we brought the field boards in, they would collapse.
So we could have done solid blocking, and a lot of contractors will take a 4×4 or double 2×4, and they’ll block it all up in here. But if we did that, then it would block the water from draining through the gap between the field deck boards and the border board. I like to let the water flow through.
Joist Protection
Now that we’ve got the frame and the blocking all installed, we want to protect the top of all the joists from water penetration by using the Trex® Joist Tape. This is 1-⅝ in. wide, so it’ll cap right over the top of the joists. When you drive nails through it, it’ll seal around the shank of the nails, and those nails, or actually screws, will be from the deck boards when we install those.
When we install this, there are a couple of things you’ve got to keep in mind. I want to make sure that I bridge over that joint wherever there’s a butt joint. Some people, when they install the tape, will start doing just the joists and then they’ll do over the rim board, and that joint ends up being open.
So we can do this one of two ways. One, we can start and lap over the rim board and go down each joist and then do the rim board, or two, we could do the rim board first. If we do that, then we want to lap over the tape that we put over the rim board so that we’re making sure water isn’t getting in the joint. The joints are the riskiest spots, so it’ll be the joints at the joist to the rim board and the joints between the joists and the blocking.
All Decks Big and Small
Everything we’ve done here, from the footings to the posts to the beams to the joists and the blocking, is the same thing you do on a small deck or a big deck. On a big deck, where it’s mostly important is to put in diagonal braces that brace between the posts and the joists when you’re building a freestanding deck.
If this deck had been mounted with a ledger board, it’s not going to shift away from the house. But because we’re not connected to the house, we need to brace it so it doesn’t move in this direction, in and out. So we’re just going to take some diagonal braces, nail them to the bottom of the post down there and to the side of the joists. Even though these don’t line up perfectly, it’s not that important. It’s really just having those fasteners in sheer position so that nothing’s going to move.
RELATED STORIES









View Comments
I like the frame. Did not see that you treated any end grain should you do that by code? Also why tape @ hurr ties? Lastly maybe fewer ties like every other joist is enough