Mid-Wall Install
This time-tested installation method for flangeless windows ensures smooth operation and provides air, water, and vapor control.
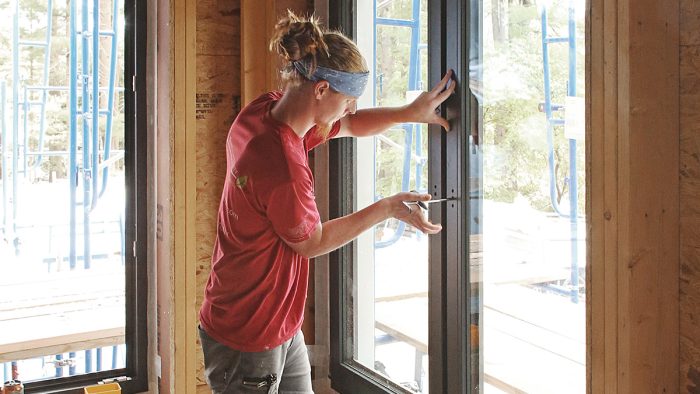
Josh Edmonds walks through the process of selecting and installing flangeless European-style windows and doors in high-performance wall assemblies. The thick, triple-pane glazing enhances comfort and reduces condensation risks, making these windows ideal for energy-efficient homes.
Detailed in step-by-step photos, the build team uses specialty tapes and shims to create a tight air- and water-seal around the window and door frames. This installation method not only improves the building’s durability but also elevates indoor comfort.
Way Back When
Before we started using European flangeless windows about 10 years ago, we installed windows with a nailing flange like almost every other builder in North America. I remember struggling over unfamiliar details as we adjusted to flange-free installations, but now everything has become second nature, from ordering and unloading to making final adjustments.
This article shows how we install flangeless European-style windows and doors in our typical high-performance wall assembly—a sheathed 2×6 wall with exterior I-joist insulation cavities dense-packed with cellulose. In this wall the I-joist acts as a Larsen truss that creates the insulation cavity on the exterior and provides attachment for the water-resistive barrier and siding. (You can see this exact assembly in “Larsen Trusses Live On” by Brian Pontolilo in FHB #321.)
So why do we use European windows? It’s certainly not for lack of patriotism or shorter lead times. Performance is the biggest factor. Our standard window, shown in the photos, has a whole-window U-factor of 0.13, which is roughly R-7. For comparison, the Department of Energy recommends windows with a U-factor of 0.30 to 0.35 (roughly R-3) in most of the country, and windows with a U-factor of 0.60 (R-1.6) in the hottest places. Given those DOE recommendations, some might ask if we really need R-7 windows. How much energy does that save?
Good Windows Make a More Comfortable, More Durable Structure
The answer is that we do need windows with excellent performance, but not because it saves money on heating and cooling—at least not a significant amount. More importantly, we need a high-performance window for the comfort of the occupants and the durability of the structure.
The 13/4-in.-thick triple-pane glazing common to European windows keeps the glass closer to the temperature inside the room. When this is combined with insulated frames that are easier to air-seal, you end up with a house that’s noticeably more comfortable than one built with ordinary windows, especially large ones.
This thick glazing also helps control condensation, which is a big deal for building durability. In our airtight and superinsulated houses we worry about creating condensing surfaces around windows and doors, which are often the coldest things in the room. When the thermostat is set to 70°F and the relative humidity is 40%, the dew point is 45°F; to avoid condensation, everything in the house should be above that temperature. In winter, keeping everything above 45°F is difficult with typical double-pane windows.
In our builds we prefer to install the windows in the middle of the wall, which allows us to insulate around the opening. This reduces thermal bridging through the window frame and the framing surrounding the rough opening. Our middle-wall location provides an interior sill, unlike fully inset windows.
Differences From Domestic Windows and Doors
We commonly install both tilt-turn windows and fixed windows. Tilt-turn windows have a sash that’s hinged on one side and swings into the space like a door. The sash also tilts toward the interior at the top, which can provide fresh air even when it is raining.
I like the tilt-turn operation more than double-hung and slider styles because it offers better airtightness. I think these windows are also more functional than casements, which have their sashes exposed to the weather when they’re open. Fixed windows are less expensive and a little more airtight, and we use them often in hard-to-reach locations.
The pricing of these European windows compares favorably to high-end or triple-pane domestic windows. There are fewer design options than top-of-the-line domestic windows, but there are several material options that can work with most budgets. Our favorite window is made by Yaro out of uPVC and has exterior aluminum cladding, which can be almost any color.
The standard uPVC’s white interior looks right at home in the modern style we commonly build, but if the client wants an upgrade, we can add a foil cladding of almost any color or wood grain of nearly any species to the sashes and frame. On multifamily projects, we’ve also used the least-expensive plain uPVC windows, which have a white interior and exterior, without any trade-offs in performance or durability.
More About Doors
The entry and patio doors we commonly use are also by Yaro. The doors have thermally broken aluminum frames and triple-pane glass, giving them far better energy performance than typical entry or patio doors. Euro-style doors install similar to the windows, with a few notable differences (see “Doors are a little different,” below).
Euro-style windows and doors have 31/2-in.-wide frames, which means the glass is smaller in dimension than with domestic windows, and you may need to upsize for an equivalent glass size. If you are looking for a 3-ft.-wide door opening, order a 42-in. door, which allows for the thicker frame and the thickness of the door when open.
Delivery takes about 10 to 12 weeks once we place an order. The windows and doors are manufactured on a per-order basis, securely packed in wooden crates, and sent to the U.S. in shipping containers. We used to unload them by hand when they were delivered, but now we use a forklift to get the crates onto the ground with less effort.
As a builder, I appreciate the precision hardware and rigid construction that makes these windows and doors a pleasure to use. Their advantages are obvious when I show them to clients, and I still smile when I open and close them in my own high-performance house.
Prep the OpeningBefore installing the windows and doors, we created an air barrier around the rough opening using 5⁄8-in.-thick Zip System sheathing to connect the interior (bearing) wall to the insulated Larsen truss on the exterior. We used Zip System Liquid Flash, a fluid-applied flashing membrane, to seal the corners.
  |
Install the Window FrameThe impressive weight of Euro-style windows and doors requires twice as many crew members to move them. If a domestic unit can be carried by a single carpenter, plan on two for a similar-sized Euro-style window and four for a standard-size patio door or big twin. High-quality suction cups are a must-have, as they provide a far better grip than the smooth frame.
|
Fasten the FrameEach window is first fastened through the clips that help hold it in position. When combined with shims, the clips can act as the final fastening. We prefer fastening operable windows with turbo screws because they’re faster than shimming at every clip, and we have the manufacturer drill holes for the screws at the proper locations. We fasten fixed windows and doors with the clips because we don’t remove the sash, which is required with turbo screws. 
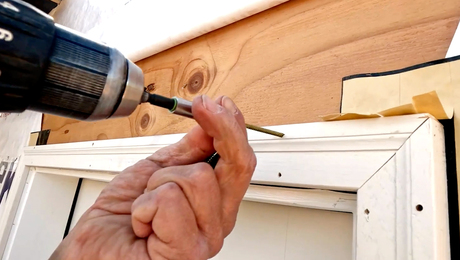
Fasten with Clips: Holding the frame plumb and against the back dam, we run 1-1⁄2-in. pan-head construction screws through the slotted hole in each clip into the sides and top of the opening. We regularly check for plumb and make adjustments by loosening the screw, correcting, and retightening. When installing doors and fixed windows, we shim at every clip location and the corners.
|
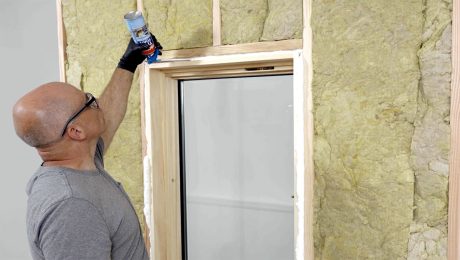
Seal the Inside, Then the OutsideOnce the window is fully fastened to the opening, sealing the interior comes next. The taped interior acts as an air barrier and prevents the spray foam that will seal around the frame from getting on any visible areas on the interior. The exterior trim will hide any foam that oozes out of the opening. When the inside is fully taped, we move outside. We use spray foam in the gap around the frame and then tape the frame to the WRB. With the air-seal on the interior, the tape used on the exterior is primarily for water management.
|
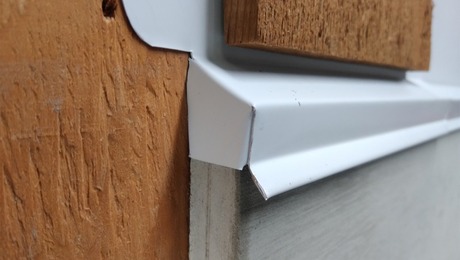
Add Final DetailsRigid-foam insulation around the window frame and window-matched extension sills provide a more durable installation. The foam keeps occupants comfortable and reduces condensation potential. The sill mounts to the window frame and directs rain and snow away from the opening.
|
Doors Are a Little DifferentDoors share many installation steps with windows, but there are differences too. Unlike the windows, these doors are installed flush with the interior walls so they’re able to open fully. This door installation started when we cast a 1-1⁄2-in.-deep recess into the floor when placing the concrete. The recess creates a drainage space and lowers the door sill to match the polished slab inside. We leave the glass panels in place when setting doors because they help keep the units square. 
Plumb and Fasten: We plumb the door from front to back with a level and then fasten through a few clips to hold the door in position. Then we check the door jambs for straight with a laser set up inside and shim the frame with composite shims. We shim at every clip before final fastening.
|
— Josh Edmonds is managing partner of Simple Integrity in Cooperstown, N.Y. Photos by Patrick McCombe.
From Fine Homebuilding 328
RELATED STORIES
Originally published November, 2024.


