A Closer Look at Pella’s Steady Set Window Installation System with Mike Guertin
Mike Guertin explains how Pella Steady Set windows are revolutionizing the glazing game and provides a helpful installation tutorial.
In Fine Homebuilding #329, Mike Guertin put Pella’s Steady Set windows to the test by installing five different windows using the system. His final thoughts? “It is definitely faster … and it’s clearly safer.” Check out this video for an in-depth tutorial on installing the Pella Steady Set windows, featuring tons of expert tips and tricks from Mike.
Here’s the Transcript
You may have heard of Pella’s new Steady Set window installation system. It comes on a couple of the window lines that they have. There are 5 features that set the window apart from other windows, but one thing that they all sort of focus toward is a complete flip around of the way we install windows.
Instead of installing a regular flange window that we install from the outside and usually with two people, you can do all of the installation of the Steady Set system from the inside (except for putting the flashing tape on the outside). It makes it a lot easier, and it also makes it faster. So let’s take a look at what those features are that make this stand out, and then we’ll walk you through an installation.
Steady Set Window Features
Let’s start at the bottom. On the bottom of all the windows, they’ve already installed shim blocks. Now these blocks are going to elevate the bottom of the window off of your sill pan by about 1/4 in.
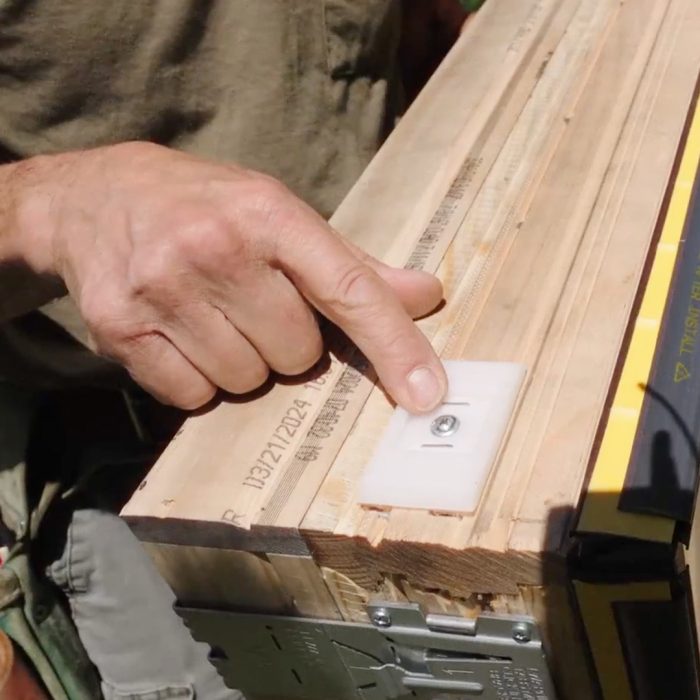
When I got these windows delivered, they only had a staple in the bottom, and what I noticed was that the staple ended up pulling out as I muscled the window around in my shop.
They also have a hole in the middle, and what I found is that you can just drive a screw in there if you want to ensure that the block doesn’t come loose. Just make sure that the cap of the screw doesn’t go beyond the depth of the recess.
This window only has two shim blocks at the bottom because it’s fairly narrow. But if you get a wider window, you’ll probably find that there are additional shim blocks.
Better Brackets
The other features include the mounting bracket. The Steady Set system relies on mounting brackets. These brackets are two-part; one part that’s screwed to the side of the window — and there might be 4 or 6 of these depending on the size of the window — and then the L-bracket that’s got a reversible in-turned flange. That’s what you’re going to use to fasten the window.
The first thing to do is slide out the bracket. It’s got a formed end, which is going to engage with little tabs that are on the mounted bracket that, as you push it in, will lift up slightly a little tab that’s on the side of that bracket. Then, as we slide it in, little detents, little holes that are embossed in the L bracket, will be locked into by the stationary bracket.
You can hear the click there. Now that’s locked in. That’s not going to come apart. There’s no need to put any additional screws into that. That’s secure. We’ll reverse all four of the brackets, then I’ll be ready to install the window in the opening.
These brackets came set up for 2×6 walls, which is what we’ll be putting this into for the demonstration, but I want to show you the other brackets that they have available. They have a 2×4 bracket, same design, same little detents in there so when you slip it in, it’ll set the exterior portion of the window beyond the sheathing just the right amount for a 2×4 wall.
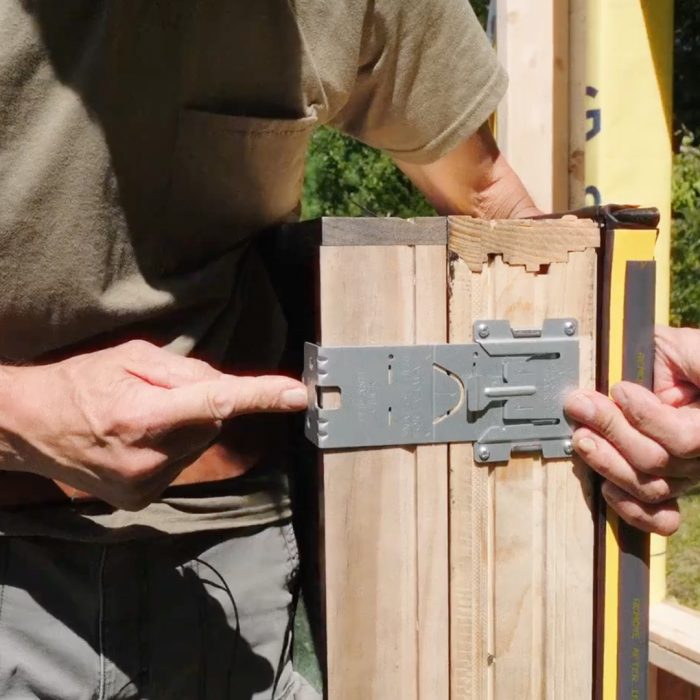
Then the one we just installed, which is the 2×4/2×6, and they got the labeling right on there. This one’s designed for primarily a 2×6 wall, but if it so happened that you had a 2×4 wall, you can snap off that extended part for the 2×6, and now it becomes a 2×4 bracket.
And then there’s a universal bracket which you can use for 2×4, 2×6, 2×8, but you’ll notice all of these little stamped-out detents you can micro-adjust for whatever-depth window you happen to have—anywhere from a 2×4 all the way out to a 2×8.
This would be useful if you’ve got a wall that has some exterior foam on the outside or if you’ve got a foam-integrated sheathing like Zip-R panels, or if you’re going to recess the window within the window opening instead of putting it out in plane with the exterior wall sheathing. You might insert the window a little bit, in which case you can micro-adjust that. I won’t go through the details on how to use that; the instructions are pretty clear.
The Stabilizer
On the top of the window is a simple-looking but very handy little device. This is called the stabilizer. What this does is when we inset the window into the rough opening from the inside, it’s going to take the place of another person.
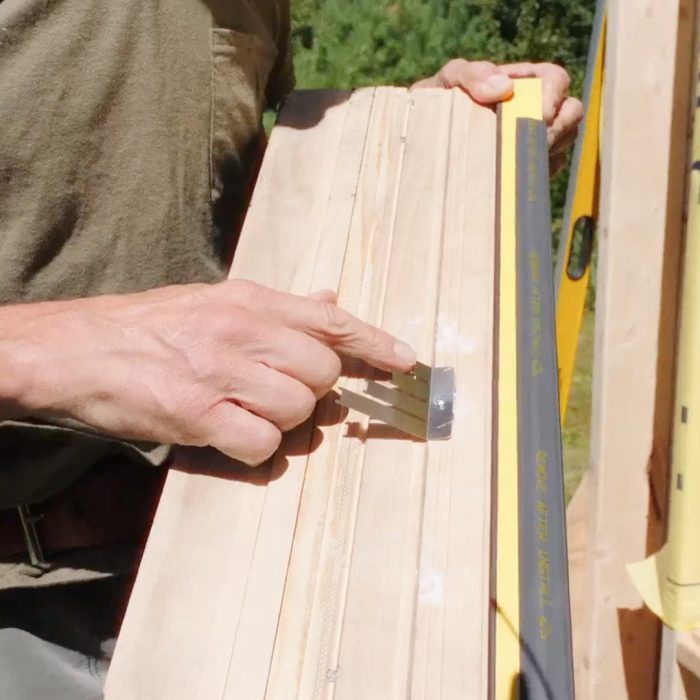
Ordinarily when you install a window from the outside, you need to have somebody on the inside or two people on the outside in order to balance the window in the opening so it doesn’t fall back out. But this stabilizer, the little tabs that are on here will engage the headboard—the bottom of the header or the header board—as they slide in, and they’ll prevent the window from sliding back out.
That way, you can do a one-person install, given that you’ve got those L-brackets that are going to stop the window from falling out, and the stabilizer will prevent the window from slipping back in. Now this is not intended for you to slide the window in, walk away, and come back 4 hours later on a windy day. This is intended for you to put the window in the opening, slide it in, and it engages and stabilizes the window. Then you pick up your level, your drill driver, and all the tools that you need to finish the install. So it’s just for a temporary extra set of hands, so to speak.
Flashing Fins
The last major feature is the fold-out flashing fins. Now, I’m very careful when I say that. I’m saying flashing fin. I’m not saying nailing flange or nailing fin; it’s a flashing fin. These come folded down onto the front of the window so that when the window is inserted into the opening, the fin can be released by removing the protective cover and then folded up.
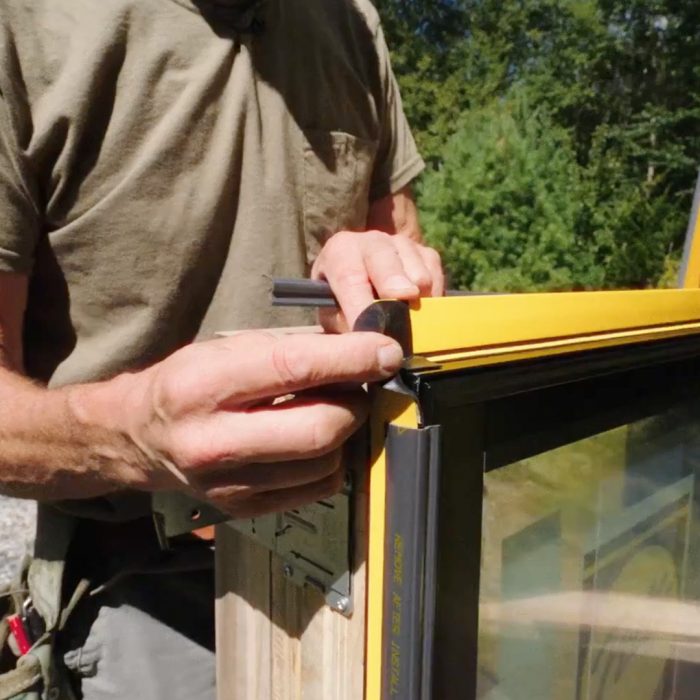
They have flexible outside corners so that you’ve got a full 100% seal all the way around the window. Then we’ll apply flashing tape around the top and the two sides, leaving the bottom open so that any water that’s in our sill pan can drain out.
So the fold-out nail fin is flat for the head and the two sides, but one thing that you don’t see highlighted in the instructions very much is that the bottom flashing fin, unlike the top and the sides, is embossed with little dimples. When you put that up against the wall, when you fold it up, it’ll create a little bit of a weep space between the flange itself and your wall WRB or your flashing tape, and that’s there to promote drainage.
So if you have a sloped or a back-dammed sill pan and water gets collected by that sill pan, this will help to promote the water draining out, instead of a flat flange, which would be in direct contact with your WRB or your flashing tape folded down over the face of the WRB, that might restrict that water flow. So that’s a good feature that doesn’t get promoted very much on the Steady Set system.
Mike Guertin’s Steady Set Pro Tips
One of the things that Pella doesn’t provide and counts on us to supply before we do the installation is a number 8 x 1-1/2-in. wood screw. It’s important to get the right screws because, as you can see on the L-brackets, it’s a tapered recess, and that matches the bugle-style head of the screw. So you don’t want a screw head that’s too big or too small. You want the one that’s going to sit right down there. You also don’t want a dome-head type of screw. I’ve already got a pocket full of these, so I’m ready to go.
One of the beauties of putting in the Steady Set window is one person can do the installation alone. To make it easier, especially on large windows, to pick up the window alone and be able to set it in the hole, I like to use a glazer’s suction cup. These have a pump on them which will evacuate the area under the rim of the cup itself so that it will stick to the glass. It stops at the precise location at the L-brackets.
Removing the Window
If you’ve installed the window and that Steady Set clip at the top is engaged at the header and you need to remove the window for some reason, it can be a little bit tricky. But what I found the easiest thing to do is get a stiff piece of metal — I’m just going to use one of the Steady Set L-bracket universal pieces because it’s got a long throat on it — slide that in and just wiggle it along and draw it toward you, and it will disengage the Steady Set clip from the header, and then you can slide the window right out.
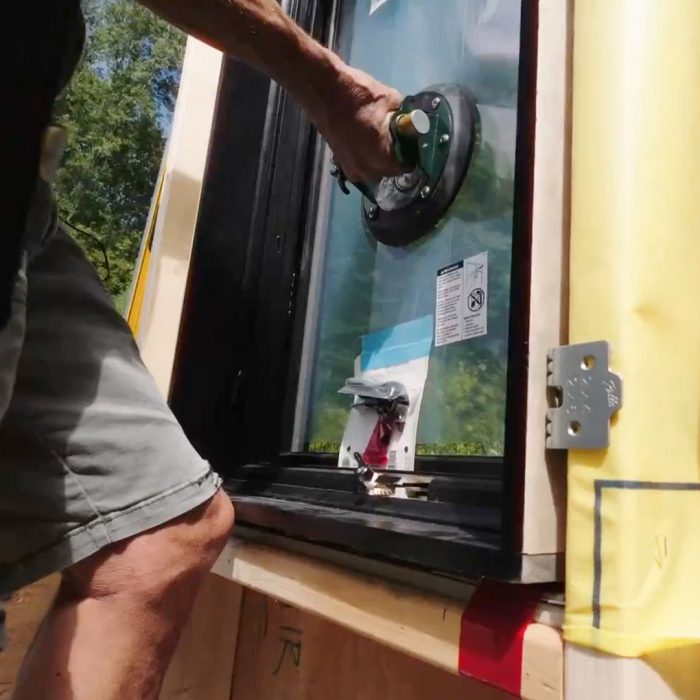
The next step is to center the window in the opening and check that it’s level. So I’m going to drive screws in the two lower brackets. And then you check the window for plumb, and then you can check the diagonals, make sure it’s square as well, which it should be.
Now that we have it secured in place, I want to check to make sure that it operates properly. So I’ll open the window lock, and then crank it out, crank it back in, make sure everything works. Now the only thing left to do is go on the outside and flash the fins.
Flashing the Fins
The first step is to take off the fin covers, and they just pull off straight away from the wall. And then the fins fold out. They have the integral corner pieces and an integral bottom flange with those dimples that’ll allow the water to weep out the bottom that’s collected by the flashing pan underneath the window.
You don’t need to put any fasteners in this fin. In fact, don’t put in any fasteners. The only thing you’re going to do is put flashing tape on. You could, if you want, though it’s not required, put a bead of sealant on the three sides—left, right, and head—leave the bottom open, or what we’ll do is just put on the flashing tape. We’ll do the two sides and then we’ll do the head again, leaving the bottom open.
As far as the fin being compatible with types of tape or the adhesive on types of tape, it’s compatible with asphalt-based tapes, which some fins are not. People are familiar with the black flashing tape. It’s compatible with acrylic-type flashing tapes, and it’s compatible with the butyl-type adhesive flashing tapes.
If there was any damage to the fins done during the installations, which is unlikely if you leave the covers on, but in the event something did get damaged, just use a piece of flexible flashing tape and then you can do a repair. But for the standard installation, we’re just going to go about 2 to 3 in. above the top of the window and then down the side on the left and the right. Pretty basic installation for flashing, nothing different here.
Shim Blocks
If you have particularly tall windows, they’re going to be some plastic shim blocks that’ll be inserted at locations where Pella wants you to shim. What you can do is use a straightedge to make sure that the outside frame of the window is nice and straight, and then where those shim points are, they’re set up for a standard width shim. Put it in the slot and you just put that right at the shim block and then you can snap it off.

We don’t have shim blocks on this window, so it won’t be important — where you’re most likely to find those shim blocks will be at the meeting rail of double-hung windows. So right in the middle of the window, you’d slide that shim in right in line with the shim block, then break it off, and go to the flashing step.
So we flash the head and the two sides of the window. We’re going to leave the bottom open so that water can weep out underneath. I can do one of two things at this point. One is I can just fold the head flap of the water-resistant barrier down over our head flashing tape and then tape the corners. Or if you like to have a metal head flashing over the top of a window, you can fabricate that and install it and then put the tape on to seal up that corner. Either way works; Pella approves both installations.
Sealing the Inside of Steady Set Windows
Pella has a couple of instructions for sealing up on the inside. First off, they recommend do not use fiberglass insulation and stuff that around the gap between the window frame and the rough opening. I think you could use some mineral wool type of material that won’t absorb any water.
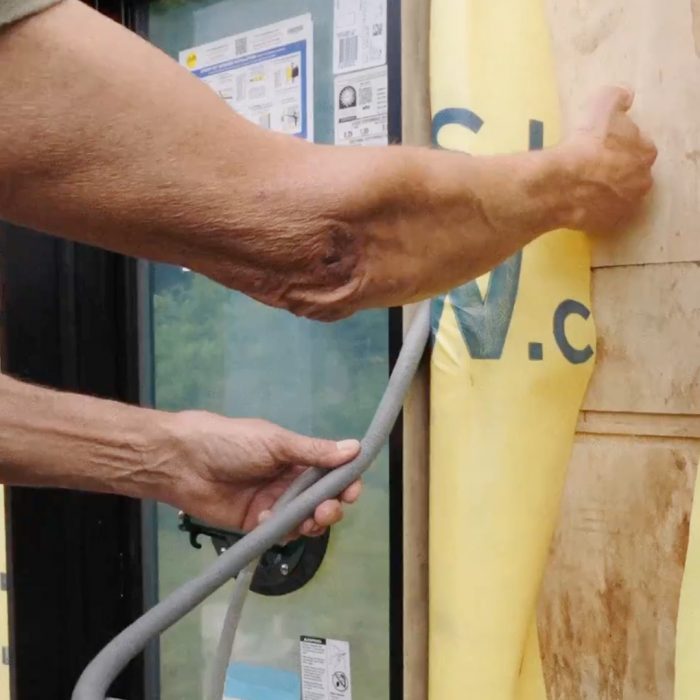
Then they recommend putting in a backer rod about a third of the way back into that rough opening between the outside of the sheathing or the inside face of the sheathing and the inside wall. Then you can finish it off on the inside with some low-expansion window and door foam, run a bead down there. Or if the gaps are small, you could just use a regular type of sealant, just a gun-able sealant around there. So you do that all the way around all four sides on the inside, and that’ll give you a good air seal.
Just like most building products today, Pella has a full set of instructions that you can download or ask the distributor to supply with the window order that goes through all the details, from the flashing stage right on through how to utilize the adjustable mounting brackets.
They also have a quick guide that’s mounted on a label inside of the window. This gives you all the basic information about the shim block at the bottom, about the L-bracket and how to engage that, how to utilize the stabilizer at the top, how to fold out the fins, a little bit about detailing the inside with insulation caulking, and so on. So refer to these guides if you want the details.
RELATED STORIES


