That Modern Look
Veneered wall paneling is popular for its clean style, but it's a surprisingly complex trim carpentry job to do well.
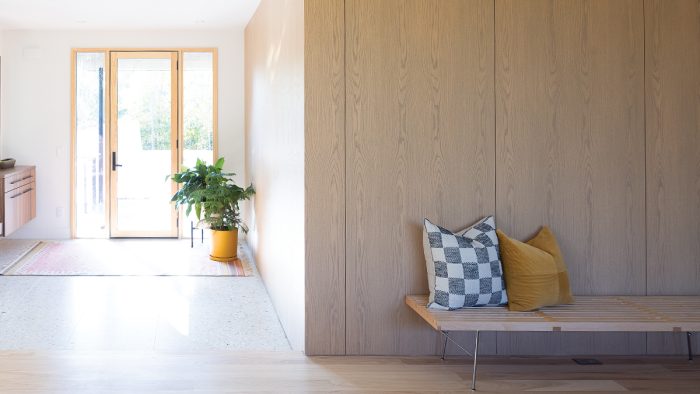
Modern wood wall paneling and flush doors bring a clean, seamless aesthetic, but achieving this look requires precision and planning. Casey Knips shares his approach to crafting veneered white oak paneling, starting with ensuring plumb, flat walls using engineered studs and plywood substrates.
He details the grain-matching, edge-banding, and specialized fastening techniques that make modern trim carpentry both challenging and rewarding. Pivot door hardware, custom jambs, and careful alignment contribute to the polished result. Knips emphasizes the importance of preparation, from planning to execution, showcasing the tools and methods that ensure success in complex modern trim projects.
Modern Trim Makes a Statement
From the look of the pocket doors in my first Fine Homebuilding article (FHB #325) and the style of this wall paneling, you might think that I specialize in modern trim. I don’t. I’m happy to tackle all styles of custom trim and cabinetry. But I’m grateful to have had the experience of tackling some projects with modern details like this red oak–veneered wall paneling that was designed by Sustainable 9 Design + Build, for whom I do a lot of work.
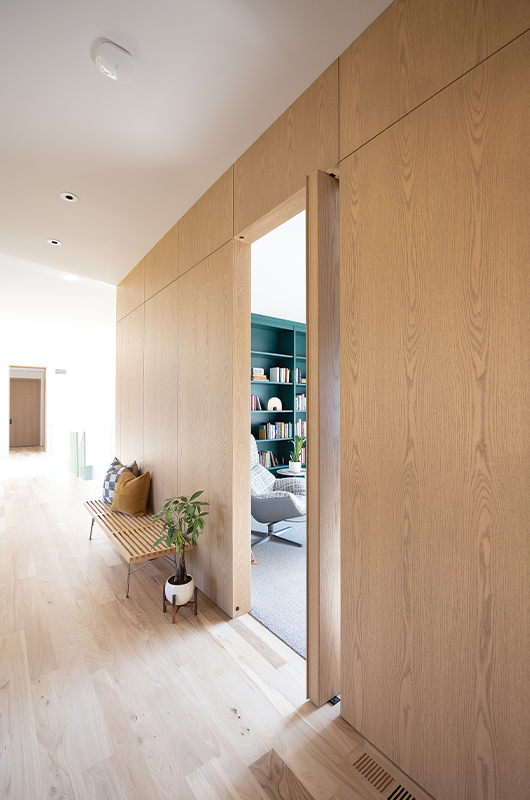
These modern details are actually quite challenging and require their own planning process, material selection, an occasional new tool, and even some specialty fasteners. As with the pocket-door trim in my first article, I used clips to install these panels. Those clips were easy to work with because they are part of a self-indexing system, which means no measuring to locate the mating pieces, thereby reducing the likelihood of error.
Prep and Planning
Even though I knew the finished look the builder was after, it took some time to work out all the installation details on paper. I also worked with the framers to get the two walls as plumb and square as possible. I asked them to use engineered studs, and I still shimmed the walls flat before installing a plywood substrate. Not only did I not want to do all this work just to have wavy walls of paneling, but a flat substrate is essential for the clips to mate and catch.
The panels are from a company called Navy Island. When I placed my order, I submitted a design board showing the dimensions and where I wanted to match the grain. The panels arrived numbered with a layout. I wrote the numbers on the plywood substrate to avoid mistakes. I did spend some time to make sure the grain lined up from the bottom panels to the top panels, but generally Navy Island did a great job with the veneer.
I edge-banded the panels and routed the edges to accept a solid red-oak spline. I made spacers to ensure even reveals, used a laser to align the panels horizontally, and scribed the panels that met the floor, walls, and ceiling. A lot of work was done before any panels were clipped into place, but it paid off—everything fit nearly perfectly and needed no adjustment, except maybe at the mitered outside corner, which I expected to be fussy.
Start With a Great SubstrateIn any house, plumb walls and square corners are a goal. When another goal is a seamless modern look like this, a flat surface is also a must. The walls were framed with engineered studs because those are more stable than common lumber, and the framing was done with extra care. Because the crisp reveals and the fastener system used to install the panels rely on the walls being perfectly flat, I checked everything with a long level and then used a laser to shim the walls before installing the 1/2-in. plywood substrate. 
|
Install Doors Before PanelingThe panels interact with the door jambs; where they meet on the hinge side, the panels are given a rabbet that overlaps the jamb’s edge. So the door jambs needed to be installed first. And because of my installation sequence for the doors, they needed to be hung before jambs were fastened off. I used pivot-door hardware from Rixson for the doors. After a little work on my bench, I installed the jambs with just a couple screws and then installed the door. Once the door was hung and operating properly, I shimmed the jamb for a perfect gap around the door and fastened it with screws.
   |
The Panels Need Some PrepEven though, given my shop drawings, I had a good idea of the final panel dimensions, I ordered the veneered MDF panels a bit oversized. I wanted the ability to cut everything to final dimensions on-site and change any panel sizes if needed. Because none of the panels were used at full width, I was able to cut a straight edge on each panel and then a perfectly parallel edge. The more perfect the panels are, the more perfect the reveals will be. I edge-banded the panels, and most of them were grooved for a spline. When I needed a rabbet to meet the door jambs, I added a solid red-oak strip before routing the rabbet. I also added a solid wood strip to the bottom of the panels so that they would bear on the floor and not be completely reliant on the clips to hold them up.
 |
Clips Instead of MeasuringThe obvious reason to use clips to install the panels is to conceal the fasteners. But there’s a lot to like about this system from Fastmount. It includes both mating clip pieces, self-indexing pins, and the tools to drill for and install the clips. The self-indexing pins mean that once I have the female side of the clips installed on the wall with the pins inserted, I can lift the panel into place, press it firmly against the pins, and know exactly where the mating male pieces should be installed on the back of the panel. There’s no measuring, and as long as I have the panel where I want it before pressing it into the pins, there are no errors. To align the panels, I scribed them to the ceiling, walls, and floor first, and used gauge blocks to ensure the reveal. 
 |
Finishing TouchesThe last two challenges I had to complete to get this project wrapped up were mitering and installing the outside corner pieces and attaching panels to the doors.   |
— Casey Knips is owner and operator of True Fit Carpentry, a custom trim and cabinetry company in the Twin Cities. Photos by Brian Pontolilo, except where noted.
From Fine Homebuilding #329
RELATED STORIES


