New Life for Old Hardware
With the right approach, you can restore old hardware—whether through soaking, scrubbing, or polishing—giving it a fresh look while preserving its original charm.
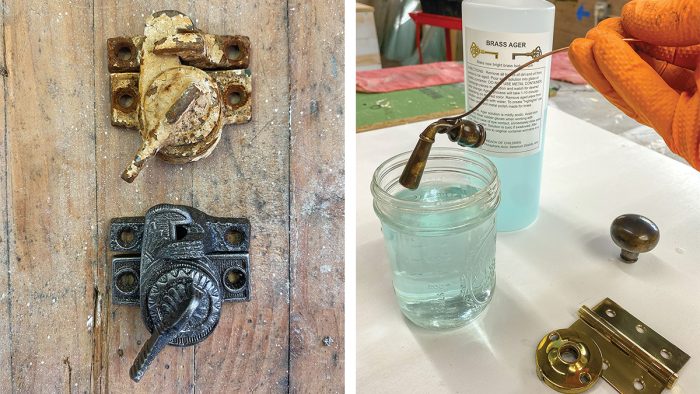
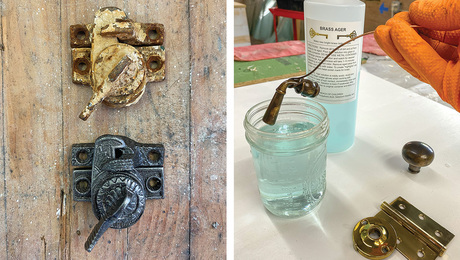
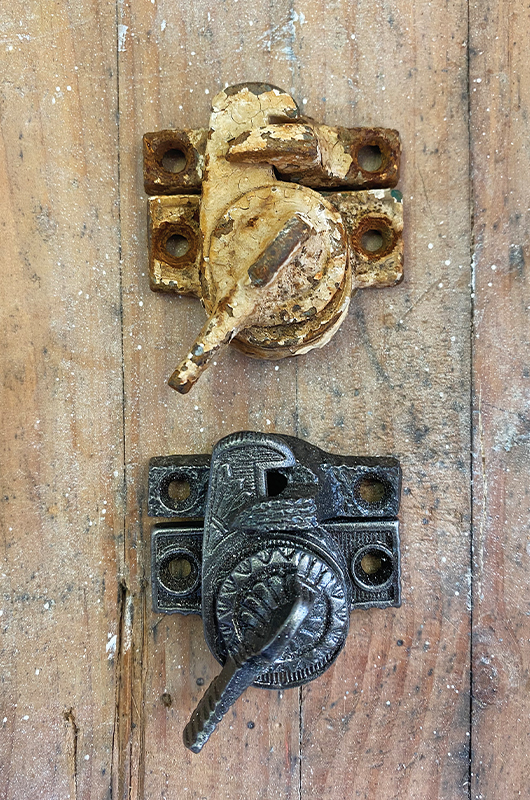
Old hardware is often covered in layers of paint, sometimes so much that the sash locks on windows look like nothing more than contoured lumps, and the barrels on door hinges have paintsicles hanging from their bottoms. Occasionally a little bit of sloppy painting from a previous owner is all it takes to open the door to the next owner deciding they might as well paint the whole piece of hardware so at least it looks consistent. But there is hope.
There are many ways to clean up old hardware—some aggressive, some slow and simple, and some more expensive, and all with various amounts of elbow grease. You should choose your approach based on the type of metal, its size and intricacies, how many pieces need to be cleaned, how much cleaning is needed, and your budget. When cleaning up old hardware, keep this in mind: It only needs what it needs. If it’s coated with eight layers of paint, it probably needs the full monty. If it’s just tarnished, you may be able to skip heavy-duty cleaning and go right to polishing.
In my experience cleaning lots of old hardware for a variety of clients, the juice is nearly always worth the squeeze. With some tips and tricks, it’s not as hard as you might think to reset the clock on even the oldest locks, knobs, fittings, and hinges to really make your restoration work sparkle.
Slow Cookers Can Be Paint Removers
Although not as effective as some other methods when it comes to removing rust and tarnish, the slow cooker is one of the best and fastest options for softening old paint. You can buy a new slow cooker for this task—they are relatively inexpensive—or hunt around for a bargain at a thrift shop or flea market. Either way, the important thing is that it can never be used for cooking food again. Label it clearly and permanently so nobody mistakenly adds it to the tag sale pile after you’re done with it.
The cleaning process is as simple as filling the slow cooker with water, tossing in the hardware that you are trying to restore, adding a little bit of dish soap or degreaser, and letting the low heat of the cooker work its magic. You’ll know the hardware is ready when the paint sloughs off with only gentle encouragement from a putty knife or metal-bristle brush. I typically pull out one piece at a time so that the rest stay hot until I’m ready to clean them up.
Helpful Tips
Wear gloves and grab the hardware with tongs (label these clearly, too), which can be used to hold the metal while you’re removing the paint. Stubborn paint or paint left in crevices may require multiple soaks; even then it may require a pass with a wire wheel or other elbow-grease approaches. One limitation to this method is quantity.
If you have 15 sash locks to revive, they likely won’t all fit in even the largest slow cooker, so you’ll have to work in batches. One alternative, if your budget allows, is to buy an electric steam table like the ones used by catering companies. The slow cooking concept is the same, but the capacity is greatly increased.
Tumbling Requires Less Elbow Grease
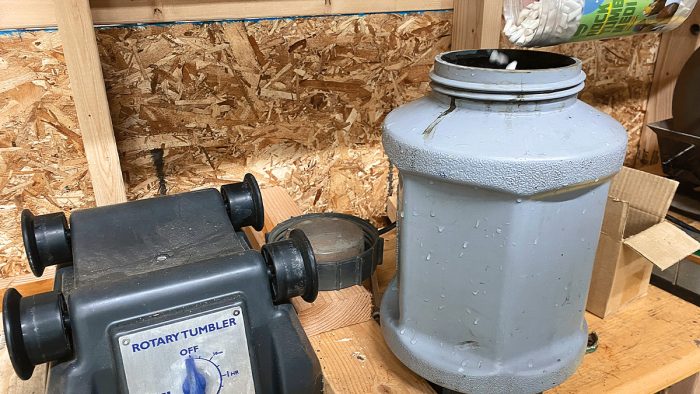
For a more hands-off approach to cleaning up old hardware, consider a media tumbler. Typically sold for tumbling rocks or for cleaning brass bullet shells, these tools rely on reusable tumbling media that gets tossed around along with the hardware to remove paint, rust, and tarnish from small parts without any of the elbow grease needed with other methods.
There are countless options when it comes to media for the tumbler, including walnut shells, stainless-steel pins, ceramic balls, and more. The media is chosen based on the type of metal the hardware is made from, as well as its shape and the intricacy of its surface details. A word of hard-learned caution here: Small tumbling media works great for getting into the recesses of hardware, but it can just as easily get stuck in those recesses and require tedious manual removal with pliers and curse words.
Typically, a cleaning solution is also added to the mix, and gathering opinions on which additives are best is similar to searching for the best recipe for homemade barbecue sauce—the answer will differ depending on whom you ask. Preferences include dish soap, a degreaser like Simple Green, some metal polish, a dash of lemon juice, vinegar, baking soda, or caustic soda. After a few hours—sometimes more, sometimes less—the hardware is tossed into a strainer, rinsed in water, and dried. For steel or cast-iron parts, you need to dry the pieces and then oil them right away to eliminate the risk of surface rusting.
 |
 |
Brushes, Wheels, Wool
Whether used for the finishing touches after soaking or tumbling, or as the primary cleanup method, there will always be a place for wire-bristle brushes, wire wheels, and steel wool when it’s time to clean up old hardware. Remember, any dry removal of old paint is an almost-certain recipe for releasing lead into the air.
At our shop, we don’t even bother testing for lead paint in our work—we just assume it’s there, often as the base coat under many years of paint that can’t easily be tested with the swipe of a test swab. If you’re using mechanical methods, cordon off your work area, wear a respirator, and be meticulous with your cleanup of everything, including your skin and clothes.
A wire wheel is the most aggressive dry-removal tool. It can be either a large wheel mounted in a bench grinder, or a small wheel held in the chuck of a drill or drill press. Wire wheels and brushes are usually available in steel, brass-coated steel, or all brass, listed here from most to least aggressive.
The Different Types of Brushes and Wheels
If you are buying a brass-bristle brush or wheel, know whether it’s all-brass or just brass-coated, as the coated option can cut through the surface layer of brass-plated hardware. When using wire wheels, watch your fingers. Gloves are a good idea, and locking needle-nose pliers are great for securely holding the piece being cleaned up, especially when you’re using a bench grinder.
Steel wool is available in a range of grades (0000, 000, 00, 0, 1, 2, 3, and 4, from finest to coarsest), which are a measure of the diameter of the steel fibers. As a point of reference, the steel-wool scouring pads used for cleaning pots and pans are typically in the range of 0 to 1 in terms of grade.
Typically, when cleaning up hardware, you will be looking at the 0000 to 0 range of options. Grade 0000, which I’ve heard sometimes called “quad zero” or “four aught” (or just “ultra fine”) is great for final polishing, especially with the help of a light oil. It’s worth noting that brass wool and copper wool are also available, are usually near the very fine end of the grading scale, and may be a good option if you’re concerned about the pads getting rusty.
No discussion of steel wool is complete without a mention of synthetic scouring pads, which are usually lumped together under the “Scotch-Brite” brand name. These are sold in different colors to indicate their level of abrasiveness. Variety packs are available and may be the best option to determine what works best on any given hardware.
Polish and Protect
Polishing the surface of the metal—after removing coatings and rust, or as the only step when removing tarnish—relies on commonly available metal polishes like Brasso and Simichrome. This step is usually done with the help of a fine steel or synthetic wool pad, or with a soft polishing cloth, and a little bit goes a long way. For big jobs, you have the option of a cloth wheel on a bench grinder or chucked into a drill or drill press, but elbow grease is always an option as well.
The last step is to apply a light coat of oil or wax to protect the surface of the hardware and lubricate any moving parts. Again, opinions vary widely here, from as simple as WD-40 or paste wax, to as specialized as conservators wax, such as Renaissance brand, which is a museum-quality micro-crystalline wax. Boiled linseed oil is one of my favorite options.
— Justin Fink owns and operates Fink & Son Historic Restoration in Connecticut. Photos by the author.
From Fine Homebuilding #329
RELATED STORIES

