Window Glazing with Traditional Putty
Discover the benefits of using linseed oil–based products when glazing and finishing window sash.
Restoration pro Justin Fink explains how to glaze a window using traditional glazing putty as well as how to finish a reproduction window sash with linseed oil paint. Because it doesn’t peel, flake, or need to be scraped like modern paints, linseed oil paint — a centuries-old finishing option — is once again growing in popularity. Linseed oil is also the base ingredient of traditional glazing putty, which means you can start painting immediately after placing the panes — no need to wait five to seven days as with modern paints. Watch Justin’s video to get all the details.
Here’s the Transcript
Hi, I’m Justin Fink from Fink and Son Restoration. We’re a Connecticut-based woodshop that focuses on old houses. Today we have some reproduction window sash that we’re putting into an old house, and we’re going to be finishing those sash with linseed oil paint.
It’s a traditional oil paint that’s been used for centuries, but it’s starting to make a resurgence and become popular again because it solves some of the problems that modern paint has, such as peeling, flaking, and the need to scrape it. After the first coat is dry, 24 hours or so, we’re going to put the glass in place, glaze it, and then do the second coat.
Putty and Panes
We’re using traditional glazing putty, which is just a mixture of chalk and linseed oil. It has the same base ingredient as the paint we’re using, meaning that after we get the glass in place, we can paint it right away. If you’re using acrylic, latex, or modern oil paints, you have to wait for the glazing putty to set up for five to seven days until it’s firm to the touch before applying your finish coats of paint.
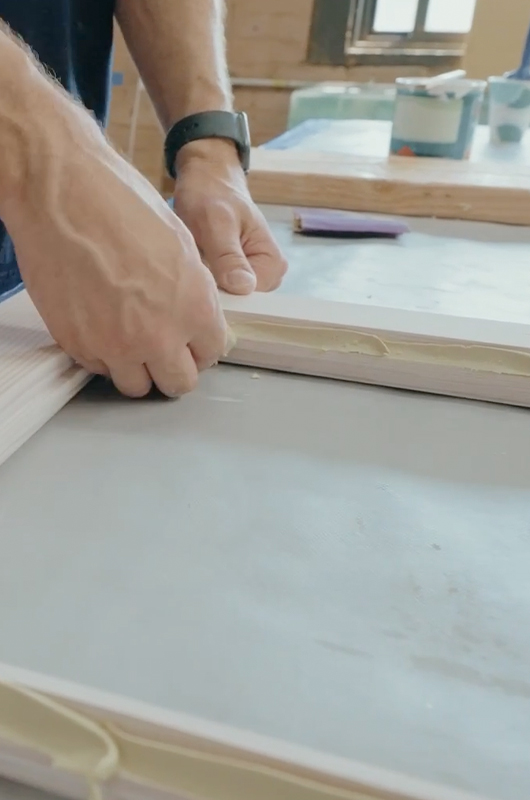
Linseed oil paint takes a little longer to dry — about 48 hours for the second or third coat — but when we’re working on windows, we can start painting a lot sooner, so it kind of evens out in the end. Right now, I’m just putting a bed of linseed oil putty on the glazing rabbet, then we’re going to put the panes of glass in here, and it’s going to sit on this, creating a seal behind the glass.
Most of the putty will squeeze back out and go back into the bucket, so we put more on here than we need and then reuse the rest. The glass gets dropped in, and then we gently push it down into the putty, keeping the pressure on the outside of the glass. Some people use a sander for this step — with a cloth over the sanding pad — to vibrate the glass into place.
Squeeze Out the Excess
Now we’re going to knock off the excess. Then we’re going to hold the glass in place with glazing points, which are just thin pieces of metal that go flat against the glass. We use a flat-sided hammer to tap in a glazing pin every 6 in. to 8 in. For this one, these panes of glass are 28 in. long, so I’m just going to put three. You want to tap them in far enough that they’ll be beyond the line of the glazing rabbet so they’re hidden once we apply the finish coat of putty.
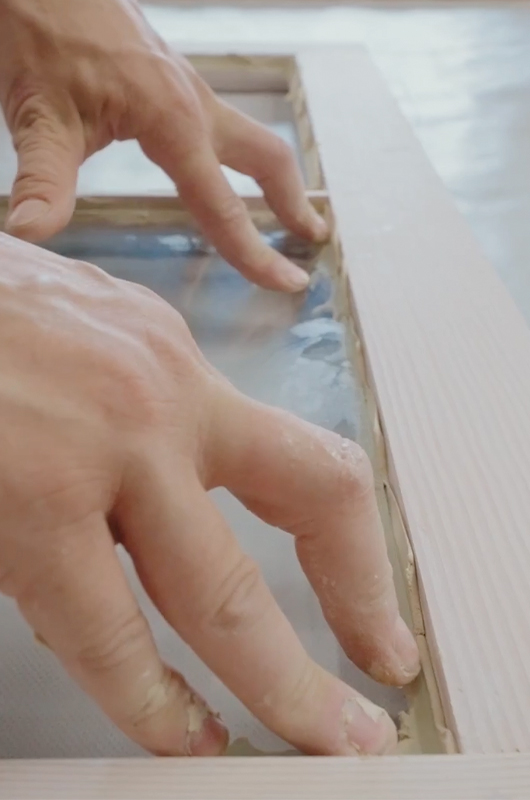
This is the inside face of the sash, the interior side. You can see that bed coat of glazing putty — we’re just scraping off the excess here and making sure it’s packed down so that when we come back to do the finish coats of interior paint, you don’t see any gaps. After glazing the sash, we’ll come back and do this step a second time because pushing down on the glass tends to squeeze out a little more glazing putty on the interior side.
We’ll knock off most of it now so that when we lay this back down again, we can see the edge of the glazing rabbet through the glass. When we apply the putty and drag the knife through, we need to stay just inside that line so that the glazing putty isn’t visible from the inside of the house.
We get the same glazing putty, get it nice and warm and loose, take a chunk of it in one hand, and use your thumb and this edge to scrape off the putty in a rolling motion. Since I’m right-handed, I do all the right-hand sides first, then rotate. I’m using a decent amount of pressure because we’re trying to push that putty into the gap. This is what seals the glass, holds it in place, sheds water when it rains, and keeps the glass from rattling.
Maintain, Repair, Replace
Over time, this linseed putty dries out, cracks, and falls off, which is part of the reason we use it. It’s not permanent — it’s meant to be replaceable and maintainable. We consider it a sensible trade-off. In 15 years, maybe it needs to be touched up; in 30 years, it might need to be replaced. We just replace it with the same thing again.
For glazing knives, I use a bent glazing knife like this. A straight knife is also popular — this one I have is really stiff, but some people prefer a more flexible, longer one. It’s all about preference, so if you’re going to do this, I suggest trying a few. I press it into place so that one edge touches the glass and the other catches the edge of the wood.
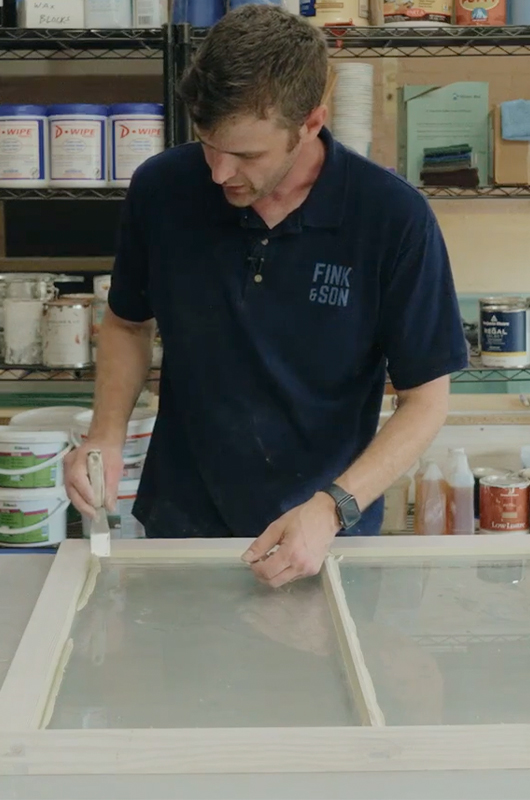
I don’t have it flat; I hold it at just enough of an angle to plow the excess putty out of the way. Then what’s left can be peeled off and reused. In the corners, I pull into the corner, then use the angled knife to scrape the excess off. The angled knife makes this easy — you just scrape in there, clean it up, and pull over like that. Then I do the same on the other side to get a nice, beveled corner.
Words of Wisdom from a Pro
One of the things we find with new people learning how to glaze is that you could spend four hours on one window trying to make it perfect. But the thing you have to remember when you’re working on windows — new ones or restorations — is your world is right in front of you when you’re painting and glazing and doing repair work.
Once you put it in a building, you’re not going to stand that close to it ever again. You’re never going to look at the glazing putty the same way that you look at it in the shop. The little imperfections that are noticeable up close or on camera don’t really matter in the real world, especially for something built by hand. Functionality comes first, then you can work on making it pretty, but don’t waste time chasing perfection.
Normally, if you’re using modern acrylic or oil paints, you have to set the glazing putty aside for five to seven days before painting. But with linseed oil paint, I can paint this immediately. So we’re going to move this right over to that easel and apply our second coat of paint.
RELATED STORIES

