Ducted vs. Ductless Heat Pumps
Choosing the right heating and cooling system means finding the best fit for your home's size, layout, and climate—and balancing trade-offs in efficiency, comfort, and cost.

Contributing editor Jon Harrod compares ducted and ductless heat pumps, discussing their advantages, disadvantages, and ideal applications. He also outlines a roadmap for making decisions on a ducted, ductless, or mixed/hybrid system, helping homeowners and builders decide which system suits their needs based on factors like home layout, budget, and comfort preferences.
Heating and Cooling with Heat Pumps
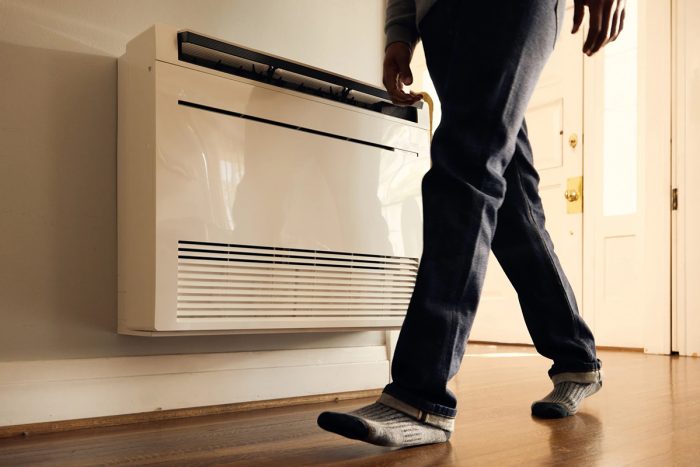
Heat pumps transfer heat between the indoors and the outdoors, providing warmth in winter and cooling in summer. Their indoor units, the parts that come in contact with the air inside the home, are of two general types. Ductless heads are attached to walls or ceilings.
They pull air directly from the space and discharge heated or cooled air through louvers or grilles on the unit itself. Ducted air handlers are usually concealed in attics, basements, or mechanical rooms; they use ductwork to distribute conditioned air to the living space.
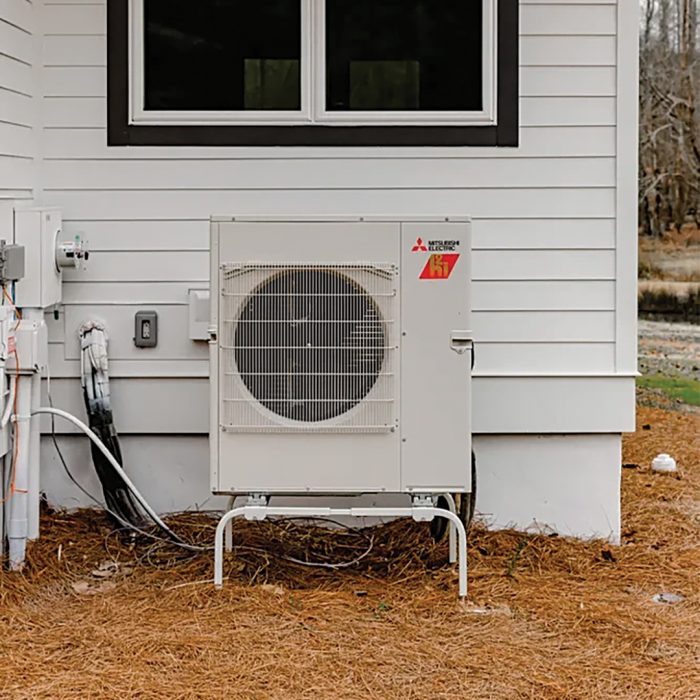
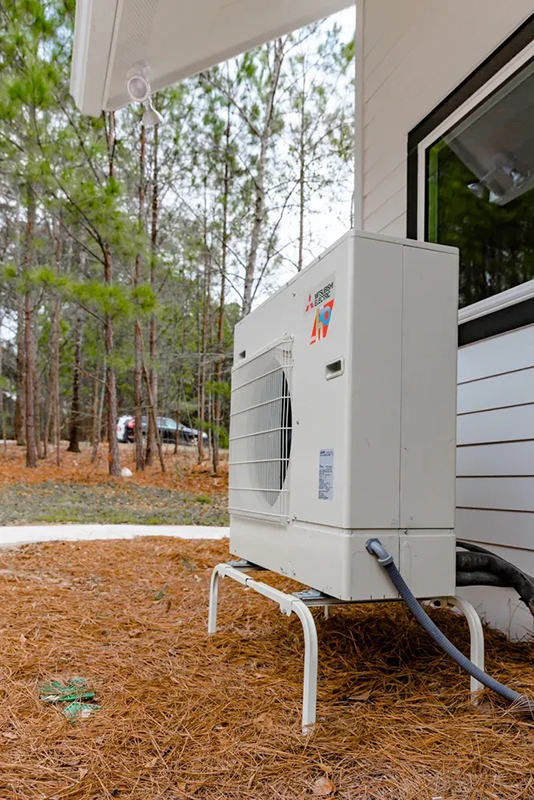
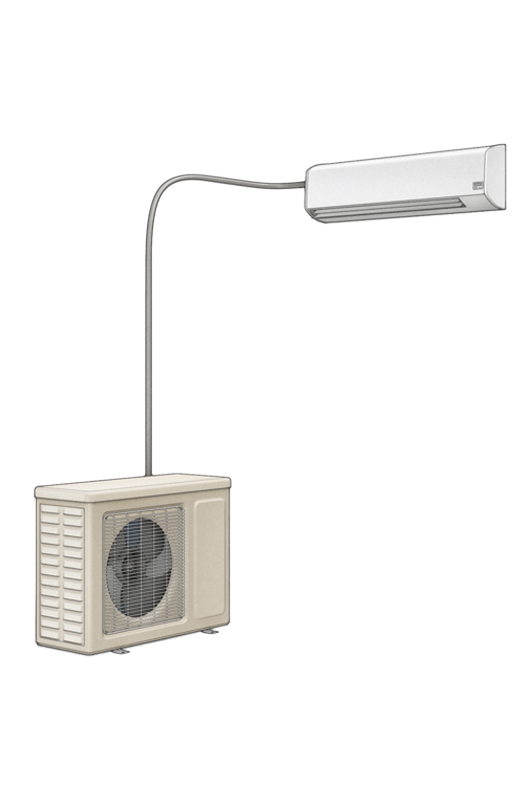
Whether ducted or ductless, each indoor unit is connected to an outdoor unit by communication wires and refrigerant pipes. Each ductless head or ducted air handler contains a fan, heat exchanger, condensate drain, and electronics. The outdoor unit has its own heat exchange coil, fan, and control circuits.
It also contains a compressor that drives refrigerant movement through the system, with valves to control its direction and flow. Some outdoor units are designed to pair with a single indoor unit. Others can support between two and eight indoor units, which can be ducted, ductless, or a mix of the two.
Heat pumps using ducted air handlers have long been common in the southern U.S. In the last few decades, improved performance in low temperatures has led to the adoption of heat pumps in more northerly regions.
Ductless heads dominated the initial wave of cold-climate heat pumps, and in northern states, public perception of heat pumps is based largely on ductless systems. As the market for heat pumps has grown, manufacturers have expanded their offerings to include ductless heads and ducted air handlers suitable for all climate zones.
Should you go with a ducted, ductless, or mixed design? Which option makes sense will depend on several factors: heating and cooling loads, home size and layout, budget, and aesthetic preferences. In retrofits, the nature of the system being replaced and the availability of mechanical space are also key considerations. In this article, I’ll discuss important differences between ducted and ductless systems. I’ll then provide a process you can use to determine which option is best for you.
Is It a “Heat Pump” or a “Minisplit”?
|
Ductless Heads
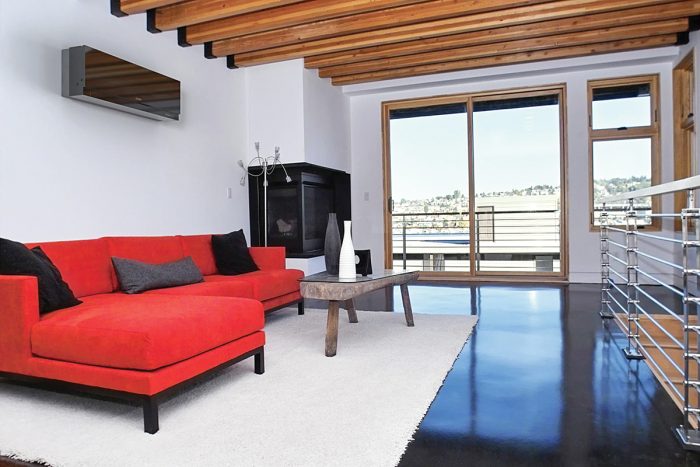
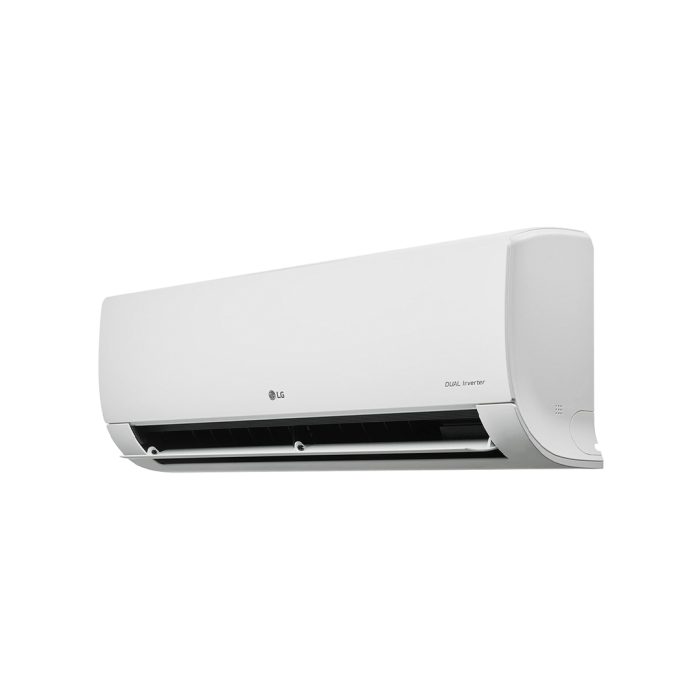
Ductless heads come in three main types: high-wall, low-wall (aka “floor”), and ceiling cassettes (see “Three ways to do it ductless,” pp. 40-41). Designed for installation in finished spaces, ductless heads typically have bright-white plastic exterior panels; some manufacturers also offer silver and black “designer” models.
Installing a ductless head is a simple and relatively noninvasive process. High-wall and low-wall heads hang on metal brackets attached with screws. If the head is located on an exterior wall, all piping and wiring connections can pass through a 21/2-in.- to 3-in.-dia. hole and then run along the exterior of the building. Pipes and wires can also be routed through attics, basements, and closets.
In homes without existing ducts, or with ducts in poor condition, ductless heads are often the most cost-effective and least invasive option. Eliminating ducts also allows for quieter, lower-powered blower fans and avoids the efficiency losses that occur when ducts pass through unconditioned spaces like attics. Single-zone ductless systems have the highest efficiency ratings of any air-source heat pump type.
On the downside, ductless heads have limited filtration capabilities, because their filters are a coarse plastic mesh that does little to capture fine particles. In addition, designs without ductwork don’t distribute any ventilation air.
Ductless systems may also struggle to provide even temperatures. While a ducted system can be designed to deliver appropriate volumes of heated and cooled air to every room, a ductless design inevitably requires trade-offs. Some rooms may end up with heads oversized for their needs, while others—the ones without heads—must rely on passive heating and cooling from adjacent rooms.
Ducted Air Handlers
Using ducts to distribute heated and cooled air has several advantages. A big one is that a branching duct system can allow a single air handler to serve multiple rooms. As long as the ducts are properly designed and installed, this approach will provide more-even temperatures than a design in which some rooms have ductless heads and others don’t.
This approach—a ducted air handler with branching ducts—allows for a better match between the capacity of the indoor unit and the needs of the rooms being served. Take, for example, a cluster of three bedrooms, each with a design heating load of 2500 Btu/hr.
The smallest ductless heads available have nominal capacities of about 6000 Btu/hr. Putting a ductless head in each room would mean 18,000 Btu/hr of total capacity. This severe oversizing can lead to temperature swings and efficiency losses. A better solution would be to install a single 9000 Btu/hr ducted air handler with ducts to the three bedrooms.
Another selling point for ducted designs is reduced visual impact. An air handler can be located out of sight in a basement, utility room, or attic, eliminating the need for heads in the living space and reducing the amount of piping on the home’s exterior.
Ducted air handlers can also do more to improve indoor air quality. Unlike ductless heads, which only offer bare-minimum filtration, ducted air handlers can incorporate high-efficiency filters capable of removing fine particles.
In homes with HRVs, ERVs, or whole-house dehumidifiers, the air handler and ductwork can distribute fresh, filtered, dehumidified air around the home. Ducted systems also promote mixing, evening out room-to-room temperature differences and diluting carbon dioxide buildup in closed-door bedrooms and home offices.
Ducted systems have fewer indoor units, reducing initial equipment costs and annual maintenance expenses. Cleaning a heat pump’s indoor unit involves spraying a cleaning solution on the coil and drain pan. For ductless heads, the surrounding wall and floor must be protected with a plastic bib or sheeting; furniture and wall hangings may also need to be moved. Compared to a multi-head ductless system, maintenance on a ducted air handler can be quicker and less intrusive.
But ducted systems also have some disadvantages. They require a mechanical room, unfinished basement, attic, or dropped ceiling cavity. Ductwork can often be concealed in walls and floor cavities, but additional soffits and chases may sometimes be necessary. While the connections for a ductless head can usually be installed through a small hole, retrofitting ducts in finished spaces can be a more invasive—and expensive—process.
Ducted air handlers also require more powerful blower fans. Higher fan energy consumption is one reason why ducted systems typically have lower efficiency ratings than ductless systems. When ductwork passes through vented attics, unconditioned air can be drawn into the ducts and conditioned air can be forced out.
Gaps in duct insulation can lead to additional heat losses and gains. In extreme cases, poorly designed and installed ductwork can increase energy use by 30% or more. Energy penalties can be minimized by keeping ductwork inside the conditioned space and by meticulously sealing and insulating any ducts that pass outside it.
Mixed Ducted / Ductless Systems
Many projects incorporate a mix of ductless and ducted indoor units. A common example is to use a high-wall ductless head in the open-floor-plan portion of a single-story house and a compact-ducted air handler to serve the bedrooms and bathrooms.
This approach allows for different temperature settings in different parts of the house, delivers conditioned air to all rooms, and avoids the need for oversized ductless heads in smaller rooms. A similar approach can work well in two-story houses that have open spaces on the first floor and bedrooms on the second.
In retrofits of homes with forced air, adding a ductless head in an area poorly served by the current furnace can sometimes make sense. A common example is a “bonus room” over a garage. Because it adjoins the outdoors and the garage on several sides, a bonus room has high per-square-foot heating and cooling needs.
At the same time, the duct runs serving a bonus room are usually the longest and most convoluted in the house. Unless the duct system was carefully designed and installed, airflow—and thermal comfort—will be less than satisfactory.
Giving the bonus room a ductless head makes it possible to decouple that space from the main thermostat and air handler, allowing better temperature control. The same is true of other spaces—additions, sunrooms, home offices, and gyms—that have different heating and cooling needs than the core of the house.
How Many Outdoor Units?
In a system with multiple indoor units, whether ductless, ducted, or mixed, we’ll need to decide whether to pair each one with its own outdoor unit or connect multiple indoor units to a smaller number of multi-zone outdoor units. The decision is a complicated one. Fewer outdoor units generally mean less visual impact and lower equipment costs.
But single-zone (“1-to-1”) systems and two- to three-zone systems have higher real-world efficiencies than ones with four or more connected indoor units. Because 1-to-1s and smaller multi-zone units can ramp down their outputs further than larger multis, they can run longer without cycling on and off. In addition to improving efficiency, this means better summer dehumidification and less wear and tear. Installing multiple outdoor units also provides redundancy in case one outdoor unit breaks down.
Different Homes, Different Designs
I have mentioned that ductless heads can be more cost-effective in a home without ducts and also that ducted systems can have fewer indoor units, which can sometimes make them less expensive. It’s difficult to generalize about the relative cost of ducted and ductless systems; which option is cheaper depends on the layout and heating/cooling loads of the house, the condition of the existing ductwork (if present), and the challenges of routing ductwork and piping.
It can also depend on the way a contractor prices jobs. A high equipment markup and low hourly rate can make a multi-zone ductless system pricier. With a lower markup and higher hourly rate, labor-intensive installations involving new ductwork can become quite expensive.
For several years, I’ve worked closely with my local Habitat for Humanity affiliate, which does both new construction and gut rehabs of older homes. I’m impressed with the way they’ve been able to create durable, high-performance affordable housing. In the last few years, their projects have included ductless, ducted, and mixed designs. (For two case studies, see “The road map for the real world,” above.)
A few factors have made both of these homes comfortable while keeping installation and operating costs down. One is careful attention to insulation and air-sealing, which reduces heating and cooling needs and helps maintain even temperatures. Another is thoughtful design and equipment selection, which has allowed them to use ductless heads and/or ducted air handlers in ways that make the most sense for each home.
A Road Map for Decision-Making
I find the following process helpful in deciding between ductless, ducted, and mixed ducted/ductless heat pump systems:
1.) Assess the Building
In new construction, this means a careful review of floor plans, insulation levels, window and door specs, and spaces available for equipment, ducts, and piping. I like to do this as early in the process as possible; often a few tweaks at the design stage can save significant time and money on the HVAC system. In existing homes, a thorough assessment of the building envelope may require an infrared scan to determine insulation levels and a blower door test to measure air leakage.
This information is used to calculate design loads—the Btu of heating and cooling that the heat pump must deliver to keep the building comfortable in both cold and hot weather. It’s also used to calculate room-by-room loads. Rooms can then be grouped based on usage patterns and thermal profiles. For example, three upstairs bedrooms might form a logical grouping. A sunroom with large glass doors and windows might have patterns of heat loss and gain distinct from the rest of the house.
In existing homes, I speak to owners about their experience. Are some areas of the house underserved or overserved by the existing system? I evaluate the ductwork, if present, to determine what changes will be necessary to accommodate a ducted heat pump. I also gather data on the existing electric panel and appliances so that I can determine whether the proposed heat pump system will require electrical upgrades.
2.) Evaluate Multiple Options
Based on the assessment results, I’ll sketch two or three viable designs. For a small new-construction home, I might propose (1) a centrally ducted system and (2) a mixed system with a ductless head serving the main area and a compact ducted system serving the smaller rooms.
For a home with no existing ductwork, I might consider an all-ductless approach and a mixed system. For a retrofit with usable ductwork, I’ll start with a centrally ducted changeout; if appropriate, I’ll also offer one or two ductless heads to solve comfort issues or provide improved temperature control.
These options provide a good starting point for discussions with the customer. Having at least a rough outline of possible solutions makes it easier to have meaningful conversations about cost, comfort trade-offs, indoor-air-quality benefits, and visual impacts. Based on these conversations, we can pick a preferred approach.
3.) Select Equipment
Once we’ve refined the layout, we can select specific indoor and outdoor equipment. Each indoor unit, ducted or ductless, needs enough capacity to meet the heating and cooling needs of its assigned rooms. For example, if a ductless head in a living room is also expected to heat and cool an adjacent dining area, its capacity must match the rooms’ combined needs.
Outdoor equipment must be compatible with the number and capacity of the indoor units. Because a heat pump’s capacity varies with outdoor temperature, it’s important to look at the outdoor unit’s extended performance data. This data, found in the manufacturer’s literature and on the NEEP website, allows the designer to check that the system is a good match for local climate conditions.
Three Ways to Do It Ductless
1.) High-Wall Units
High-wall units are the most popular ductless heads in residential applications. As the name indicates, they are mounted on walls, typically about 7 ft. above the floor. Room air enters the head through the top, passing across a coarse mesh filter before entering the heat-exchange coil.
In cooling mode, condensation that forms on the cold coil drips into a drain pan and runs into a drain. Below the coil is a long, cylinder-shaped fan, which moves air through the head. The heated or cooled air is discharged through the bottom of the unit; vanes can be adjusted to direct the air horizontally or downward.
Equipment costs for high-wall units are typically lower than for other ductless types, and more options are available. Compared to low-wall units (see right), it’s often easier to find installation locations that allow unobstructed airflow and don’t interfere with furniture or foot traffic.
But high-wall units have some disadvantages. Their placement is not ideal for heating. The ceiling-level air they draw in can be several degrees warmer than floor-level air, making them less efficient at absorbing heat. The temperatures sensed by the unit may be several degrees higher than those experienced by occupants lower in the room, leading to comfort complaints. (Installing a separate wall-mounted thermostat usually resolves this problem.)
Cleaning the filters, which homeowners should do monthly, requires a stepladder, making it less convenient and, therefore, less likely to happen. In addition, many homeowners find high-wall units visually intrusive.
2.) Floor or Low-Wall Units
Floor or low-wall units are another popular style. Installation is similar to high-wall units except that the units sit within a few inches of the floor. Air enters through a grille on the front, passes through the filter and heat exchanger, and is discharged through a louvered opening on the top.
Low-wall units’ locations and form factors are similar to hydronic radiators, making them a good match for historic homes. They also work well in second-story rooms in Cape Cod–style houses with limited upper-wall space. Some low-wall units can be recessed into the wall cavity so that they don’t stick out as far into the room. Disadvantages include higher cost and fewer options compared to high-wall units. Finding locations where their airflow won’t be obstructed by furniture can also be more difficult.
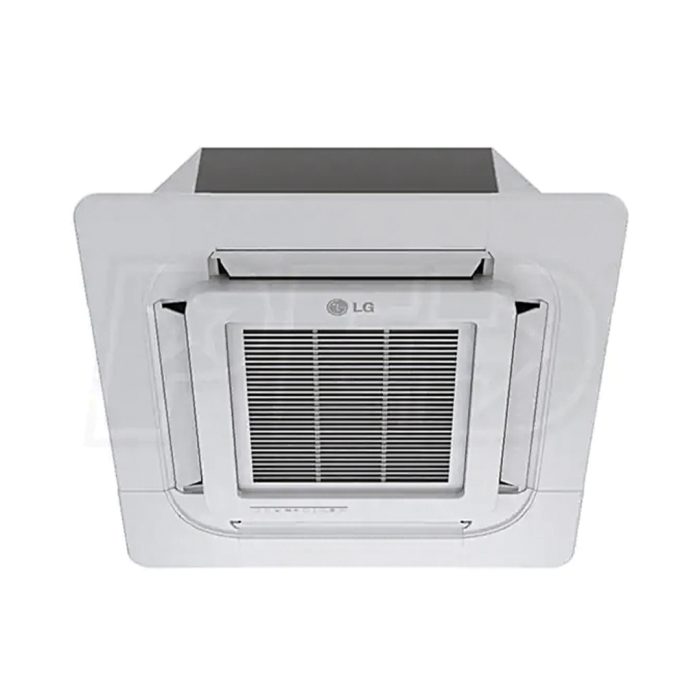
3.) Ceiling Cassettes
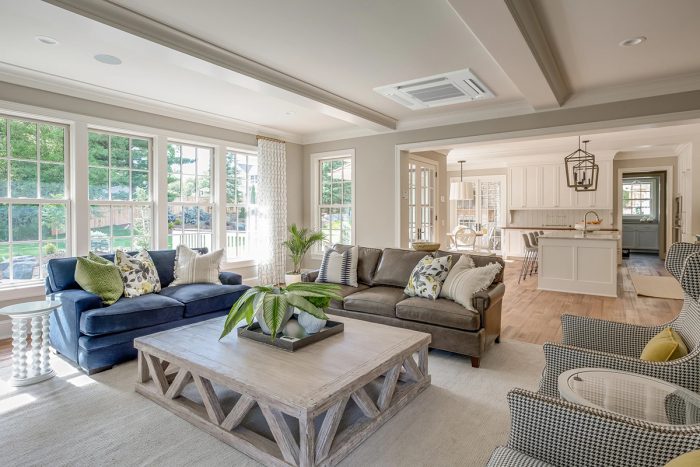
Ceiling cassettes are recessed into an attic or dropped ceiling cavity, leaving only the plastic trim with air intake grille and supply outlets exposed. Long used in commercial settings like conference rooms, ceiling cassettes are gaining popularity in residential applications. Their location and low profile make them less visually obtrusive than wall-mounted units. Unlike wall units, they can be located in the center of a room, providing more even coverage.
Four-way cassettes have a square trim; they pull air in through the center and discharge it through openings on the sides. Four-way cassettes can also be configured to provide two- or three-directional airflow. Some models can fit between standard 24-in. on-center ceiling joists.
One-way cassettes have a longer, narrower design, allowing them to fit between 16-in. on-center joists. Instead of a central intake and four supply openings, a one-way cassette has the return grille along one long side and a single supply opening on the other.
Ceiling cassettes have some drawbacks. Installation requires access from an unfinished attic or a dropped ceiling cavity, and installations between attic joists may require framing modifications. Cutting the opening in the ceiling, hanging the unit with threaded rods, and piping the condensate across the attic or dropped ceiling can all contribute to higher labor costs. And, like high-wall units, they draw in ceiling-level air, which can reduce their heating efficiency.
Two Types of Ducted Units
Ducted air handlers come in two main forms. Manufacturers use various terms in describing their products; here I’ll follow the Northeast Energy Efficiency Partnership (NEEP) in distinguishing “centrally ducted” from “compact ducted” units. As with ductless units, both types include models that can be connected to single-zone or multi-zone outdoor units.
1.) Centrally Ducted Air Handlers
Centrally ducted air handlers are similar in size and shape to natural-gas furnaces. Mitsubishi refers to them as “multi-position air handlers,” highlighting the fact that they can be installed in upflow, downflow, or horizontal left and right configurations.
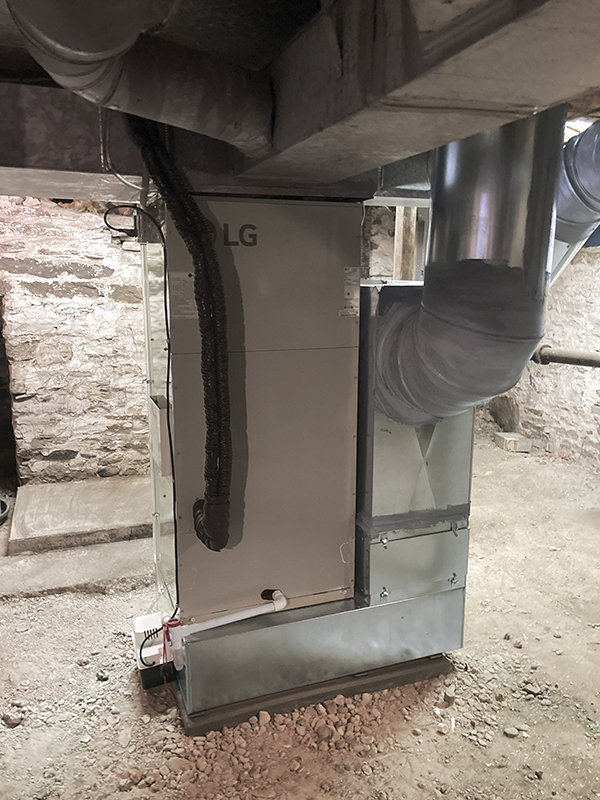
For homes with an existing furnace and ductwork, centrally ducted air handlers offer a relatively simple retrofit; the air handler is installed as a direct replacement. Because heat pumps require more airflow per unit of heat than fossil fuel equipment, furnace-to-heat-pump retrofits usually involve at least some modifications to existing ductwork.
The filter is often the most restrictive component in the duct system. Replacing a standard 1-in. filter with an oversized media filter with 4-in.- to 6-in.- deep pleats makes it possible to reduce airflow resistance while significantly improving filtration.
Another advantage of centrally ducted air handlers is the easy integration of electric resistance heaters to provide auxiliary (aux) and emergency heat. Modern cold-climate heat pumps can operate well below 0°F, but a heat pump sized to cover the full heat load on the very coldest days may be significantly oversized for more typical conditions.
A better approach often is to size the heat pump to around 90% of the design load, supplementing with aux heat in the coldest weather. Emergency heat serves as a backup if the heat pump fails, though it won’t function during an outage without backup power.
Centrally ducted systems can incorporate aux/emergency heat as an add-on module or built-in heating elements within the air handler. The heat-pump thermostat controls their operation. Programmed correctly, it ensures that resistance heat is used only when necessary.
By contrast, supplemental heat for ductless and compact-ducted systems is usually provided by baseboards, wall heaters, or resistance mats controlled by separate thermostats. If the thermostats for these external heaters are set too high, they can operate unnecessarily, increasing energy costs.
2.) Compact-Ducted Air Handlers
Compact-ducted air handlers have a very different shape. They typically blow horizontally and are much wider than they are tall. Compact-ducted air handlers are sometimes referred to as “ceiling concealed” and “slim duct” in manufacturers’ literature and as “pancake air handlers” among installers. Compact-ducted air handlers are, as their name suggests, smaller than centrally ducted units and so easier to install in tight spaces.
Compact-ducted air handlers have historically been more common in commercial settings, where they are installed above dropped ceilings. In this application, supply ductwork connects to ceiling diffusers. Return air may be ducted to the unit through a filter grille, or a transfer grille may allow return air to move freely through the ceiling cavity, with filtration provided by a mesh filter on the return opening of the unit itself.
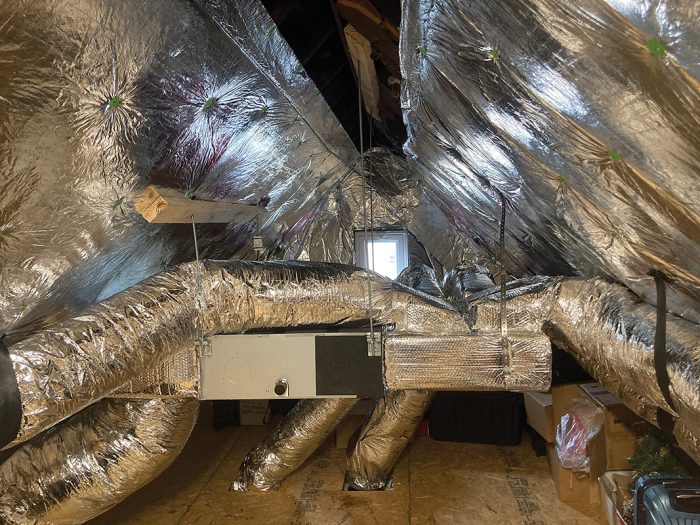
In residential settings, compact-ducted air handlers can be installed horizontally in attics, crawlspaces, basements, and dropped-ceiling cavities. The units are typically suspended from threaded rods. Many models will require service access to the bottom of the unit, so it’s important to check the required clearances. Some compact-ducted air handlers can be installed in an upflow configuration, allowing for closet installations.
Within the general category of compact-ducted units, there’s an important distinction between “mid-static” and “low-static” units. Mid-static units are designed to operate at levels of airflow resistance similar to those encountered by centrally ducted air handlers and fossil-fuel furnaces. For a given airflow, they will use similarly sized ducts. Mid-static units are suitable for applications requiring higher capacities and longer duct runs.
Low-static units have much weaker fans, so they make less noise and consume less power, but they also are less able to overcome duct and filter resistance. Historically, low-static units have been used with short, simple duct runs—for example, a bedroom suite with an adjacent bathroom and walk-in closet.
But low-static air handlers have also been used successfully in whole-house applications. Doing so requires up-sizing ducts and paying careful attention to other components of the duct system: grilles and registers, filters, and fittings. While manufactured plenums and return boots for centrally ducted air handlers are widely available, the short, wide duct openings on compact-ducted systems often require custom sheet-metal work. When the supply and return plenums are attached, the footprint of a compact-ducted unit can be surprisingly large.
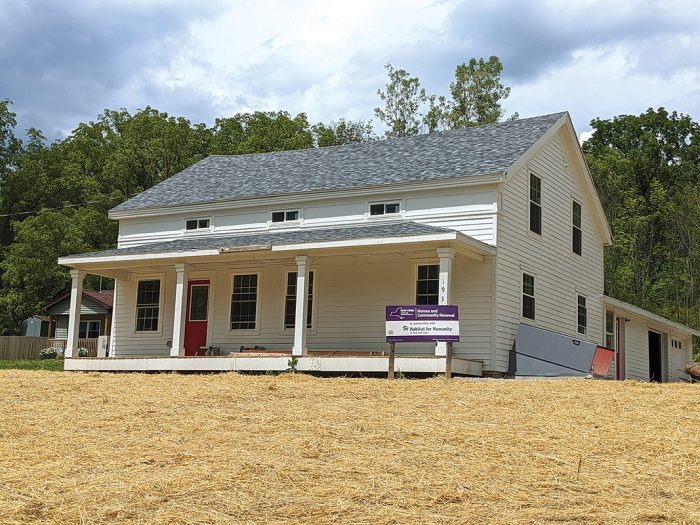
The Road Map in the Real World: An 1860s Greek Revival Goes Ductless
1.) Assess the building
With a new foundation, new windows, and upgraded insulation, this post-and-beam farmhouse in Upstate New York now has a very modern enclosure. The wiring was upgraded too. The first floor has an open kitchen/living room, a bedroom, a bathroom, and a laundry room.
The second floor has three bedrooms, a bathroom, and a large landing. An unconditioned basement extends under the entire first floor, and a small, encapsulated attic runs along the middle of the second floor. Envelope improvements brought design heating and cooling loads close to those of a similarly sized new home.
As with most houses in colder climate zones, the heating load is significantly larger than the cooling load. Walls are the most important component of the heating load, while cooling needs are driven largely by windows and internal gains.
2.) Evaluate Multiple Options
Centrally ducted, mixed ducted/ductless, and two ductless-only options were considered. A centrally ducted system was ruled out due to the lack of existing ductwork and to avoid efficiency losses associated with ductwork in the unconditioned basement. In addition, post-and-beam construction would have made running ductwork in the cavity between the first and second floors difficult.
A mixed system (a ductless head for the first floor and a compact ducted air handler serving the second floor) would have provided good air distribution to the bedrooms. It was not selected due to budget constraints and limited attic space.
A four- or five-zone ductless design would have resulted in ductless heads that were badly oversized for the bedrooms.
It would have also increased upfront costs and ongoing maintenance needs. A scaled-back ductless design was ultimately chosen. A high-wall unit serves the open area of the first floor, and a ceiling cassette over the second-floor landing serves the upstairs.
3.) Select Equipment
A 2.5-ton (30,000 Btu/hr) multi-zone outdoor unit was selected. It has a heating capacity of 26,825 Btu/hr at the local design temperature of 0°F. It connects to two indoor units: an 18,000 Btu/hr high-wall head serving the first floor and a 12,000 Btu/hr ceiling cassette on the second-floor landing. Electric baseboards provide supplemental heat in smaller rooms.
 |
 |
→ Total conditioned floor area: 1700 sq. ft.
→ Total heating load: 25,670 Btu/hr
→ Total cooling load: 14,010 Btu/hr
→ System cost: $18,295 before utility incentives (2022)
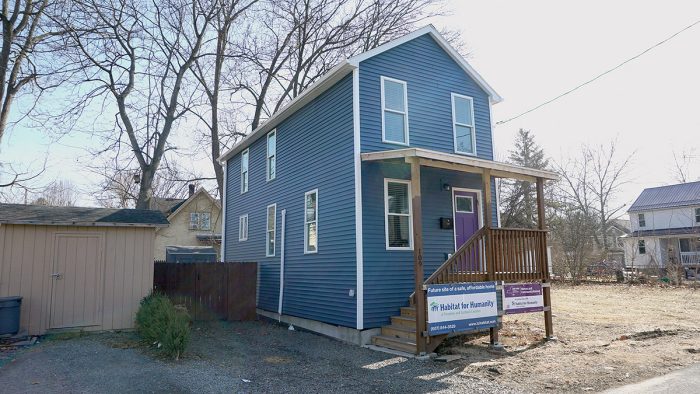
The Road Map in the Real World: A 1920s Three-Bedroom Gets a Mixed System
1.) Assess the Building
This downtown neighborhood home had significant enclosure improvements, including continuous exterior insulation and lots of air-sealing work. Testing at 1.9 ACH50, this home is significantly tighter than the 3.0 ACH50 required by code. Before the renovation, the home had a forced-air natural gas furnace, but the ductwork was unsuitable for reuse.
The floor plan was reconfigured to create a more open first floor and add a third bedroom. The second-floor bedrooms and a full bath are arranged front to back along a stairwell and hall. The first floor is over an insulated crawlspace, and the attic extends over the entire second floor.
The home’s small size and envelope improvements are reflected in its low heating and cooling loads. Walls are the most important source of heat loss, while windows, internal gains, and ceilings contribute most to cooling requirements.
2.) Evaluate Multiple Options
A centrally ducted system was not suitable for this house because the remodeled first floor offered few possibilities for chases. Ductless-only and mixed ducted/ductless options were considered. A ductless-only system was not a good option. Even the smallest-capacity ductless heads would have been oversized for the bedrooms and would have resulted in inefficient operation.
The physical size of high-wall units in these small bedrooms would also have been an issue. The layout of the second-floor hallway was not conducive to a high-wall head or ceiling cassette. A mixed system (a ductless head for the first floor and a compact-ducted air handler serving the second floor) offers several advantages.
An air handler located out of sight in the conditioned attic can deliver heated and cooled air to all second-floor rooms. Its capacity can be divided between the rooms, reducing problems with oversizing. A filter grille drawing return air from the hallway allows for better filtration than a ductless head can provide.
3.) Select Equipment
A 2.0-ton (24,000 Btu/hr) multi-zone outdoor unit was selected. It has a heating capacity of 23,725 Btu/hr at 0°F. It connects to two indoor units: a 12,000 Btu/hr high-wall head serving the first floor and a 12,000 Btu/hr mid-static compact-ducted air handler in the attic. The air handler’s flat shape allowed it to fit below the collar ties.
→ Total conditioned floor area: 953 sq. ft.
→ Total heating load: 20,660 Btu/hr
→ Total cooling load 10,286 Btu/hr
→ System cost: This system was installed with labor donated by employees of Halco Energy. The approximate market-rate cost would have been $25,000 before utility incentives (2024).
— Jon Harrod; FHB contributing editor.
RELATED STORIES