In this first part of a two-part article, Gary Striegler explains how he built custom tall cabinets as part of a built-in window seat project. He breaks down the cabinet-making process into four phases: constructing the boxes, building face frames, making doors, and installing drawers.
Working on-site with portable tools, Striegler emphasizes practical techniques like using a story pole for layout and combining pocket screws with shallow dadoes for strong, accurate joints. He shares tips on materials, such as using birch plywood for durability and poplar for face frames. The next article will cover building the window seat, cabinet tops, and shelves, and the final installation in the client’s home office.
Maximize Space with Built-Ins
A built-in cabinetry project can really improve the function and feel of a space. You could hire a cabinet shop to do the work, but I like working on built-ins, and knowing how to build simple cabinets has led to a lot of fun, interesting jobs and happy clients.
On this project, I transformed a blank wall with a custom window seat and bookshelves, creating both functional storage and a cozy place to read. It’s a good example of how I make custom cabinets for almost any built-in project. It was too much to pack into a single FHB article, so we made it two parts. This article is all about how I build the tall cabinets on both sides of the window seat.
They’re made in two sections, so they’re easier to manage and install. I show how to construct the cabinet boxes and face frames for the base and upper cabinets. I also build and install the doors and drawers for the lower cabinets. In the second article, which will appear in FHB #333, I build the window seat, make tops for the base cabinets and shelves for the uppers, and install the seat and cabinets in my client’s home office.
Basic Built-In Construction
I break cabinet or built-in construction into four phases: cutting and assembling a plywood box; building the face frame; making and fitting doors, drawers, and shelves; and installing the cabinets with trim. Once you have a plan for the cabinet sizes and arrangement, the first step is to determine and lay out the individual cabinets and their components.
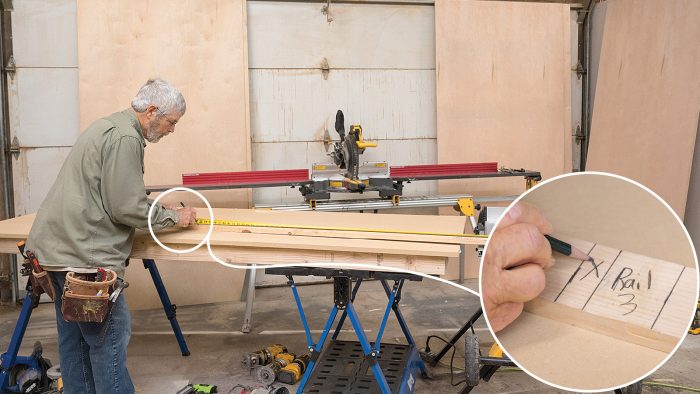
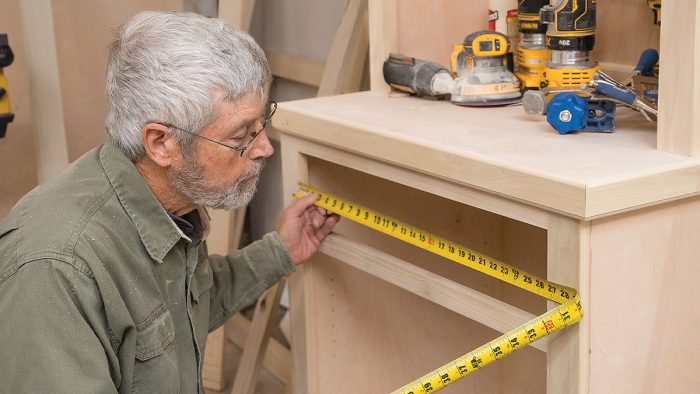
As a visual learner, I prefer a story pole that I make on the job site that shows the cabinet locations along the wall and the individual components all on a piece of long, skinny stock. I find this method prevents costly and time-wasting mistakes.
Face frames create the cabinet’s finished dimensions. I typically make my face frames overhang the box by 1/2 in. on the sides. The overhang allows for tight joints between cabinets and a little room for scribing. Because I want consistent face-frame dimensions, I adjust the cabinet box dimensions to get the face-frame overhang I am looking for.
Typically this means I make the cabinet box 1 in. narrower than its face frame. When a cabinet stands alone or is at the end of a run, I’ll make the face-frame overhang smaller or flush with the box for aesthetics. If I know I have significant scribing to do for out-of-plumb walls or irregular surfaces, I may create a bit more face-frame overhang, but again, I’m always adjusting the cabinet-box dimensions, not the face frame.
Joining the Cabinet Box
Although MDF used to cost less than cabinet plywood, it’s now practically a wash, so I prefer 3/4-in. birch plywood for box construction. MDF is very heavy and sometimes splits when I’m driving fasteners. I use poplar for the face frames, but I pick through the stock to avoid boards with purple and green streaks, which bleed through some finishes. I include a 1/4-in.-thick plywood back, which helps square up the cabinet and adds a lot of strength to the box.
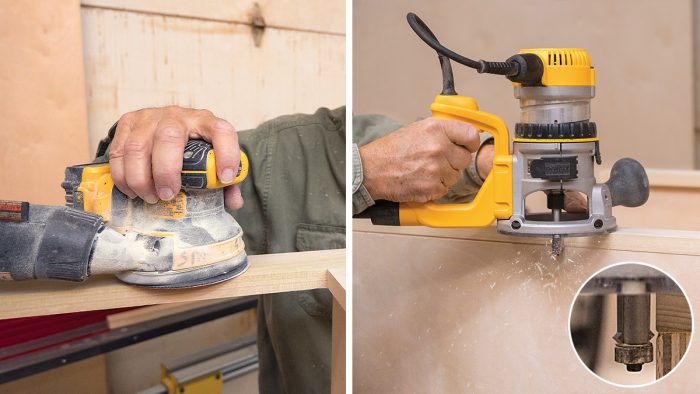
Some carpenters and cabinetmakers use pocket-hole joinery exclusively in building cabinet boxes, but I find that pocket screws can push the plywood off layout during assembly, so I also use a 1/8-in.-deep dado that helps align the parts and creates a strong joint without weakening the cabinet sides like a deeper dado can.
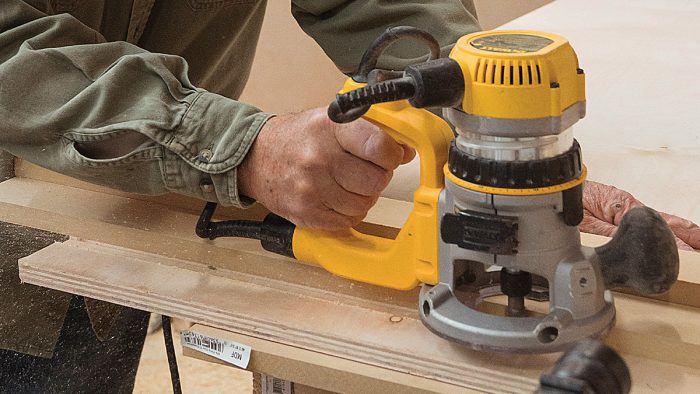
To get the right depth, I make a test cut or two on a scrap piece of stock with my router setup. Most plywood is slightly thinner than the 3/4-in.-dia. router bit, but the small amount of wiggle room in the dado actually makes assembly easier. Keep an eye out next issue for the follow-up article, which will show how I build the bench and create tops and shelves for the two-part side cabinets. Finally, you’ll see how I installed the bench and cabinets in the space.
Set Up Shop
I usually set up my “cabinet shop” in the garage of the house where I’m building. Equipment includes a tablesaw with a 2-ft. by 8-ft. outfeed table that I also use for assembly, a miter saw, an air compressor and finish nailers, routers, and a benchtop planer. I also set up a track saw or circular saw with a guide for breaking down plywood.
Table at the Center: Placed on sawhorses, a sheet of 3/4-in.-thick MDF creates a dead-flat surface for building cabinet boxes and provides outfeed support for the tablesaw.
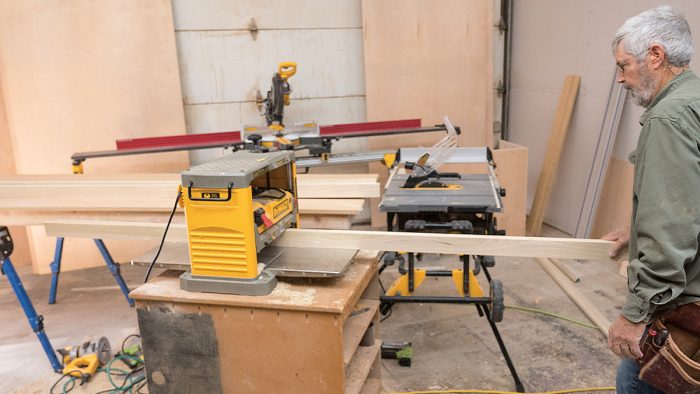
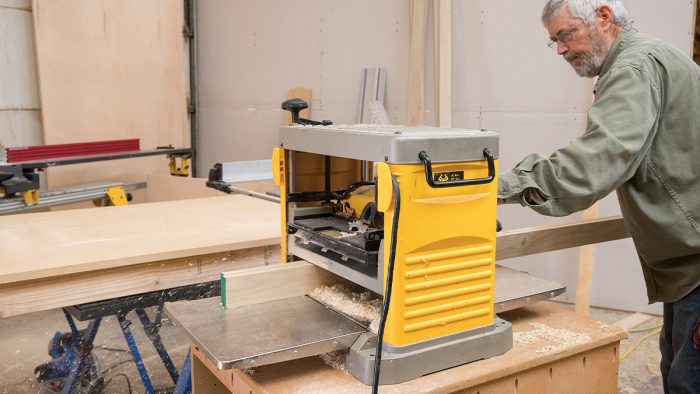
Planer Makes Uniform Stock: A portable planer smooths saw marks left by the tablesaw and creates stock of uniform width for face frames, door frames, and shelf edgebanding.
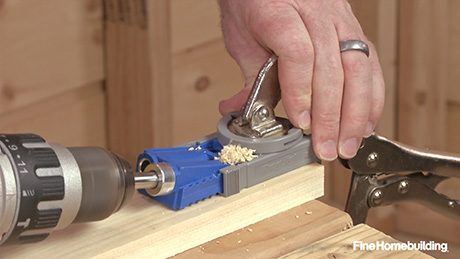
Pocket Holes for Joints: Pocket screws make fast, strong joints for cabinet and face-frame assembly. I have a Kreg Foreman ($350), which speeds production, but inexpensive pocket-hole jigs work fine too.
Build the Boxes
Although they can be any dimensions, base cabinets are generally constructed so they’re 24 in. deep and 35 in. tall. This allows for a 24-in. countertop and makes the final height around 36 in. when the cabinets are shimmed level and a standard countertop is installed. These cabinet boxes are made of 3/4-in. cabinet-grade Baltic-birch plywood with a 1/4-in. plywood back.
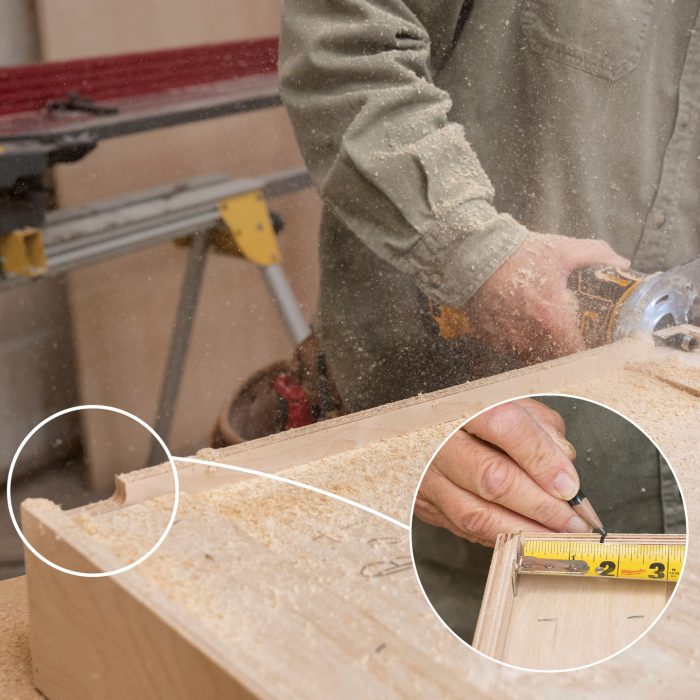
Story Pole Prevents Mistakes: To make sure the completed cabinets will fit the space, I draw full-scale horizontal and vertical layouts on pieces of stock. They show the location of the face-frame stiles and rails, the cabinet-box plywood panels, and any trim I plan as part of the final installation.
Dado the Sides: I make both cabinet sides from a full-width piece of plywood that I will later rip to the cabinet depth. I cut 1/8-in.-deep dadoes with a 3/4-in. bit in a router that’s guided by a clamped 55-in.-long fence made from 2-in. and 6-in. pieces of 3/4-in. MDF.
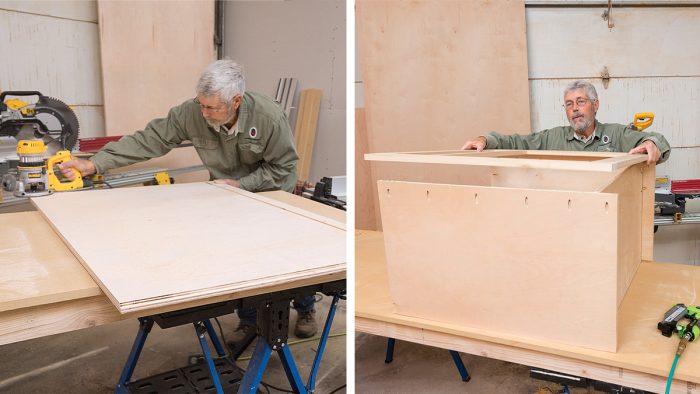
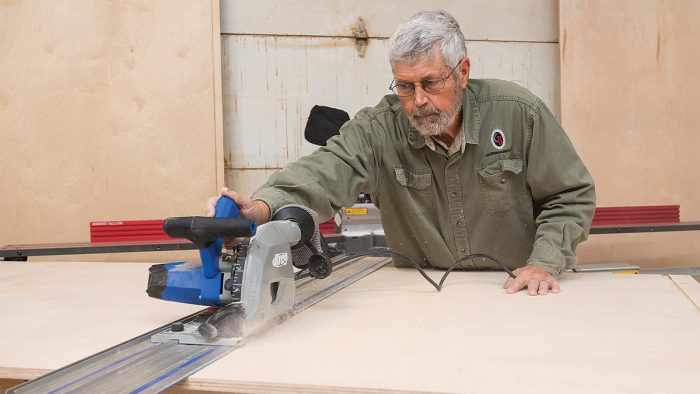
Cut to Height: With the dadoes cut, I move on to the cabinet sides, cutting them to height with a track saw. For the wall cabinets, the sides are the full height of the cabinet. With the base cabinets, I need to subtract the countertop thickness from the sides. My vertical story pole comes in handy here.
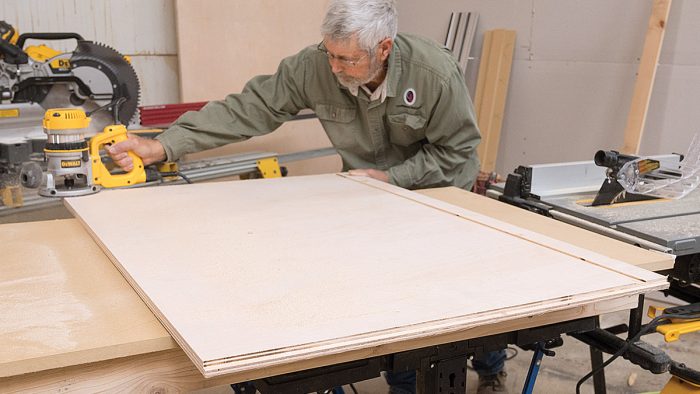
Rabbet the Back: Using a router, I cut a 3/8-in. by 3/8-in. rabbet on the top and sides of the panel for the 1/4-in. plywood back. The extra 1/8 in. of depth ensures the cabinet sides will touch the wall over drywall joints.
Cut the Cabinet Depth: Finally, I cut the plywood to match the depth of the cabinet with a tablesaw or track saw. The panels should be the depth of the cabinet minus the thickness of the face frame. With 3/4-in. stock, base-cabinet panels are generally 231/4 in. deep. Wall cabinets are usually 111/4 in.
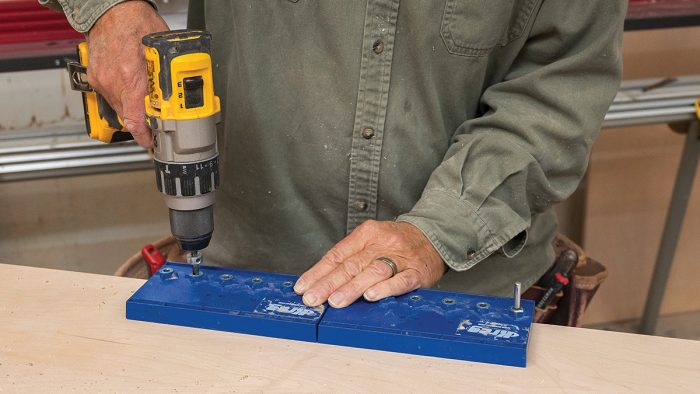
Drill for Shelf Pins: Upper cabinets generally have adjustable shelves, so I drill the holes using a Kreg jig that uniformly spaces the 5-mm holes. Generally, I plan for a shelf for every 12 in. of cabinet height. I ask clients what they intend to store or display so the shelves are appropriately spaced.
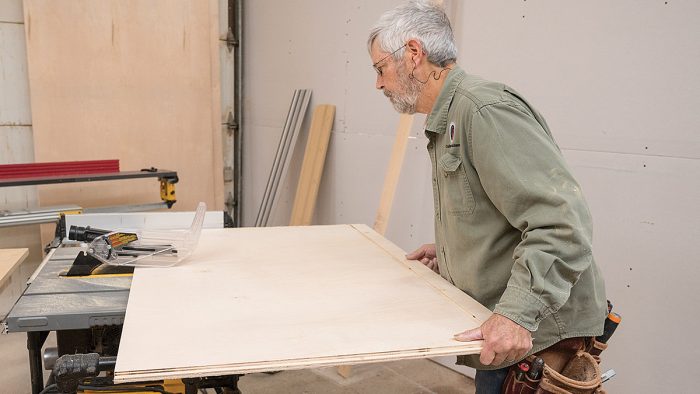
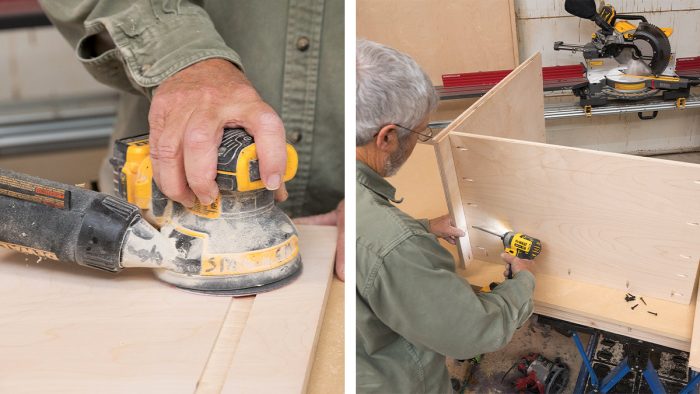
Sand and Assemble: I sand the panels with 100-grit paper and then attach the sides to the bottom with 11/8-in. pocket screws. I join the panels with the cabinet front on the table. The smooth surface keeps the front edges of the panels aligned so the face frame will fit tight to the box.
Install the Top and Bottom: The top and bottom panels are 1/4 in. wider than the box’s inside dimensions because they slide into 1/8-in.-deep dados on each side. Upper-cabinet tops, bottoms, and shelves are 3/8 in. narrower in depth than the sides so the back panel can run behind them. They are installed with pocket screws.
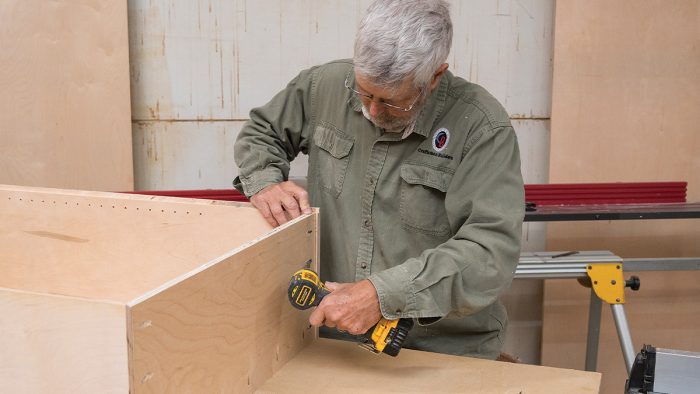
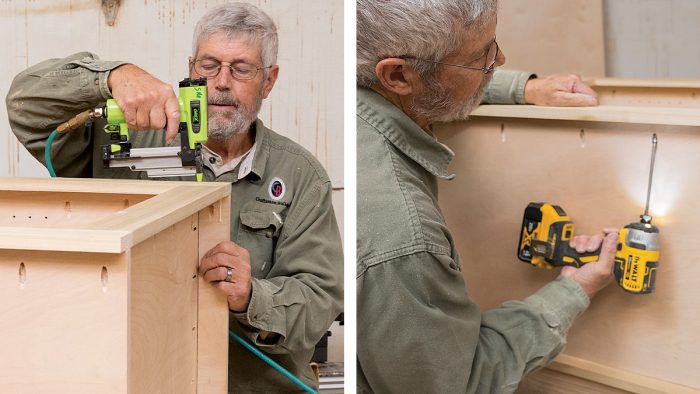
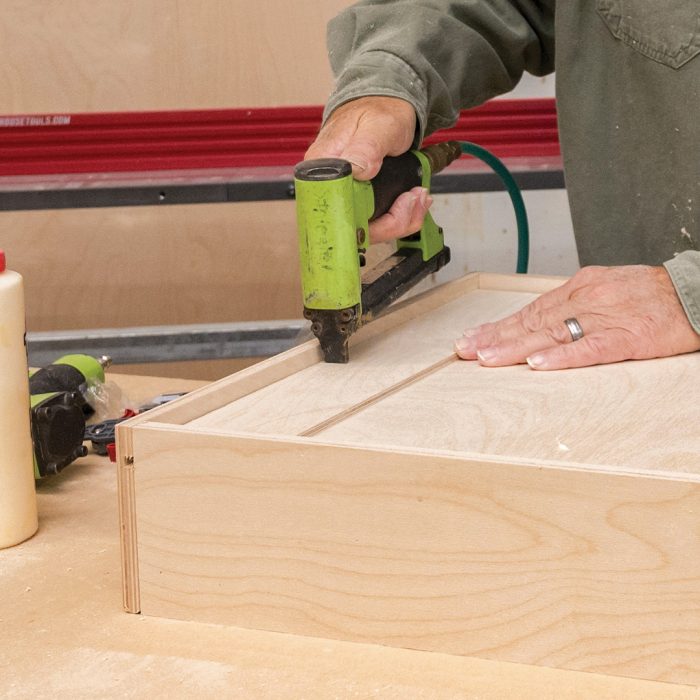
Add a Rail: I install a 4-in.-wide plywood stretcher rail at the top of base cabinets and at the top and bottom of wall cabinets before installing the cabinet back. The rails help strengthen and square the cabinet and reinforce where it fastens to the wall. In this case, I shoot a few headless pins to hold the stretchers in place while I drive pocket screws into the box sides. It’s faster than clamping, and the screws pull everything together.
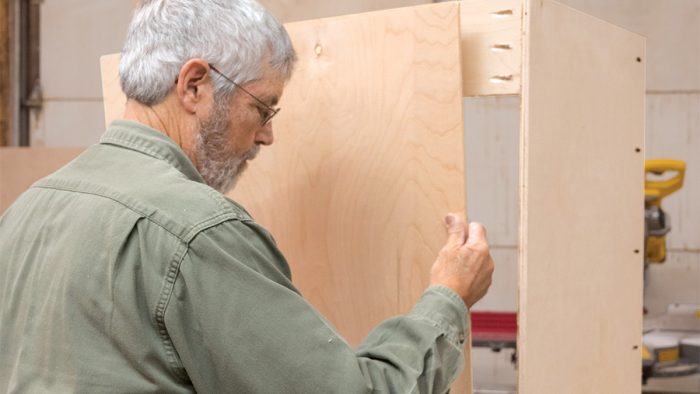
Install the Back: The plywood back is cut so that it fits inside the rabbets machined on the side panels and covers the back edge of the bottom panel. I fasten the back with 1/2-in. by 5/8-in. staples driven every 4 in.
Make and Mount the Face Frames
These poplar face frames have 2-in. stiles and 3-in. rails joined with pocket screws. I cut the parts 1/8 in. wider and about 3 in. longer than the finished dimensions. After planing them to their final width, I cut them to length, removing any snipe at the ends. I use the straightest stock for long stiles and rails.
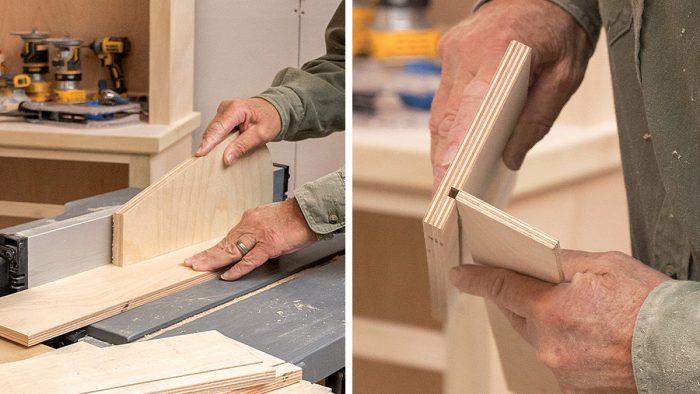
Plane to Width: I plane equal-width stiles and rails at the same time with a portable planer that ensures they’re all the same width. First passes remove about 1/32 in. each, while final passes are lighter.
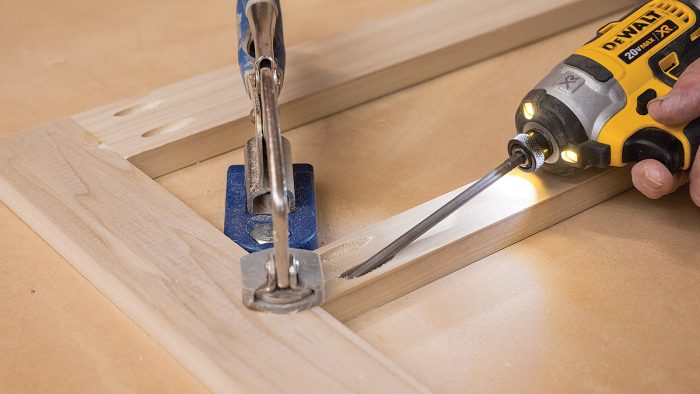
Connect the Stiles and Rails: I use a Kreg Automaxx bench clamp to align the parts and hold them tightly together for fastening. Pairs of 11/8-in. coarse-thread pocket screws driven through the rails into the stiles provide strong connections.
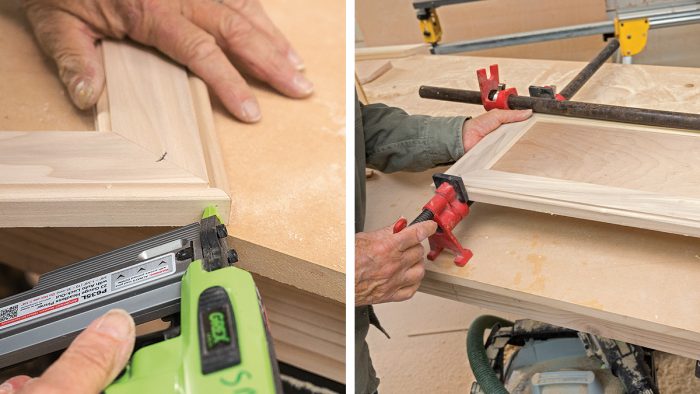
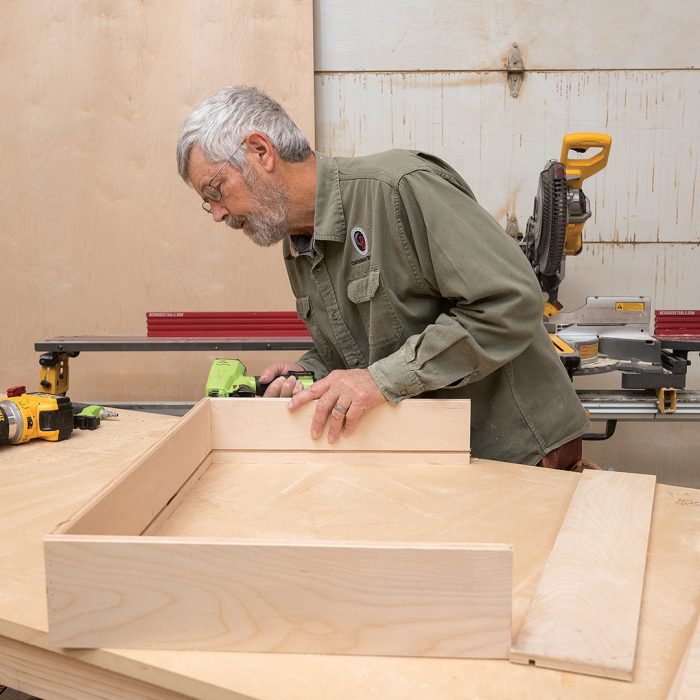
Join the Frame and Box: I apply glue to the front of the box and lay the face frame onto the cabinet front, maintaining the proper face-frame overhang on both sides. Then I tack it in place with a 21-ga. pin nailer before fastening with pocket screws or glue and clamps.
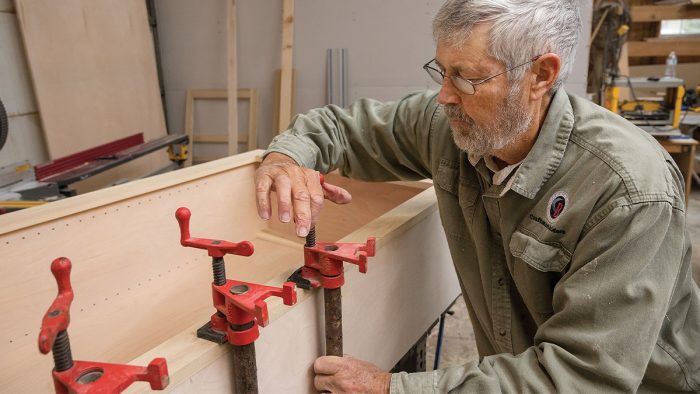
Clamp Visible Sides: The sides of the bookshelves I’m building here will be exposed as part of a window-seat nook. Exposed pocket holes look bad, and filling them is a multistep process, so I glue and clamp the frame to the box instead, spacing the clamps about every 8 in. to 12 in.
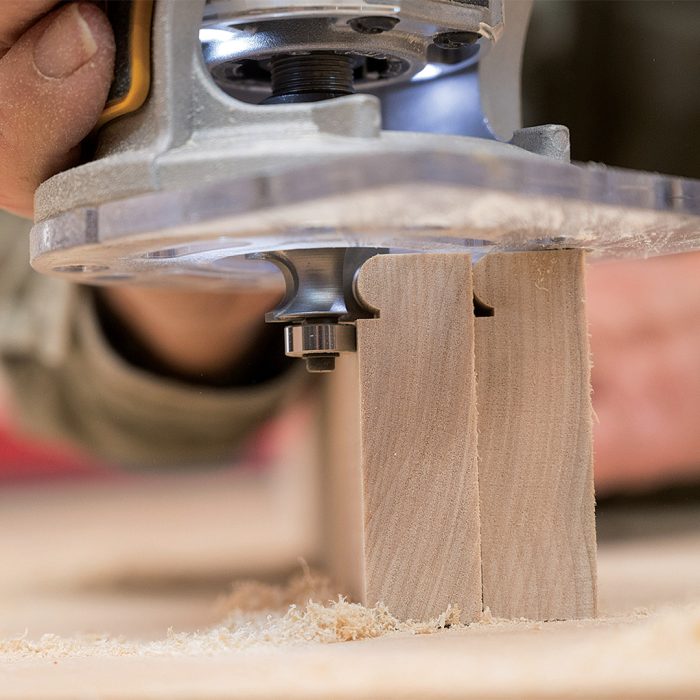
Sand and Trim: I wait at least an hour for the glue to set up before I pull the clamps and sand the face frame. The final step is flush-trimming the finished end (the exposed side) of the cabinet with a flush-trim V-groove bit, and then I lightly sand where the frame and cabinet box meet.
Make and Install the Doors
Most Cabinets I build have doors and drawers that overlap the face-frame opening by 1/2 in. on all sides. I build and install the doors first, then I line up the drawers to match the doors. I like doors with mitered corners because they have no exposed end grain and are easy to build.
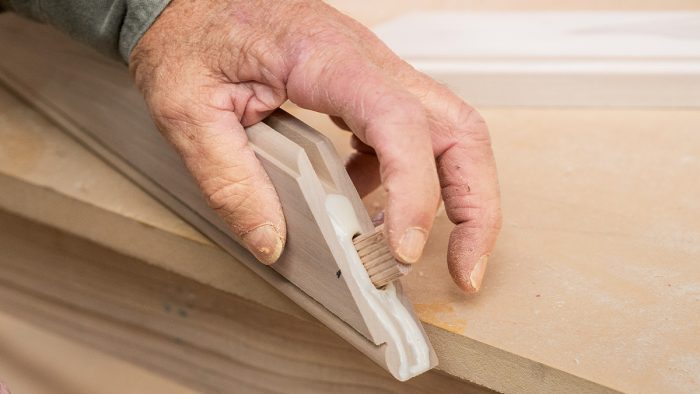
Prep the Edges: I pick flat, straight ¾-in. material for the door frame, rip it 1/8 in. oversized in width, and plane the edges. I then route the inside and outside edges: I set two pieces on edge and profile the outside edges with a beading bit, and then I use a 1/4-in. roundover bit to smooth and round the inside edges.
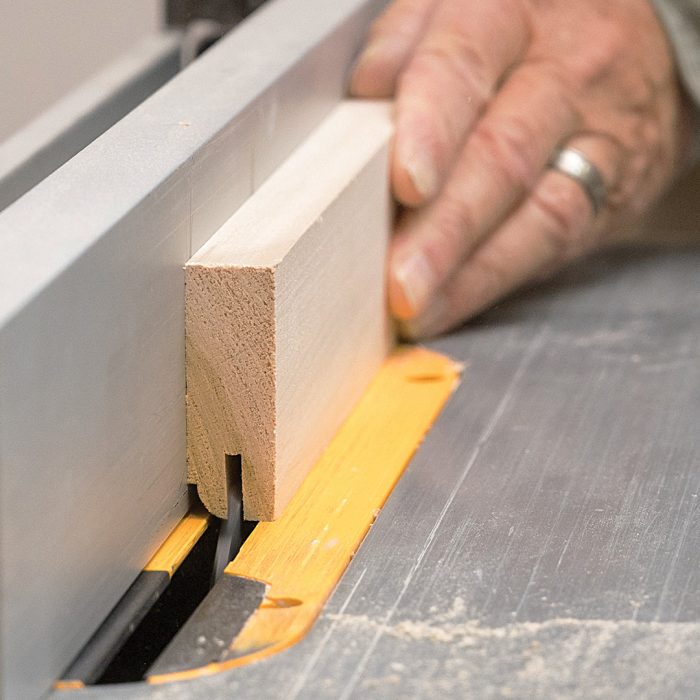
Cut a Groove: The last step in prepping the door frame is making a 1/2-in. by 1/4-in. dado for the plywood center panel. I do this in two or three passes using a standard blade in my tablesaw. I use a scrap of panel material to check the fit. I want the groove to be snug but not too tight for the panel to slide in.
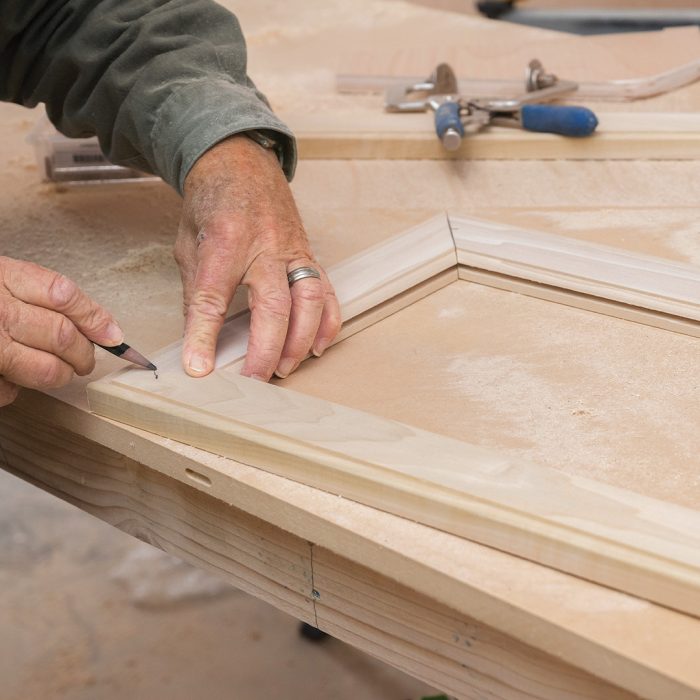
Cut the Frame: I cut the sides of the door frame on the miter saw to their final dimensions and then test-fit them together. I draw a line across the miter to mark the location of the loose-tenon joinery.
Prep for Joinery: I use Kreg’s loose-tenon system for joining the door frame’s mitered corners. The fit allows the tenon a small amount of side-to-side adjustment, making it easy to line up the corners.
Assemble the Door: I glue the tenons and the miters on both ends of one stile to make a three-sided frame, using 1/2-in.-long headless pins to keep the long points of the miters aligned. I then slip in the plywood panel (cut 1/8 in. undersized) and glue on the fourth side of the frame before clamping.
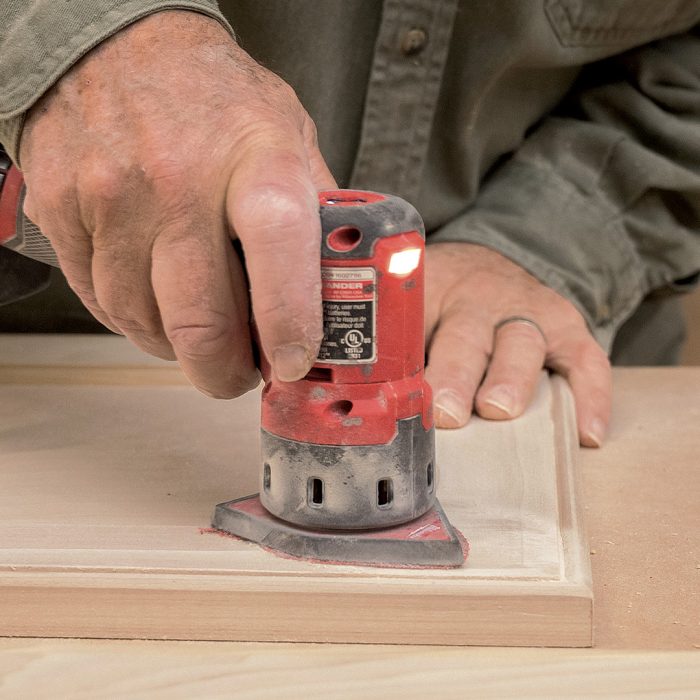
Sand the Corners: After letting the glue set for an hour, I unclamp the door and sand the corners with a Milwaukee detail sander. The small sanding pad smooths the miter without messing up the door’s beaded edge.
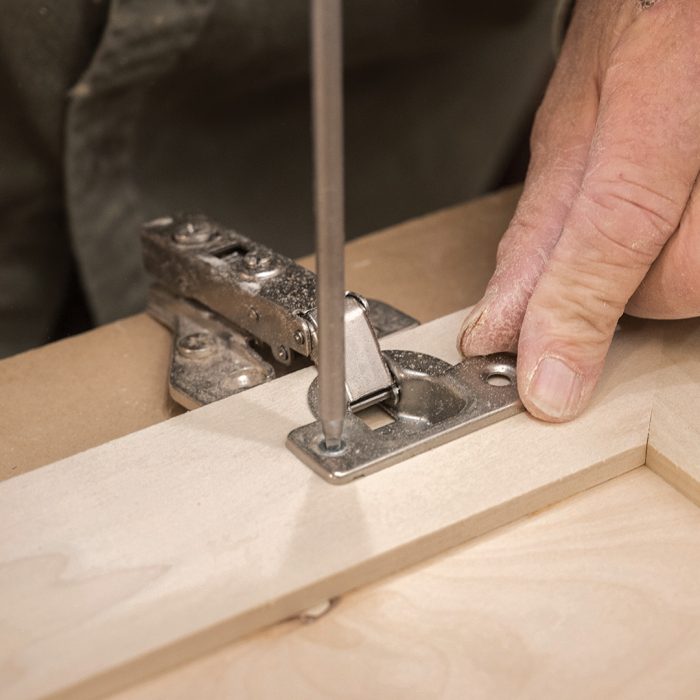
Install Hinges: With a jig from Kreg, I drill the 35-mm holes for the soft-close cup hinges that I use with cabinet doors. The end of the jig is lined up with the top or bottom of the door for repeatable drilling without measuring.
Mount the Door: I use a scrap of stock that’s ripped 1/2 in. narrower than the bottom rail to help locate the door on the frame with the correct 1/2-in. overlap. Once the door is mounted, I fine-tune the left and right reveal with the adjustment screws on the hinges.
Make and Fit the Drawers
The drawer boxes are made from 1/2-in. Baltic-birch plywood with a bottom of 1/4-in. Baltic birch. Concealed undermount drawer slides have replaced side-mounted slides as my standard. The undermount slides from Hardware Resources that I used here require the width of the drawer box (the outside dimension) to be 5/8 in. less than the drawer opening. The drawer box attaches to the drawer slides in two places: at the back of the drawer box, and at a pair of clips on the bottom of the box, tight to the front.
Size and Cut: I measure the drawer opening and cut the drawer-box parts with a miter saw. I deduct 1-5/8 in. in width from the front and back pieces of the drawer box—5/8 in. to accommodate the slides, and 1 in. because the two 1/2-in. drawer-box sides will overlap the front and back.
Cut a Groove: Once the drawer-box parts are cut, I cut a 1/4-in.-wide dado 3/4 in. up from the drawer bottom by making several passes on the tablesaw. I check the fit with a scrap of the same 1/4-in. plywood I use for the drawer bottom.
Nail the Box: The drawer is nailed together with 21-ga. pins. You could add glue, but I’ve found nailing alone to be plenty durable.
Add Thickness for Screws: I glue 3-in.-wide strips of 1/4-in. plywood to the bottom of the drawer bottom and then secure them with 1/2-in. by 3/8-in. staples. The additional thickness gives the drawer-slide mounting screws more grip and prevents them from poking through to the inside of the drawer.
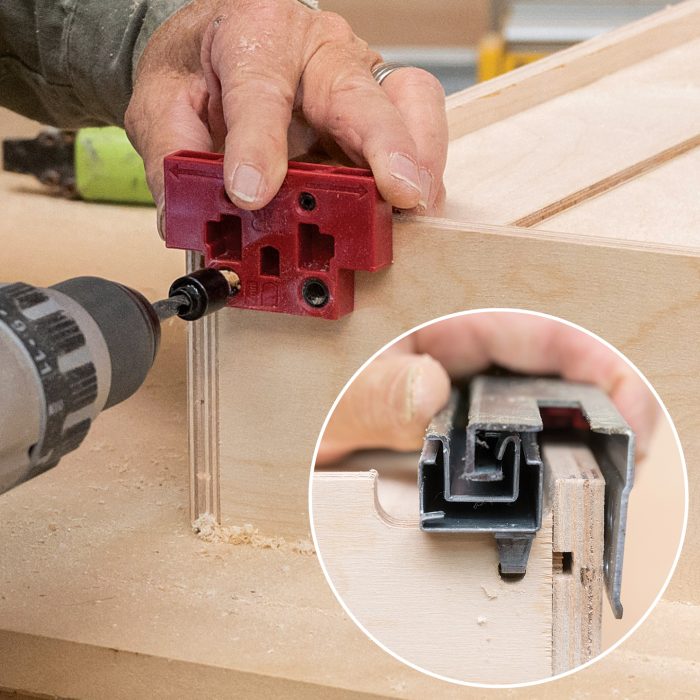
Notch for Slides: I use a flush-trim router bit to create a 11/2-in.-wide notch in the drawer back to accommodate the slides.
Drill the Mounting Hole: The slides have metal hooks that connect to holes in the back of the drawer box. I use a jig from Hardware Resources to drill the 3/16-in. holes level and in the right spots. You can also hold the slide in the proper spot and tap the hook with a hammer to mark it for drilling.
Mount the Clips to the Drawer Bottom: The clips that hold the slides are mounted in the front corners of the drawer box. They’re screwed to the box front and sides, and to the plywood strips installed on the box bottom.
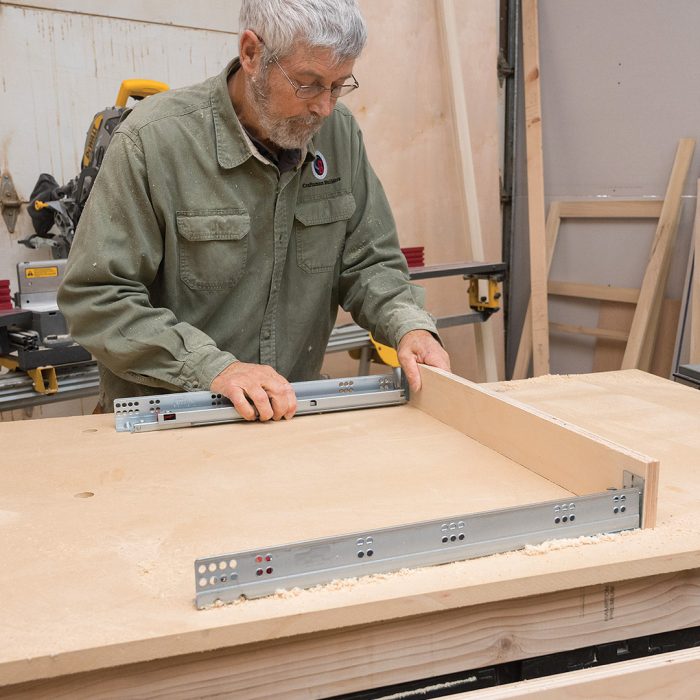
Make a Slide Assembly: The drawer slides are held at the back with clips that mount to the back of the cabinet box. I first mount the clips on a 3-in.-wide piece of 3/4-in.-thick plywood, their edges flush with the ends of the plywood. The plywood is cut the same width as the drawer opening.
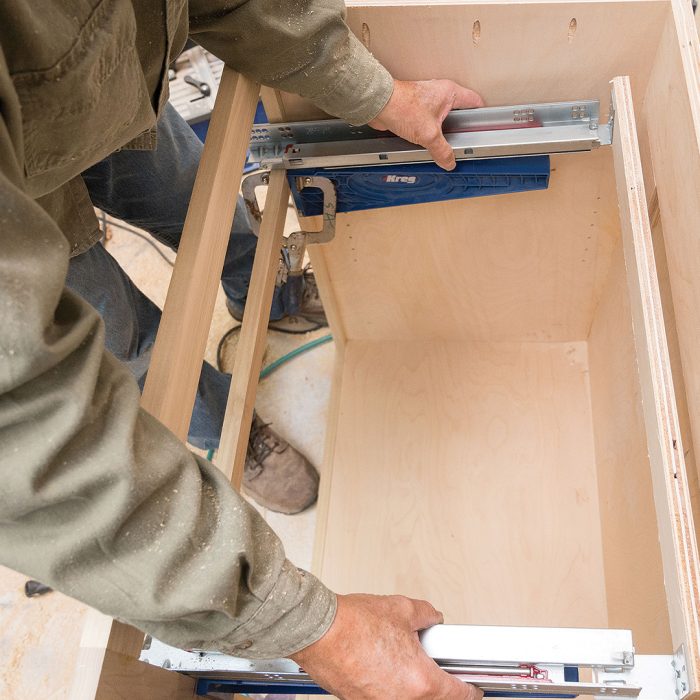
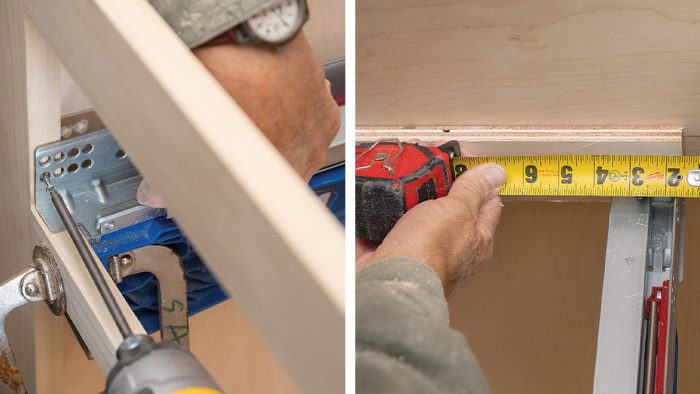
Position the Slides for Installation: I add plywood spacers under the mounting rail for fastening the drawer-slide assembly. I then mount the slide assembly, using jigs from Kreg to hold it level.
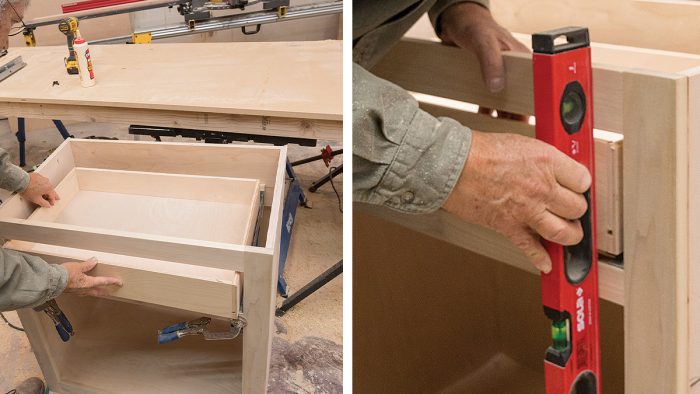
Mount the Slides: I first screw the slides into the face frame, and then I screw the assembly to the cabinet back. Before locking it in, however, I check the measurements from the cabinet side to the slide to make sure it is running parallel to the cabinet box.
Adjust the Slides: I usually have to make some small adjustments on the drawer slides, but installing both slides as an assembly gets me close. I use a level to check the front-to-back adjustment and measure between the drawer box and face frame to check the side reveals and make them consistent.
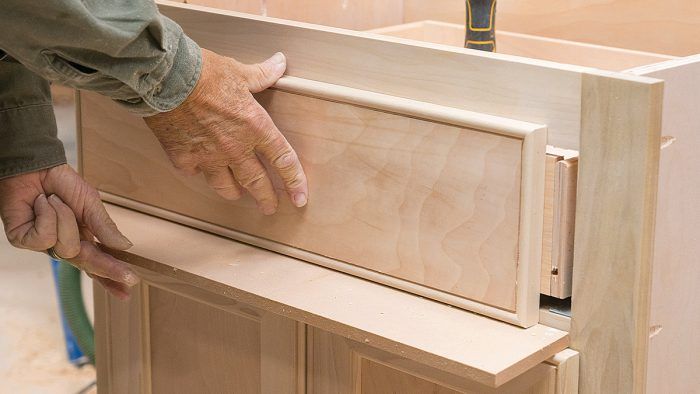
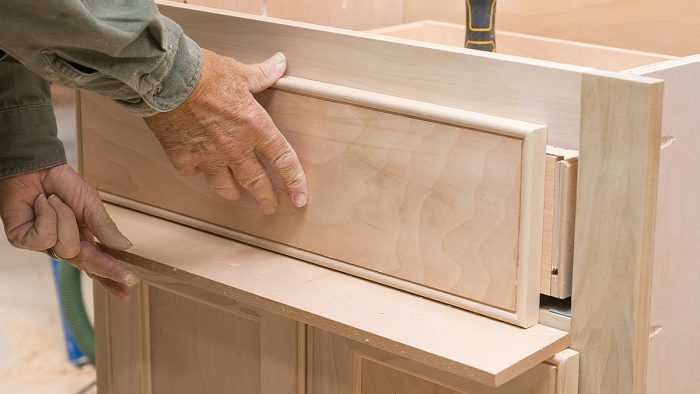
Make and Mount the Fronts: I make drawer fronts from 3/4-in. plywood edgebanded with a bead molding that matches the cabinet doors. I miter the bead’s corners and fasten the pieces with glue and pins. I use a 1/2-in. spacer to create the proper reveal before fastening the front with screws driven from the back side.
— Gary Striegler is a longtime FHB contributor and the owner of Striegler and Associates in Fayetteville, Ark. Photos by Bryan Striegler.
The designer and builder of the 2018 Fine Homebuilding House detail why they chose mineral-wool batts and high-density boards for all of their insulation needs.
This is a dialog window which overlays the main content of the page. The modal window is a 'site map' of the most critical areas of the site. Pressing the Escape (ESC) button will close the modal and bring you back to where you were on the page.
We use cookies, pixels, script and other tracking technologies to analyze and improve our service, to improve and personalize content, and for advertising to you.
We also share information about your use of our site with third-party social media, advertising and analytics partners.
You can view our Privacy Policy
here and our Terms of Use here.