Vintage Sash Windows Get an Energy-Efficient Upgrade
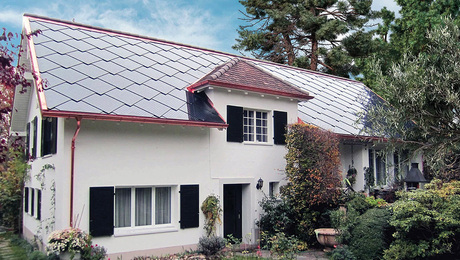
Low-e storm panels improve the energy efficiency of these old sash windows without changing their classic look.
You don’t need to entirely replace aging or historic windows to make them more energy efficient. Chris Pratt and Ghazi Jendoubi of OpenSash Window Retrofit demonstrate how to improve the performance of old windows without destroying their character. Watch the video above or keep reading to see the entire process.
Here’s the Transcript
Today we’re checking out a window restoration on this project. We’re going to see how they take out the old sash, upgrade the weatherstripping, and reinstall the windows. The performance difference is amazing. This morning when we got here, they were taking out the window sash.
The whole process starts with removing the stops. The first step is for window expert Ghazi Jendoubi to remove the sash for upgrades. The inner stops are held with wood screws. He removes the screws and pulls the window stops from the frame. Then he removes the sash cords from the sash and lets the weights fall to the bottom of the pockets.
Next, he removes the parting stop by cutting the paint with a putty knife and gripping the stop with sheet metal locking pliers. Once again, he removes the sash weight cords and lets the weights fall to the bottom. Now that the sash are removed, the rest of the work happens back at the shop. Let’s go pick it up there.
Back at the Shop
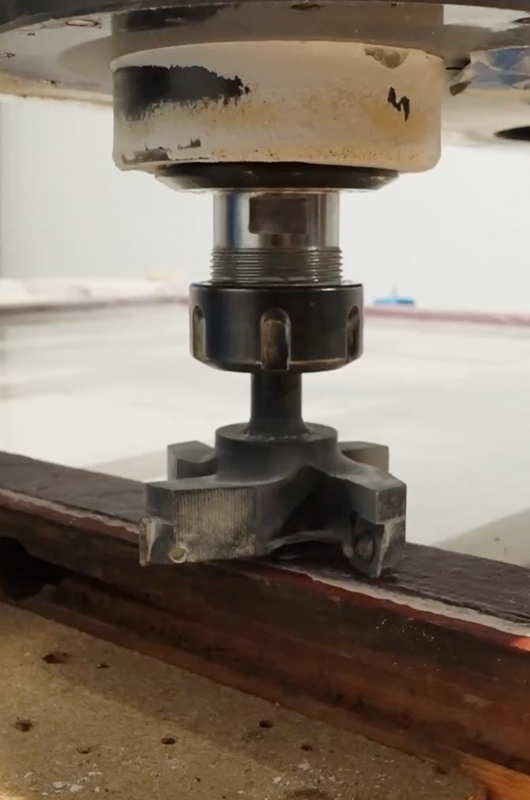
Here we are at the OpenSash Window Retrofit in Montpelier, Vt. Here, the team is going to improve these double-hung windows for increased efficiency and easier operation. To start, the sash is sanded and hardware is removed. Next, the sash is trimmed to make room for new weatherstripping. The sash is clamped to the table of a CNC router by OpenSash business owner Chris Pratt.
The router flattens the sash for the low-e storm panel that will be added later. Before routing, he checks the sash for nails with a metal detector. He then flattens the exterior of the sash using a cutter with replaceable blades. A second setup removes the old glazing putty. The router is programmed so it can compare all the sash of the same size with one setup.
The meeting rail and edges of the sash are sanded. Then he makes slots on the sides of the window sash and on the meeting rail for weatherstripping, which will be installed later. After checking that the cuts are straight, he creates a recess for the storm panel. It’s cut from small pieces of stock to make a four-sided frame. The pieces are narrower than the sash, so the existing window frame and stops will work with the upgraded window.
A piece of acrylic with square corners helps locate and square the stops for the storm panel. The white pine stops are coated with waterproof glue, and then 5/8-in.-long 18-ga. brads hold the stop in place while the glue sets. Ghazi wipes the sash with linseed oil and lets it dry for a few hours before glazing. Then he cleans the glass with alcohol and applies the glazing putty to hold the glass and shed water.
When the glazing putty is set up, usually two or three days later, the sash is primed on all sides with an all-purpose primer. The storm panel has a low-e coating that he puts on the inside of the panel, and then he installs the frame that protects the glass edges. Latex sealant attaches the frame to the energy panel. When the sealant is dry, he installs the storm panel with turn buttons. Then he installs the weatherstripping on the sash edges and meeting rail.
Reinstalling the Windows
Ghazi and the rest of the crew covered the window openings using scrap stock, painter’s tape, and sheet plastic while the sash were being worked on in the shop. Now he removes the plastic and checks the sash opening for nails and blobs of paint while he removes the old weatherstripping nailed to the window frame.
He installs the top sash first. Acrylic latex sealant is applied to the stops surrounding the top sash. It will be fixed in place. New stops permanently hold the top sash closed. The sash can be made operable if requested, but the sash weights that formerly held it up will be used to balance the lower sash, which is now heavier because of the low-e energy panel.

Ghazi opens the weight pocket, cuts the knot from the end of the cord, and duct tapes new sash cord to the end of the old one. The sash weight pulls the new cord into the pocket. It’ll be connected to a pair of sash weights.
He ties a knot on the end of the new cord that fits into a recess in the top of the window sash. He ties the new rope to the two weights that formerly balanced the top and bottom sash with square knots. The two weights used together will counteract the additional weight of the new low-e glass energy panel on the bottom sash.
Final Adjustments
Satisfied the weights are moving freely, he reinstalls the sash weight cover, then does the same on the other side. Ghazi reinstalls the parting stops which separate the upper and lower sash. The crew uses the window’s original stop when possible. Broken stops are reproduced with clear, straight-grain stock in the original wood species.
He caulks around the upper sash and prepares to install the lower sash. Then he attaches the sash cords to the bottom sash, placing the knotted ends in their original mortise, then driving screws for secure attachment. Aluminum flashing helps align and compress the weatherstripping, which helps the tight-fitting sash slip into place. The final step is to reinstall the interior stops using the original brass screws.
Thanks for visiting us on the job site and here in the OpenSash shop. Hope you learned something about window improvement and restoration.
RELATED STORIES


View Comments
What is the Low-e storm panel? Is it a vacuum glass unit, or something else? It looked too thin to be an IGU. It looked sort of like low-e glass placed over the existing glass but if that were the case how does it handle condensation, because if so that's really interesting
No mention of lead based paint.........