FHB Logo Facebook LinkedIn Email Pinterest Twitter X Instagram Tiktok YouTube Plus Icon Close Icon Navigation Search Icon Navigation Search Icon Arrow Down Icon Video Guide Icon Article Guide Icon Modal Close Icon Guide Search Icon Skip to content
Subscribe
Log In
  • How-To
  • Design
  • Tools & Materials
  • Restoration
  • Videos
  • Blogs
  • Forum
  • Magazine
  • Members
  • FHB House
  • Podcast
Log In

Fine Homebuilding Project Guides

Drywall

Guide Home
  • Drywall Basics
  • Tools and Materials
  • Hanging Drywall
  • Taping and Sanding
  • Special Installations
  • Drywall Repairs
  • Plaster
How-To

Basement Ceilings: Drywall or a Drop Ceiling?

Your choice between these two options will be based on looks, mechanicals, and access to the ceiling.

By Justin Fink
  • X
  • facebook
  • linkedin
  • pinterest
  • email
  • add to favorites Log in or Sign up to save your favorite articles
A good example of a drywall ceiling in a typical basement

I’ve remodeled a lot of basements over the years, and one of the most important decisions I face on every job is how to handle the ceiling. You’ve got two basic choices: install a drop ceiling (sometimes called dropped ceiling, suspended ceiling, or paneled ceiling), or install drywall (commonly referred to as Sheetrock, which is one brand of drywall).

The choice you make will be based on mechanicals, desire for access to the ceiling, and the look you want to achieve. Here are some things to consider:

Looks

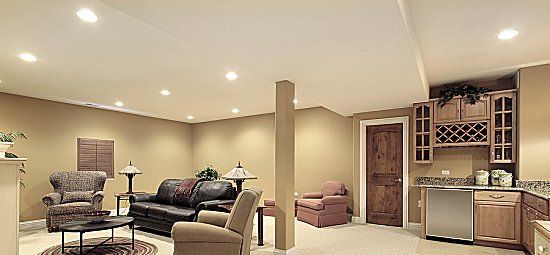
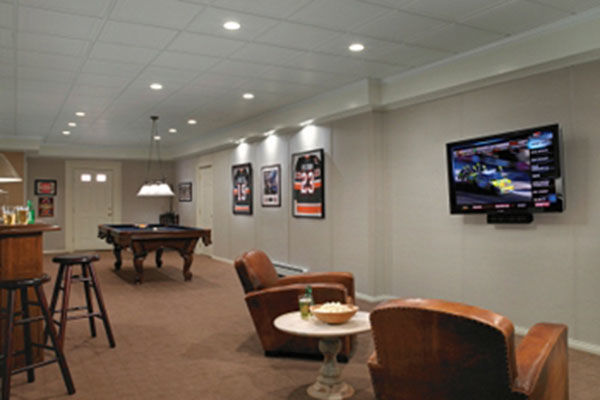
Never underestimate the amount of hassle that people are willing to go through in order to make things look nice. Ceiling tiles are the go-to choice for commercial buildings, but they usually have higher ceilings. Somehow the lower ceiling height of a typical basement makes that drop ceiling feel just a bit too close for my comfort.

To me (and maybe I’m alone in this?) it’s pretty hard to spend much time in a finished basement living space that has ceiling tiles and not see them as a constant reminder that you’re in a portion of the house that isn’t being treated the same way as the rest of your above-ground living space.

Ceiling tiles in the basement

Mechanicals

Unless they’re told otherwise, mechanical contractors don’t always bother to group ducts, electrical cables, and plumbing assemblies into neat groupings that are easy to enclose. Can you blame them? If the basement wasn’t originally intended as living space – and for most houses they aren’t, at least not at the building stage – why would the subcontractors all try to cram their installations across the same beam, or bother to drill holes through the joists when it’s faster to run across the bottom of them?

dropped ceiling track and panels allow access to mechanical components

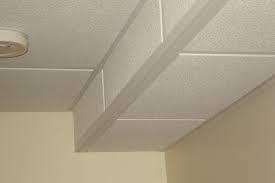
So you have to ask yourself whether it’s easier to box in all of the different mechanical components with dropped ceiling track and panels, or spend time framing them, covering them with drywall, and working on all of those corners that each soffit will create.

Keep in mind, most drywall installers will up the cost of a job based on how much corner work they have to deal with – for them, it means more time and labor. Now, for me, the effort is worth the payoff (see argument for “looks”, above), but the scale can start to tip the other way if you think you’ll need access to the things hidden behind those soffits.

Access

Building inspectors will require you to leave access to any shut off valves (plumbing or heating/cooling), electrical panels, and plumbing drain cleanouts. With a drop ceiling, the access is built right in. Now, this can be done with a drywall ceiling by adding access panels – simple metal or plastic doors that get integrated with the drywall – but if you anticipate the need for more serious access than drywall might not be your best bet.

drywall ceilings look cleaner

What qualifies as a good reason to anticipate more serious access? …Plumbing, electrical, or ductwork that is approaching the time when the cost of repairs might start to outweigh the cost of full replacement. The last thing you want to do is cover your basement ceiling with drywall and then upgrade your furnace and be told that it’s time to tackle the ductwork, too. When in doubt, ask an inspector to give you an assessment of your systems.

Previous: Estimating Materials Next: Planning Access for Materials

Guide

Drywall

Chapter

Drywall Basics

Sign up for eletters today and get the latest how-to from Fine Homebuilding, plus special offers.

Signing you up...

This site is protected by reCAPTCHA and the Google Privacy Policy and Terms of Service apply.
See all newsletters
See all newsletters

View Comments

  1. timrowledge | Feb 09, 2015 01:52pm | #1

    I solved the problem in my own house with pop-up panels a bit like typical office T-bar ceilings. Except I used an assortment of sizes of Doug.Fir and 2x4's to make the 'T-bar' since the house is timber-framed. Panels are 4ft x 2ft ⅜" ply, the roughest surfaced I could find for some texture. Mind you, it took 3 coats of bevy primer and 3 more of colour coat to get a decent finish!

    The structure was fairly simple to build, using small blocks of ply screwed to the sides of the lower stringer of the open web trusses and aligned with a laser. The only bit I needed assistance with was raising the 16ft 2x8's to secure them.

    As a result I can pop out panels to check or add wiring, piping, ducting etc. I think it looks pretty cool too. Best of all I think the entire 1200 sq.ft. cost about $1200.

    Some pictures on my blog at
    http://www.rowledge.org/tim/building/building/blog_files/8703d436c4f04f76f697a5d7fcc6960e-191.html
    http://www.rowledge.org/tim/building/building/blog_files/4e44c67d4d383783adc3be6073794055-192.html
    http://www.rowledge.org/tim/building/building/blog_files/ef6a7acaaaa22b56a47b5b220365a351-193.html

  2. Julimor | Feb 09, 2015 01:59pm | #2

    When I was designing our house back in 1986, I decided to use 2x4 trusses that were engineered out to 24" high. I thought it was a lot of deck but it allowed for the all mechanicals to run through the trusses without drilling or cutting any joists.

    When it came time to finish the basement, I chose a drop ceiling because I knew I'd want access later on. All of the mechanicals were run in the trusses so I only lost about 4" in ceiling height with no soffits. With a finished 7'5" ceiling and no lally columns, there is no cramped feeling.

    For our house, the choice of basement ceiling was a no-brainer and having that access has, over the years, proven to be a huge time and money saver.

    1. jpweber | Jul 22, 2020 10:29pm | #3

      Do you have pictures? I would love to see what your basement looks like(and pictures of build in progress, if you have them). I'm a little confused by your description of the trusses being built out of 2x4 trusses engineered to 24" high. Wouldn't the mechanicals run parallel with the trusses generally, so that the need for them to go through the trusses isn't really necessary? or maybe I'm just not following..

  3. BobboMax | Aug 16, 2020 08:09pm | #4

    Sometimes a hybrid approach works- drywall in high use/visibility areas, drop ceiling in areas that are less visible/more likely to need service, for example a laundry room under a bathroom.

Log in or create an account to post a comment.

Sign up Log in

Become a member and get full access to FineHomebuilding.com

Drywall

Drywall

Trusted, comprehensive guidance for choosing, hanging, taping, sanding, and repairing drywall—the right way

View Project Guide

View All Project Guides »

Become a member and get unlimited site access, including the Drywall Project Guide.

Start Free Trial

Drywall Basics
  • Types and Uses of Drywall
  • Planning the Job
Tools and Materials
  • Hanging Tools
  • Taping Tools and Materials
  • Sanding and Finishing Tools and Materials
Hanging Drywall
  • Prep for Hanging
  • Measuring and Cutting Drywall
  • Guidelines for Hanging and Fastening Drywall
  • Hanging Ceilings
  • Hanging Walls
  • Hanging Airtight Drywall
  • Trim Accessories/Corner Beads
Taping and Sanding
  • Taping Basics
  • Taping Seams
  • Taping Inside and Outside Corners
  • Sanding
Special Installations
  • Tricky Transitions
  • Curved Surfaces
  • Other Special Installations
  • Decorating with Drywall
Drywall Repairs
  • Patching Holes, Cracks, and More
Plaster
  • Working with Lime Plaster
  • Plaster Repair
  • Classic Plaster Techniques

Fine Home Building

Newsletter Sign-up

  • Fine Homebuilding

    Home building tips, offers, and expert advice in your inbox.

  • Green Building Advisor

    Building science and energy efficiency advice, plus special offers, in your inbox.

  • Old House Journal

    Repair, renovation, and restoration tips, plus special offers, in your inbox.

Signing you up...

This site is protected by reCAPTCHA and the Google Privacy Policy and Terms of Service apply.
See all newsletters

Follow

  • Fine Homebuilding

    Dig into cutting-edge approaches and decades of proven solutions with total access to our experts and tradespeople.

    Start Free Trial Now
    • Facebook
    • Instagram
    • X
    • LinkedIn
  • GBA Prime

    Get instant access to the latest developments in green building, research, and reports from the field.

    Start Free Trial Now
    • Facebook
    • YouTube
  • Old House Journal

    Learn how to restore, repair, update, and decorate your home.

    Subscribe Now
    • Facebook
    • Instagram
    • X

Membership & Magazine

  • Online Archive
  • Start Free Trial
  • Magazine Subscription
  • Magazine Renewal
  • Gift a Subscription
  • Customer Support
  • Privacy Preferences
  • About
  • Contact
  • Advertise
  • Careers
  • Terms of Use
  • Site Map
  • Do not sell or share my information
  • Privacy Policy
  • Accessibility
  • California Privacy Rights

© 2025 Active Interest Media. All rights reserved.

Fine Homebuilding receives a commission for items purchased through links on this site, including Amazon Associates and other affiliate advertising programs.

  • Home Group
  • Antique Trader
  • Arts & Crafts Homes
  • Bank Note Reporter
  • Cabin Life
  • Cuisine at Home
  • Fine Gardening
  • Fine Woodworking
  • Green Building Advisor
  • Garden Gate
  • Horticulture
  • Keep Craft Alive
  • Log Home Living
  • Military Trader/Vehicles
  • Numismatic News
  • Numismaster
  • Old Cars Weekly
  • Old House Journal
  • Period Homes
  • Popular Woodworking
  • Script
  • ShopNotes
  • Sports Collectors Digest
  • Threads
  • Timber Home Living
  • Traditional Building
  • Woodsmith
  • World Coin News
  • Writer's Digest
Active Interest Media logo
X
X
This is a dialog window which overlays the main content of the page. The modal window is a 'site map' of the most critical areas of the site. Pressing the Escape (ESC) button will close the modal and bring you back to where you were on the page.

Main Menu

  • How-To
  • Design
  • Tools & Materials
  • Video
  • Blogs
  • Forum
  • Project Guides
  • Reader Projects
  • Magazine
  • Members
  • FHB House

Podcasts

  • FHB Podcast
  • ProTalk

Webinars

  • Upcoming and On-Demand

Podcasts

  • FHB Podcast
  • ProTalk

Webinars

  • Upcoming and On-Demand

Popular Topics

  • Kitchens
  • Business
  • Bedrooms
  • Roofs
  • Architecture and Design
  • Green Building
  • Decks
  • Framing
  • Safety
  • Remodeling
  • Bathrooms
  • Windows
  • Tilework
  • Ceilings
  • HVAC

Magazine

  • Current Issue
  • Past Issues
  • Magazine Index
  • Subscribe
  • Online Archive
  • Author Guidelines

All Access

  • Member Home
  • Start Free Trial
  • Gift Membership

Online Learning

  • Courses
  • Project Guides
  • Reader Projects
  • Podcast

More

  • FHB Ambassadors
  • FHB House
  • Customer Support

Account

  • Log In
  • Join

Newsletter

Get home building tips, offers, and expert advice in your inbox

Signing you up...

This site is protected by reCAPTCHA and the Google Privacy Policy and Terms of Service apply.
See all newsletters
See all newsletters

Follow

  • X
  • YouTube
  • instagram
  • facebook
  • pinterest
  • Tiktok

Join All Access

Become a member and get instant access to thousands of videos, how-tos, tool reviews, and design features.

Start Your Free Trial

Subscribe

FHB Magazine

Start your subscription today and save up to 70%

Subscribe

This is your last free article.

Don't miss another expert tip or technique from building pros. Start your free trial today.

Start your FREE trial

Already a member? Log in

We hope you’ve enjoyed your free articles. To keep reading, become a member today.

Get complete site access to expert advice, how-to videos, Code Check, and more, plus the print magazine.

Start your FREE trial

Already a member? Log in

Privacy Policy Update

We use cookies, pixels, script and other tracking technologies to analyze and improve our service, to improve and personalize content, and for advertising to you. We also share information about your use of our site with third-party social media, advertising and analytics partners. You can view our Privacy Policy here and our Terms of Use here.

Cookies

Analytics

These cookies help us track site metrics to improve our sites and provide a better user experience.

Advertising/Social Media

These cookies are used to serve advertisements aligned with your interests.

Essential

These cookies are required to provide basic functions like page navigation and access to secure areas of the website.

Delete My Data

Delete all cookies and associated data