FHB Logo Facebook LinkedIn Email Pinterest Twitter X Instagram Tiktok YouTube Plus Icon Close Icon Navigation Search Icon Navigation Search Icon Arrow Down Icon Video Guide Icon Article Guide Icon Modal Close Icon Guide Search Icon Skip to content
Subscribe
Log In
  • How-To
  • Design
  • Tools & Materials
  • Restoration
  • Videos
  • Blogs
  • Forum
  • Magazine
  • Members
  • FHB House
  • Podcast
Log In

Fine Homebuilding Project Guides

Painting

Guide Home
  • Intro to Painting
  • Tools & Materials
  • Prep Work
  • Painting Walls, Ceilings, and Trim
  • Wallpaper
  • Windows and Doors
  • Spray Painting Interiors
  • Exterior Painting
How-To

Smoother Walls

Spraying primer/surfacer can be faster and less expensive that skim coating drywall when you want a perfect paint job.

By Philip Hansell Issue 260 - June/July 2016
  • X
  • facebook
  • linkedin
  • pinterest
  • email
  • add to favorites Log in or Sign up to save your favorite articles

Synopsis: Joints and screw heads often show up even under three coats of joint compound because drywall’s paper face and the compound have different porosities and so reflect light differently. Rather than skim coating the walls, a faster and less expensive solution is to use a drywall primer/surfacer. Pro painter Philip Hansell thoroughly explains the two types of primer/surfacers and outlines their respective pros and cons. He also describes how to get the best results from these products.


Most new drywall has three coats of joint compound on corners and seams, but much of the drywall’s paper face is left uncoated. This is a Level 4 finish as specified by the National Gypsum Association. Even though the walls and ceilings look and feel smooth to the touch, the drywall’s paper surface and joint compound have different porosities. This means that when the wall is painted, the seams look darker and have a slightly glossier finish. The condition is worse when there’s raking light and when walls are painted with dark or glossy paints. Known as joint telegraphing, it’s a problem I’ve seen a lot in the 20 years I’ve been a painter. One common way to prevent telegraphing is to go the extra step to what the National Gypsum Association calls a Level 5 finish, which has traditionally been done by skim coating the entire drywall surface with compound. However, by using a modern drywall primer/surfacer, a crew of three or four painters can prep and spray the walls and ceilings of an entire average-size house to a Level 5 finish in one day for less cost.

Choose the right product

You may have learned that PVA primer is the right primer for new drywall. Primer/surfacers are similar and include the same vinyl acrylic base that seals the drywall paper and compound. But primer/surfacers cover better because they have a greater percentage of solid particles than PVA primer. These solids create a uniform surface that reflects light evenly. There are two basic types of primer/surfacers: standard and high-build. The difference is in how thick they go on.

For less-demanding applications, such as under flat or nearly flat paint and on surfaces that won’t get raking light, I use standard products that apply in a coat of about 4 or 5 mils. These primer/surfacers have fewer solids (more than 40% by weight) than high-build products but still more than a run-of-the-mill PVA primer, which can contain as little as 30% solids by weight. My favorites in this class include PPG Speedhide Interior Max Prime and Sherwin-Williams Builders Solution Interior Primer/Surfacer. These products won’t produce a Level 5 finish, but they do a good job when applied over Level 4 finished drywall, and they can prevent joint telegraphing in many cases. Besides being less expensive than high-build versions (6¢ per sq. ft. vs. 13¢ per sq. ft.), these less-viscous primer/surfacers can be sprayed with less-powerful sprayers because they require a smaller tip (0.015 in. dia. to 0.021 in. dia.). Sprayers this size are lighter and less expensive than the spray rigs needed for high-build primer/surfacers, which require larger tips (0.023 in. dia. to 0.031 in. dia.). you also can roll on standard primer/surfacers with a 3⁄8-in. to 3⁄4-in. nap roller, but rollers only make sense for small jobs because spraying is much faster.

High-build primer/surfacers can contain 66% solids by weight, and they go on thick, around 20 or 25 mils wet, which is equivalent to four or five coats of regular paint. These products can fill sanding scratches, smooth drywall fuzz, and hide other small surface imperfections. For high-build primer/surfacers, I like PPG Speedhide MaxBuild and Sherwin-Williams High Build Interior Latex Primer. When applied over Level 4 drywall, these high-build products provide a Level 5 finish, which I prefer under dark or glossy paint and in harsh lighting conditions.
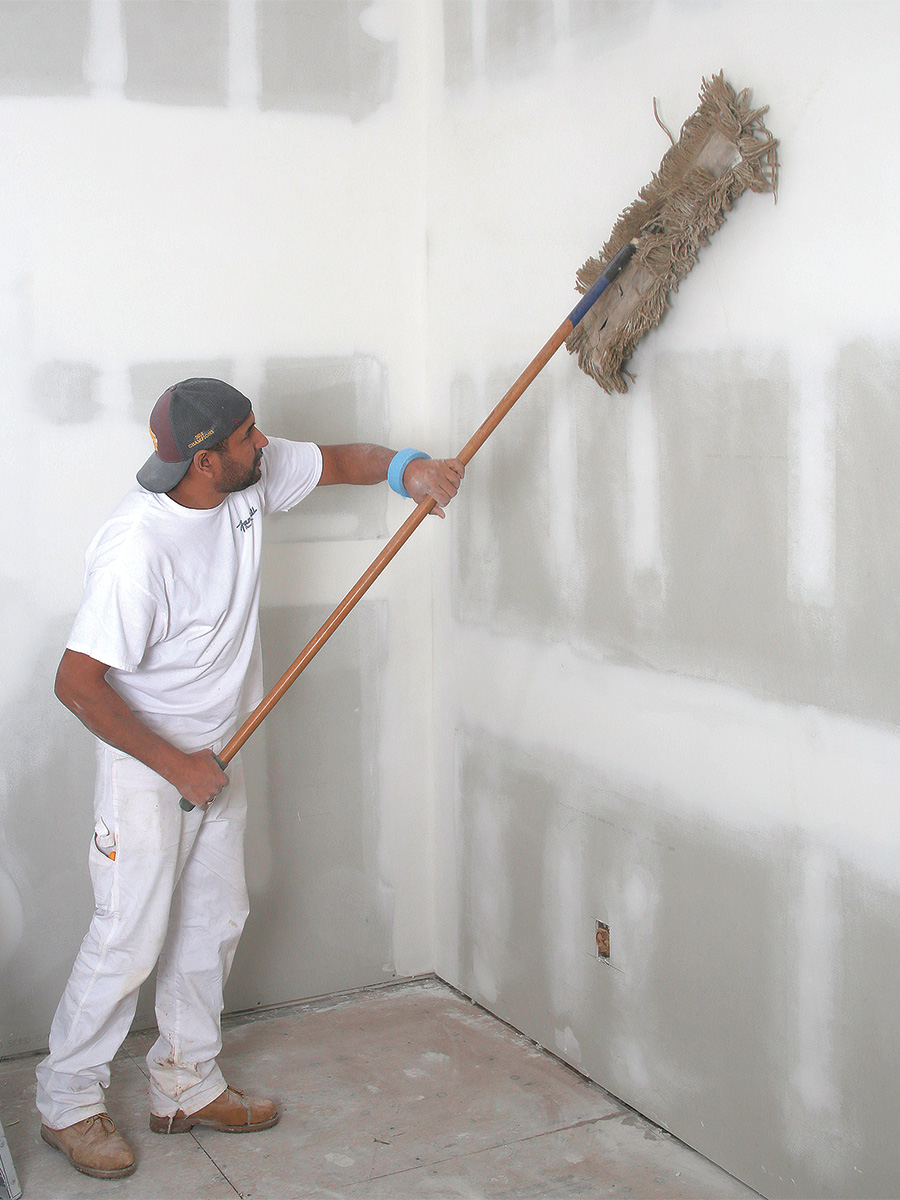
Clean and mask

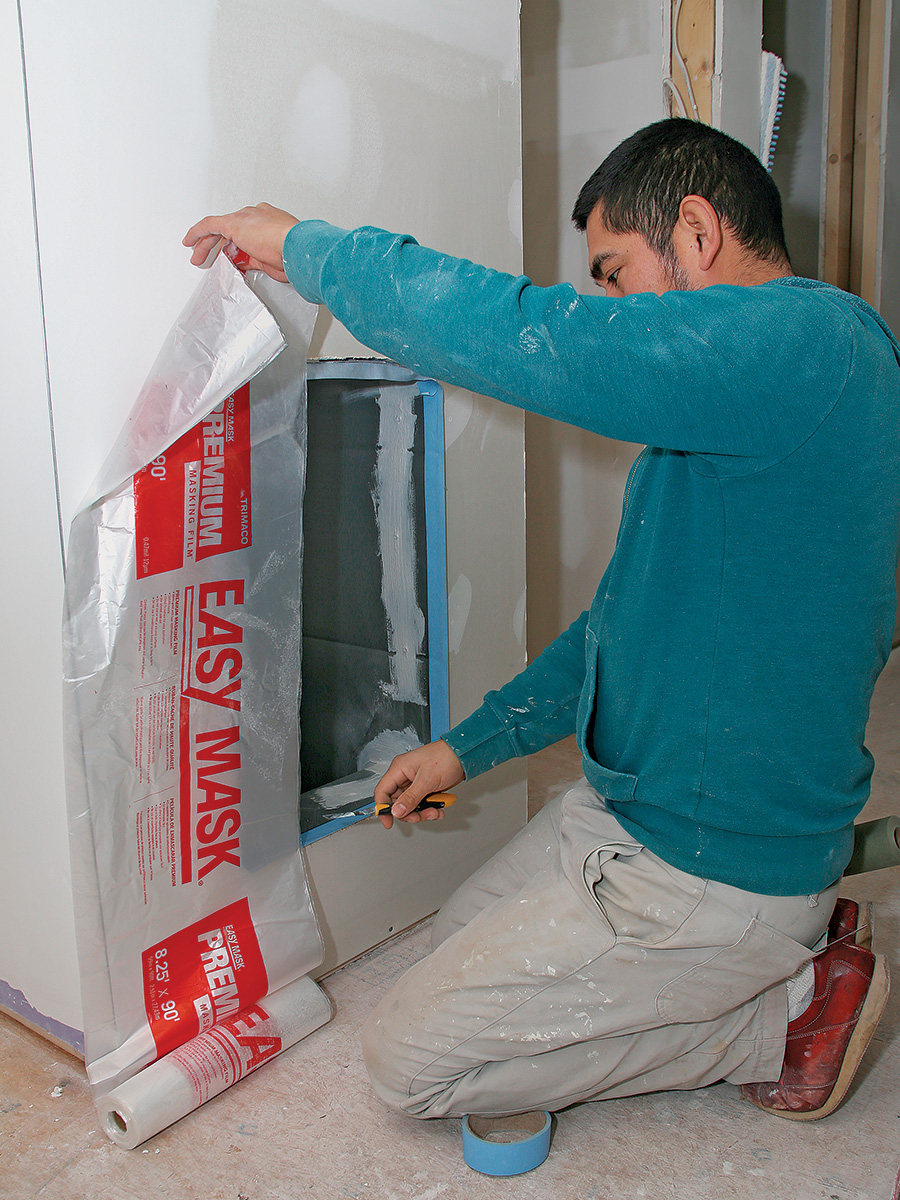
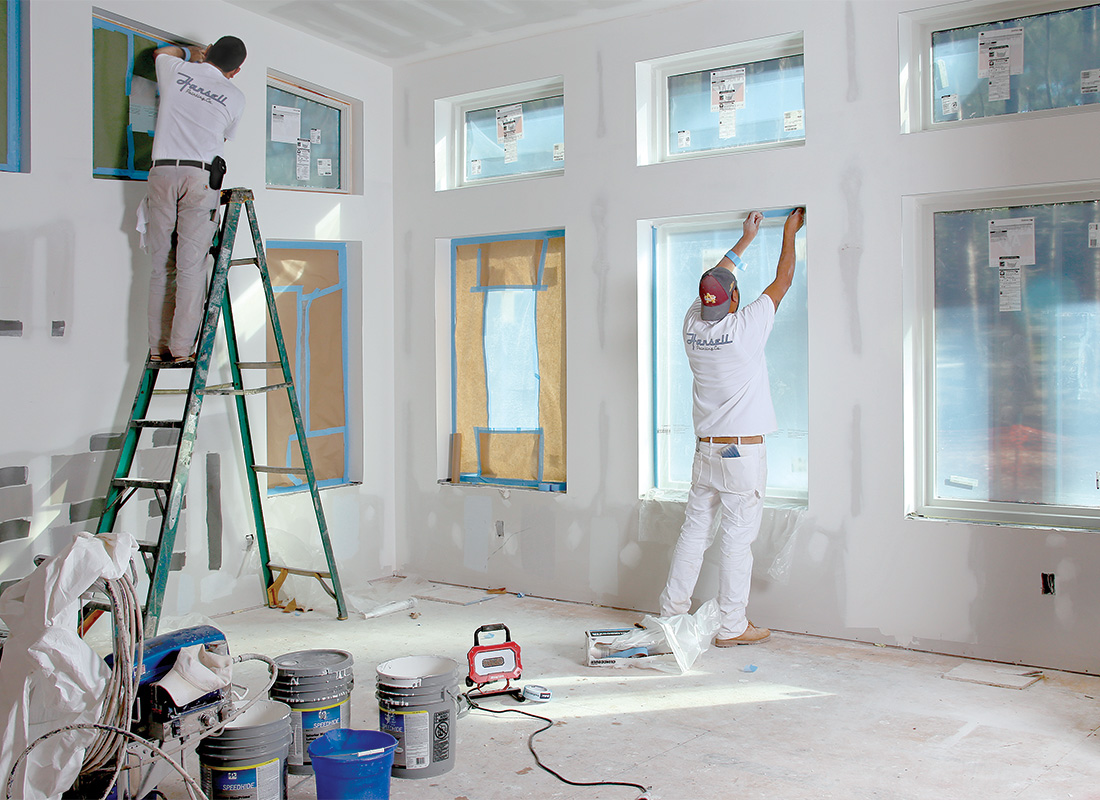
My crew sprays primer/surfacers when the drywall is finished and before the interior trim is installed. We start by wiping down the drywall with a commercial dust mop and then vacuuming the floor. If the finished flooring is in place, we mask and tape the floor. We mask HVAC openings, and we stuff all the electrical boxes and can lights with masking paper. We cover the exterior doors and windows with plastic masking film and then cover the perimeter of the plastic film with paper. Primer/surfacers don’t stick well to plastic masking films, so we use the additional paper layer to prevent the primer/surfacer from being blown off and contaminating the surface when we spray the base coat and topcoat of paint. We like the plastic layer underneath for two reasons: It allows some light to pass, and it installs faster because static electricity helps it cling to the window while you tape around the edges.

Prepping for primer

dusting walls for painting covering vents
Dust the walls

A commercial dust mop clears the drywall of dust. Vacuuming the floor afterward prevents dust from being stirred up by the sprayer and deposited on freshly

Cover the vents

Air-conditioning and heating ducts are covered with cling plastic sheeting to prevent overspray from getting inside the ductwork. Electrical and low-voltage cables emerging from the wall are also covered with plastic and wrapped with tape.

masking windows and doors

Mask windows and exterior doors

Doors and windows are masked with plastic sheeting and taped. Then the plastic is covered with a layer of paper because primer/surfacers don’t stick well to plastic and could be blown onto walls and ceilings when subsequent coats are sprayed.
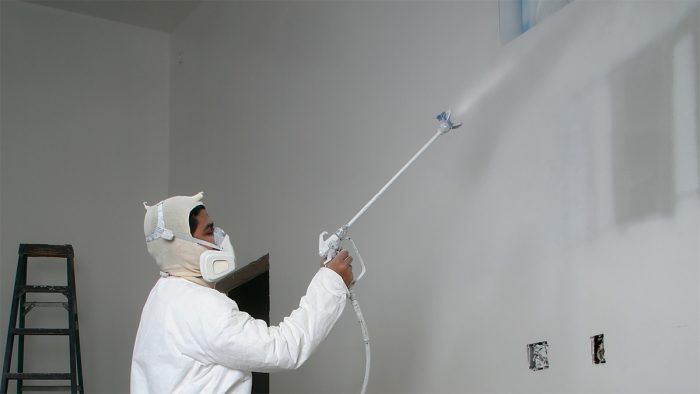
filling electrical boxes for painting
filling can lights for painting
Fill electrical boxes

Can lights and electrical boxes are stuffed with masking paper so that the wire colors and any labels will still be visible after the surfaces are sprayed.


Time to spray

Our spray rigs generally have 100 ft. of hose, so we set the sprayer up in the center of the house. We have our paint supplier shake the paint buckets before we pick them up in the morning. The 5-gal. pails require six minutes of machine shaking, and we have a dozen or more on an average-size job, so having the paint store do the mixing saves us time. High-build products cover about 100 sq. ft. per gal., while standard primer/surfacers cover four times that amount. I always order extra because running out while on the job is an expensive waste of time.

Using a 10-in. or 15-in. extension on the spray gun, we start spraying the ceiling in a corner opposite the door so that we can work our way out of the room. The extended gun is long enough to reach 8-ft. and 9-ft. ceilings. With higher ceilings, we use a stepladder. Longer extensions are available, but we find them too heavy and bulky.

If you’re already familiar with spraying, it won’t take long to get the feel for spraying primer/surfacers. But when spraying high-build products, you’re applying the equivalent of four coats of ordinary paint in a single coat. This much material can sag on previously painted surfaces, but that is only a problem when clients use large expanses of wall to test colors. In those cases, we spray a coat that’s about half as thick as we would ordinarily apply. We have also found it important to keep primer/surfacers off of trim because they compromise the adhesion of the oil based primer we use on trim.

Since drywall primer/surfacers are latex based, cleanup is easy. We pour any remaining primer back into its original bucket and flush the sprayer with water (see Don’t Be Afraid to Spray, FHB #252). High-build primer/surfacers may take a day or more to dry in humid weather. Standard primer/surfacers take usually three or four hours. When we come back to paint the walls and ceilings, we first check the drywall for damage and patches. Small areas can be touched up with a roller, but any major drywall repairs should be resprayed, especially when the area will get strong lighting or glossy paint

View PDF
Previous: Paint a Room Series: Masking for Interior Paint Next: How to Keep Things Clean When Caulking Trim

Guide

Painting

Chapter

Prep Work

Sign up for eletters today and get the latest how-to from Fine Homebuilding, plus special offers.

Signing you up...

This site is protected by reCAPTCHA and the Google Privacy Policy and Terms of Service apply.
See all newsletters
See all newsletters

View Comments

  1. NotYourFwiendGuy | Jul 23, 2019 12:53pm | #1

    How about using Zinsser Gardz to prime a level 4 finish? I think it’s a bit more expensive but it really seals eveeything uniformly.

Log in or create an account to post a comment.

Sign up Log in

Become a member and get full access to FineHomebuilding.com

Painting

Painting

Everything you need to know to get the perfect finish, from choosing the right paint to applying the final coat

View Project Guide

View All Project Guides »

Become a member and get unlimited site access, including the Painting Project Guide.

Start Free Trial

Intro to Painting
  • Painting Basics
  • Painting Inspiration
Tools & Materials
  • Paint
  • Brushes and Rollers
  • Caulks and Sealants
  • Spray Equipment
  • Prep and Cleanup
Prep Work
  • Getting Ready For Painting and Finishing
Painting Walls, Ceilings, and Trim
  • Painting Interior Surfaces
Wallpaper
  • How to Prep and Install Wallpaper
  • Removing Wallpaper
  • Wallcovering Choices
Windows and Doors
  • Painting Windows and Doors
  • Video Series: Finishing an Exterior Door
Spray Painting Interiors
  • How To Spray Walls, Trim, Cabinets, and More
Exterior Painting
  • Exterior Paint Prep
  • Exterior Painting Techniques

Fine Home Building

Newsletter Sign-up

  • Fine Homebuilding

    Home building tips, offers, and expert advice in your inbox.

  • Green Building Advisor

    Building science and energy efficiency advice, plus special offers, in your inbox.

  • Old House Journal

    Repair, renovation, and restoration tips, plus special offers, in your inbox.

Signing you up...

This site is protected by reCAPTCHA and the Google Privacy Policy and Terms of Service apply.
See all newsletters

Follow

  • Fine Homebuilding

    Dig into cutting-edge approaches and decades of proven solutions with total access to our experts and tradespeople.

    Start Free Trial Now
    • Facebook
    • Instagram
    • X
    • LinkedIn
  • GBA Prime

    Get instant access to the latest developments in green building, research, and reports from the field.

    Start Free Trial Now
    • Facebook
    • YouTube
  • Old House Journal

    Learn how to restore, repair, update, and decorate your home.

    Subscribe Now
    • Facebook
    • Instagram
    • X

Membership & Magazine

  • Online Archive
  • Start Free Trial
  • Magazine Subscription
  • Magazine Renewal
  • Gift a Subscription
  • Customer Support
  • Privacy Preferences
  • About
  • Contact
  • Advertise
  • Careers
  • Terms of Use
  • Site Map
  • Do not sell or share my information
  • Privacy Policy
  • Accessibility
  • California Privacy Rights

© 2025 Active Interest Media. All rights reserved.

Fine Homebuilding receives a commission for items purchased through links on this site, including Amazon Associates and other affiliate advertising programs.

  • Home Group
  • Antique Trader
  • Arts & Crafts Homes
  • Bank Note Reporter
  • Cabin Life
  • Cuisine at Home
  • Fine Gardening
  • Fine Woodworking
  • Green Building Advisor
  • Garden Gate
  • Horticulture
  • Keep Craft Alive
  • Log Home Living
  • Military Trader/Vehicles
  • Numismatic News
  • Numismaster
  • Old Cars Weekly
  • Old House Journal
  • Period Homes
  • Popular Woodworking
  • Script
  • ShopNotes
  • Sports Collectors Digest
  • Threads
  • Timber Home Living
  • Traditional Building
  • Woodsmith
  • World Coin News
  • Writer's Digest
Active Interest Media logo
X
X
This is a dialog window which overlays the main content of the page. The modal window is a 'site map' of the most critical areas of the site. Pressing the Escape (ESC) button will close the modal and bring you back to where you were on the page.

Main Menu

  • How-To
  • Design
  • Tools & Materials
  • Video
  • Blogs
  • Forum
  • Project Guides
  • Reader Projects
  • Magazine
  • Members
  • FHB House

Podcasts

  • FHB Podcast
  • ProTalk

Webinars

  • Upcoming and On-Demand

Podcasts

  • FHB Podcast
  • ProTalk

Webinars

  • Upcoming and On-Demand

Popular Topics

  • Kitchens
  • Business
  • Bedrooms
  • Roofs
  • Architecture and Design
  • Green Building
  • Decks
  • Framing
  • Safety
  • Remodeling
  • Bathrooms
  • Windows
  • Tilework
  • Ceilings
  • HVAC

Magazine

  • Current Issue
  • Past Issues
  • Magazine Index
  • Subscribe
  • Online Archive
  • Author Guidelines

All Access

  • Member Home
  • Start Free Trial
  • Gift Membership

Online Learning

  • Courses
  • Project Guides
  • Reader Projects
  • Podcast

More

  • FHB Ambassadors
  • FHB House
  • Customer Support

Account

  • Log In
  • Join

Newsletter

Get home building tips, offers, and expert advice in your inbox

Signing you up...

This site is protected by reCAPTCHA and the Google Privacy Policy and Terms of Service apply.
See all newsletters
See all newsletters

Follow

  • X
  • YouTube
  • instagram
  • facebook
  • pinterest
  • Tiktok

Join All Access

Become a member and get instant access to thousands of videos, how-tos, tool reviews, and design features.

Start Your Free Trial

Subscribe

FHB Magazine

Start your subscription today and save up to 70%

Subscribe

You have 1 free article remaining.

Get complete site access, including thousands of videos, how-to tips, tool reviews, and design features.

Start your FREE trial

Already a member? Log in

We hope you’ve enjoyed your free articles. To keep reading, become a member today.

Get complete site access to expert advice, how-to videos, Code Check, and more, plus the print magazine.

Start your FREE trial

Already a member? Log in

Privacy Policy Update

We use cookies, pixels, script and other tracking technologies to analyze and improve our service, to improve and personalize content, and for advertising to you. We also share information about your use of our site with third-party social media, advertising and analytics partners. You can view our Privacy Policy here and our Terms of Use here.

Cookies

Analytics

These cookies help us track site metrics to improve our sites and provide a better user experience.

Advertising/Social Media

These cookies are used to serve advertisements aligned with your interests.

Essential

These cookies are required to provide basic functions like page navigation and access to secure areas of the website.

Delete My Data

Delete all cookies and associated data