
Trimming Windows
Get the window jambs flush with the drywall, and the casing miters come easily.
Synopsis: An experienced builder and trim carpenter shares timeless tips for installing window jamb extensions, stools, and casing.
We constantly look through windows. A well-trimmed window enhances the view the same way a picture frame enhances the art it surrounds. As with a picture frame, window trim should stand up to critical scrutiny but not draw your eye. Doing a good job trimming windows is a matter of following an efficient sequence, understanding what has to be done when and slowing down enough to do your best work.
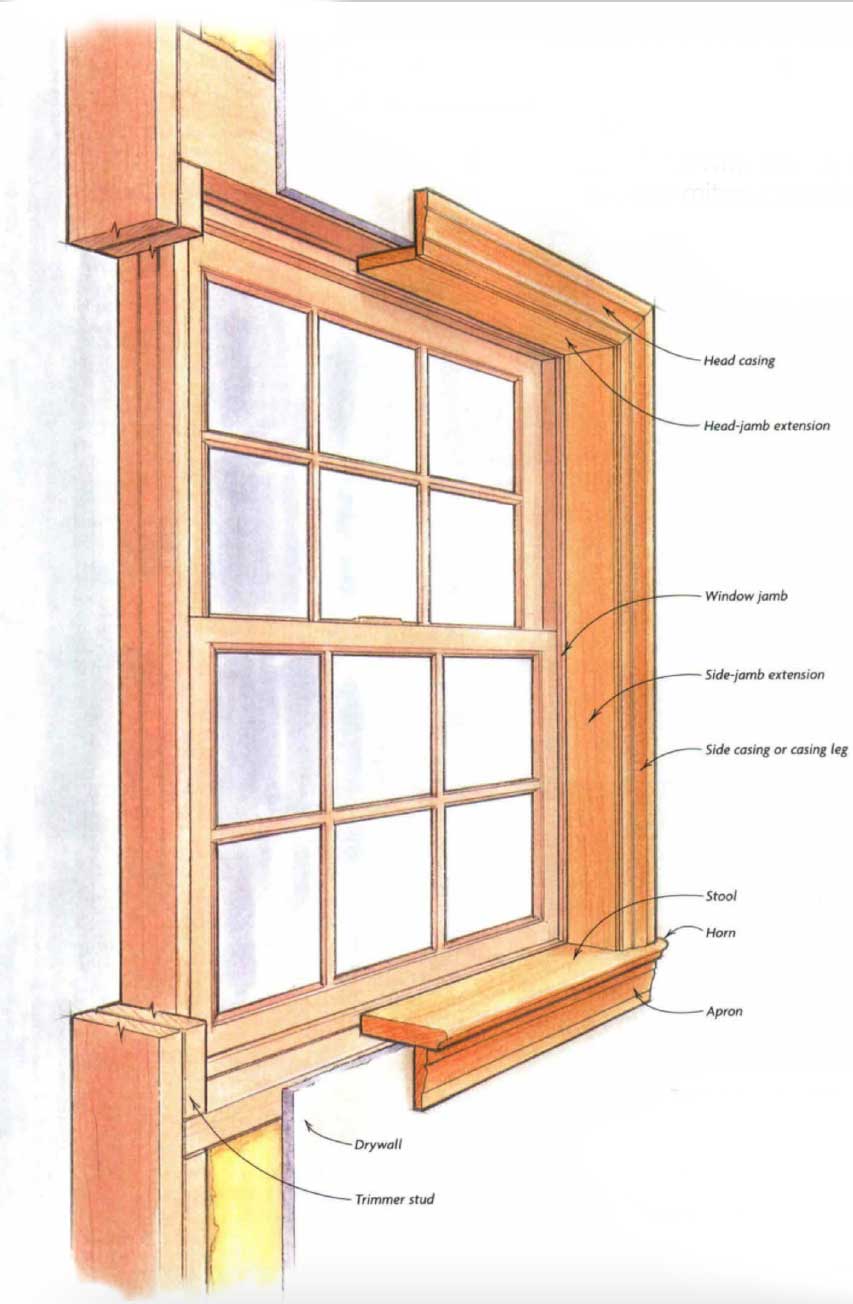
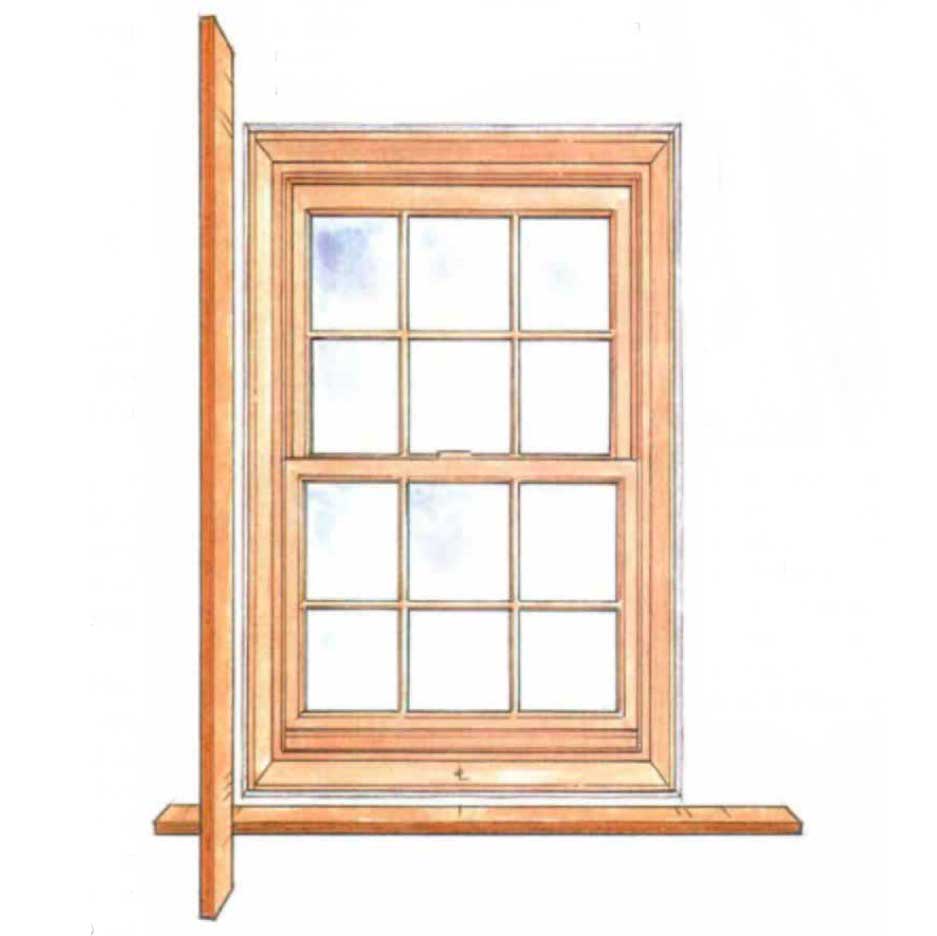
I usually trim windows in one of two ways. They either have stools, the horizontal piece at the window’s bottom where the cat sits, or they don’t and are picture-framed with casing. In either case, because many houses are built with walls thicker than the depth of the window jambs, I often have to extend the jamb to bring the window flush with the drywall.
I usually trim the widest, tallest windows on a job first. This way, if I cut something too short on the larger windows, I might be able to recut and use the trim on a smaller window. I also identify the most visible windows on the job, usually the kitchen, living room, entry and master bedroom, and try to use the best-looking stock in those high visibility areas.
First, mark all the details on a story pole
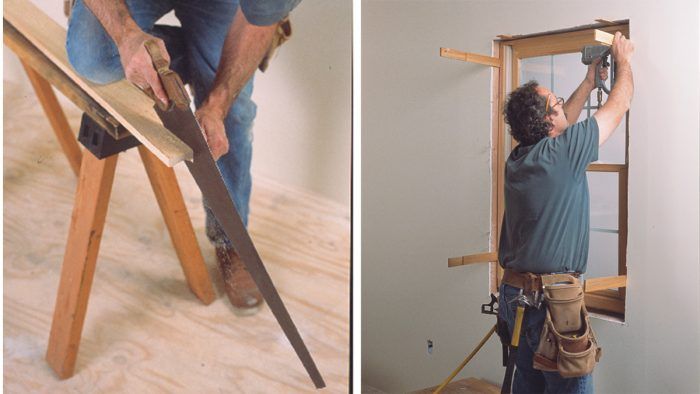
Before cutting stock, I trim any drywall that extends past the framing and remove any blobs of taping mud. Drywall dust is extremely abrasive and will quickly scratch trim, particularly prefinished material. Because of this risk, I take a minute to sweep the room clean after I prepare the openings.
Then, assuming that I’m trimming more than a handful of windows, I make up story poles. Story poles are lumber or plywood scraps with all the relevant dimensions for a job marked on them full scale.
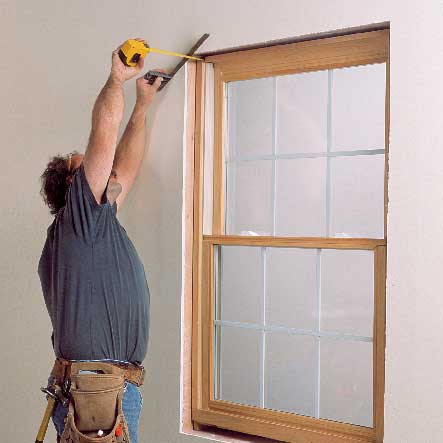
I refer to story poles throughout the job for measurements. Story poles reduce the possibility of errors in measurement that can happen when reading a rule or tape. I use two story poles for each size of window: one each for height and width.
After labeling the marks and double checking all reveals and measurements, I cut the poles to length at their widest marks. A word of caution: Sometimes the reveal between the bottom jamb extension or stool and the window will differ from the other three reveals. Casement windows often have cranks at the bottom, and you need to be certain that you have left the space for them to turn.
Story poles are the DNA of window trim
|
To get trim straight, you might have to install crooked jamb extensions
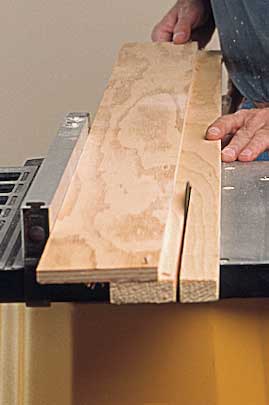
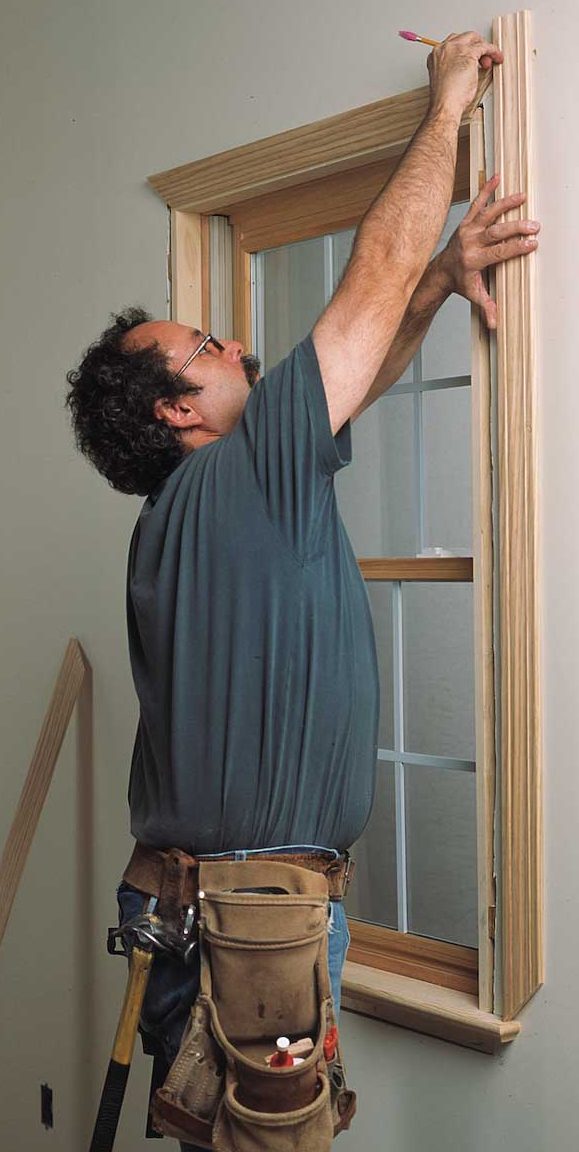
I start by ripping jamb extensions, usually nominal 1-in. stock, slightly wide on a table saw. This width leaves some meat for trimming. I set my blade at 2° or 3° to bevel slightly the edge of the jamb extension that meets the window. The slight point of this bevel is on the visible side of the jamb extension and helps to ensure a nice fit.
When possible, I cut all four jamb extensions for a window consecutively from a single board. This technique keeps the boards color-matched, and the grain usually meets at all but the last corner, where the opposite ends of the board meet up. I think about how this window will most often be viewed and put the last joint where it seems least conspicuous. I usually cut the top and bottom jamb extensions the same length as the window width plus reveals, and cut the side jamb extensions to lap the top and bottom ones.
But I’m getting ahead of myself. Before cutting extensions to their final lengths, I rip them to their exact widths. Because it’s likely that I’ll be custom-tapering each piece, though, I have to cut the long stock close to its final length. I cut all the pieces 2 in. oversize and number their backs sequentially.
So that the subsequent casing joints will lie flat and fit well, it’s critical that the jamb extensions end up in plane with the surface of the wall, particularly at the corners. Because windows rarely seem to be installed exactly parallel to drywall, jamb extensions usually need to taper to come up flush with the drywall. On new construction, it’s not unusual to have to taper the jamb extensions as much as in. There’s no telling what you’ll find on a remodel. The alternative is bashing the drywall even with the jambs, an inelegant solution that at best gets the two only close to flush.
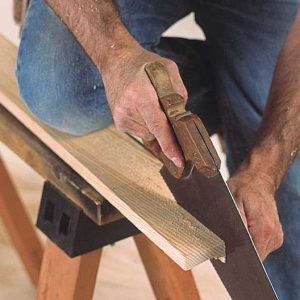
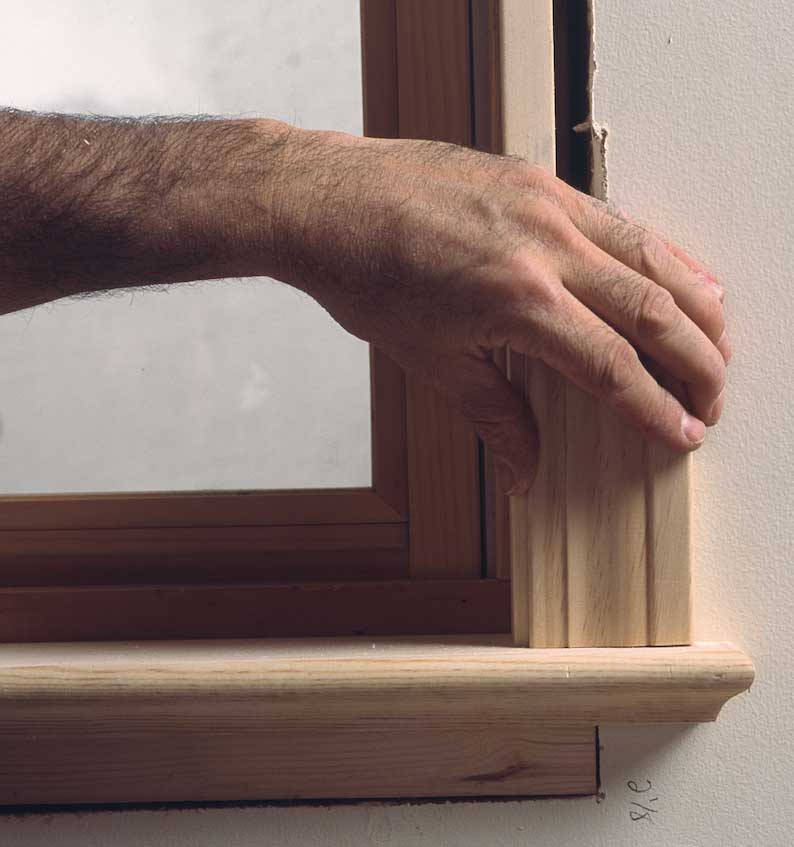
I find the widths of the jamb extensions at the windows’ corners by measuring to a straightedge held against the finished wall (photo above). Then I taper the jamb extension as needed on the table saw.
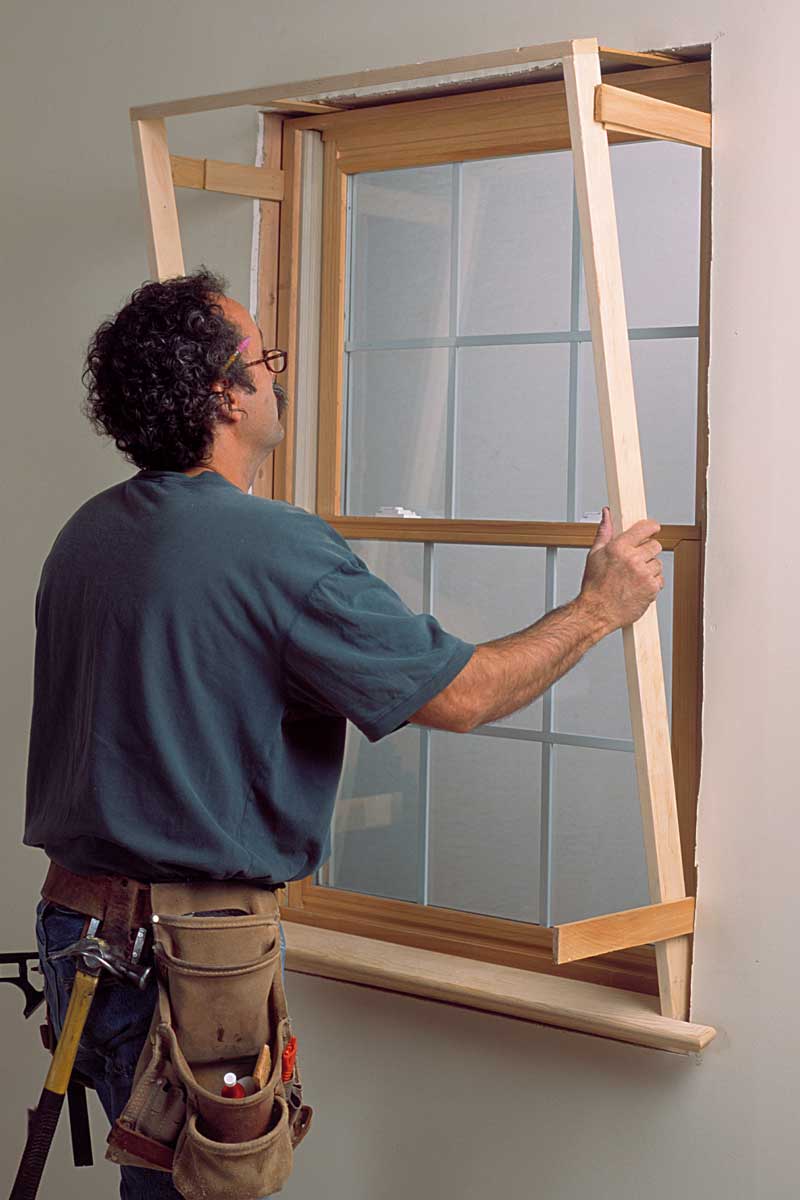
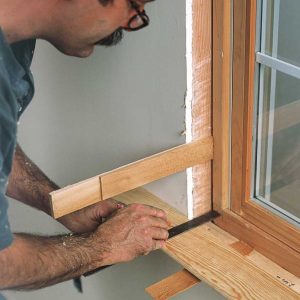
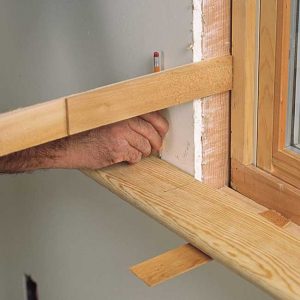
I test-fit the jamb extensions once they’re tapered, then nail them into a boxlike unit. Before setting this unit, I nail cedar shingles to the studs; the shingles shim the jamb extensions to leave the proper reveal on the window jamb. I’ll typically shim every 2 ft. or so.
Next, I slide the assembled jamb extensions into place. I nail them just below the shims, using 6d or 8d finish nails. This step allows me to fine-tune the shims if necessary. When I like the reveal, I cut the shims to length using a sharp knife. Now is the time to stuff the space between the jamb extension and the framing with insulation or minimally expanding foam.
Installing jamb extensions
|
Window stools are the traditional lower-jamb extension
Windows with a stool in place of the bottom jamb extension are only a little more complicated. I start by cutting the stool to length, based on marks on the story pole. If I plan to return the ends of the stool to hide the end grain, I cut the stock several inches too long. Some carpenters say that hidden end grain marks a professional trim job; I say it depends on the nature of the job. For example, I would not return the horns on Craftsman-style window stools because exposed end grain is a characteristic of the style.
No design rule is hard and fast, not even one seemingly as basic as no end grain showing. After cutting the stool, I temporarily support it at its finished height on shims to lay out the notch that will bring the stool in contact with the window.
nail hole that needs no filling. This nail
does little to tighten the miter, but
rather helps to keep the head and leg in
plane when they’re nailed to the wall.
With the stool centered on the window and tight against the drywall, I measure the distance between it and the window next to each trimmer stud. (It’s common for measurements to differ at each end.) I square out the appropriate distance on each end of the stool, marking where I will crosscut the notch that fits the stool between the trimmers.
Without moving the stool, I scribe it to the wall. Using the scribe line as my starting point, I mark on the stool the measurement between the stool and the window. I mark the stool in two spots: at the end of the stool and at the crosscut mark. Connecting the points marks the rip cuts. There is often a -in. or -in. gap between the wall and the end of the uncut stool. Laying out the stool in this manner should account for these gaps and fit the stool tightly to the wall and to the window.
Because the rip cut is seldom parallel to the front of the stool, I cut it quickly with a sharp handsaw. However, I usually make the notch’s crosscut with a chopsaw. The remaining part of the stool that extends onto the wall is called the horn. I test-fit the stool and make any minor adjustments to fit it tightly to the window and to the walls with a plane or a rasp. Although the bottom of the casing leg covers much of the horn, its ends will show, so I take a little extra time to get a good fit against the wall.
When I like the fit, I mark where the jamb extensions will meet the stool. A couple of 6d finish nails through the bottom of the stool in the ends of the jamb extensions holds them together. The top jamb extension is nailed to the legs, and I slide the assembly into the window opening.
Sometimes I hide the end grain of the horn with returns, where the end of the horn is mitered and a matching mitered piece of stool is glued in place. I begin by leaving the stool a few inches long on both ends. After notching the horn, I miter-cut the returns from it; then I mark and miter-cut the stool to its overall length. Mitering the return pieces from the horn scrap lets me wrap the grain around the corner.
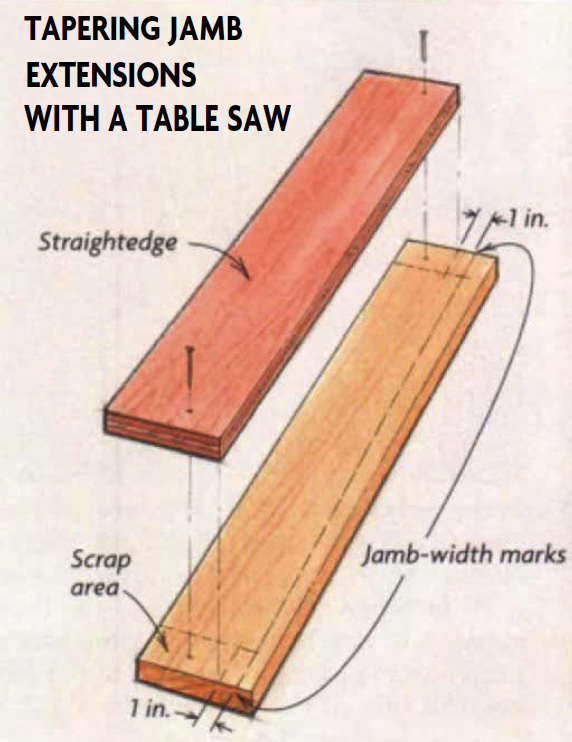
Tapering jamb extensions with a tablesawTo make up for framing discrepancies, jamb extensions usually need to be custom-tapered to end up flush with the wall. The author marks the jamb width on the scrap areas. Then he affixes a wider straightedge, say a 4-in. ripping of plywood, to the jamb extension with its edge 1 in. in from the marks. With the rip fence set 1 in. over the straightedge’s width, passing this assembly through the saw rips the taper exactly.
|
Picture-frame style casing calls for four perfect miters
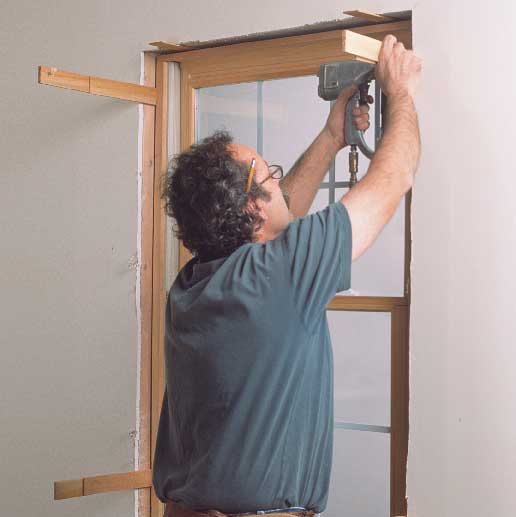
With the jamb extensions in place, the window is ready for casing. As with the jamb extensions, I try to cut all four pieces of casing consecutively from a single board.
Getting all four miters tight can be tricky. I’ve seen the air turn blue and the kindling pile grow as a carpenter tried to fit a board that was mitered at both ends. If the jamb extensions are slightly proud of the wall, either because they were cut wrong or because nailing the casing to the wall pushes the drywall tighter to the studs, the casing cants slightly backward. This causes the pieces to hinge on the backside of the miter, opening the face of the joint. I avoid this problem by slightly carving out the ends of the miters with a knife.
Taking the measurements from my story pole, I miter both ends of the four pieces of casing. I install the head piece, then the two legs and finally the bottom piece, changing mitered angles slightly with the saw or block plane. I back-cut as needed and work my way around the opening.
I use just enough nails or brads to hold the casing in place until the joints look good. I first nail the casings to the jamb extensions, then glue and nail the miters, using 3d finish nails for both. I finally nail the casing to the wall using 6d finish nails.
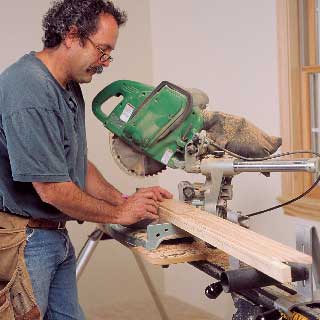
When picture-framing windows, I sometimes set up the miter saw remotely and cut and number all the casing pieces in a house before ever nailing any up. This technique can speed things considerably by minimizing trips back and forth to the saw.
Notch the stool
|
Casing windows that have stools
As with picture-frame windows, I try to cut all the pieces of casing consecutively from the same board. On windows that have a stool, however, taking only the two legs and the head from the same board is okay. The bottom piece of casing, or apron, doesn’t touch the legs. It runs underneath the stool, so grain differences aren’t as apparent.
I cut and install the head casings first, again referring to the story pole for dimensions. I then miter the legs, one left and one right for each window, leaving them an inch long, and stack a pair at each window. As I visit each window, I hold a square-cut casing scrap in place to check if a square-cut leg will fit against the stool.
I mark the casing legs’ length. This step shows me its length, and I cut and test-fit the leg, checking for any discrepancies in miter or length. If everything looks good, I back-cut the miter, spread a little carpenter’s glue on the miter and nail the leg in place.
I don’t use story poles to lay out the casing legs of windows that receive a stool because in this case, marking the legs in place is more accurate. This is particularly true if the window is slightly out of square and if I have to cut the leg’s bottom at an angle.
For out-of-square windows, I use a bevel gauge to find the angle at which to cut the bottom of the casing legs. I cut these legs a bit long and test-fit each angle before cutting the leg to finished length. Finally, I nail up through the stools into the bottom of the casing legs to tighten those joints.
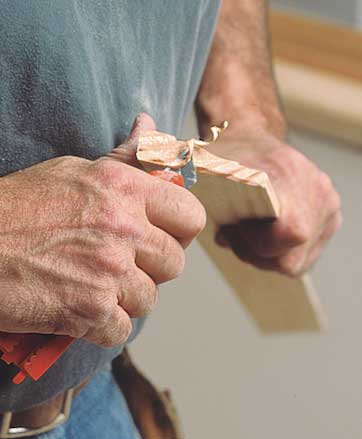
Finally, I install the aprons. For material with a profile, say a colonial casing, I usually cut mitered returns on the ends of the aprons so that end grain doesn’t show. This step is similar to cutting returns for stools .
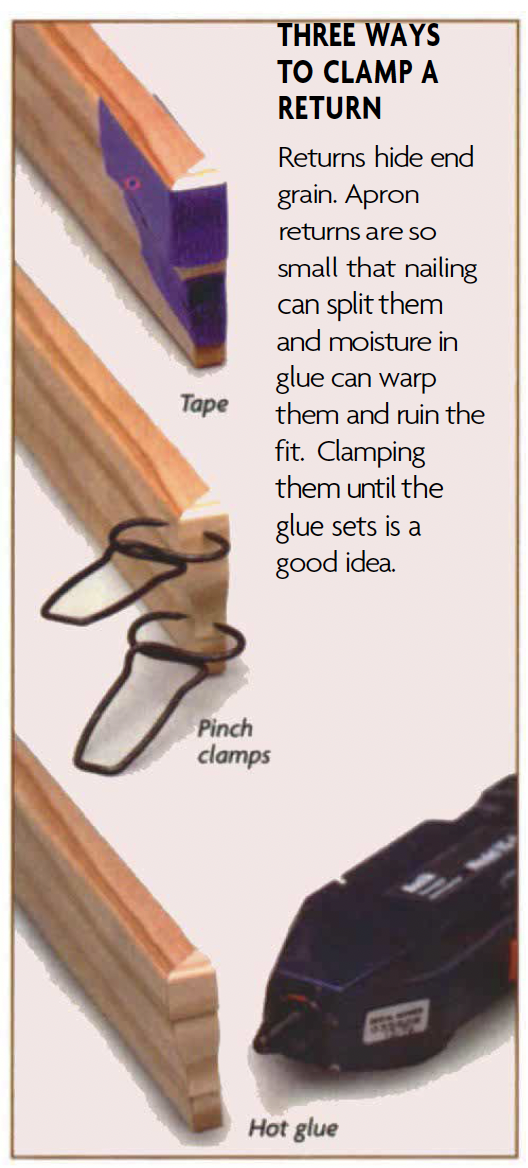
Because of their small size, cutting these returns can be trickier than cutting stool returns. When I complete the cut, I release the trigger and wait for the blade to stop spinning before raising it. Sometimes the return shoots out the back of the saw, but it usually tips over harmlessly next to the blade. I then cut the required miters on the ends of the apron and glue the returns in place. Pinch clamps ($3 per clamp; The Peck Tool Co.) are a great way to hold returns in place until the glue sets.
Craftsman-style trim is usually butt-joined, so it goes a bit quicker than mitered trim. I cut the head so that it will overhang the legs by in. or so, depending on the customer’s wishes. And I install the legs first so that eyeing a symmetrical overhang is easier. Of course, on Craftsman-style trim, I don’t use returns. Whatever style aprons I use, I usually cut them the same length as the width of the casing, leaving the same reveals above and below the stool. I spread the aprons around the room and nail as many as I can at once. Often the wall right below a window is not perfectly flat, so I use 8d nails to suck the apron tight against the wall.
Returning the stool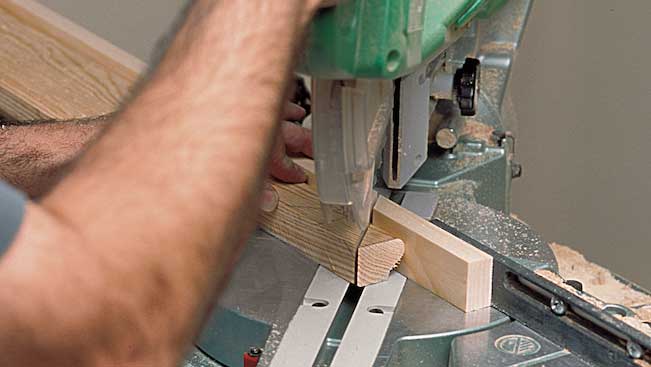 Sometimes I hide the end grain of the stool’s horn with returns, where the end of the horn is mitered and a matching mitered piece of stool is glued in place. I begin by leaving the stool a few inches long on both ends (1). After notching the horn, I carefully miter the return pieces from it, and then mark and mitercut the stool to its overall length (2). Finally, I glue the return to the horn so that the grain wraps around the corner (3). —J. B. 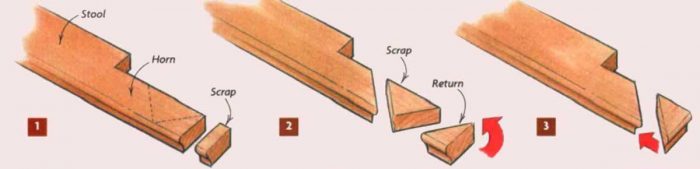 |
Closing the miters
 Tie on the apron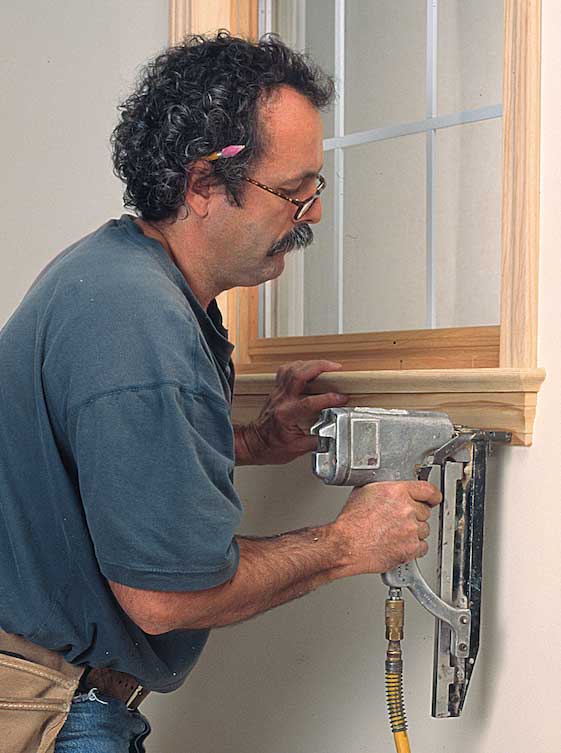 |
Jim Blodgett owns A Small Woodworking Company in Roy, Washington. Photos by Andy Engel. Drawings Dan Thornton
From Fine Homebuilding #137
Fine Homebuilding Recommended Products
Fine Homebuilding receives a commission for items purchased through links on this site, including Amazon Associates and other affiliate advertising programs.
Original Speed Square
Smart String Line

100-ft. Tape Measure

View Comments
I'm impressed
wonderful !
Excellent
Good job! Keep it up!
Good work you have done here! Keep it up!
Perfect article.