
Cutting Ceramic Tile
From simple tile nippers to diamond-bladed angle grinders and wet saws, here is an overview of the tools and techniques a pro tilesetter uses to make complex cuts.
If it weren’t for the cutting, tilework would be relatively easy. But tile is both hard and brittle—about as unforgiving as a material can be—and you always need to cut tile during an installation. Luckily, specialized cutting tools and techniques make this job much easier and can keep a potentially beautiful tile job from becoming a mediocre one. Because the tools are specialized, though, more than one type of cutter is needed to complete all but the most basic installations. I never show up on a job with fewer than three different tile cutters. Also, remember that working with tile is like breaking glass all day long: Safety glasses are a must, and gloves are a good idea.
Cutting boards: a basic straight-cut tool
Manual cutting boards are easy to use and cut most common types of ceramic tile. These simple cutters work much like a glass cutter and use a carbide wheel mounted on a handle to score the tile’s ceramic surface. After the tile is scored, the same handle is used to snap the tile along the scored line. I can cut a tile this way in seconds, and I have to set only the cutting board’s stop to make repeated cuts.
Cutting boards are available in a variety of models that handle up to 20-in.-wide tiles. I own a smaller board, which cuts tiles up to 10 in., and a larger two-rail model, which has a 20-in. capacity. Both cut tiles on a diagonal, although a wet saw makes those cuts faster and cleaner. The boards don’t require more maintenance than an occasional drop or two of oil along the rail; the cutting wheels are replaceable and usually cost less than $15. The cost of a cutting board can range from $30 for the smallest size to more than $300 for an imported cutter that handles 24-in.-sq. tiles.
Cutting boards have limitations: They cut only straight lines. Sometimes, the break can veer from the scored line, resulting in a tile that has to be recut or finished with another tool. Cutting boards also can’t cut marble, stone, or thick quarry tile, and they can’t take off a thin sliver of tile.
Nippers take care of the details
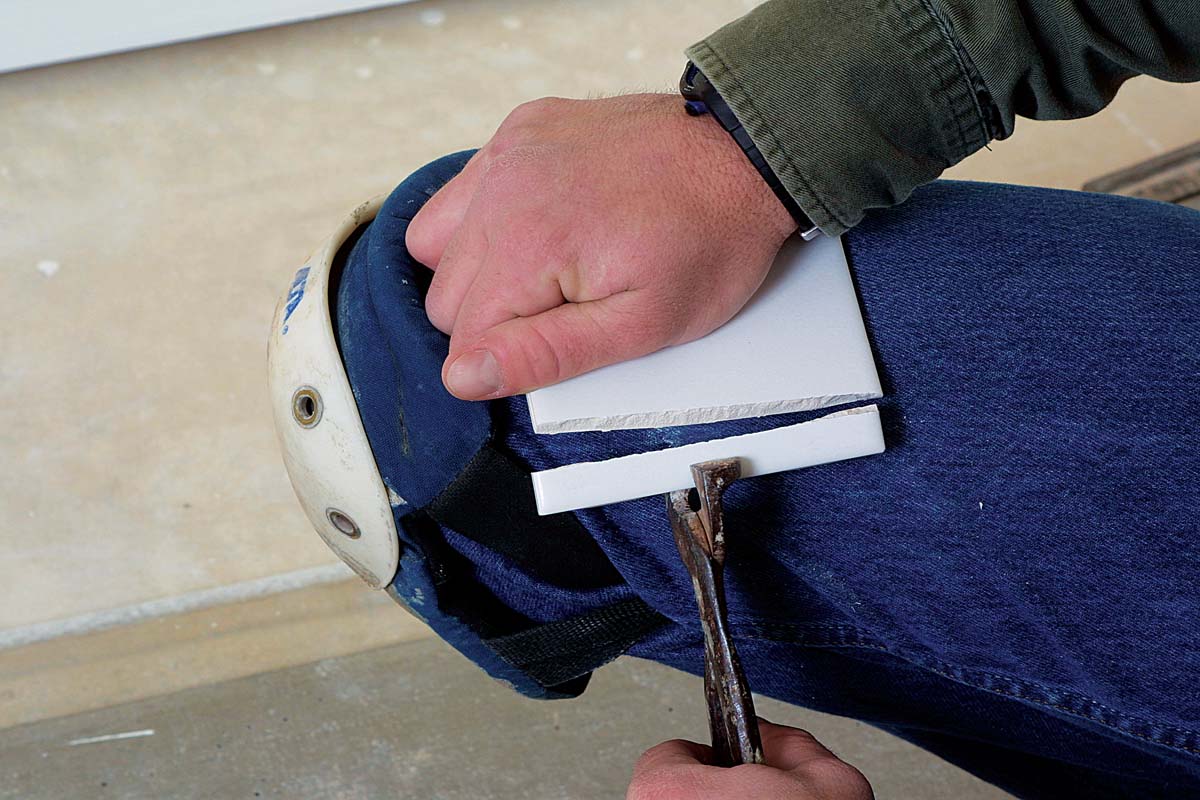
Another essential tile tool is a pair of nippers, sometimes called biters. Nippers are used to break pieces from tile, and as the name suggests, they work best when they take small bites. A common mistake when using nippers is to take too big a bite, which usually cracks the tile in half. Also, instead of crunching through the tile, I’ve found that nippers work better if you grab the tile and lever down, snapping off the piece.
If a pipe falls on a joint between two tiles, I use nippers to cut an arc in the tile (photo center, p. 60). I also use them to trim off a thin slice from tile that my cutting board can’t break (top photo, p. 60). You can pay $10 or so for a cheap pair of nippers, but for an additional $15 or $20, you get a better-quality model that features carbide-tipped jaws. Remember to be careful when you use nippers: The tile’s cut edges are as sharp as broken glass and can easily slice an unwary hand.
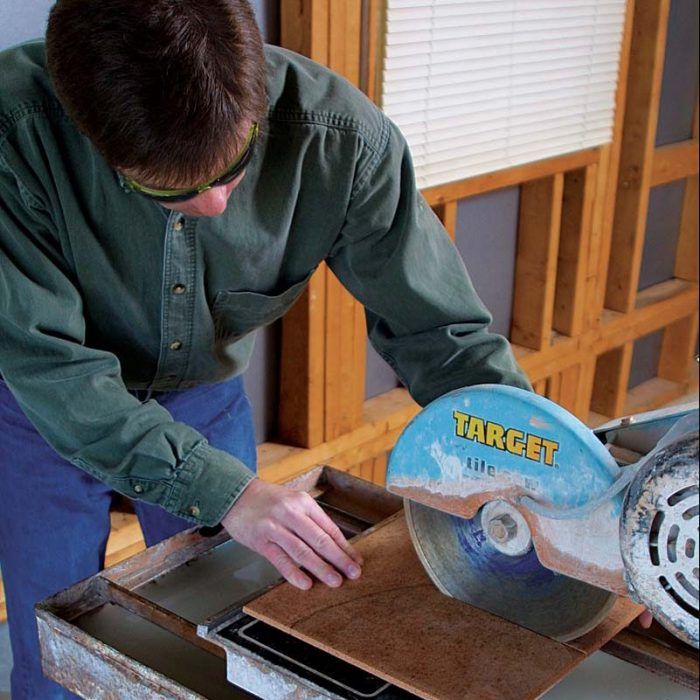
Wet saws are messy but make the cleanest cut
Wet saws (photo below) are simple to use and versatile. I can cut fairly precise semicircles and other complex shapes with the help of a pair of nippers. Some cuts aren’t easy, and I’ve gone through three or four pieces of tile before I successfully completed the cut. (That’s why it’s important to buy extra tile.) I can do some jobs, especially those with small tiles, without a wet saw, but for installations of large, thick or hard tiles, I have a wet saw ready to go.
The saws typically consist of a 1-hp (or larger) motor mounted over a shallow tub filled with water. The motor powers a diamond blade, usually 8 in. or 10 in. in dia.; a small pump sprays water onto the blade to cool and lubricate it and to keep tile dust to a minimum. The tile sits on a sliding table that rides just above the water on pair of rails. To make a cut, I keep the tile flat on the sliding table and push the tile into the spinning blade under even pressure. The best way to make precise cuts is to mark the cut on the face of the tile with a regular pencil or a grease pencil. On dark tiles, I stick masking tape to the tile and mark the tape (bottom photo, p. 63).
More than a dozen manufacturers make various styles of wet saws (sources of supply, p. 63). They all cut tile, but I discovered that the smaller tabletop saws that retail for a few hundred dollars just don’t perform as well as larger, more expensive models, which can sell for $1,000 or more. I bought a tabletop wet saw when I first started my business and got rid of it two weeks later. It worked well enough, but it lacked a substantial blade guard and threw tile chips and water all over me. If you plan to take on several tile jobs over the course of a few years, it might be worthwhile to buy a larger wet saw. My Target wet saw has served me well for 15 years.
Don’t want to drop $1,000 on a tile saw? If you plan to do only one or two jobs, you can rent a wet saw for as little as $40 or $50 a day at most tile distributors or home centers. With a little planning, you can do the necessary cutting in a day or two, no matter how large or complicated the job.
Other small wet saws use an angle grinder equipped with a 4-in. or 5-in. blade, a tub of water and a small rolling tray. Like the first wet saw I bought, these saws work. But they have limitations, and I don’t know a full-time tile contractor who uses one.
No matter what type of wet saw I use, I always set up outside or in an area that can get wet and dirty. I never set up the saw over hardwood flooring (leaks from the saw’s water tray stain wood), and I don’t use it in a finished house for fear of damaging walls or flooring with the dust and water that inevitably sprays from the blade.
Dry-cutting with angle grinders and diamond blades
One of the best innovations in the tile industry is a dry-cut diamond blade that fits on an angle grinder (photos p. 62). Granite, marble, limestone, ceramic and quarry tile cut like butter with this setup. I use a 4-in. blade on a Makita grinder (www.makita.com; 800- 462-5482) that has a fast blade rotation and can make fairly straight cuts, curves, L- and U-shapes, and holes in the middle of a tile.
Like any tool, however, my angle grinder has limitations. It tends to chip the glaze on most ceramic tile, and it leaves a rough edge on a piece of marble or granite. I don’t use it when that cut edge is to be exposed.
Dry-cut saws are also fairly dangerous if they aren’t used properly. Because the grinder has a tendency to jump when it starts to cut, it’s important to hold tightly onto this tool. Grinders are equipped with a blade guard that some tile installers remove. I’ve always kept on the blade guard, and on a couple of occasions when the tool kicked back and hit me in the leg, the blade guard probably saved me from a trip to the hospital.
These tools also throw clouds of dust, so I use them outside unless the situation requires indoor use. For instance, I’ve used my grinder to cut installed tile to retrofit electrical outlets, floor vents and even plumbing fixtures. When I cut indoors, I have an assistant hold a vacuum cleaner behind the blade to suck up the huge amount of dust that accompanies these tools. A vacuum won’t get it all, however, so I cover anything that needs to stay dust-free.
Angle grinders are standard tools among professional tile installers, and anyone who plans to do several installations should consider purchasing one. The grinder itself costs $100 or so; the blade costs about $50.
Hole saws for a perfect circle
If I want to cut a hole in the middle of a tile for a plumbing-supply line, I sometimes use a hole saw. These tools have a carbide or diamond-tipped pilot bit, and a diamond-edged hole saw. These saws cut through a soft-bodied ceramic or marble tile in less than a minute. However, they don’t work well on extremely hard ceramic tiles, marble or granite unless you use a hammer drill, and even that doesn’t always cut through the hardest tiles. Costs range from $30 to $80. Hole saws come in several sizes; I own a 11 ⁄4-in. dia. model and use a dry-cut grinder for larger holes.
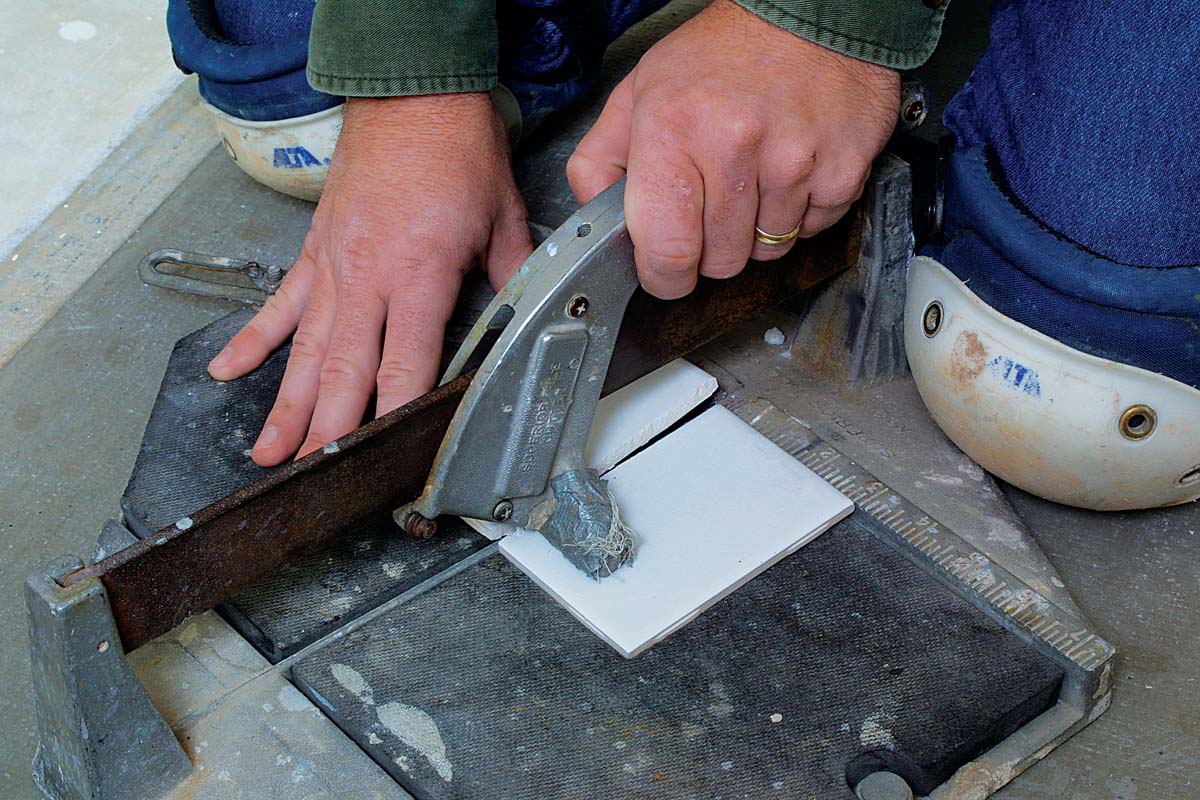
Using a Cutting Board
Under light, even pressure, the cutting wheel scores a line across the tile’s surface. The handle is then levered down onto the tile, snapping it along the score.
 |
 |
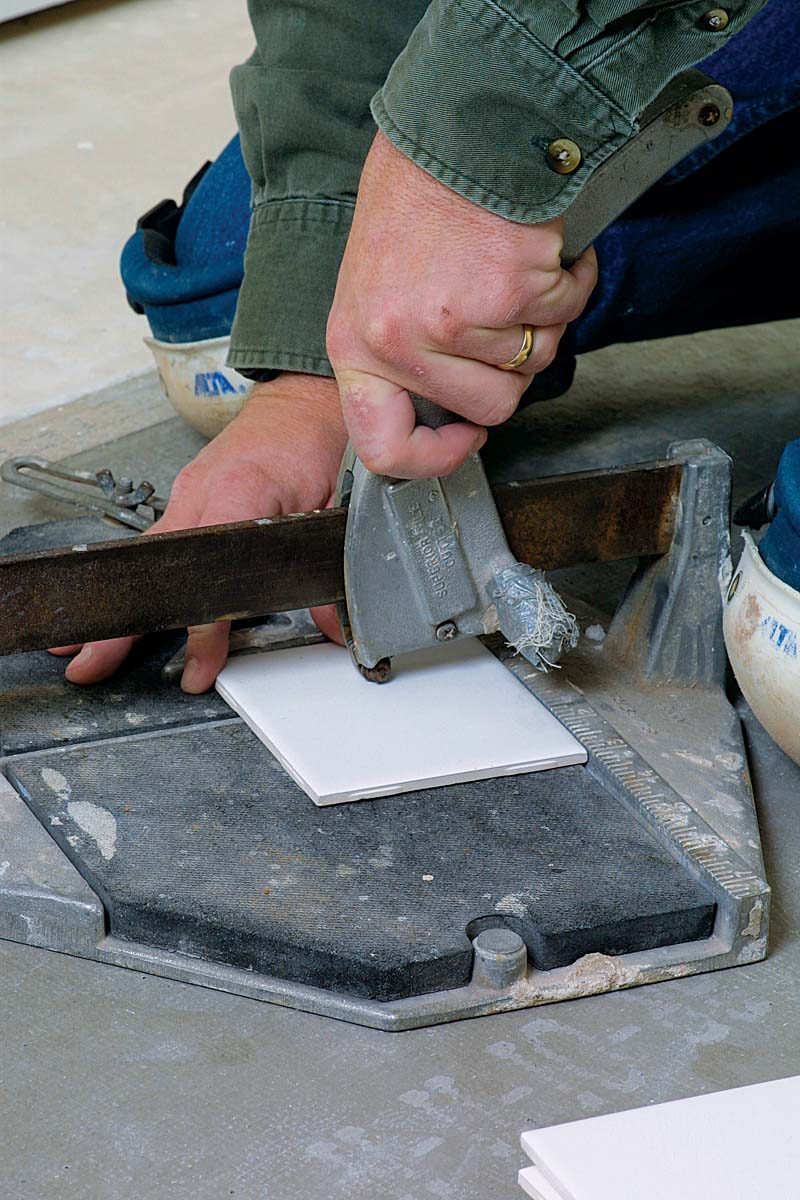
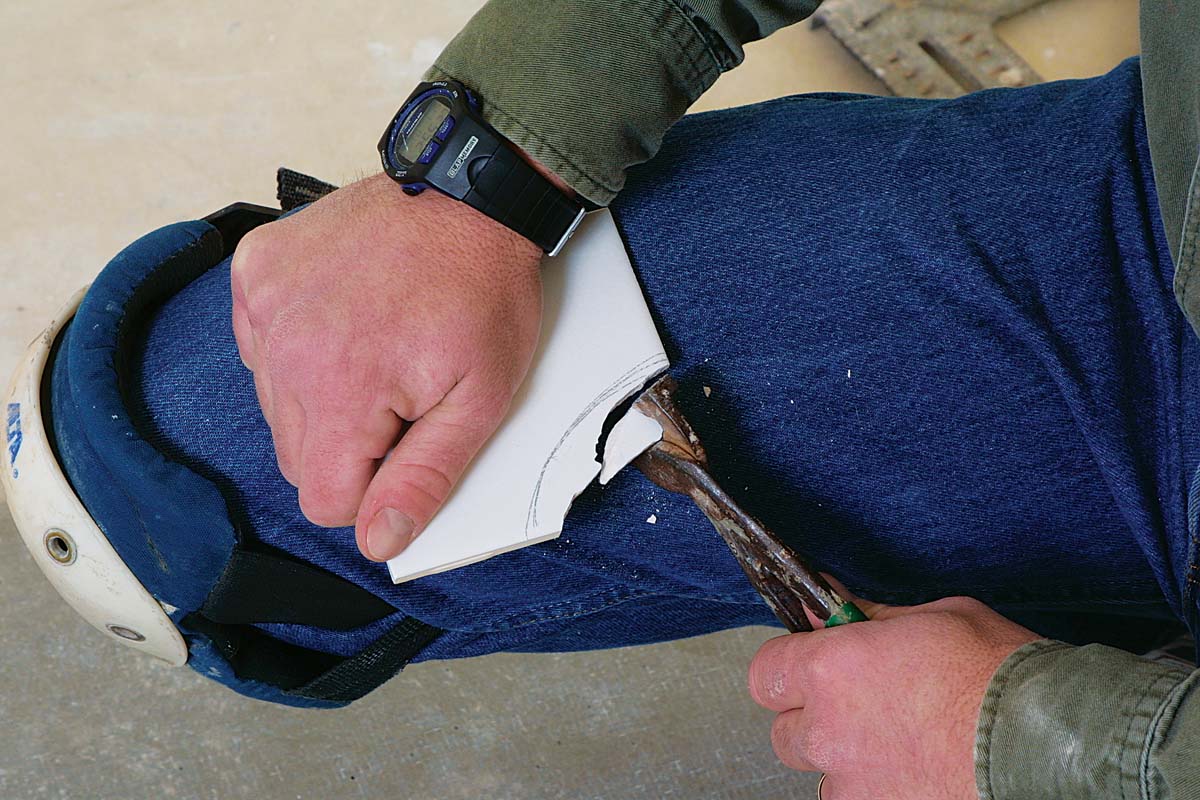
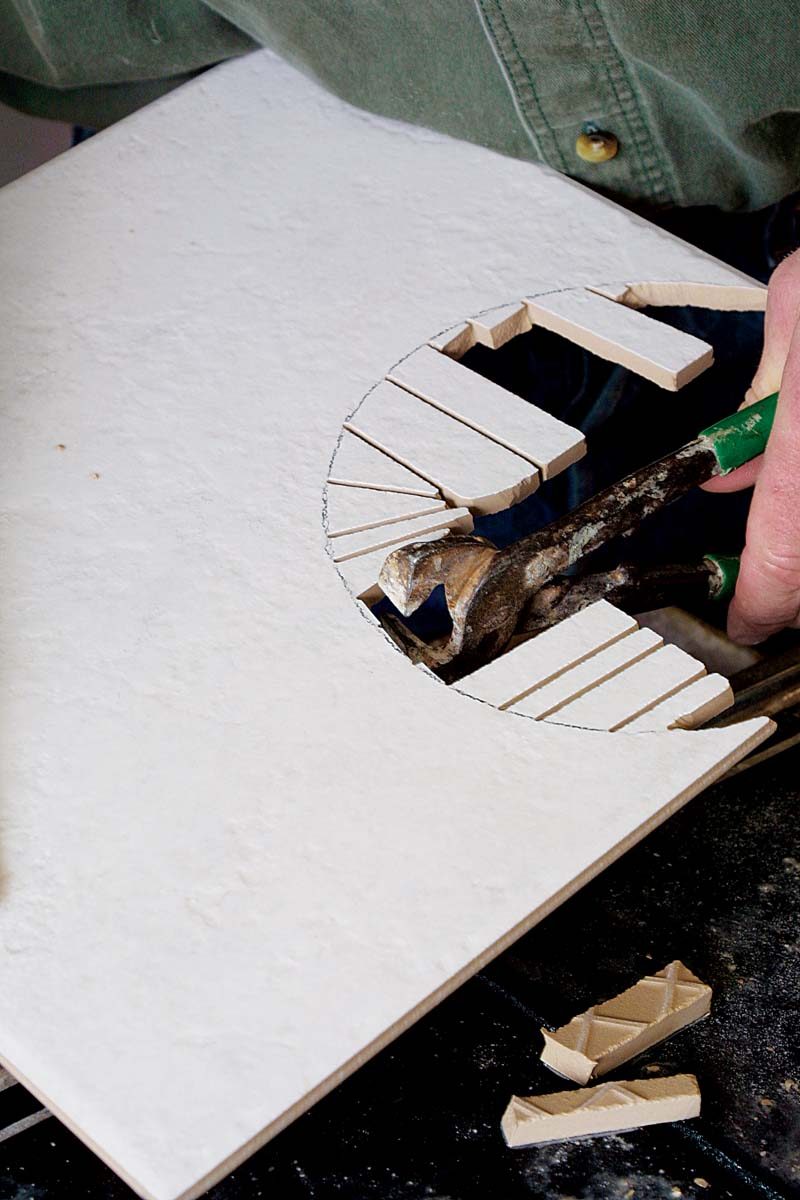
Cutting Tile with Nippers
Cutting boards can score but can’t snap a thin offcut, a job perfectly suited to nippers. Grabbing the waste and levering down with the nippers usually produces a clean break. Any remainder can be nipped away as needed. When breaking out a small radius, it’s better to take small, measured bites, especially as you get nearer the line. Large bites tend to crack the tile.
 |
 |
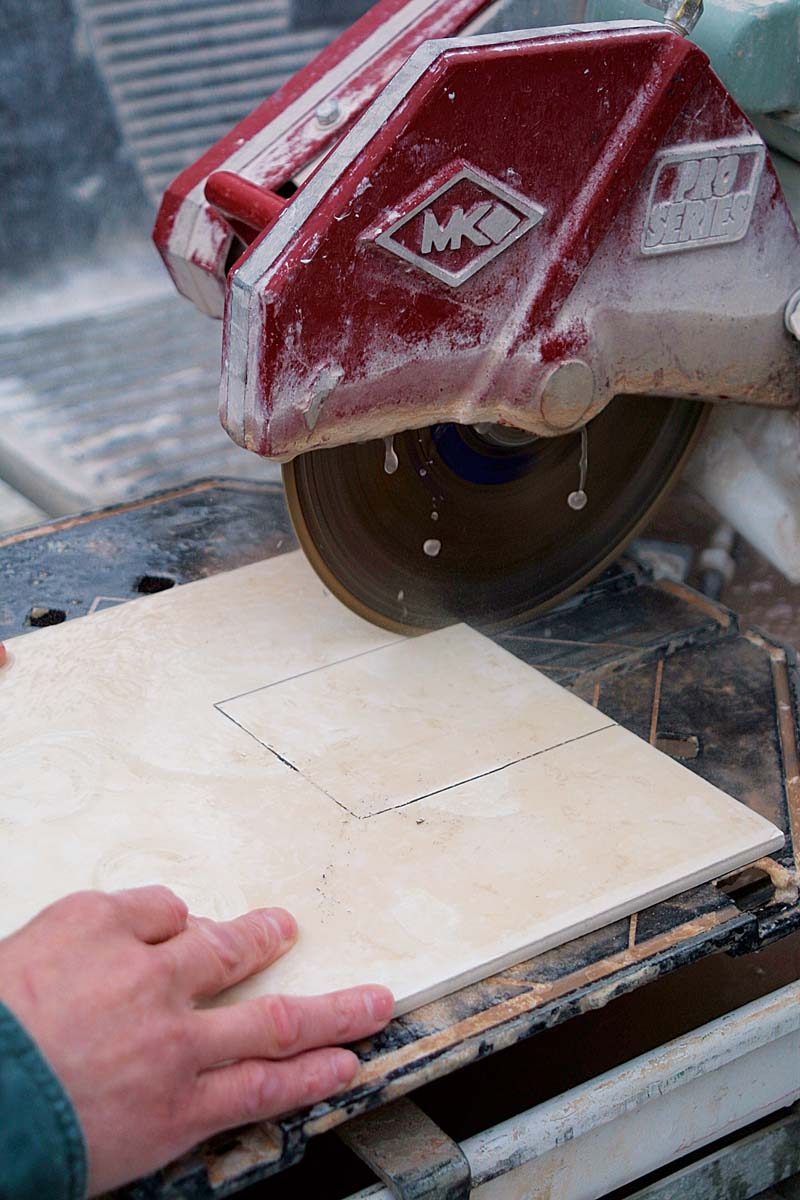
Making a U-Shaped Cut
Tile often must be cut to fit around light switches or soap dishes. Although nippers or a dry saw might work, a wet saw makes the cleanest cut. With the tile held flat on the saw bed, the two parallel cuts are made by pushing the tile into the blade. To make the crosscut, many professionals might lift the tile into the blade. However, saw manufacturers recommend that the sawblade be plunged into the tile instead. After loosening the saw head’s depth adjustment, you raise the head and turn over the tile. Aligned beneath the blade, the tile is held firmly while the blade is plunged into the cut.
 |
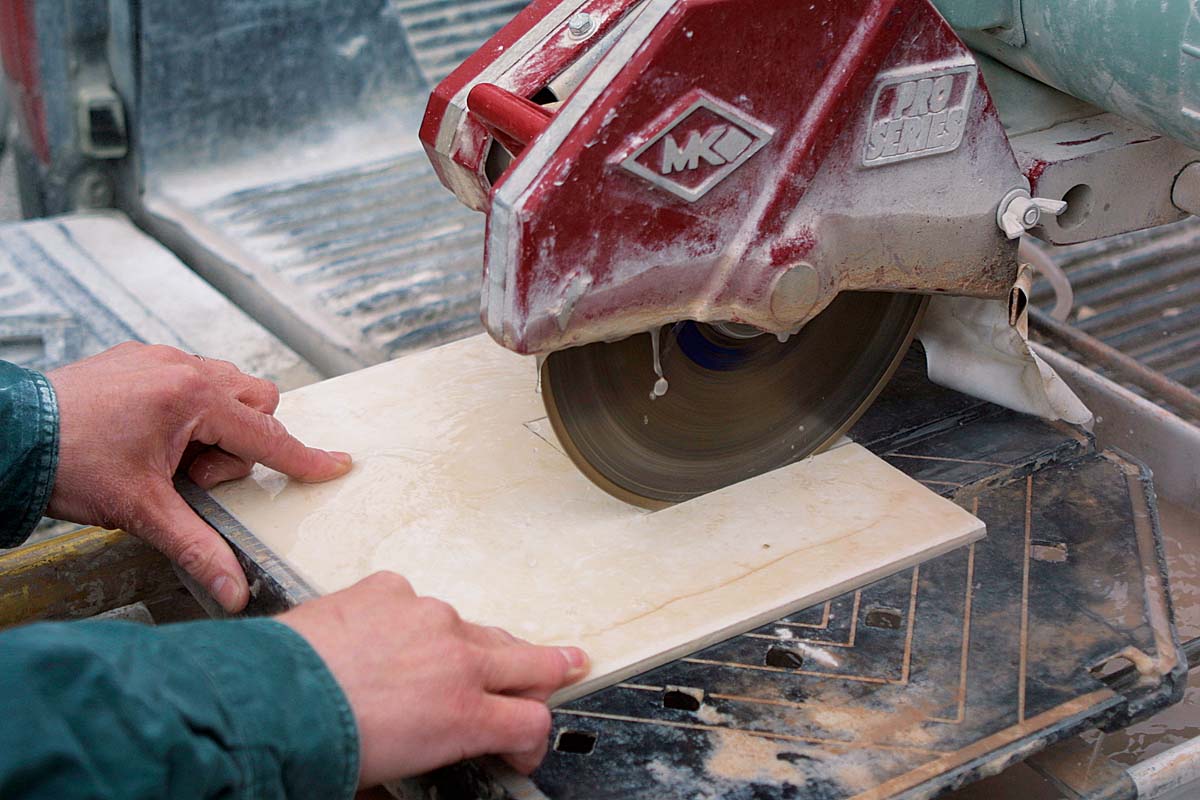 |
Cutting a Radius
To cut around a closet flange, the author makes straight cuts by holding one end of the tile on the bed and carefully lifting the other end into the blade. (Although not sharp, diamond blades should be treated with caution.) The waste is removed at the line with nippers.
 |
 |
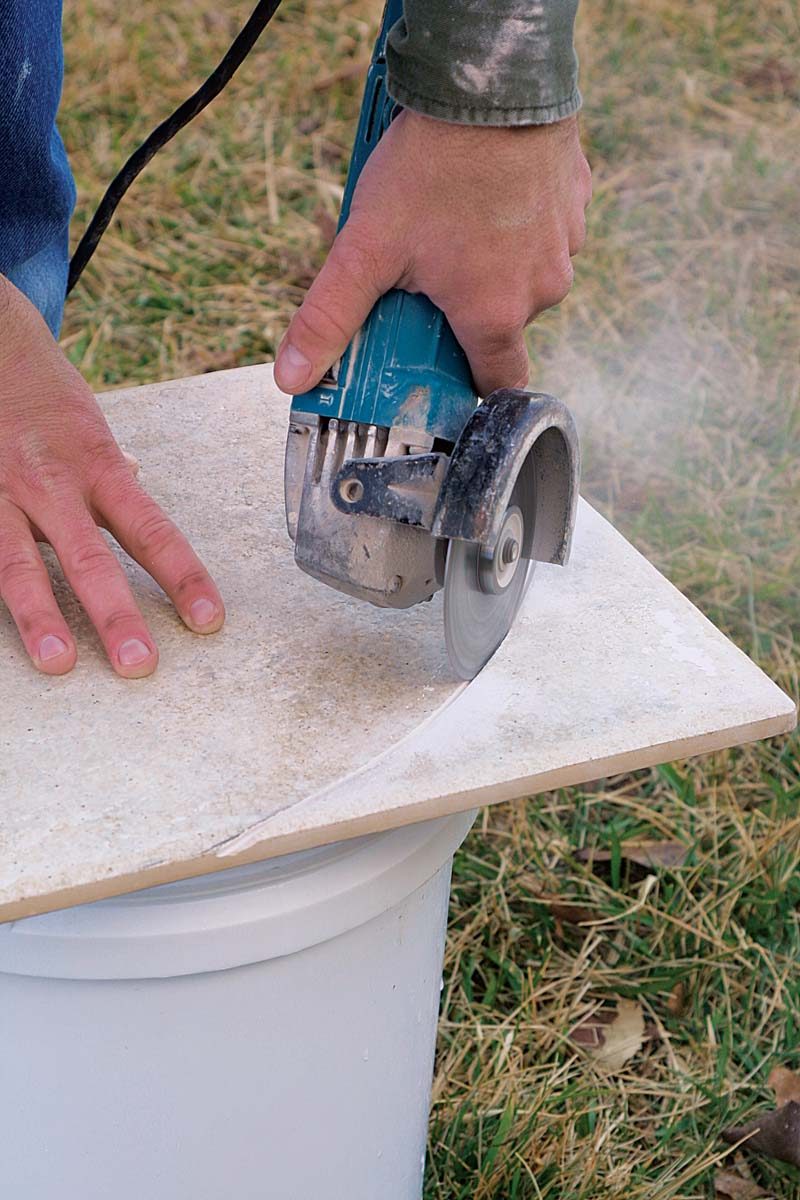
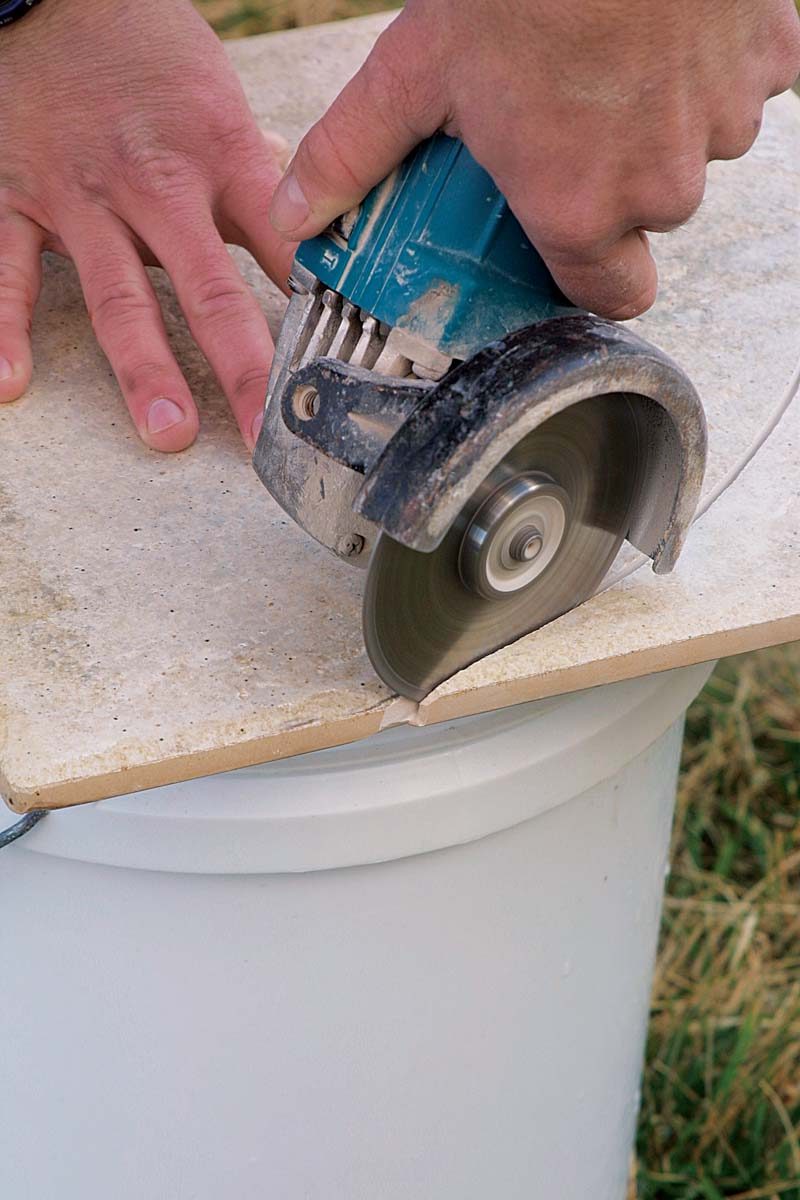
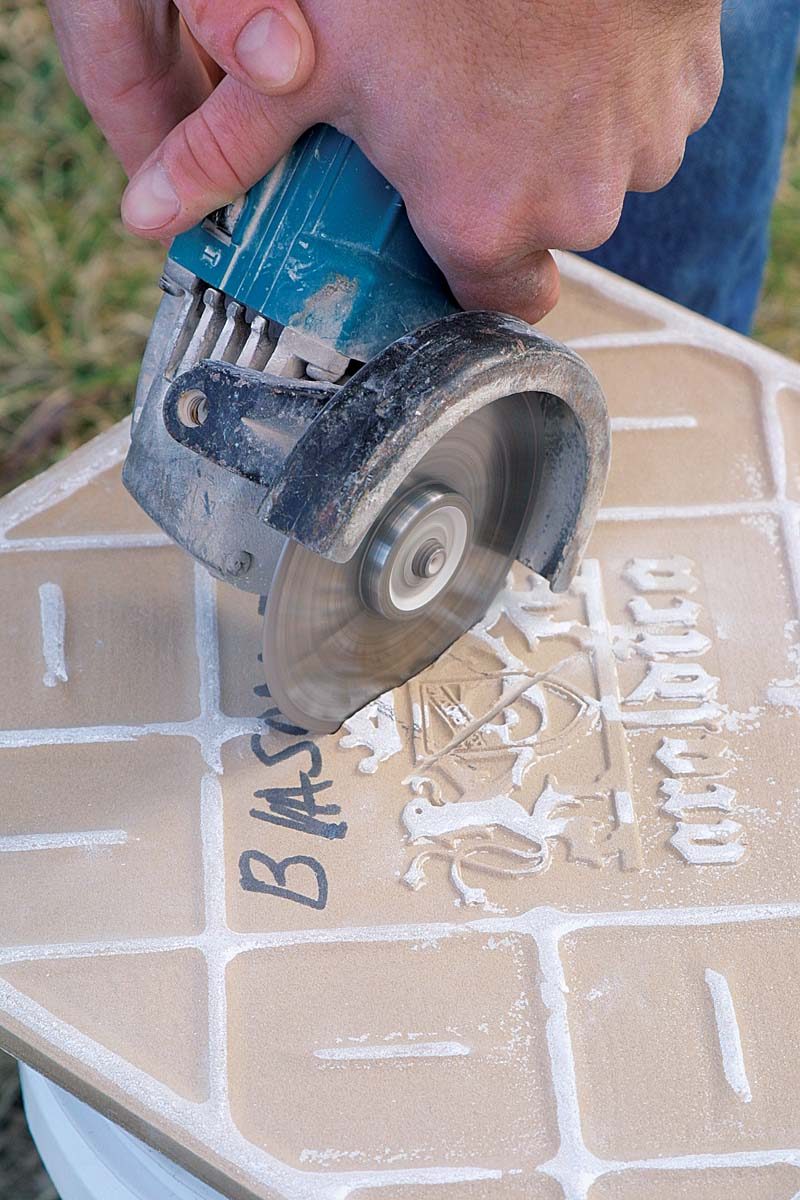
Dry-Saw Cutting
An angle grinder fitted with a diamond blade makes quick work of freehand tile cuts, but this tool is noisy, throws lots of dust and should be used outside with a dust mask. To cut a radius, the author firmly secures the tile with one hand, and holding the grinder in a tight grip throughout the process, he makes a series of shallow, scoring cuts along the pencil line. The shallow cuts keep the blade from binding in the material; as the blade progresses down into the material, the kerf should be widened toward the waste to allow the blade easier passage.
 |
 |
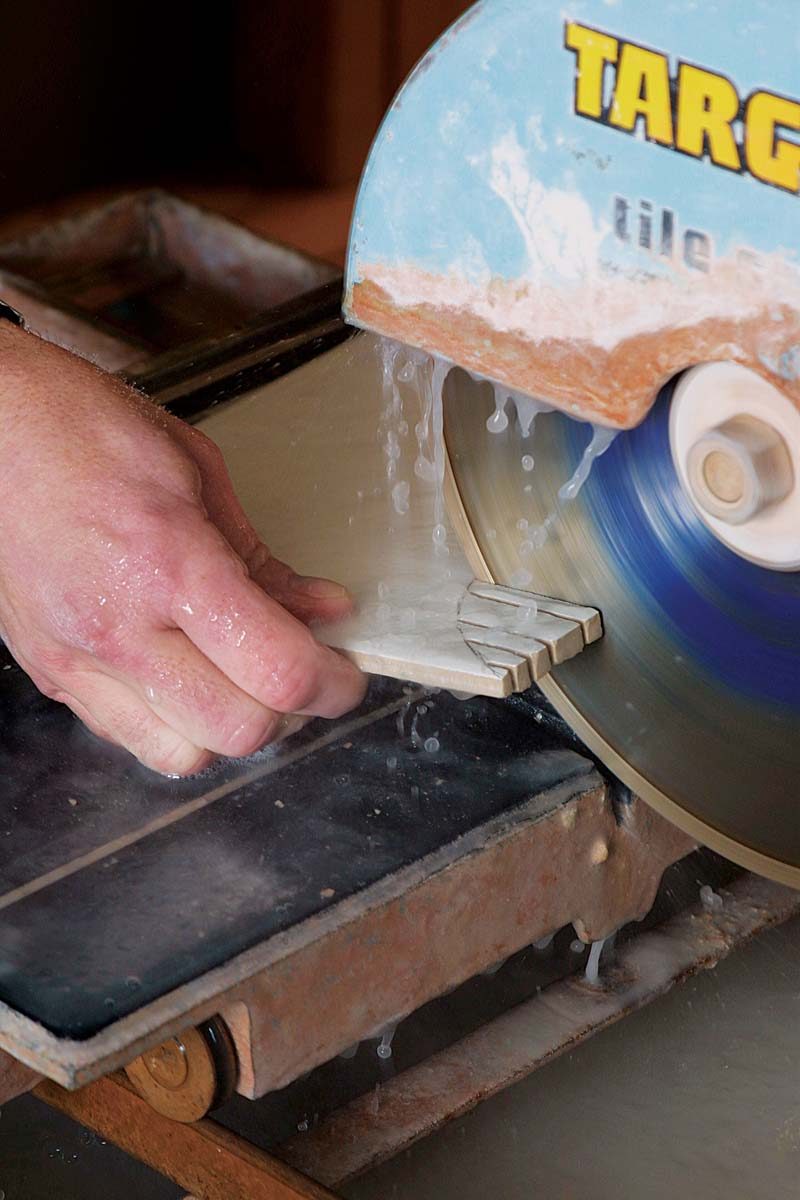
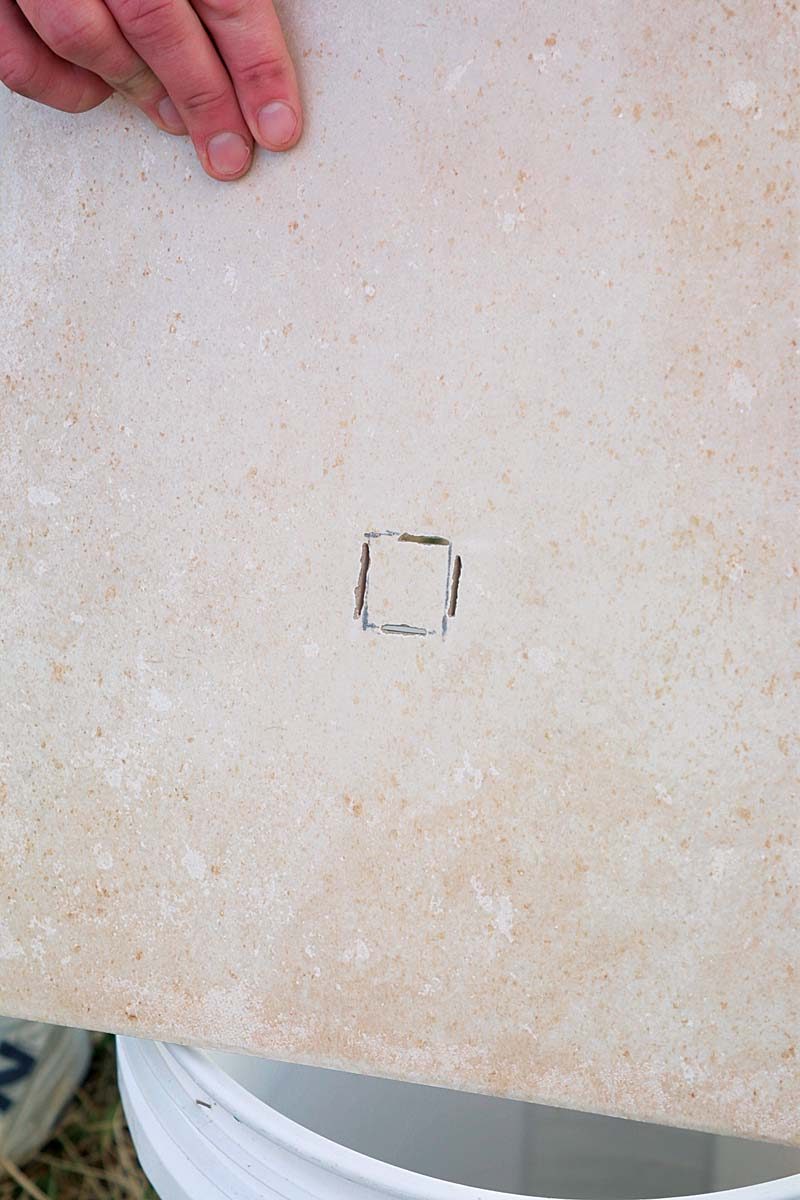
Cutting Holes with a Dry Saw
Bathtub plumbing often exits the wall in the middle of a tile. If a hole saw isn’t handy, the next best thing is a dry saw. The angle grinder offers a quick, if rough, way of cutting a hole in the middle of a tile. After measuring a square that’s large enough to fit around the pipe but small enough to be covered by the flange, the author marks the tile on both sides and makes four small plunge cuts into the back of the tile. The front of the tile must be checked periodically to make sure the cuts don’t go beyond the lines. When the cuts on the back have extended nearly to the corners drawn on the front, the tile is flipped, and the cuts can be finished from the front.
 |
 |
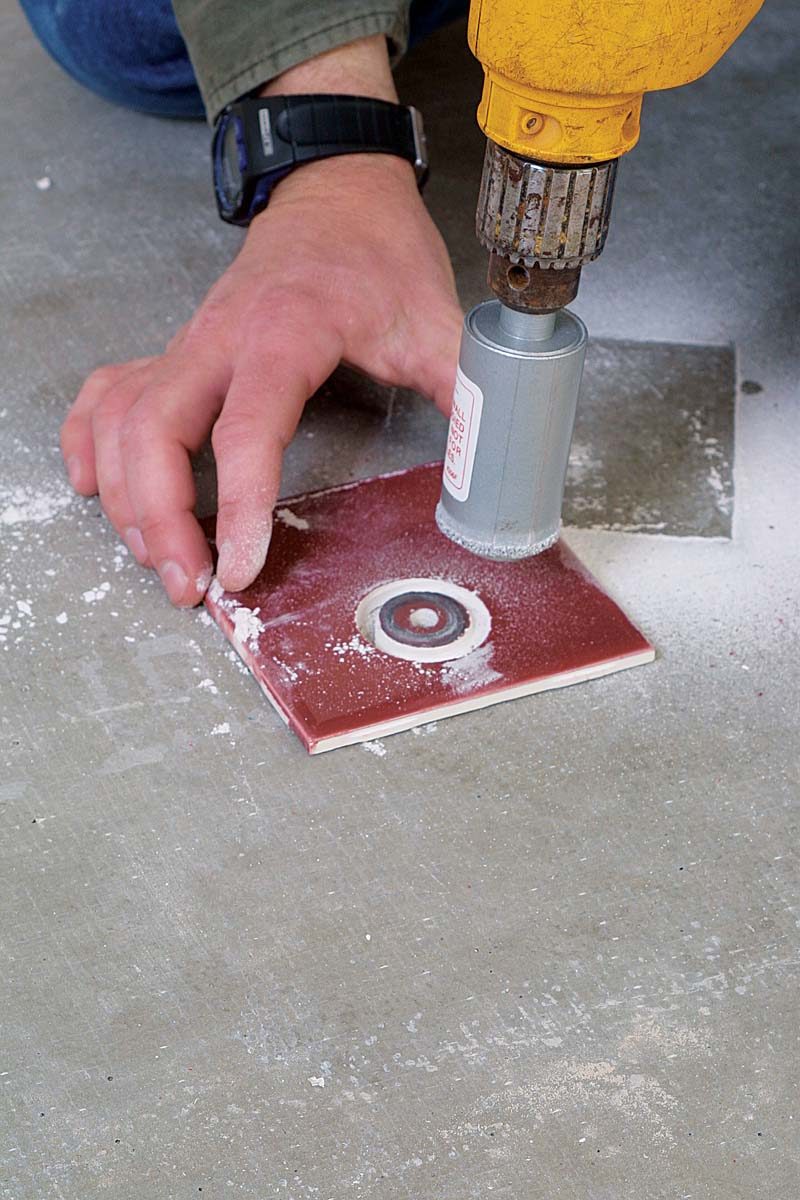
Cutting the Perfect Hole
A diamondcoated hole saw chucked into a 3 ⁄8-in. drill cuts a clean hole in most ceramic tiles. Available in different diameters, hole saws are a bit slower cutting than dry saws. They also can’t cut harder tiles or granite as easily, but are still a good choice for production work.
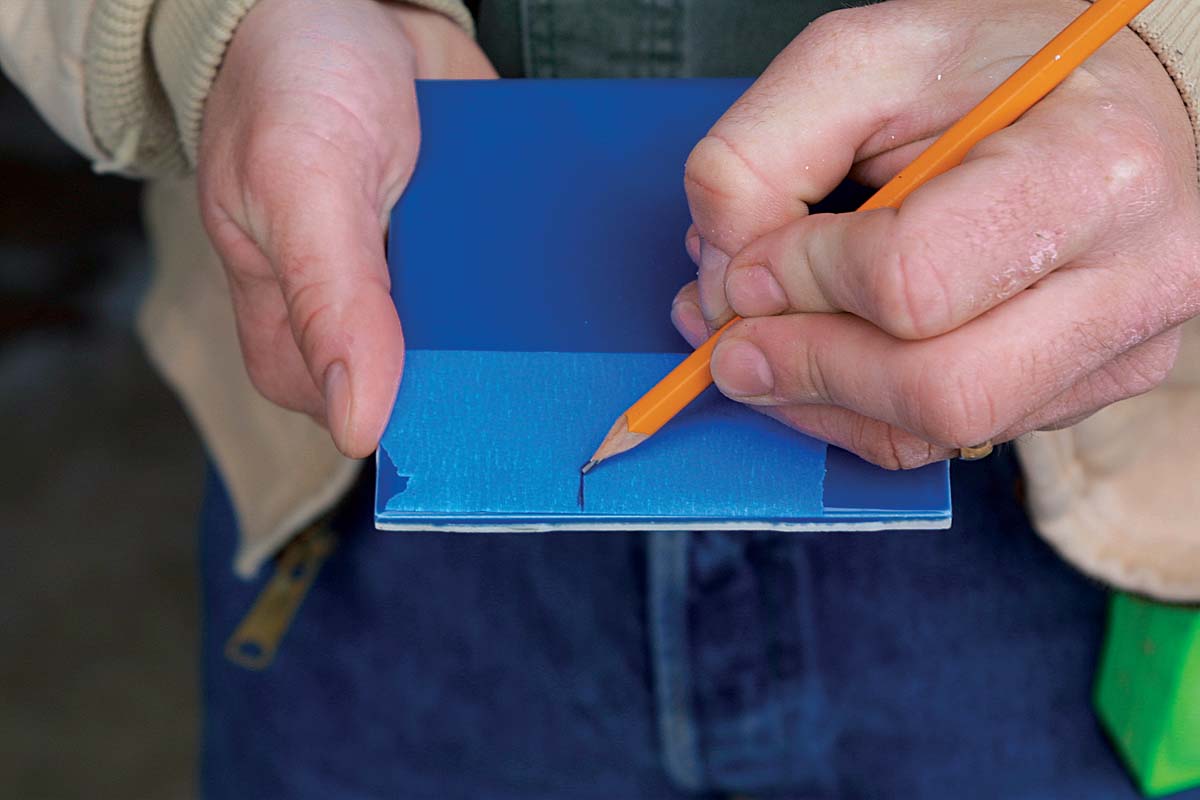
Tape Tip
Forget a white pencil? When you’re marking dark tiles, a pencil line drawn on a piece of tape becomes a good substitute for a grease pencil or a crayon. The mark can be full length on the tile or just serve as a crow’s foot.
For more photos and details, click the View PDF button below:
