
The Right Header for Every Wall
Several code-approved options beyond the standard double 2x12 save material and energy.
Synopsis: Double 2×12 headers are still the standard for window and door openings, even though the IRC lists other options for headers that save lumber, minimize thermal bridging, and save space for insulation. Builder Mike Guertin provides a comprehensive look at header design and discusses how to figure out the right-size header for a given span. He also discusses several alternative designs to the double 2×12 and when they are appropriate: rim-board header, box header, and using a flat 2x instead of a header.
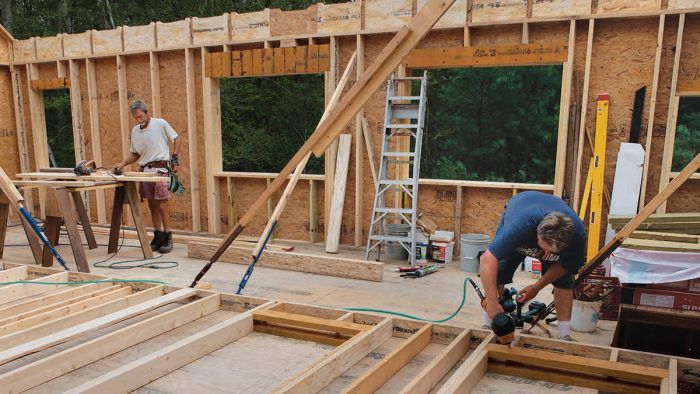
When I started framing houses in the late 1970s, the standard header for almost any size window and door opening was a double 2×12 with a 1⁄2-in. plywood spacer to bring the header flush with the stud edges in a 2×4 wall. When the header is pushed hard to the double top plate of an 8-ft.-high wall, its bottom sets up window and door head jambs 6 ft. 10 in. off the floor, perfect for standard 6-ft. 8-in. doors.
When high-performance homes gained market share in the late 1980s, the building industry looked for options to reduce the amount of lumber used to build headers — or to eliminate conventional headers altogether — in order to save resources, minimize thermal bridging, and provide more space for insulation. Double 2×12 headers are often oversize for the load, but they’re still the standard. In most cases, there is no structural advantage to installing headers that are larger than required, and there are downsides. Not only do they cost more than right-size headers, but the deeper a lumber header is, the more likely it is to lead to drywall cracks as green lumber dries or dried lumber expands during seasonal humidity changes.
When I look at the prescriptive options available in the IRC, I’m surprised by how many builders still frame the way I did nearly 40 years ago. I guess bigger and beefier looks stronger and impresses clients, and I admit that it’s easier to use the same-size headers throughout a house whether for a large patio door or a narrow window. Thoughtful header design takes planning and organization, but it’s a better way to build. Shallower headers, single-ply headers, engineered lumber, innovative use of rim joists, and even no headers at all save material, money, and energy.
Do you even need a header?
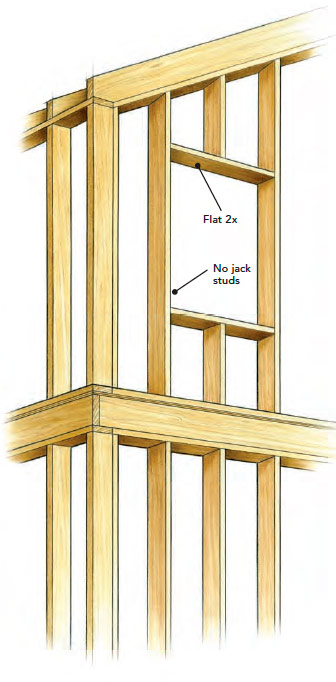
The 2015 IRC says, “Load-bearing headers are not required in interior or exterior nonbearing walls. A single flat 2-inch by 4-inch member may be used … for openings up to 8 feet in width” (R602.7.4).
In essence, the code doesn’t require a header unless the end of a floor joist, roof rafter, or truss lands on that wall or there’s a concentrated load bearing over the opening. You don’t even need to install structural jack studs, since there is no load for them to bear.
A header also isn’t required when a window or door is narrow enough to fit between studs on layout. This is more typical with framing on 24-in. centers. Then, when a window is less than 22 in. wide, you don’t need a header; you just install 2x head and sill boards to box out the rough opening.
Right-size headers optimize lumber usage
Sizing a header for the load it will carry is pretty simple, can be done without an engineer, and usually results in headers that use less material. For conventionally framed houses, tables in the IRC help you determine the right-size header for the opening width and the load it supports. In the 2012 IRC and earlier versions, the header span table for exterior bearing walls (R502.6[1]) was published in chapter 5, “Floors”—hardly a logical spot—and the table only included two-ply, three-ply, and four-ply headers. The 2012 IRC added a table for single-ply headers in chapter 6. The 2015 IRC consolidated this information in a single exterior-wall-header table (R602.7[1]) in chapter 6. This section includes similar tables for headers in interior walls and porches.
In addition to their listing in the table, single-ply headers have a subsection requiring that one 2x flat board be installed at the bottom of the header and another one on the top (unless the header is tight to the top plate).
The header options are listed by the number of plies (one to four) and the lumber size (2×4 to 2×12). While only three building widths (20 ft., 28 ft., and 36 ft.) are shown, the code permits you to interpolate for building widths between those listed. If you don’t want to interpolate, you can just use the spans listed for the next-larger building width. Also in the tables are columns labeled NJ, meaning “number of jack studs” required under each end of the header.
Interpolation
If the house width falls between the three provided in the IRC, header spans can be interpolated with some simple math. For example, let’s use the same rough opening and house configuration as before, except that in this case the house is 26 ft. wide. We’ll use a single 2×8 header.
Begin with the difference in span for a given header configuration between the building width on each side of the actual building width. At 20 ft., a single 2×8 can span 3 ft. 11 in. At 28 ft., it can span 3 ft. 5 in., so the header span difference is 6 in. over 8 ft. To find the difference per foot, divide 6 in. by 8 ft.:
6 in. ÷ 8 ft. = 0.75 in. per ft.
Since the 26-ft.-wide building is 6 ft. wider than the 20-ft. width from the table, calculate the following:
0.75 in. per ft. × 6 ft. = 4.5 in.
Subtract the above number from the header span for a 20-ft.-wide building to find the allowable header span for a 26-ft.-wide building:
3 ft. 11 in. – 4.5 in. = 3 ft. 6.5 in.
Rim-board headers use existing framing
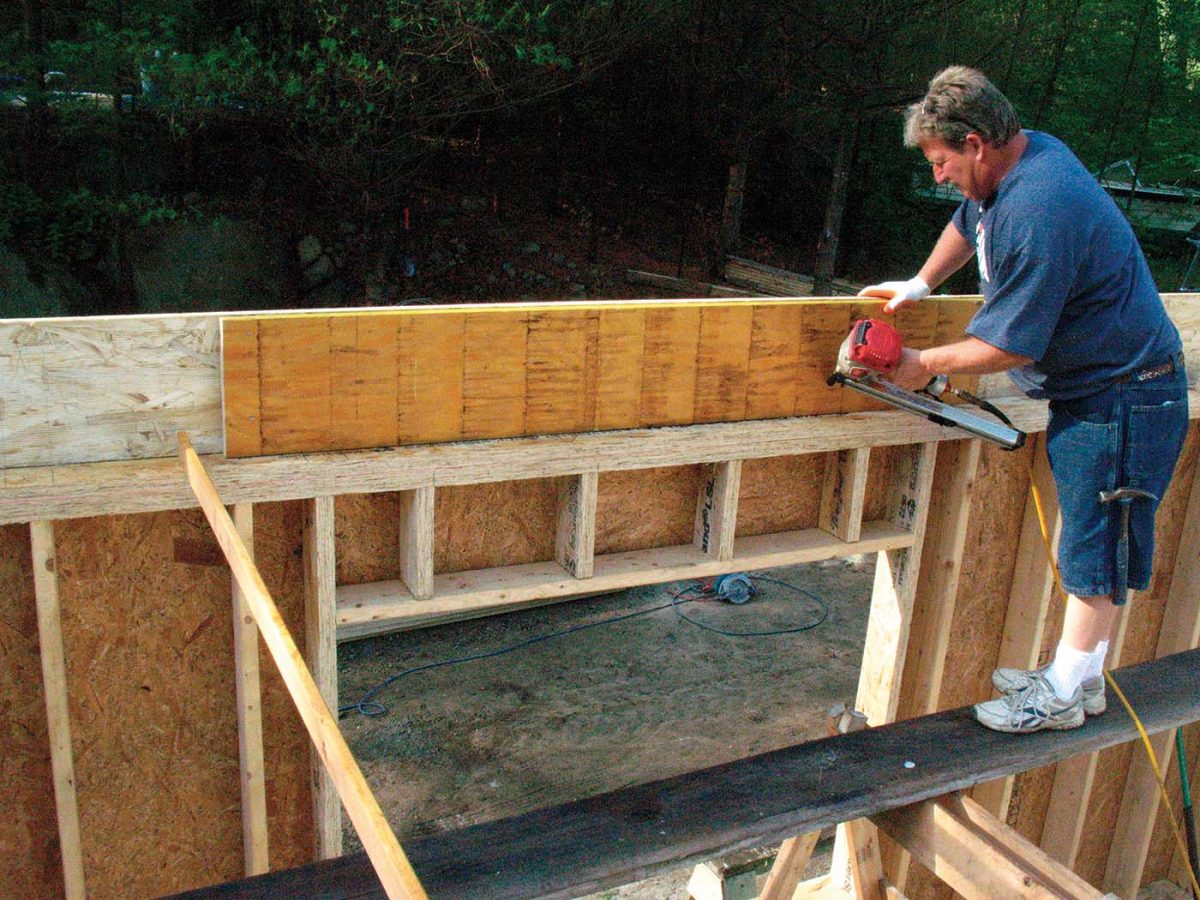
Why does a header have to be framed into an exterior wall when there’s already a rim board in the floor framing above the top plate? A rim board often can bridge a window or door opening, and as of the 2015 IRC, there is a subsection on them (R602.7.2). Rim-board headers are sized according to the same table used to size regular headers, and in many cases the single-ply rim board you’re already installing may eliminate the need for a conventional header below. In situations where the loads are greater or the opening is larger, the rim board can be sistered with additional material (photo). In all cases, there can be no joints in a rim-board header over the opening and for 6 in. past the outer bearing studs. The number of outer studs framing each end of the rough opening must at least equal half the studs displaced by the opening, assuming you are using the maximum stud spacing permitted in table R602.3(5). This may sound confusing, but it’s easy in practice. If there would be two studs falling in the opening, then you would need one jack stud at the left side of the opening and another at the right side.
According to the IRC, as long as floor joists have at least 1-1⁄2 in. of top plate to bear on (say, a single rim board on a 2×4 top plate), hangers are not required. This is one case when I go beyond the code; I install hangers on all rim-board headers.
Box headers take advantage of the sheathing
Box headers are made by installing structural-sheathing panels to the outside face or to the inside and outside faces of the framing between the top plate and a flat 2x at the head of a rough opening. The sheathing and framing combine to act as a truss. Because they are built with a minimal amount of lumber, there is more space to fill with insulation. Box headers can be used only in walls supporting just a roof and a ceiling, and in walls supporting a roof, a ceiling, and one center-bearing floor with an interior center-bearing wall. The IRC lists spans for 9-in.-tall and 15-in.-tall box headers.
Two-sided box headers have greater spans than single-sided ones. All you have to do is follow a few conditions outlined in figure R602.7.3. Begin by framing in the cripple studs between the top plate and a flat 2x at the head of the rough opening, and support the flat 2x with the same number of jack studs the code requires for a conventional header of that length. Make sure the structural sheathing and top plate continue through the opening without any joints. Follow the fastening schedule: 8d common nails spaced every 3 in. and driven into the plates and the cripples. The sheathing must be a nominal 1⁄2 in. thick, and its strength axis must run parallel with the wall length. (The strength axis of most structural sheathing aligns with the sheets’ long edges.) In many cases, the exterior wall sheathing alone can be used to create a one-sided box header. For instance, in a 28-ft.-deep house with two stories and a center-bearing wall, a one-sided 9-in.-tall box header can span up to 3 ft.
Two-sided box headers give greater spans, but the interior structural panel is applied to the face of the studs, requiring you to pad out all the studs to match the plane before installing drywall. Alternatively, if you’re framing walls from 2x6s, you can rip 1⁄2 in. off the plate, the tops of the king studs, and the head board. This isn’t allowed with a 2×4 wall.
If you’re already framing with 1⁄2-in. structural sheathing, then one-sided box headers are easy to incorporate. Just keep joints in the sheathing and top plate from falling above the opening, and nail the perimeter of the header properly. If the house is being sheathed with 7⁄16-in. OSB, you can install pieces of 1⁄2-in. panels just for box headers. The slight difference in thickness won’t cause any problems.
Building up headers
When building multi-ply headers, you should start with the IRC’s fastening schedule (table R602.3[1]), which covers two-ply headers with a 1⁄2-in. plywood or OSB spacer, presumably for a 2×4 wall. (No fastening schedule is given for other headers.) The schedule calls for 16d common nails at 16 in. on center or 16d box nails at 12 in. on center. I run two rows of nails on 2×6 to 2×10 headers and add a third row in the middle of 2×12 headers.
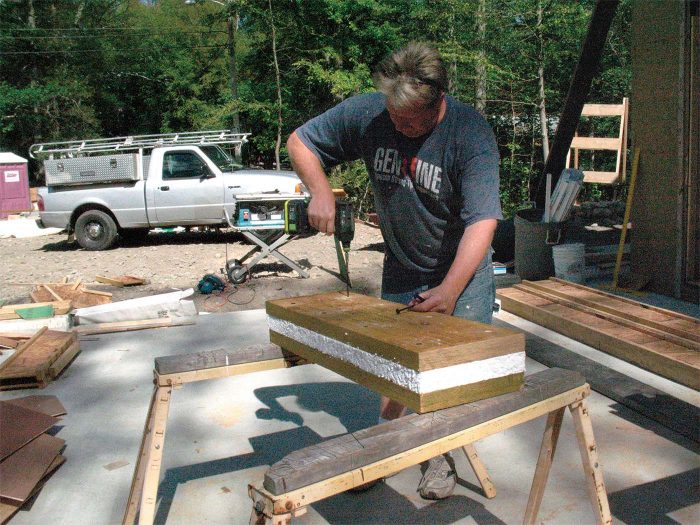
In 2×6 walls, I usually frame double headers by sandwiching 2-in. rigid foam between 13⁄4-in. LVL stock or 21⁄2-in. rigid foam
between 2x stock. Because nails aren’t long enough to penetrate both plies and the foam, I use 5-in. or 51⁄2-in. Fasten
Master FlatLok or HeadLok screws, or 5-in. Simpson Strong-Tie SDWS screws. The low-profile heads on these screws sit flush with the surfaces of the lumber, so they don’t interfere with sheathing or drywall. I space the screws roughly 16 in. apart about 2 in. down from the edges of the header.
I rarely frame walls with 2x4s, but when I do, I use 1⁄2-in. rigid foam between the plies of built-up headers rather than OSB or plywood. Even though the R-value of the foam is small, it breaks the thermal bridge somewhat.
Engineered-lumber headers
LVL, LSL, and insulated headers are usually more consistent in size and less prone to shrinking and swelling than sawn-lumber headers, which is one reason many builders have adopted them. Some companies make headers in a laminated sandwich with a rigid insulating-foam core or face. Engineered-lumber manufacturers provide header-span tables similar to the ones listed in the IRC, making it easy to size them. I’ve used engineered lumber as single-ply headers, multi-ply headers, and rim-board headers. In many cases, the engineered-lumber members can span greater distances compared to sawn-lumber headers of similar sizes. It’s important to check the manufacturer’s instructions, as there may be special-use conditions not covered in the code.
Why header spans change
Today’s lumber isn’t as strong as the old-growth material of years past, so lumber-rating authorities have been reducing the rated structural capacity of most species. One way that those reductions are manifest is in shorter header spans. If your code jurisdiction adopts a more recent version of the IRC, you may have to change your header sizes according to the revised table.
Photos courtesy of Mike Guertin. Drawing courtesy of Don Mannes.
RELATED STORIES
Fine Homebuilding Recommended Products
Fine Homebuilding receives a commission for items purchased through links on this site, including Amazon Associates and other affiliate advertising programs.

Stabila Classic Level Set

Short Blade Chisel

QuikDrive PRO300s

View Comments
testing
I was wondering how the roof rafters were going to set down...never saw it this way before?
"Rim-board headers use existing framing...According to the IRC, as long as floor joists have at least 11⁄2 in. of top plate to bear on..." Is this true even when you are using the rim board as a substitute for a header below? It seems to me that with no header below and no joist hangers, you're relying on the top plate and the sheer strength of the nails into the joists to carry the load. I would think if you are relying on the rim board to carry the load--(with or without a top plate ledge), joist hangers would be required. I can see ditching the hangers if you 1 1/2" of top plate to sit on and the header is below.
According to the art text in Figure 602.7.2 in the 2015 IRC hangers were not required. Yes, it seems like they are counting on just the shear strength of the nails through the rim and into the joists.
That art text was changed in the 2018 IRC to note that "Joist hanger required at ends of all floor joists within the header span." So as I recommended in the article - we should be using joist hangers. The code caught up with good practices in this case.