
Installing Replacement Windows
Measure, insulate, and caulk. Do it right, and cut your energy bill by 25%.
Synopsis: Replacing the windows in your house can be a daunting prospect, but if the new windows are installed properly, you could save a chunk of money on your heating and cooling bills. Builder and remodeling contractor Mike Guertin offers his advice on the best way to install new windows, emphasizing the importance of properly measuring the opening so that the new window will fit properly. He then outlines the procedure for removing the old window, insulating and caulking, and then installing the new window.
Windows wear out before a house does. Sometimes the need for replacement windows is obvious, like when you encounter poorly functioning single-pane sashes with weights. But even windows with insulated glass become difficult to operate, suffer from damaged seals, or show signs of deterioration. The good news is that replacement windows do away with these problems, offering improved appearance, easier operation, and greater levels of energy efficiency. A whole-house window replacement can cut heating and cooling costs by as much as 25%.
Full-service replacement-window fabricators measure, make, and install new windows, On my first job, I asked a local company’s sales rep to show me the measurement and installation process. I learned that replacement windows are easy to order and fast to install. I also discovered that I could save money by installing the windows myself.
Evaluate existing windows
The installation in this article took place in a modest Cape Cod-style house that still had its original single-glazed, sash-weighted windows — a perfect candidate for replacement windows. I chose frame-and-sash replacement windows (also known as pocket windows) because the house’s window jambs, sills, and trim were solid, and its siding was in good condition. Had the window frames been rotted or the siding in need of replacement, I would have had to install new-construction windows using the old rough openings. Also, the budget didn’t allow for the extra labor to tackle full window replacement, which would have required the siding to be stripped back, and the interior and exterior trim to be removed and then reinstalled or replaced.
Finally, I didn’t want to disturb the homeowners. Pocket windows are quick to install and create little mess inside or outside. On average, working alone, I can install one in less than 30 minutes. So I’d be in the house for only a day with no major mess to clean up.
Choosing the right windows is challenging
In my area, I can order from more than a dozen replacement-window fabricators. Some manufacturers are national, some are regional, and a couple of the local fabricators have shops near where I work.
I advise shopping around, but be certain you’re comparing equal products and services. Some companies’ standard features are options that cost more from other fabricators. Frame-material thickness and extrusion designs can differ. Bargain windows could have lower-quality frames that require more time to shim and brace adequately for proper operation.
If I have a choice, I use high-quality vinyl windows made locally. Although they might not be a popular name brand my clients recognize, the warranty is good (20 years), and the price is reasonable. To reduce order errors, I purchase direct from the fabricator rather than through a dealer. A sales rep can help to measure orders and handle service issues. The windows cost a little more than those available through a national retailer, but there are few, if any, callbacks for operation, glass, or performance problems. If problems arise, I have someone local to call.
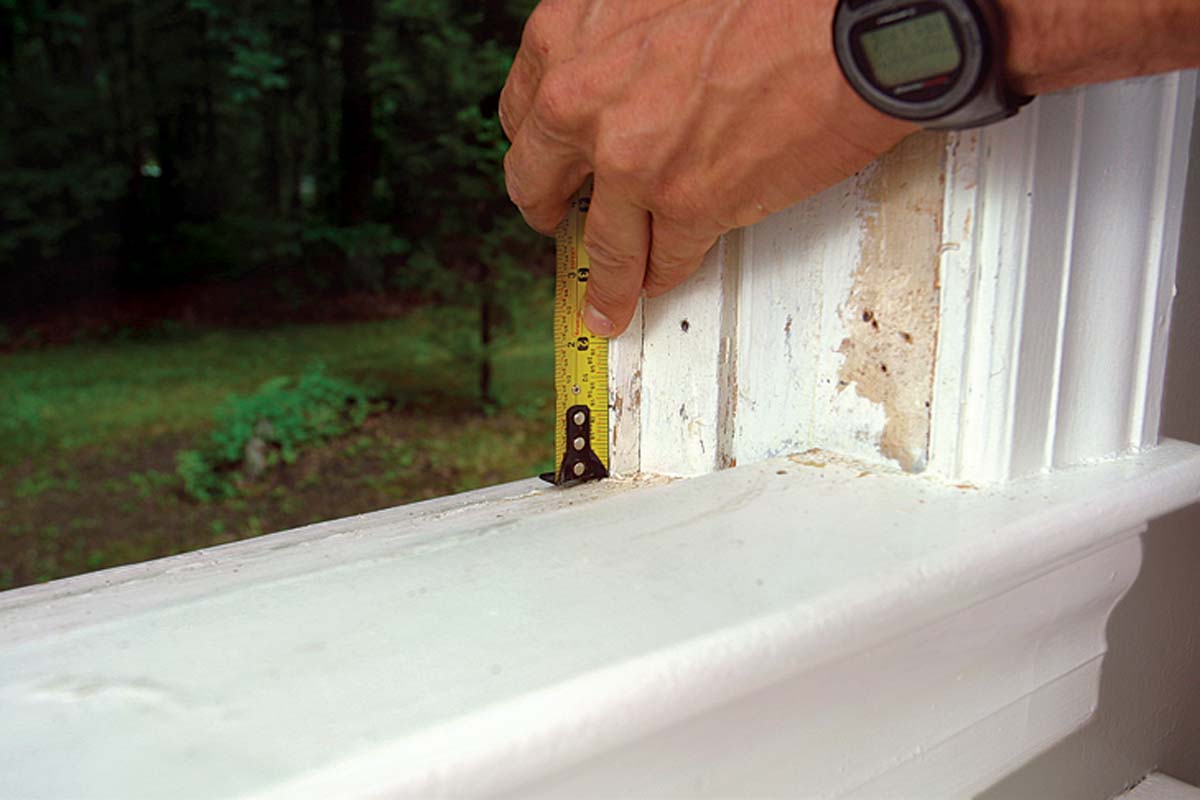
Accurate measurements are critical
I always take measurements myself, and if the sales rep comes out to help, I check that person’s work. Even though I do a little more work, I know that the information is right. The last thing I want is to show up for work on the morning of a whole-house window replacement and find out that someone else messed up the order.
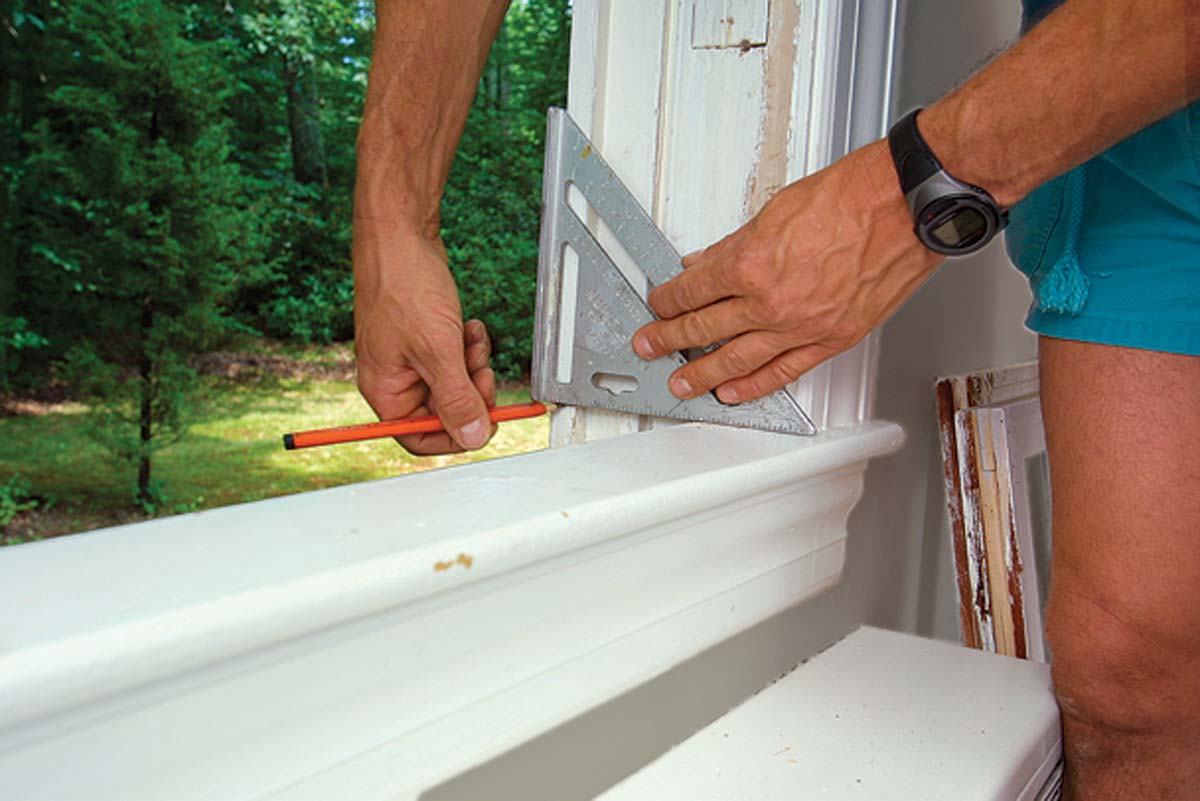
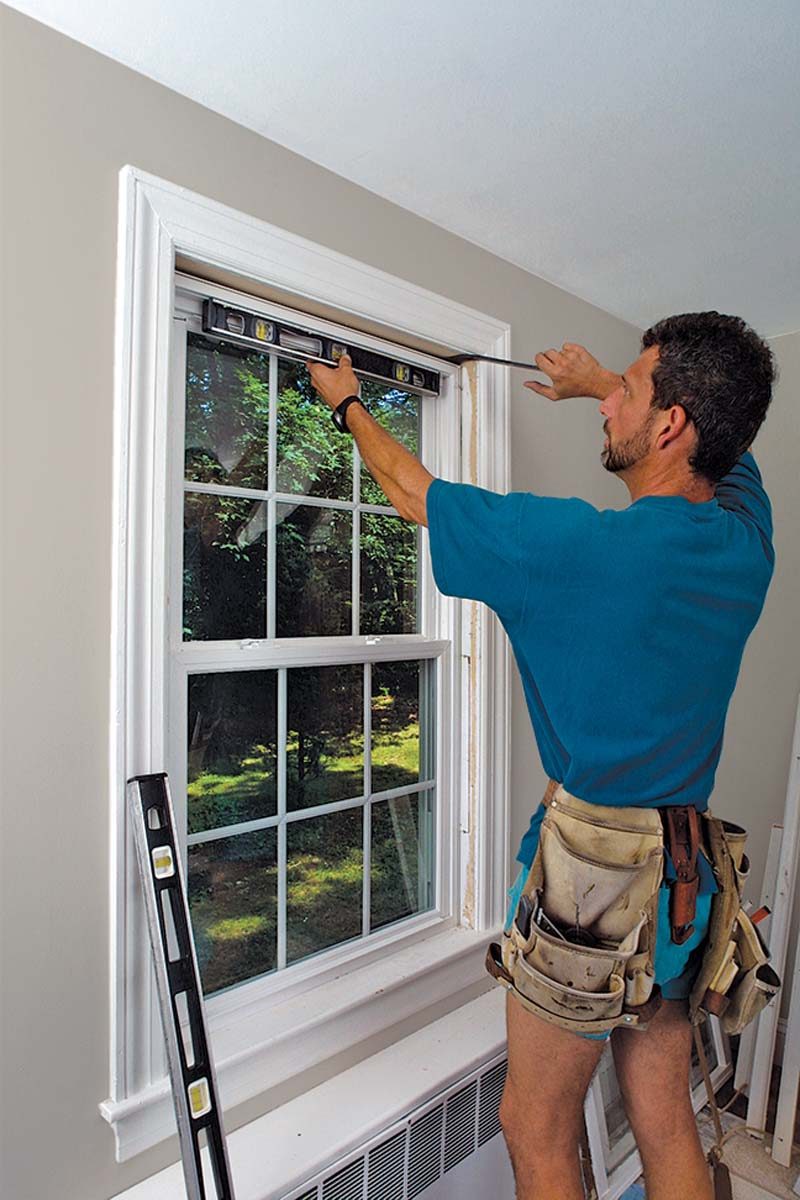
The most important thing about measuring is checking multiple spots: top, bottom, middle, and diagonally for square. The new window has to be sized for the shortest measurement (drawing p. 61). I use a systematic approach with my own order sheet to note dimensions and window location. Writing down measurements on a block of wood just doesn’t cut it. One wrong measurement, and you own a perfectly good window that doesn’t fit.
Know how the windows are sized
Replacement-window fabricators manufacture units on a 1⁄4-in. basis, a 1⁄2-in. basis, or a combination of the two. This guideline forces you to order a unit smaller than anticipated when a dimension falls on a 1⁄8-in. increment, but undersizing a window is better than having it too tight. Window height is more forgiving than width due to the sill and head expanders, which is why many fabricators offer 1⁄4-in. width sizing and only 1⁄2-in. height sizing. If I have to make a choice of leaving only 1⁄8 in. of wiggle room or having 5⁄8 in. to play with, I’ll take the bigger measurement.
Some window fabricators take orders based on opening measurements, and they make the
deductions to actual unit size from information you supply. I never order this way because it does not account for out-of-square conditions. Make your own deductions from the measured opening, and order the actual window size (sometimes called tip-to-tip size).
Guarantee a smooth installation
First, I keep my starting location flexible to accommodate the homeowner’s schedule. Wherever I start, I move the furniture out of the way for clear access to the window, and I cover the floor with a drop cloth to collect paint chips and debris. I always bring a vacuum and a dust brush to clean out the windowsill and to clean up the floor when I’m done working.
Remove The Old Window And Prep The Opening
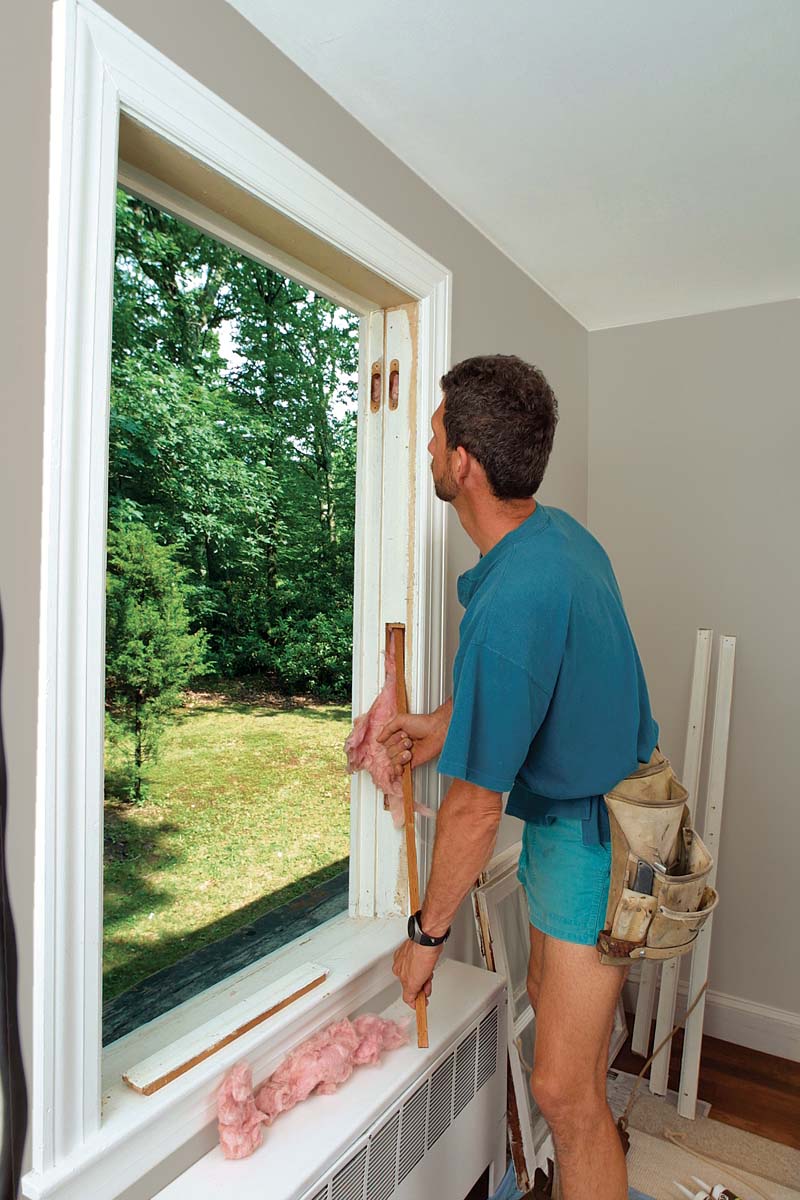
Once I’ve checked to make sure the windows I ordered fit in the opening, I lay down a drop cloth to catch paint chips, which could contain lead. Stripping out old window sashes is easy, but I still work carefully because the windows can be fragile and the glass can break easily. I’d rather spend extra time in preparation than on cleanup.
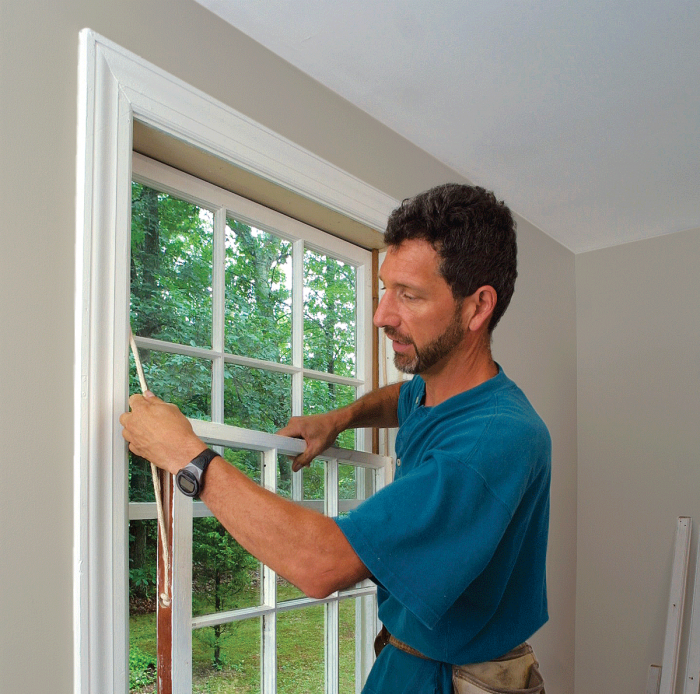
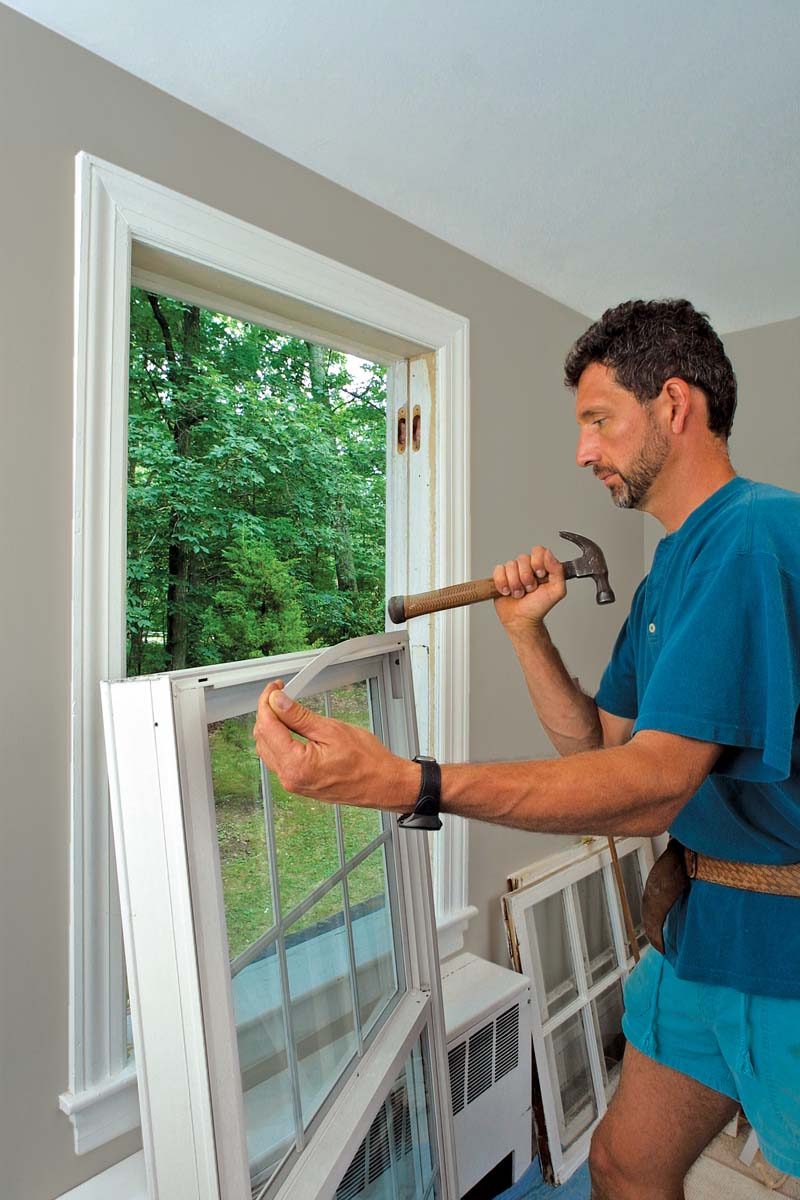
1.Remove sash stopsCut the paint at the jamb joint with a utility knife; then drive a stiff paint scraper into the joint to pry off the stops. Be careful not to damage anything because the sash stops will be reused. |
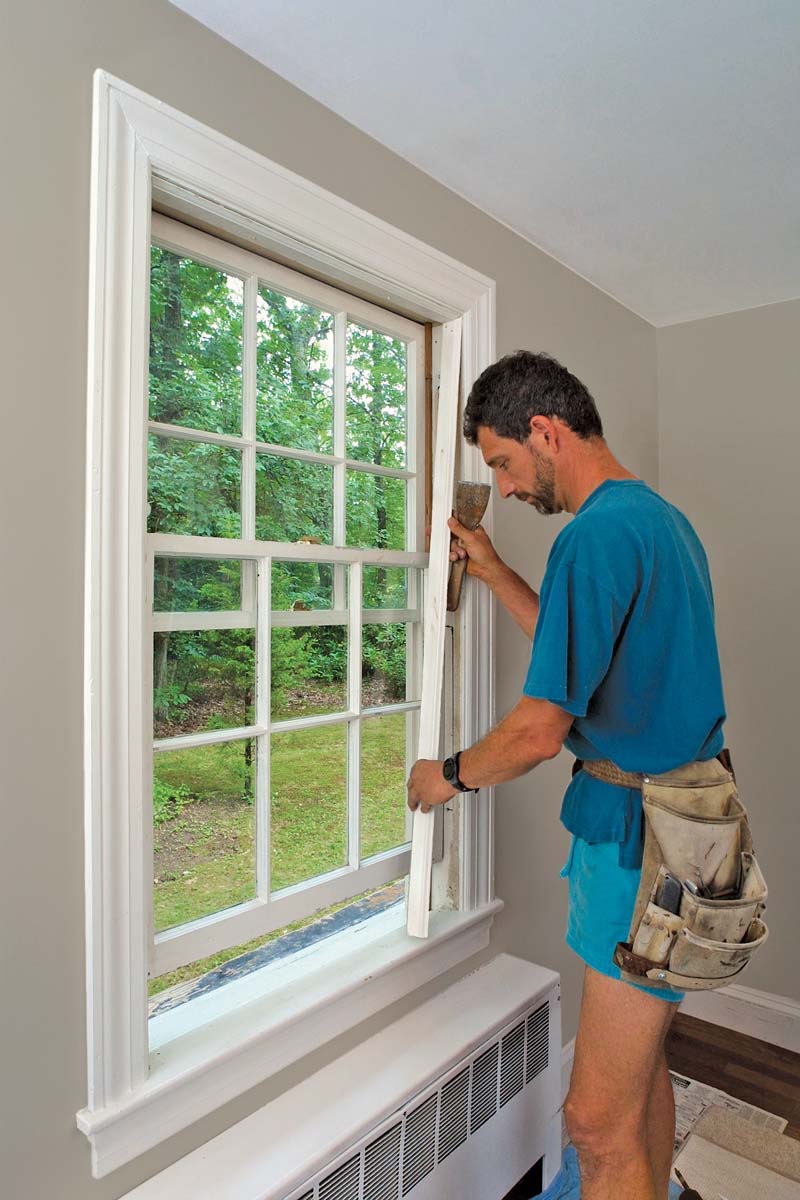
2.Carefully remove the sashesSwing the inside sash out of the window opening, and cut the counterweight cords to free the sash. Remove the small parting bead between the sashes, and take out the outer sash the same way. |
 |
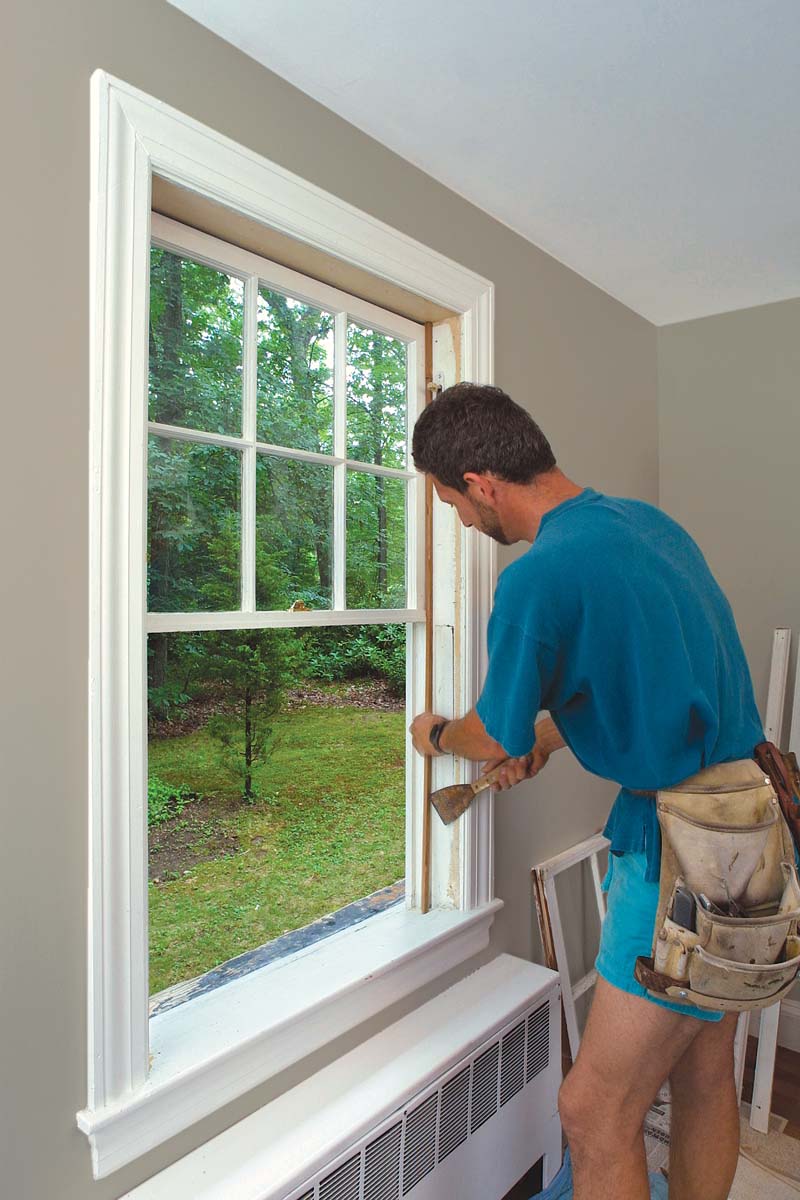 |
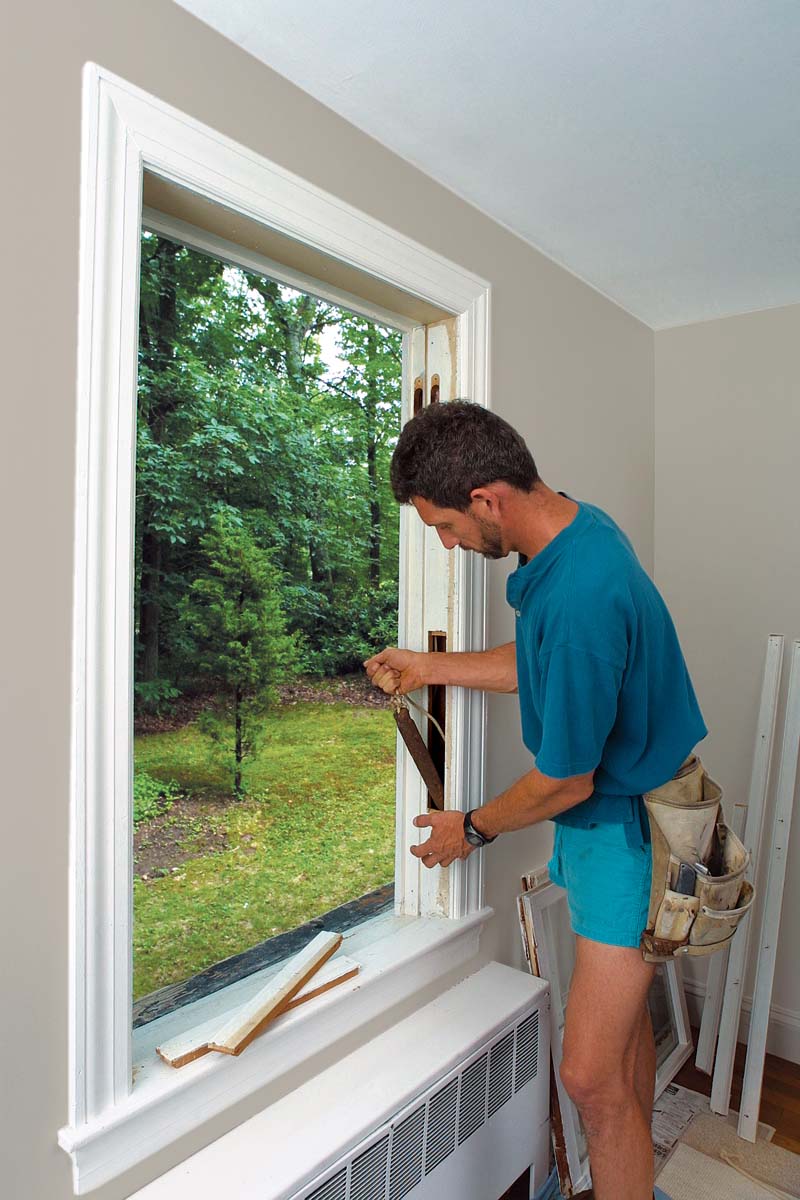
3.Remove the weightsOpen the counterweight doors to remove the weights and cords; then unscrew the pulleys and remove them. Some installation guides suggest hammering the old pulleys into the jamb, but I disagree. The pulley holes make good view spots when installing insulation. |
4.Insulate the cavityUse an old parting bead to slide strips of batt insulation into the cavity. Don’t overstuff the cavity, or you’ll reduce the insulation’s R-value. Replace the counterweight doors, and scrape loose paint from the jamb and stops. Prime any bare wood on the jamb and sill to protect it from rot. |
 |
 |
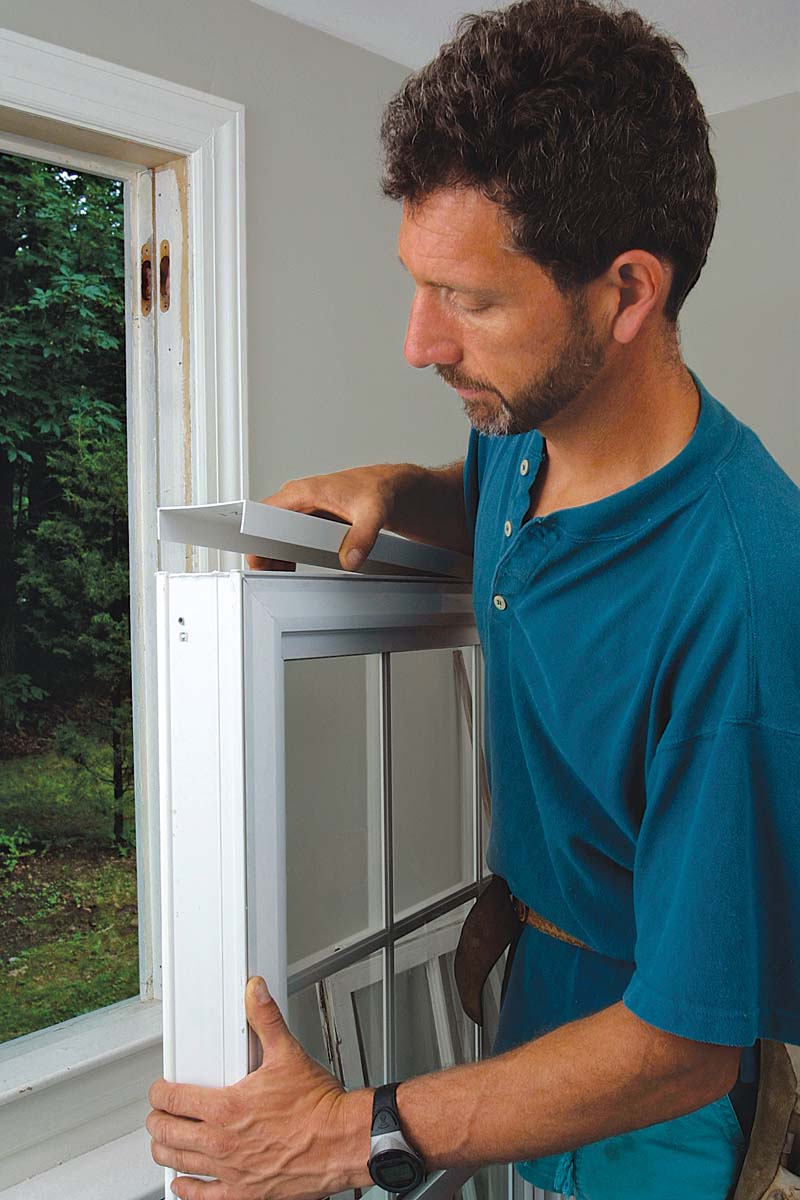
Install The New Window With Expanders, Shims, And Screws
1.Install the bottom sill expander
I use a Speed Square to make a level reference line so that I can measure how much the sill slopes. I then can use a utility knife to cut the bottom sill expander to fit snugly against the sill. Tap the expander into the window frame with the butt of a hammer handle.
 |
 |
2.Install the head expander
If the replacement window doesn’t overlap the head stop, you need to add the head expander that fits over the top of the window and fill the airspace with low expanding foam or fiberglass insulation.
 |
 |
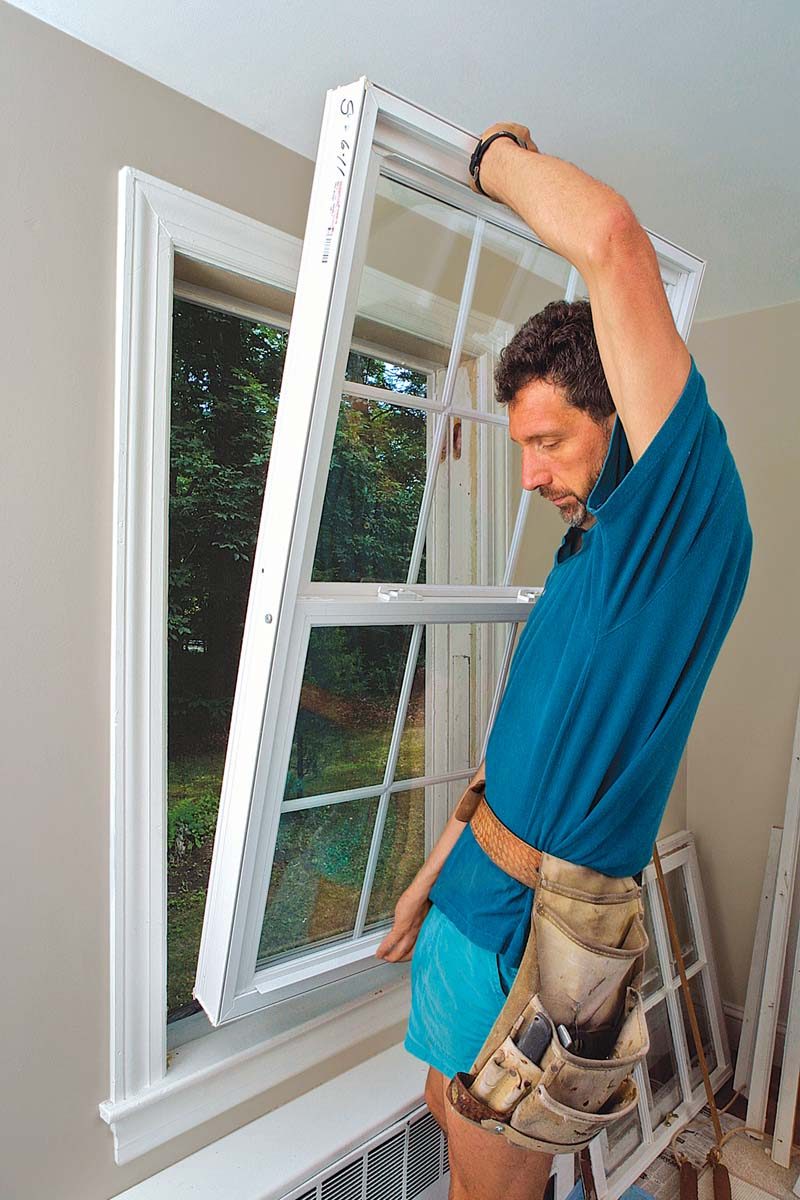
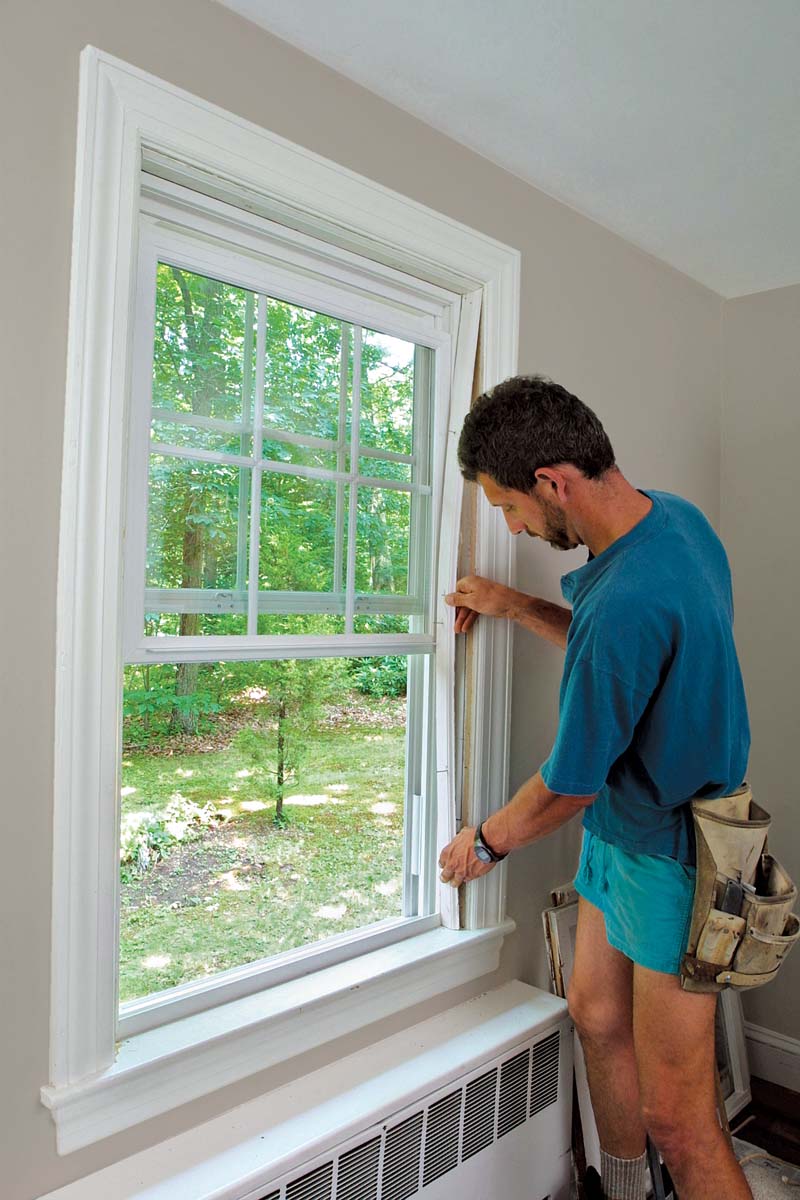
3.Insert and center the window
Drive two mounting screws partway through the window frame and into the jambs to keep the window in place. Then use a small pry bar to get the frame centered, level, and plumb.
 |
 |
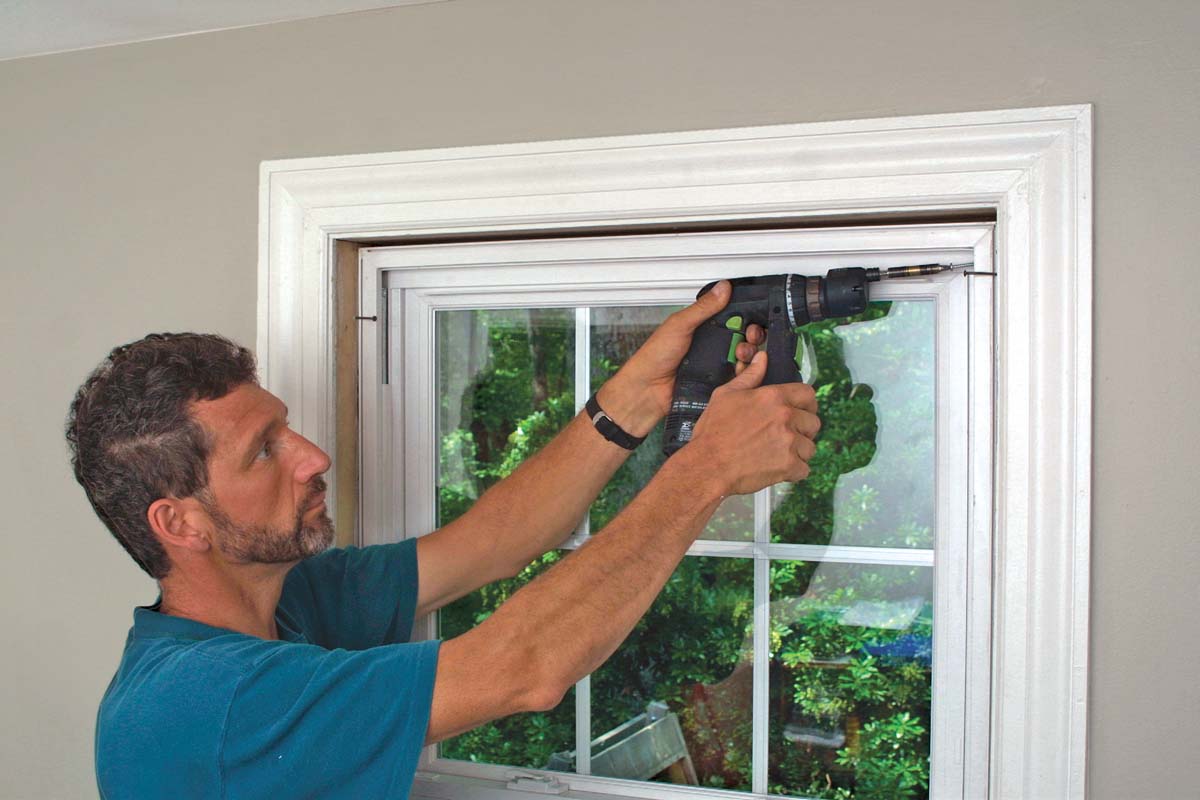
4.Secure the window
Insert shims between the window and the jamb as backing for mounting screws. Drive mounting screws in all the pilot holes. Sometimes these holes are concealed by sash stops or balance guards that can be slid out of the way or removed.
 |
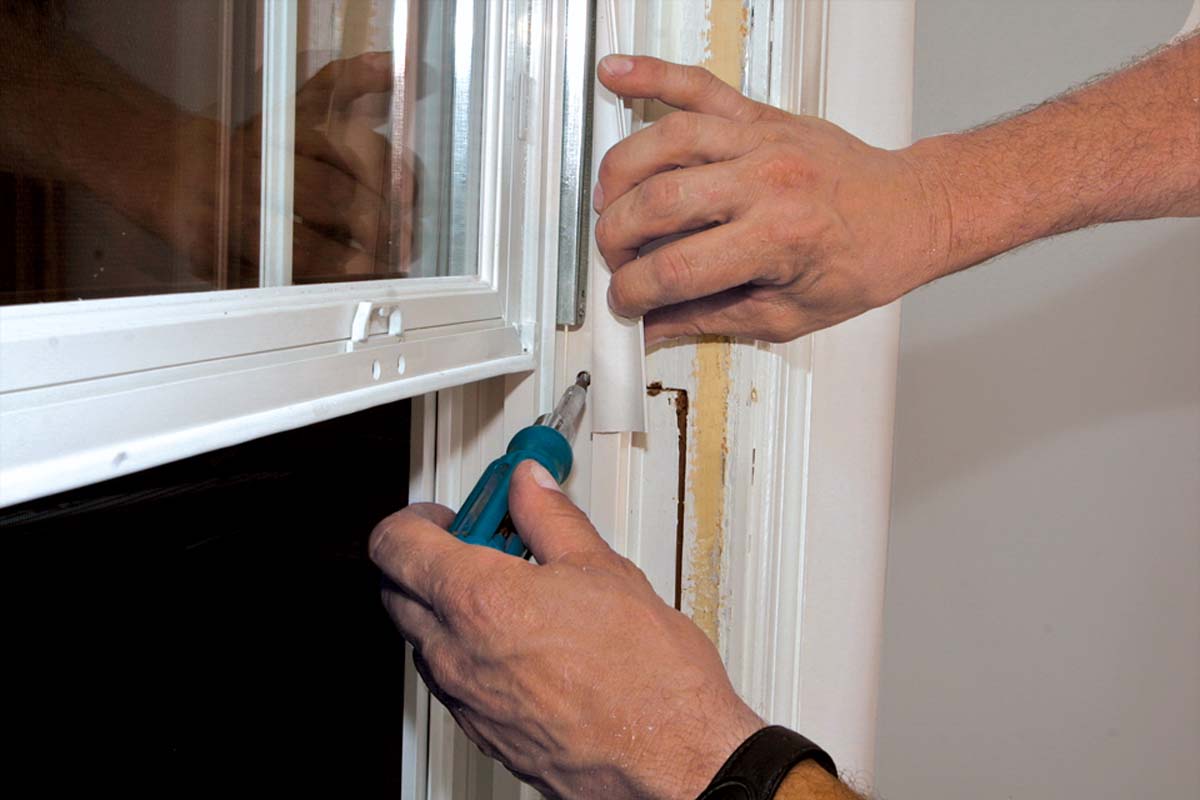 |
5.Replace the sash stopsThe payoff for removing the old stops carefully is that they can be reused to finish the new window. Before installing the stops, I fill gaps between the window and the jamb with low-expanding foam, part of the weathersealing process (sidebar facing page). |
 |
Replacement Windows Offer All The Features Of New Construction
The same manufacturers that make windows for new construction also make replacement windows. In addition to the factors listed below, you’ll need to consider cost and warranty details.
Style: Double-hung, single-hung, casement, awning, and other window styles are available.
Glass: Choose between different types of insulated glass, including glass with heat-reflective coatings and gas-filled glass. You also can order windows with snap-in grilles or true divided lites.
Material: The type of material used in the window determines its price, its durability, and its appearance. Here’s a quick tour:
Vinyl
- Usually less expensive than other types
- Durable, low maintenance
- Limited color choice
Wood
- Requires painting
- Compatible with historic houses
Fiberglass
- Stronger than vinyl and just as durable
- Available with wood interior surfaces
- Low maintenance
- Usually more expensive than other types
Aluminum-clad
- Durable exterior, wood interior
- Many colors available
- Aluminum can be painted
More info
Fine Homebuilding’s article “Get the Right Replacement Windows” (FHB #166, pp. 52-57) contains lots of helpful information about the factors to consider when buying windows. You’ll also find detailed information at the following Web sites:
www.nfrc.org
www.efficientwindows.org
www.eere.energy.gov/consumer
For more photos, illustrations, and details, click the View PDF button below:
