
Building Big Doors, On Site
When a custom-size door is needed, try this simple technique for a frame-and-panel look.
Synopsis: Carpenter Gary Striegler describes his method for building custom-size frame-and-panel doors. He uses poplar for the stiles and rails and plywood for the panels. Through a series of photographs, he outlines the process of building the doors: getting straight edges from the stock; gluing up the bottom rail; fitting and laying out the joinery; cutting the grooves, mortises, and panels; and the final glue up.
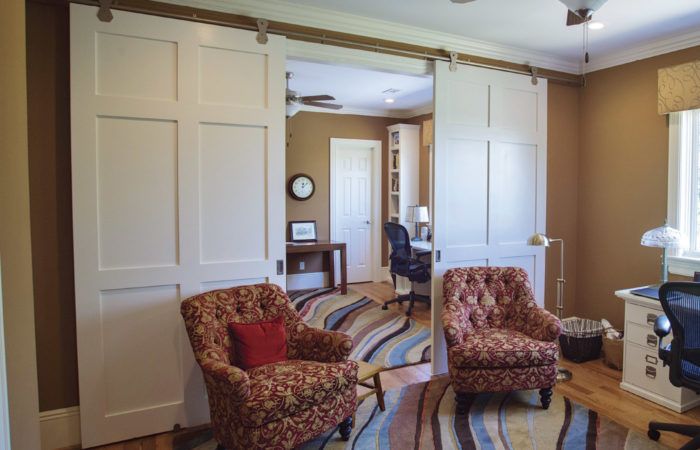
Recently, one of our clients decided to open up the wall between two rooms in their new house with a large cased opening. The rooms were both intended to be used primarily as home offices, so the couple liked the idea that they could be open to each other most of the time. When needed, though, the rooms would double as guest bedrooms. Since overnight guests wouldn’t be as excited about an open floor plan, we had to come up with a good-looking option to separate the spaces. A large set of sliding doors was the perfect solution.
A sliding door must be at least 2 in. wider than the jamb opening. For example, a 30-in. door opening needs a minimum 2-ft. 8-in.-wide door. Often our clients want the door to be wide enough to still cover the casing when it is closed, which means the door must be even wider. Depending on the type of hardware I’m using and the particular trim details, the door may need to be a custom height, too. Whenever custom-sized doors are needed, I have to make a decision: Buy them or build them?
Pretty early in my career, I figured out that I could build a custom door by gluing two 3⁄4-in.-thick frames back-to-back (see FHB #145, “A Different Approach to Frame-and-Panel Doors”). I still build some doors that way, but it’s labor intensive and takes a huge pile of clamps to glue up the frames. As the popularity of sliding doors—and the need for custom sizes—grew, I decided to see if I could build the doors from solid lumber and still offer a better price than the cost of ordering a custom door. The answer is job-specific and depends on the size and style of the doors, and if they are paint or stain grade.
We wanted these doors to complement the paint-grade frame-and-panel-doors we had ordered for the rest of the house, so I got a schematic drawing from my salesman and laid out the doors on a story pole to generate a cut list. I priced 6/4 (1-1⁄2-in.-thick) poplar for the stiles and rails. The material was available in random-width and random-length boards, so I assumed about 20% waste. I added to my costs a single sheet of 1⁄2-in. plywood (with two good faces) to make the panels for each door. It turned out that even with my labor included, it was more cost effective for me to build the doors on site.
Dimensions In Detail
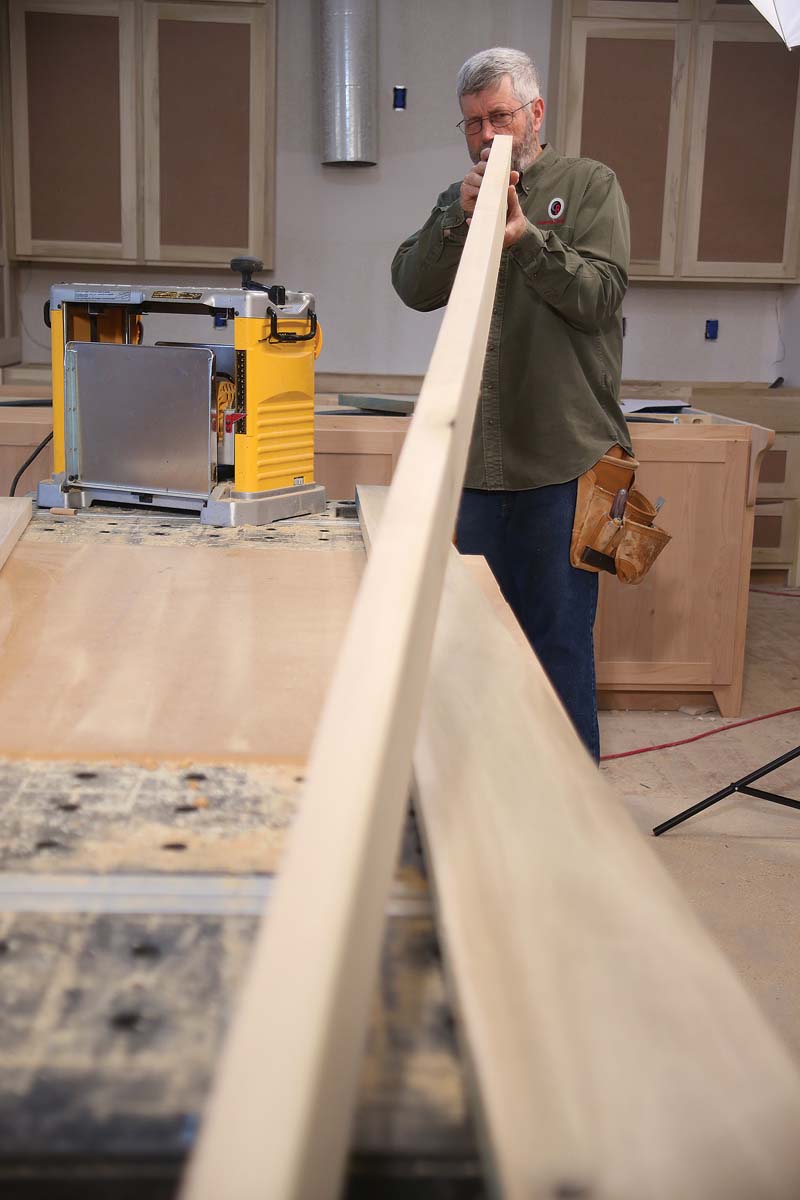
As soon as the lumber was delivered to the job site, I spent about an hour sorting through it. Since the finished doors would be 1-3⁄8 in. thick, I couldn’t afford to face-joint the boards to get rid of bows or twists. I could have started with 8/4 (2-in.-thick) poplar, but that would have blown my budget. Instead, I chose the straightest and flattest pieces to make the outermost door stiles, which run the full height of the door. The other boards became the shorter intermediate stiles and the rails. I also looked for some extrawide pieces to make the wide bottom rails, but ended up having to glue two pieces together to get the right width.
I’ve learned that frames go together better if all the material is precisely the same thickness. For these doors, my router and Domino cuts would be referenced off the faces of each board, so getting the thickness right was more critical than ever.
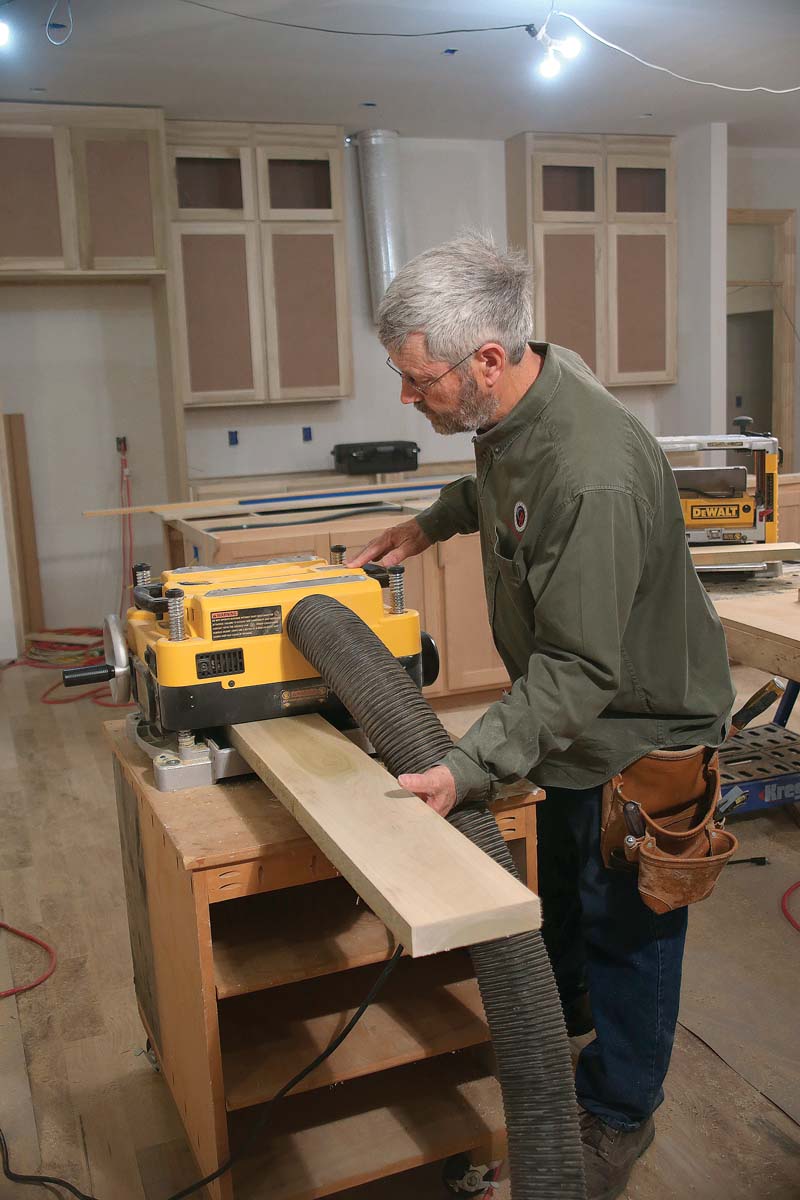
I rough-cut all the parts 4 in. longer than the finished length to account for planer snipe, flipped the knives in my planer to get the best possible cut, and then started feeding pieces through, taking 1⁄16 in. off the first pass. Then I raised the planer one full crank, flipped the material over, and fed everything through again to take off another 1⁄16 in. To ensure consistency, I kept a second planer set to the final thickness and didn’t change this setting until all the boards were cut to their final dimension. If you only have one planer, surface all of the boards first and then set the planer to the final thickness and run them all through to get consistent dimensions.
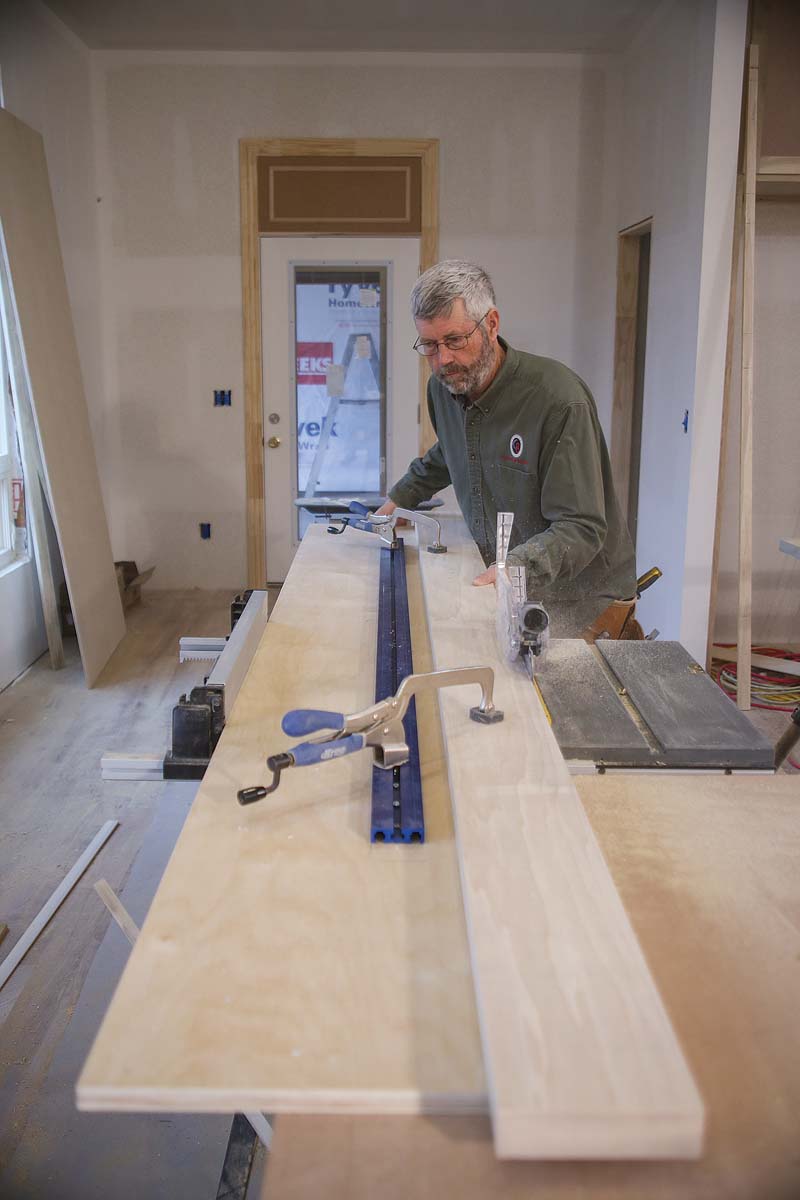
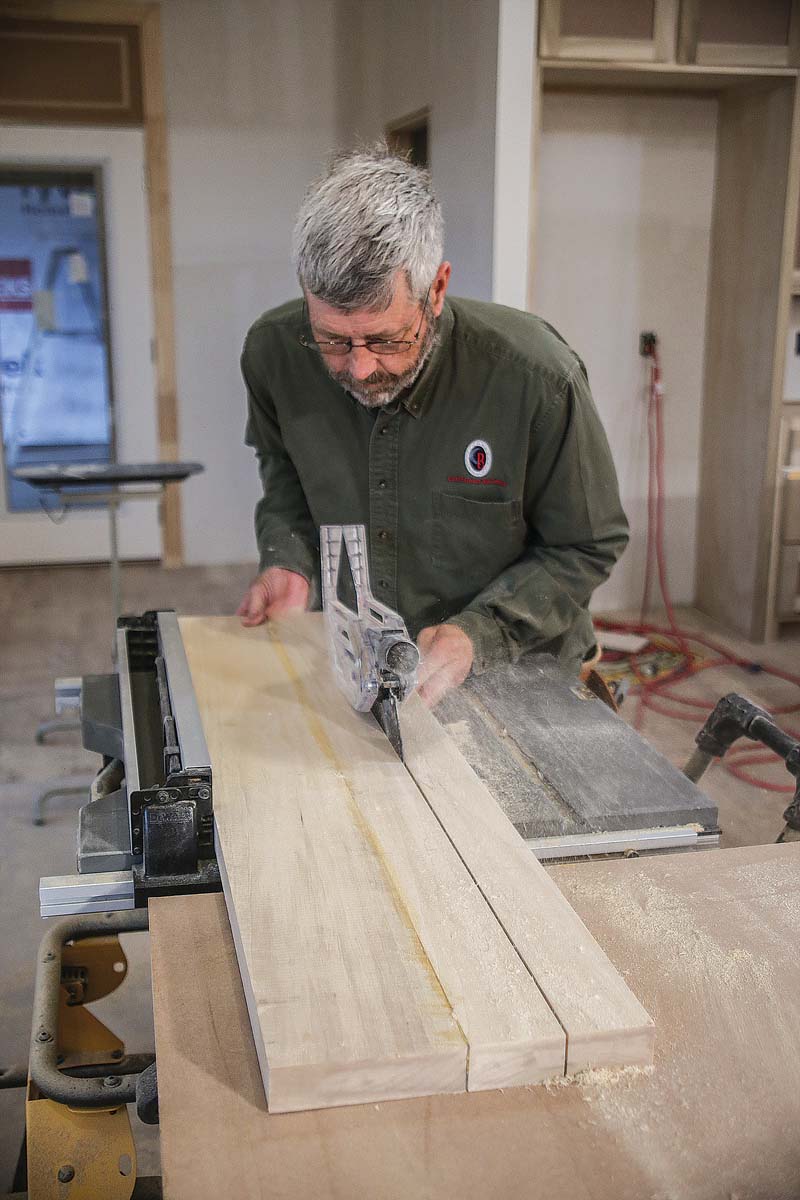
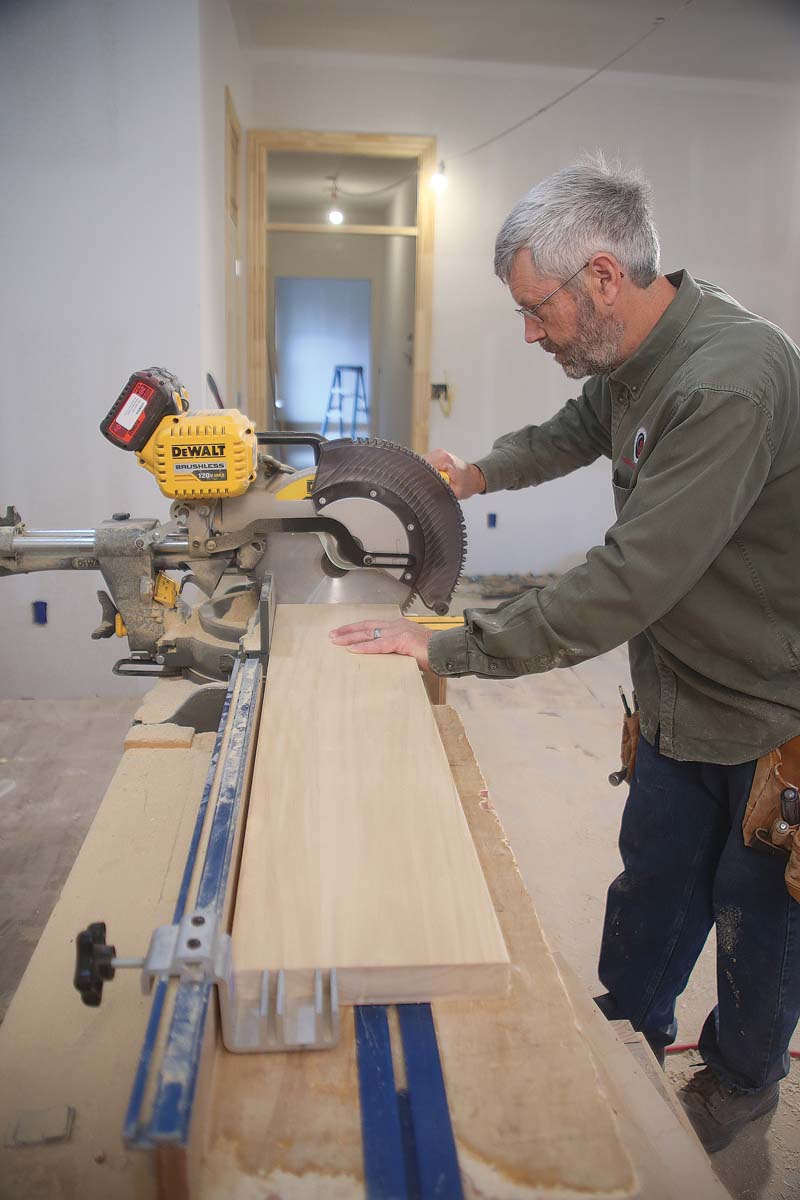
Next, I ripped the boards to within 1⁄8 in. of their final width on the tablesaw. Although I ordered the boards with one straight edge, a couple of them still seemed less than ideal for tight butt joints. I ran those boards though the tablesaw on a sled to create a straight edge. I used the planer again to get all the boards to their final width. Finally, I cut the boards to their final length on the miter saw, setting a stop for consistency when I needed more than one piece of the same length.
Getting In The Groove
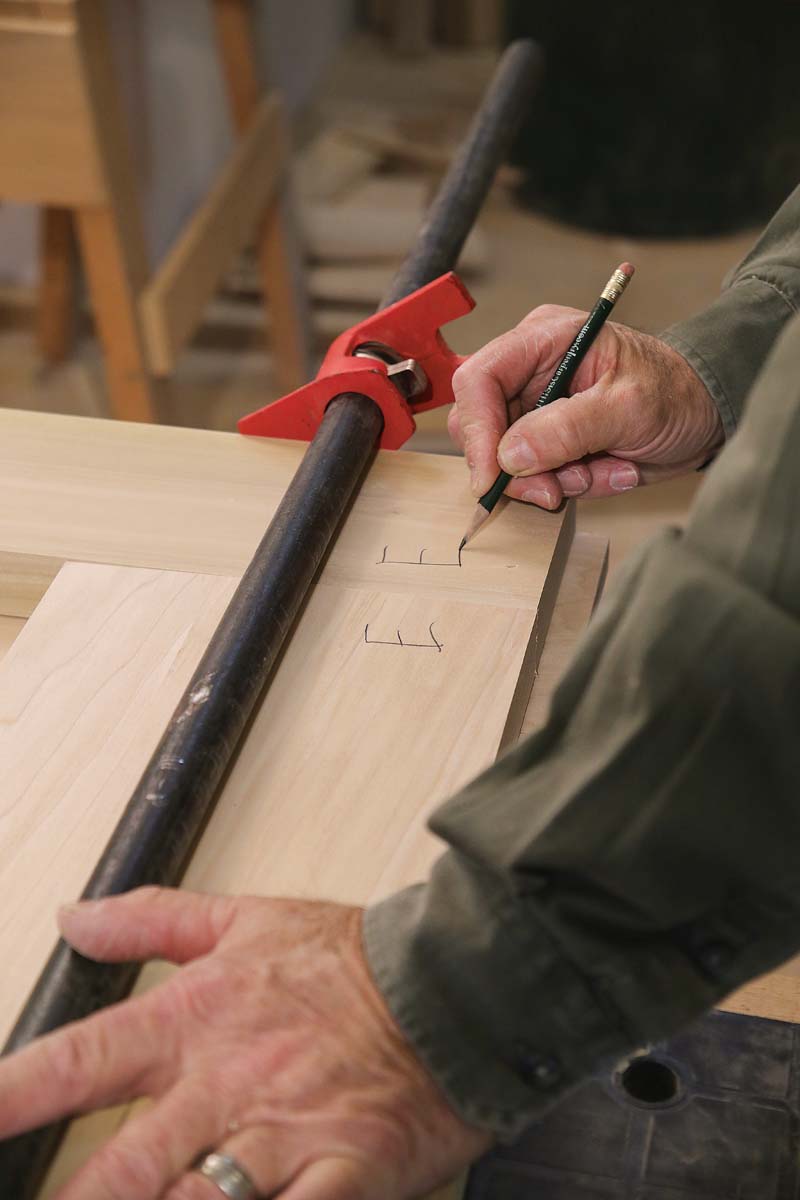
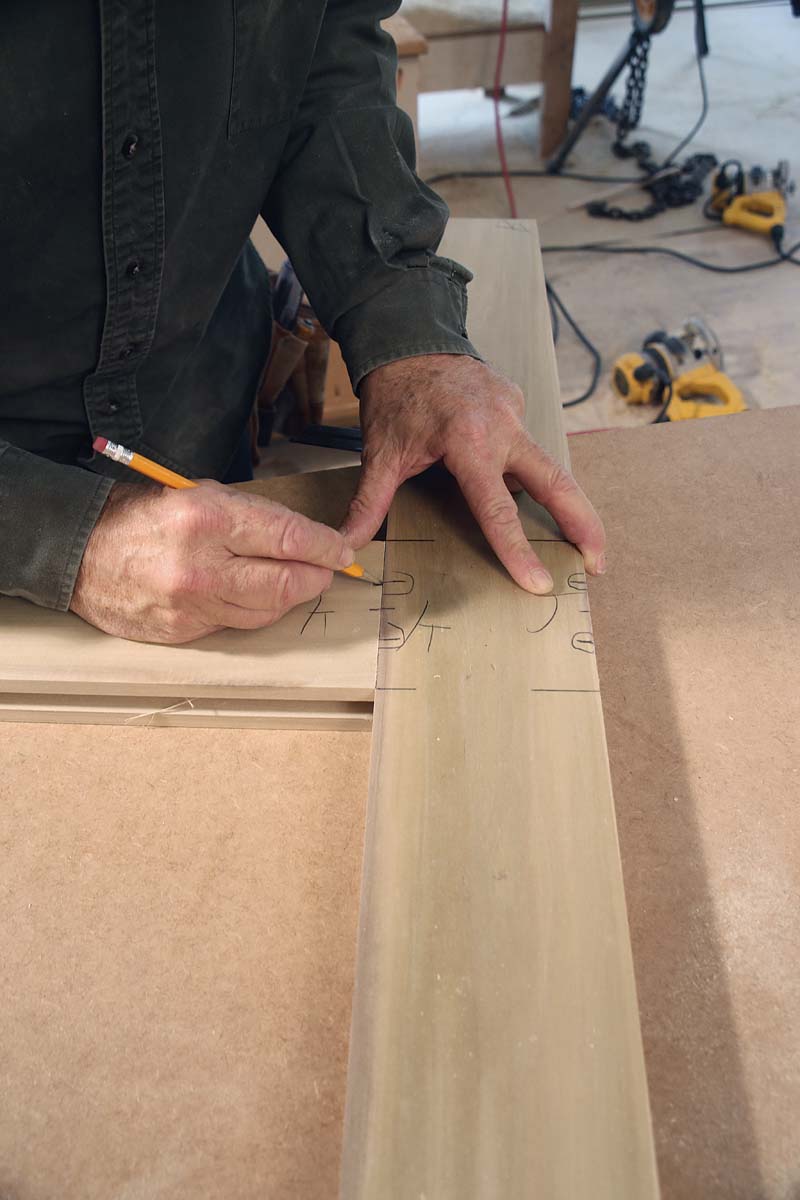
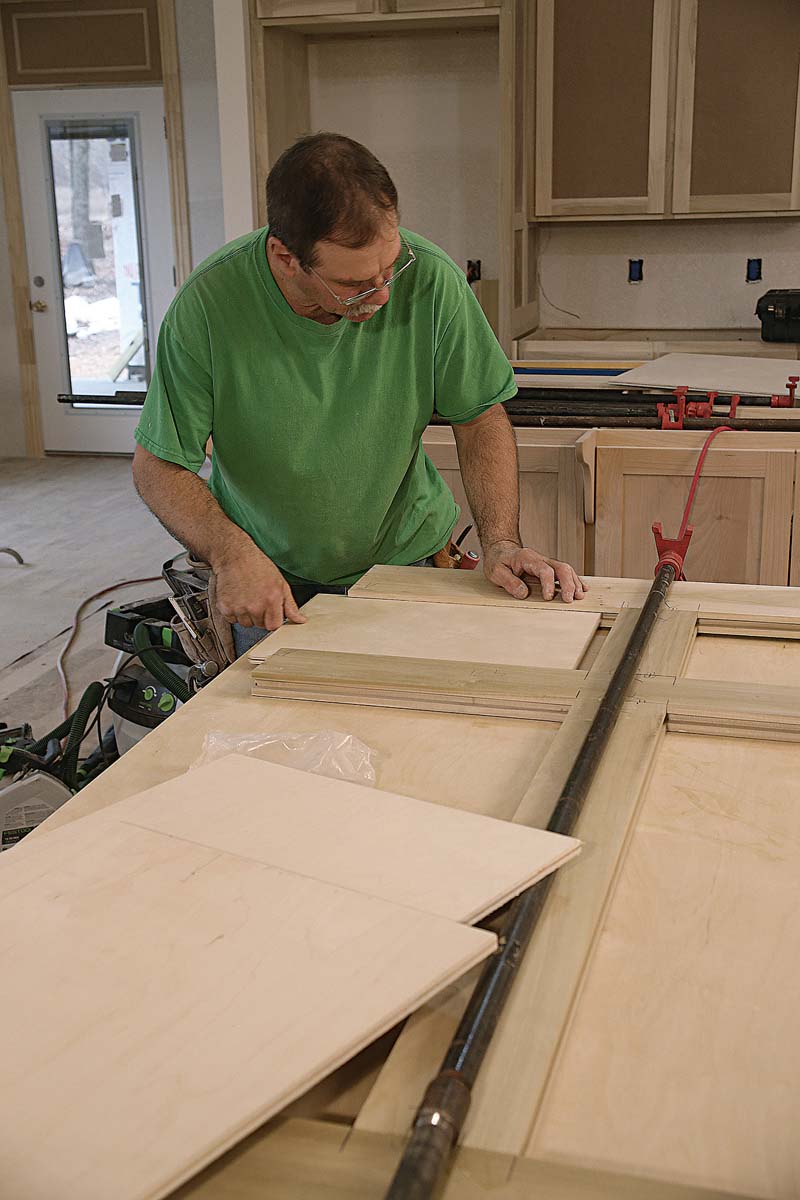
With all the lumber milled and cut to length, it was time to make the grooves for the door panels and cut the mortises for the Domino tenons. To get set up for this work, I laid the door parts out on a table and temporarily held everything together with a few clamps. I marked both pieces of each joint with a letter to make sure I would know how to put it all back together and then marked where the grooves needed to stop to leave enough space for the tenons. While I had the door parts temporarily assembled, I took measurements for the plywood panels, adding 3⁄4 in. to both the width and height.
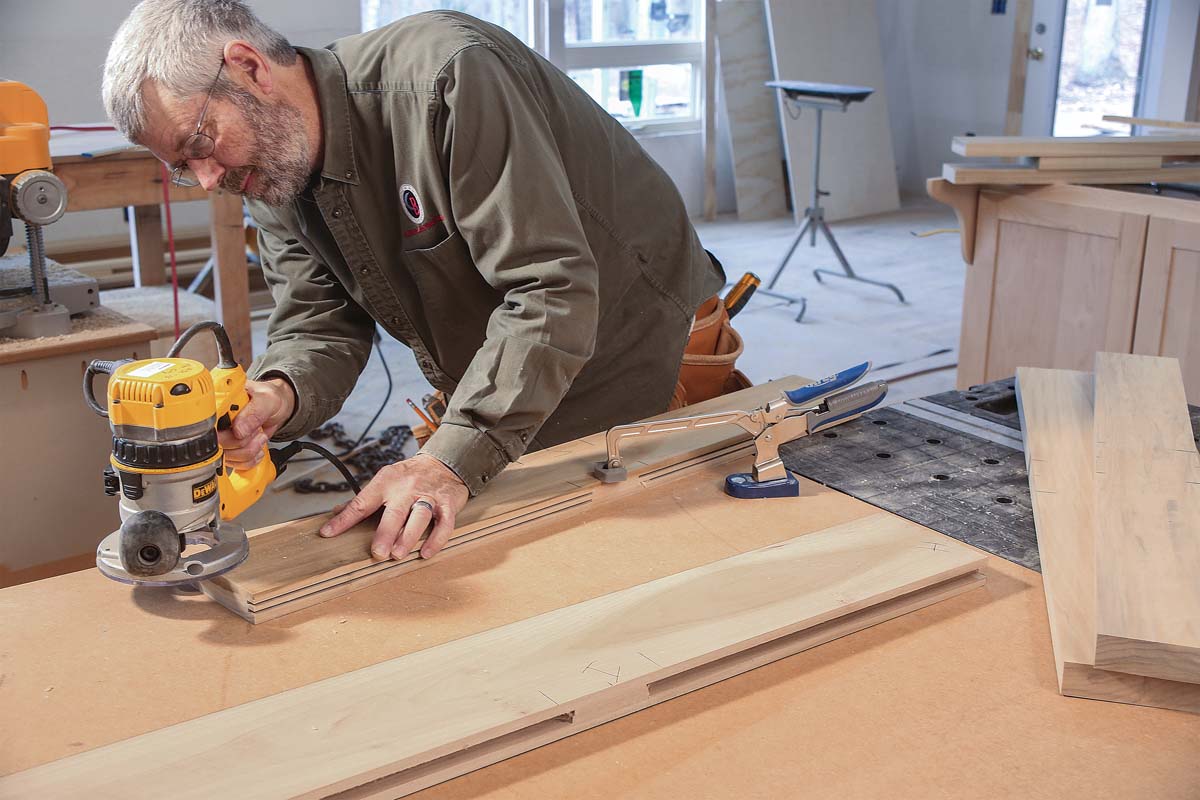
The best way I know to cut a clean, consistent groove in the edge of a board is with a slot-cutting bit in a router. The bearing guides the bit for uniform depth and the three-wing cutter leaves a clean edge. The plywood for these doors is a full 1⁄2 in. thick, so I needed to make grooves in all of the stiles and rails about 1⁄32 in. wider than that. This means that I needed to cut two grooves, one from each face of the board.
I made the router cuts freehand instead of setting up a router table. A freehand router will follow any slight humps or bows in the styles and rails, creating a near-perfectly centered groove. I made several test cuts on a scrap to check my setup and realized that with a 1⁄4-in. slot cutter, a pass from each face still leaves some material in the middle. I decided it was worth using a second cutter in another router to clean up the dado. Just in case I made a mistake and needed to remake a piece, I didn’t want to have to reset a router.
To have plenty of room for the tenons and lots of surface for glue, I didn’t want to extend the grooves much past each rail intersection. Stopping the cuts leaves a rounded corner in the groove. I could have squared this up with a chisel, but found it faster to clip the corners of each panel.
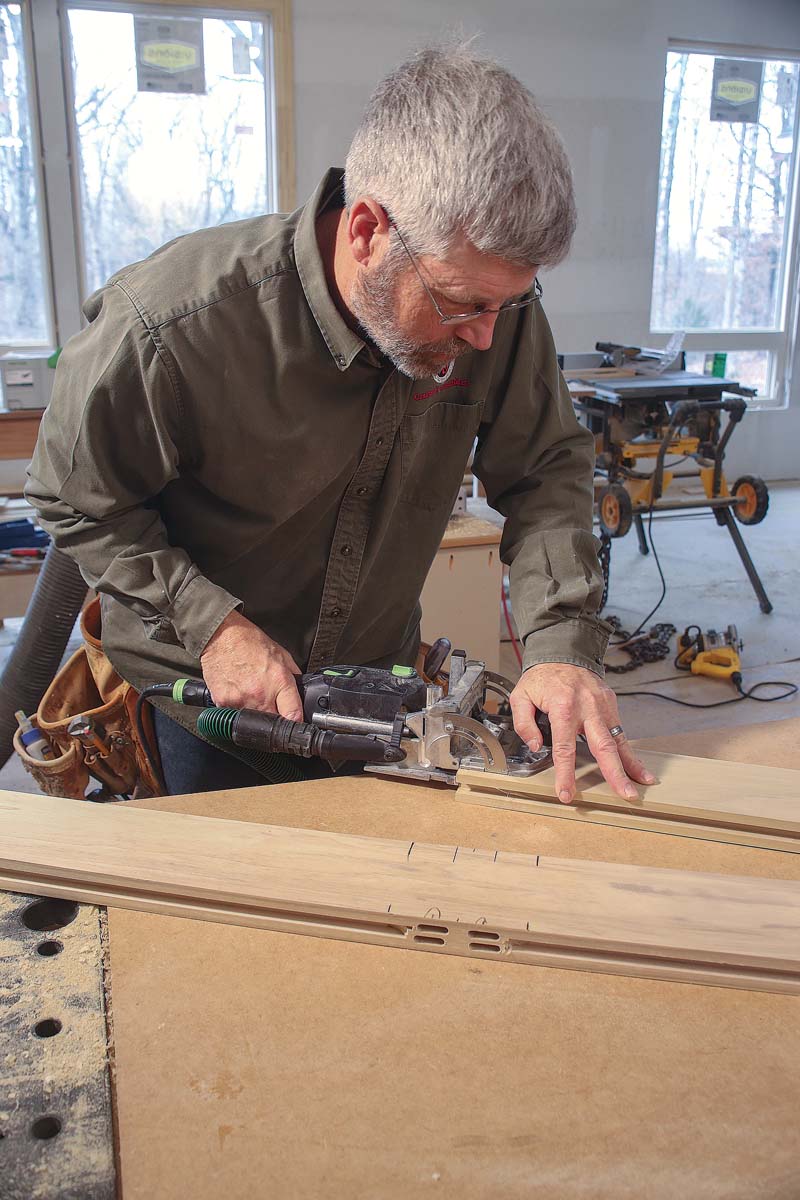
To make these big doors strong, I decided to put a double row of tenons at each joint. I set the mortise width adjustment on the tool a bit wider than the tenons, which left some wiggle room when it came time to glue up the door.
Be Prepared For The Glue Up
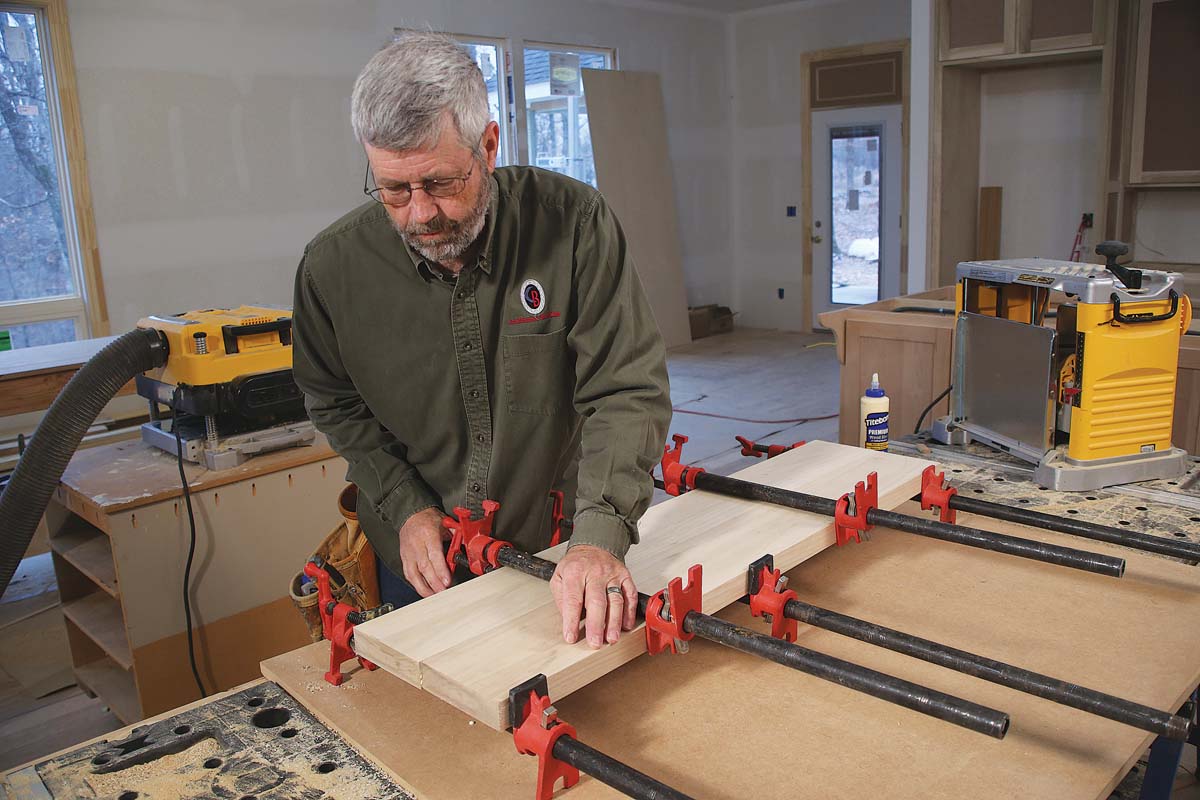
There are three rules I follow every time I glue up a door. First, I get a friend to help. An extra set of hands is a must. Second, I make sure that I have a flat surface ready on which to glue up the door; you don’t want to build a warped door. Last, I presand all of the panels; once they’re in the frame, there’ll be places you can’t get to.
It takes quite a bit of work to bring all the parts for a door like this together, so I glued and assembled everything on a table at a comfortable working height. Before finally tightening the clamps, however, I moved the door to the floor, which is dead flat. I usually check the door for square by pulling a tape from corner to corner and looking for a consistent measurement, but if the rails were cut precisely the same length, and square, the door just about has to be right.
I have found that it saves a lot of work later if I wipe up as much glue squeeze-out as possible right after the last clamp is tightened. Then I leave the door clamped up for at least half a day or overnight (make sure the temperature doesn’t get below freezing if you are working on an unheated job site).
In a perfect world, a little random-orbit sanding is all it takes to flatten the joints, but sometimes I use my belt sander to quickly take off more material. After all the joints were flattened out on these doors, I went over everything one more time with a random orbit sander and 100-grit paper. The doors will need a little touch-up sanding right before the painter shows up to finish them.
My clients are thrilled with the way these doors look and the flexibility they provide to their home office/guest bedroom. I have to think that there are many more doors to build in my future. Sliding doors are trending, but this method for building custom doors would work for swinging doors, too.
Get Straight Edges Without A Jointer
 |
 |
|
Sort the stack. Choose the straightest and flattest boards to use for the longest door parts—the outermost stiles. Cut the intermediate stiles and the rails from other boards. As you inspect each board, look for knots and other imperfections and keep them on the waste side of your cuts, if possible. |
Rip a straight edge. To put a straight edge on a board on the job site, make a long plywood sled, clamp the board on it, and run the sled against the tablesaw fence, making sure the blade is set accurately to 90°. Make all other rips with the new straightened board edge against the fence. |
Glue Up A Wide Bottom Rail
 |
 |
|
Glue it up. If you can’t find boards wide enough to make a wide bottom rail, cut a straight edge on two boards and glue them together. |
Rip the right width. Run the glued-up bottom rail through the tablesaw, set just a bit wider than the final width. Use a hand plane or a hand-held power planer to flatten the rail to its final dimension. |
Have A Strategy For Consistent Dimensions
 |
 |
|
Surface, then thickness. Run all of the rough-cut stiles and rails through the planer, taking 1⁄16 in. off of each face. After everything has been surfaced, set the planer to the final thickness and run each part through again. For consistency, don’t change the planer settings until everything has been cut to the final thickness. |
Use a stop. When cutting multiple parts to the same length on the miter saw, use a stop to ensure consistency. |
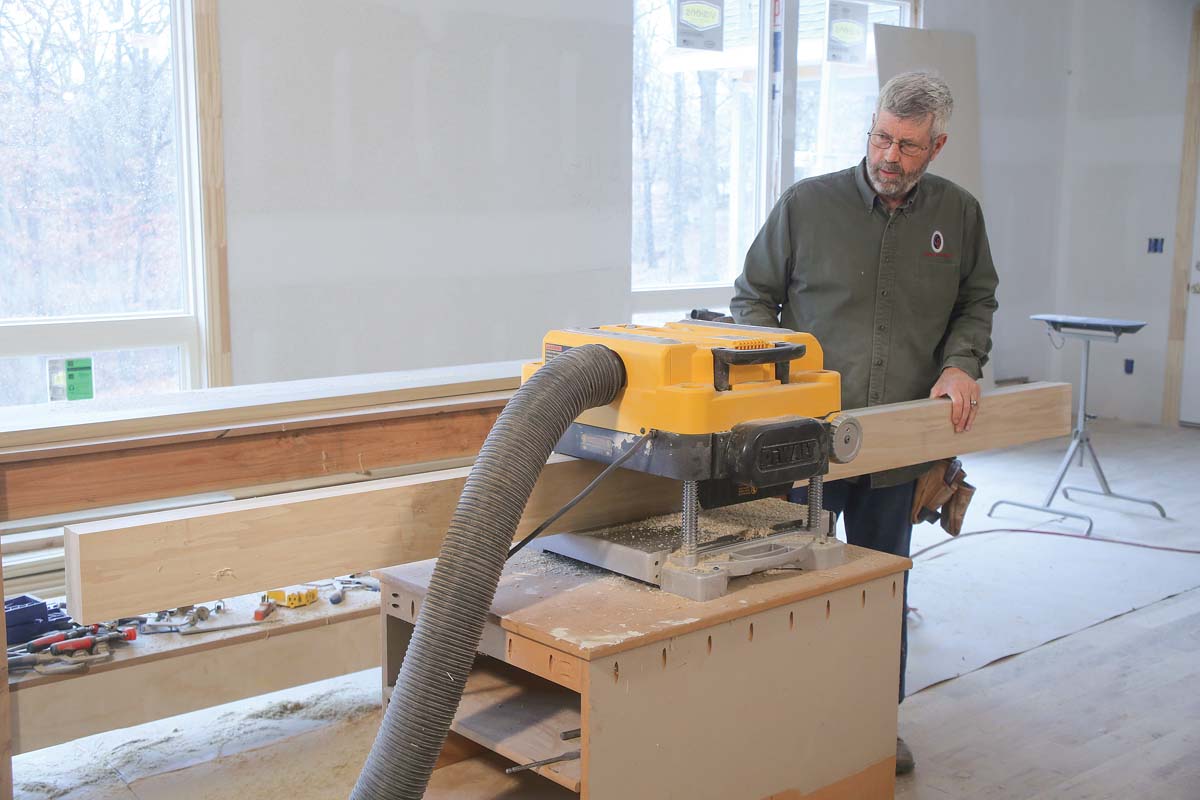 |
On edge. After ripping all of the stiles and rails about 1⁄8 in. wider than their final dimension on the tablesaw, send them through the planer to get them to their final width. Run them through in pairs to keep them square. |
Test The Fit And Lay Out The Joinery
 |
 |
|
Mock it up. With all of the frame parts ready to go, assemble the door on a table and temporarily clamp everything in place for a test fit. |
Label the joints. Once you have everything fitting well, letter both pieces of each butt joint to make sure that you reassemble the door the same way when it comes time for the final glue up. |
 |
 |
|
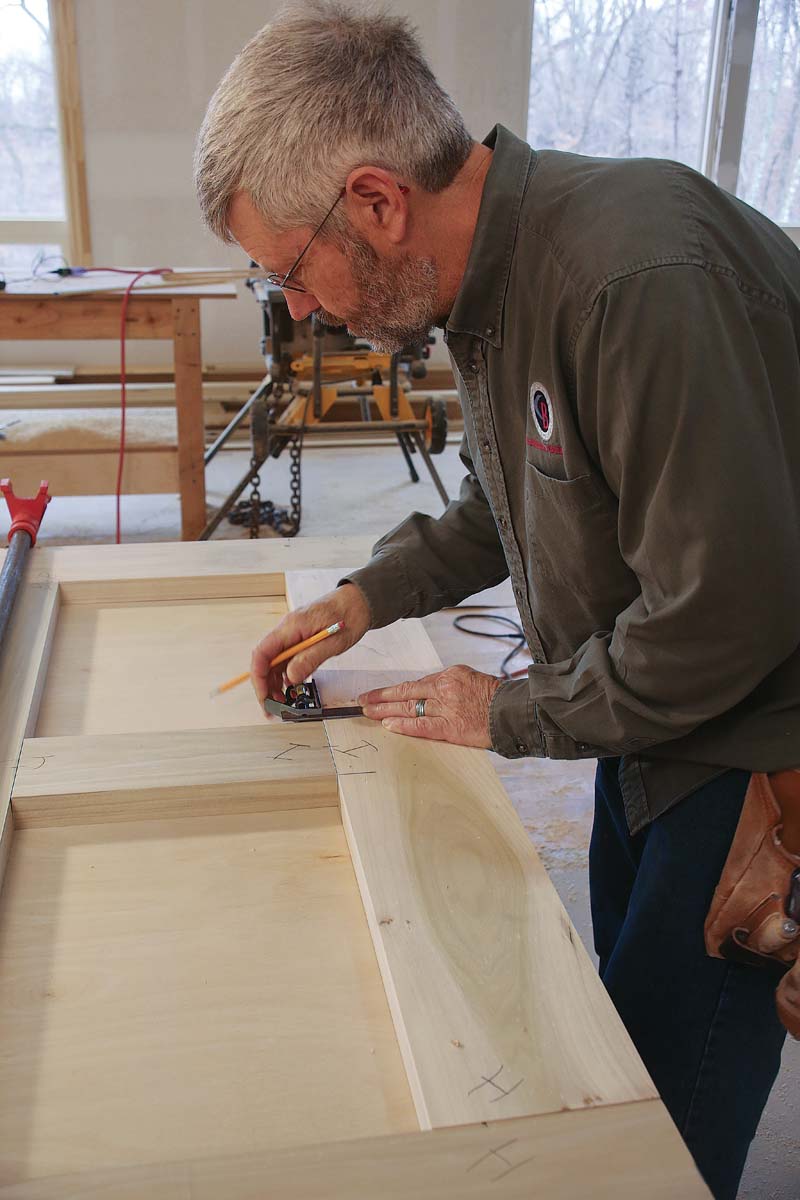
The groove stops here. Draw a square line where the stiles and rails intersect. This will tell you where to stop your router cuts when making the grooves for the door panels. |
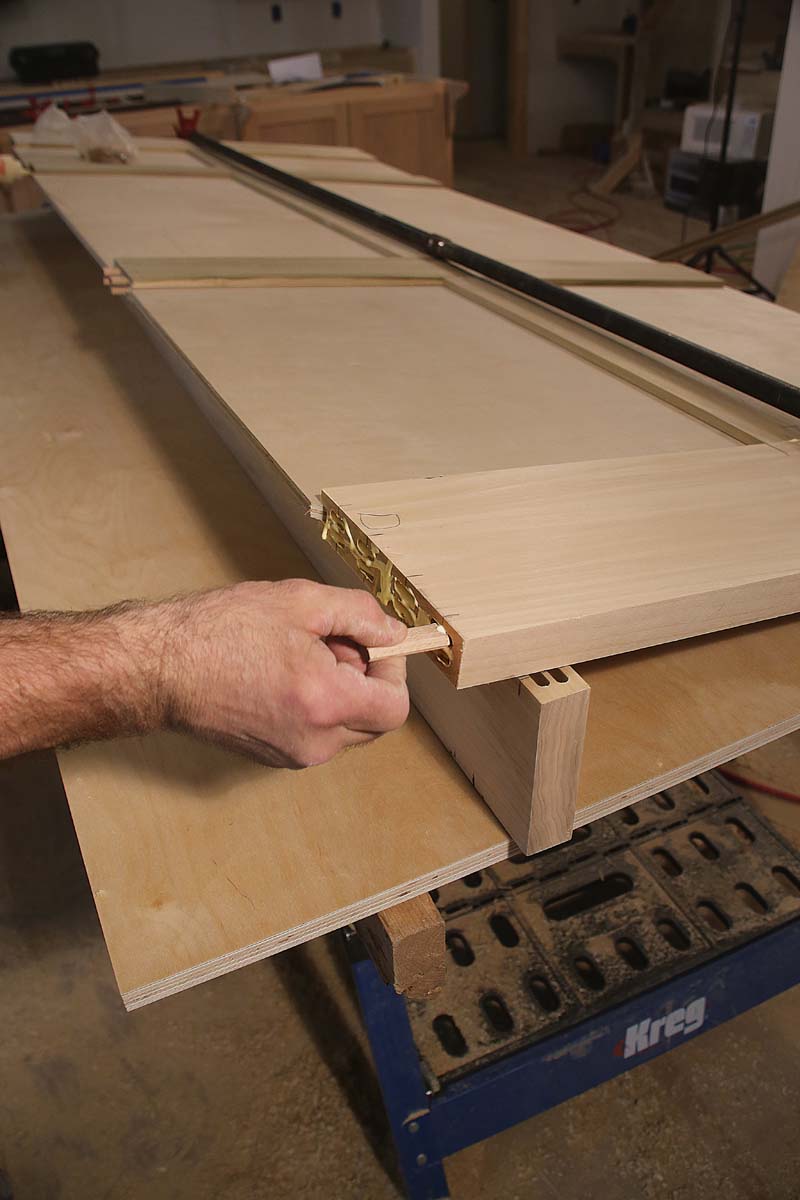
Draw in the joinery. Lay out the Domino locations by drawing a line that crosses each joint, from the stiles to the rails. Once you separate the parts, use a square to transfer all marks to the other side of each piece. |
Cut The Grooves, Mortises, And Panels
 |
 |
|
Three passes with the router. The panel grooves are made with a 1⁄4-in. slot-cutting bit in a router. You’ll need to make one pass from each side of the board and a final pass to remove the material left in the middle of the two cuts. |
Dominos for days. Cut mortises for four loose tenons in all of the joints except for the tall bottom rail. There, cut six. |
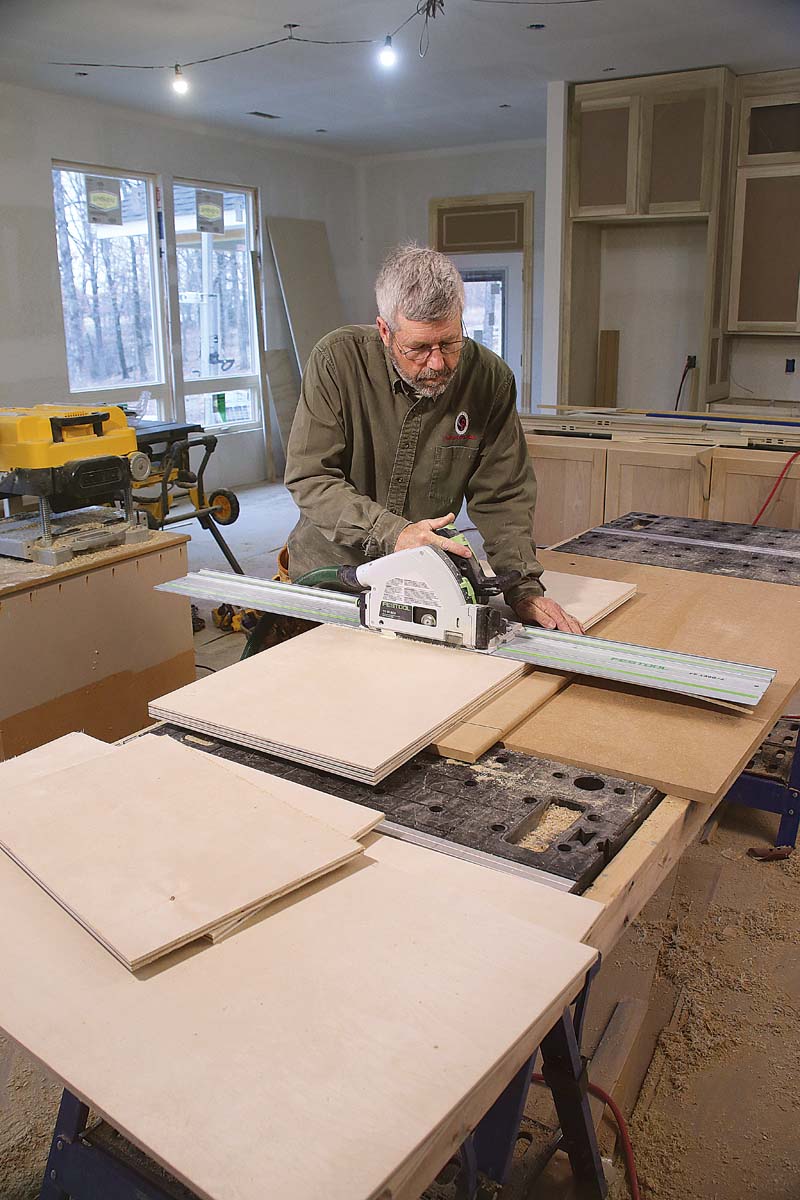 |
Perfect panels. A track saw makes quick work of breaking down the 1⁄2-in. plywood sheets used to make the door panels. Clip all four corners of each panel on the miter saw for an easy fit during glue up. |
Get Some Help For The Glue Up
 |
 |
|
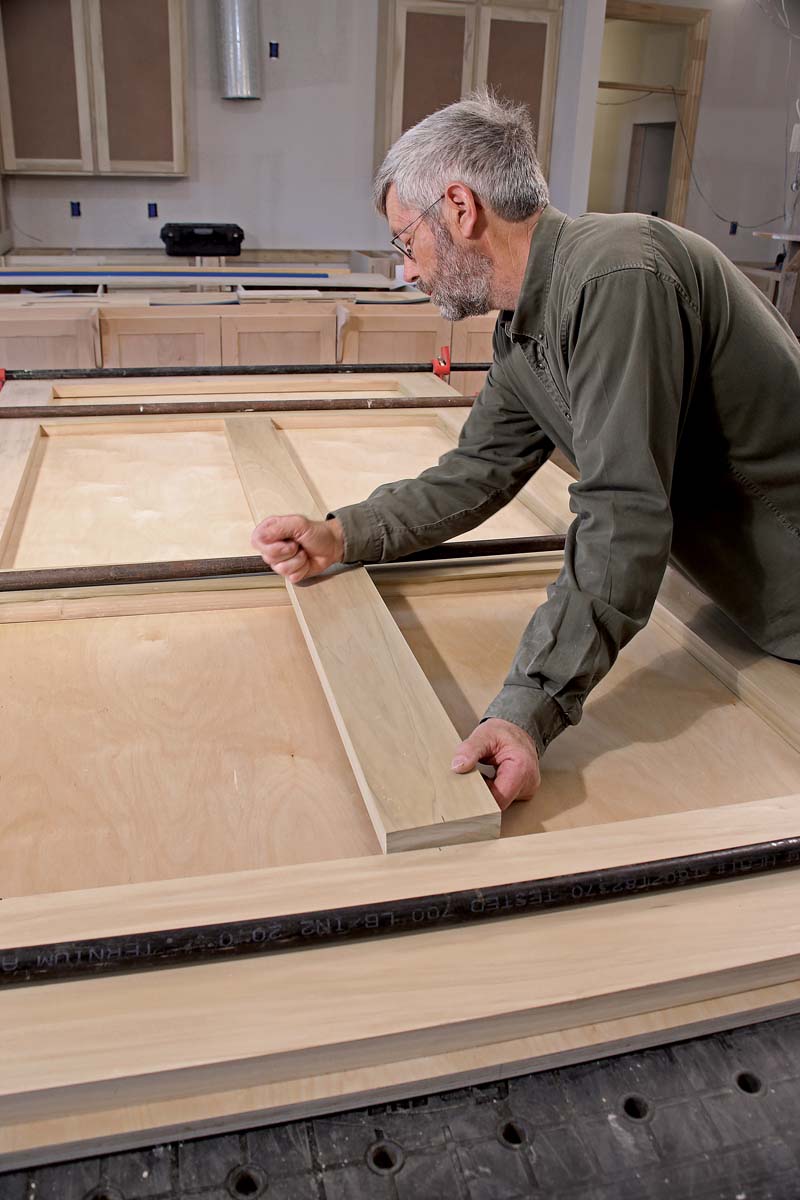
Start in the center. Begin by assembling all of the intermediate stiles and the rails, then slide the panels into place. |
Glue everything. Put some glue into each mortise before inserting the loose tenons. Then add some glue to and around the tenons before attaching the outer stiles. |
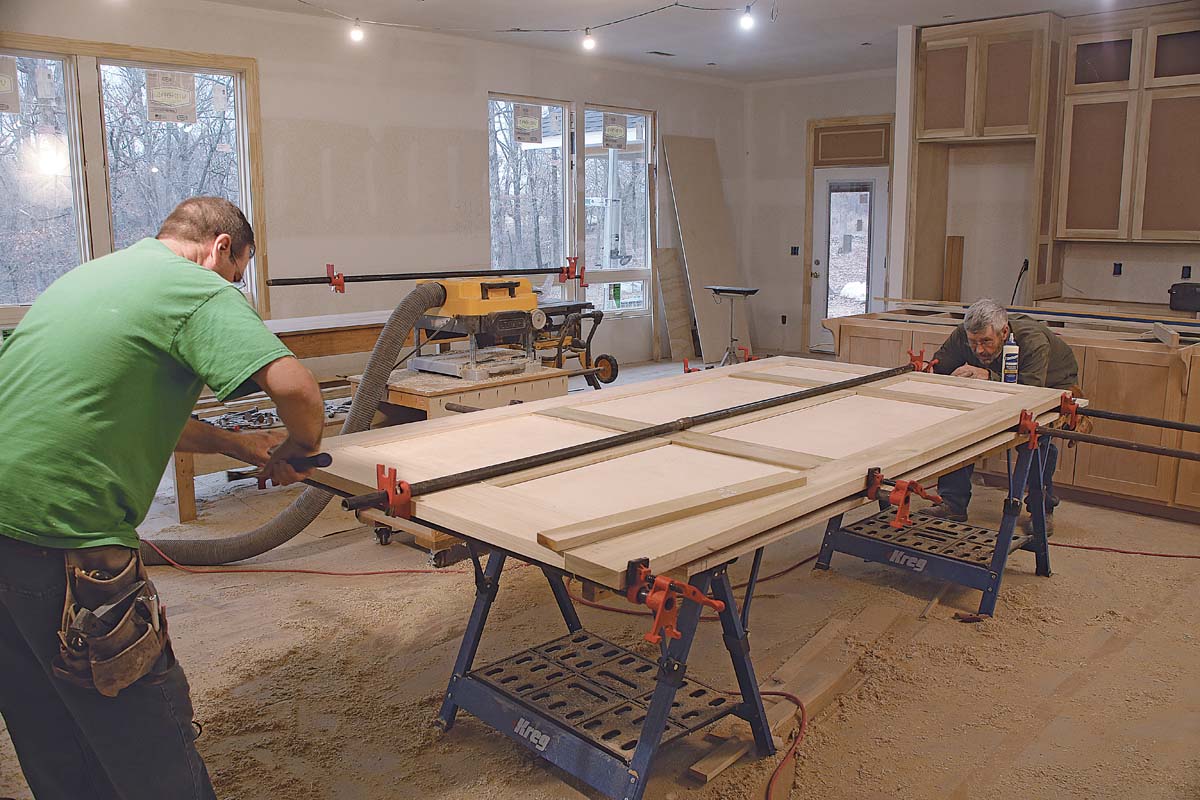 |
Work together. Once everything is assembled, work with a partner to make sure that all of the joints are properly aligned and tight, and to keep everything straight and flat as you tighten the clamps. |
Check out this video of Gary working on this project.
For more photos and information, please click the View PDF button below.

View Comments
The answer is job-specific and depends on the size and style of the doors, and if they are paint or stain grade.
Great article, I always enjoy Gary's material. Is the 6/4 milled poplar stable over time? Or, would stave core rails and stiles be more stable?