FHB Logo Facebook LinkedIn Email Pinterest Twitter X Instagram Tiktok YouTube Plus Icon Close Icon Navigation Search Icon Navigation Search Icon Arrow Down Icon Video Guide Icon Article Guide Icon Modal Close Icon Guide Search Icon Skip to content
Subscribe
Log In
  • How-To
  • Design
  • Tools & Materials
  • Restoration
  • Videos
  • Blogs
  • Forum
  • Magazine
  • Members
  • FHB House
  • Podcast
Log In

Fine Homebuilding Project Guides

Siding & Exterior Trim

Guide Home
  • Choosing Siding
  • Installing Siding
  • Choosing Exterior Trim
  • Installing Exterior Trim
  • Repairing Siding & Trim
How-To

Siding to Last a Lifetime

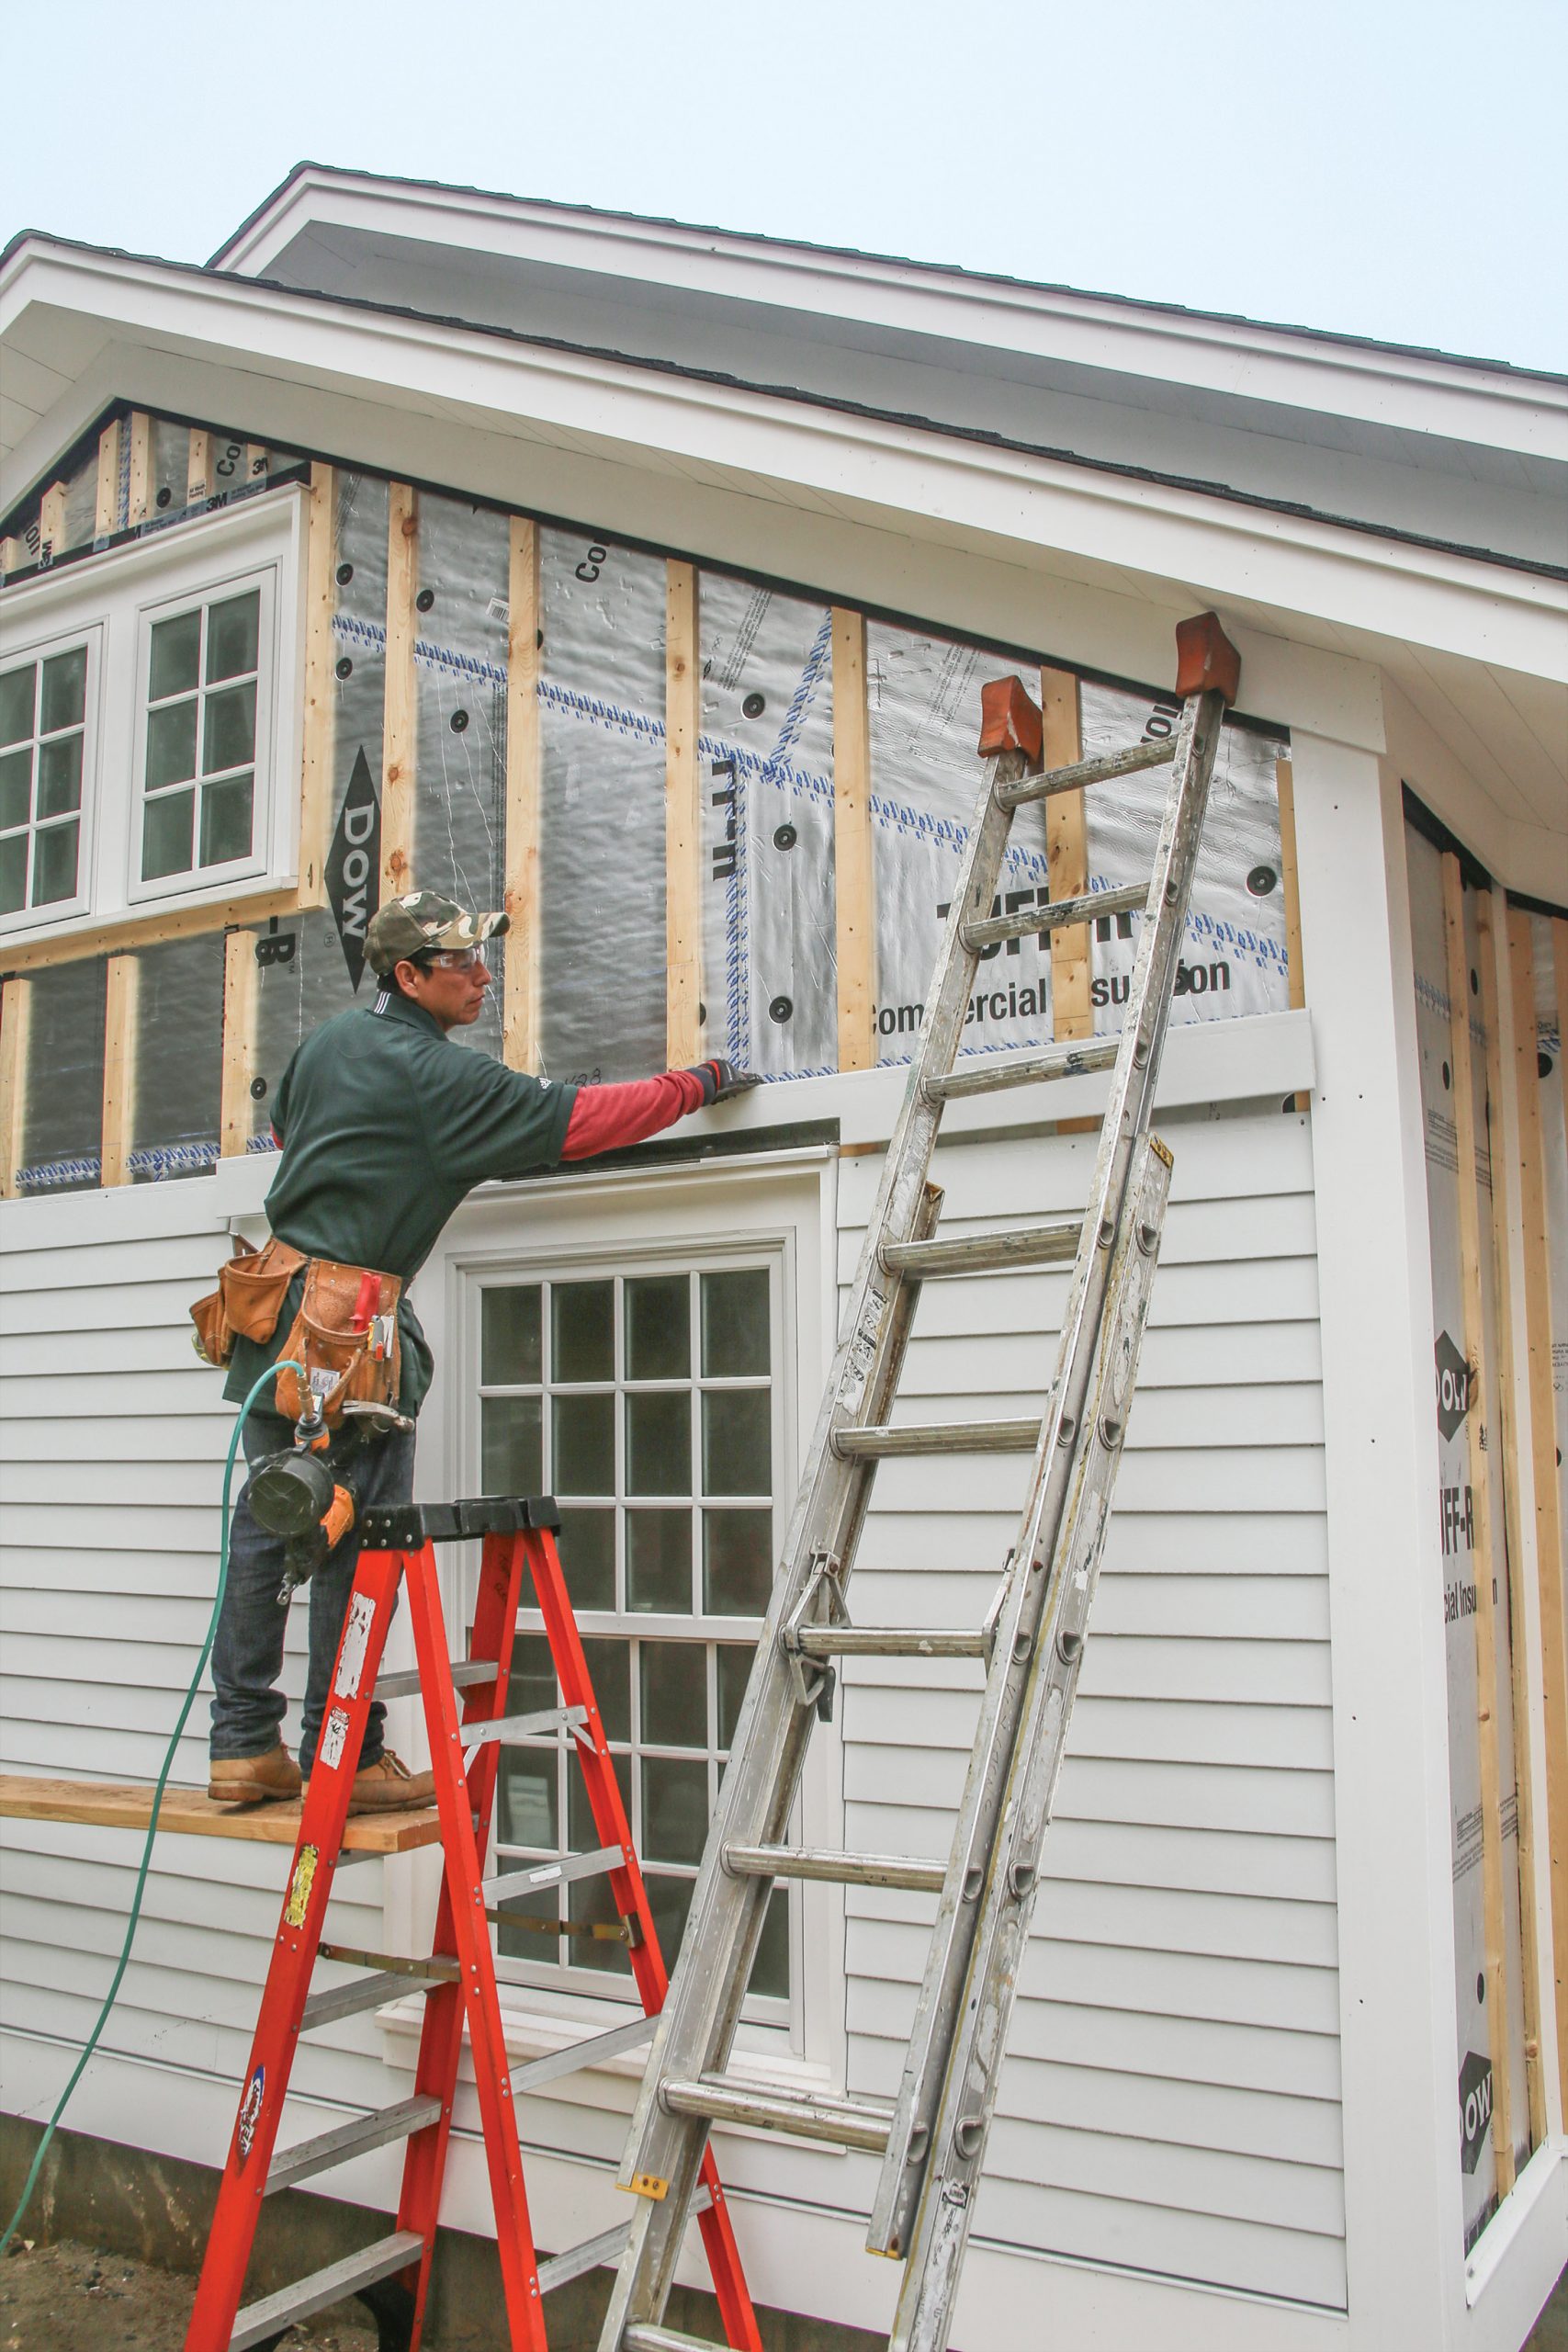
Builder John Constantini outlines rainscreen details that improve the durability of any lap-siding installation.

By John Constantini Issue 276 - July 2018
  • X
  • facebook
  • linkedin
  • pinterest
  • email
  • add to favorites Log in or Sign up to save your favorite articles

Synopsis: In this article, a builder and remodeler outlines siding details that prevent leaks, rot, and structural damage. He installs a rainscreen detail, or lap siding over an airspace—siding nailed to 3/4-in.-thick furring strips. Vents at the top and bottom of the wall allow any water that gets behind the siding a chance to get back out, and the air gap promotes fast drying. The author describes the layout of the siding, the installation of each course of siding, and the watertight details above and below windows (with detailed illustrations). The article includes a sidebar showcasing the author’s favorite fasteners.

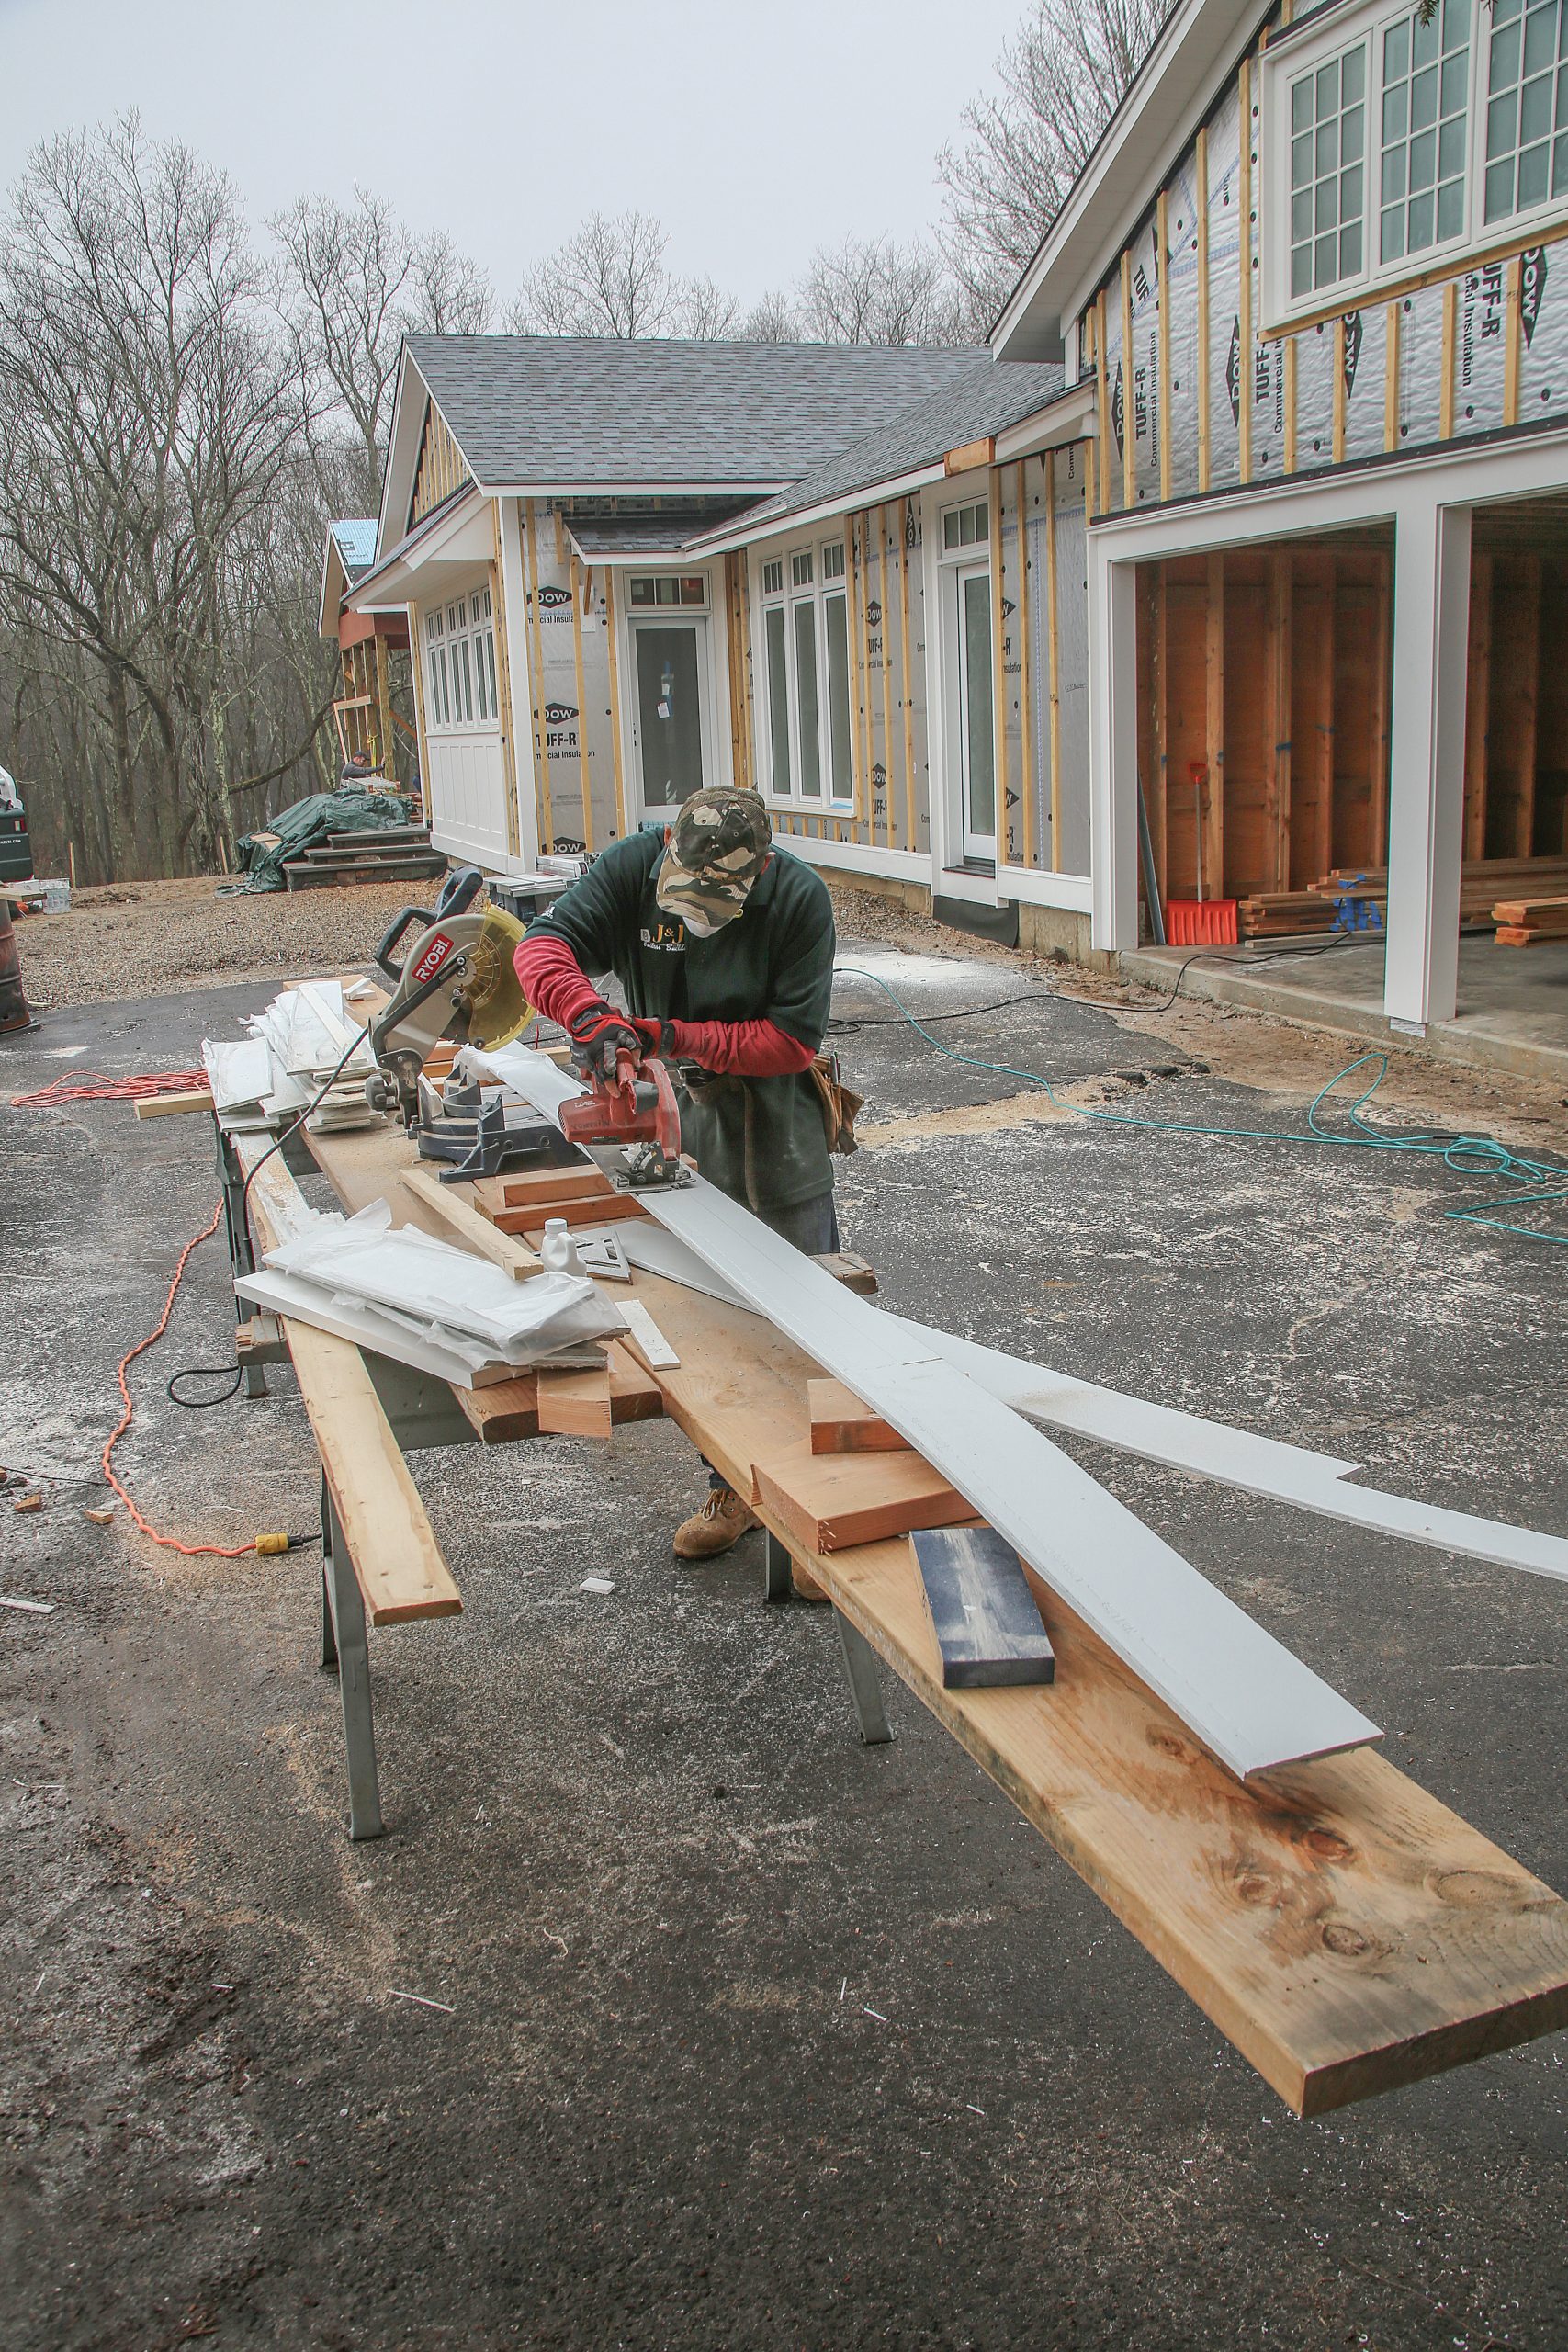
My partner, Joe Filanowski, and I have been working together for almost 20 years. He handles the business side of our custom-home-building business and I run the job site. Most of our work is along the western Connecticut coastline, where homes are routinely pounded by coastal storms packing savage winds.

Through our remodeling work, we came to the conclusion long ago that even the best siding jobs leak when subject to gale-force wind and rain. We’ve seen firsthand the rot and structural damage that occurs when rain is forced behind siding and can’t get out. The stakes are even higher with modern insulation and air-sealing requirements, because there’s often very little drying potential when the inevitable leak occurs. For all these reasons, we now insist that clients install lap siding over an airspace on major remodels and new builds.

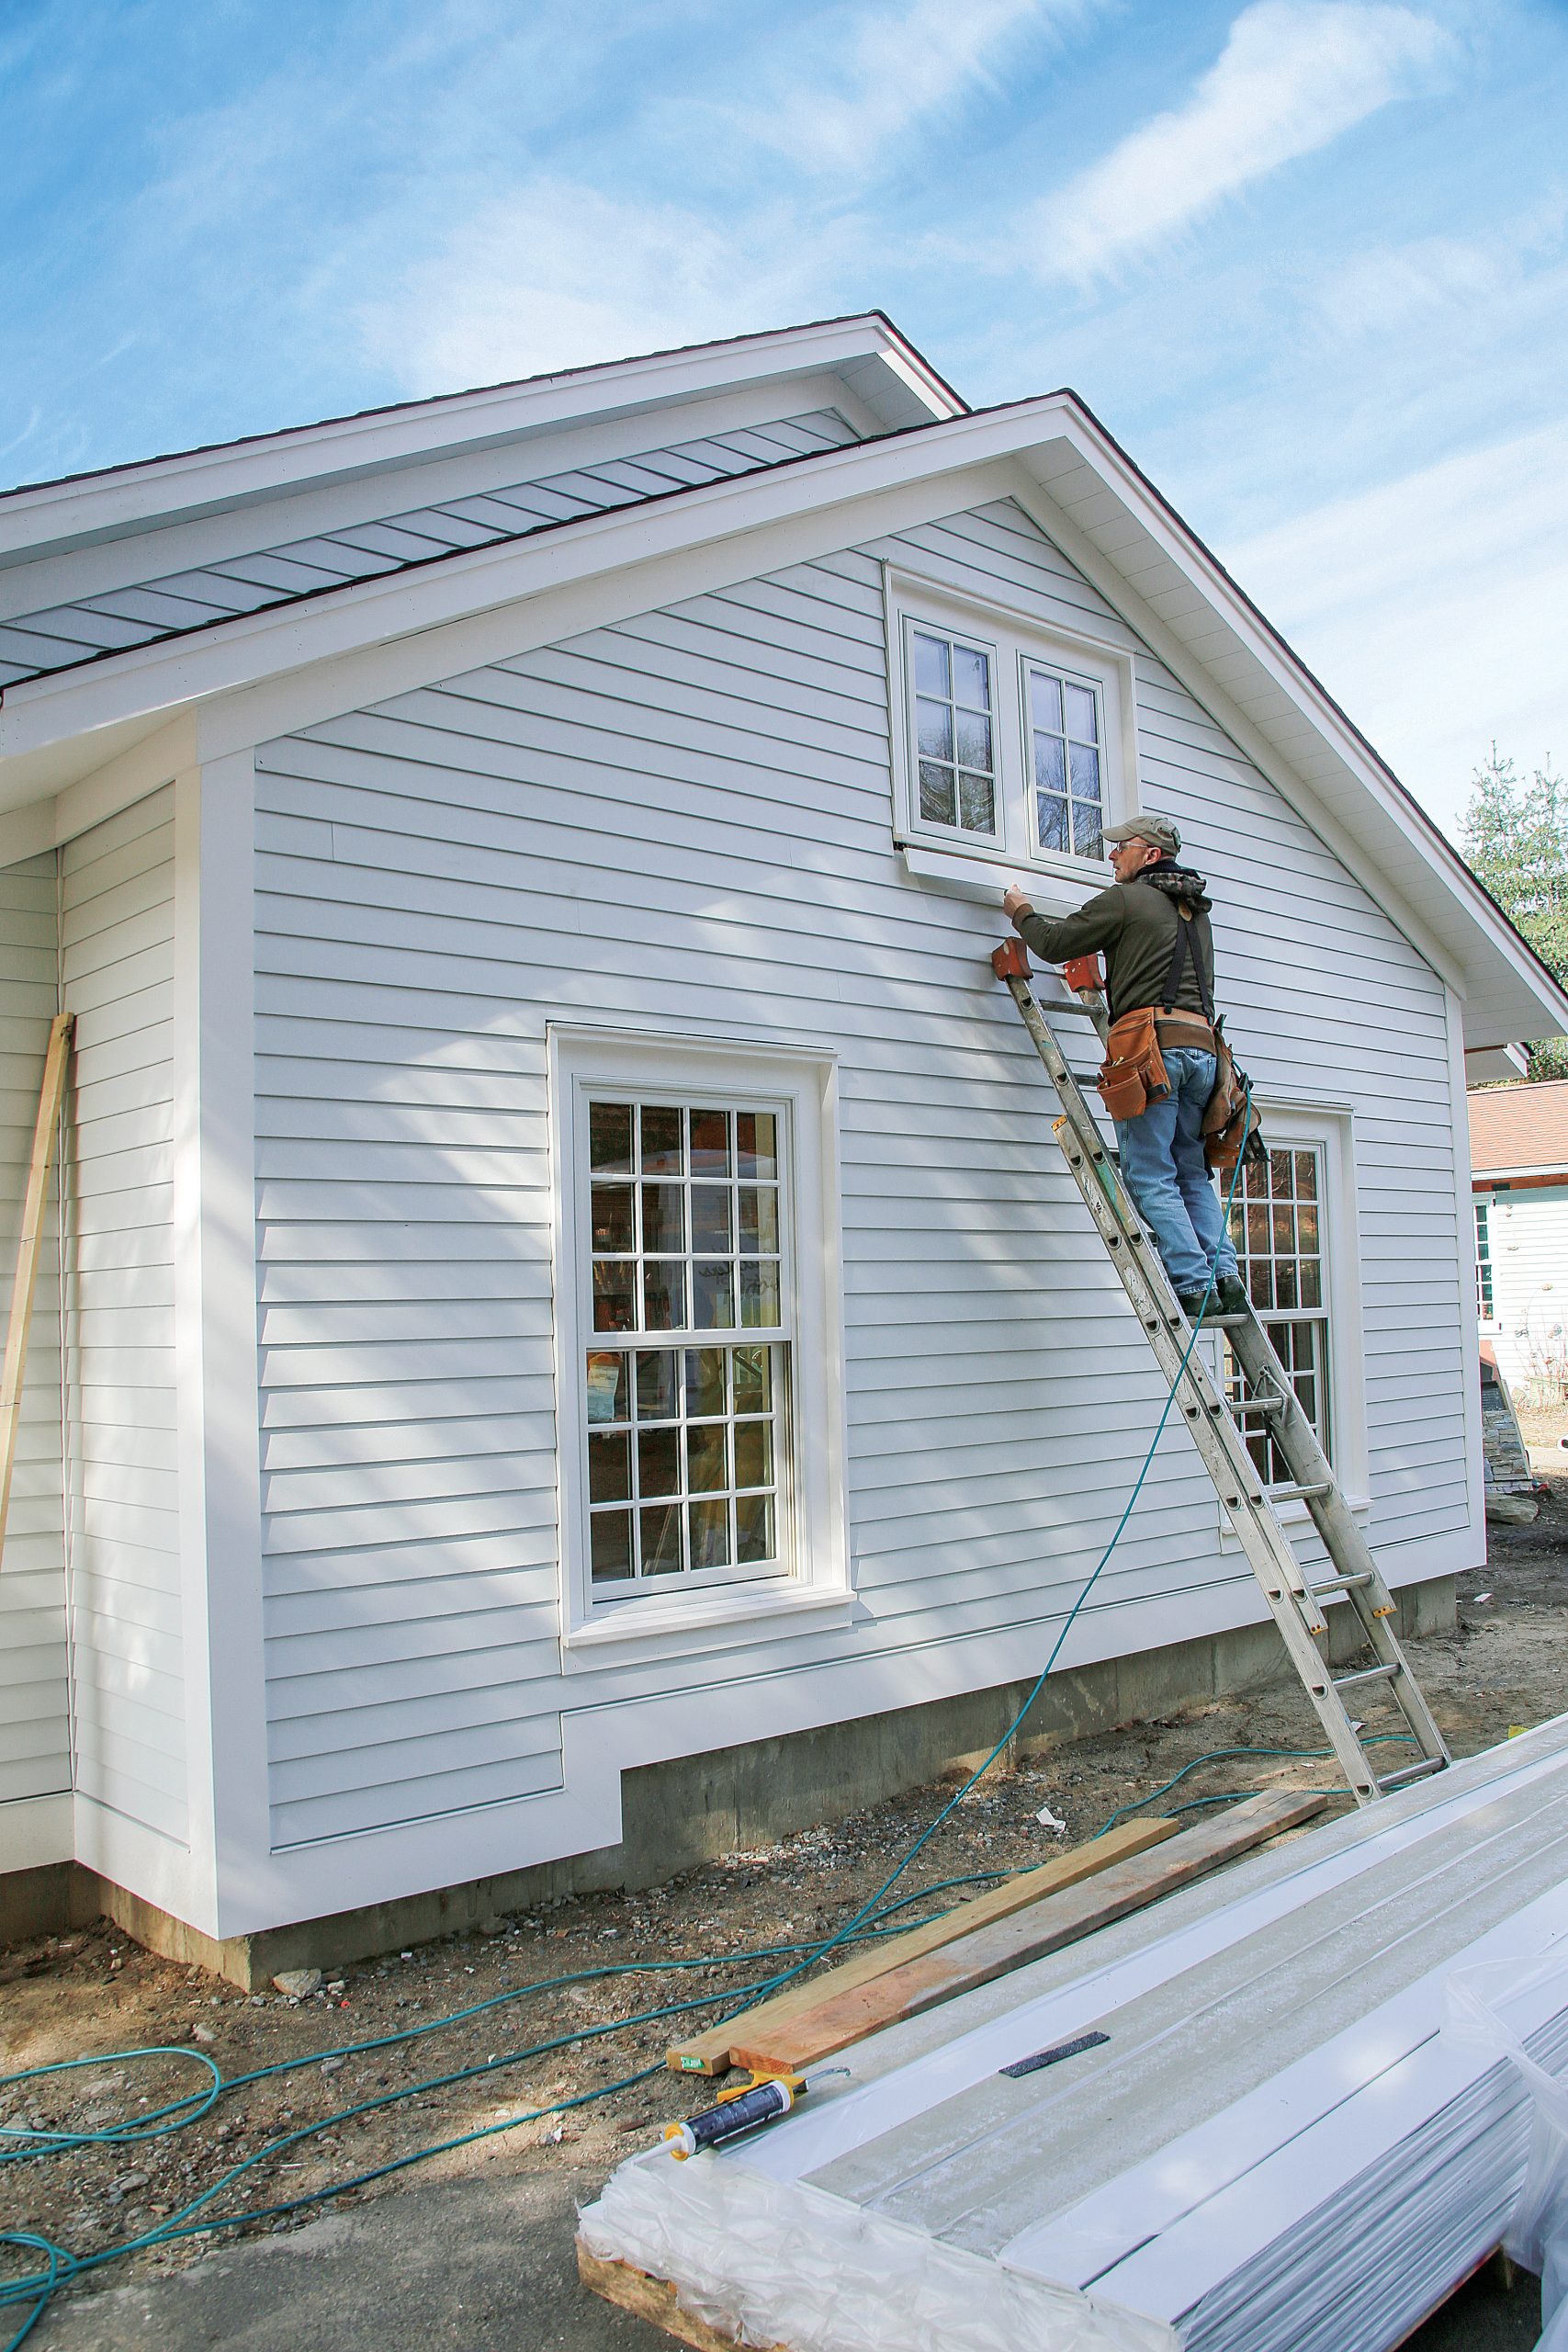
We nail the siding to 3⁄4-in.-thick furring strips, and assembly often described as a rainscreen. Vents at the top and bottom of the wall allow any water that manages to get behind the siding a chance to get back out, and the air gap eliminates pressure differentials—which can cause water to be sucked inward—while also promoting air circulation for fast drying. The home shown here has prefinished fiber-cement siding from James Hardie, but the installation methods are virtually the same for every type of lap siding.

Where to Start?

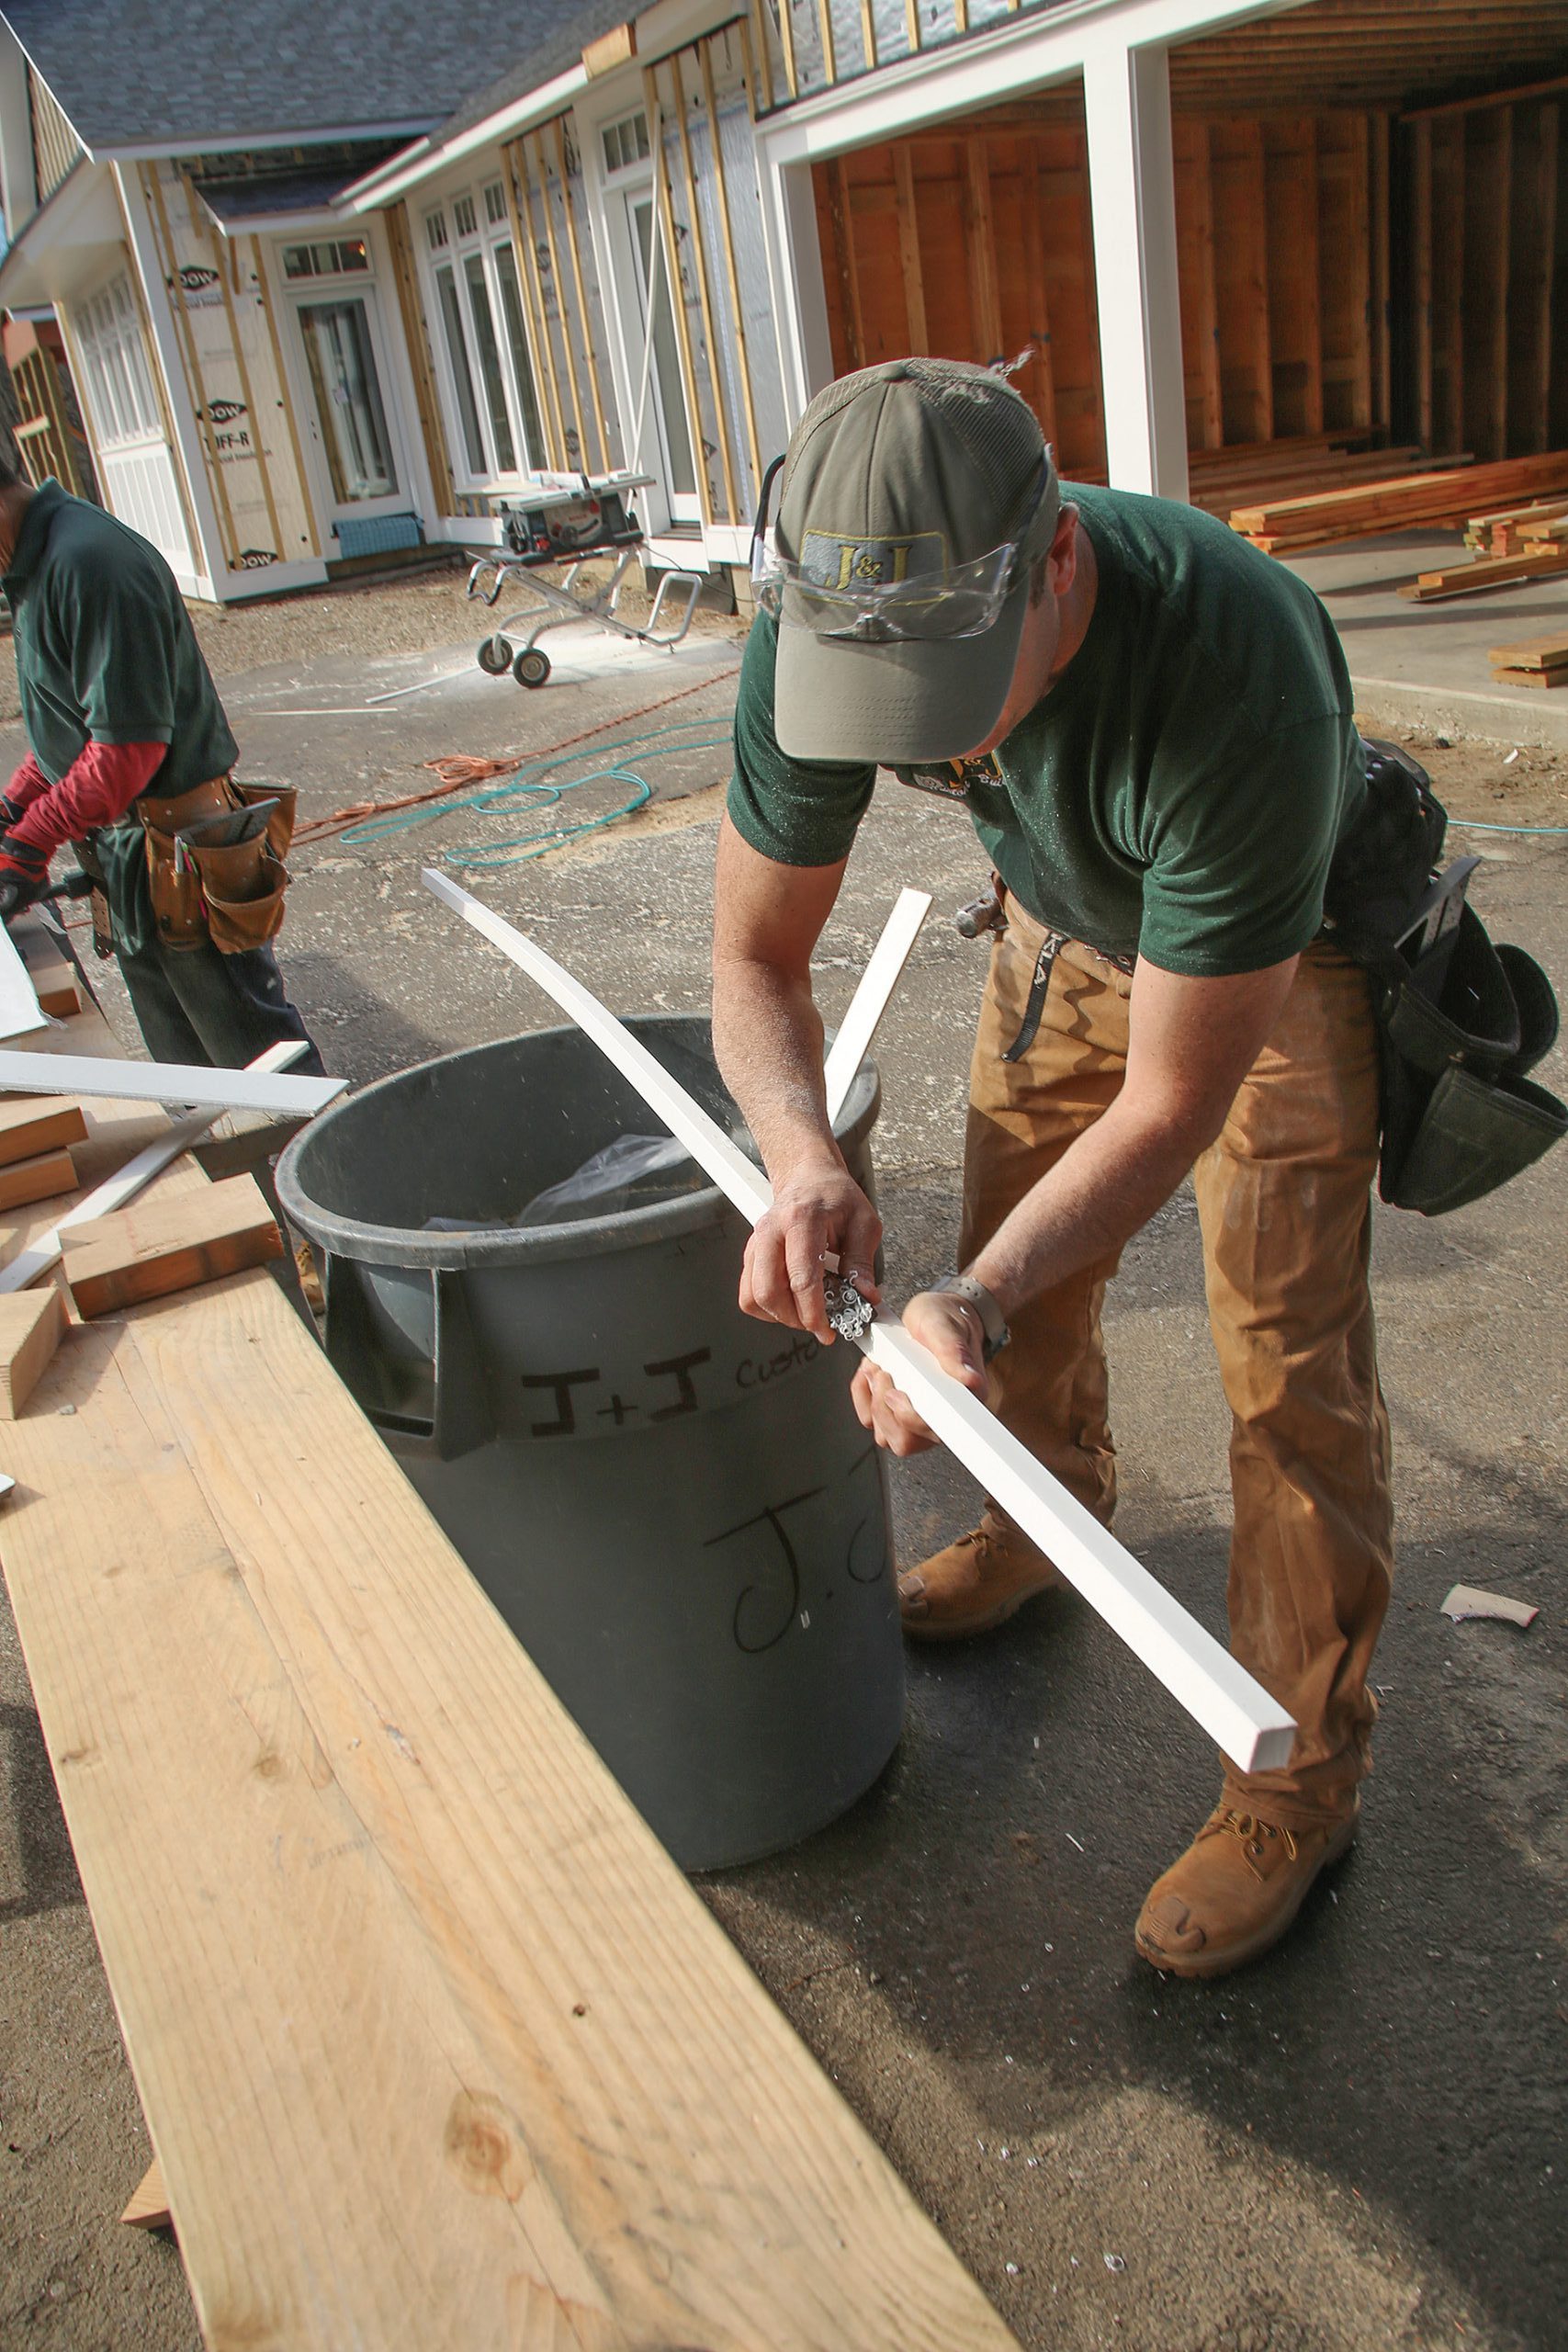
Before we can install the siding, we have to install the trim. On this project, and on most others, we used PVC trim fastened with a combination of stainless-steel screws and 15-ga. stainless-steel finish nails. We use the finish nails on small and relatively short pieces of trim, and the screws on larger, longer elements like frieze boards and water tables. The screws are a must for those pieces in order to minimize the problems associated with the expansion and contraction of PVC. We prefer Cortex screws and their premade plugs, and we leave the plugs out until the siding is installed so we can remove the trim if it’s necessary.

Even though this house is all on one level, the siding follows several grade changes and the windows and doors are different sizes and at different elevations. In traditional New England carpentry, the mark of a good siding job was full courses at both the tops and bottoms of doors and windows. Carpenters would adjust the siding’s exposure to ensure things lined up. This is easy with consistently-sized windows and simple architectural forms like capes, center-hall colonials, and saltboxes, but it’s impossible when you have a house like this one.

We decided that having the courses line up at corners was more important than having full courses above and below windows, so we kept the 4-in. exposure consistent on all the elevations.

The west side of the house that’s shown in these photographs is near the driveway—and it’s the first side you see when arriving. It also has several corners close together, so it made sense to start the siding there. This is also one of the elevations with a step in the foundation. We adjusted the location of the water table by varying the amount it overhangs the foundation so there would be full courses at as many of the stepped elevation changes as possible. To ensure the courses of siding lined up from one side of the house to the next, we made story poles that referenced off the top of the water table.

An Airtight, Durable Assembly

On this project, the clients are aiming for net-zero performance, so to minimize thermal bridging, the exterior is skinned with 1-1⁄2 in. of foil-faced polyiso insulation. A layer of 1⁄2-in. Zip System sheathing with taped seams is behind the polyiso. The sheathing is nailed to the framing with 2-1⁄2-in. nails and the foam is secured to the sheathing with 2-1⁄2-in. screws set in Thermal-Grip washers. I like these screws for fastening rigid insulation because their slightly conical washer flattens as the screw is driven. When you use metal roof tins or cheaper washers, the edges tend to curl up, so any furring strips that land on a screw are more difficult to get tight to the sheathing.
We also splurged on the 3⁄4-in. by 3-in. pine furring because it better resists cupping and twisting than less-expensive and more commonly used spruce strapping. The result is flatter siding that’s easier to install. The furring strips are fastened to the studs with 4-1⁄2-in. structural screws. To locate the studs through the polyiso insulation, we station one carpenter inside the house to shout distances from windows, doors, or corners to another carpenter outside the house who marks the stud locations on the foam with a felt-tip marker.

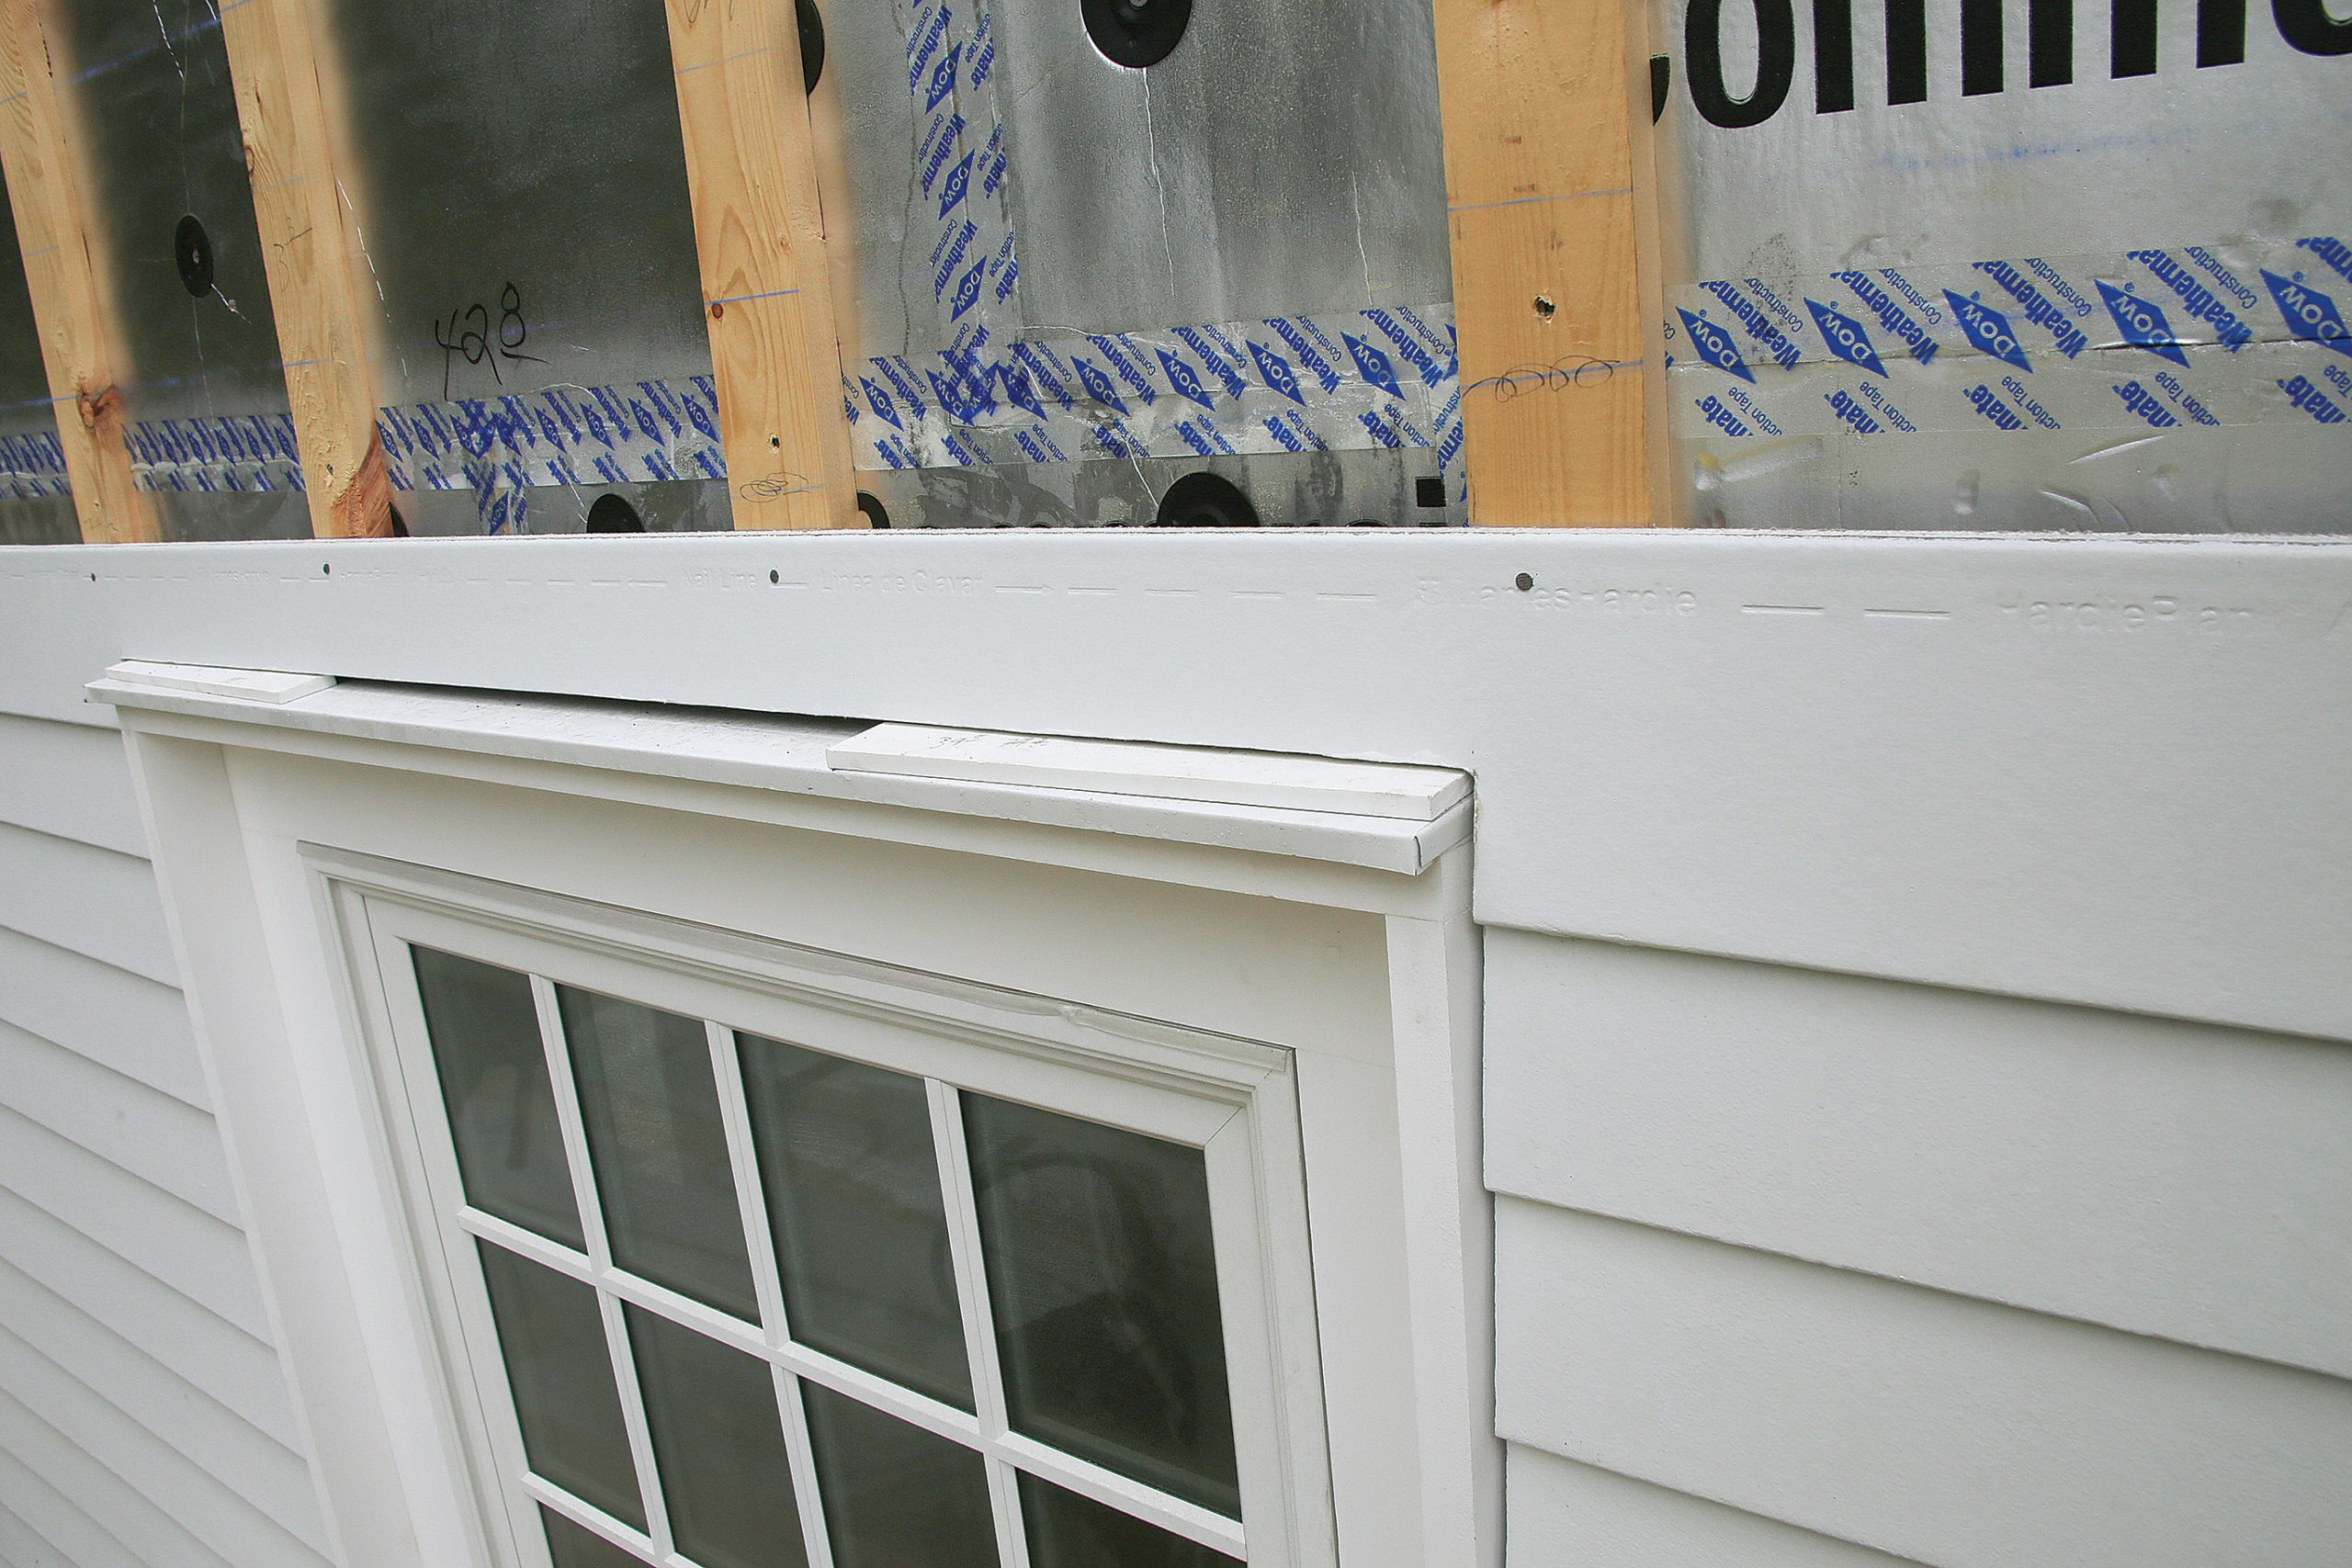
To accommodate the walls’ extra thickness on this house, the window casing has 3⁄4-in.-thick stock applied to the outside perimeter with 2-in. screws. At the tops of windows and doors is a PVC drip cap that’s covered with a secondary aluminum drip cap with hemmed ends. We make the aluminum cap on site with a metal brake.

Details to Promote Drying

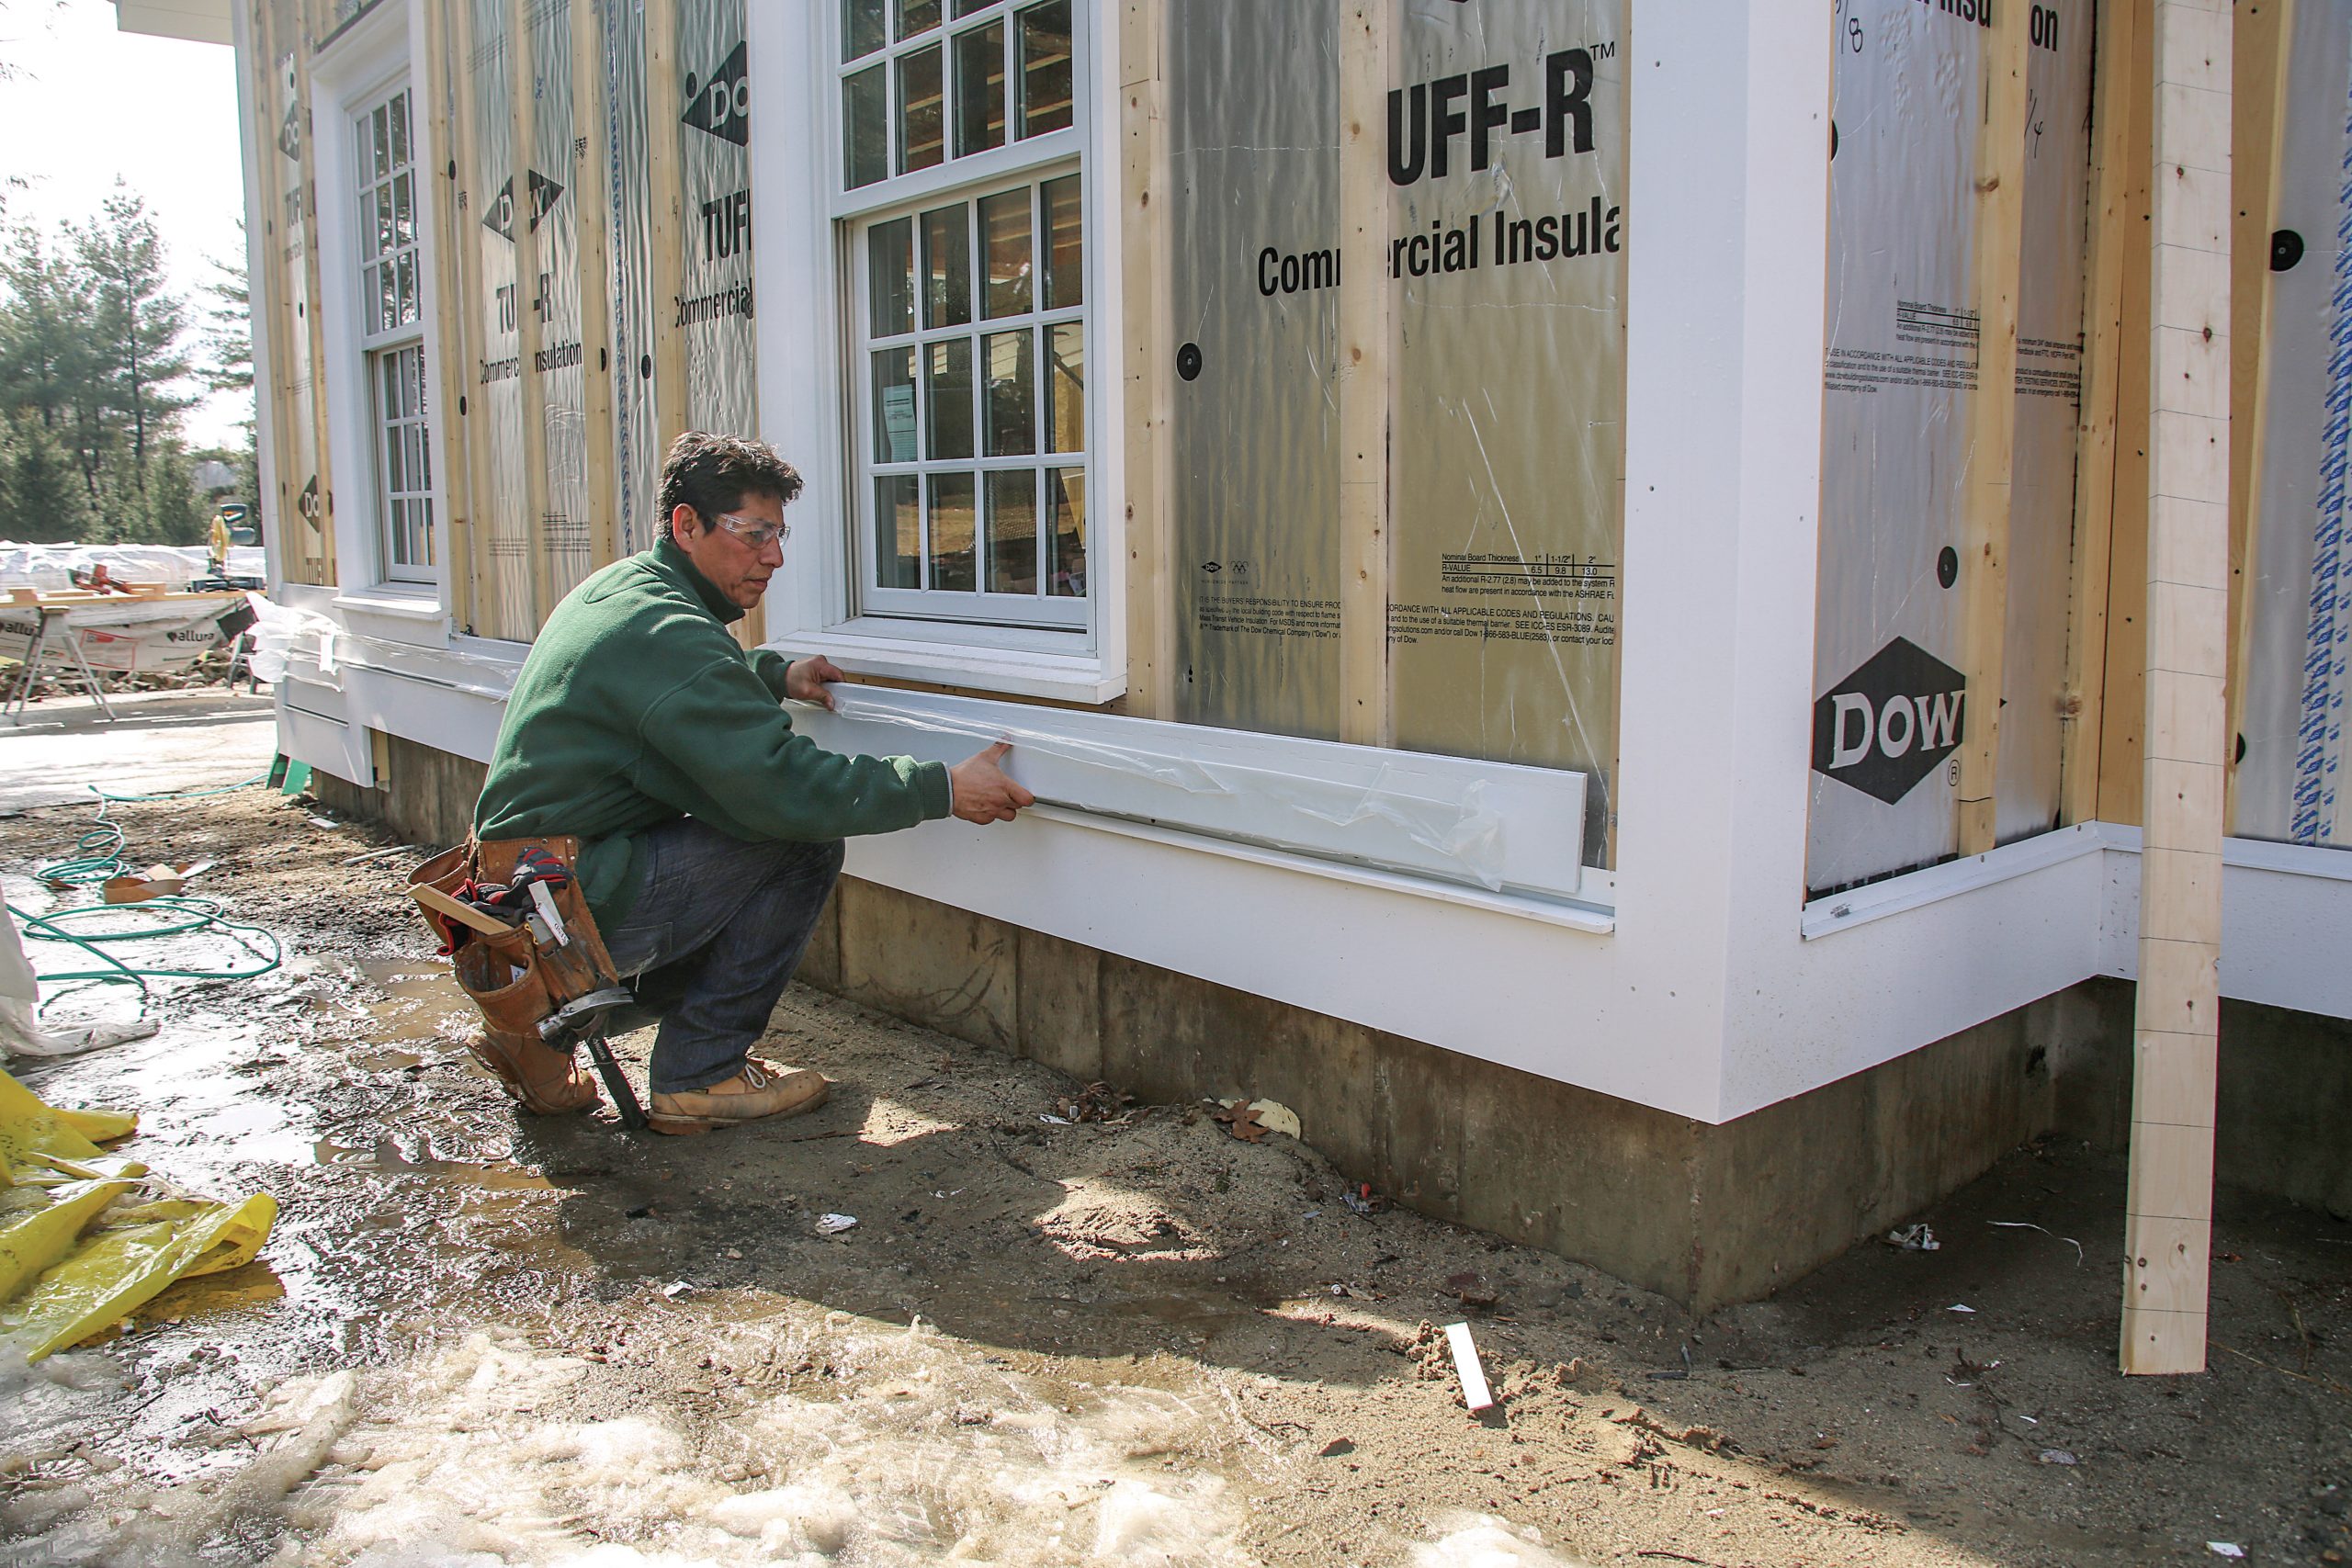
To enable drainage and drying, we install the water table on Cor-A-Vent SV-3 vent strips, which match the thickness of the furring strips. This corrugated plastic vent is sturdy enough to resist crushing when we screw trim over it and it does a good job keeping out pests. We also install Cor-A-Vent at the top of the wall, behind a frieze, which is packed out 1 in. at eaves and rakes (see drawing p. 35). We do this so the siding can be slipped behind the frieze for better water shedding and to conceal the gap left for air circulation. We paint the bottom of the packout material with black spray paint so the gap is as unobtrusive as possible.

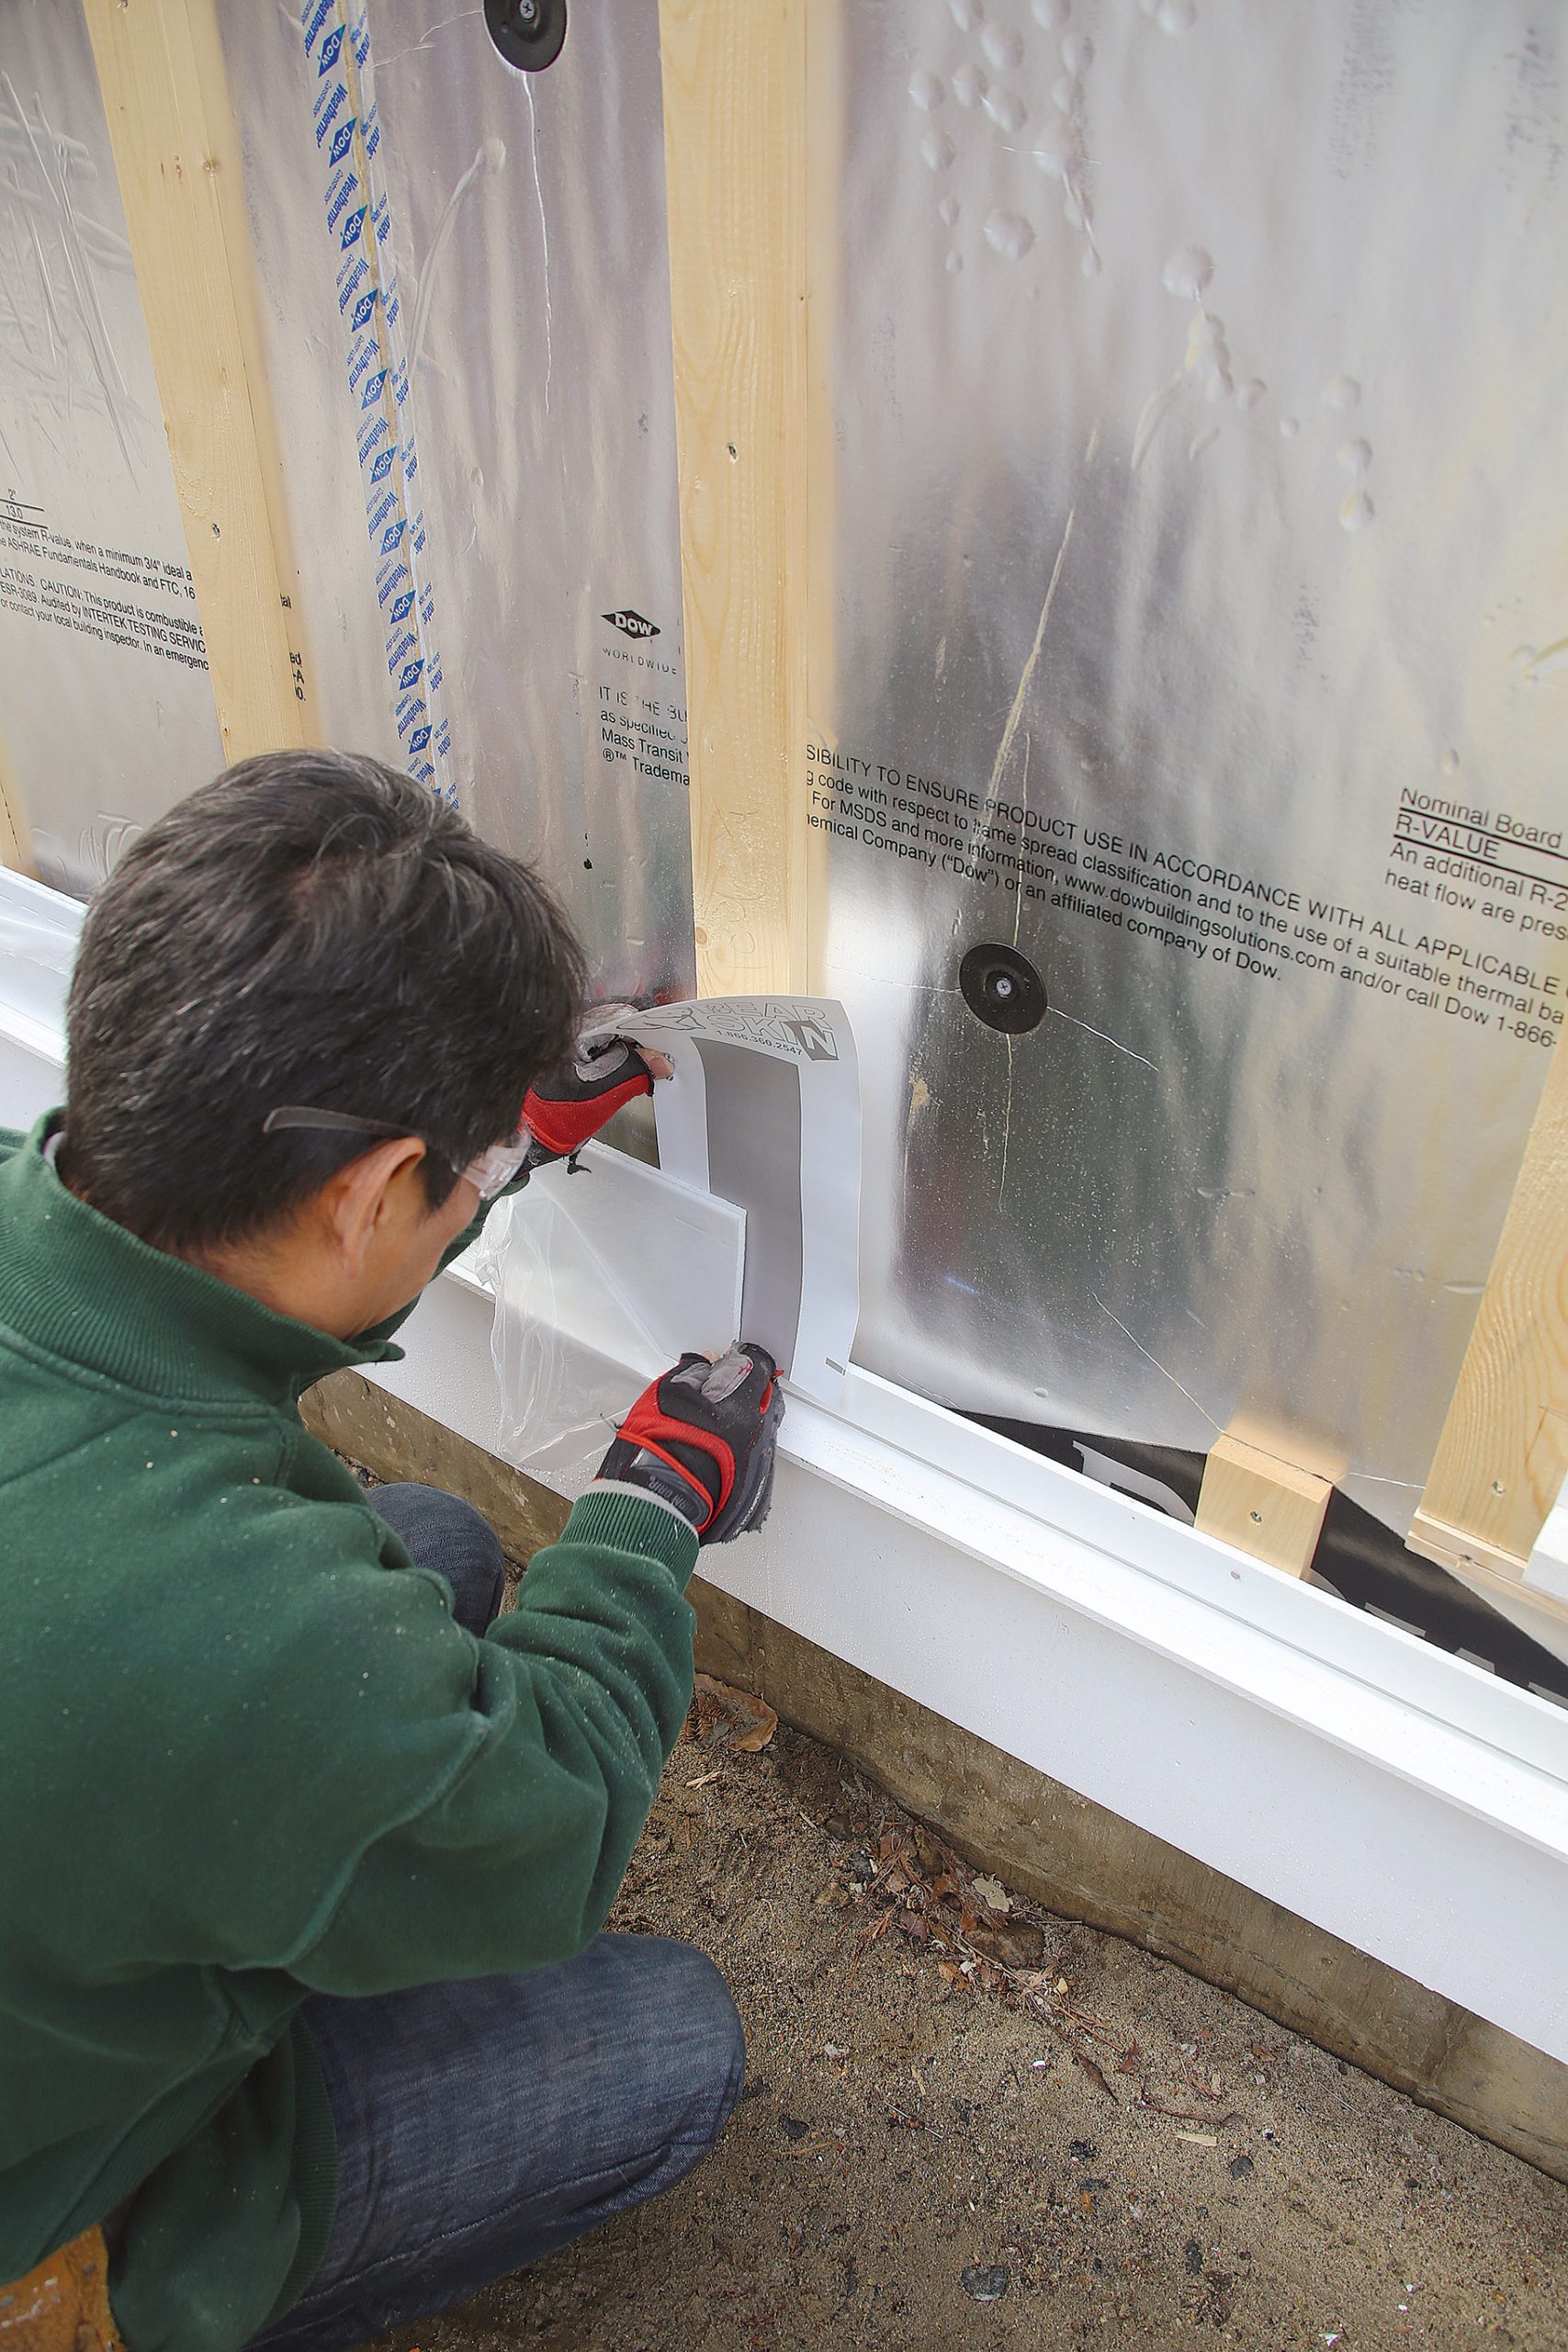
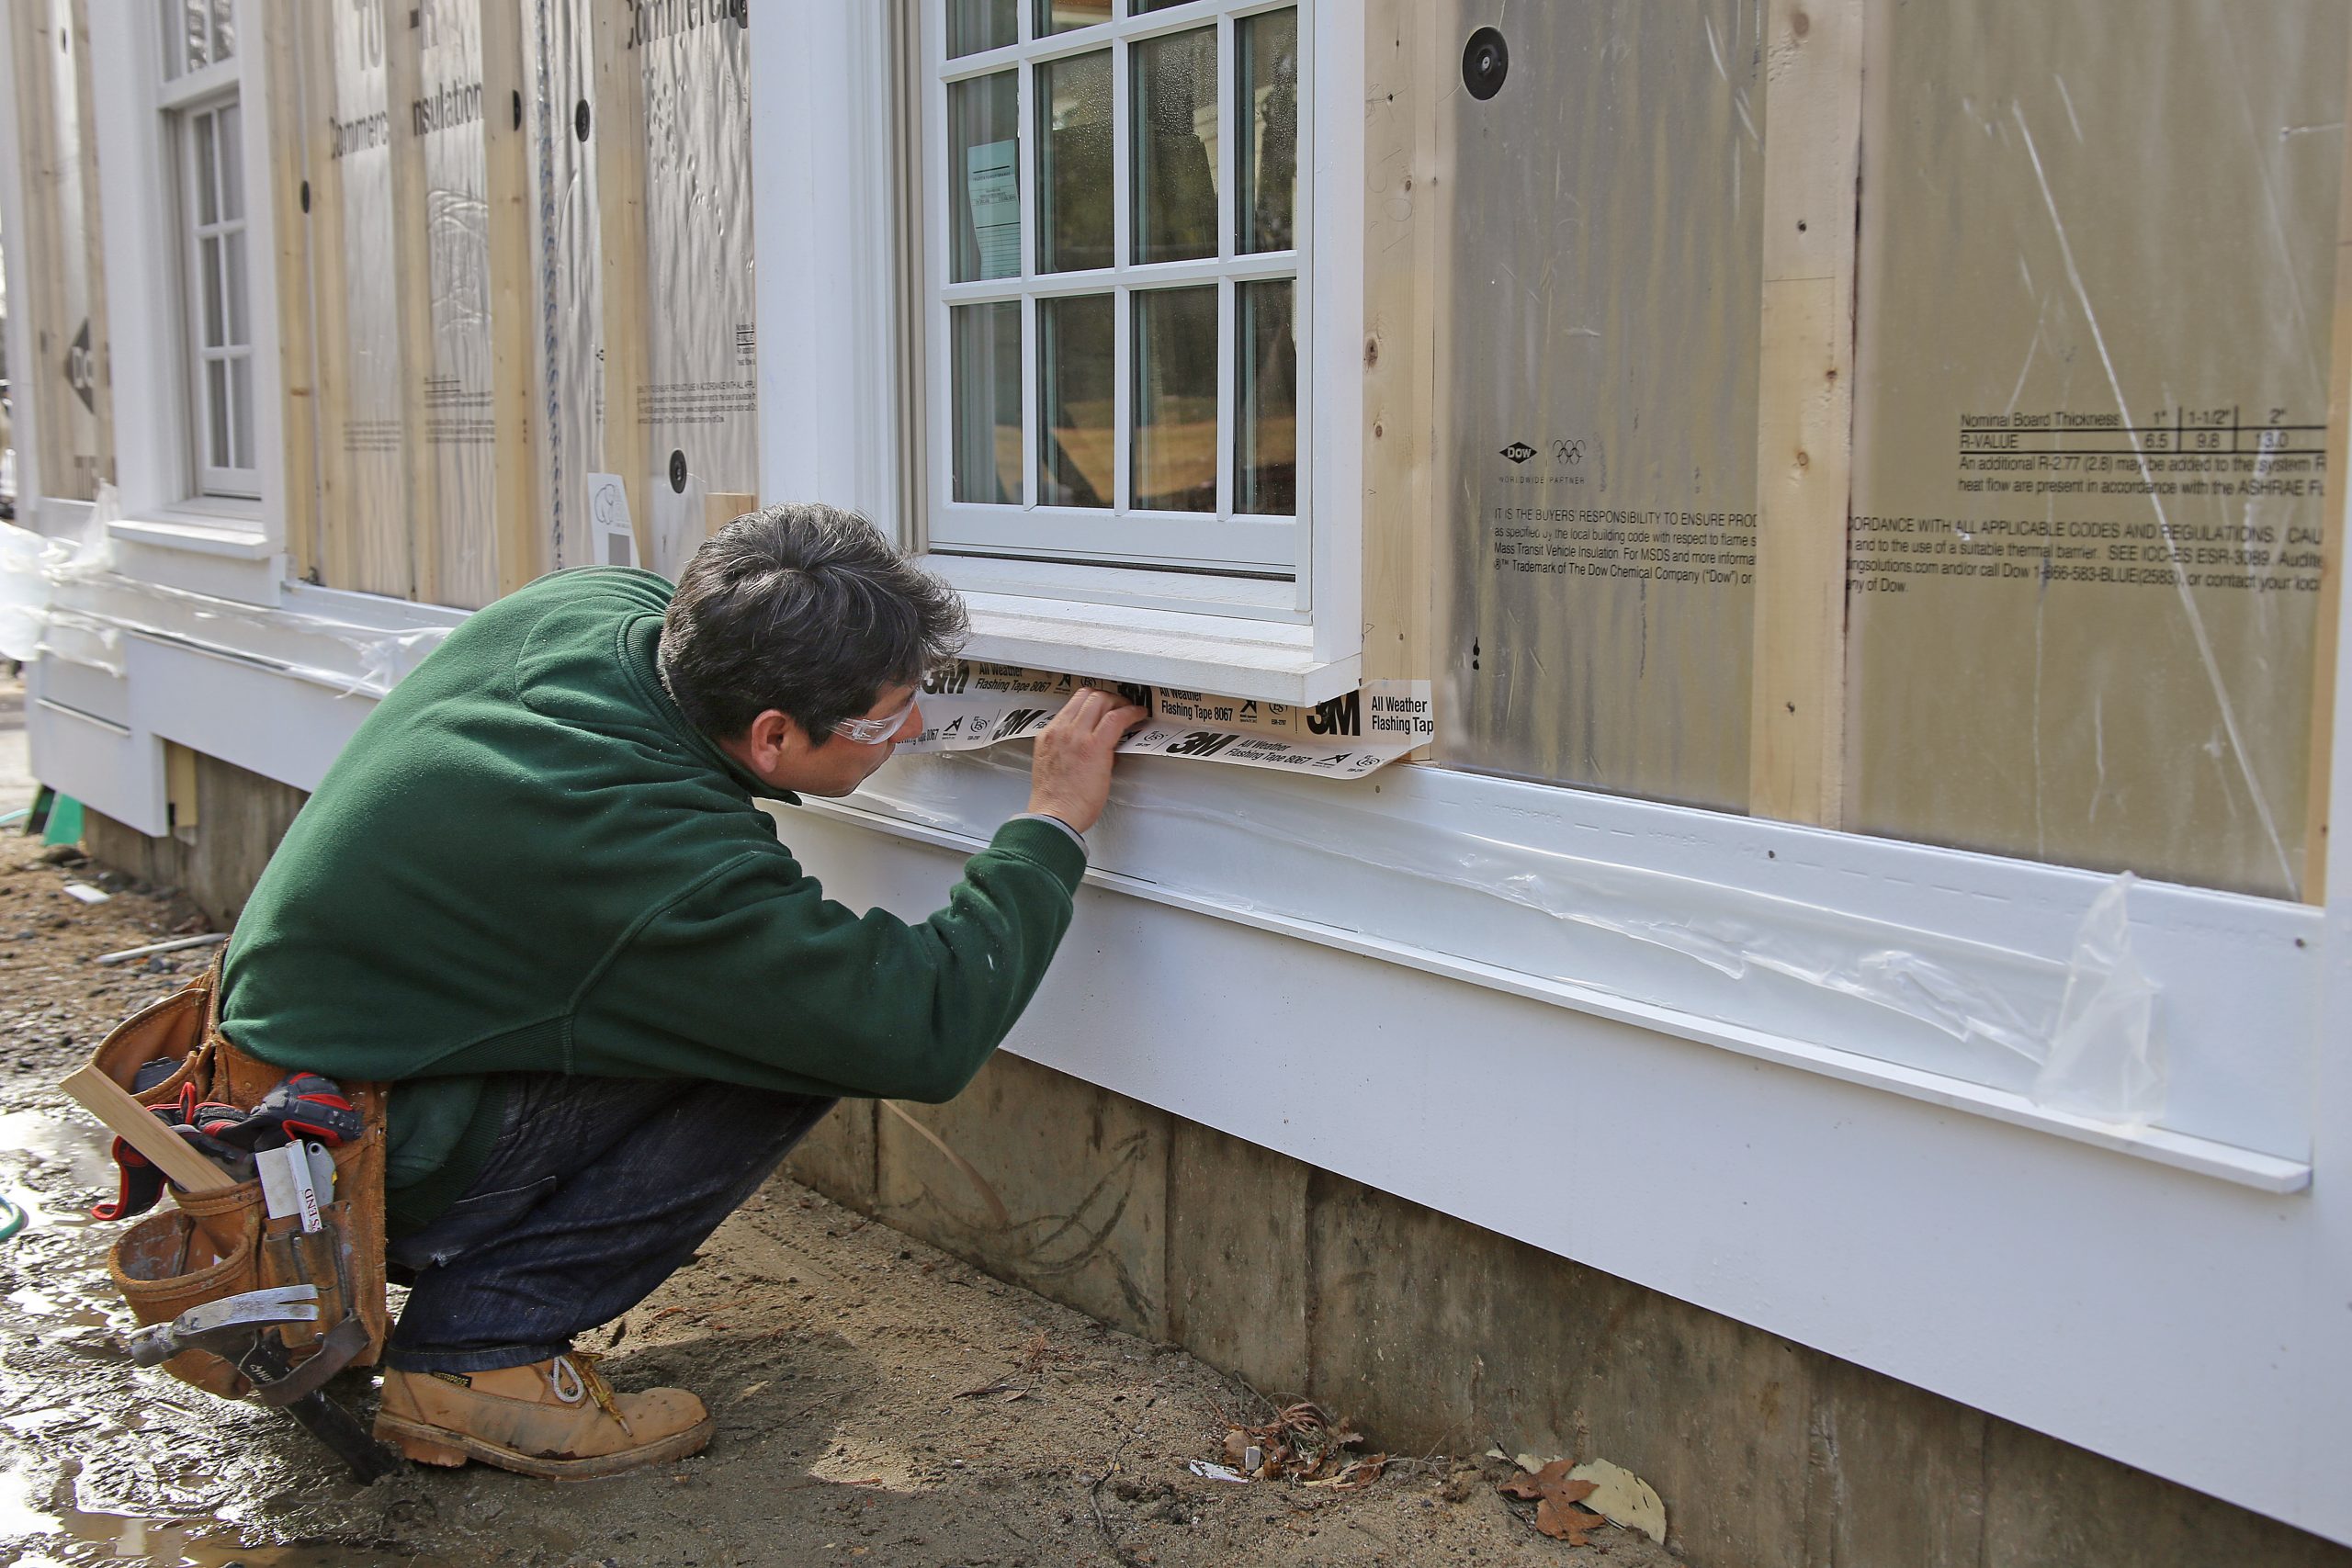
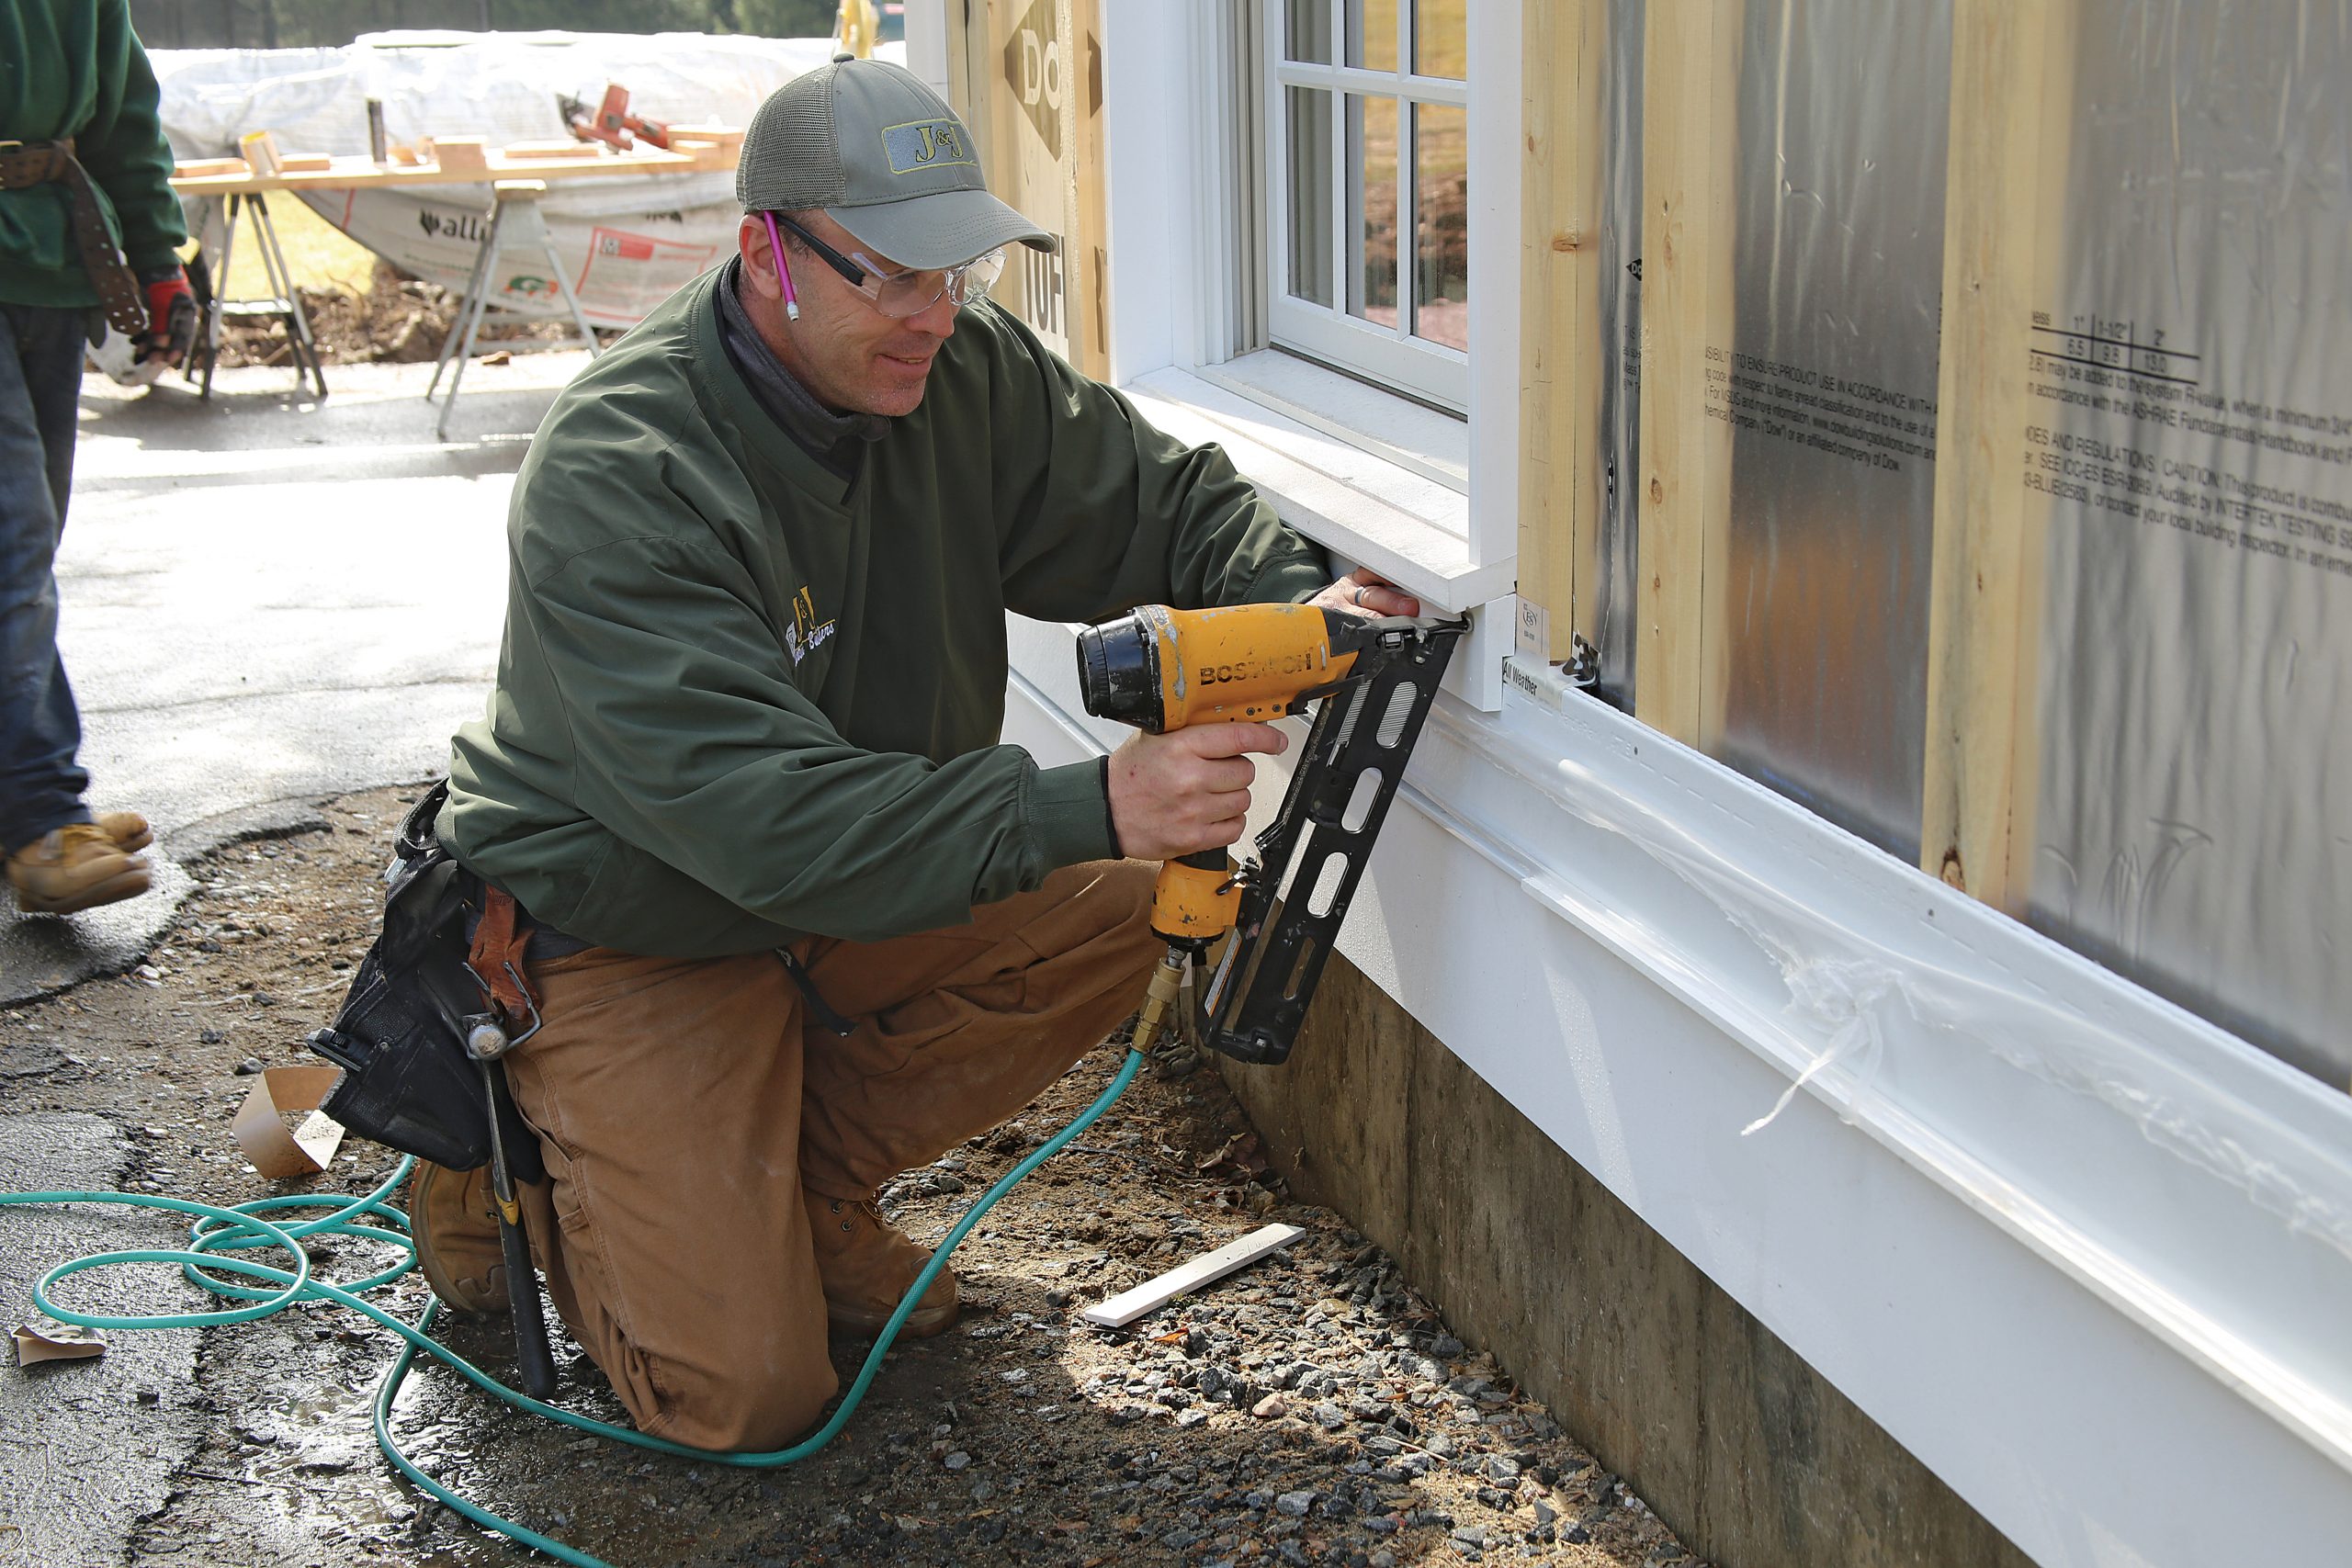
Although some builders don’t bother ventilating above and below windows, we install the Cor-A-Vent at the tops of windows, too. The siding manufacturer requires a gap between the window’s or door’s drip cap and the siding to promote drainage and drying. We exploit that gap to introduce airflow as well. Underneath windows and doors, we use a sill pan that drains on top of the insulation layer. An additional layer of 6-in.-wide 3M All Weather Flashing Tape attached to the sill nosing and lapped over the top edge of the siding prevents wind-driven rain from finding a way in. On top of the flashing we install a PVC apron with a notched back cut so that it follows the siding contours.

Is All of This Really Necessary?

Builders in other areas of the country may ask, is all this extra work really worth it? In our climate, with our clients, it absolutely is. They expect the best exterior details and are willing to pay for them. When we started our business, we committed to doing the best possible job for our customers, and we won’t work for clients who are unwilling to let us do that.

In recent years, we’ve had the opportunity to work for repeat clients. When we’ve opened up walls that we’ve worked on previously, they’re dry and in good shape, which only reinforces our belief that we’re doing things the right way.


Trim and Layout

Meticulously installed trim doesn’t just look better, it also makes it easier to install the siding. Aim for level, plumb, and square and the payoff is less time spent laying out and fitting siding.

Chamfer the hidden edge of the inside-corner stock with a block plane before installation to ensure the 1-in.-square stock will sit tight to the underlying furring strips.
Ease the Back: Chamfer the hidden edge of the inside-corner stock with a block plane before installation to ensure the 1-in.-square stock will sit tight to the underlying furring strips.

Inside corners—rips of PVC trim—must be shimmed and plumbed before final fastening with 15-ga. stainless-steel finish nails.
Start Straight: Inside corners—rips of PVC trim—must be shimmed and plumbed before final fastening with 15-ga. stainless-steel finish nails. Making the corners straight ensures uniform 1⁄8-in. gaps at the ends of siding planks.
mark the end marking to ends

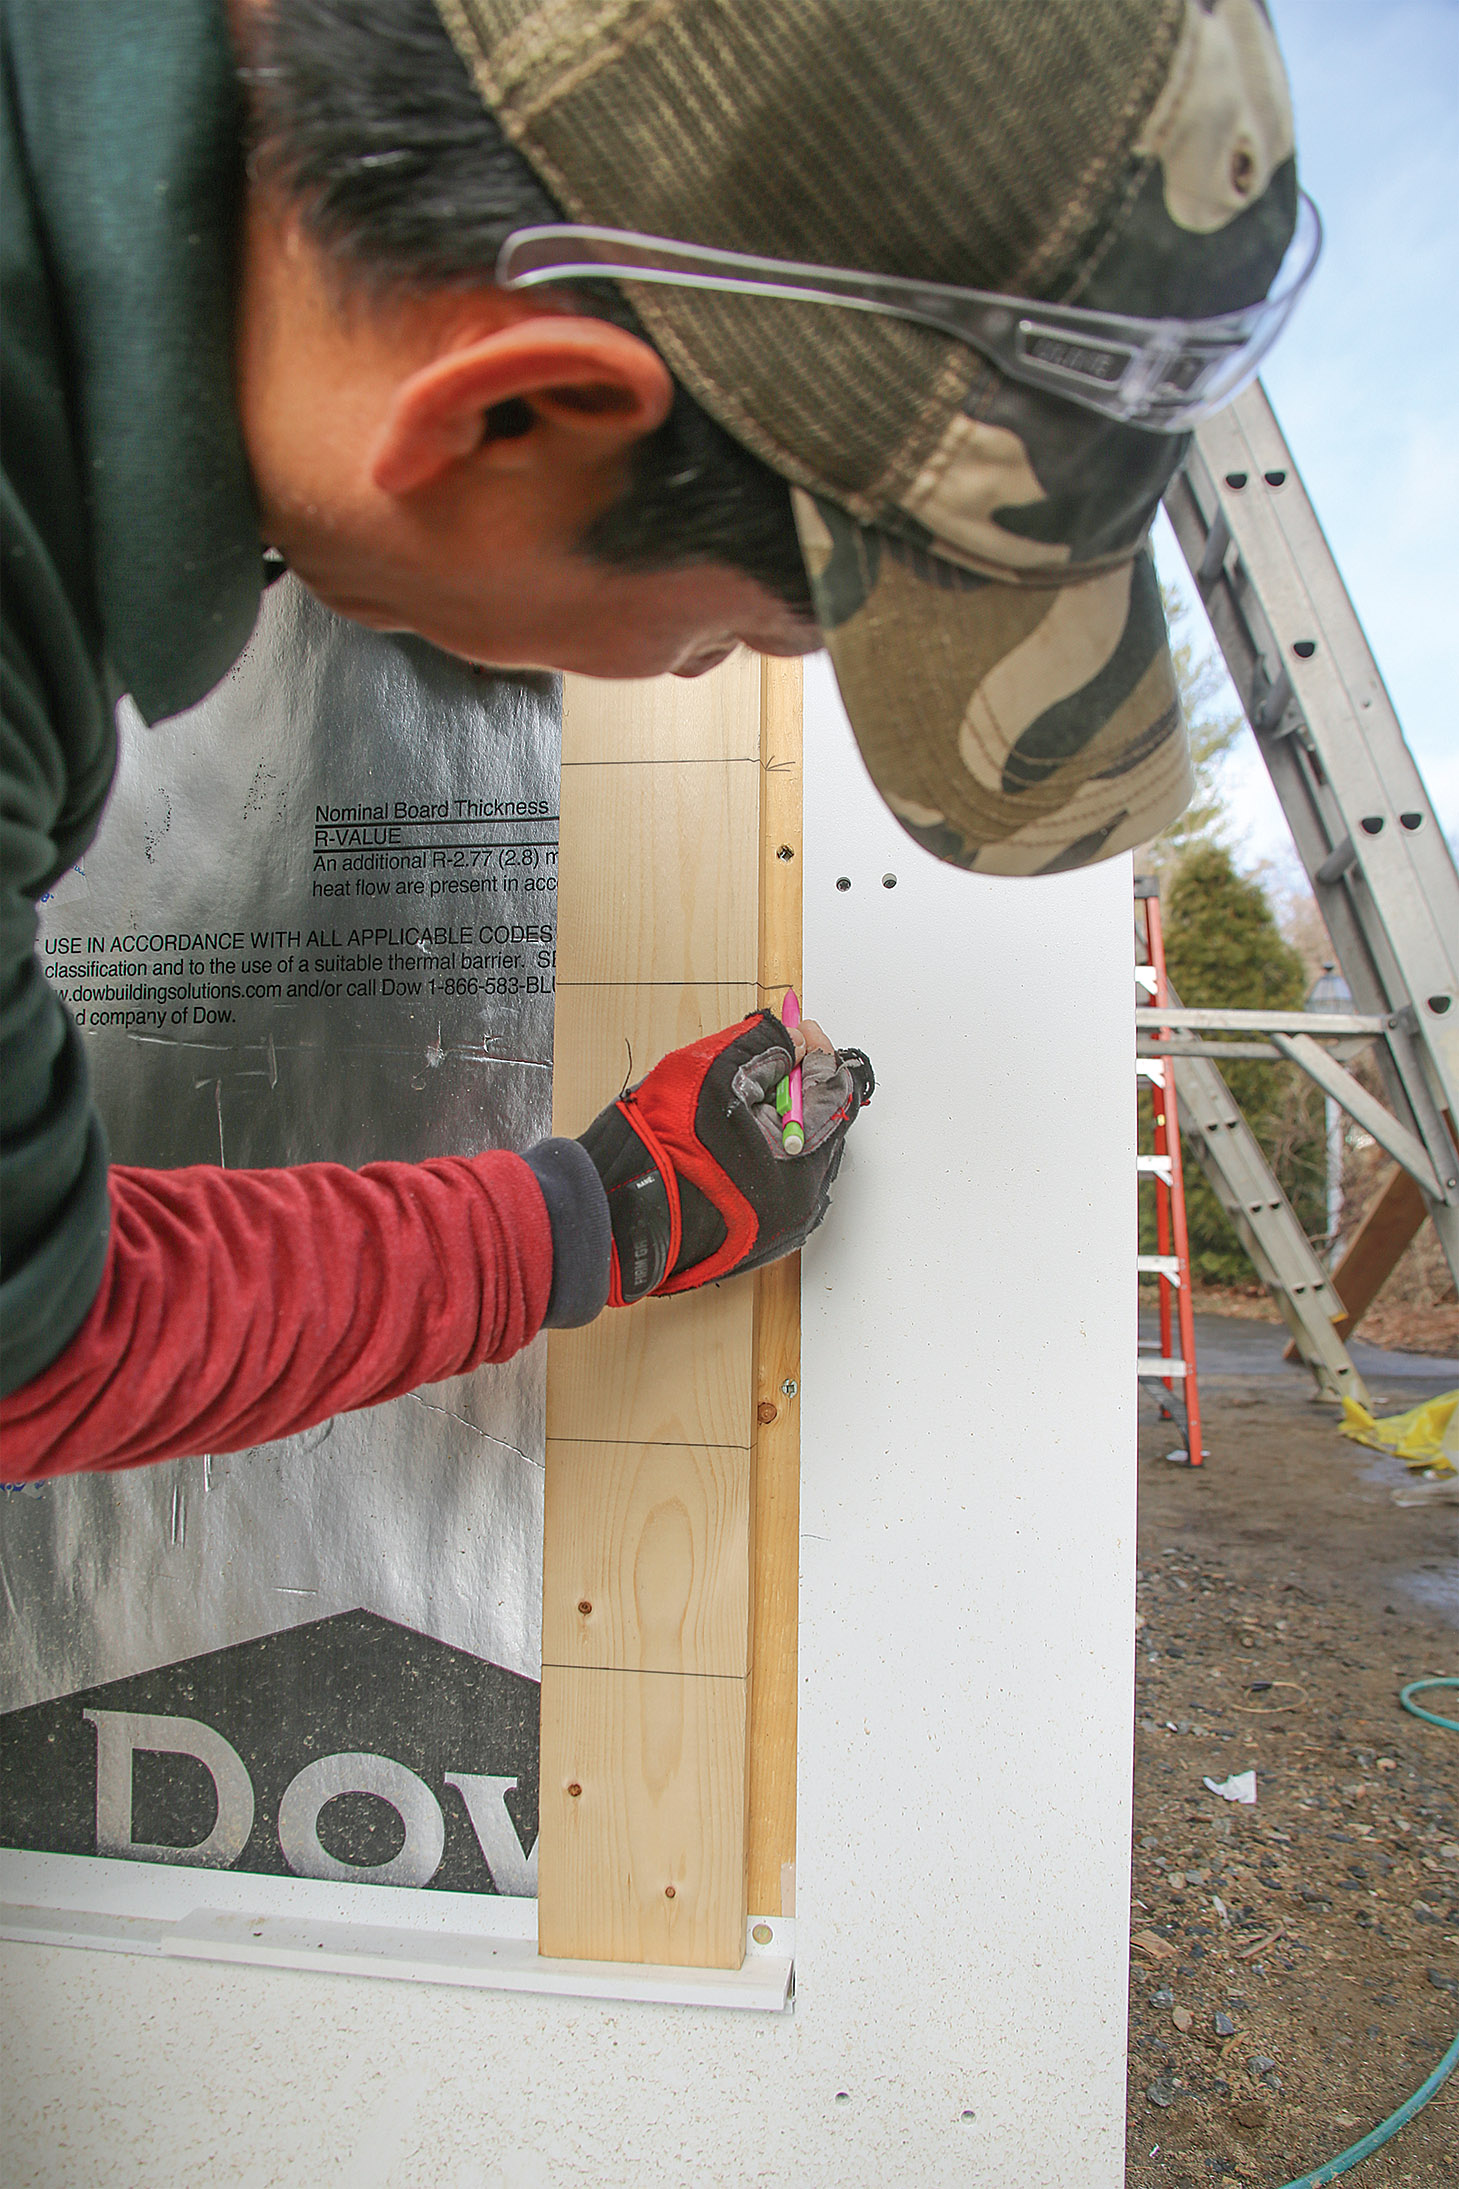
Mark Both Ends: Place the story pole, marked with a 4-in. siding exposure, on top of a 1⁄4-in. shim that creates the manufacturer-required gap above the water table. Once in place, transfer the siding courses from the story pole to the furring strips at both ends of each run. Snap chalklines between the marks so the siding can be easily aligned for its entire length.
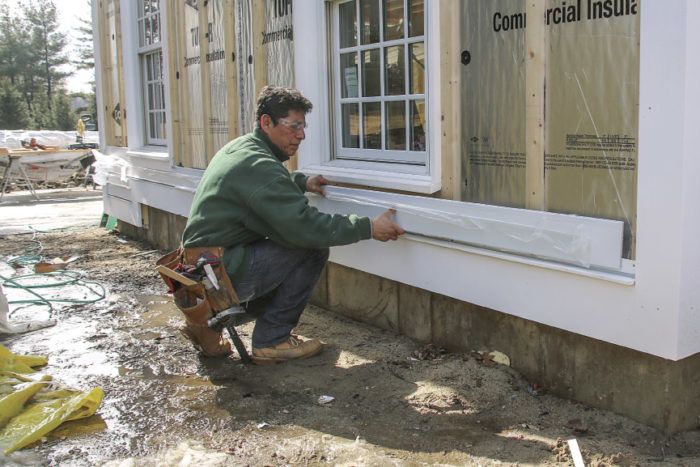
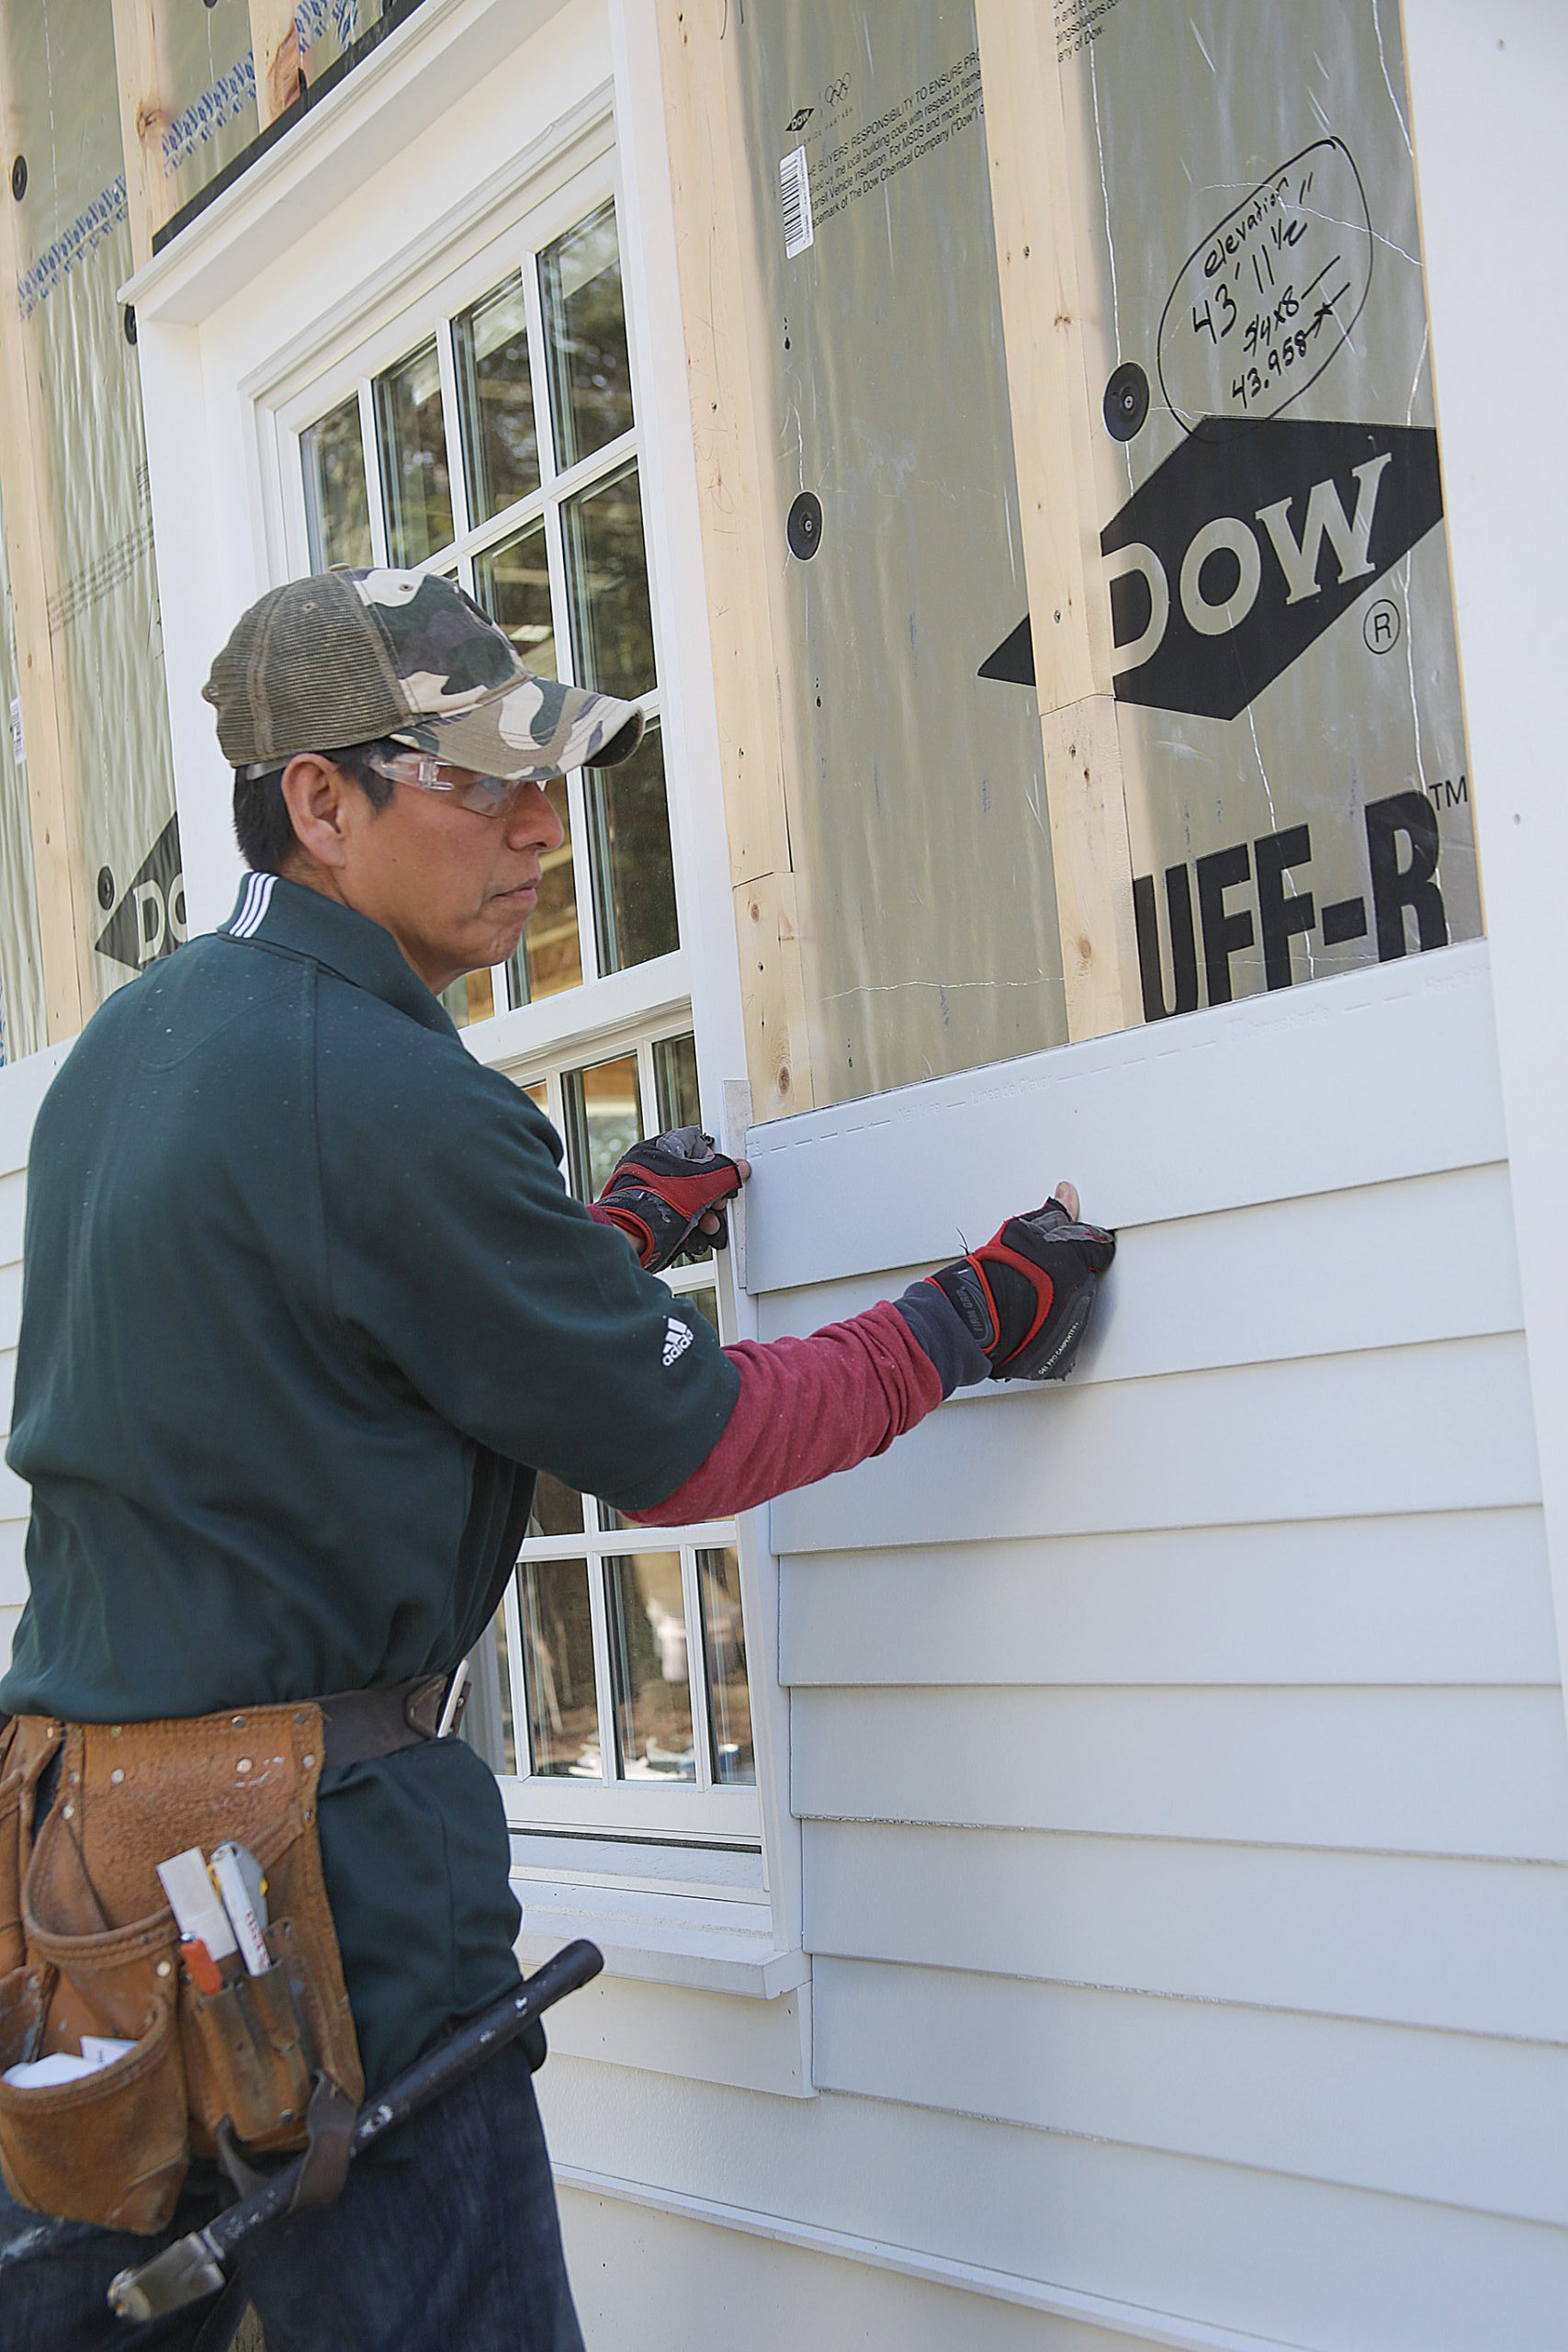
The First Course

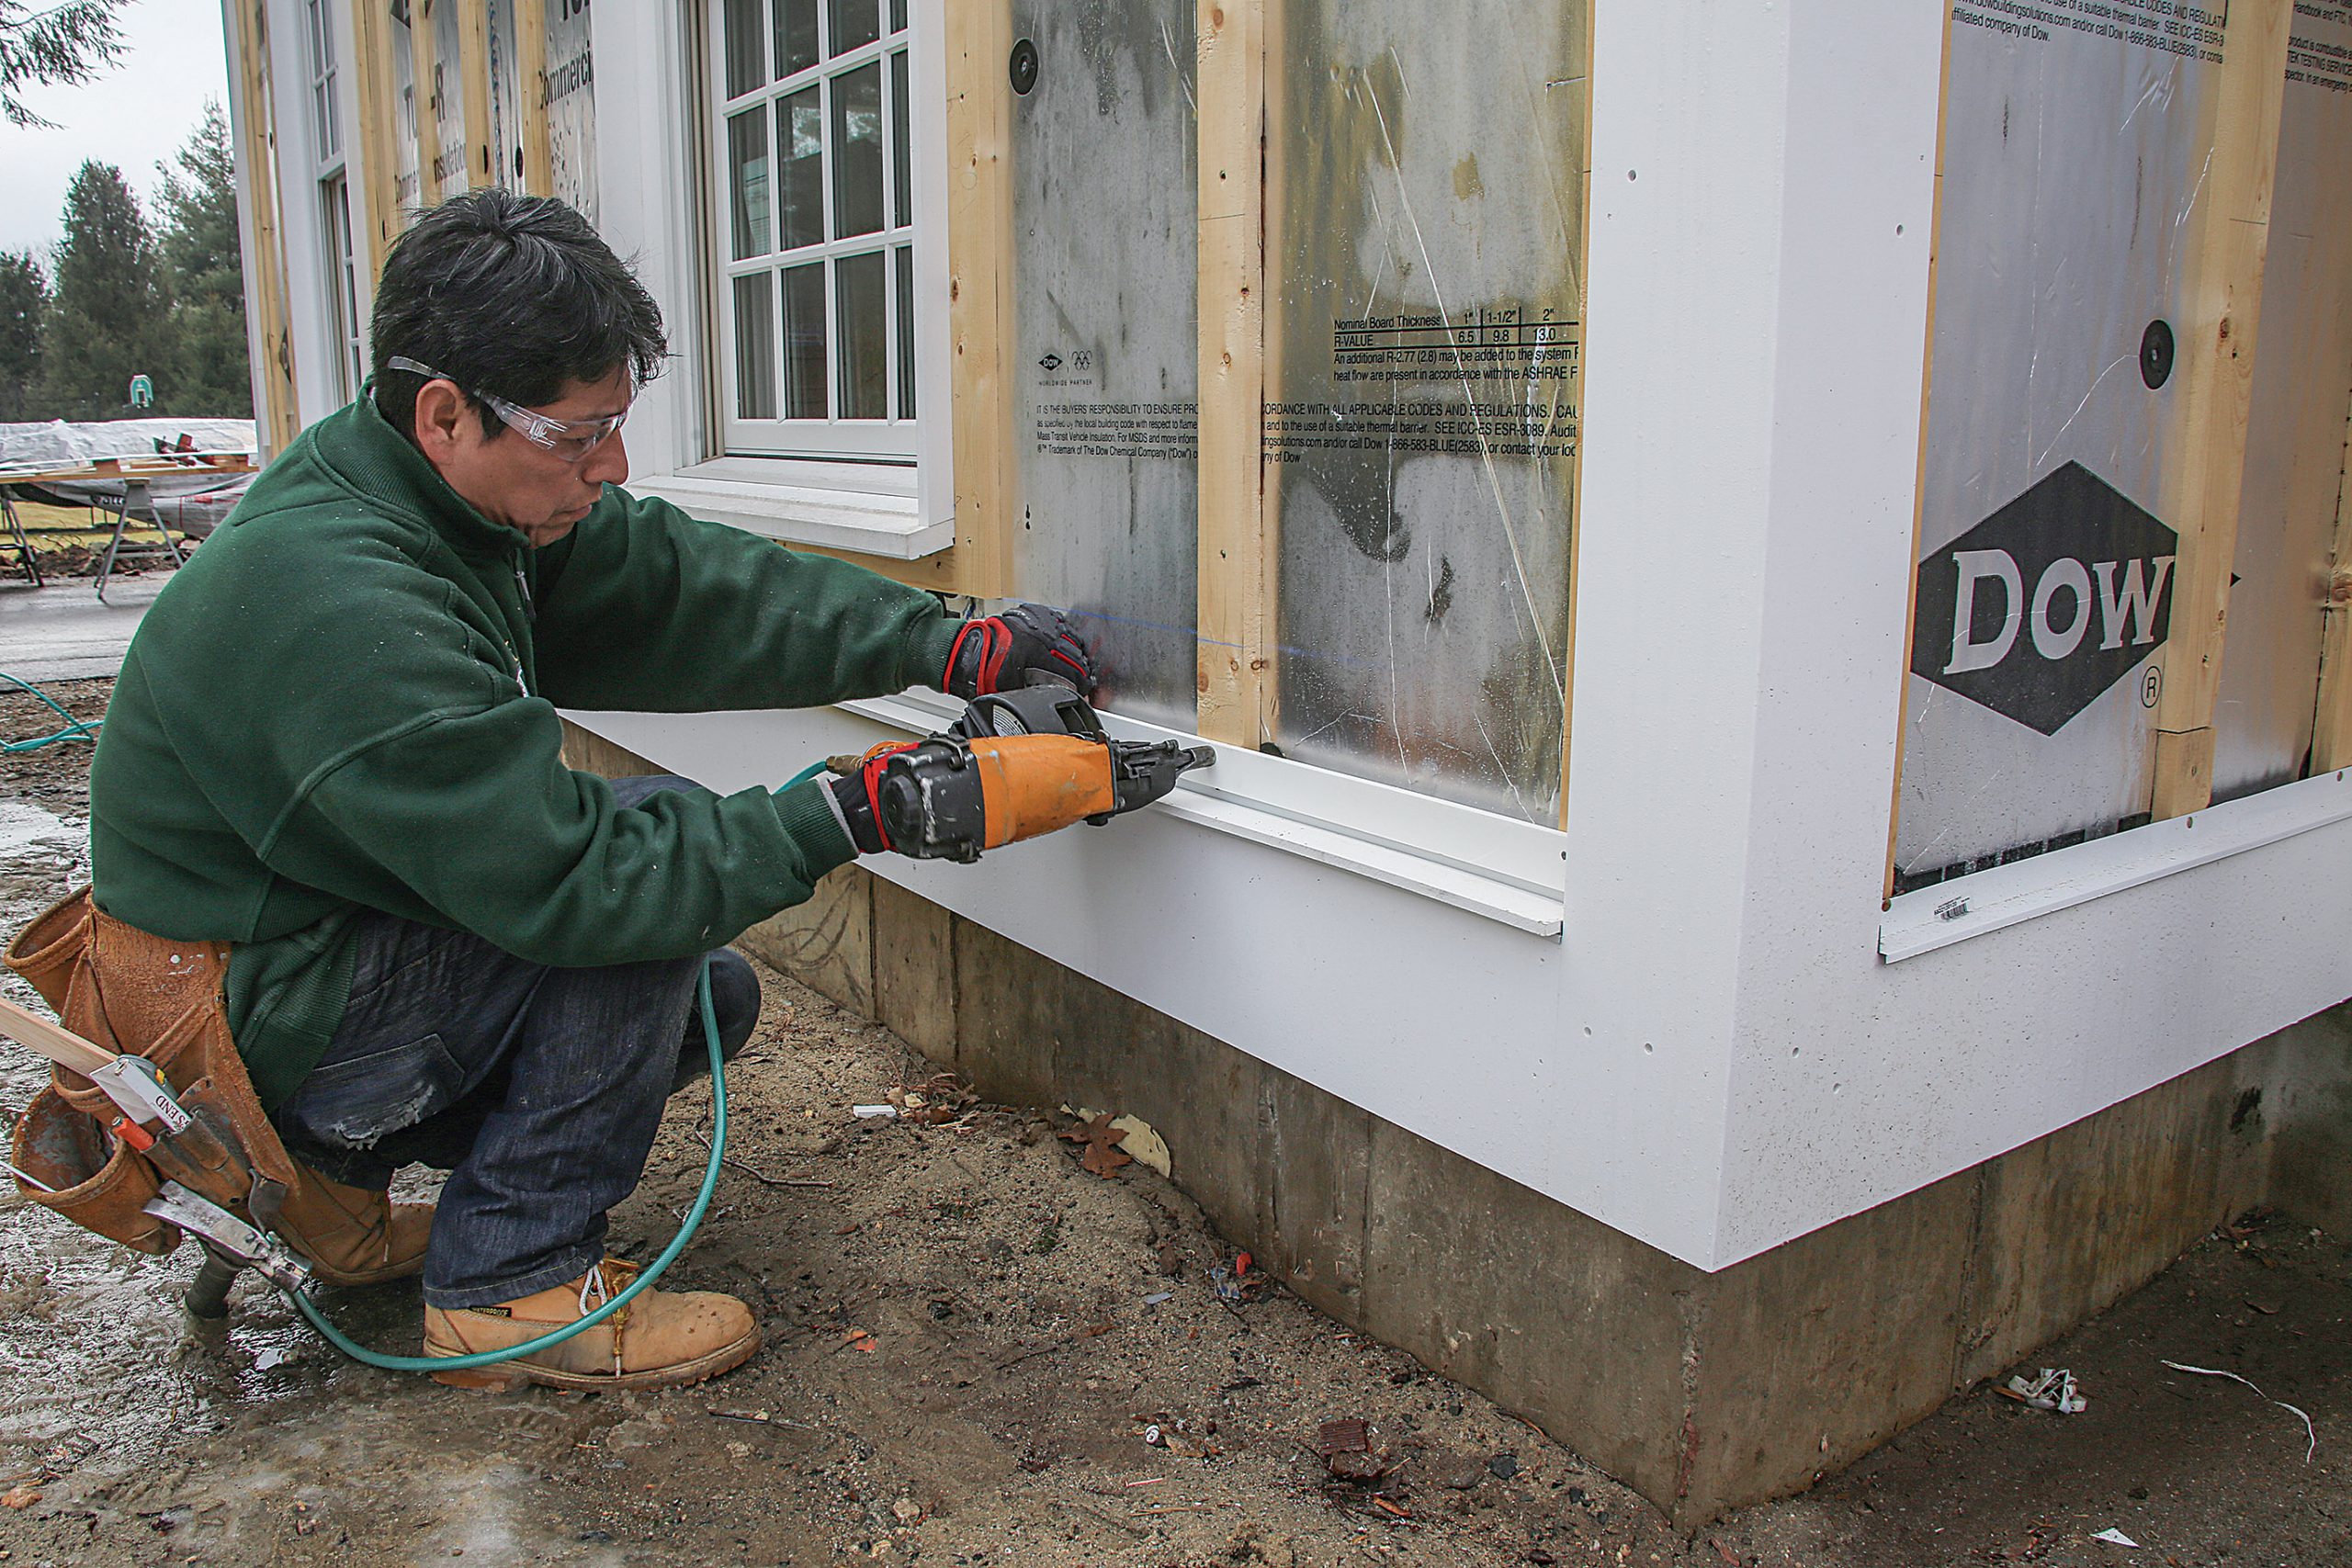
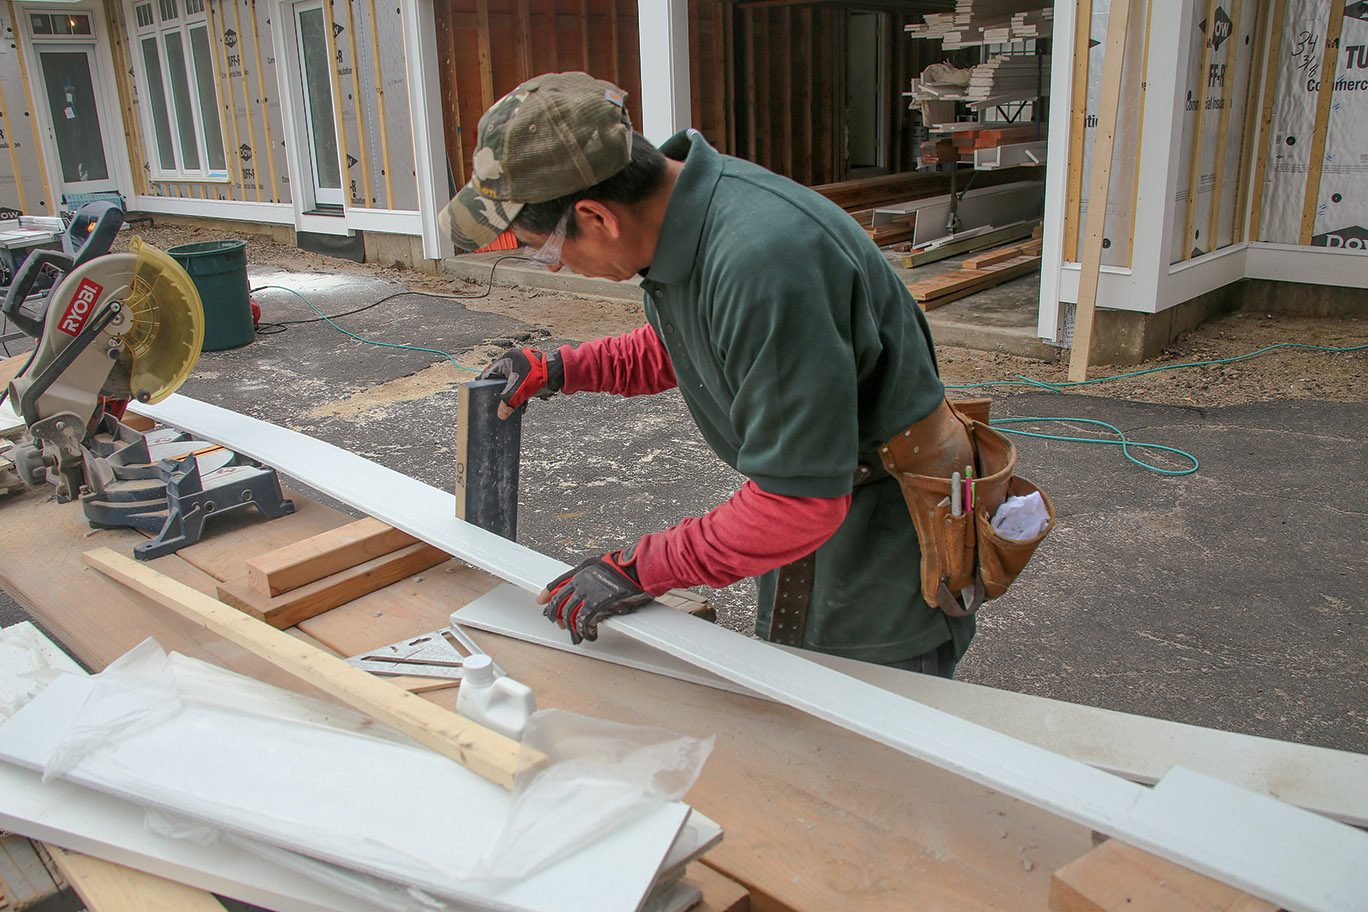
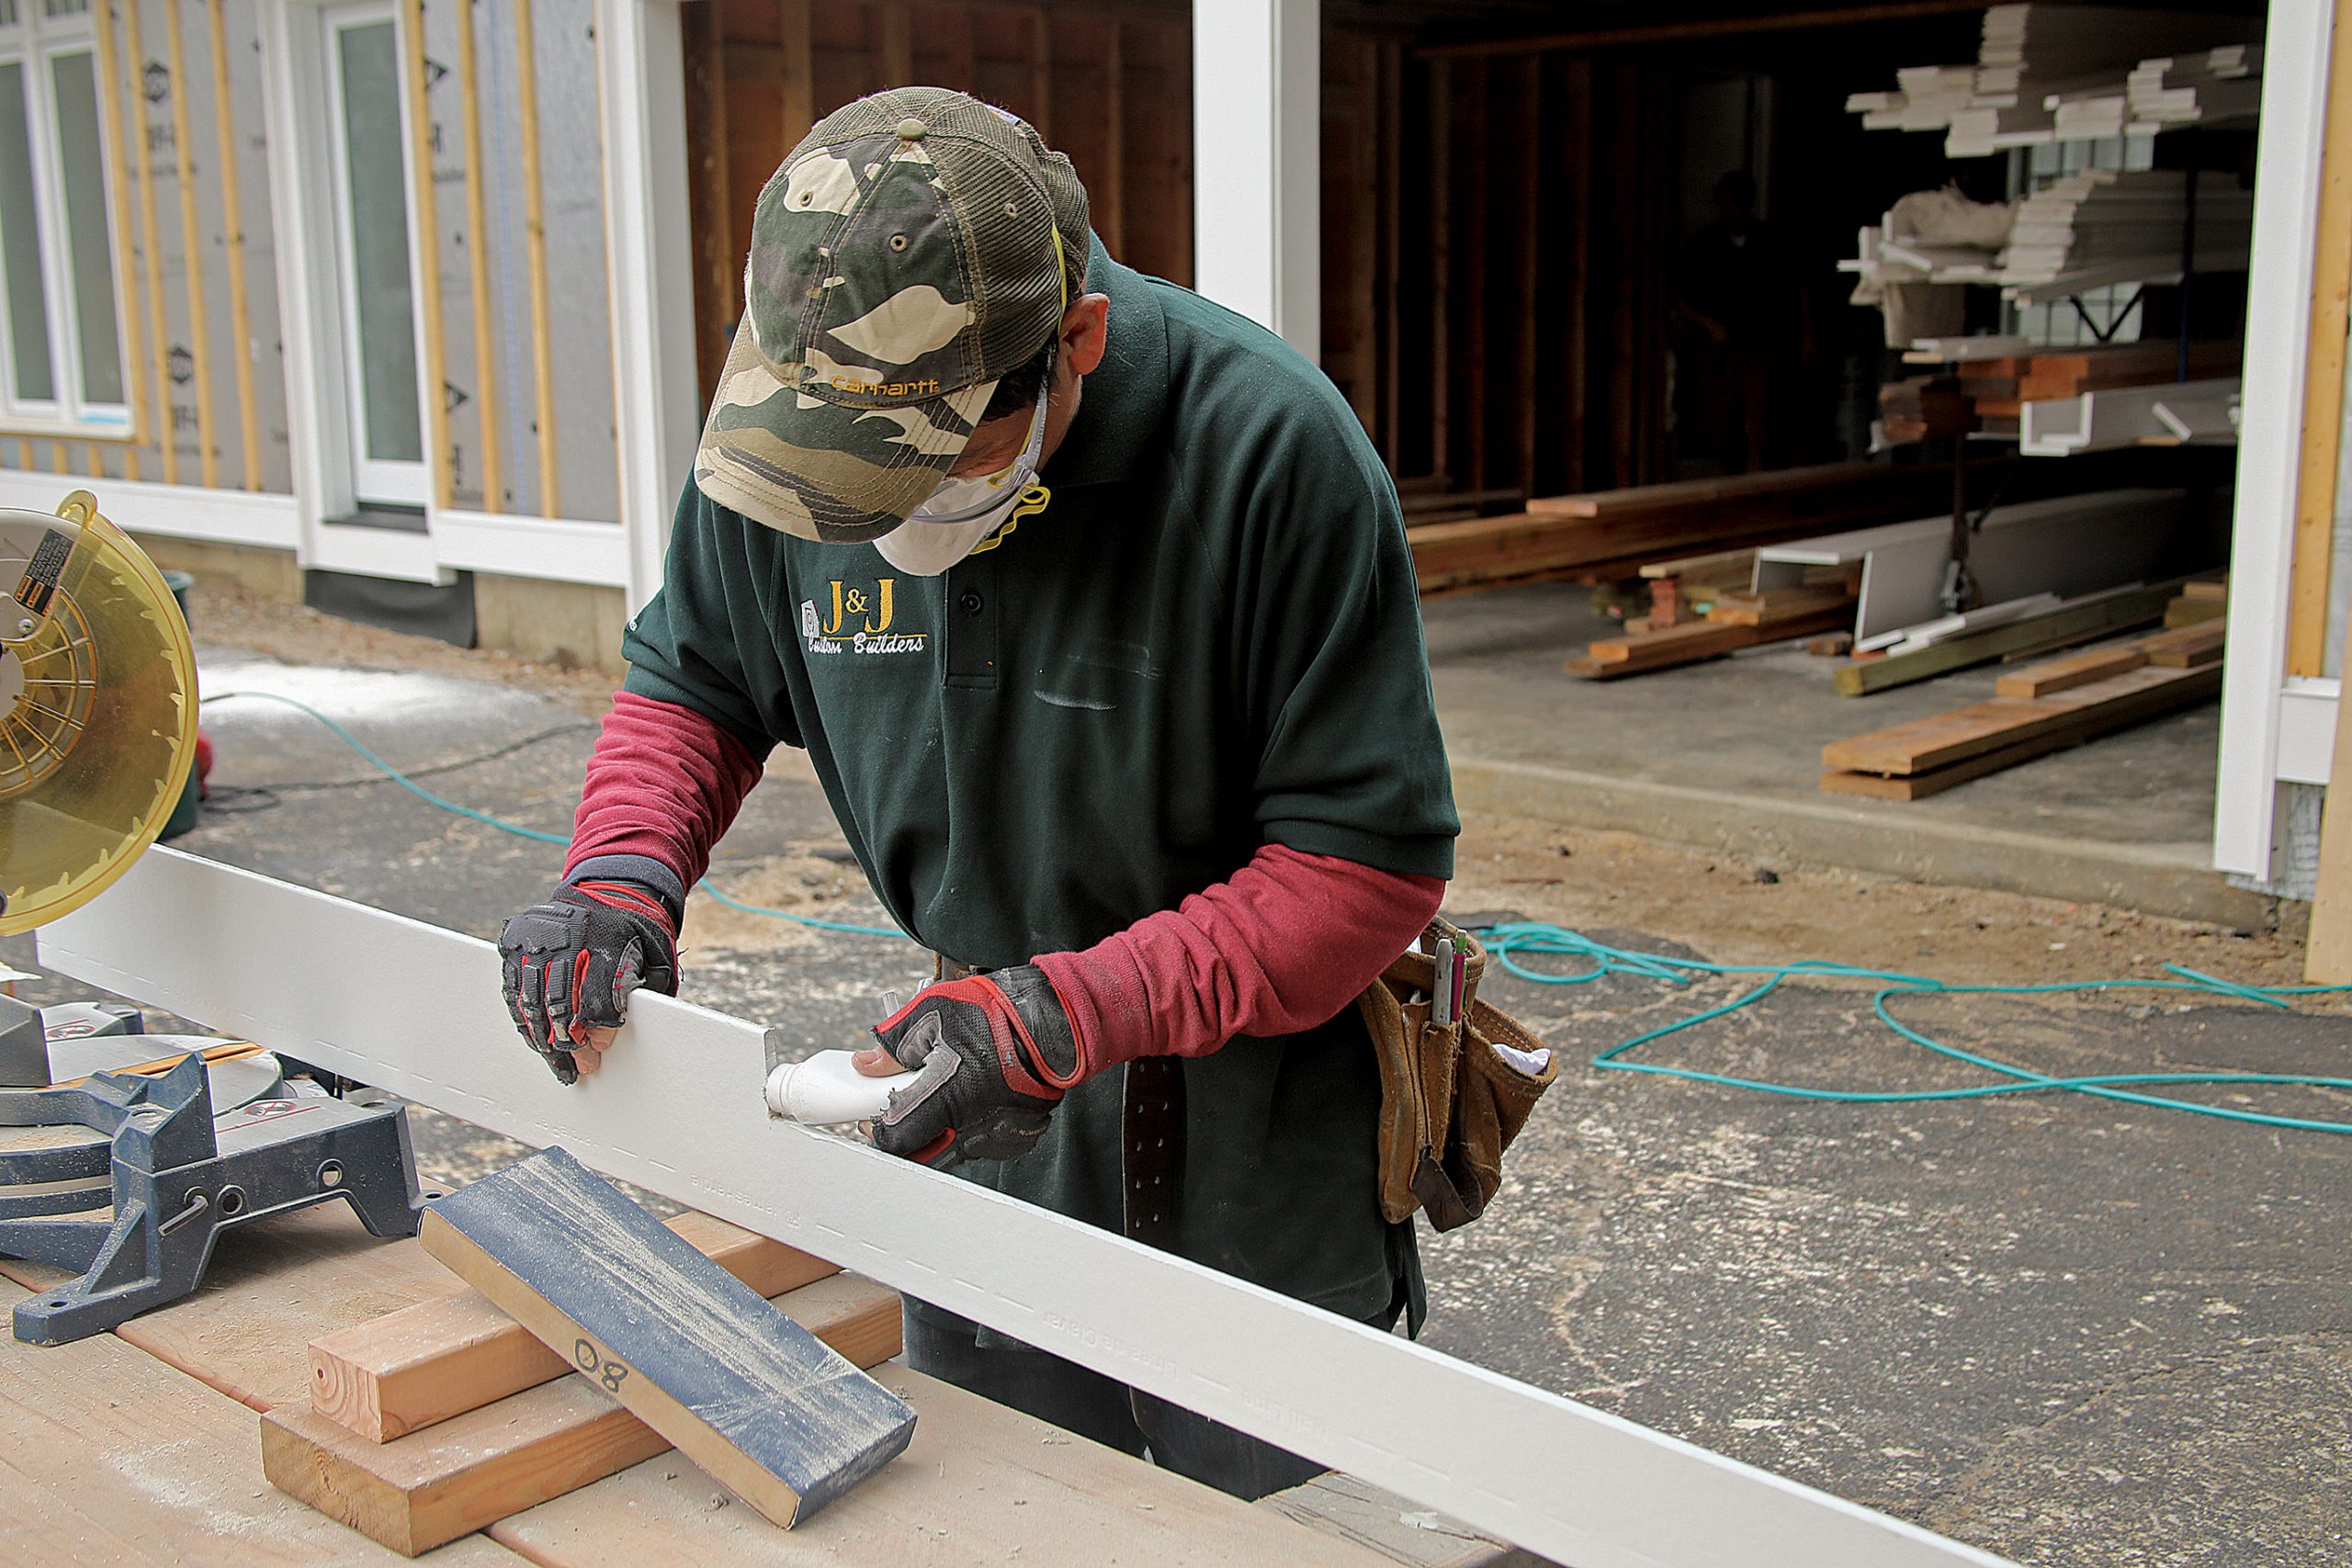
The first piece of siding sets the stage for everything that is fastened above it, so be sure the water table is level, the starter strip is in place, and the first course is fit and fastened according to manufacturer instructions.

A 1-1⁄4-in.-wide starter strip—ripped from 1⁄4-in.-thick PVC sheet stock—angles the first course of siding so it matches the subsequent courses.
Begin with a Starter Strip: A 1-1⁄4-in.-wide starter strip—ripped from 1⁄4-in.-thick PVC sheet stock—angles the first course of siding so it matches the subsequent courses. Set the starter strip atop 1⁄4-in.-thick shims and fasten it to the furring strips with 1-1⁄4-in. stainless-steel ring-shank siding nails.

Set the first course of siding atop the same 1⁄4-in.-thick shims to create a drainage space between it and the water table below
Hang the First Plank: Set the first course of siding atop the same 1⁄4-in.-thick shims to create a drainage space between it and the water table below, eliminating the chance of the siding wicking water. Once it’s in place, nail the plank into the furring—following the stamped nailing line and ensuring the nails are driven snug with minimal, if any, countersinking—before removing the shims.


Flash butt joints
Flash Butt Joints: Cut siding planks so that any butt joints land in the center of a furring strip where they can be backed up with flashing (bearclip.com) before being nailed about 1⁄2 in. from the end of the plank. Offset seams at least 2 ft. and arrange them so they don’t create a repeating pattern.


Watertight Details Under Windows
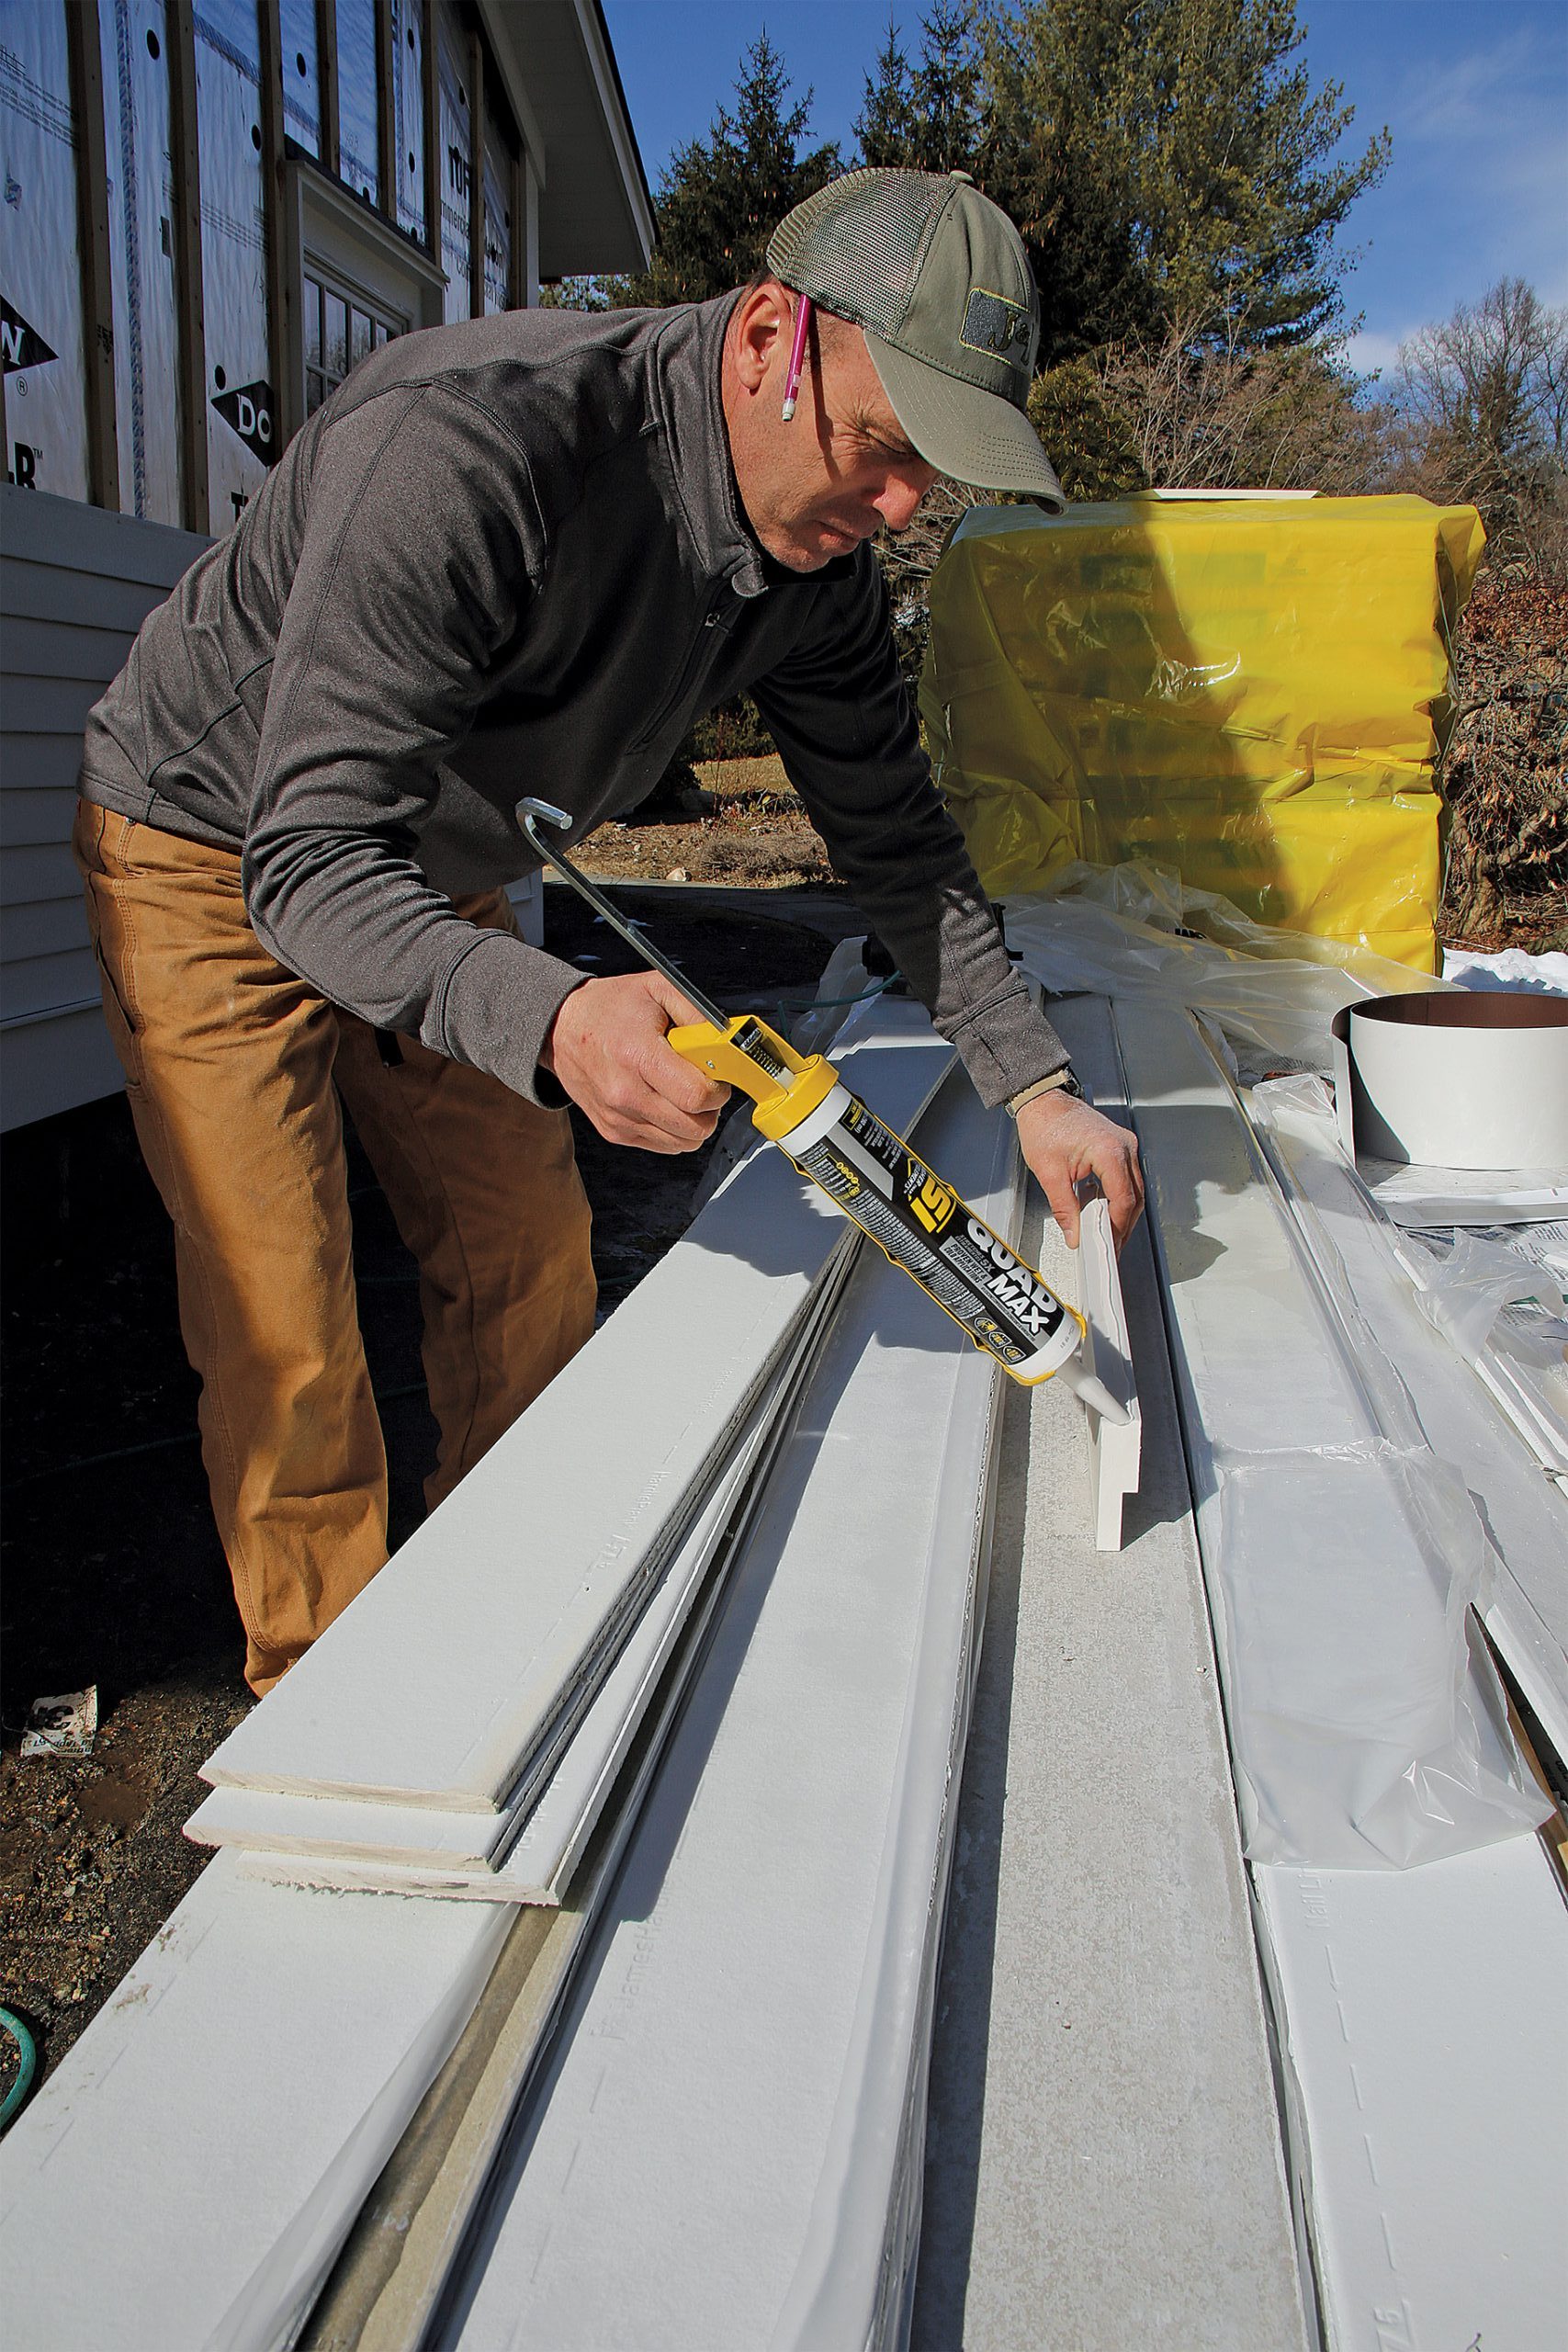
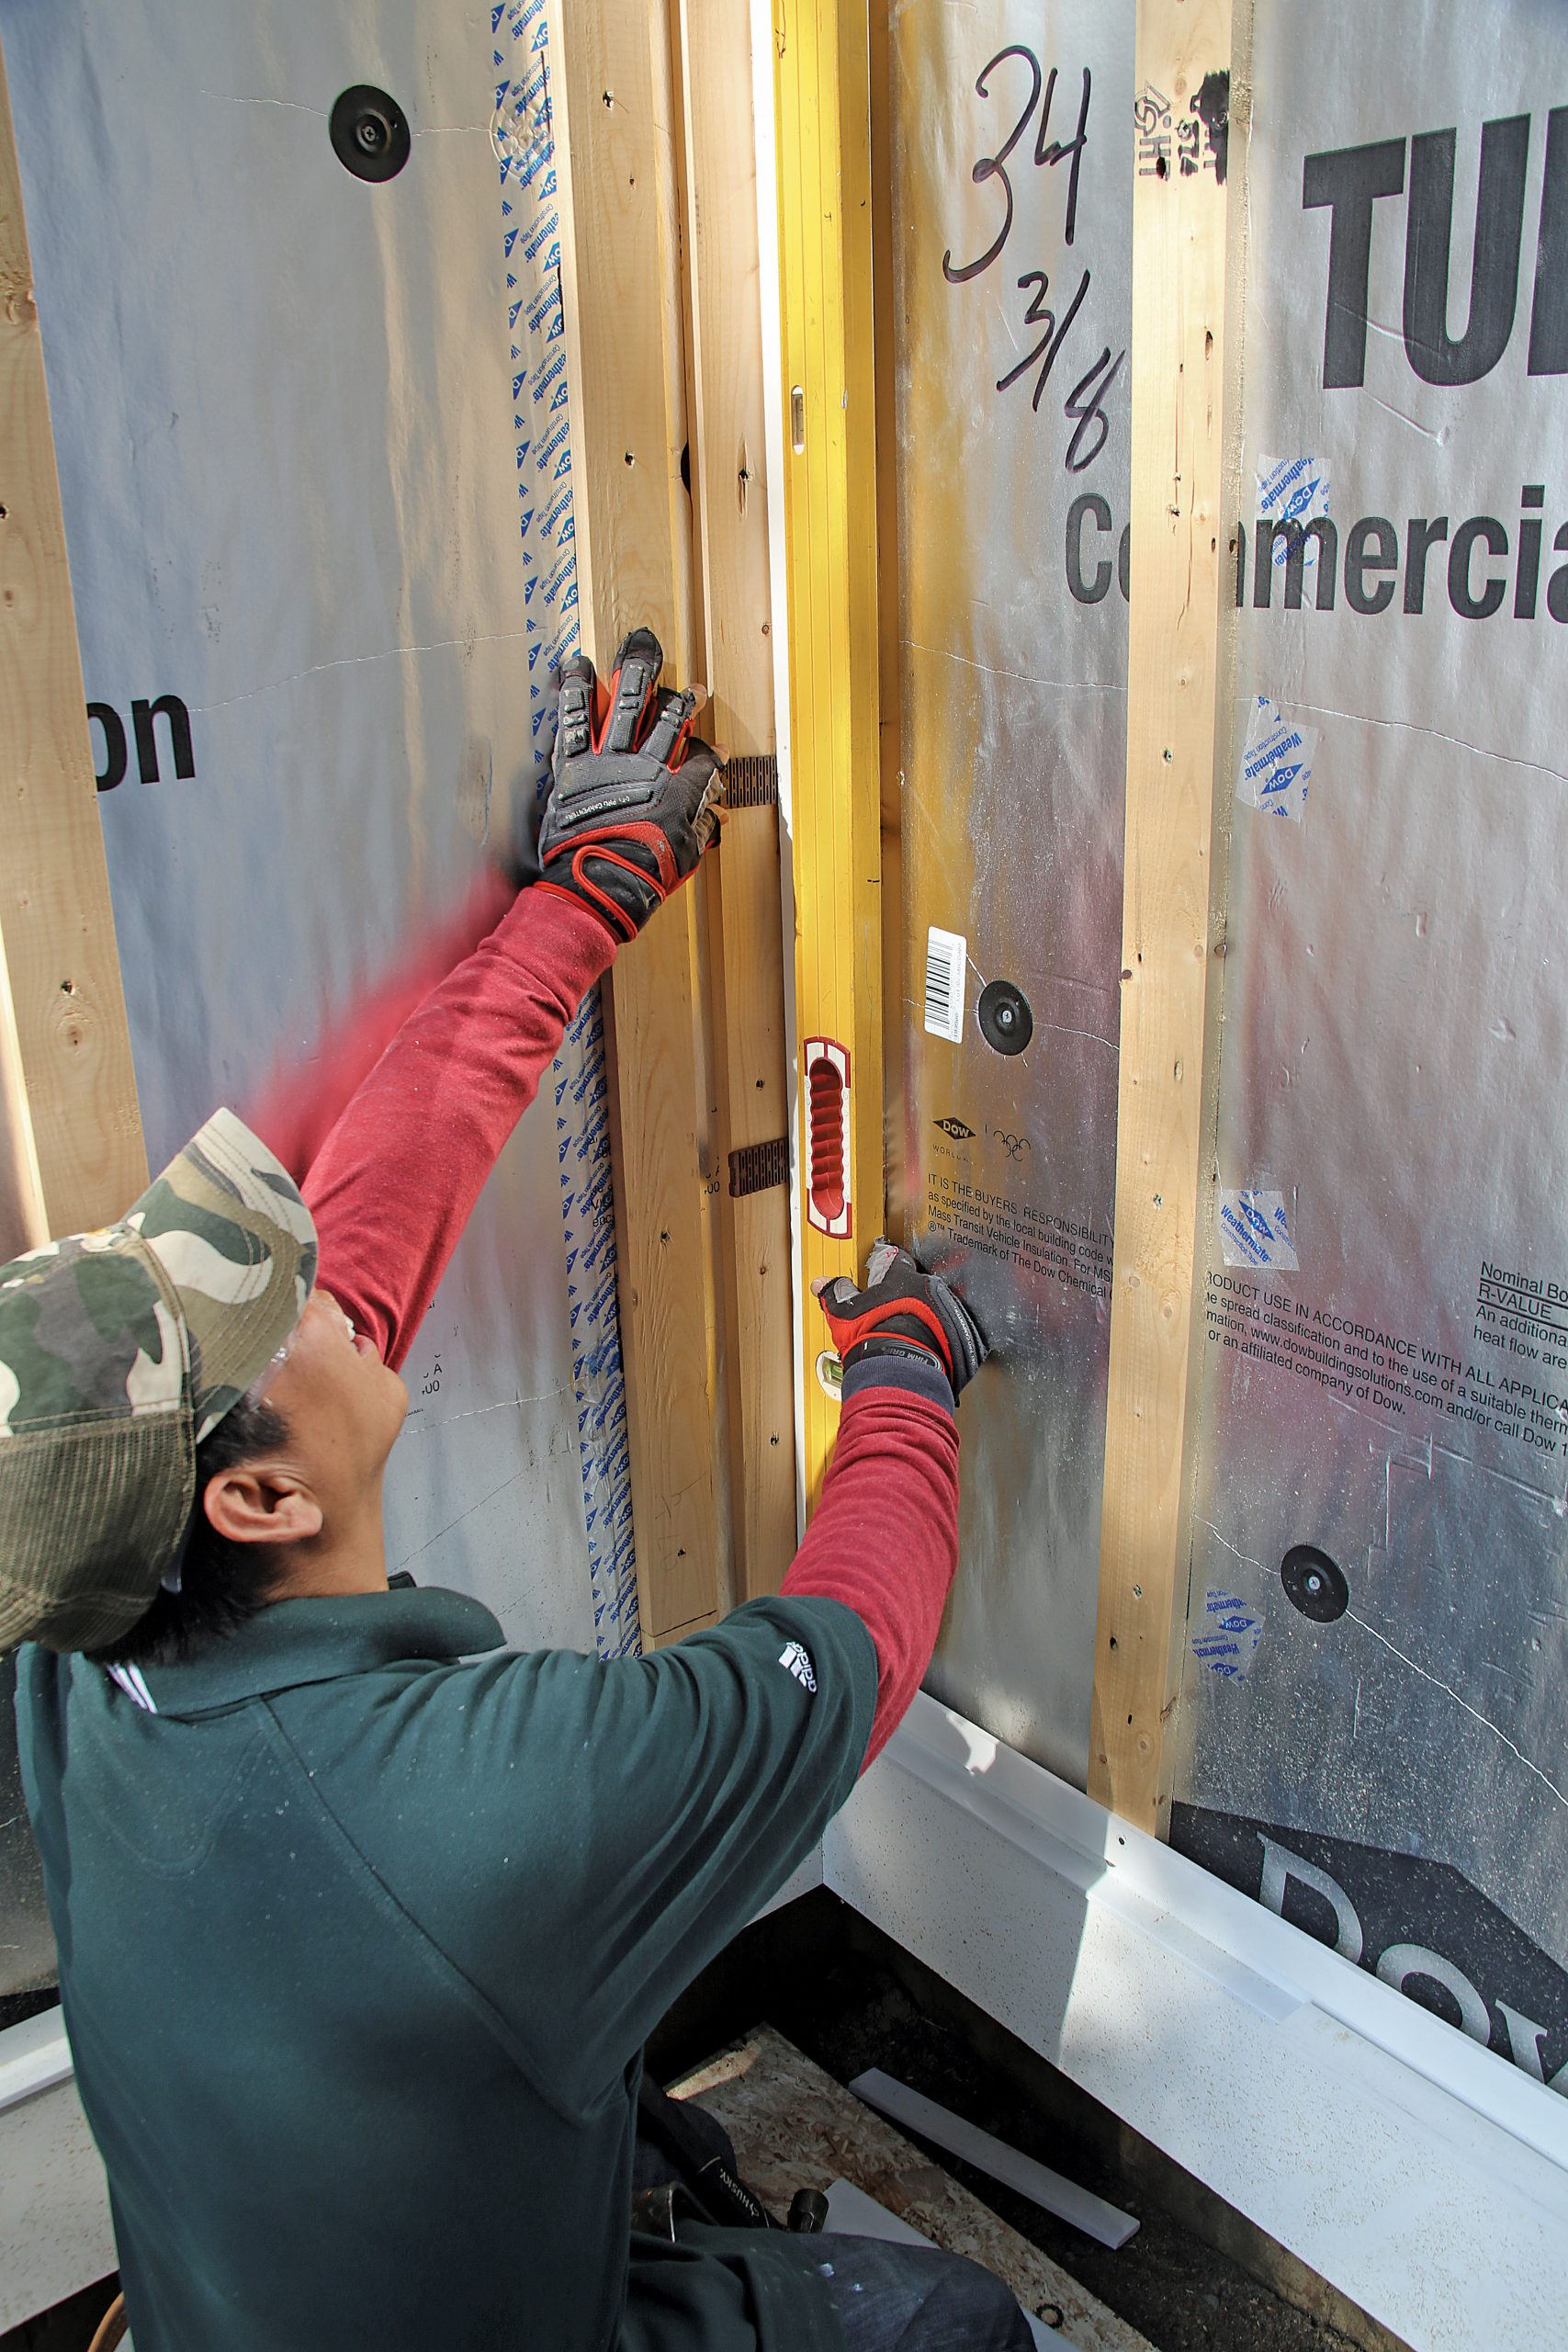
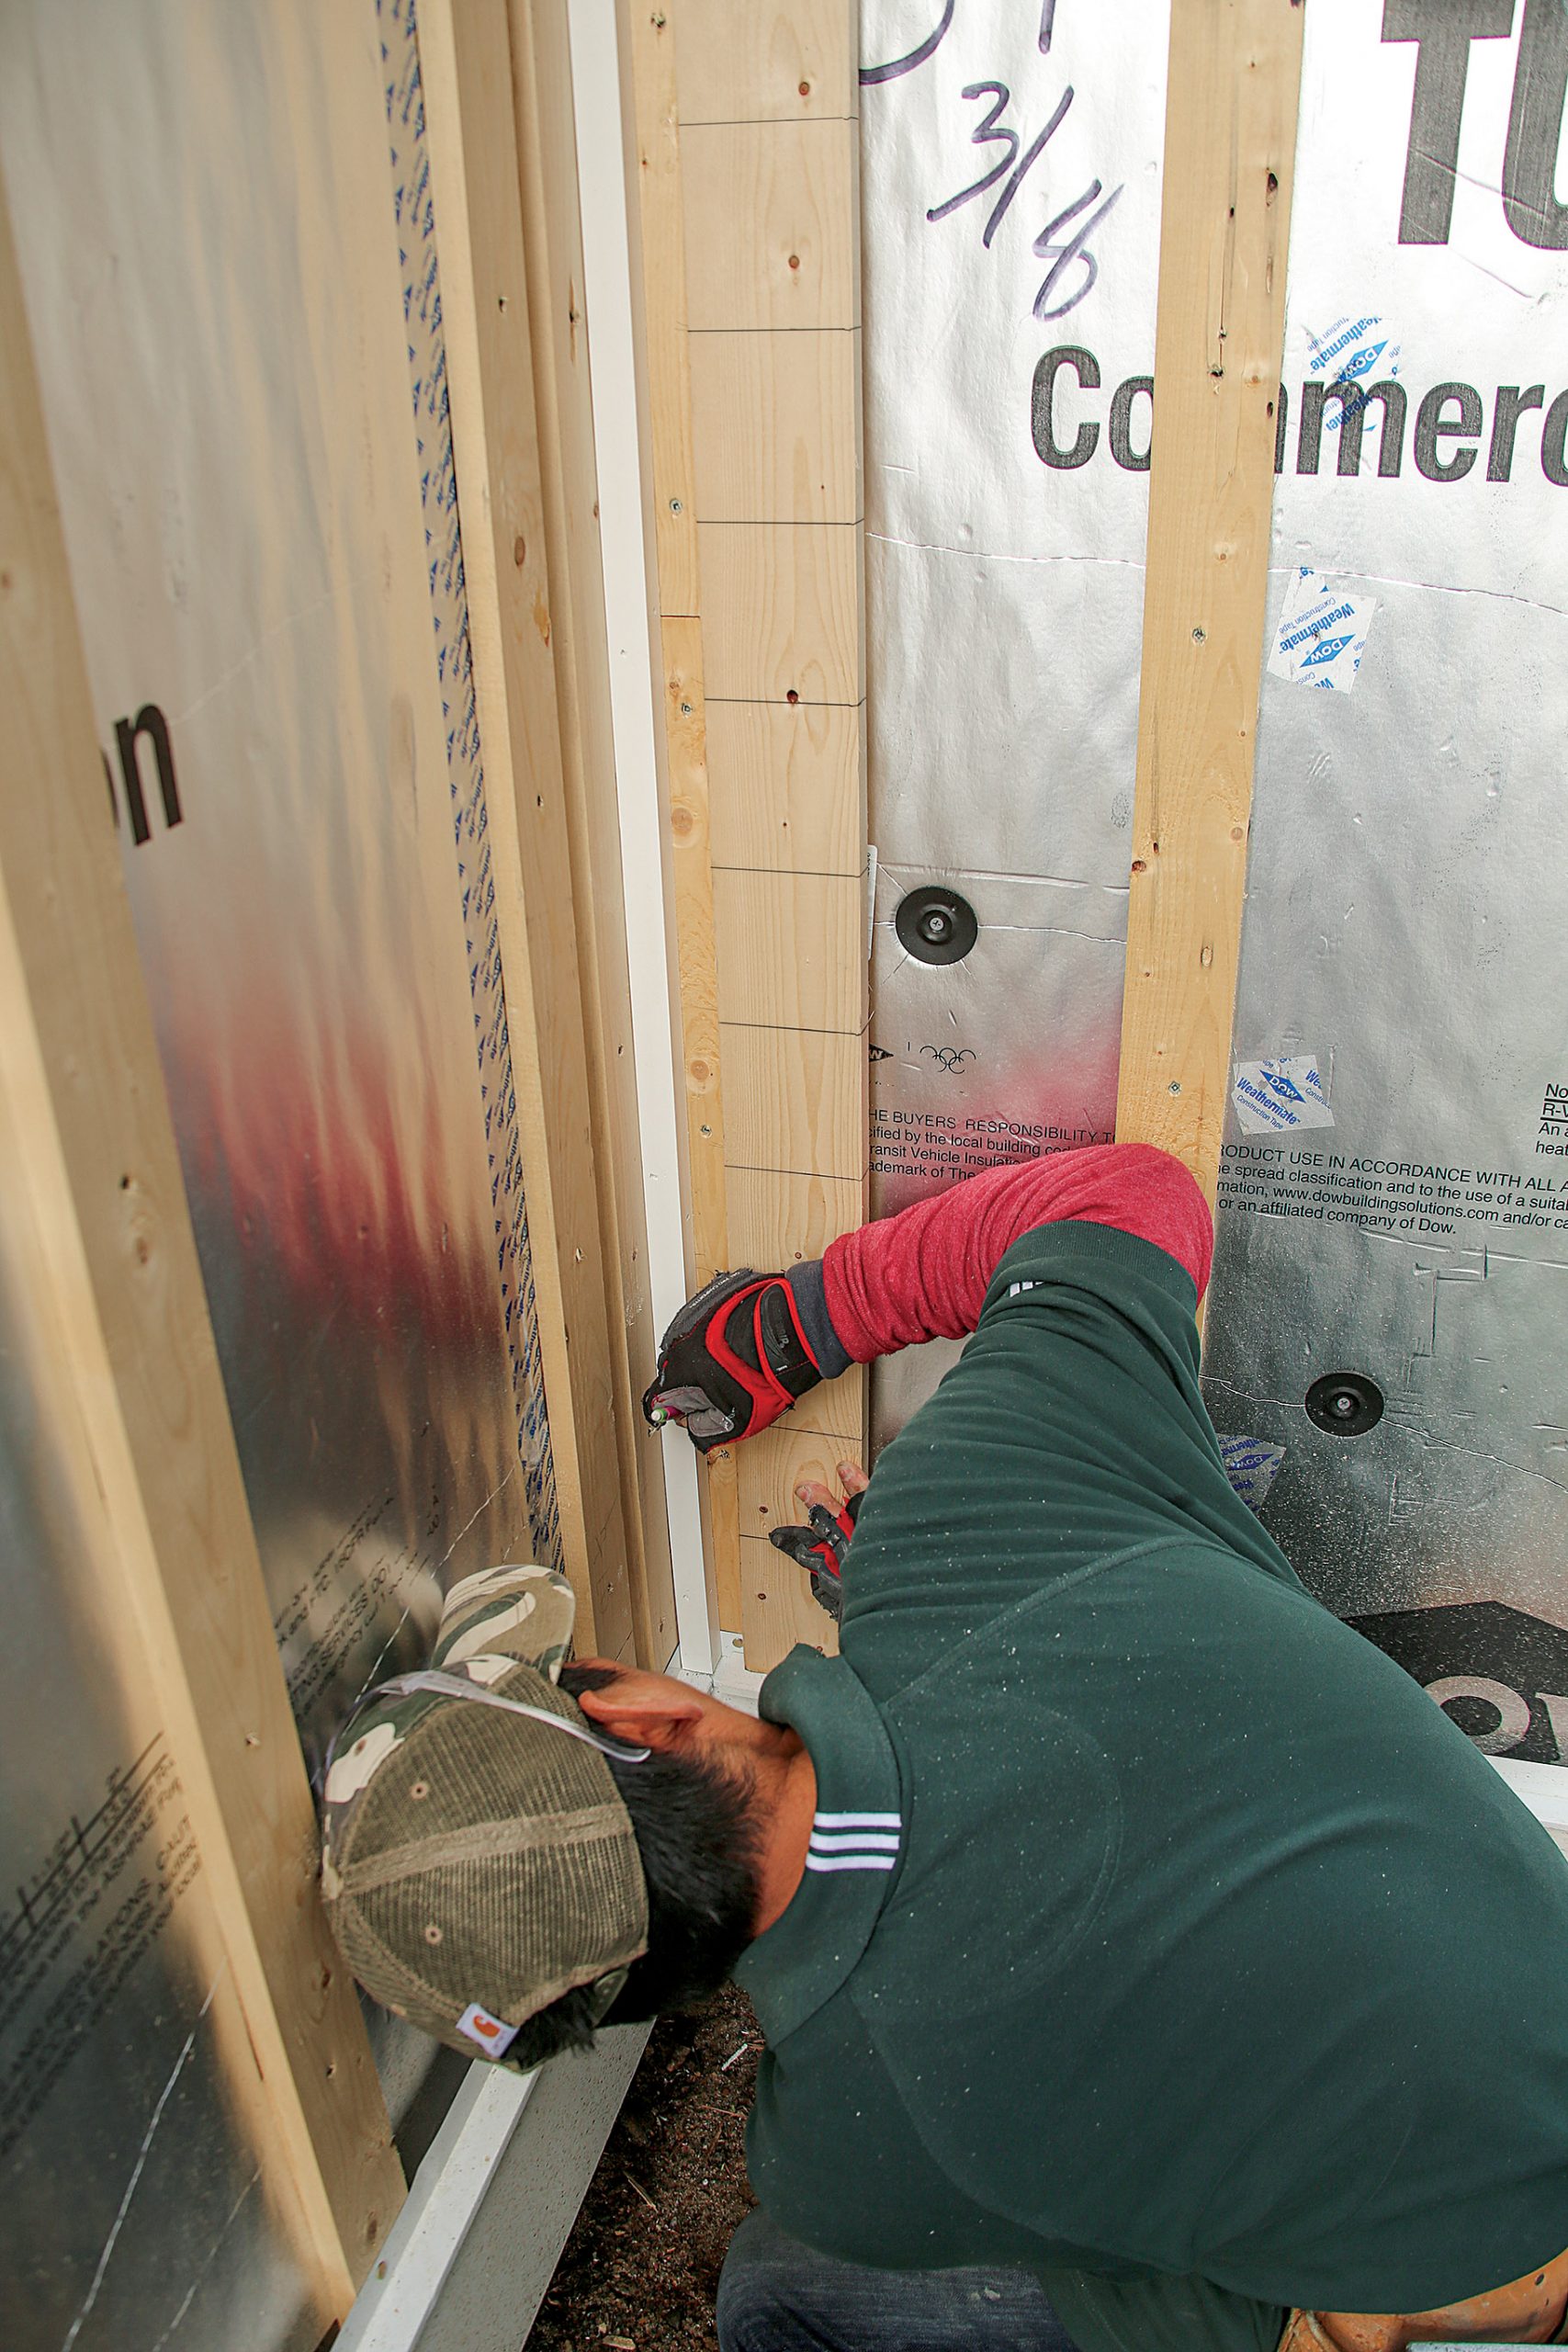
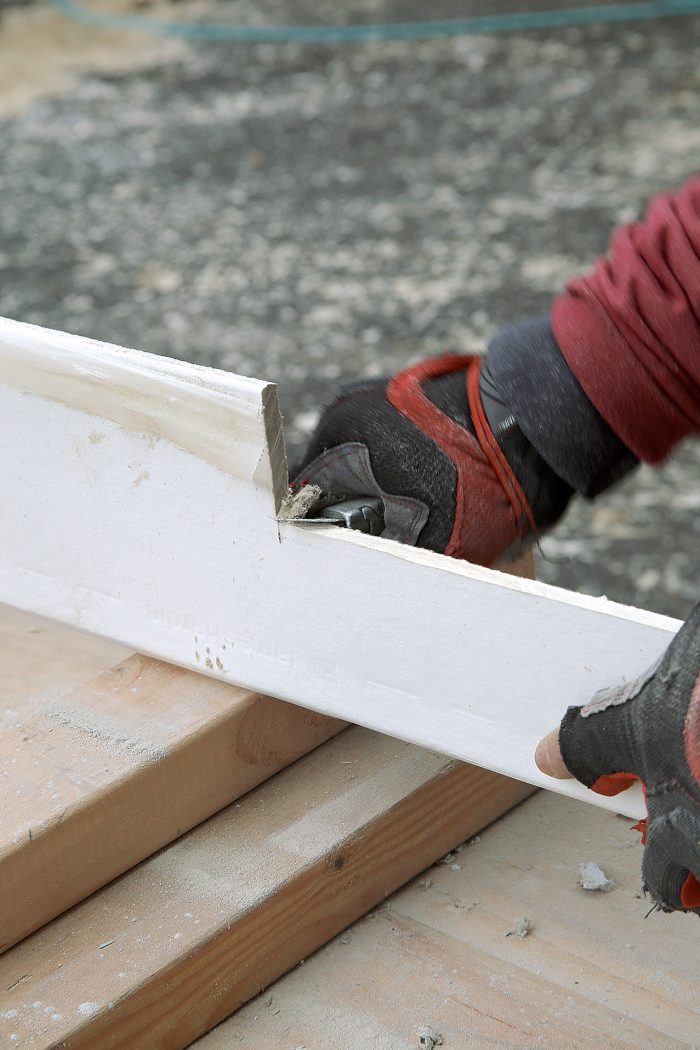
To prevent wind-driven rain from getting under windows, lap the bottom of the windowsill
Extra protection. To prevent wind-driven rain from getting under windows, lap the bottom of the windowsill and the nearest full course of siding below with a 6-in. layer of self-adhered flashing.
Apply a liberal bead of solvent-based, all-weather sealant to the apron’s top edge
Seal First: Apply a liberal bead of solvent-based, all-weather sealant to the apron’s top edge, which will be in contact with the underside of the window’s sill nosing, before nailing the apron to the wall.
Windows wear an apron.
Windows wear an apron. Cut the 5/4 PVC window aprons with a bevel at the top that matches the slope of the sill and a notch on the back that matches the angle of the lap siding. The size of the notch varies with the layout of the courses, so each is custom-cut.

Fit and Fasten

Shim for an even gap
Shim for an Even Gap: When measuring and fitting each plank, use an 1⁄8-in.-thick shim at either end to ensure a consistent gap where the ends of siding planks butt into trim boards.

he tops and bottoms of windows and the tops of doors often require a U-shaped cut
Work Around Windows and Doors: The tops and bottoms of windows and the tops of doors often require a U-shaped cut. We prefer to make these cuts using a circular saw equipped with a fiber-cement blade.

Instead of overcutting the corners, stop the vertical cuts of a U-shaped cutout at the layout marks on the panel’s front side.

break off the waste piece and square up the corners with a utility knife.
Clean Up Corners: Instead of overcutting the corners, stop the vertical cuts of a U-shaped cutout at the layout marks on the panel’s front side. Then break off the waste piece and square up the corners with a utility knife.

Cut ends, even in fiber-cement siding, will wick moisture and lead to degradation and peeling paint.
Prime Cuts: Cut ends, even in fiber-cement siding, will wick moisture and lead to degradation and peeling paint. We prefer to apply primer with a foam-tipped squeeze bottle, much like a liquid shoe polish.

Watertight Details Above Windows

The flat casing surrounding each window and door is topped with a PVC drip cap and an aluminum drip cap.
The flat casing surrounding each window and door is topped with a PVC drip cap and an aluminum drip cap. Both pieces are meant to direct water away from the opening.
Install the planks over openings with the same 1⁄4-in. gap used below the first course
Mind the Gap: Install the planks over openings with the same 1⁄4-in. gap used below the first course. These gaps are not caulked, allowing water to get out from behind the siding and air to circulate for fast drying.

Finishing Up

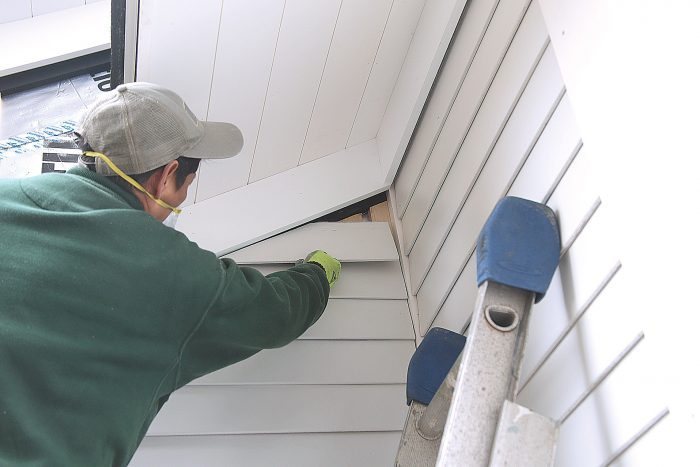
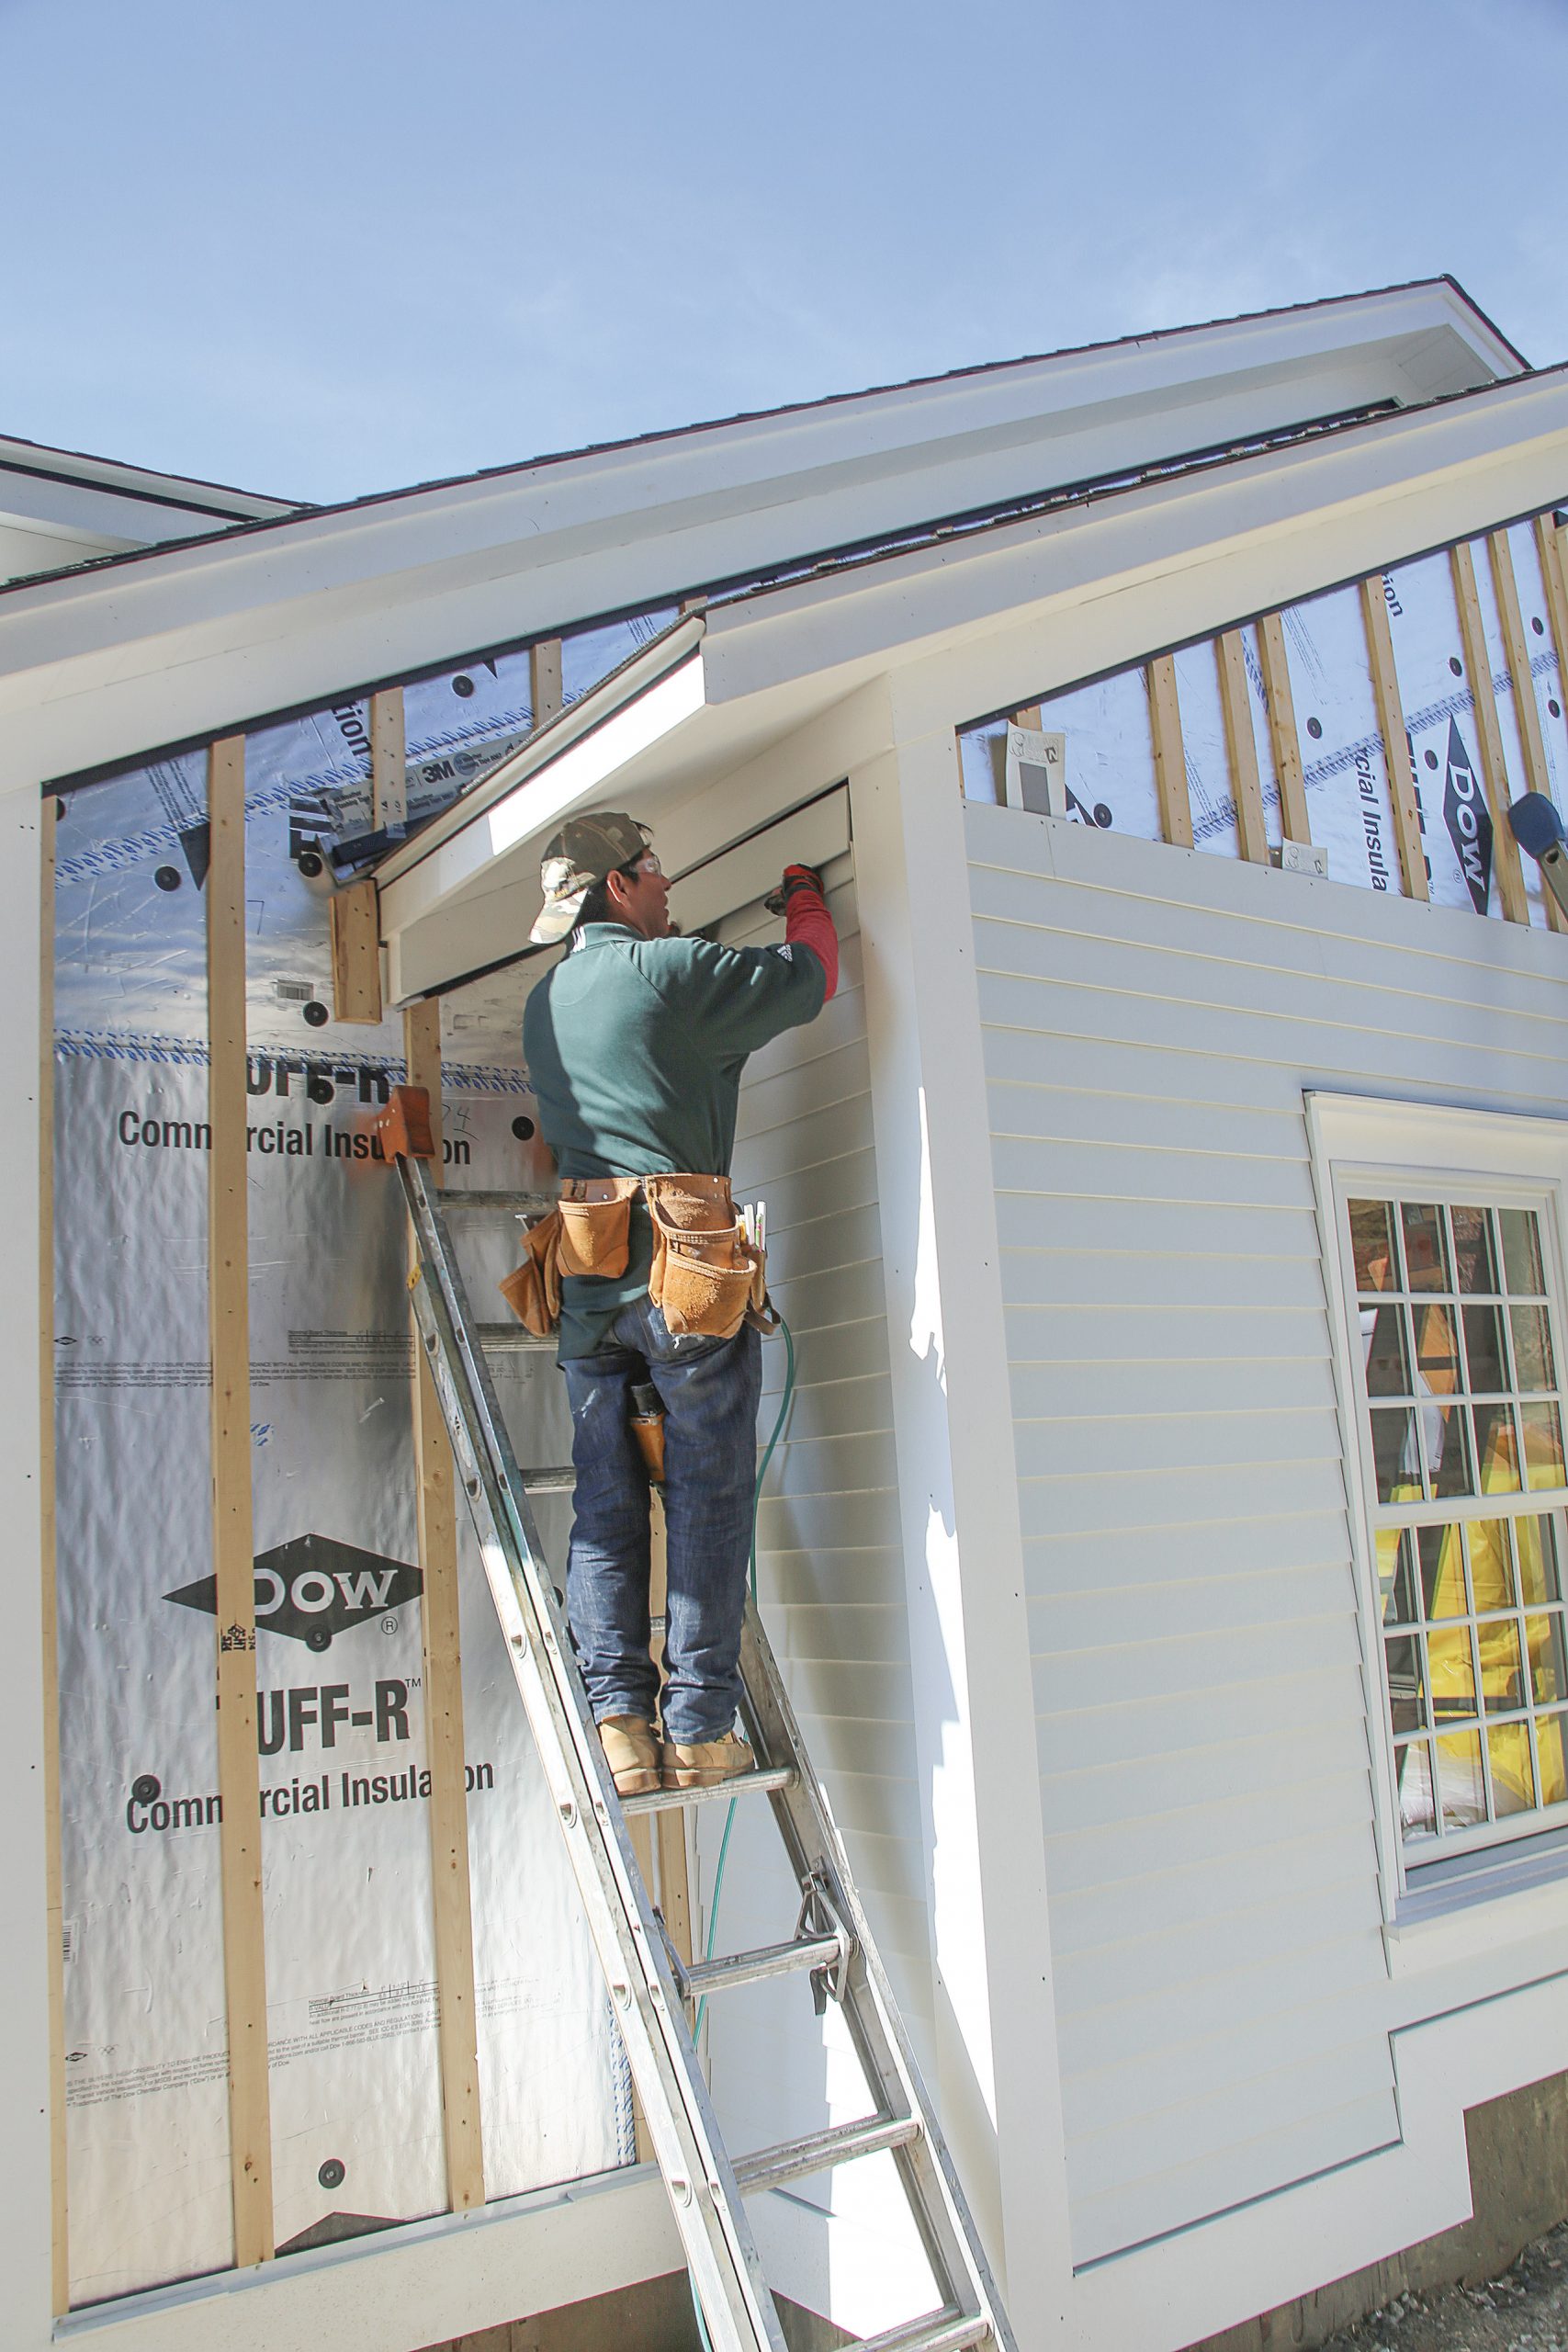
By padding out the frieze board 1 in., we’re able to fit the siding behind the frieze for better water shedding. The gap also creates the rainscreen’s top vent, so the furred cavities can dry when wind-driven rain is forced behind.

Frieze overlaps siding
​

Frieze overlaps siding

Frieze Overlaps Siding: The final course of siding at eaves and gable ends is pretty forgiving to install thanks to the packed-out frieze, which allows pieces to be slipped into place.

Click here to check out a video about this topic.

For photos, diagrams, and info, please click the View PDF button below.

View PDF
Previous: High-Strength, Long-Life Lap Siding Next: Good-Looking, Long-Lasting Lap Siding

Guide

Siding & Exterior Trim

Chapter

Installing Siding

Sign up for eletters today and get the latest how-to from Fine Homebuilding, plus special offers.

Signing you up...

This site is protected by reCAPTCHA and the Google Privacy Policy and Terms of Service apply.
See all newsletters
See all newsletters

View Comments

  1. user-7072686 | May 17, 2018 12:38pm | #1

    I use a very similar system with PVC trims. This is a really great article! The devil is always in the details with getting the shadow lines and reveals on window trims, door trims, etc. while maintaining air flow and correct drainage patterns. I am a huge believer in a rain screen behind siding. We are in the Northwest (Oregon Willamette Valley) and it rains all winter. We have a mild temperature in general, but things get wet for months. I like Roxul for insulation, if we add some to the outside of a wall, as it has really interesting advantageous characteristics. I would love to hear from others that are solving the details of doing rain screens on residential. My compliments to the author and crew.

Log in or create an account to post a comment.

Sign up Log in

Become a member and get full access to FineHomebuilding.com

Siding & Exterior Trim

Siding & Exterior Trim

Trusted, comprehensive guidance from the pros for choosing, installing, and repairing siding and exterior trim

View Project Guide

View All Project Guides »

Become a member and get unlimited site access, including the Siding & Exterior Trim Project Guide.

Start Free Trial

Choosing Siding
  • Materials
  • Design Options
Installing Siding
  • Siding Basics
  • Lap Siding
  • Shingle Siding
  • Board & Batten
  • Fiber Cement and Composite Siding
  • Vinyl Siding
  • Masonry Claddings
Choosing Exterior Trim
  • Trim Materials
  • Trim Design
Installing Exterior Trim
  • Trim Basics
  • Roof Eaves Trim
  • Corner Boards
  • Corbels & Brackets
  • Window & Door Trim
Repairing Siding & Trim
  • Trim Repairs
  • Siding Repairs

Fine Home Building

Newsletter Sign-up

  • Fine Homebuilding

    Home building tips, offers, and expert advice in your inbox.

  • Green Building Advisor

    Building science and energy efficiency advice, plus special offers, in your inbox.

  • Old House Journal

    Repair, renovation, and restoration tips, plus special offers, in your inbox.

Signing you up...

This site is protected by reCAPTCHA and the Google Privacy Policy and Terms of Service apply.
See all newsletters

Follow

  • Fine Homebuilding

    Dig into cutting-edge approaches and decades of proven solutions with total access to our experts and tradespeople.

    Start Free Trial Now
    • Facebook
    • Instagram
    • X
    • LinkedIn
  • GBA Prime

    Get instant access to the latest developments in green building, research, and reports from the field.

    Start Free Trial Now
    • Facebook
    • YouTube
  • Old House Journal

    Learn how to restore, repair, update, and decorate your home.

    Subscribe Now
    • Facebook
    • Instagram
    • X

Membership & Magazine

  • Online Archive
  • Start Free Trial
  • Magazine Subscription
  • Magazine Renewal
  • Gift a Subscription
  • Customer Support
  • Privacy Preferences
  • About
  • Contact
  • Advertise
  • Careers
  • Terms of Use
  • Site Map
  • Do not sell or share my information
  • Privacy Policy
  • Accessibility
  • California Privacy Rights

© 2025 Active Interest Media. All rights reserved.

Fine Homebuilding receives a commission for items purchased through links on this site, including Amazon Associates and other affiliate advertising programs.

  • Home Group
  • Antique Trader
  • Arts & Crafts Homes
  • Bank Note Reporter
  • Cabin Life
  • Cuisine at Home
  • Fine Gardening
  • Fine Woodworking
  • Green Building Advisor
  • Garden Gate
  • Horticulture
  • Keep Craft Alive
  • Log Home Living
  • Military Trader/Vehicles
  • Numismatic News
  • Numismaster
  • Old Cars Weekly
  • Old House Journal
  • Period Homes
  • Popular Woodworking
  • Script
  • ShopNotes
  • Sports Collectors Digest
  • Threads
  • Timber Home Living
  • Traditional Building
  • Woodsmith
  • World Coin News
  • Writer's Digest
Active Interest Media logo
X
X
This is a dialog window which overlays the main content of the page. The modal window is a 'site map' of the most critical areas of the site. Pressing the Escape (ESC) button will close the modal and bring you back to where you were on the page.

Main Menu

  • How-To
  • Design
  • Tools & Materials
  • Video
  • Blogs
  • Forum
  • Project Guides
  • Reader Projects
  • Magazine
  • Members
  • FHB House

Podcasts

  • FHB Podcast
  • ProTalk

Webinars

  • Upcoming and On-Demand

Podcasts

  • FHB Podcast
  • ProTalk

Webinars

  • Upcoming and On-Demand

Popular Topics

  • Kitchens
  • Business
  • Bedrooms
  • Roofs
  • Architecture and Design
  • Green Building
  • Decks
  • Framing
  • Safety
  • Remodeling
  • Bathrooms
  • Windows
  • Tilework
  • Ceilings
  • HVAC

Magazine

  • Current Issue
  • Past Issues
  • Magazine Index
  • Subscribe
  • Online Archive
  • Author Guidelines

All Access

  • Member Home
  • Start Free Trial
  • Gift Membership

Online Learning

  • Courses
  • Project Guides
  • Reader Projects
  • Podcast

More

  • FHB Ambassadors
  • FHB House
  • Customer Support

Account

  • Log In
  • Join

Newsletter

Get home building tips, offers, and expert advice in your inbox

Signing you up...

This site is protected by reCAPTCHA and the Google Privacy Policy and Terms of Service apply.
See all newsletters
See all newsletters

Follow

  • X
  • YouTube
  • instagram
  • facebook
  • pinterest
  • Tiktok

Join All Access

Become a member and get instant access to thousands of videos, how-tos, tool reviews, and design features.

Start Your Free Trial

Subscribe

FHB Magazine

Start your subscription today and save up to 70%

Subscribe

We hope you’ve enjoyed your free articles. To keep reading, become a member today.

Get complete site access to expert advice, how-to videos, Code Check, and more, plus the print magazine.

Start your FREE trial

Already a member? Log in

Privacy Policy Update

We use cookies, pixels, script and other tracking technologies to analyze and improve our service, to improve and personalize content, and for advertising to you. We also share information about your use of our site with third-party social media, advertising and analytics partners. You can view our Privacy Policy here and our Terms of Use here.

Cookies

Analytics

These cookies help us track site metrics to improve our sites and provide a better user experience.

Advertising/Social Media

These cookies are used to serve advertisements aligned with your interests.

Essential

These cookies are required to provide basic functions like page navigation and access to secure areas of the website.

Delete My Data

Delete all cookies and associated data