
How to Choose the Right Replacement Windows
Learn what details and conditions to look for to see if an insert replacement window makes more sense than removing and replacing the entire original window.
Synopsis: If you have an outdated home with wood windows, replacement windows can be a good alternative to new-construction windows – they cost less to install, and they leave trim and molding in place. On the flip side, installing replacement windows means there is no chance to access the details around the window and improve air-sealing and insulation; and with replacements, proper installation can make or break the unit’s performance. Contributing editor Asa Christiana describes when replacement windows make sense, and when they don’t; the steps to a proper installation; and additional alternatives for improving the performance of outdated windows.
Selected and used properly, replacement windows can be a godsend for older homes with outdated wood windows—installing quickly into existing window frames at less cost than new-construction windows, preserving interior and exterior details, and vastly improving the performance of one of the key parts of the building envelope.
Bought from a hard-sell outfit, however, and installed by lower-skilled technicians, replacement windows can be a big mistake, costing a bundle for a result that looks only so-so, operates poorly, and performs even worse.
To find out when replacement windows make the most sense and learn the critical steps of a proper installation, it’s important first to understand how these units work.
Replacement basics
Most of today’s replacement windows, also called “pocket replacements” or “insert replacements,” include a full frame with sashes inside, very similar to a new- construction window but without the nail fin at the edge. Developed primarily for improving old wood windows, these full-frame replacements are manufactured to order, custom-sized to fit into the existing frame with only a narrow gap around the edges.
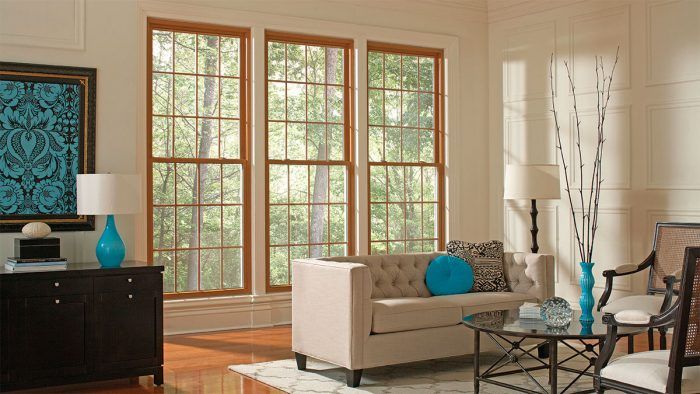
Because they add a frame inside the existing frame, replacement windows have smaller sashes than the originals, resulting in less glass and diminished daylighting accordingly. Although replacement windows are most often pushed tight to the exterior trim, these windows have narrower frames than new-construction windows, so they can be placed at different positions— favoring the exterior side, favoring the interior side, or right in the middle of the jambs—depending on existing trim and other conditions.
Since replacement units are just narrower versions of new-construction windows, with the same sashes inside, they offer the same options for frame material, historical detail, mechanics, glazing, and energy performance.
While the cost of an insert unit is similar to the cost of the same window with a nail fin, they require much less time and labor to install. From removing the old sashes and stops to sealing the old frame, installing the replacement unit, replacing the stops, and weather-sealing the new unit, a window can be upgraded in a few hours or less, with a single drop cloth to catch the mess.
Contrast that with the work involved in installing a nail-fin new-construction window—stripping back the siding, removing the entire window frame and the trim on both sides, breaking into the existing water plane and weather-sealing, and putting it all back together after the window installation—and you can see how a replacement unit might be half the price in the end.
Replacements vs. new construction windows
Installation is the big story with replacement units, and it cuts both ways. Replacements go in quickly, leave distinctive trim and moldings in place, cost less, improve comfort and performance, and may provide energy savings if installed correctly.
On the flip side, leaving everything in place means there’s no opportunity to assess the sheathing around the window rough opening. Stripping everything down to the framing to install a new-construction window lets you look closer for problems, chase them to their root, and apply best practices for flashing, air-sealing, and insulating the entire opening. A new-construction window is almost always your best bet if budget and conditions allow.
At the same time, that level of surgery is not always necessary. If the window frames are sound and no water has visibly intruded, the added measures taken around the rough opening might not be needed. For poorly insulated homes, the dividend delivered by replacement units would be better spent on energy-efficiency measures with lower cost and higher impact, like insulating the attic.
When replacements make sense
If the sills and jambs are sound in an older home, the head flashing is still working well, and there are no signs of significant water intrusion, there are many situations in which a replacement insert window makes sense.
The most common situation is an older home with siding and trim that is hard to strip away and replace afterward, or hard to replace and match. Some homeowner associations and historical review boards will not allow exterior trim to be touched, or will only approve removal if it can be matched closely. For all of these instances, nicely detailed replacement units offer a cost-effective way to replace painted-shut sashes that have single-pane glass.
“I use them in hard-to-reach areas where there is intricate architectural detail,” says Steve Pink, who remodels high-end homes Portland, Oregon. “Inside, you don’t have to touch the sill, which can have some nice detail to it. If you are crafty enough and measure right for the replacement unit, you can even reuse the stops you pulled off the frame. Those often have a nice molding profile on them too.”
Older homes often have lead paint encapsulated inside layers of latex, and replacement units offer a chance to improve the window without putting lead paint in the air and either reduce or eliminate the need for abatement measures.
Brick and stucco homes are also popular candidates for replacement inserts, where the brick face or stucco covers part of the window frame and new-construction windows would cause major mayhem. Homes with plaster walls and plaster returns inside the window openings are also great candidates.
Beyond the world of high-end remodeling, budget is a big driver for replacement inserts. Longtime Pittsburgh remodeler Andy Grace has installed hundreds of insert windows as a cost-effective solution for the older brick homes common to the area. “I strip off the aluminum storm overlays—which look terrible—pull out sashes that are painted shut and inoperable, keep the wood frame and trim, and put an energy-efficient window back in.”
For lower-end jobs like those, Grace goes with a vinyl replacement window from Simonton, which has a reinforced frame to guard against bowing, a common problem with cheap vinyl replacement products. “It’s a really nice insert I can get for $169 in any size up to 5 ft. tall. I can have one installed in 15 minutes and be ready for caulk in another 15. It’s less hassle and cost for the customer.”
On historic homes with attractive trim inside and out, Grace turns to aluminum-clad-wood replacement units from Marvin and WeatherSeal, which offer classic, stain-grade appearance inside and low maintenance on the exterior.
When replacements don’t make sense
By and large, replacement units are used in wood window frames only—vinyl and aluminum frames don’t usually provide the broad, flat inner surface that replacement requires. If a wood frame has significant rot that can’t easily be repaired, or evidence of water penetrating into the interior of the wall, remove it, address problems around the rough opening, and install a new-construction window. (It may be possible to cut out or repair a partially rotted sill in order to make insert replacements work for a home on a budget.)
On full-gut remodels, there is no sense in keeping the trim and jambs intact, and new-construction windows become a no-brainer.
Replacement windows make far less sense for houses with vinyl siding, assuming there are no other layers of siding below the vinyl. In cases where vinyl is applied directly over the WRB, it’s very easy to strip back and reattach the vinyl during the installation of nail-fin new-construction windows. Also, many vinyl-sided houses have vinyl windows that won’t accept replacement units, and most don’t have architectural trim worth saving.
Return on investment is a controversial topic among experts. While replacement windows are economically justifiable—if properly installed—the savings in energy costs is only slightly more than the cost of buying and installing them. From a pocketbook perspective, if you leave the existing windows and add exterior or interior storm windows, the energy savings is almost equal for far less money, which is why in the long run, this route may have the biggest bang for the buck.
Installation is make or break
All of the replacement-window manufacturers I spoke to, from Marvin to Pella to Jeld-Wen, as well as the skilled remodelers, installers, and energy-efficiency experts, were in basic agreement about replacement windows: You get what you pay for with the window unit, but installation is what makes or breaks performance.
“Once customers choose a good window, they assume that installation will be good too,” says Pella’s manager of retail sales, Eric Smithey. If they plan to hire a contractor for the job, Smithey says, “They need to ask as many questions about installation as they do the window.” Another solid option is buying directly from a reputable company’s local dealer, whose salespeople and installers have been trained by the manufacturer.
“Watch out for installers who say, ‘We’ll be in by eight and out by noon,’” says Eric Klein, longtime installation and field service instructor for Marvin. “Those companies like just popping out one window and popping another one in, sealing the best they can. They are operating on volume, not quality.”
When it comes to the windows themselves, one good indicator of quality is the availability of detailed installation instructions. These should be included with every replacement unit. While the windowsills and exterior caulking should be inspected and repaired every five years or so, as on any window, a well-executed replacement install should last the life of the window unit, which is 30 years or more for a high quality product.
That said, low-skilled installers make a variety of critical mistakes, bowing or racking insert frames to force them into out-of-square or poorly measured openings, shimming them out of square, and sometimes holding them in place with sealants and foam alone. In many cases, coiled aluminum pieces are caulked in to close big gaps. In the end, the results of a poor installation can be catastrophic.
Know the steps of a proper installation
The best window is still only as good as its installation. The following steps are a good guide for what to focus on when evaluating an opening and swapping old window sashes for a replacement unit.
Evaluate the existing frame
Major signs of rot and water damage are a deal breaker. If you have to pull off trim and cladding to investigate, you might as well go with a new-construction window and update the entire opening. Other deal breakers are window frames that are significantly out of square, more than 1⁄2 in. in any direction.
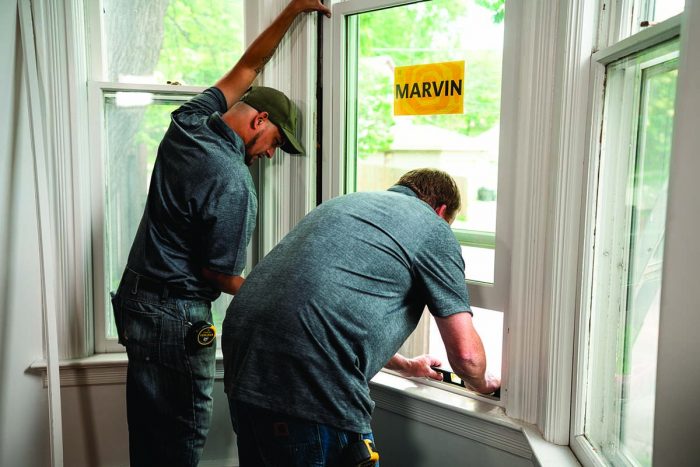
Measure carefully
Replacement windows are available in common sizes, and can also be made to order. In both cases, accurate measurements will ensure a window will fit the opening as closely as possible while accommodating the warping and out-of-square quality common in old window frames. Each replacement unit has its own tolerances for gaps, but 1⁄8 in. is usually the goal at the sides, 1⁄4 in. at the top, and no more than 1⁄2 in. anywhere around the frame. Since the existing sill will be sloped in most cases, the height measurement depends on where the replacement unit will sit in the frame. Always check the window installation literature prior to ordering (some models also require you to measure the angle of the sill). Some installations are easiest from inside out, which means removing the interior stops and pressing the replacement against the exterior ones, or vice versa, pushing the replacement unit back against the interior stops and the stool of the interior sill. Measuring diagonals and checking how straight the jambs are is also critical.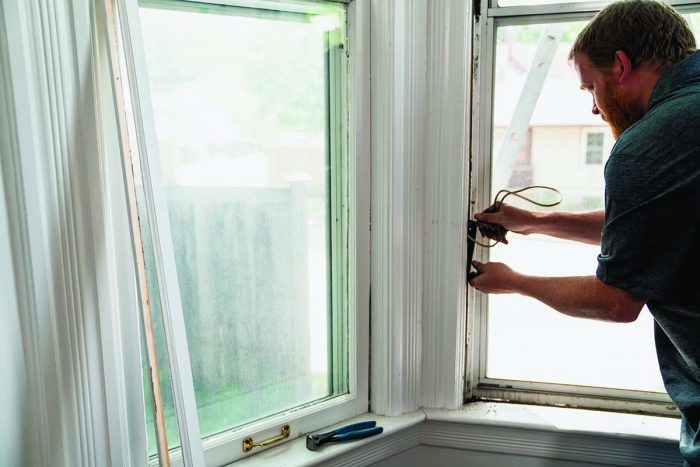
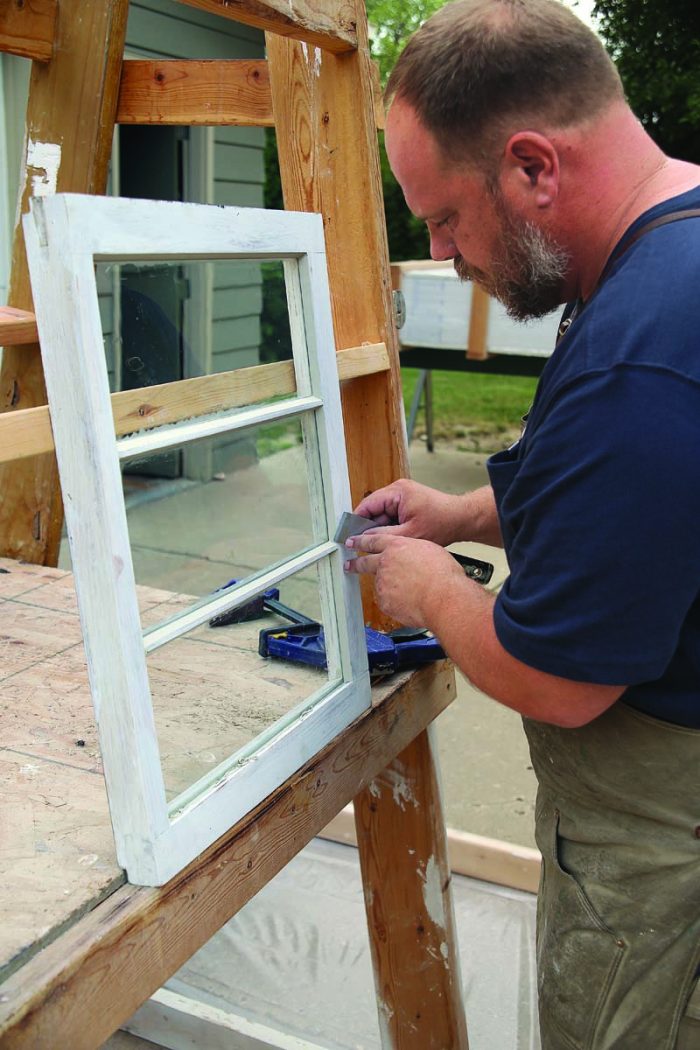
Prep the opening
While the frame stays in place in most replacements, there is still a chance to clean it up and improve it. After the stops come off, caulk any open joints and give the frame a fresh coat of paint. Now is also a good time to address flashing concerns using either flashing tape or liquid-applied flashing on the exterior sill, extended up onto the interior stool and a couple of inches up the jambs. Assume that water will eventually get in, and prep the frame so that it’s ready to shed it outward. If there are sash weights and ropes, remove them and fill their cavities with canned spray-foam insulation. Fiberglass-batt insulation, although once a common choice, does not adequately control airflow.
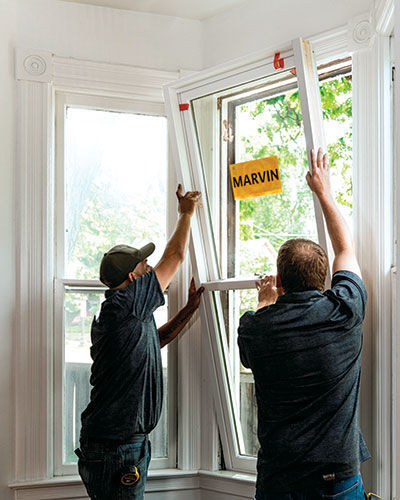
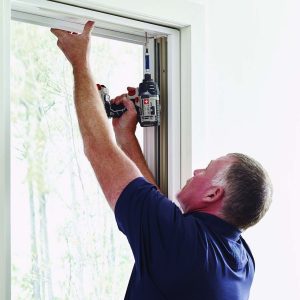
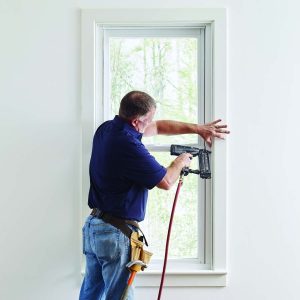
 Set the window
Before setting the window into place, lay a bead of silicone caulk on the back edge of the exterior trim so the new frame can be pressed against it, completely sealing the joint. Next, shim the window level in the opening without shifting it out of square, and drive screws through the new jambs into the old ones.
Finish up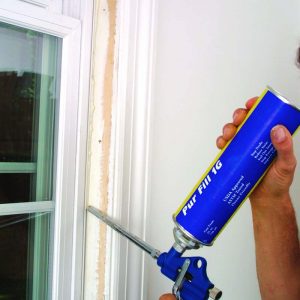
Proper air- and water-sealing usually involves three layers of defense: silicone caulk on the outside, low-expansion foam around the gaps between the window and the existing opening, and some type of sealant on the inside. One excellent choice inside is Prosoco AirDam, with a backer rod inserted into larger gaps. While the back of the replacement unit is sealed completely against water intrusion, the gap at the front of the sill must be left at least partially open, giving water a place to escape.
More options for old windows
There are a variety of lower-cost and lower-impact options for improving the performance and energy efficiency of outdated windows.
Don’t toss those old windows without first considering restoration as a viable approach. Old wood windows were designed and built to be easily disassembled and repaired (see “Restore a Wood Window Sash,” FHB #273). The work typically includes removing the sashes, scraping and repainting them, and replacing and reglazing the rattly panes. The opening can also be cleaned up and improved by replacing broken sash locks, installing new weatherstripping all around, and ensuring that the sashes operate smoothly all the way up and down, and close fully at the top, bottom, and middle. This will restore proper performance of the window and greatly improve air-sealing, while saving a distinctive part of your home and keeping another old window out of the landfill.
 |
 |
 |
Sash-replacement kits
Rather than dropping in a fully assembled replacement window, sash replacements ride in jamb liners that fit inside the existing frame. This low-profile approach maximizes sash size and amount of glass, but sash replacements aren’t as easy to install. The jamb liners are held in place by a row of clips, attached directly to the jambs, which are often bowed or out of parallel in older windows. A proper install requires shimming individual clips so the jamb liners are straight and parallel with each other.

Easily removable in warmer months, storms act much like a second pane in a modern glazing unit, and when paired with sash repair, will deliver energy savings similar to a full window replacement. Exterior storms can be custom-built or made to order, and typically install flush with the exterior to fit the traditional character of an older home, but may need to be opened or vented to the exterior to prevent a buildup of condensation. Interior storms, a popular choice among old-house remodelers, are easily the least visually obtrusive option, and are easy to safely install and remove as seasons change, but block the function of the window when in place.
From Fine Homebuilding #286
To view the entire article, please click the View PDF button below.

More about windows:
Get the Right Windows – Three basic steps to make sure you’re up to date with the changing window market.
Should I Replace My Old Windows? – Energy Nerd: The cost to make and transport new windows vs better efficiency.
Learning to Install Windows – Students do the tricky (and sticky) work of installing windows in the FHB House’s hi-performance wall assembly.
Fine Homebuilding Recommended Products
Fine Homebuilding receives a commission for items purchased through links on this site, including Amazon Associates and other affiliate advertising programs.

Staple Gun

Utility Knife

Insulation Knife
