
Decking Installation Overview
Follow these basic guidelines to lay out, cut, and install any type of wood decking.

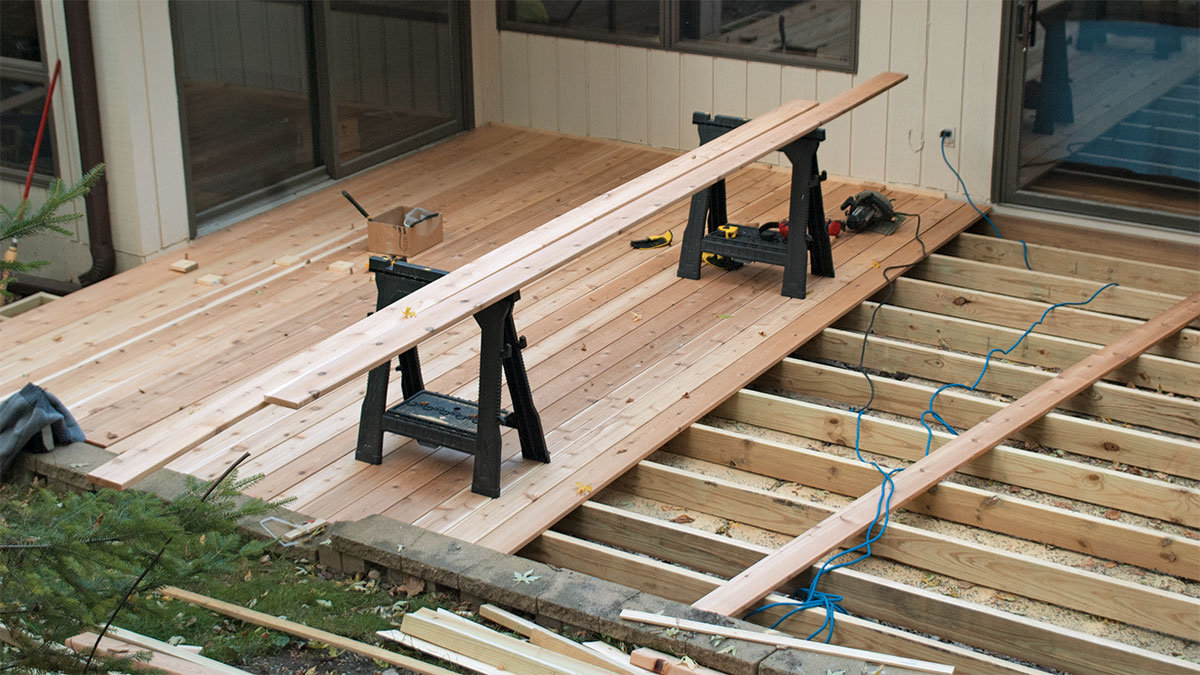
Decking is the most dramatic stage of building a deck. After the heavy lifting of installing footings, posts, beams, and joists, you’ll at last have something you can stand on, something that really looks like a deck. And, if your deck calls for fascia and skirting, you are going to end up with a truly finished project.
When ordering decking, allow for about 10% waste and error—15% if you are installing the planks at a 45-degree angle. Have the material delivered well before you need it so you have recourse in case of a mistake in color or type. Store your decking level and supported every couple of feet if you are using synthetic decking. Cover the decking with a tarp.
Plan your layout before installation. Give thought to the most visible areas of the deck. For example, decking near the main access should be free of unsightly gaps or butt joints. With wood, the main access area is the place to be the most selective about grain and any imperfections that wouldn’t be noticed elsewhere. Avoid having to end with a thin strip of decking somewhere—see the sidebar for tips on building in a fudge factor.
Building in a Fudge Factor
As rewarding as installing decking is, it requires a methodical approach so the gap and fastener pattern are consistent. Your first task is planning the installation so you don’t end up with a thin strip of wood somewhere. To manage this, you have three areas of flex:
Overhang
Decking can overhang the rim joist or fascia by 1 in. It should overhang by at least 1/4 in., so that gives you 3/4 in. to work with.
Spacing
As you approach the end of the deck, adding 1/16 in. of spacing or so for the last few courses can make all the difference you need. No one will notice.
Hide inconsistencies
If you must trim a piece or leave a gap, hide it where it will be least noticed—away from the doorway, behind a bench or planter, or in a low-traffic area.
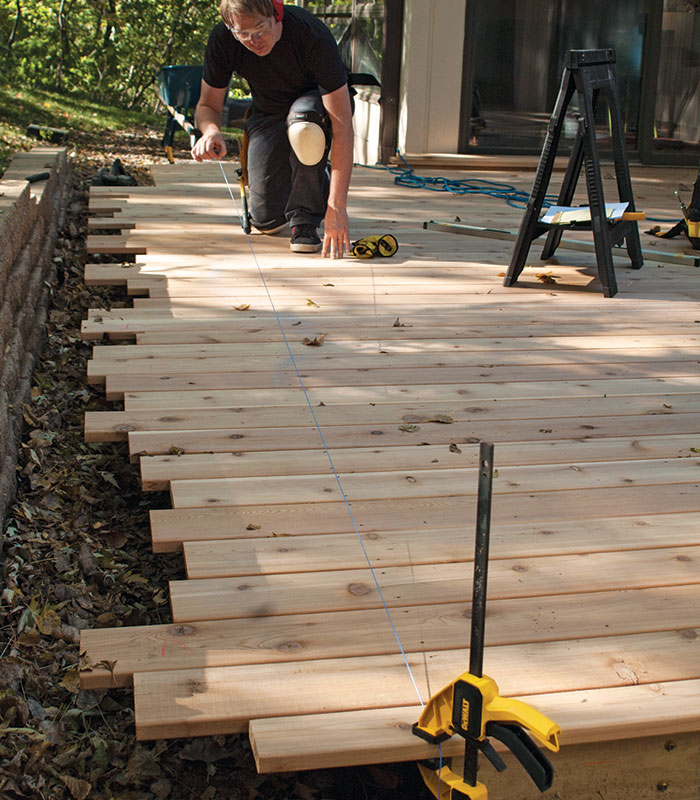
Installing the planks is repetitious and a little mind numbing. Stand up every few courses and take in the big picture. Measure often to confirm you are parallel with the outer edge of the deck, and stretch a line to be sure bends in the planks are not being compounded as you work.
Culling Your Wood
Number 2 grade 5/4 x 6 cedar decking will inevitably have flaws you’ll want to hide, cut off, or in rare cases, reject.
 |
 |
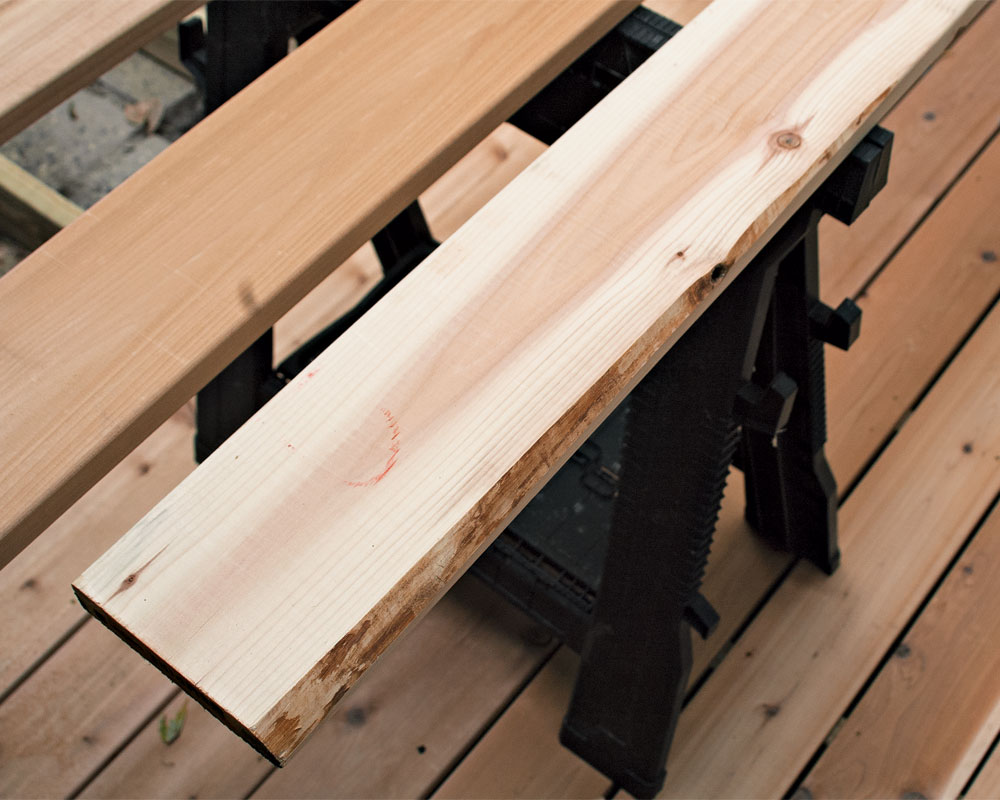 |
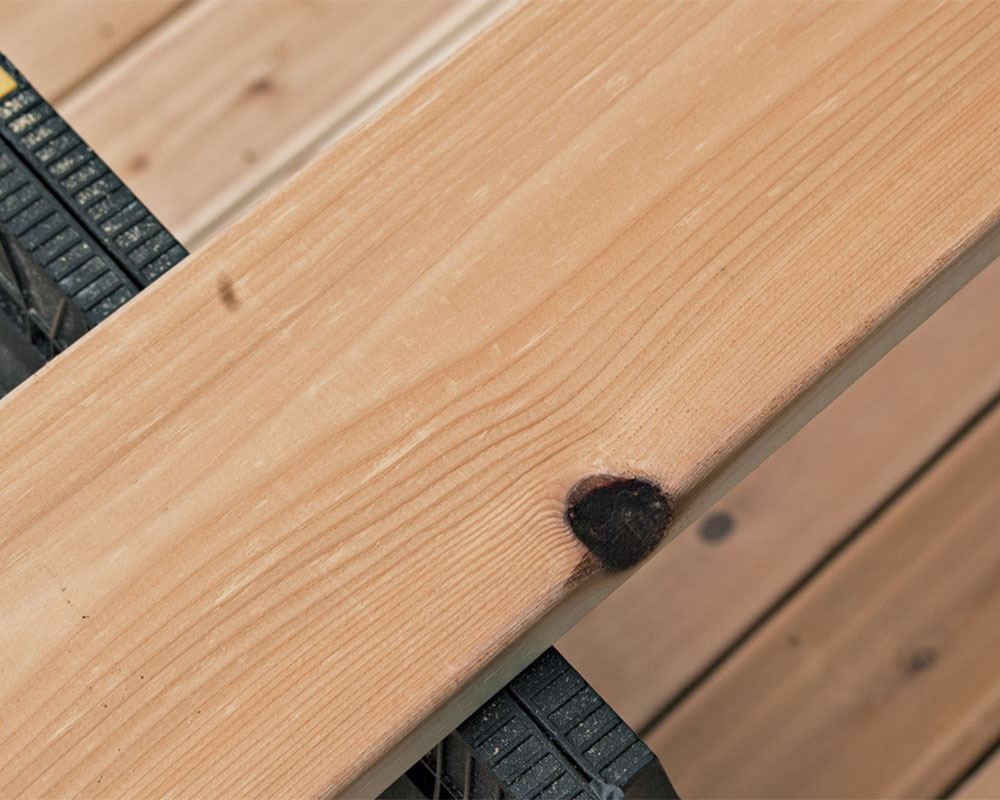
| Split End. A split end is the most common flaw and why it is smart to order lengths longer than you need. Trim a couple of inches beyond the split so it doesn’t reappear. | Open Knot. A loose, or open, knot leaves a hole on the edge of the plank, not all the way through. By flipping it over in an out-of-the-way area, you can put the plank to good use. | Rough Edge. If an area of your deck calls for a ripped piece, a plank with a rough edge may be the candidate. Or, trim off the worst of the rough edge and flip the piece over. |
Tip: If you have plenty of overhang, take advantage of the chance to practice the trim cut. Try for smooth, steady forward movement. Easy does it is the key.
Installing Wood Decking
Cedar and pressure-treated wood remain popular choices for decking. They are affordable, easy to work with, and offer the warm good looks of something that came from a real tree. Wood is easy to handle and shape and takes stain and other finishes well.
While a circular saw is more than up to the job, a sliding power miter saw on a stand with long supports will yield the most precise cuts. If you opt for using a circular saw, arrange planks and scraps on sawhorses to fully support your work.
Using a Guide
A straight 1×4 attached to the deck can be a helpful sawing guide, but it is not fail-safe. Lose your concentration for a moment and the blade can wander or bind. If possible, try cutting with and without a guide to see which you are most comfortable with.
Unless you are lucky enough to plan your deck around full lengths of decking—the best approach for a sleek-looking deck—leave at least 32 in. between adjacent butt joints and stagger any joints by at least two planks. Don’t get your hopes set on doing any miter joints to try to achieve a snazzy look at the corners. Wood moves too much over its life for it to hold a tight miter.
1 Check ends. Never assume the planks will arrive with ends cut perfectly square. More often than not, they’ll need to be cut square.
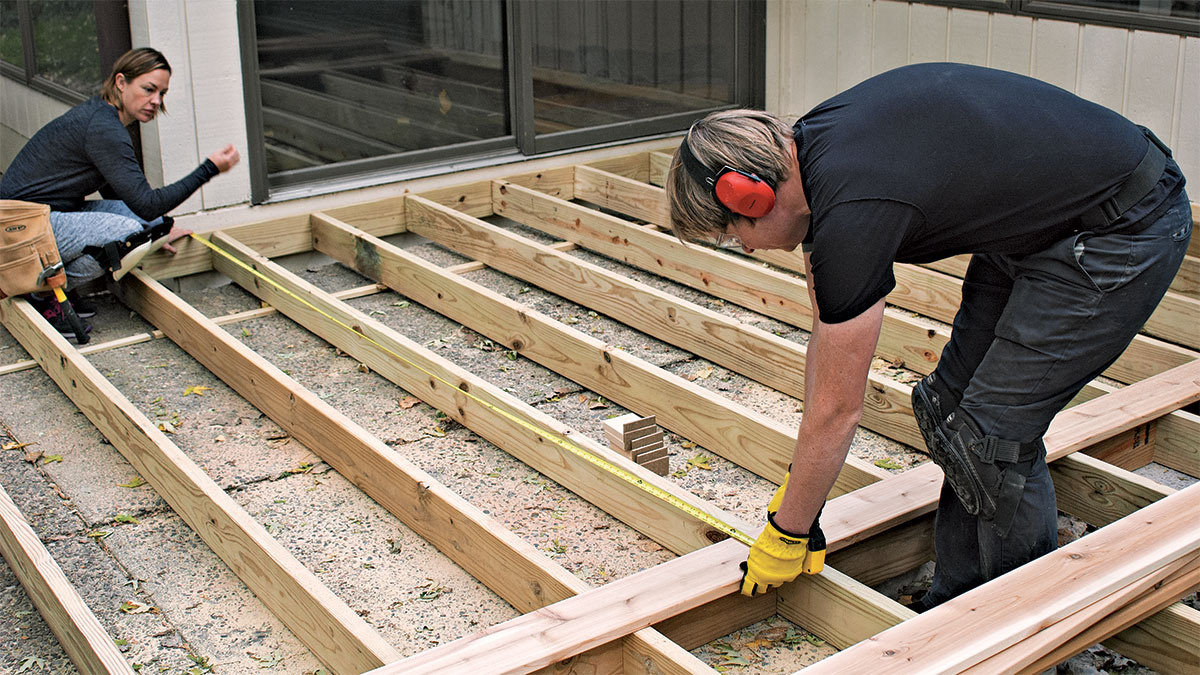
2 Square up a starter plank. Choose a wall to run your decking parallel to. Here, two sliders and a door provide access to the deck. It made sense to use the wall with the sliding door that gives access to the kitchen—the spot where appearances count the most. By squaring up the starter plank 6 ft. or 8 ft. out, you can be assured that small errors won’t be compounded into a big problem by the time you reach the other end of the deck. Measure and calculate the distance so you’ll end with a whole plank at the entry area.
Mind the Gap
Time was when decks were gapped 1/8 in., mainly because spiky high heels would get caught in anything larger. The downside of such a small gap is that it readily clogs with debris. A 3/8-in. gap drains well, carrying away most leaves and dirt. It’s up to you to anticipate the dress code for your deck entertaining and gap accordingly. Using a 1/4-in. gap is a nice compromise.
For pressure-treated decking, the boards can be secured with no gap. Given their high moisture content—you’ll notice as you heft one—the gap will open as the wood dries to yield a 1/8-in. gap. Use a spacer if you want a larger gap.
Here’s how to make your own spacers out of 1/4-in. hardboard and 1x4s.
Select a scrap of hardboard equal in thickness to the gap between planks you want. Cut a dozen or so pieces about 2 in. by 3 1/2 in. Drill two 1/8-in. holes for nailing. Cut an equal number of approximately 4-in.-long pieces of 1×4.
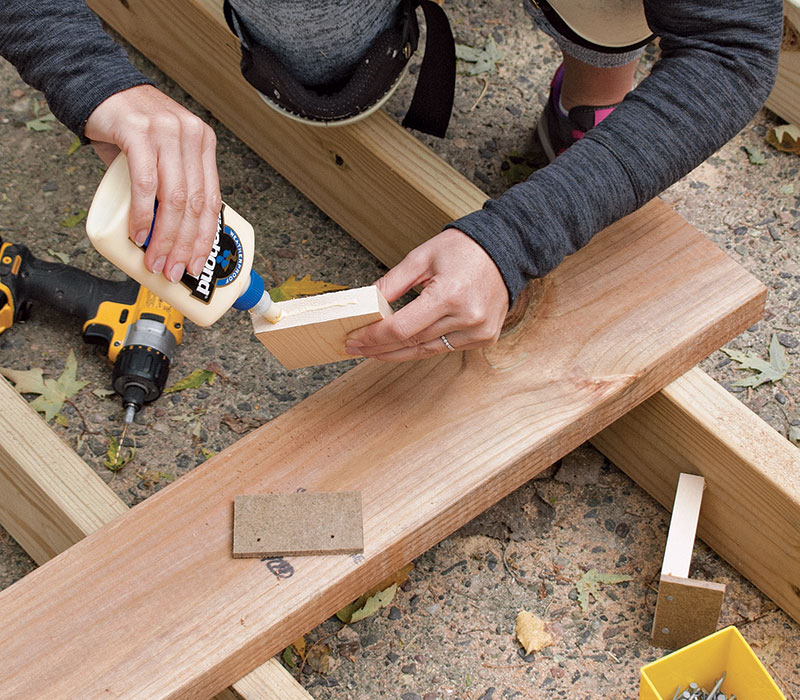
To eliminate any wiggle, apply woodworker’s glue to the 1×4 piece before nailing. Complete the spacer by using 4d nails to nail the hardboard onto the 1×4 pieces.
 |
 |
| 1 Prep hardboard spacer and add glue. | 2 Complete the spacer. |
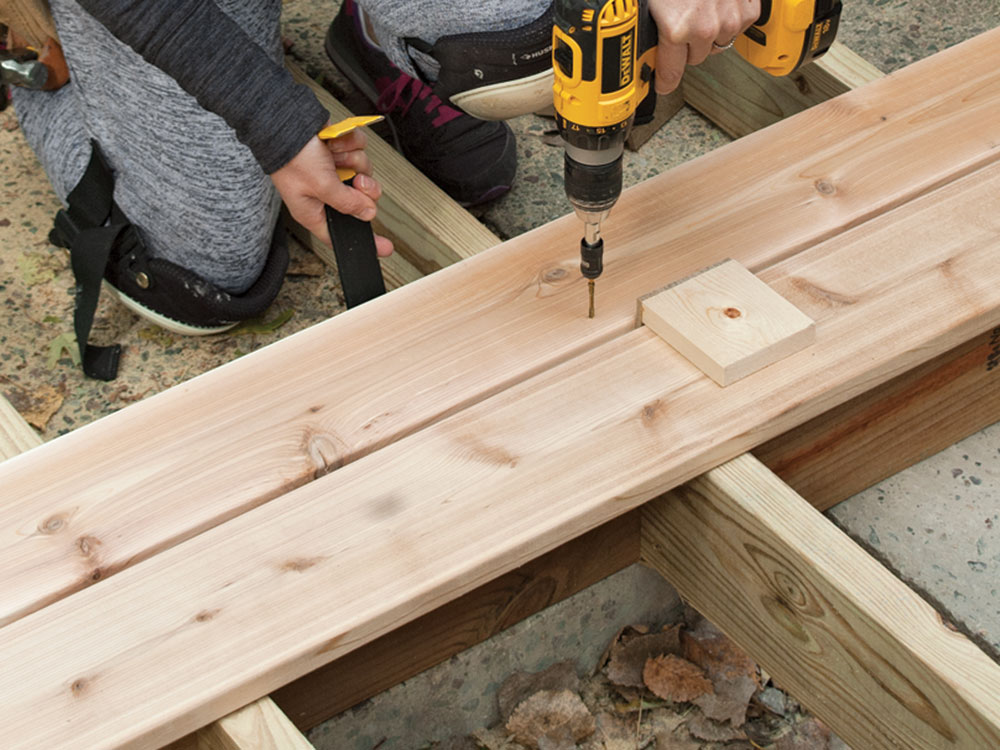
3 Snug the board to the spacer. If you find a slight bend in a board, enlist an assistant to use a pry bar to snug it up against the spacer. At the same time, install the fastener, keeping it nicely perpendicular to the deck.
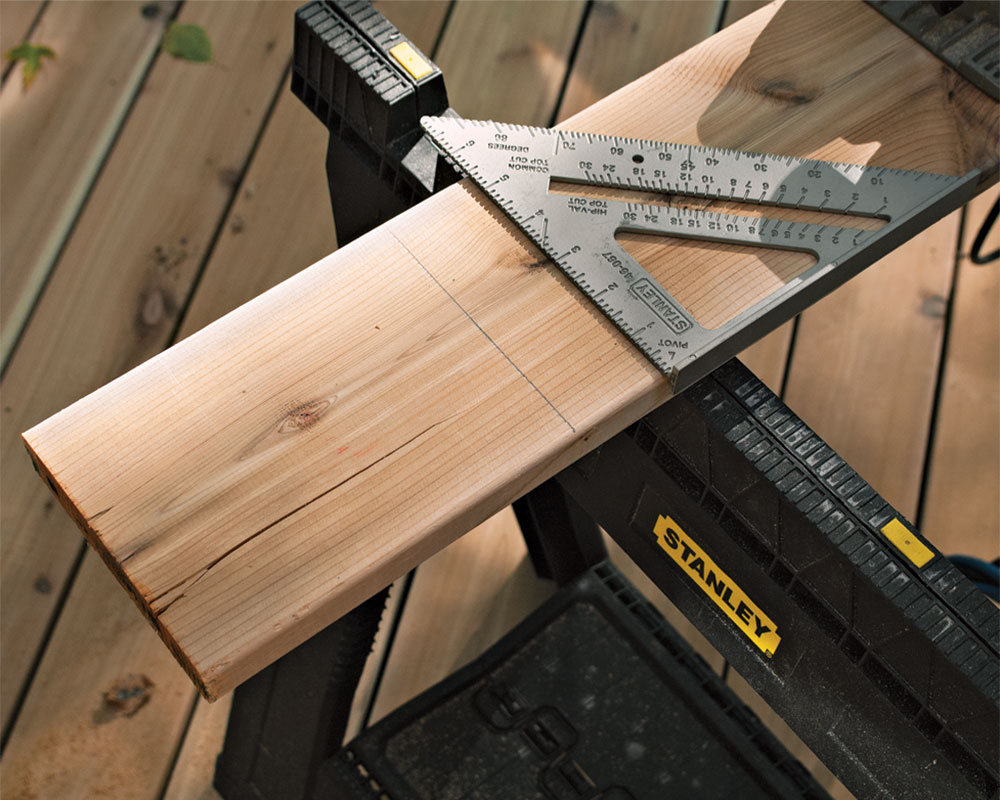
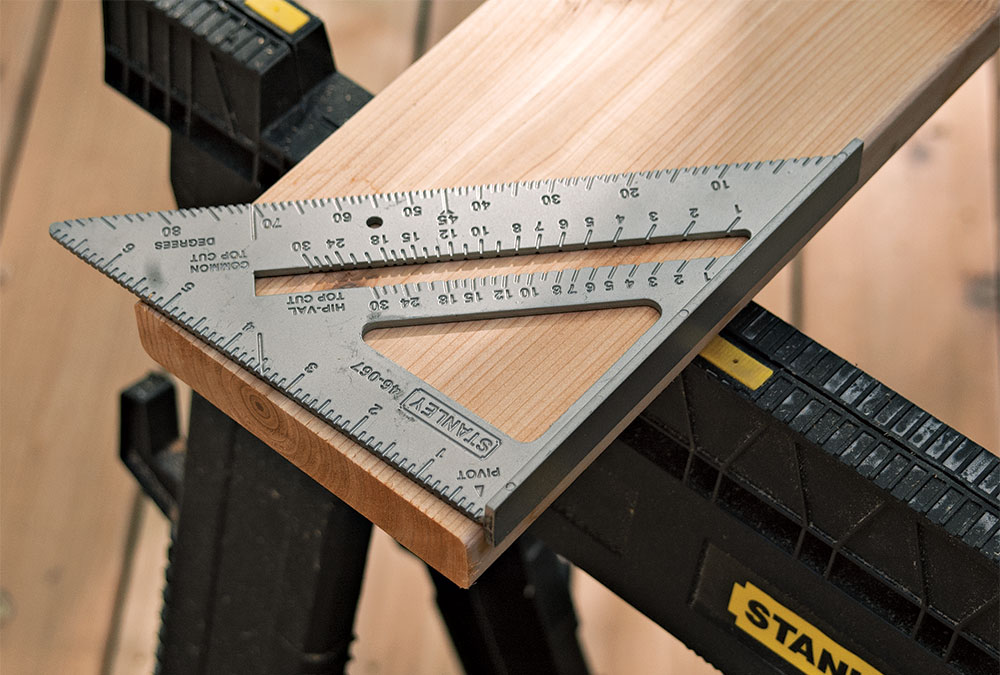
Tip: To get your fasteners in a precise row, use a framing square or Speed Square as a guide. Avoid a chalkline or pencil line—both are surprisingly hard to remove.
4 Set up a workstation. Once you’ve gotten an area done, ease your workload by setting up sawhorses on the deck so you can comfortably check the boards and trim ends.
5 Mark a cutline. Strike a chalkline so your deck will extend about an inch from the rim joist or fascia.
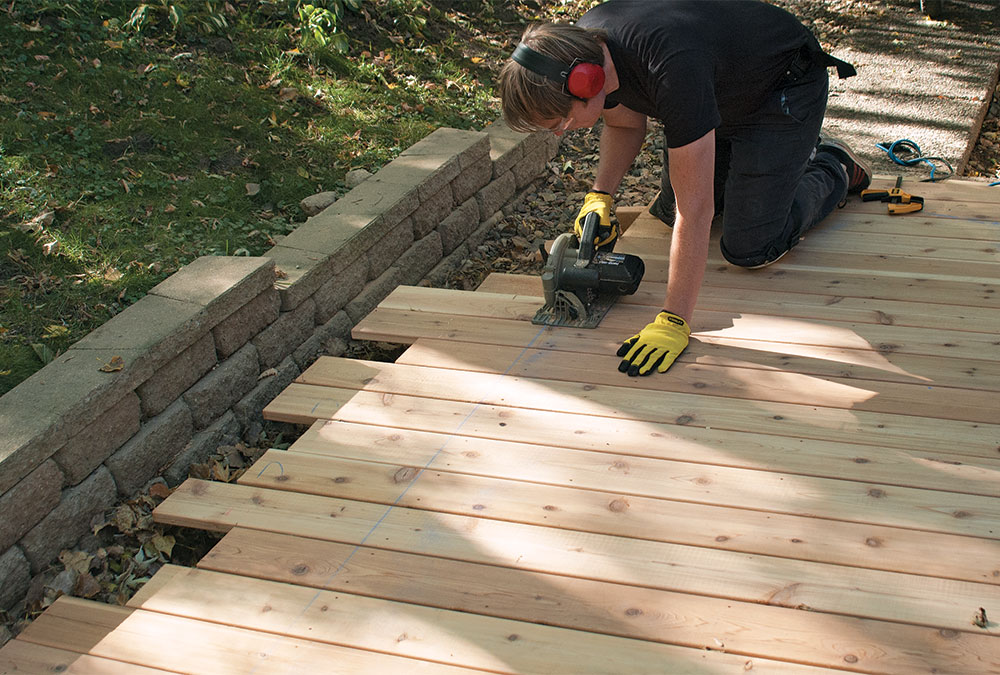
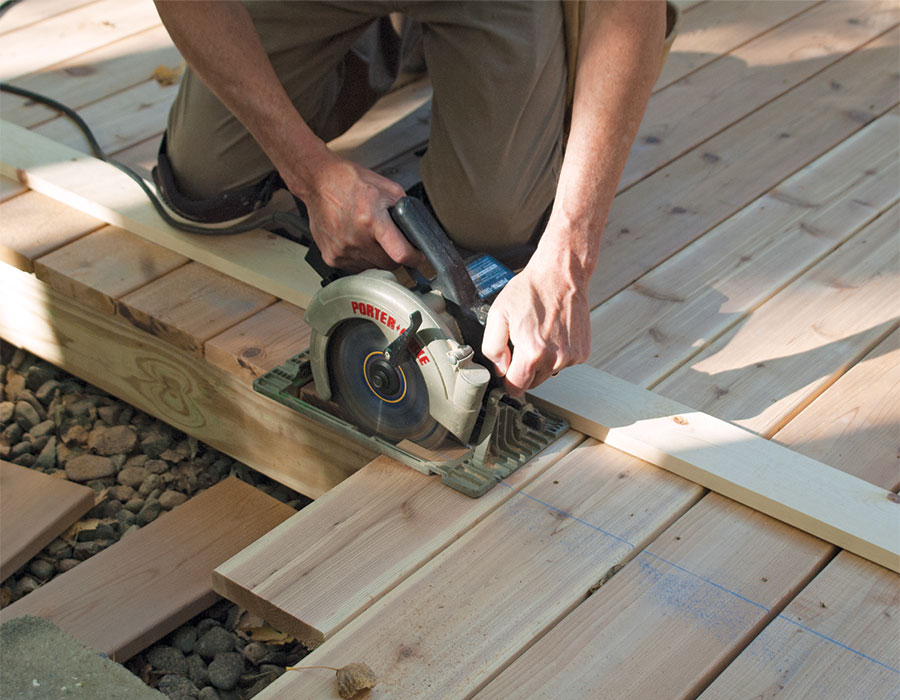
6 Trim the deck. With the blade set about 1⁄4 in. below the decking, trim the edge with a circular saw. As you work, before you reposition yourself as you make the long cut, always pull the blade backward and let the blade come to a full stop. When you restart, let the saw get up to full speed before pushing it into the wood.
Fastening Ipe and Other Hardwoods
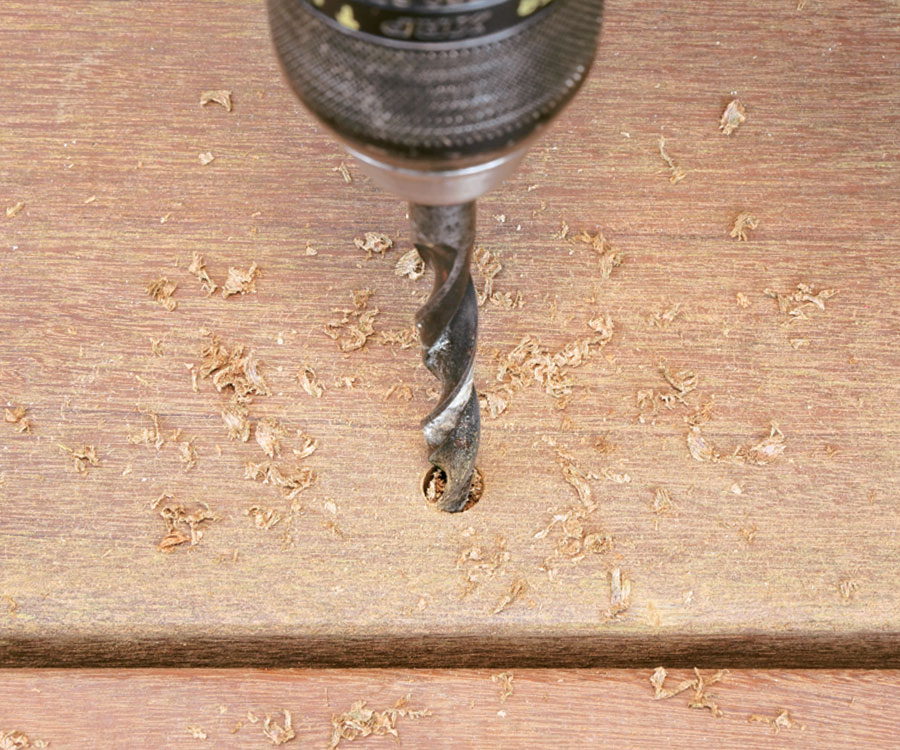
The installation of Ipe and other exotics differs from softwood decking only in that exotics are notoriously hard to cut and drill. Carbide tips help, as does buying sawblades with thin kerfs. Be prepared for slow work and burning through a lot of blades. Given the high cost of these woods, you probably don’t want your deck marred by fastener heads. Here’s a method for making them disappear.
 |
 |
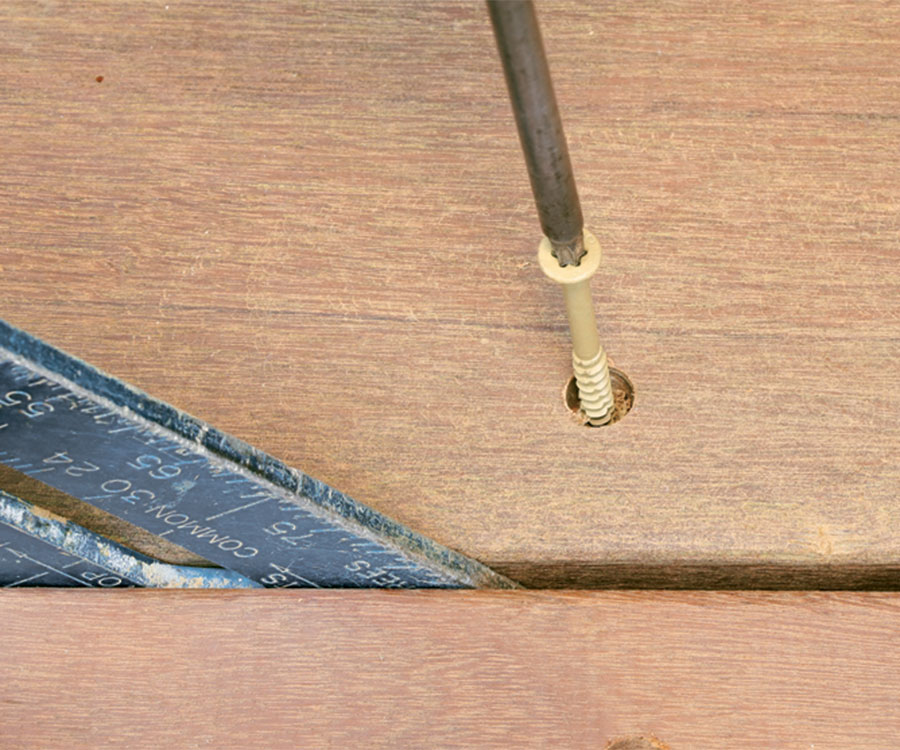 |
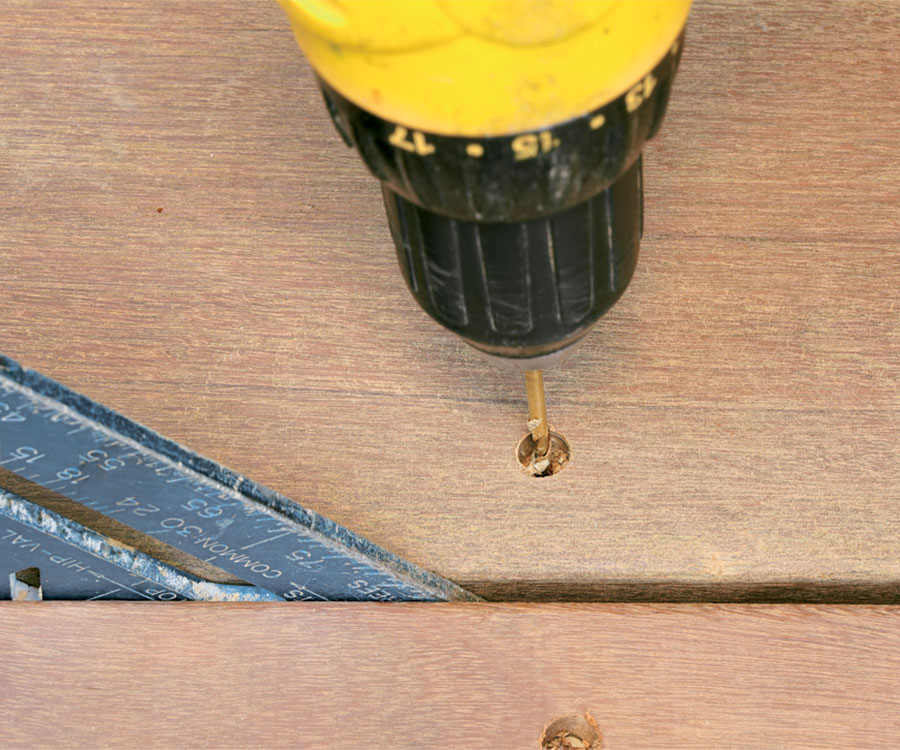
| 1 Bore a hole. Using a sharp bit, bore a hole slightly larger than your fastener head and equal to the size plug you are using. A 1/4-in. or 3/8-in. hole works well. Bore 1/4 in. deep. | 2 Drill a hole for the fastener. In the center of the hole, drill a pilot hole the same width as the shaft, not the thread, of your fastener. | 3 Insert the fastener. Drive the fastener into the decking until the head snugs into the hole 1/4 in. below the surface. |
 |
 |
 |
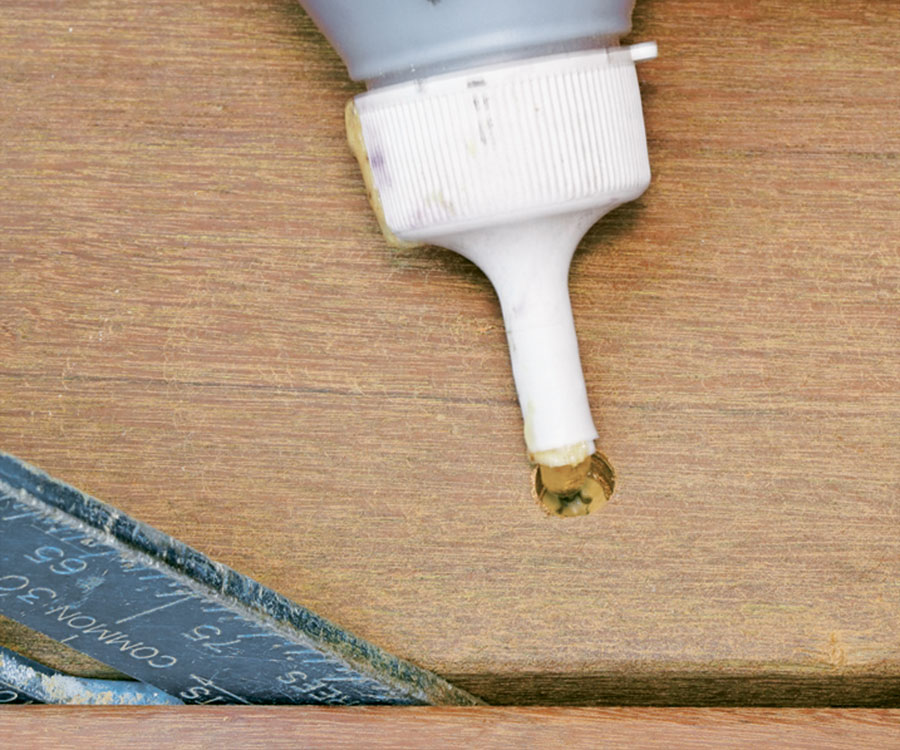
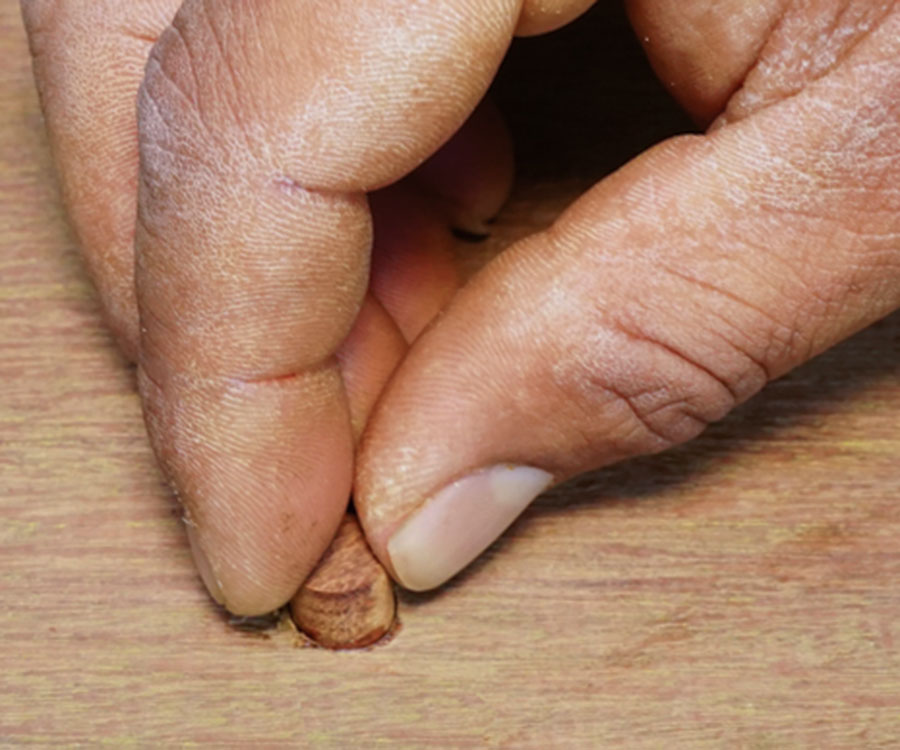
| 4 Add glue. Add a touch of exterior glue to the hole, being careful to keep it from the deck surface. | 5 Insert a plug. Lining up the grain with the decking, push a plug into the hole. Tap it down with a hammer. | 6 Sand the plug. Give the glue time to dry and then sand the plug flush with a random-orbital sander. |
Tip: Ipe plugs are available for purchase online by the bag. Available diameters include 1/4 in., 3/8 in., and 1/2 in.
Fine Homebuilding Recommended Products
Fine Homebuilding receives a commission for items purchased through links on this site, including Amazon Associates and other affiliate advertising programs.

MicroFoam Nitrile Coated Work Gloves
Cepco BoWrench Decking Tool

4-Gallon Piston Backpack Sprayer
