FHB Logo Facebook LinkedIn Email Pinterest Twitter X Instagram Tiktok YouTube Plus Icon Close Icon Navigation Search Icon Navigation Search Icon Arrow Down Icon Video Guide Icon Article Guide Icon Modal Close Icon Guide Search Icon Skip to content
Subscribe
Log In
  • How-To
  • Design
  • Tools & Materials
  • Restoration
  • Videos
  • Blogs
  • Forum
  • Magazine
  • Members
  • FHB House
  • Podcast
Log In

Fine Homebuilding Project Guides

Decks

Guide Home
  • Design & Planning
  • Tools & Materials
  • Footings & Foundations
  • Framing a Deck
  • Installing Decking
  • Installing Railings
  • Deck Stairs
  • Custom Details
  • Finishes, Repairs, and Maintenance
  • Complete Deck Builds

Multi-Feature Curved Deck: Decking

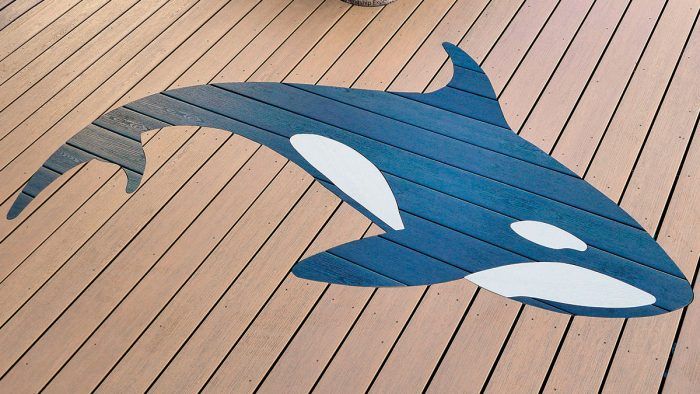
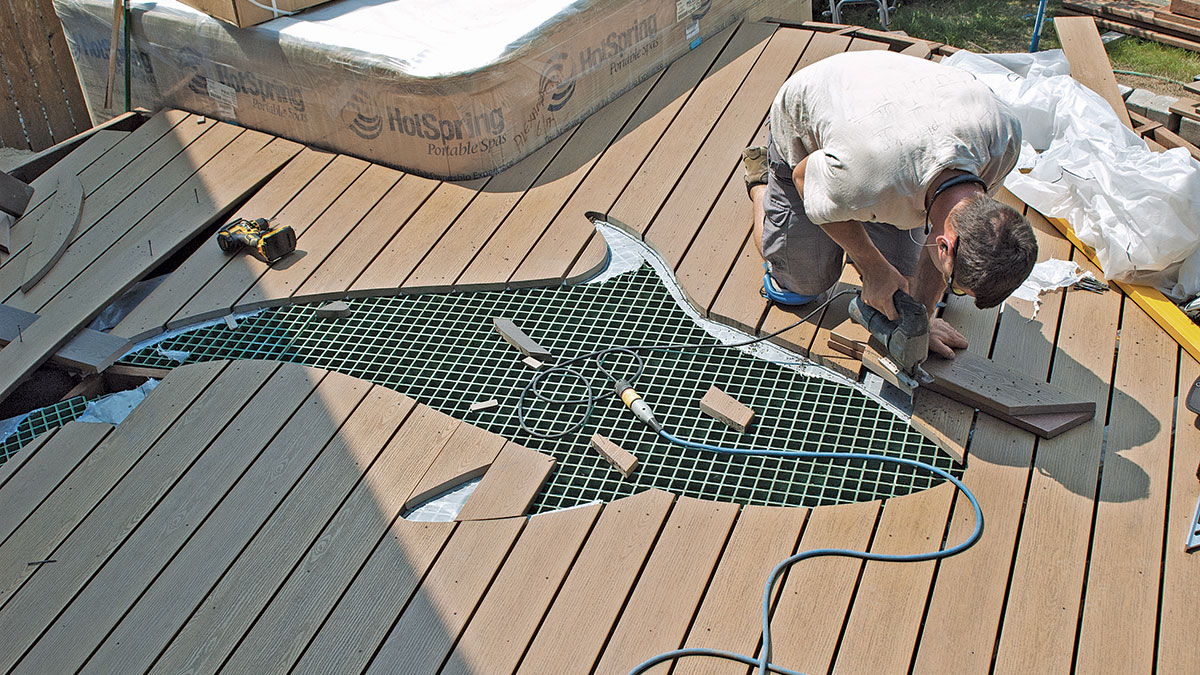
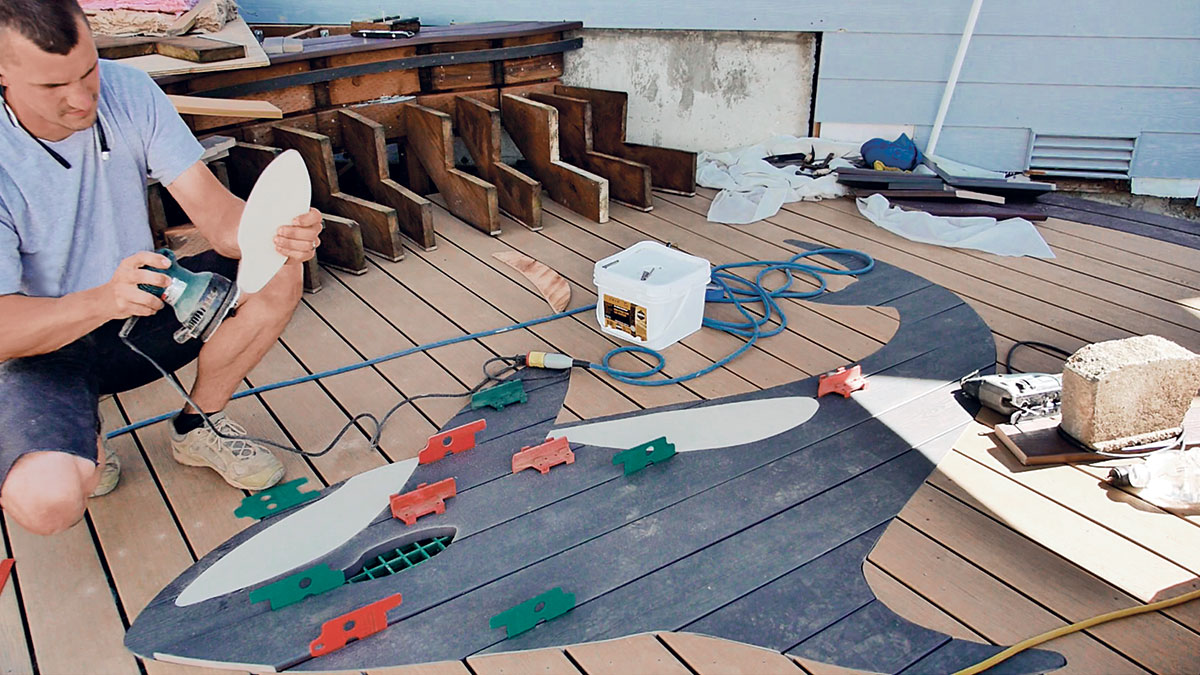
An inlaid graphic of an orca whale dresses up the deck planking.
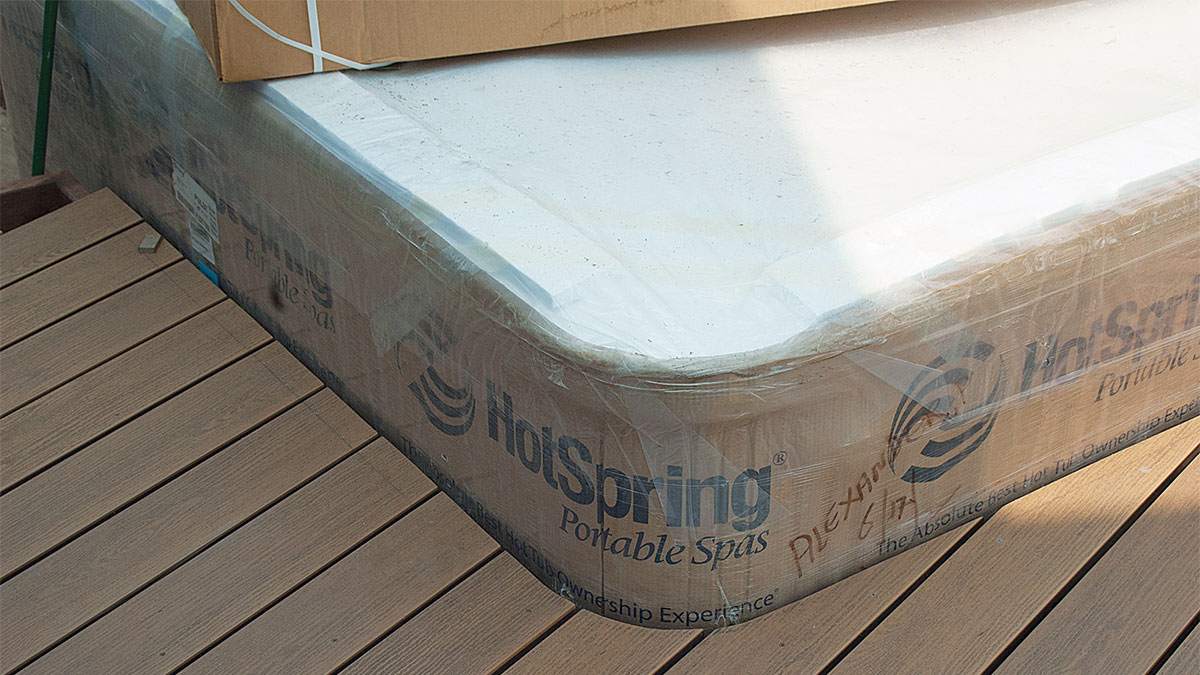
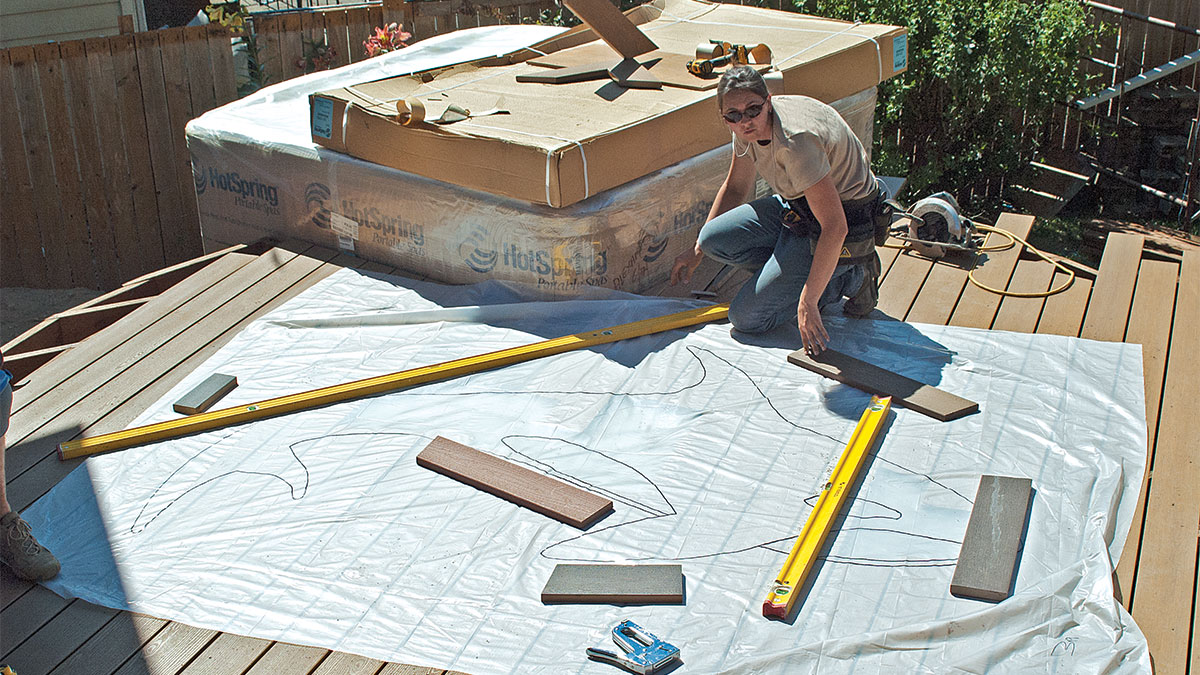
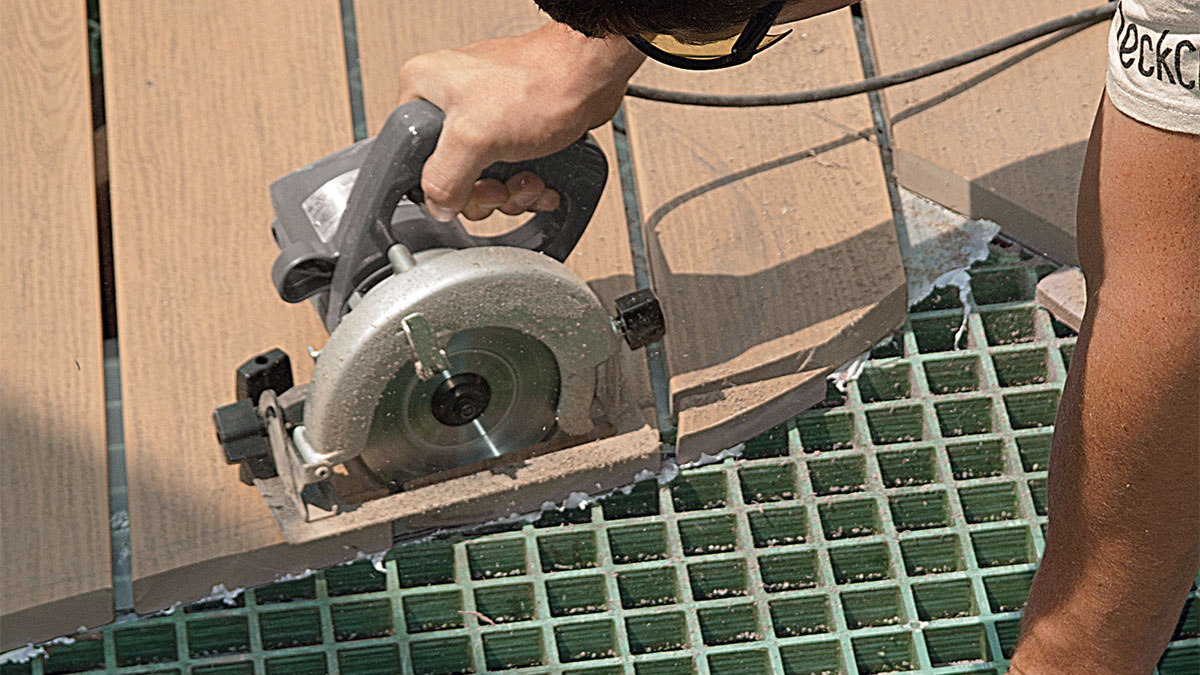
By David Toht
  • X
  • facebook
  • linkedin
  • pinterest
  • email
  • add to favorites Log in or Sign up to save your favorite articles

Trimming for the Tub

To avoid damage, it makes sense to leave the packaging on the hot tub until most of the construction is done. For the best results, rough-cut the decking around the tub. Then pull it far enough away from the tub so you can accurately scribe a cutline. Use a circular saw and a jigsaw to make the cuts.

A successful inset graphic has to be as well supported as any other area of decking. Fiberglass panels used for industrial grating fit the bill for this deck. Avoid overly small pieces in your graphic, opting for no piece with an area smaller than a dinner plate.

Adding an Inset Graphic

When choosing or drawing a graphic like the orca whale used on this deck, be careful to generalize the details so they are large enough to be rendered with pieces of decking. Once you’ve found or drawn your design, borrow a computer projection device so you can transfer the image to a piece of plastic sheeting. Use a permanent marker to trace the design. You’ll need at least four copies. Then prepare for a creative adventure in transforming decking into scaled-up puzzle pieces!

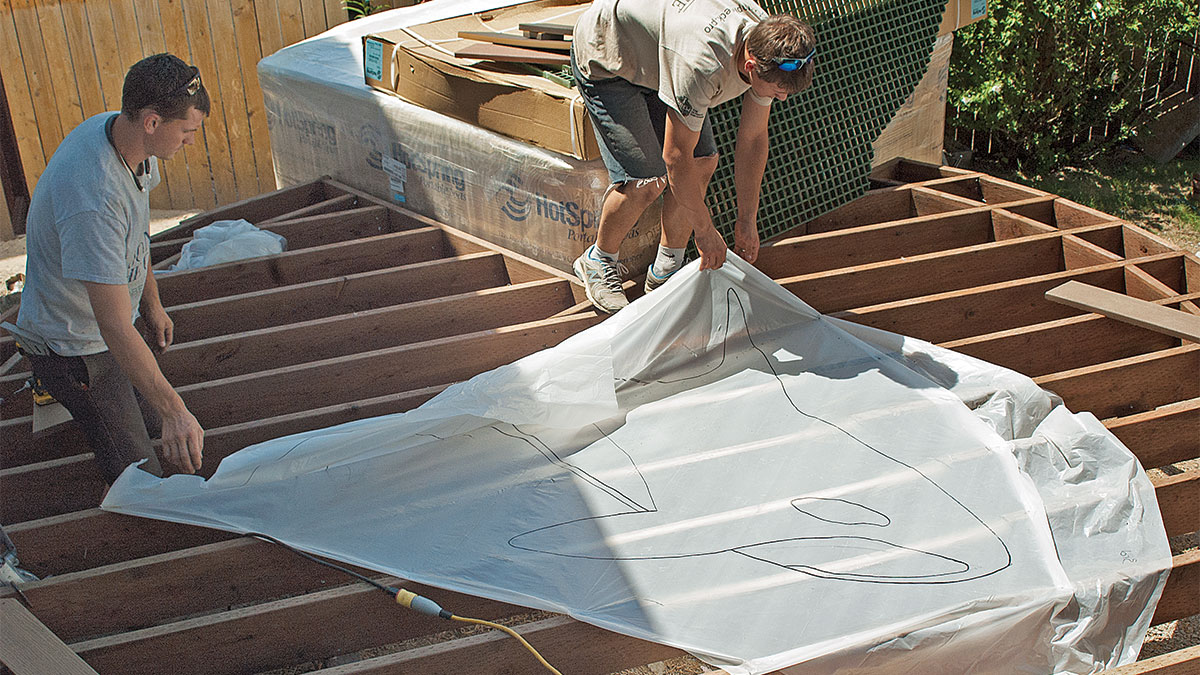
1. Position the graphic. With the joists and blocking in place, it’s time to notch the framing for the grating that will support the puzzle pieces of the graphic. Lay down one of the plastic sheets on which you’ve transferred the graphic. Move it around until you have the design where you want it. Tape or place scraps along one side to hold it in place.

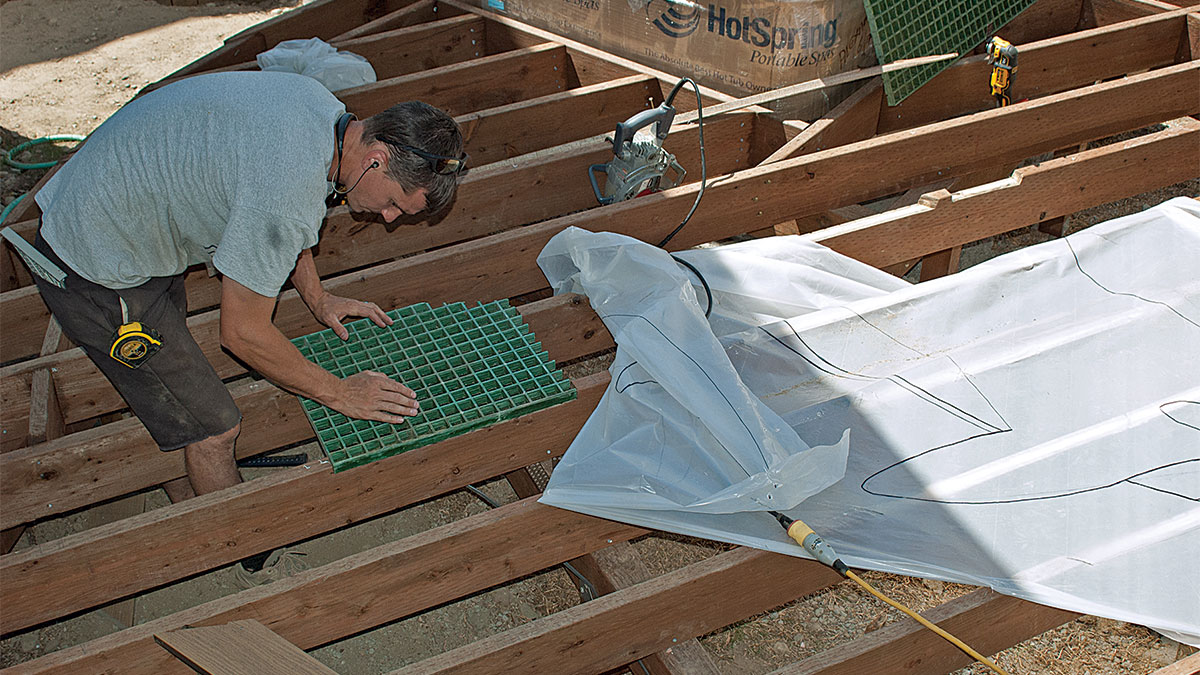
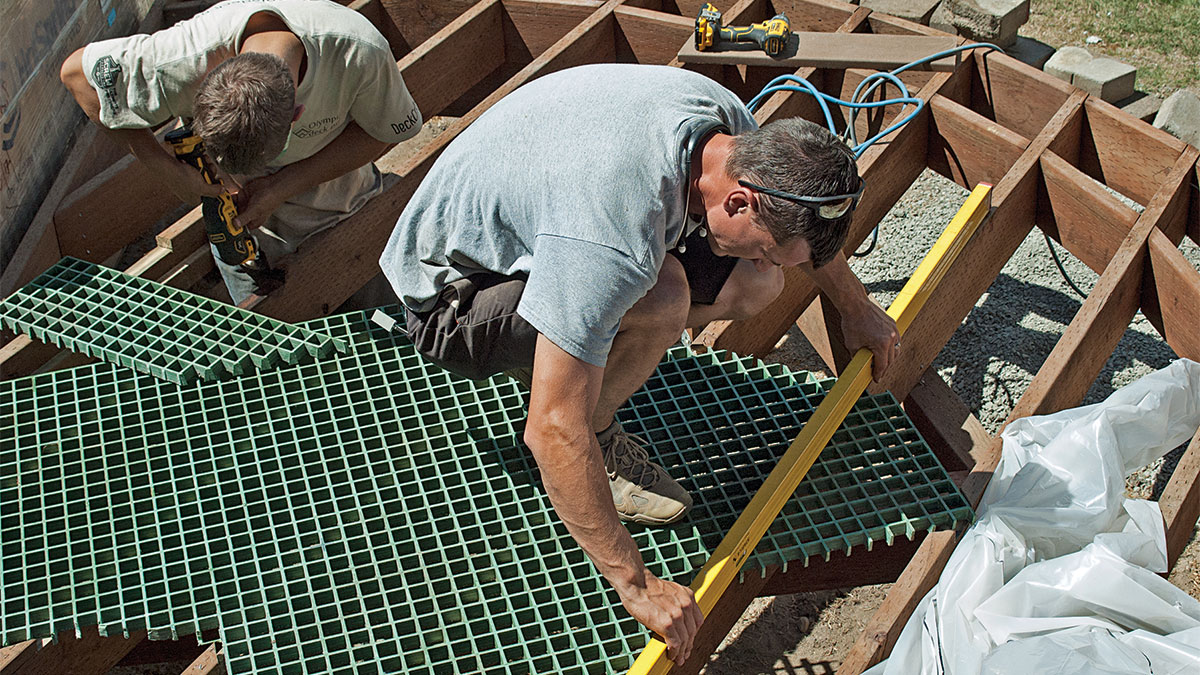
2. Mark for the support grating.  Because the outline of the orca design is complex, it would be difficult to install blocking to provide the necessary support. Instead, sections of fiberglass grating smoothly support the many puzzle pieces of the graphic.

TIP

For a super-smooth transition from the deck to the graphic, make sure the grating extends at least 6 in. beyond the feature. Provide an extra-generous section of grating for complex details like the tail and the fins of this design. Once the grating is notched into the joists, go underneath the deck to add extra bridging so the grating is fully supported.


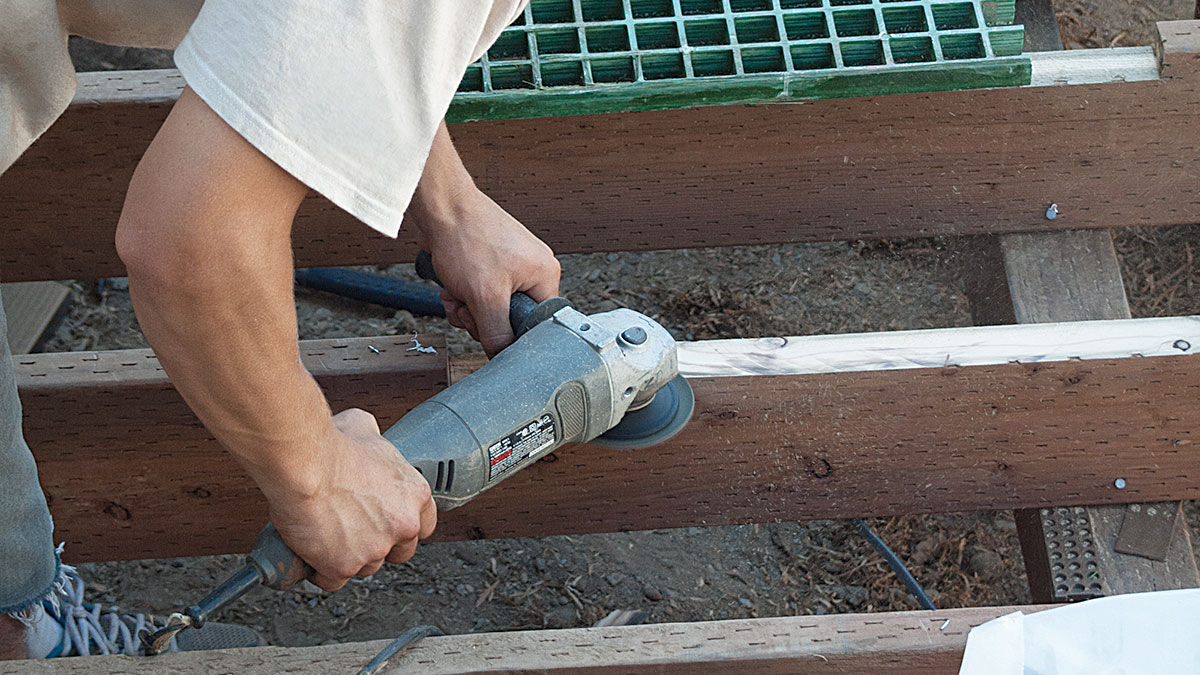
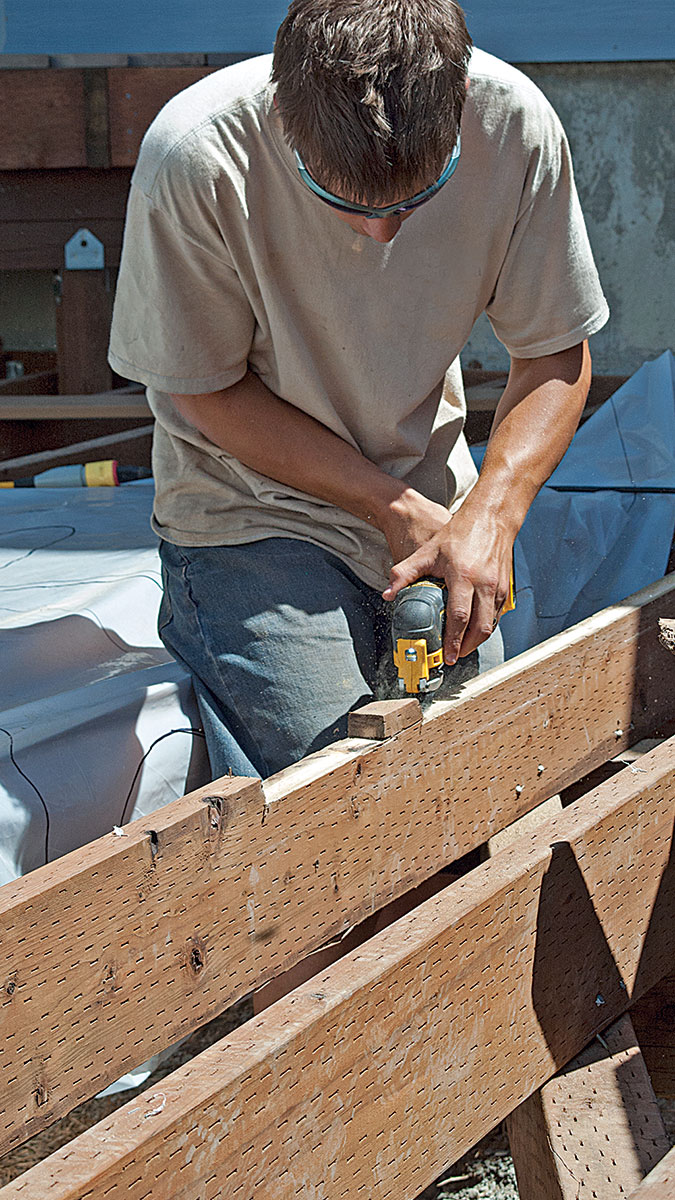
3. Notch for the support grating. Use a circular saw to cut notches to let the pieces of grating into the joists. A grinder makes fine adjustments so the top of the grating is exactly even with the top of the joists.

4. Complete the cut.
An oscillating saw is ideal for cutting out the bits a circular saw can’t reach. A handsaw can also do the job.
5. Recheck the fit.
Check again to be sure the top surface of the grating is exactly flush with the top of the joists. Use a straightedge like an extended level to check the fit.

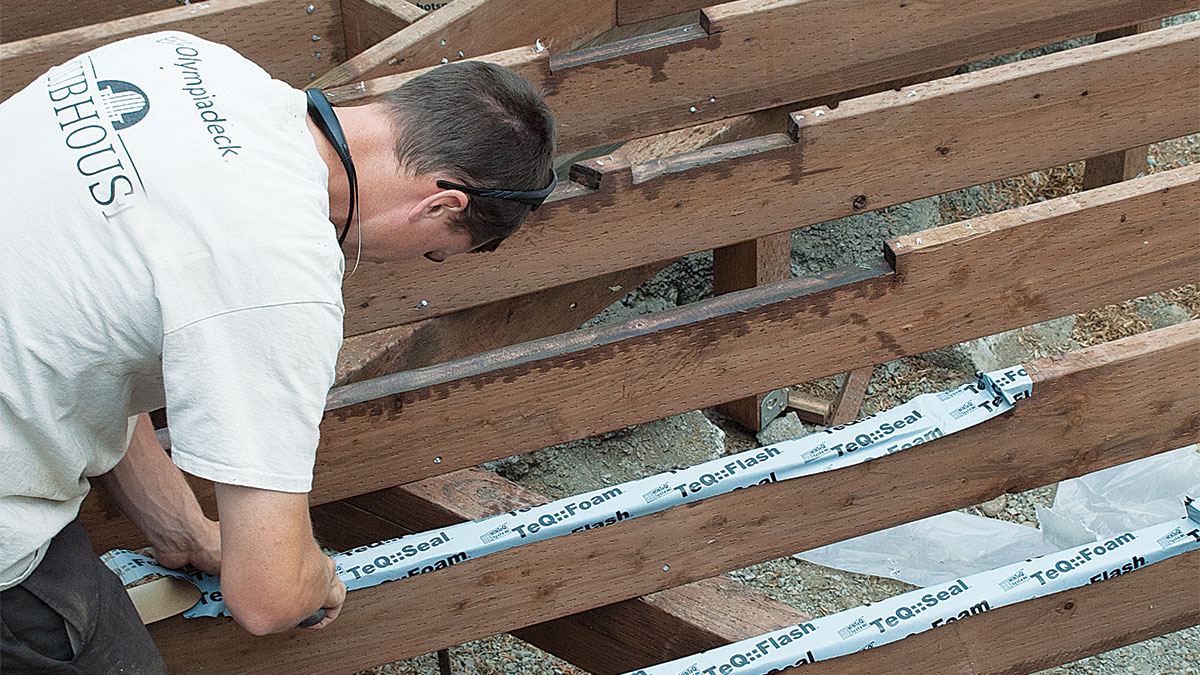
6. Add stretchable flashing. Paint the notches with preservative. Once the preservative dries, apply stretchable flashing to each notch to further protect the joists.

Using Decking to Add a Graphic Feature

Because PVC and composite decking come in a wide range of colors, either one can be used to make a graphic feature (here, we used PVC). A successful feature has enough detail to make it interesting but is not so fussy that it has small bits that are difficult to fasten in place securely. By equipping the framing with a fiberglass grate and added bridging, all the edges of the design are well supported. The simple, rounded shapes that make up the orca motif lend themselves to decking.

This stunning graphic of an orca whale especially suits its Washington State location but would be a memorable feature anywhere. Notice that the decking used in the graphic is set perpendicular to the field decking, simplifying construction and adding a touch of contrast.

The first stage is installing the background decking. Key priorities are extending the decking far enough into the design for trimming later and keeping the gap and orientation of the planks consistent across the inlay.

Inlaying the design requires checking and rechecking the template to make sure it hasn’t slipped while transferring the design to the deck. Take your time and step back often to get the big picture. Start with large pieces and use cutoffs and scraps for the smaller pieces.

TIP

When using a jigsaw, cut PVC and composite decking with a slow blade action to avoid heat buildup. Check the owner’s manual for the ideal orbital cutting action for such materials—it will make a difference in the quality of the cut.


1. Apply the decking. Reposition the plastic sheet with the outline of the graphic on top of the grating. Begin installing the decking. In this case, scraps of decking cut to 3/8 in. are used as spacers.

2. Continues courses over the graphic. To make sure that the decking lines up accurately on both sides of the graphic, run a couple of courses over the graphic. Use them as an alignment guide for installing the other pieces that will surround the inset design.

3. Reposition the tracing. Now is the time to put your second tracing to use. Carefully lay it in place, aligning it with the sheet underneath the decking. Instead of marring the decking with staples, hold the plastic in place with scraps.

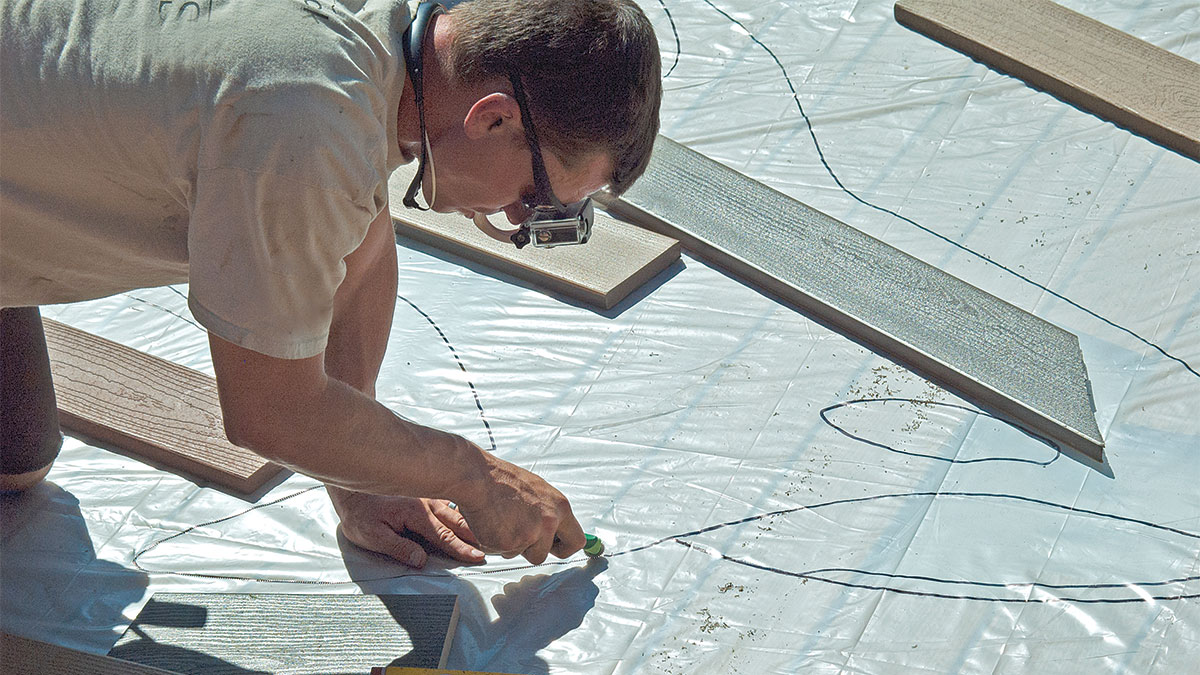
4. Transfer the graphic. Using a wheeled serration tool, work your way around the outermost portion of the design, pressing down firmly.

TIP

Special projects call for special tools. Head to a crafts or fabric store to buy a wheeled serration tool. As you use the tool, enhance the serrations with a pencil to accent your cutline.


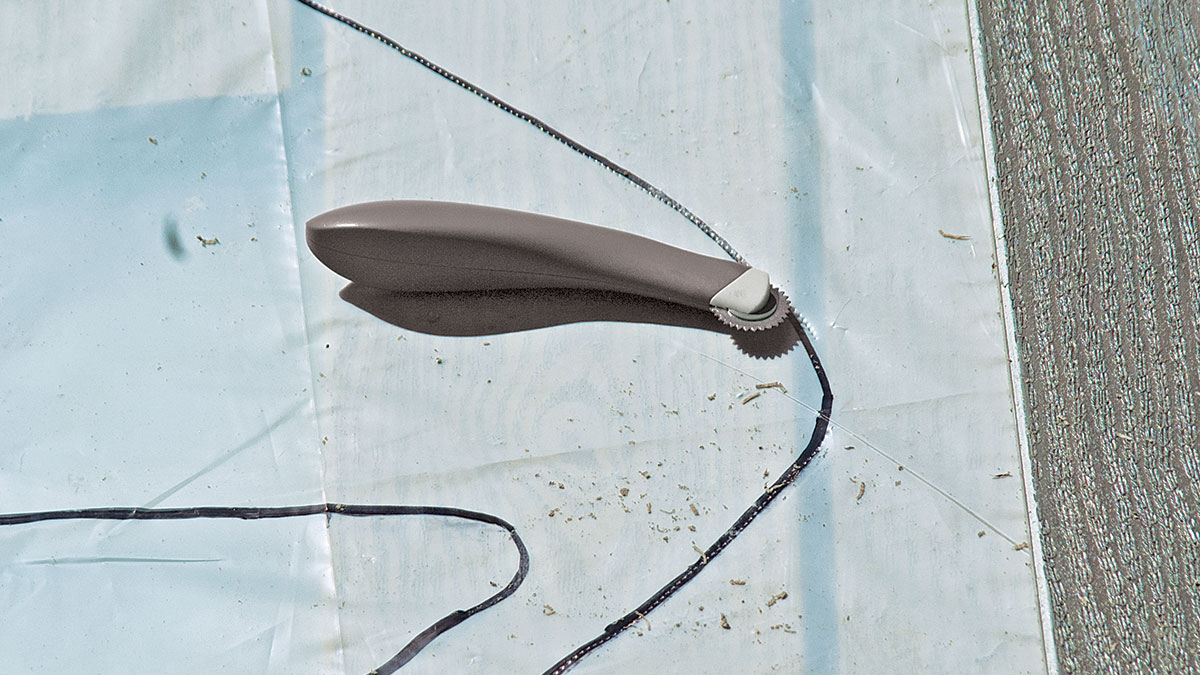
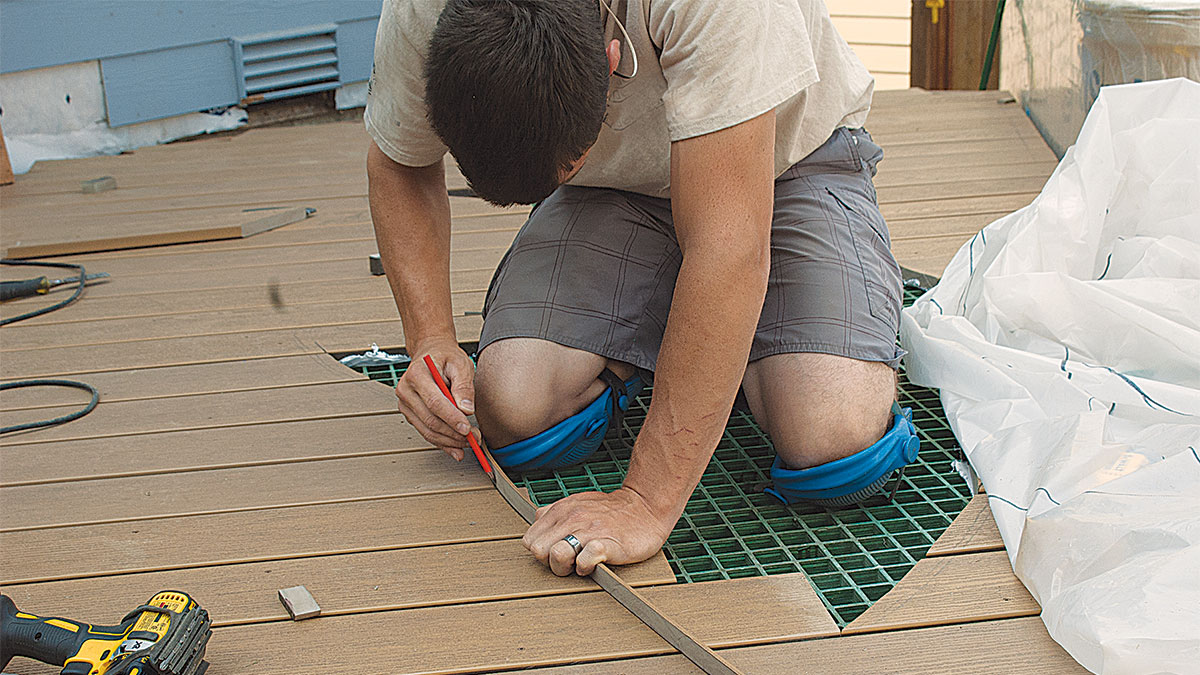
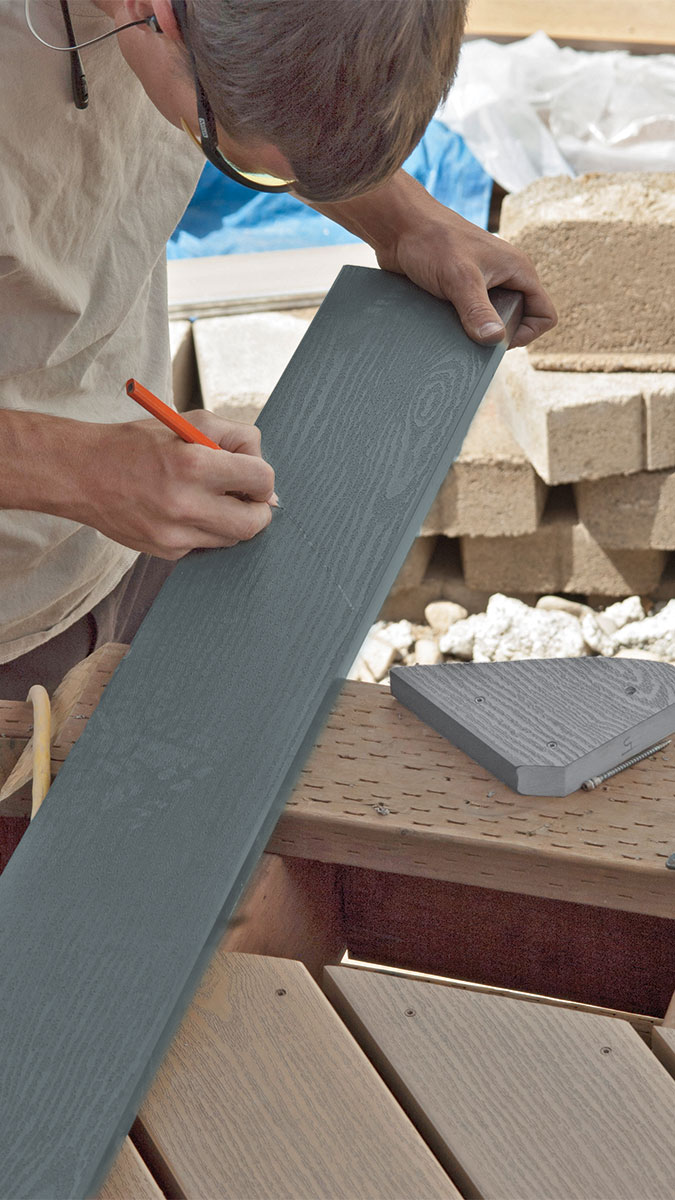
5. Enhance the line. Pull back the tracing and use a pencil to make your cutline nice and clear. A flexible strip of decking or 1x makes a handy guide for marking a smooth curve.

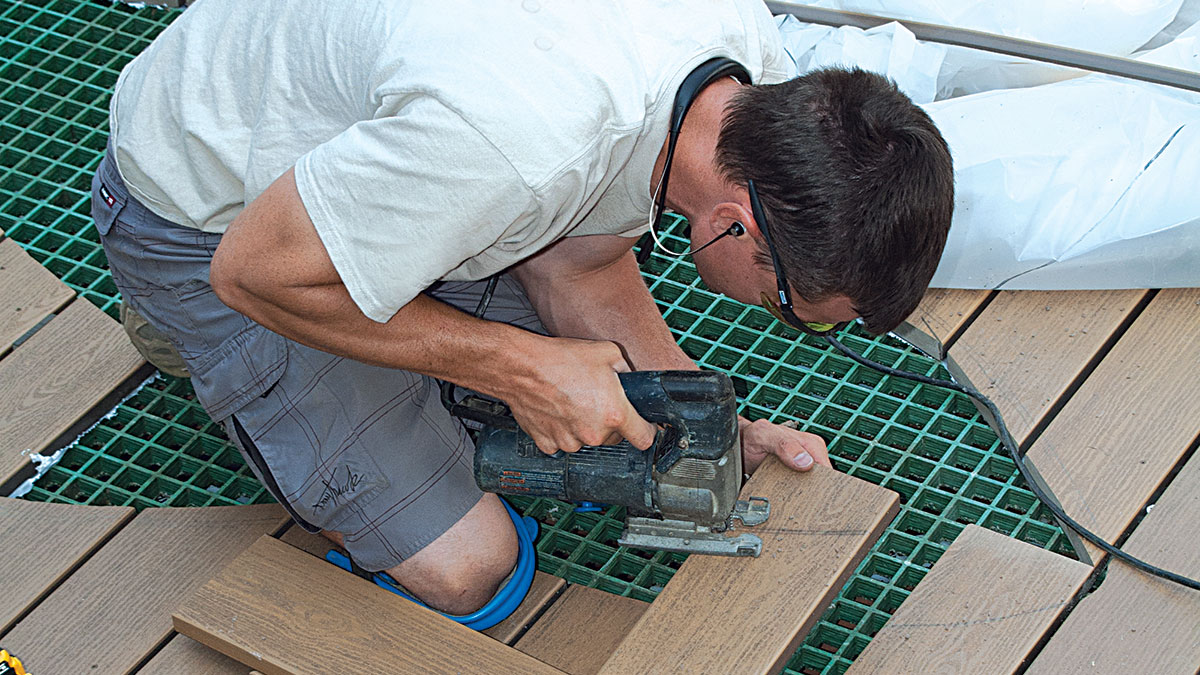
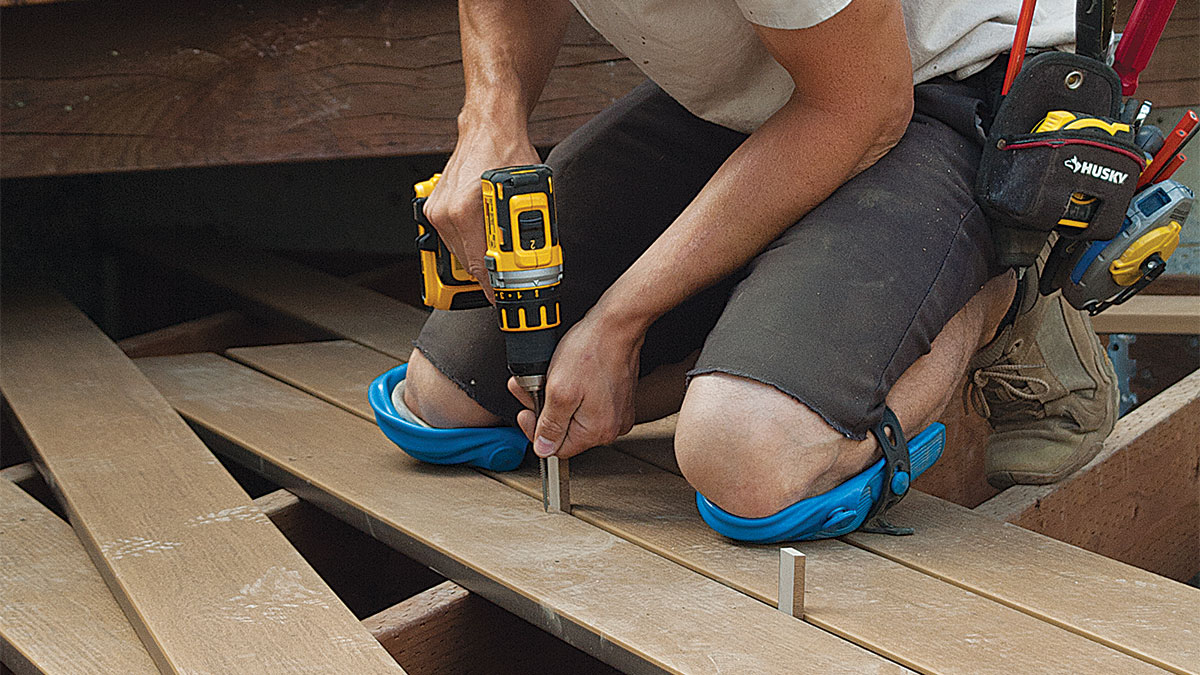
6. Make the cut. By backing out the screws ­nearest the end of a plank and slipping some scraps ­underneath it, you can cut the plank in place. This saves you the trouble of lining up the cut end later.

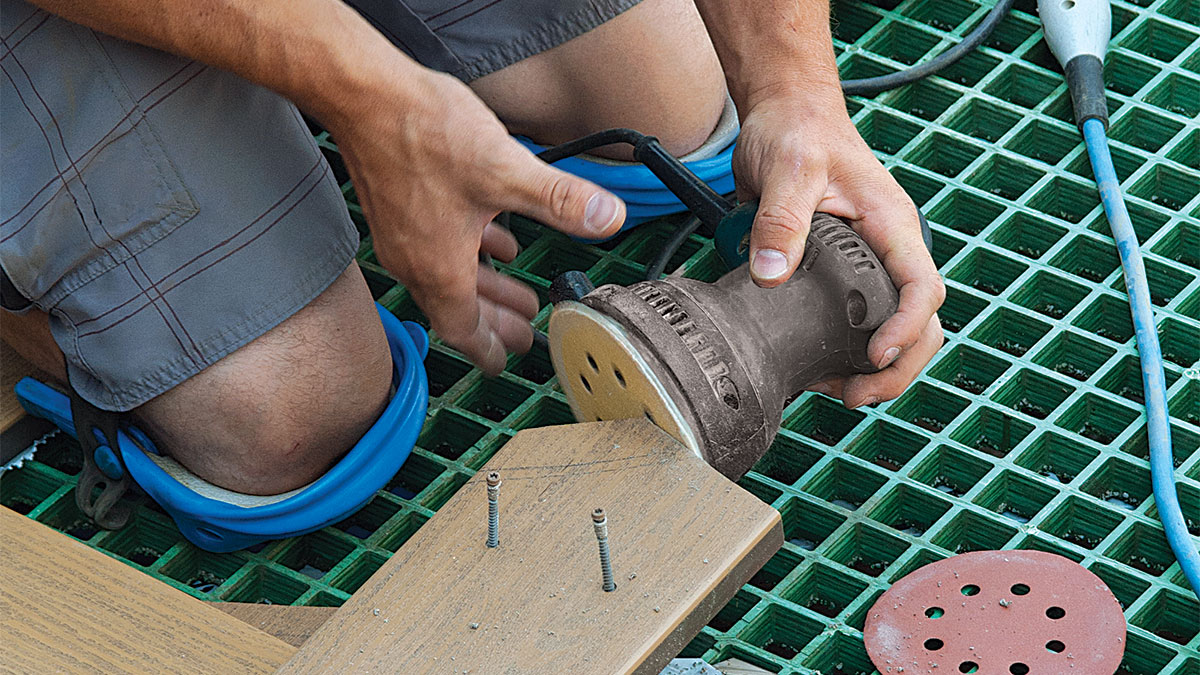
7. Sand the cut. While the plank is conveniently propped up, smooth the cut edge with a sander.

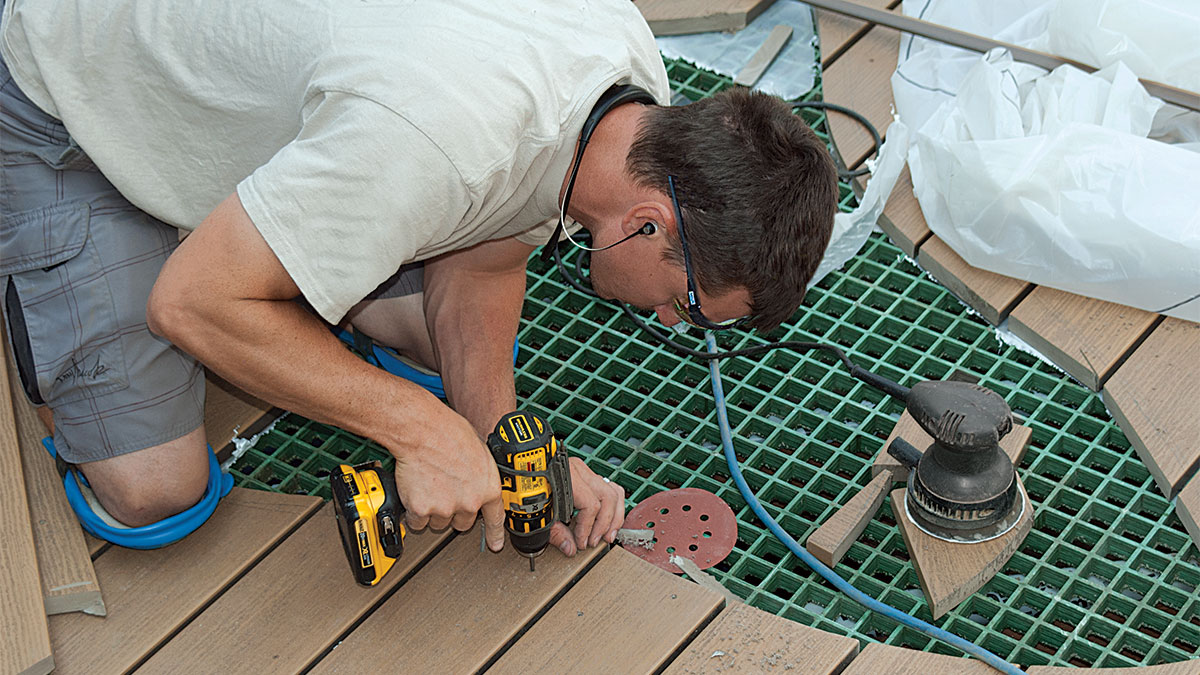
8. Fasten the decking. Replace each piece of decking and check that the cut is square and smooth before replacing the fasteners.

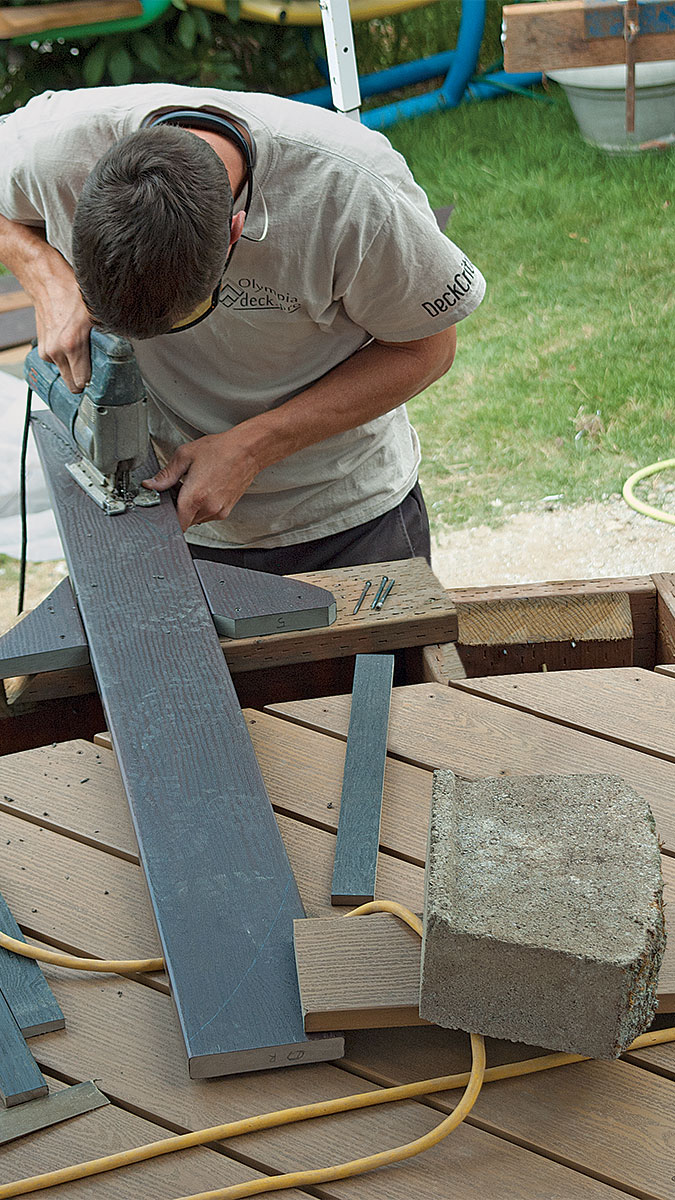
9. Cut gentle curves. Flatter curves can be cut with a compact circular saw equipped with a 4-1/2-in. blade. Set the blade just deep enough to cut the decking while cutting no more than 1/8 in. into the grating. Move the saw slowly and smoothly.

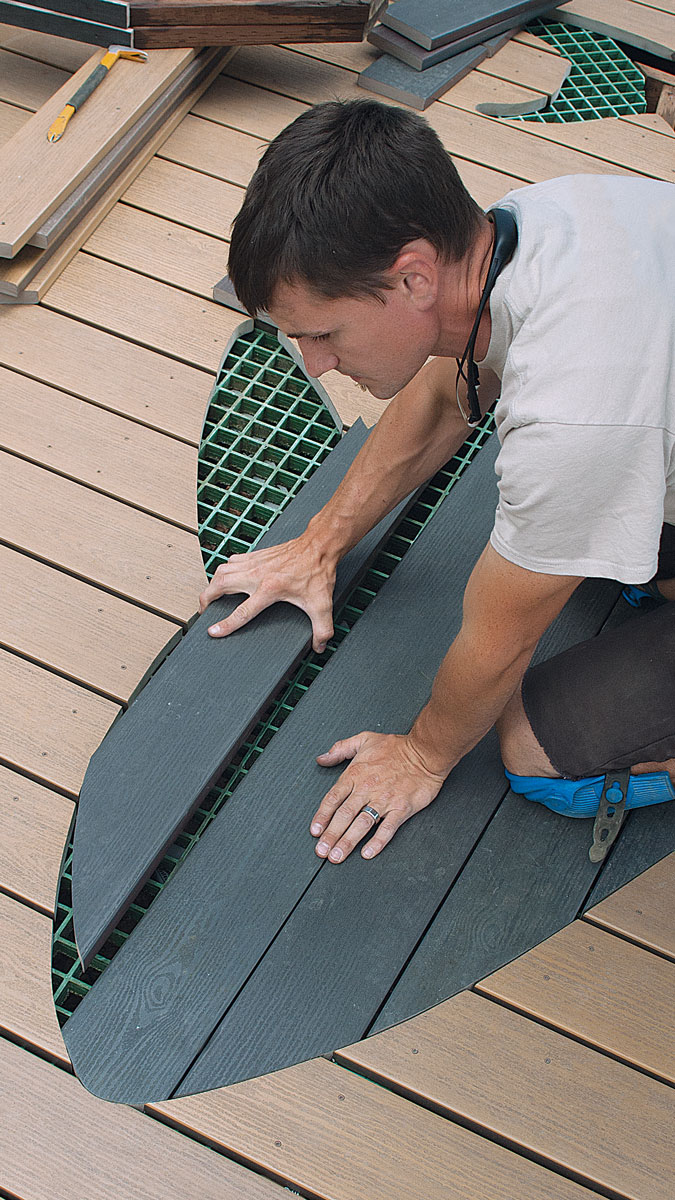
10. Complete the cutout. Continue working your way around the design. Double-check that the cut ends of the decking line up with each other, sanding to make minor adjustments. As a final step, remove the scraps of plastic before refastening the planks in place.

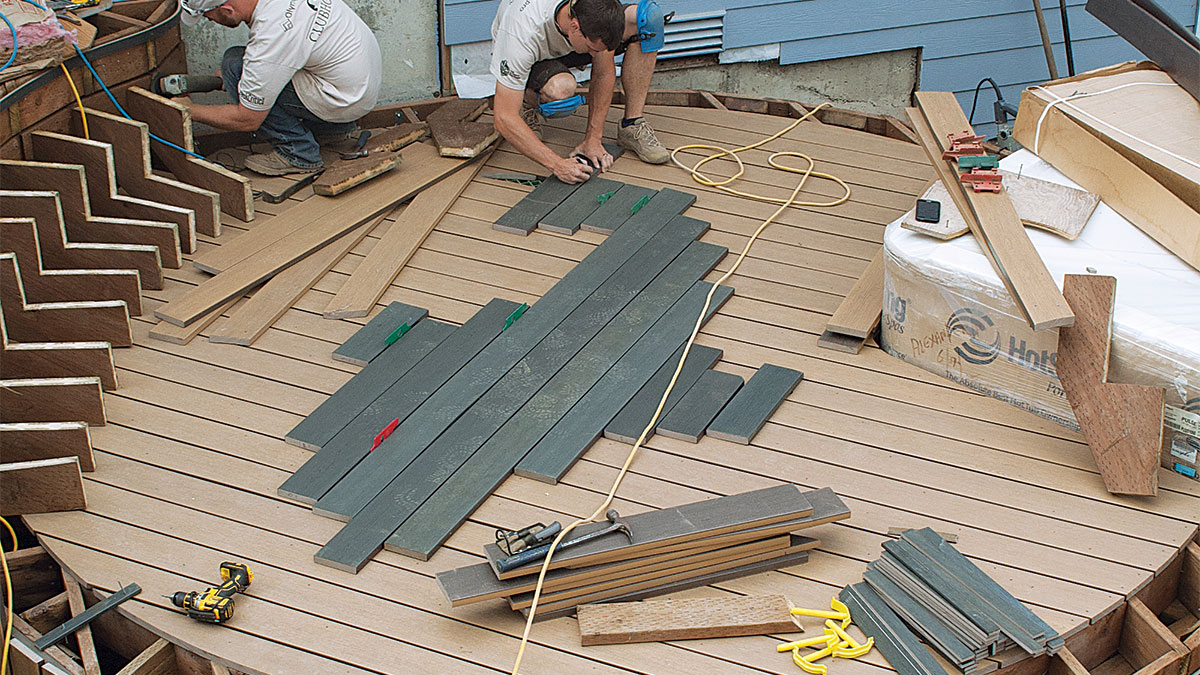
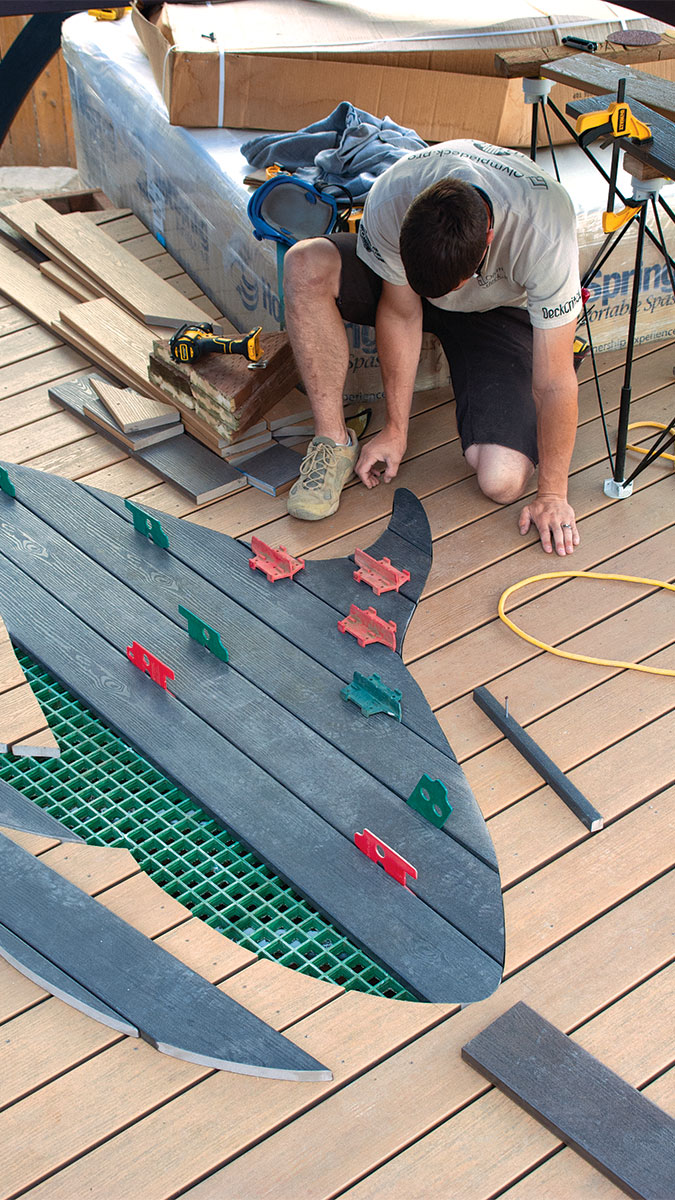
11. Rough-cut interior pieces. When the outline cutout is done, cut pieces longer than needed, arranging them so there will be as few small pieces as possible. Use spacers to confirm how the planks will fit the cutout.
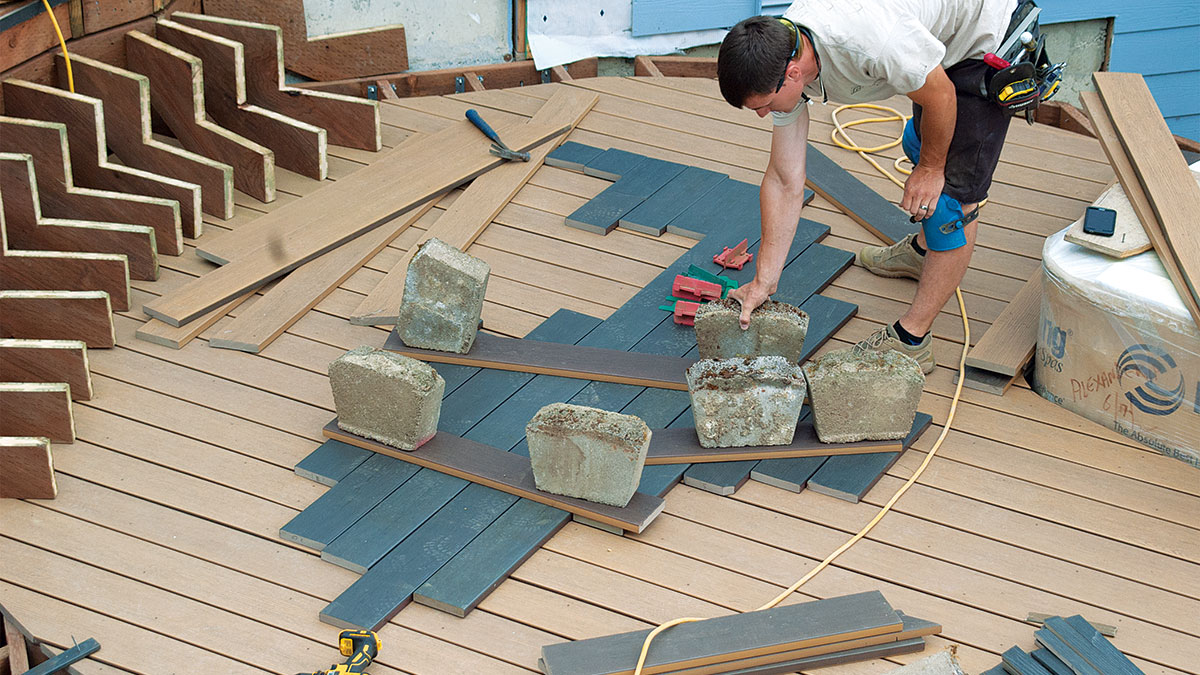
12. Prep for making the interior pieces.
To hold the rough-cut pieces in place, weigh them down with scraps of decking and heavy weights like concrete blocks. From underneath the deck, sketch cutlines on the pieces.
13. Mark clear cutlines.
You’ll be forced to mark around the fiberglass grate, joists, and blocking—a chicken-scratched bunch of lines at best. Carefully extend any broken lines.
14. Trim the interior planks.
Clamp or otherwise stabilize the plank. Using a jigsaw, carefully make the needed cuts.
15. Scribe for a gap.
Insert the pieces. Initially the fit might be tight, but as long as you can squeeze them into the inset, you can scribe them for a gap consistent with the rest of the decking. In some cases, you might find you’ve overdone the cut and have to try again with another piece of decking.
16. Reset and space the pieces.
As you scribe and trim the pieces, work in spacers to match it up with the surrounding deck. This will take finesse and a lot of trial and error.
17. Complete the puzzle.
Cut out the contrasting pieces, lay them on the graphic, trace around them, and cut out the background. Test-fit the pieces, using a random-orbital sander to achieve a consistent gap around each piece.


TIP

Use a combination of trim-head screws and construction adhesive to fasten the puzzle pieces in place. The screws must be at least 3 1⁄2 in. long to pierce through the decking, go past the grating, and fasten at least 1 in. into the framing beneath. Where no framing is nearby, use construction adhesive to glue the pieces to the grating.


Fine Homebuilding Recommended Products

Fine Homebuilding receives a commission for items purchased through links on this site, including Amazon Associates and other affiliate advertising programs.

Drill Driver/Impact Driver

Whether you're pre-drilling holes or driving screws, this Milwaukee® compact cordless driver is the way to go when it comes to building decks.
Buy at Amazon

Jigsaw

When it comes to fitting and installing decking, a cordless jigsaw is a must-have for custom cuts — especially around posts.
Buy at Amazon

Flashing and Joist Tape

Flashing joists is a great way to prolong the life of a deck frame — after all, moisture management is key to longevity.
Buy at Amazon
Previous: Multi-Feature Curved Deck: Framing Next: Multi-Feature Curved Deck: Installing Railing Posts and Skirting

Guide

Decks

Chapter

Complete Deck Builds

Sign up for eletters today and get the latest how-to from Fine Homebuilding, plus special offers.

Signing you up...

This site is protected by reCAPTCHA and the Google Privacy Policy and Terms of Service apply.
See all newsletters
See all newsletters

Log in or create an account to post a comment.

Sign up Log in

Become a member and get full access to FineHomebuilding.com

Decks

Decks

Hundreds of articles and videos by top deck-building pros on how to design and build a beautiful, sturdy, and safe deck

View Project Guide

View All Project Guides »

Become a member and get unlimited site access, including the Decks Project Guide.

Start Free Trial

Design & Planning
  • Basic Design Options
  • Generating Plans
  • Calculating Deck Loads
  • Code Compliance
Tools & Materials
  • Deck Building Tools
  • Foundation and Framing Materials
  • Decking Materials
  • Fasteners and Hardware
Footings & Foundations
  • Choosing a Foundation
  • Sizing and Laying Out Footings
  • Excavation
  • Pouring the Foundation
Framing a Deck
  • Framing Overview
  • Installing the Ledger
  • Setting Posts and Beams
  • Installing Joists
Installing Decking
  • Decking Basics
  • Installation Process
  • Adding Fascia and Other Decorative Elements
Installing Railings
  • Installing Deck Railing Posts
  • Building Wood Rails and Balustrades
  • Non-Wood Railing Options
  • Installing Nonwood Balustrades
Deck Stairs
  • Deck Stairs Overview
  • Laying Out, Cutting, and Installing the Stringers
  • Installing Treads, Risers, and Stair Railings
Custom Details
  • Benches, Planters, and Privacy Features
  • Pergolas
  • Lighting
Finishes, Repairs, and Maintenance
  • Deck Finishes
  • Cleaning and Refinishing
  • Inspection and Repair
Complete Deck Builds
  • Grade-Level Decks
  • Raised Decks

Fine Home Building

Newsletter Sign-up

  • Fine Homebuilding

    Home building tips, offers, and expert advice in your inbox.

  • Green Building Advisor

    Building science and energy efficiency advice, plus special offers, in your inbox.

  • Old House Journal

    Repair, renovation, and restoration tips, plus special offers, in your inbox.

Signing you up...

This site is protected by reCAPTCHA and the Google Privacy Policy and Terms of Service apply.
See all newsletters

Follow

  • Fine Homebuilding

    Dig into cutting-edge approaches and decades of proven solutions with total access to our experts and tradespeople.

    Start Free Trial Now
    • Facebook
    • Instagram
    • X
    • LinkedIn
  • GBA Prime

    Get instant access to the latest developments in green building, research, and reports from the field.

    Start Free Trial Now
    • Facebook
    • YouTube
  • Old House Journal

    Learn how to restore, repair, update, and decorate your home.

    Subscribe Now
    • Facebook
    • Instagram
    • X

Membership & Magazine

  • Online Archive
  • Start Free Trial
  • Magazine Subscription
  • Magazine Renewal
  • Gift a Subscription
  • Customer Support
  • Privacy Preferences
  • About
  • Contact
  • Advertise
  • Careers
  • Terms of Use
  • Site Map
  • Do not sell or share my information
  • Privacy Policy
  • Accessibility
  • California Privacy Rights

© 2025 Active Interest Media. All rights reserved.

Fine Homebuilding receives a commission for items purchased through links on this site, including Amazon Associates and other affiliate advertising programs.

  • Home Group
  • Antique Trader
  • Arts & Crafts Homes
  • Bank Note Reporter
  • Cabin Life
  • Cuisine at Home
  • Fine Gardening
  • Fine Woodworking
  • Green Building Advisor
  • Garden Gate
  • Horticulture
  • Keep Craft Alive
  • Log Home Living
  • Military Trader/Vehicles
  • Numismatic News
  • Numismaster
  • Old Cars Weekly
  • Old House Journal
  • Period Homes
  • Popular Woodworking
  • Script
  • ShopNotes
  • Sports Collectors Digest
  • Threads
  • Timber Home Living
  • Traditional Building
  • Woodsmith
  • World Coin News
  • Writer's Digest
Active Interest Media logo
X
X
This is a dialog window which overlays the main content of the page. The modal window is a 'site map' of the most critical areas of the site. Pressing the Escape (ESC) button will close the modal and bring you back to where you were on the page.

Main Menu

  • How-To
  • Design
  • Tools & Materials
  • Video
  • Blogs
  • Forum
  • Project Guides
  • Reader Projects
  • Magazine
  • Members
  • FHB House

Podcasts

  • FHB Podcast
  • ProTalk

Webinars

  • Upcoming and On-Demand

Podcasts

  • FHB Podcast
  • ProTalk

Webinars

  • Upcoming and On-Demand

Popular Topics

  • Kitchens
  • Business
  • Bedrooms
  • Roofs
  • Architecture and Design
  • Green Building
  • Decks
  • Framing
  • Safety
  • Remodeling
  • Bathrooms
  • Windows
  • Tilework
  • Ceilings
  • HVAC

Magazine

  • Current Issue
  • Past Issues
  • Magazine Index
  • Subscribe
  • Online Archive
  • Author Guidelines

All Access

  • Member Home
  • Start Free Trial
  • Gift Membership

Online Learning

  • Courses
  • Project Guides
  • Reader Projects
  • Podcast

More

  • FHB Ambassadors
  • FHB House
  • Customer Support

Account

  • Log In
  • Join

Newsletter

Get home building tips, offers, and expert advice in your inbox

Signing you up...

This site is protected by reCAPTCHA and the Google Privacy Policy and Terms of Service apply.
See all newsletters
See all newsletters

Follow

  • X
  • YouTube
  • instagram
  • facebook
  • pinterest
  • Tiktok

Join All Access

Become a member and get instant access to thousands of videos, how-tos, tool reviews, and design features.

Start Your Free Trial

Subscribe

FHB Magazine

Start your subscription today and save up to 70%

Subscribe

We hope you’ve enjoyed your free articles. To keep reading, become a member today.

Get complete site access to expert advice, how-to videos, Code Check, and more, plus the print magazine.

Start your FREE trial

Already a member? Log in

Privacy Policy Update

We use cookies, pixels, script and other tracking technologies to analyze and improve our service, to improve and personalize content, and for advertising to you. We also share information about your use of our site with third-party social media, advertising and analytics partners. You can view our Privacy Policy here and our Terms of Use here.

Cookies

Analytics

These cookies help us track site metrics to improve our sites and provide a better user experience.

Advertising/Social Media

These cookies are used to serve advertisements aligned with your interests.

Essential

These cookies are required to provide basic functions like page navigation and access to secure areas of the website.

Delete My Data

Delete all cookies and associated data