
Flangeless Windows Done Right
Learn how to install European-style windows that sit within the rough opening and require a face-sealed approach to water and air management.
Synopsis: Flangeless windows, often referred to as “Euro-style windows,” have different installation details than the flanged windows common in the United States. In this article, builder and remodeler Jake Bruton details a Flangeless window installation: locating the window in the opening, flashing the rough opening, setting and securing the window, and then face-sealing for water and moisture control.
Some of you may have taken the time to watch my video series with Fine Homebuilding about properly installing flanged windows in multiple assemblies. Those methods apply to most windows installed in the United States, but they don’t apply to flangeless “European style” windows, including the triple-glazed, tilt/turn windows preferred by many high-performance builders. This type of install is known as a “face-sealed system”.
Of course, some of the fundamental principles are the same; shingle-style lapping, for example, is the right way to detail any window flashing, as well as using a back dam and creating a slope at the sill of the rough opening. Your walls may vary, but these principles will provide a solid starting point so that you can adapt the installation to suit your situation. The windows on the project shown here are from Schüco, though many European-style windows install similarly.
Locating the window in the opening
Over the past five years I have not built a home with walls that were less than 71⁄2 in. thick. Most of the time that assembly includes 2×6 framing (51⁄2 in.) plus 1⁄2 in. of drywall inside and 11⁄2 in. of Zip System R-sheathing outside. Having this thick wall gives us an opportunity to make choices about how our Euro-style, flangeless windows are installed.
One option is to push the window outward in the assembly, but this presents more challenges for water management because the window is closer to the weather. Moving the unit to the interior face of the wall better protects the unit from the elements, but in doing so, also moves the unit away from the sunlight and the breeze—two reasons why we have windows in our houses in the first place.
The other factor that must be considered when positioning a window unit is the potential for creating a microclimate. If the window is placed all the way to one side within a deep wall (in this case, likely deeper than 71⁄2 in.), you limit airflow in the window well on the opposite side, and this raises the risk of creating a zone that is different than the surrounding areas. This microclimate can create the right conditions for moisture accumulation in areas where you don’t want it. For this reason, I typically locate the window in the middle.
This limits the microclimate effect and maximizes the connection to the light, breeze, and views, all while limiting the window’s exposure to the elements—by which I mean primarily water, mostly in the form of rain.
Moving the window head into the middle of the wall is essentially like placing it under a small roof, limiting exposure to water. The top corners of windows are the most common places for leaks—but if it doesn’t get wet, then it can’t leak.
Preparing the rough opening
We add materials to the rough opening that the manufactures haven’t factored into their recommended rough-opening dimensions, and that means I need to frame our openings a little bigger than the standard. The dimensions for your job will vary depending on your specific assembly. To do this efficiently and minimize room for error, I find it helpful to use a spreadsheet, set up so that I can enter
the window size and use a formula to calculate our framed rough-opening dimensions.
If our budget allows, I wrap the rough opening with 7⁄16-in. Zip System sheathing to create a durable, easily executed connection between the exterior air barrier and the rough opening. This is the most important takeaway from window installation: The water barriers and air barriers must fully connect to each other. I prefer to use Zip System sheathing in the opening, especially when using Zip R-sheathing on the exterior, because it protects the exposed foam edge around the opening—but if the budget is more restrictive, like on this home, this same protection can be achieved using tape.
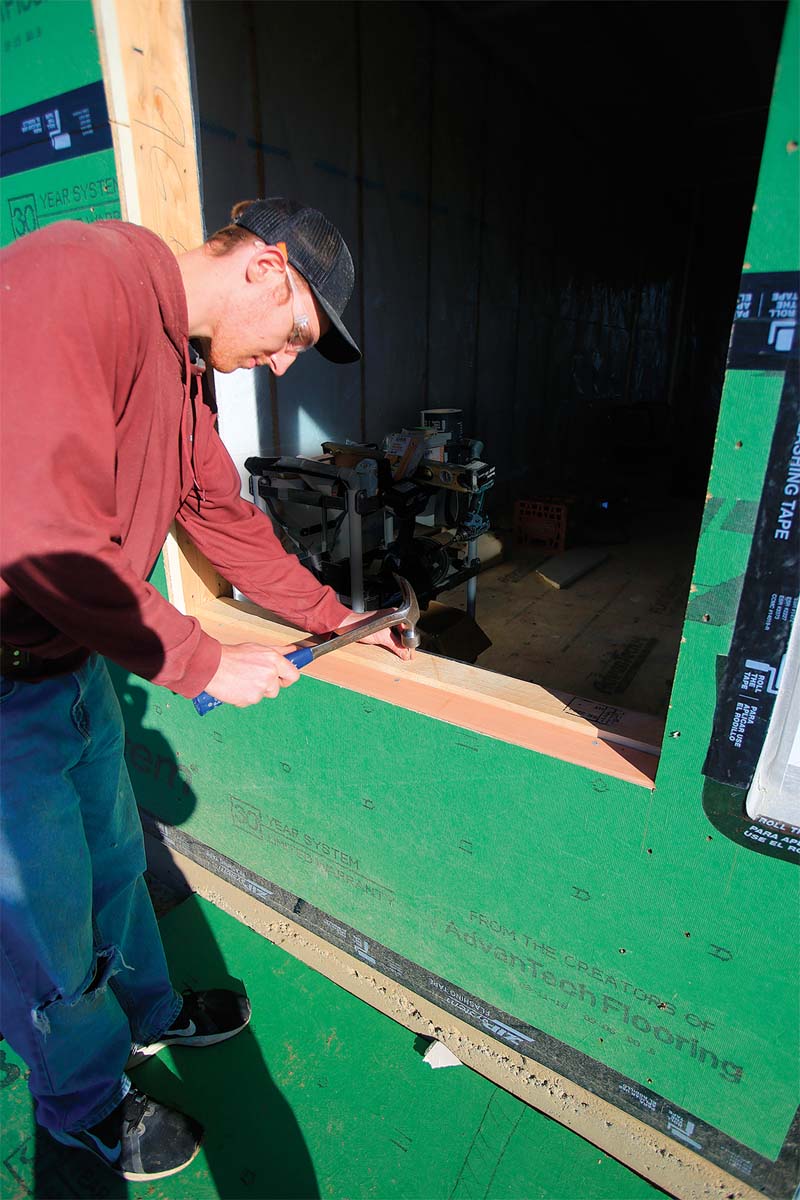
I use a rip of 3⁄4-in. stock to create a back dam on the rough sill, placed directly beneath the window, 2-1⁄2 in. from the face of the sheathing. In front of the dam I place a rip of cedar bevel siding to create a slope toward the exterior of the wall to encourage any water that gets behind the flashing to drain to the outside. When you rip the cedar siding to width, always use the thickest edge, which provides better withdrawal resistance when nailed into place with short roofing nails. After our sill pan is built, the waterproofing process begins.
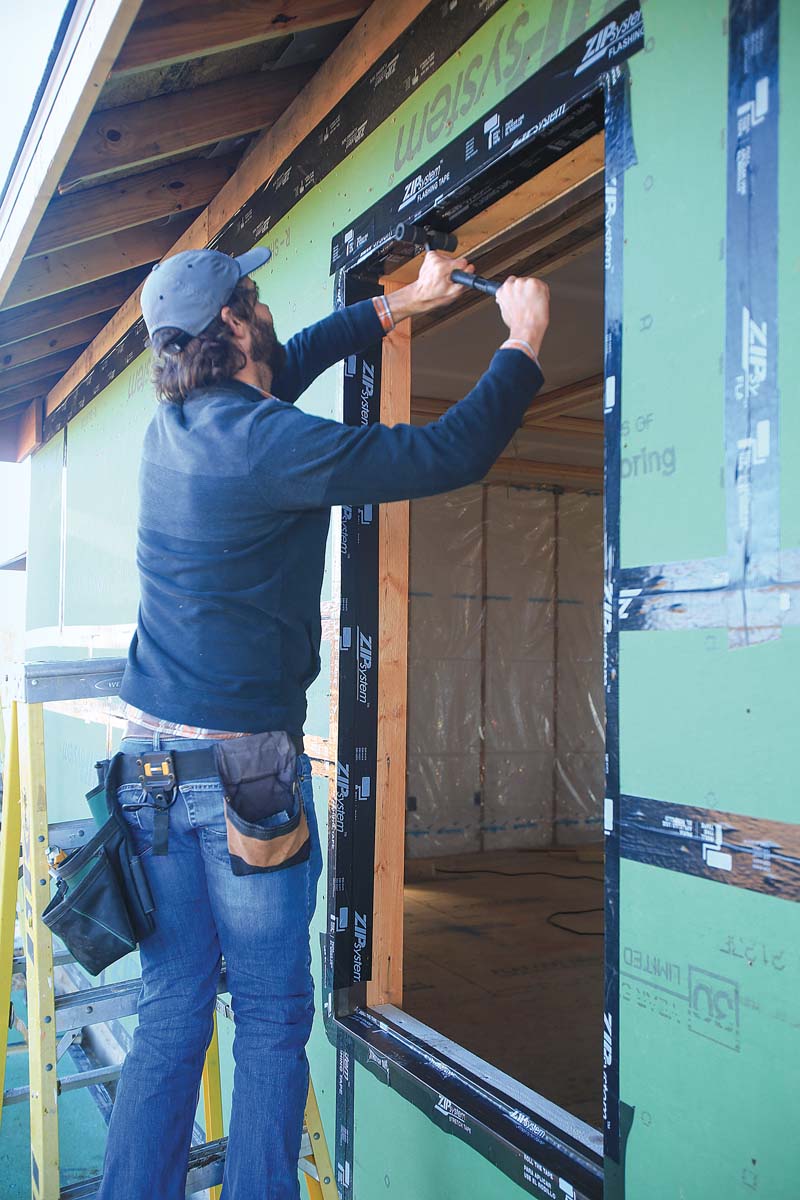
Time to start flashing
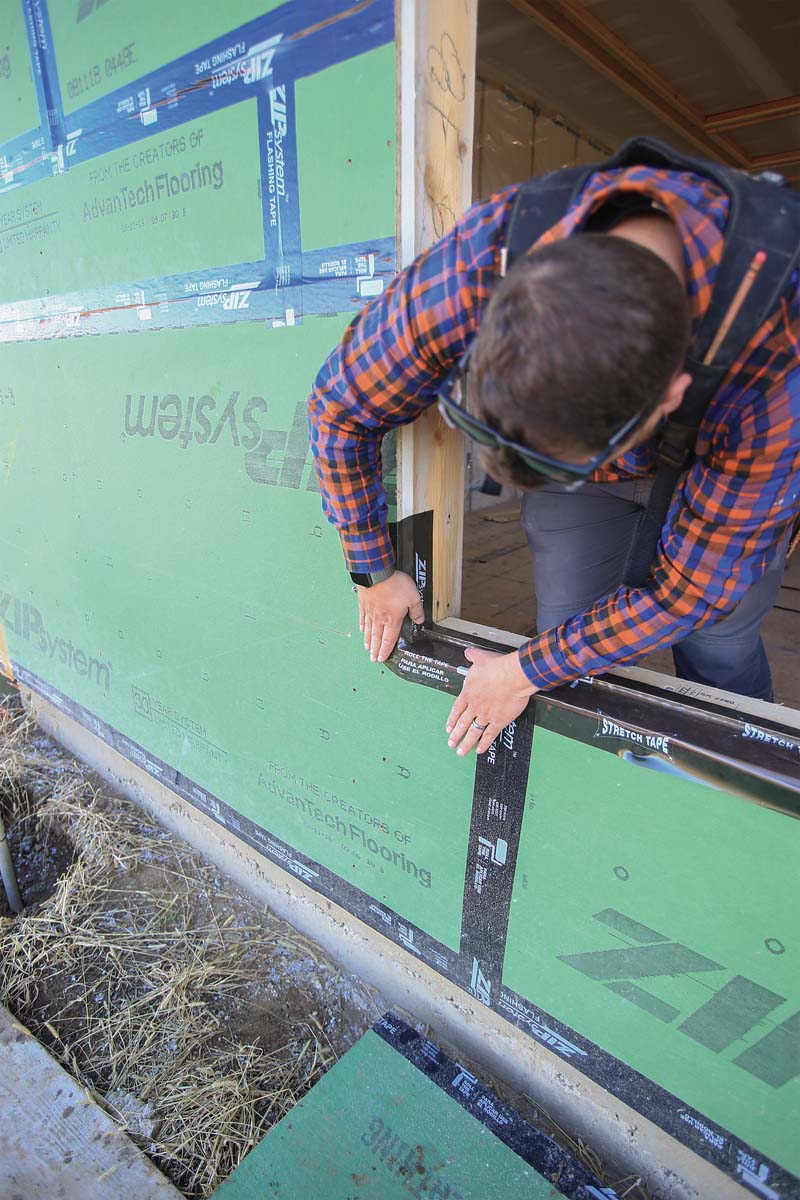
When dealing with multiple planes and angles, a fluid-applied flashing is best. It can be pushed and dragged into nooks and crannies with ease. But needing to mask things off and wait on dry times means a stretchy flashing tape is a faster and more budget-friendly way to go. So, when the budget doesn’t allow for a fluid-applied product, Zip System stretch tape is our choice. When using tape, be careful to protect it while the windows are being placed. A sharp window corner resting on the wrong plane during installation can cut holes in the tape.
As with most exterior assemblies, the waterproofing starts at the bottom of the rough opening and continues upward shingle-style. The first piece of stretch tape is cut roughly 12 in. longer than the width of the sill. I like to mark a centerline on both the bottom of the sill and the tape so I can align them easily. With the stretch tape, start in the center of the opening in order to better control how the tape is stretching to both sides. The stretch tape should lap about 1 in. or so onto the back dam, wrap across the width of the cedar siding fastened to the rough sill, and turn downward and out onto the water-resistive barrier (WRB), which in this case is the Zip System R-sheathing.
When it comes to the vertical legs of the installation, I use two runs of Zip System seam tape. I prefer to use the 4-in. product because I already have the tape on-site for sheathing installation, wider tape is harder to get in my area, and I like the control you can get with the narrow backer-free tape. Starting on the jamb side, the first row of tape sits entirely in the rough opening and is pressed mainly on the rough-opening framing. The second row of tape rests about 1 in. into the opening and then turns onto the face of the WRB, creating a durable connection (see photos, p. 59).
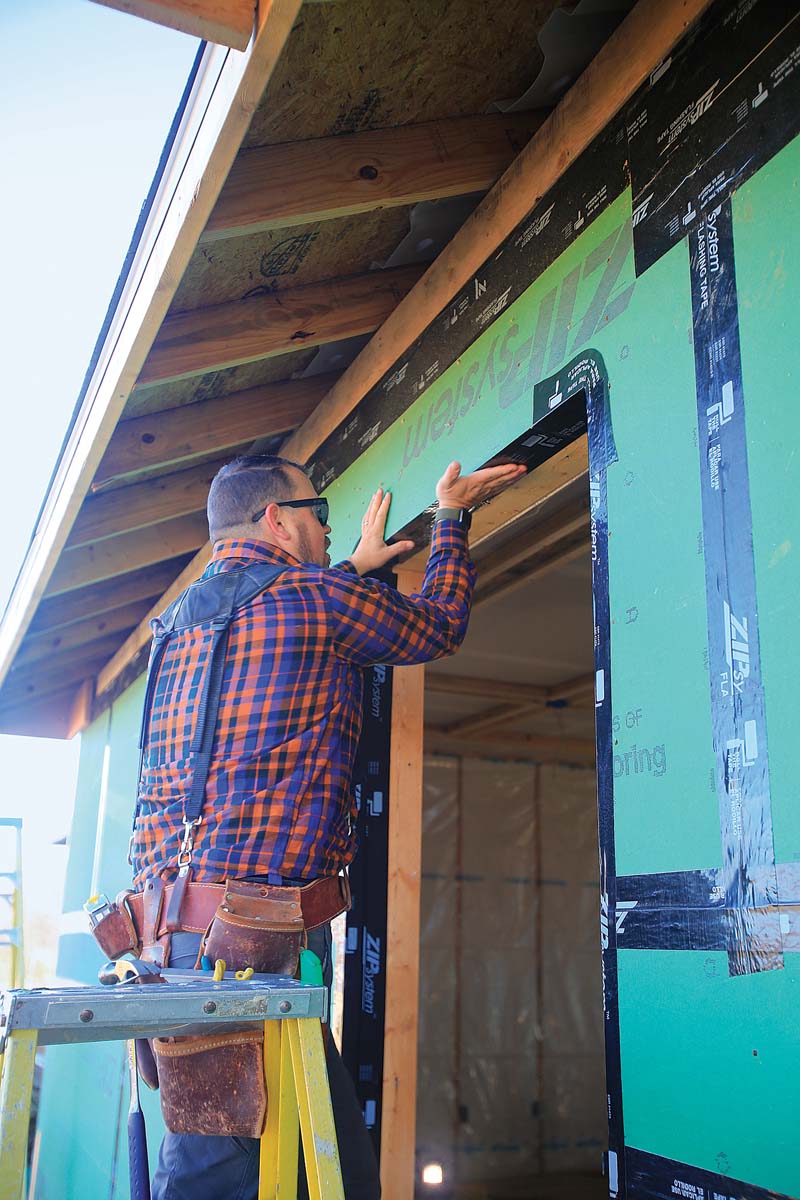
I treat the head a little differently than the sill—at the sill I’m very concerned about having joints that could fail, so I use one piece of stretch tape across the entire assembly. The head of the rough opening is much more protected, so I’m comfortable with joints in that location. I like to cut two 12-in. pieces of the stretch tape to detail each corner, and then I apply two runs of the 4-in. seam tape as I did on the jamb sides.
Once all this tape is applied, it is adhered with a hard-rubber roller in order to wet the tape in place. Remember, these tapes have a pressure-activated glue, and I can’t stress enough the importance of this step.
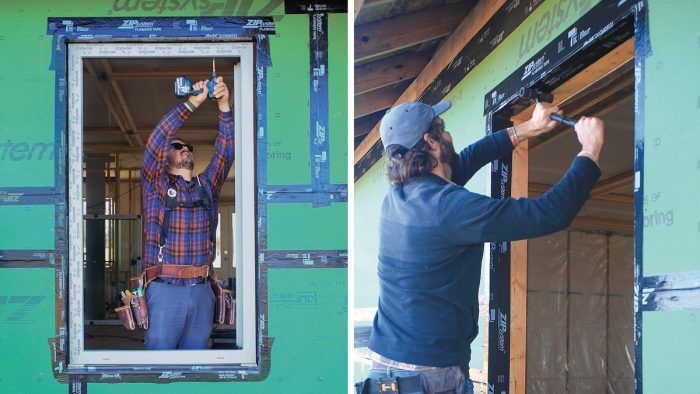
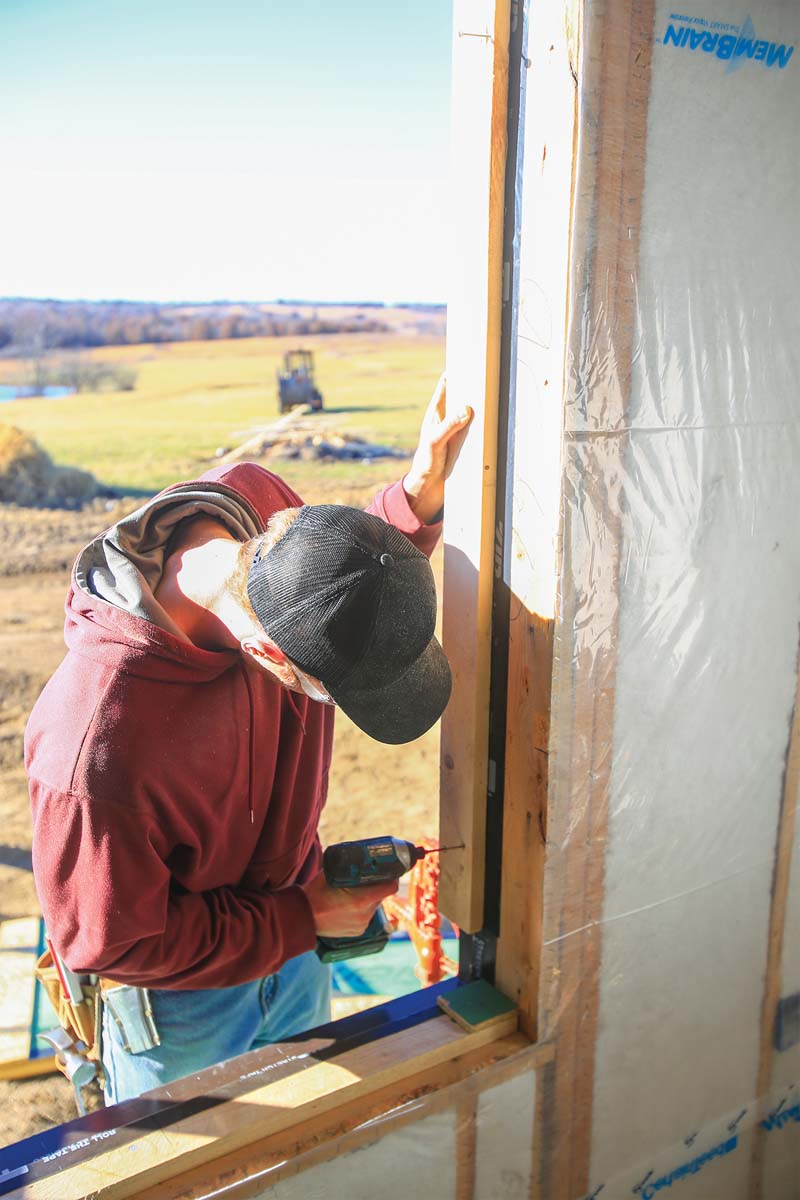
Time to install the window
With the rough opening flashed, I place a couple small scraps of 7⁄16-in. sheathing at the outside edges of the sill, against the jamb sides. These little pieces allow me to check the sill for level and shim as needed, and then I can rest the window on top without fear of puncturing the flashing.
To ease installation, I use a trick borrowed from installing prehung, solid-jamb doors. Instead of attempting to hold the window in place inside the rough opening, I draw a plumb line up from the face of the back dam, which I know is where I want the face of the window to be, and mount temporary boards to create a stop. Then, when I lift the window into the opening from inside the house, I can simply push it tight to these temporary stops and it will be plumb. I fasten these boards with screws held close to the window so that, when removed, the screw holes will be covered by our final window tape.
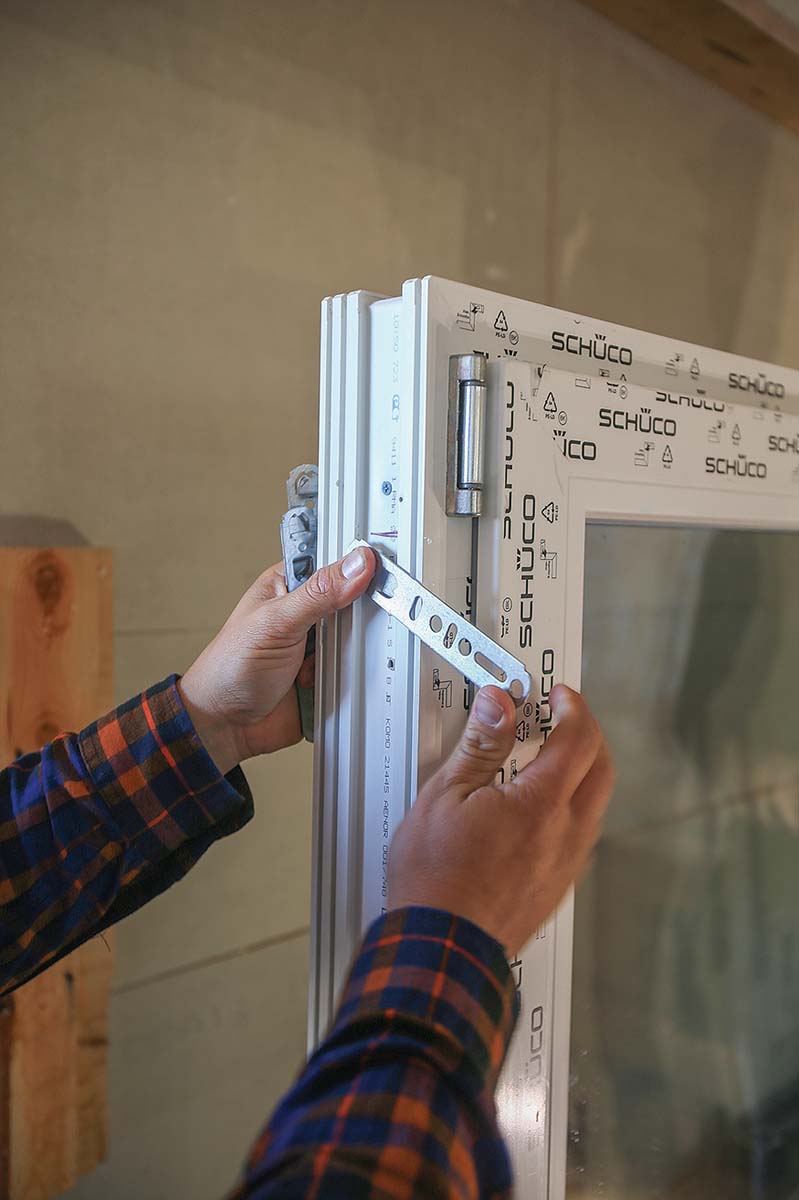
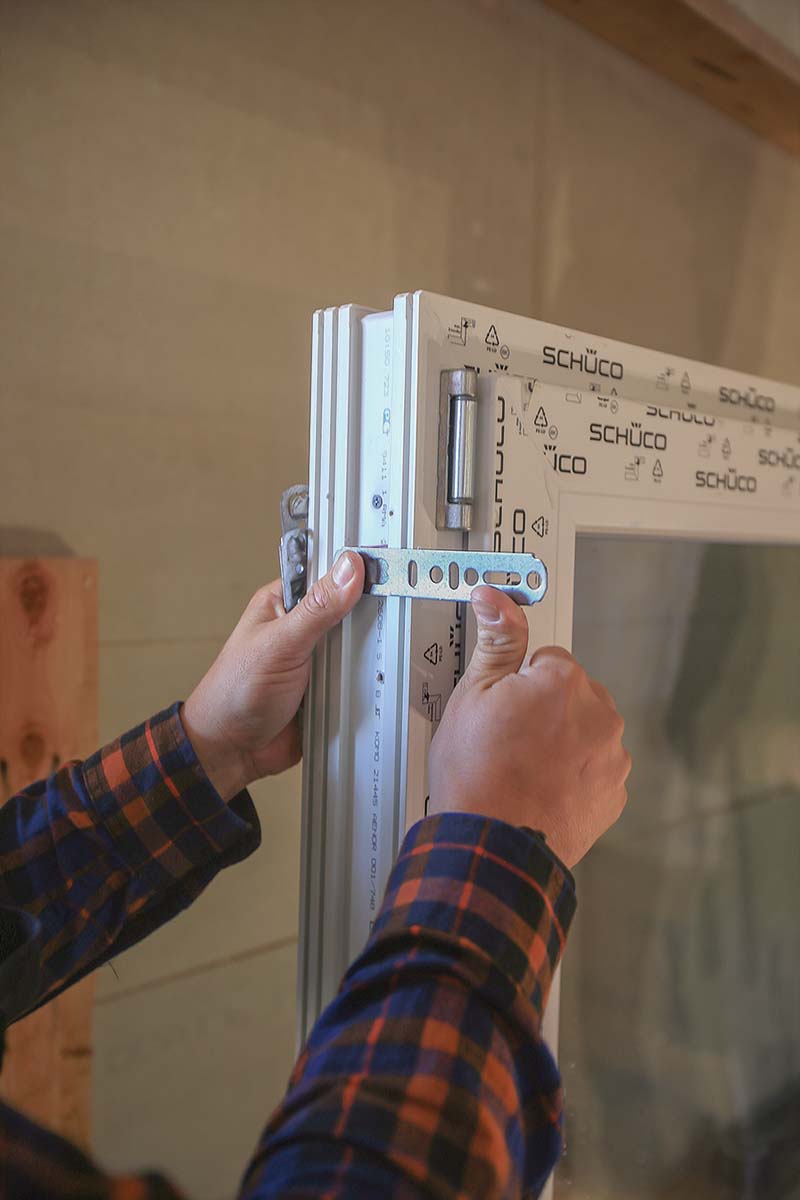
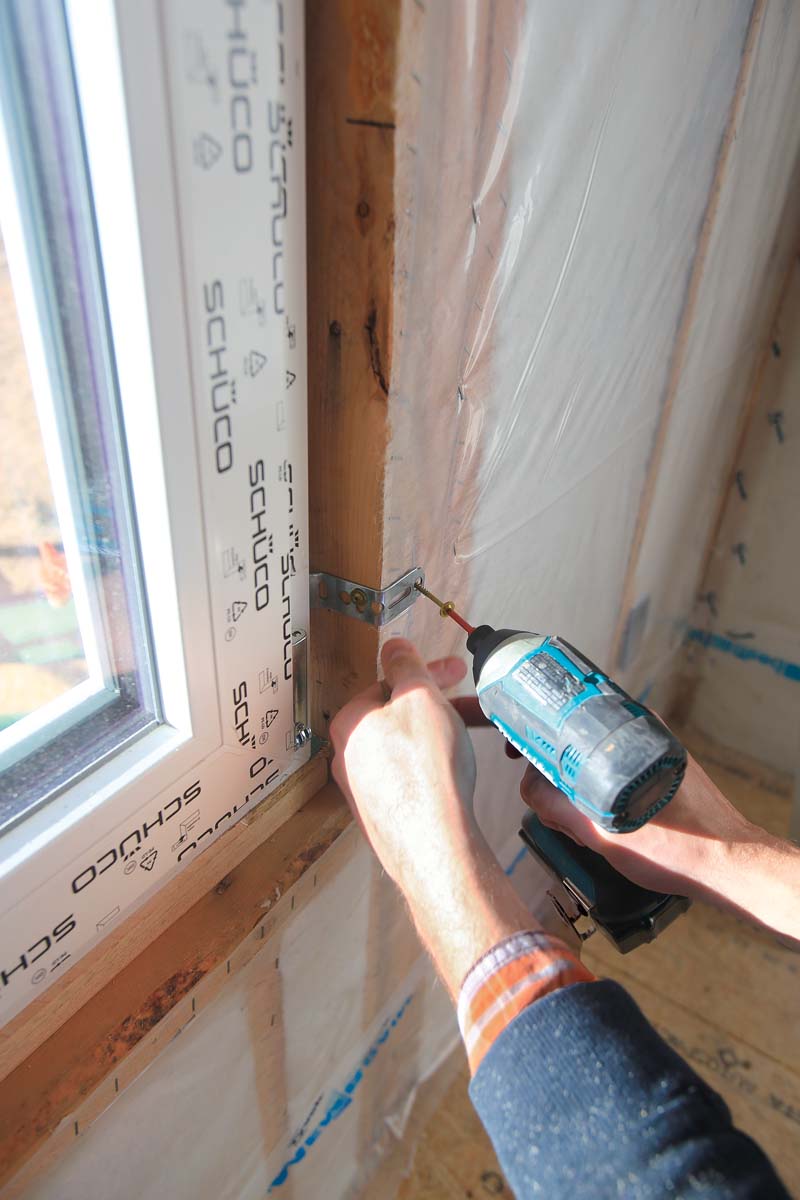
The rough opening is now prepped and ready to accept a window unit. Depending on whether the Euro-style window is a fixed or operable unit, it will install with just metal clips or both clips and screws. The clips are attached to the UPVC frame on-site, and I put one 6 in. from each corner, and then spaced less than 2 ft. in between those on all sides of the frame. Here’s a helpful tip: When mounting the clips to the jamb, bend the clip toward the window unit before bending the clip toward the jamb. The two bends together give the clip an offset that will help it lay flat after the screws are in place (see drawing, p. 60).
After the units are all hung from the clips, so-called “turbo screws”—fully threaded, roughly 3⁄16-in.-dia. by 6-in.-long screws—are driven through the interior window jambs into the rough opening through factory-drilled holes. The idea behind using a fully threaded screw is that the unit doesn’t have to be shimmed side to side because the threads grab the rough framing and window frame, locking everything into place. After testing the window to make sure it is functioning properly and making any needed adjustments, it’s time for the final taping.
Face-sealed details
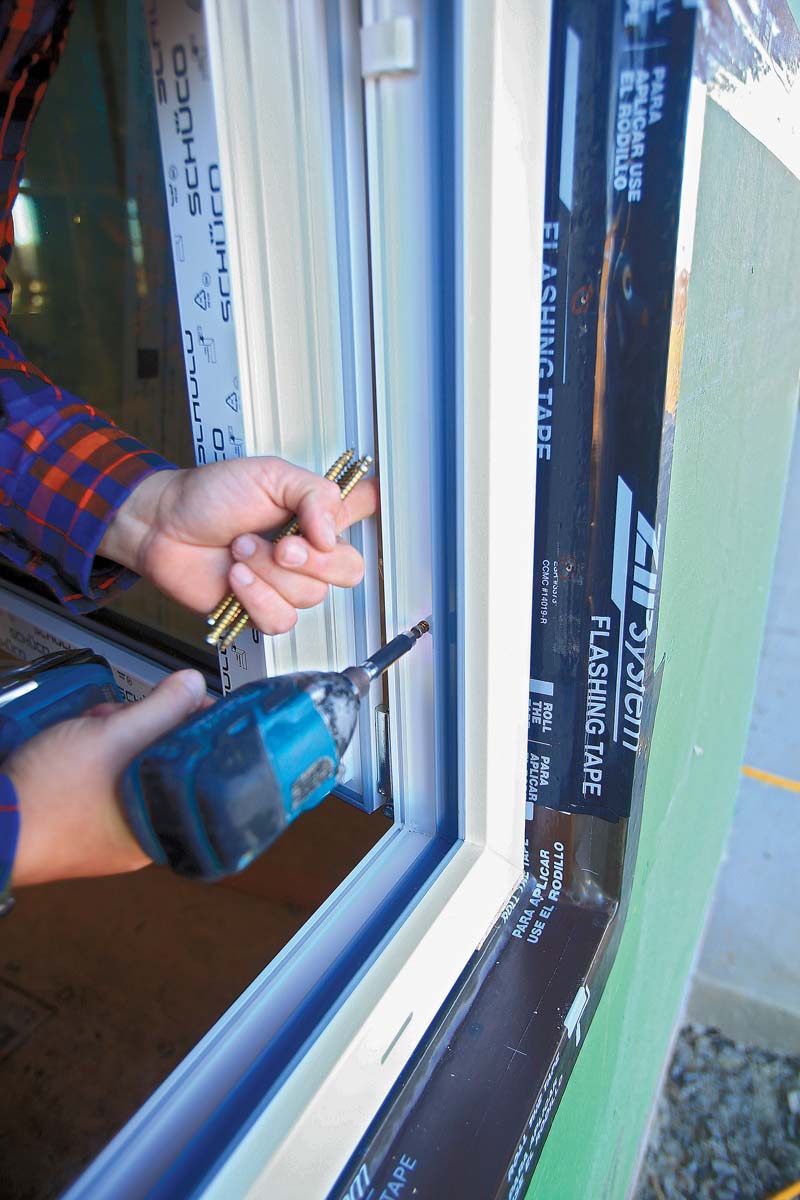
The tape I use for the face of the window is Siga’s Fentrim. It’s about 3 in. wide, has a fold with a 1⁄2-in. face that doesn’t have backing, and has a split backing on the rest of the width. This partial-backing design is helpful when applying the tape, but it can be difficult to cut with a knife. I have found that the best method for cutting the pieces I need is to use a large worktable and scissors. To determine the length of each piece, I measure the edge of the window I’m taping and then add 1 in.
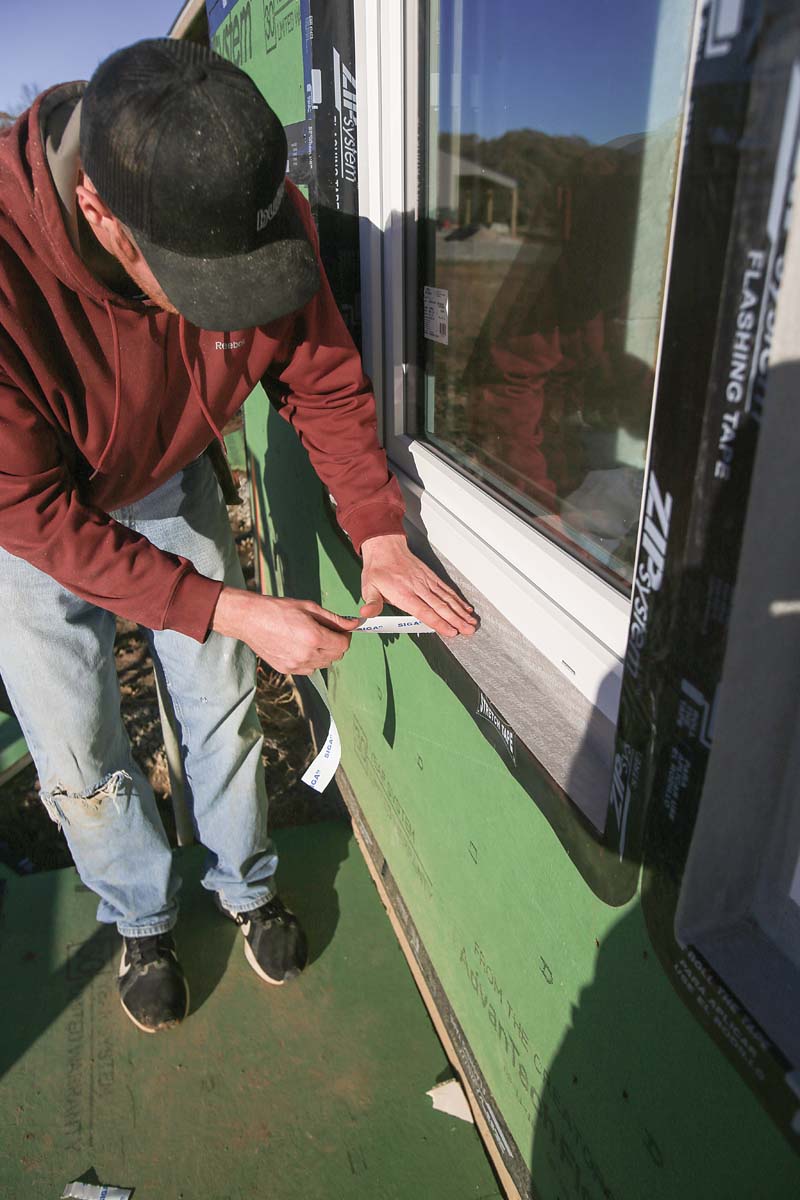
To install it, I align the tape so that the backer-free 1⁄2-in. face laps onto the window and then press it firmly into place. This allows the backing on the rest of the tape to be removed fairly easily by a single installer. Fair warning, though: This Siga tape has a very high initial grab, so it’s still finicky to work with. As usual, the sill is taped before the jamb sides and the top is taped last. Once all the tape is applied, I seal the corners, the most vulnerable area, with a bead of fluid-applied sealant.
I know some of you just panicked at the idea of taping the sill, which is often left open for drainage. I assure you, this is not the worst idea ever—I want the tape at the sill for air-sealing. While leaving the bottom of flanged windows open is considered best practice, when it comes to a Euro-style, flangeless window protected by the jamb at the head, I have much less concern about leaks. That said, part of the reason for choosing the Fentrim tape is that it’s vapor-open, which means that if water does get behind the window, it will have an opportunity to dry. For this to work, it’s important that when you add a bead of spray foam around the interior side of the window, you take care to not fill past half the depth of the jamb. This leaves a void behind the Fentrim tape, and the sloped sill keeps the water from seeping inward until it has a chance to dry to the exterior.
In short, there is no reason to be afraid of European-style flangeless windows. All it takes is a few minor adjustments to your current methods to have a properly water-managed assembly.
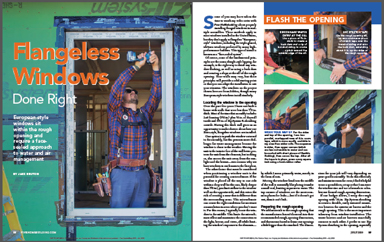
Flash The Opening
|
Discourage water entry at the sill |
Use stretch tape |
 |
 |
|
Work your way up. For the sides and top of the opening, I use two parallel, overlapped rows of 4-in. seam tape, which is more readily available in my area than wider rolls. The sequence is sides, then upper corners (which are less vulnerable to water and can be sealed with short pieces of flexible flashing), then across the top. After all the tape is in place, press every square inch using a hard-rubber roller. |
 |
 |
Set The Window In The Opening
 |
Permanent blocks, temporary stops. To protect the sill flashing tape from damage and create a gap for insulation, nail small scraps of sheathing to the top of the back dam, giving the window a place to sit. Then add temporary stops to the sides of the rough opening to locate the window during installation. |
 |
 |
|
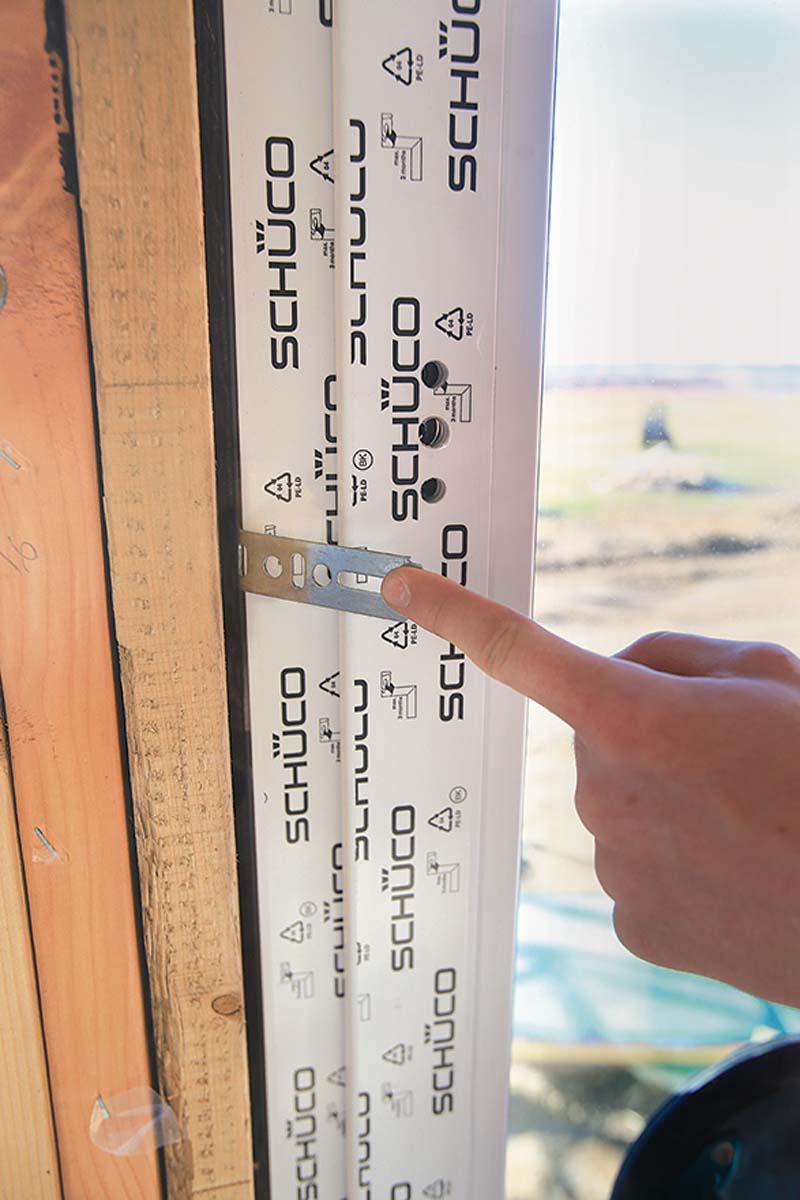
Do the twist. The metal installation clips, which are attached to the window on-site, lock into the edge of the window frame with a twisting motion. |
 |
 |
|
A preparatory bend To get the installation clips to sit nicely against the rough opening, first bend them toward the window, then back toward the rough opening, creating an offset. |
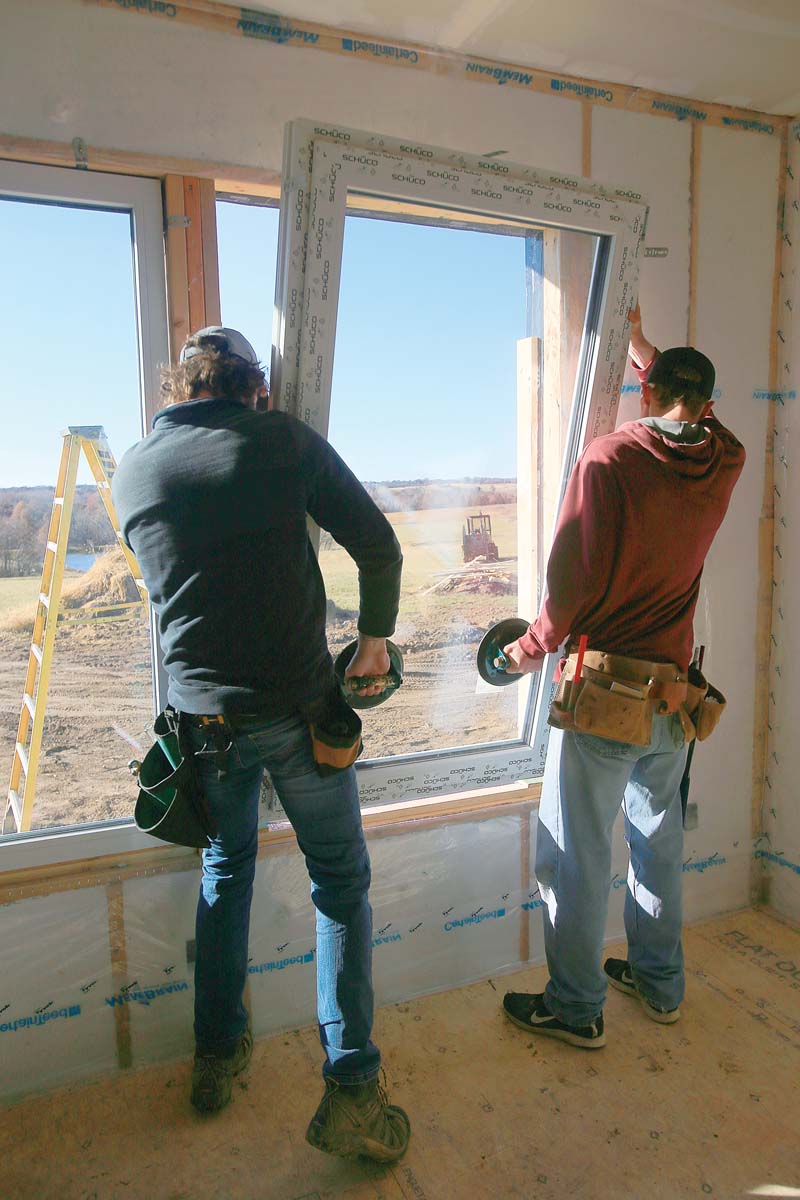 |
Get a grip European-style triple-pane windows are heavy, so to protect your fingers and make lifting and moving easier, use vacuum cups that attach to the glass. We use cups from Wood’s Powr-Grip, which sell for about $80 apiece. |
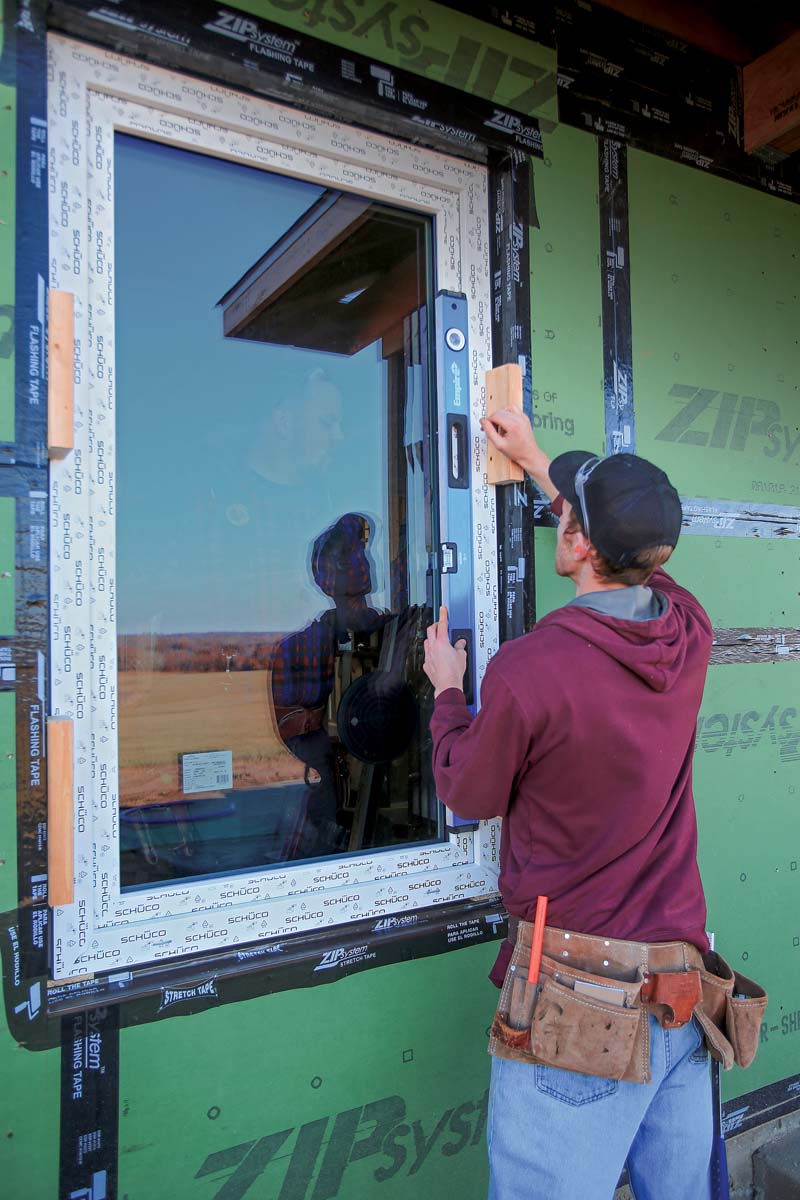 |
Centered and plumb. Prior to fastening, adjust the window side to side as needed until the reveal is even, and verify that it’s plumb. |
Secure The Window In Place
 |
 |
|
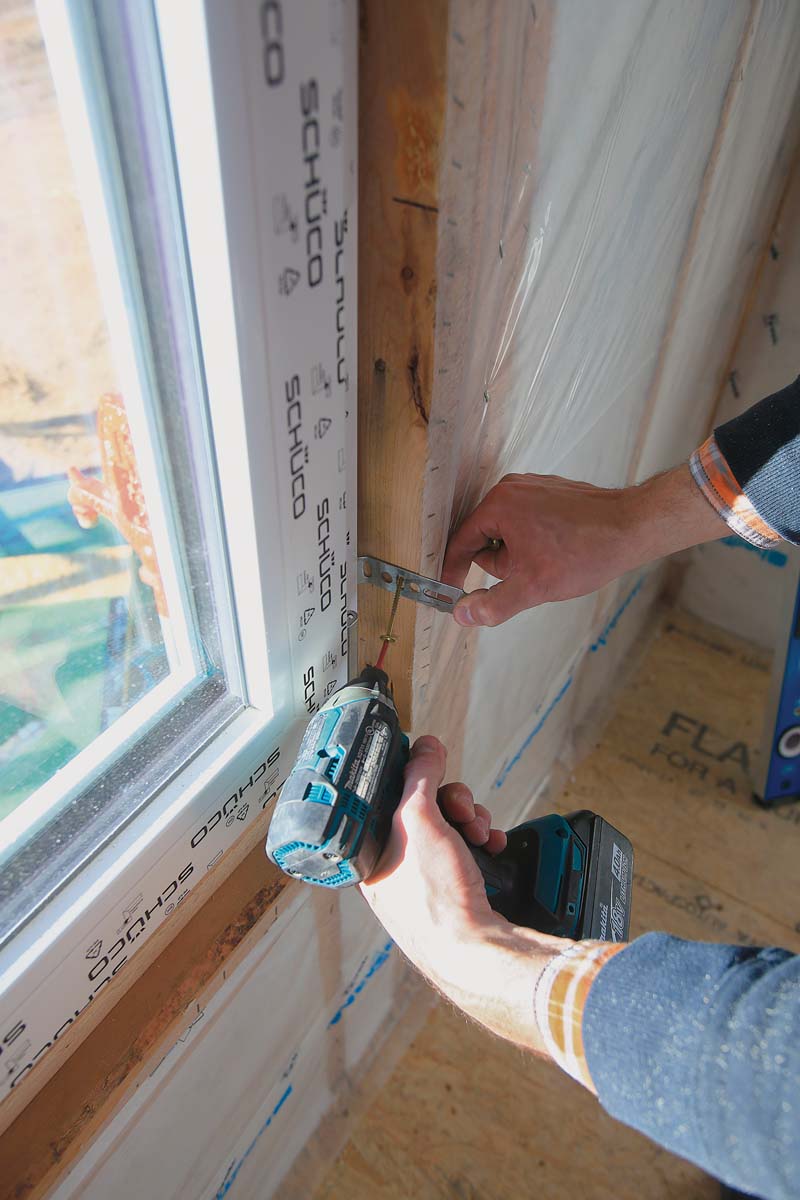
Two screws will do. First, screw the clip to the inside of the rough opening, and then bend it around the face of the framing and drive another screw. |
 |
No shims needed |
Face-Seal The Window
 |
 |
|
One backing at a time. Siga Fentrim flashing tape has a thin, unbacked lip and |
 |
As always, proceed shingle-style. Apply the same Fentrim tape up the rough-opening sides, then across the top, so that each layer laps over the previous layer, and then roll all of the tape. |
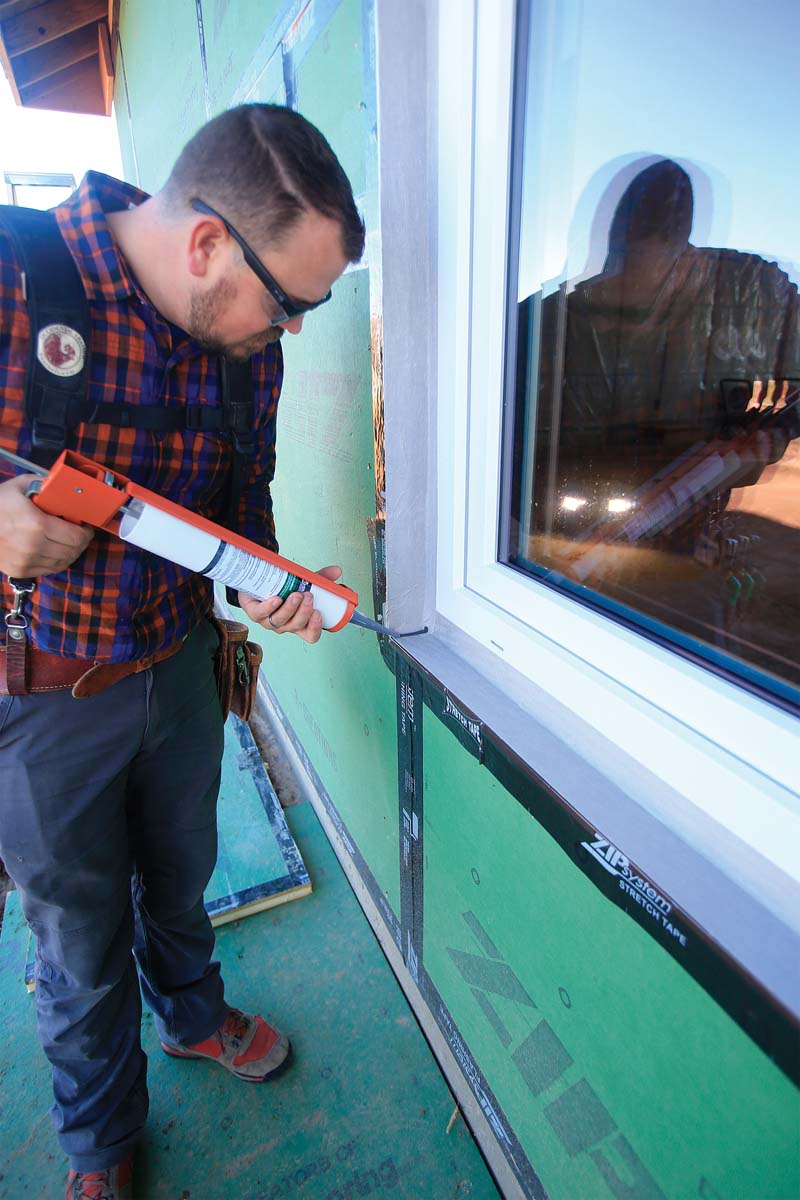 |
A fluid insurance policy. To give the transition between sill and jamb side added protection, I like to seal the corners with a bead of fluid-applied flashing, which I smooth with a quick swipe of my finger. |
To view the entire article, please click the View PDF button below.
More about window flashing:
Don’t Forget the Flashing – Easily overlooked and sometimes installed incorrectly, flashing keeps water out and rot at bay.
Flashing for Old Windows – How do you get a good weathertight seal on old windows that don’t have a flange?
Fix for Poorly Installed Window Flashing – When water is leaking in around newly installed windows, chances are that there are some missing or improper flashing details that need to be corrected.
Fine Homebuilding Recommended Products
Fine Homebuilding receives a commission for items purchased through links on this site, including Amazon Associates and other affiliate advertising programs.

Stabila Extendable Plate to Plate Level

Bluetooth Earmuffs

Magoog Tall Stair Gauges

