FHB Logo Facebook LinkedIn Email Pinterest Twitter X Instagram Tiktok YouTube Plus Icon Close Icon Navigation Search Icon Navigation Search Icon Arrow Down Icon Video Guide Icon Article Guide Icon Modal Close Icon Guide Search Icon Skip to content
Subscribe
Log In
  • How-To
  • Design
  • Tools & Materials
  • Restoration
  • Videos
  • Blogs
  • Forum
  • Magazine
  • Members
  • FHB House
  • Podcast
Log In

Fine Homebuilding Project Guides

Drywall

Guide Home
  • Drywall Basics
  • Tools and Materials
  • Hanging Drywall
  • Taping and Sanding
  • Special Installations
  • Drywall Repairs
  • Plaster
How-To

Skim Coating

Take your walls to the next level with a thin coat of compound over the entire surface.

By Myron R. Ferguson
  • X
  • facebook
  • linkedin
  • pinterest
  • email
  • add to favorites Log in or Sign up to save your favorite articles

If you follow the detailed instructions in my previous articles about applying the first, second, and third coats, you’ll achieve what the industry calls a level 4 finish. To take the job to a level 5 finish, you need to apply a skim coat of compound over the entire drywall surface.

A skim coat is essentially a “film” of joint compound and is not a readily measurable thickness. Skim coating is recommended if the surface will be highlighted by bright lights or if you plan to decorate the walls with paint that has a glossy (or even eggshell) finish or a thin wallcovering. If you tape only the joints and fasteners, the porosity of the untaped paper surfaces will differ from that of the taped surfaces. In addition, the texture will be different; the taped surfaces will be smooth and fine, the paper surface will be a little rougher. In areas that have been sanded lightly, the paper fibers will be raised. These differences are magnified by certain paint and lighting.

Remodeling is another instance where you might consider skim-coating drywall; for example, if you’re trying to blend new drywall panels with an existing painted surface. A skim coat helps minimize the textural differences between the surfaces as well as variances in absorption.

Applying a skim coat

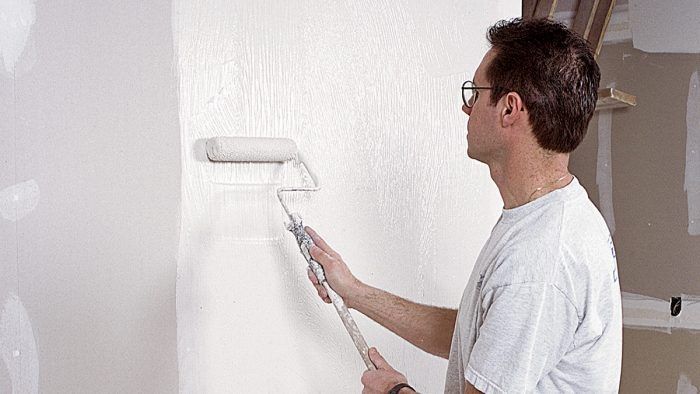
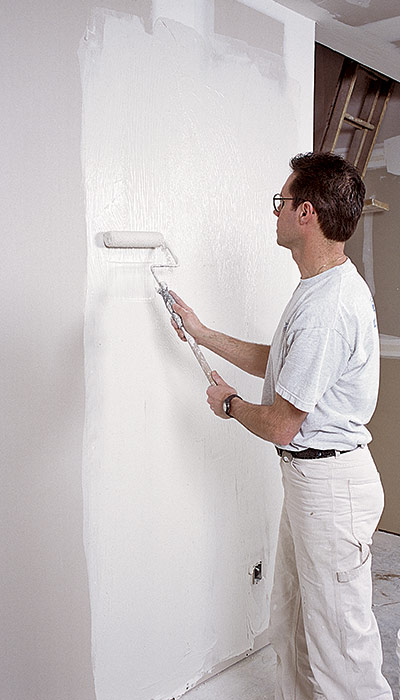
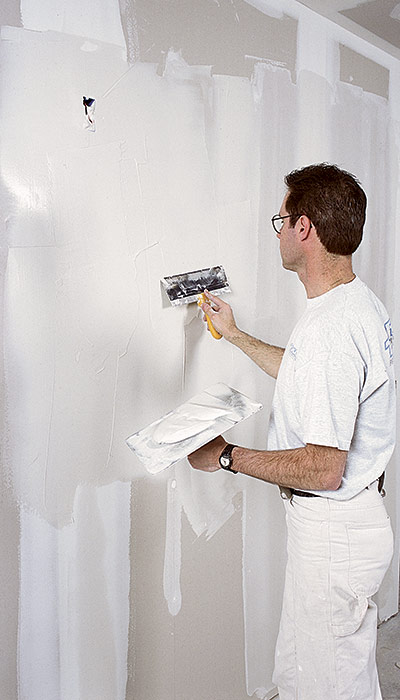
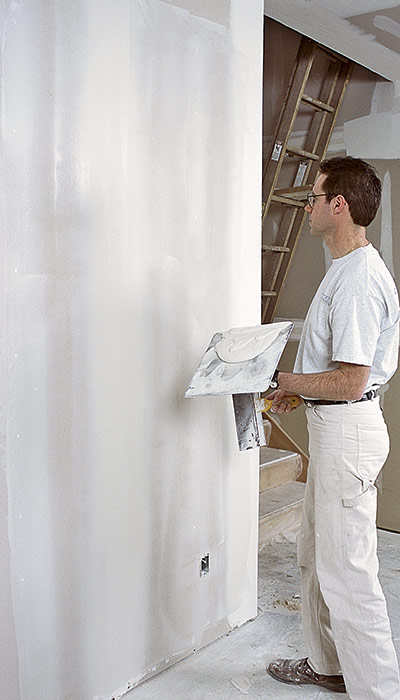
To apply a skim coat, thin down a topping compound. The compound should not be runny, but it should be thin enough to trowel or roll on easily. For larger areas, I like to use a paint roller. Work a 30-sq.-ft to 40-sq.-ft. area at a time, so that the compound doesn’t dry out in places before you smooth it. Once you have the area covered with a thin coat, use a 12-in. taping knife to remove most of the compound. The end result should be a smooth surface that is free of tool marks and ridges.

As you can imagine, skim coating to create a level 5 finish is time-consuming work. To do a good job, you need good lighting and a finisher who really understands the process. Otherwise, it can create an uneven surface covered with tool marks and even air bubbles. Because of the time and skill required, level 5 finishes are not frequently applied.

WORK SMART: When applying a skim coat, remember that the inside corners have already been coated, so there is no need to cover those areas again.

Roll out a skim coat
Roll out a skim coat: A skim coat provides the highest level of drywall finish, referred to as a level 5 finish. Here, the author is using a roller to apply the skim coat. The compound will be removed with a wide taping knife.

Or knife it on
Or knife it on: You can also apply the skim coat with a large taping knife.

Leave a thin film
Leave a thin film: Smooth the compound with a taping knife. As you work, the knife removes excess compound, leaving only a thin film. The finish should be perfectly smooth with few tool marks.

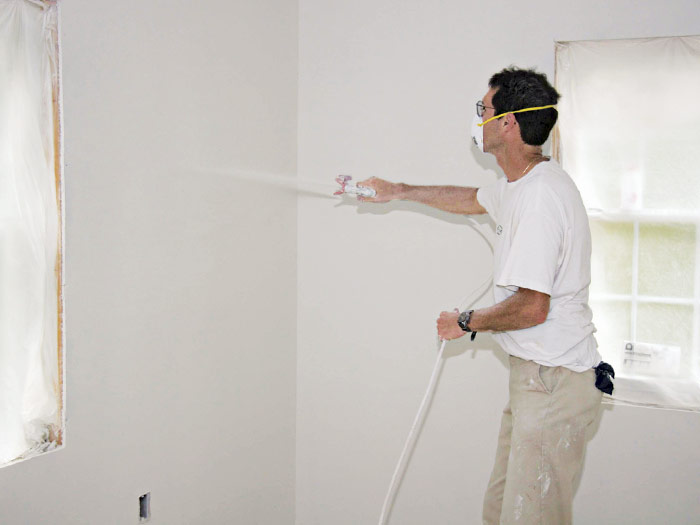
Thank goodness a number of drywall and related companies have come up with an alternative to skim coating. Spray-on finishes can be applied over a sanded level 4 finish to achieve a level 5. Now, a high-quality finish can be achieved by simply spraying on one of these products. Most of the spray-on coatings that I have seen or used are applied quite heavy (between 15 and 20 mils wet). For that reason, it can’t be backrolled (sprayed and then rolled out while still wet). But all of these products equalize the differences in porosity and texture just like a skim coat of joint compound. Another advantage is that most also prime the surface for painting at the same time.

Spray it on
Spray it on: A level 5 finish can be sprayed on over a finished level 4.


Previous: Roll Compound on Your Drywall Seams for Faster, Easier Taping Next: Flawless Drywall Finish

Guide

Drywall

Chapter

Taping and Sanding

Sign up for eletters today and get the latest how-to from Fine Homebuilding, plus special offers.

Signing you up...

This site is protected by reCAPTCHA and the Google Privacy Policy and Terms of Service apply.
See all newsletters
See all newsletters

View Comments

  1. user-2067626 | Sep 08, 2023 09:51am | #1

    I have an old house that was re-plastered after a move ~ 1930. They stopped at the blue coat and wallpapered, again and again..
    Would the process be the same to apply the Skim coat to the plaster, or should it be plaster rather than compound?
    Thanks,
    Rick in Ontario Canada.

Log in or create an account to post a comment.

Sign up Log in

Become a member and get full access to FineHomebuilding.com

Drywall

Drywall

Trusted, comprehensive guidance for choosing, hanging, taping, sanding, and repairing drywall—the right way

View Project Guide

View All Project Guides »

Become a member and get unlimited site access, including the Drywall Project Guide.

Start Free Trial

Drywall Basics
  • Types and Uses of Drywall
  • Planning the Job
Tools and Materials
  • Hanging Tools
  • Taping Tools and Materials
  • Sanding and Finishing Tools and Materials
Hanging Drywall
  • Prep for Hanging
  • Measuring and Cutting Drywall
  • Guidelines for Hanging and Fastening Drywall
  • Hanging Ceilings
  • Hanging Walls
  • Hanging Airtight Drywall
  • Trim Accessories/Corner Beads
Taping and Sanding
  • Taping Basics
  • Taping Seams
  • Taping Inside and Outside Corners
  • Sanding
Special Installations
  • Tricky Transitions
  • Curved Surfaces
  • Other Special Installations
  • Decorating with Drywall
Drywall Repairs
  • Patching Holes, Cracks, and More
Plaster
  • Working with Lime Plaster
  • Plaster Repair
  • Classic Plaster Techniques

Fine Home Building

Newsletter Sign-up

  • Fine Homebuilding

    Home building tips, offers, and expert advice in your inbox.

  • Green Building Advisor

    Building science and energy efficiency advice, plus special offers, in your inbox.

  • Old House Journal

    Repair, renovation, and restoration tips, plus special offers, in your inbox.

Signing you up...

This site is protected by reCAPTCHA and the Google Privacy Policy and Terms of Service apply.
See all newsletters

Follow

  • Fine Homebuilding

    Dig into cutting-edge approaches and decades of proven solutions with total access to our experts and tradespeople.

    Start Free Trial Now
    • Facebook
    • Instagram
    • X
    • LinkedIn
  • GBA Prime

    Get instant access to the latest developments in green building, research, and reports from the field.

    Start Free Trial Now
    • Facebook
    • YouTube
  • Old House Journal

    Learn how to restore, repair, update, and decorate your home.

    Subscribe Now
    • Facebook
    • Instagram
    • X

Membership & Magazine

  • Online Archive
  • Start Free Trial
  • Magazine Subscription
  • Magazine Renewal
  • Gift a Subscription
  • Customer Support
  • Privacy Preferences
  • About
  • Contact
  • Advertise
  • Careers
  • Terms of Use
  • Site Map
  • Do not sell or share my information
  • Privacy Policy
  • Accessibility
  • California Privacy Rights

© 2025 Active Interest Media. All rights reserved.

Fine Homebuilding receives a commission for items purchased through links on this site, including Amazon Associates and other affiliate advertising programs.

  • Home Group
  • Antique Trader
  • Arts & Crafts Homes
  • Bank Note Reporter
  • Cabin Life
  • Cuisine at Home
  • Fine Gardening
  • Fine Woodworking
  • Green Building Advisor
  • Garden Gate
  • Horticulture
  • Keep Craft Alive
  • Log Home Living
  • Military Trader/Vehicles
  • Numismatic News
  • Numismaster
  • Old Cars Weekly
  • Old House Journal
  • Period Homes
  • Popular Woodworking
  • Script
  • ShopNotes
  • Sports Collectors Digest
  • Threads
  • Timber Home Living
  • Traditional Building
  • Woodsmith
  • World Coin News
  • Writer's Digest
Active Interest Media logo
X
X
This is a dialog window which overlays the main content of the page. The modal window is a 'site map' of the most critical areas of the site. Pressing the Escape (ESC) button will close the modal and bring you back to where you were on the page.

Main Menu

  • How-To
  • Design
  • Tools & Materials
  • Video
  • Blogs
  • Forum
  • Project Guides
  • Reader Projects
  • Magazine
  • Members
  • FHB House

Podcasts

  • FHB Podcast
  • ProTalk

Webinars

  • Upcoming and On-Demand

Podcasts

  • FHB Podcast
  • ProTalk

Webinars

  • Upcoming and On-Demand

Popular Topics

  • Kitchens
  • Business
  • Bedrooms
  • Roofs
  • Architecture and Design
  • Green Building
  • Decks
  • Framing
  • Safety
  • Remodeling
  • Bathrooms
  • Windows
  • Tilework
  • Ceilings
  • HVAC

Magazine

  • Current Issue
  • Past Issues
  • Magazine Index
  • Subscribe
  • Online Archive
  • Author Guidelines

All Access

  • Member Home
  • Start Free Trial
  • Gift Membership

Online Learning

  • Courses
  • Project Guides
  • Reader Projects
  • Podcast

More

  • FHB Ambassadors
  • FHB House
  • Customer Support

Account

  • Log In
  • Join

Newsletter

Get home building tips, offers, and expert advice in your inbox

Signing you up...

This site is protected by reCAPTCHA and the Google Privacy Policy and Terms of Service apply.
See all newsletters
See all newsletters

Follow

  • X
  • YouTube
  • instagram
  • facebook
  • pinterest
  • Tiktok

Join All Access

Become a member and get instant access to thousands of videos, how-tos, tool reviews, and design features.

Start Your Free Trial

Subscribe

FHB Magazine

Start your subscription today and save up to 70%

Subscribe

This is your last free article.

Don't miss another expert tip or technique from building pros. Start your free trial today.

Start your FREE trial

Already a member? Log in

We hope you’ve enjoyed your free articles. To keep reading, become a member today.

Get complete site access to expert advice, how-to videos, Code Check, and more, plus the print magazine.

Start your FREE trial

Already a member? Log in

Privacy Policy Update

We use cookies, pixels, script and other tracking technologies to analyze and improve our service, to improve and personalize content, and for advertising to you. We also share information about your use of our site with third-party social media, advertising and analytics partners. You can view our Privacy Policy here and our Terms of Use here.

Cookies

Analytics

These cookies help us track site metrics to improve our sites and provide a better user experience.

Advertising/Social Media

These cookies are used to serve advertisements aligned with your interests.

Essential

These cookies are required to provide basic functions like page navigation and access to secure areas of the website.

Delete My Data

Delete all cookies and associated data