
The Drywall Sanding Process
Expert drywaller Myron Ferguson demonstrates a detailed approach to his drywall sanding process, from using a pole sander to finishing by hand.
Drywall sanding is a two-step process. I first use a pole sander to remove excess joint compound, such as marks left by taping tools, crowned areas where too much compound was applied, and intersecting joints that need blending. I call this the rough sanding stage. To finish up, I do a final sanding using one or more hand tools.
A pole sander fitted with a 150-grit sanding screen or paper does an excellent job of smoothing out 95 percent of the taped surfaces. If you’re sanding a nice, smooth taping job, you can use an even finer grit. On areas where an ultrasmooth finish is a must I go over the sanded surface with 180- or 220-grit to eliminate any scratches in the compound and to smooth out roughed-up paper. When sanding, try to avoid scuffing up the drywall face paper by staying close to taped areas. The finer grits work better with lightweight joint compounds or with topping compounds, which are slightly softer than all-purpose compound and scratch more easily with the coarser grits of sandpaper.
Start by sanding the screw or nail heads lightly in the direction of the strip of joint compound. Check the edges to make sure they are smooth. When sanding screws, you’ll be putting pressure on the drywall around the screw head. If the screw has not properly pulled the drywall panel tight against the framing, it may pop loose under the pressure. The joint compound may come off the screw head, or you may see the drywall move in and out around the screw. To correct the problem, use a Phillips screwdriver and turn the screw until it is tight again. If it goes in too deep or does not tighten up, place another screw about 1-1/2 in. away and then retape the area with three coats of joint compound.
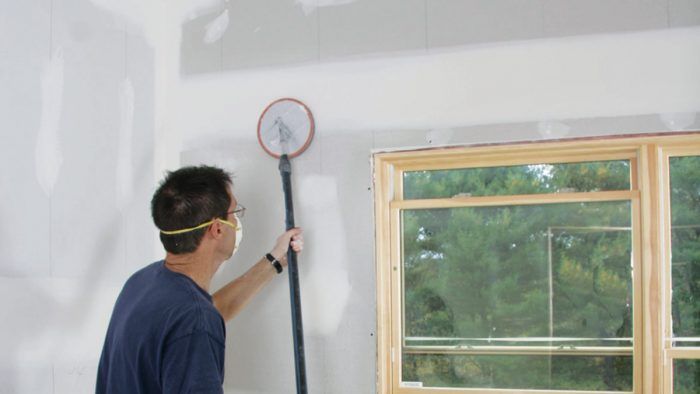
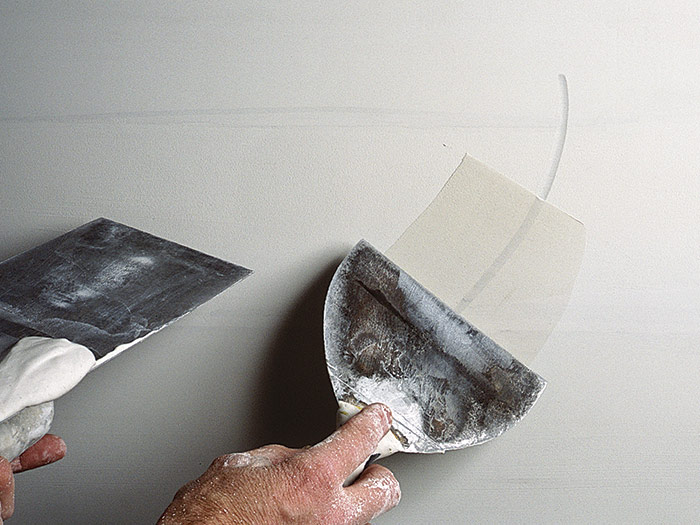
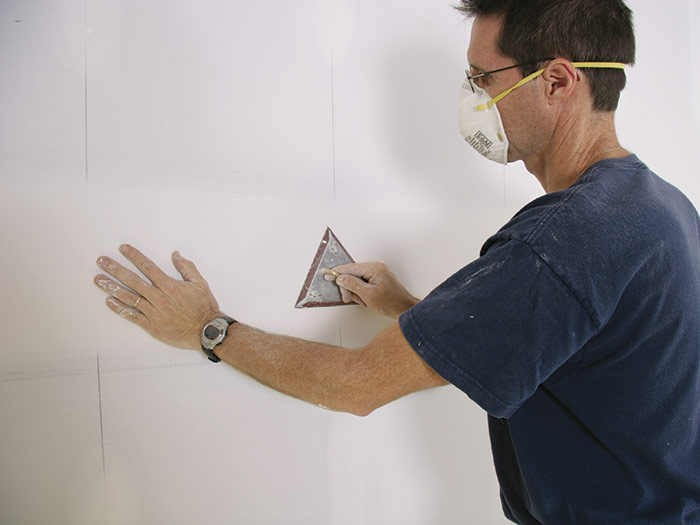
Rough Sand with a Pole SanderA pole sander outfitted with 150-grit or finer paper makes quick work of rough sanding the fasteners, seams, and corners. Done correctly, rough sanding eliminates the worst spots of a sanding job.
|
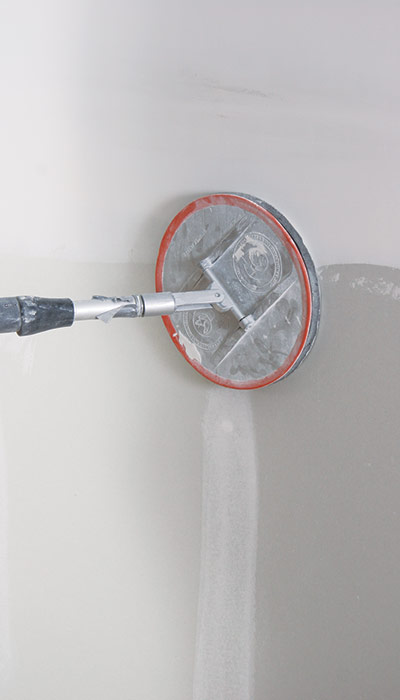

After sanding the fasteners, use gentle, even pressure to push the pole sander along the seams and outside corners. Always work in the direction of the seam or corner. Keep the edges smooth and sand down any high spots or chunks of joint compound on the seams. Run the pole sander over the entire taped area. Be especially careful when sanding inside corners, because there is only a thin layer of joint compound covering the paper tape. Blend in the edges smoothly, and go along the inside edge only lightly with the pole sander. The inside edge will be finish sanded later with a hand sander, dry sanding sponge, or a folded piece of sandpaper.
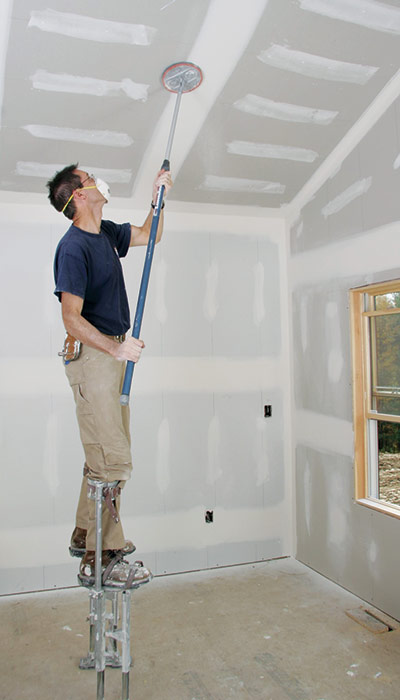
Even though you can reach most ceilings with a pole sander, I prefer to work on stilts. Using stilts gets me closer to the ceiling, where I can better see the area I’m sanding. Most of the dust then settles away from my face instead of on it. The work is also less strenuous. (Wear safety goggles or glasses to help keep the dust out of your eyes.)
| WORK SMART: Be aware that different compounds and compounds that have been thinned down will respond differently to sanding. Sanding through a thinned-down lightweight compound to a regular, unthinned compound can create an uneven surface. |
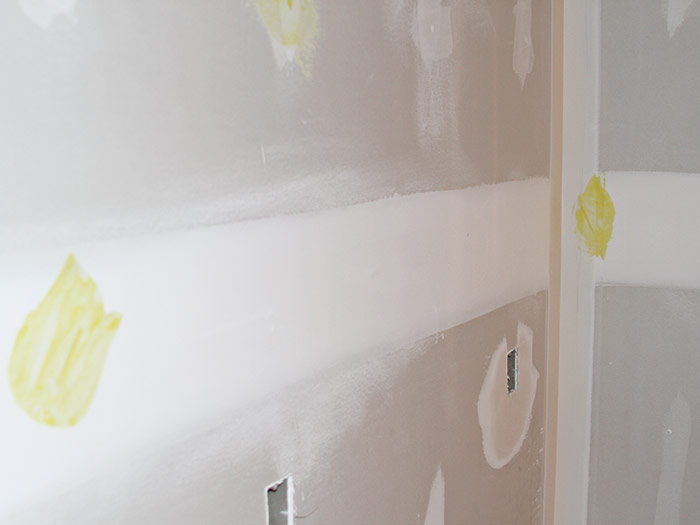
Don’t try to remove every last defect with the pole sander—you may sand out the scratch or dent but in the process oversand the entire area. Some defects may need to be filled with joint compound and then sanded again later, so it’s a good idea to keep a trowel with a small amount of joint compound handy. So they won’t be overlooked, fill in the defects as you go along. But keep in mind, this is your last chance to correct any problems. If you do any repairs that will need sanding, make a note on the compound next to the area.

OversandingIf you sand too much (a common problem with beginners) and expose the joint tape or damage the drywall face paper, you may have to reapply the third coat of joint compound. In more serious cases, you may need to reapply the second as well as the third coat. If your sandpaper is too coarse, you may scratch the compound or drywall face paper. If you do, lightly sand the surface with a finer sandpaper or with a sanding screen (200 grit usually works well). If the scratches still show, apply a thin finish coat of compound and lightly sand it again when dry.
|
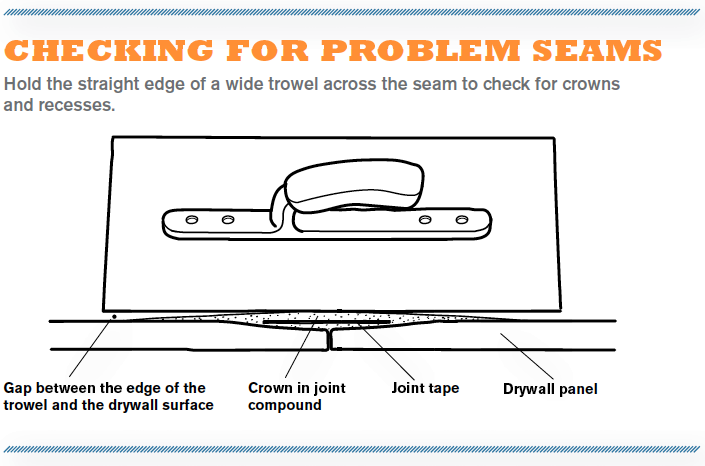
If you notice a seam that is indented or slightly crowned, you may need to apply a third coat of joint compound, or in a worse case, a second and a third coat. A good way to check whether a seam is crowned too much is to hold the edge of a wide trowel across it (see the drawing “Checking for Problem Seams”). If the trowel rocks more than 1/16 in. on either side of the center of the seam, try sanding out the crown. If this does not correct them, you may want to widen the seam by feathering out the joint compound on each side, being careful not to add any to the crowned center. If the trowel indicates a recess of more than 1/16 in., fill in the seam with joint compound and then reapply a third coat.
Finish sanding
After all the taped surfaces have been sanded with a pole sander, I switch to a hand sander for the finish sanding. I also use a dry sanding sponge or a folded piece of sandpaper or sanding screen for the finish work. Before you get started, make sure you have adequate lighting. A bright light shining along a wall or a ceiling helps highlight defects or problems you may not see with poor lighting or with natural lighting alone.
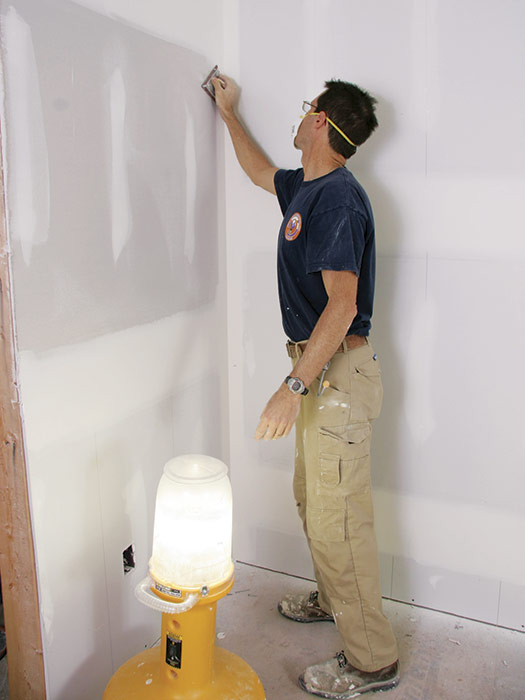
Use a hand sander fitted with 150-grit or finer sandpaper or sanding screen and go over all the seams, corners, and fasteners. Look and feel for any defects. Lightly sand problem areas and any edges that are not feathered properly. Once again, remember not to oversand. If a defect is deep or if you sand through to the tape, repair the area with a thin coat of joint compound. Mark those areas with a pencil (a pen or marker bleeds through most paints) and resand them, if necessary.
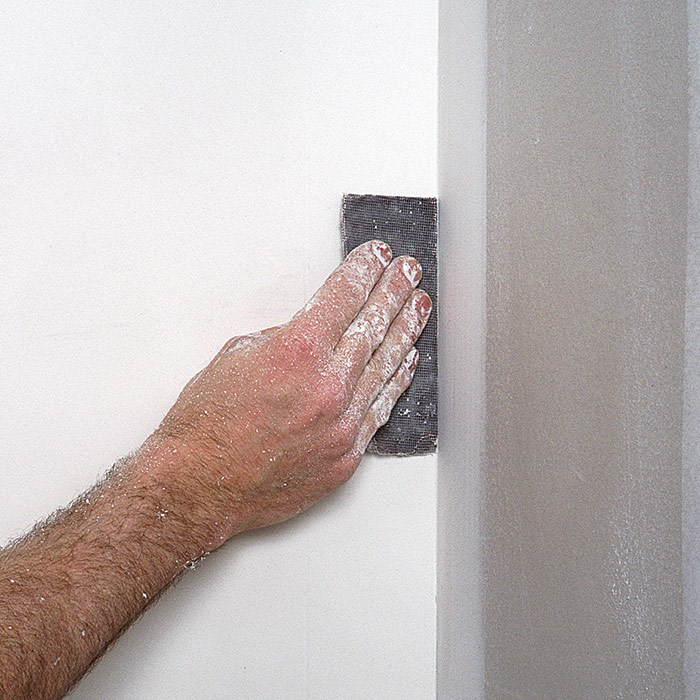
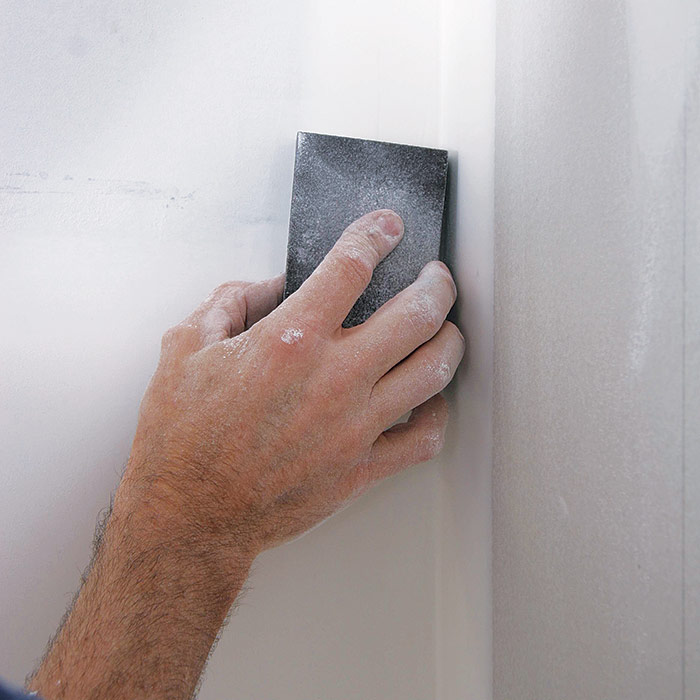
Use a dry sanding sponge, a triangle-shaped sander, or a folded piece of sandpaper to smooth small defects. I prefer to use a fine-grit dry sanding sponge to smooth the inside edge of an inside corner and for most of the small touchups. Be careful around electrical boxes, because drywall face paper tears easily where it has been cut. I use a folded piece of sandpaper or a sanding screen to get into spots where other sanders can’t reach and to prevent damaging the area around a defect.
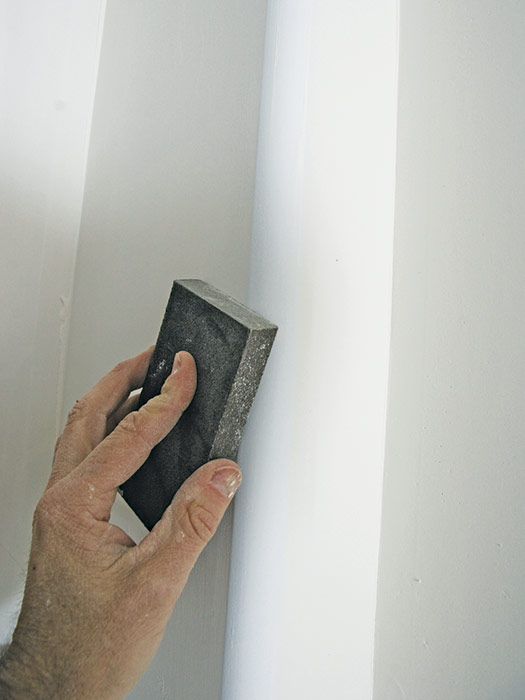
Finish Sand by HandFinal sanding is best done up close and by hand. Various techniques and sanding tools ease the process.
|
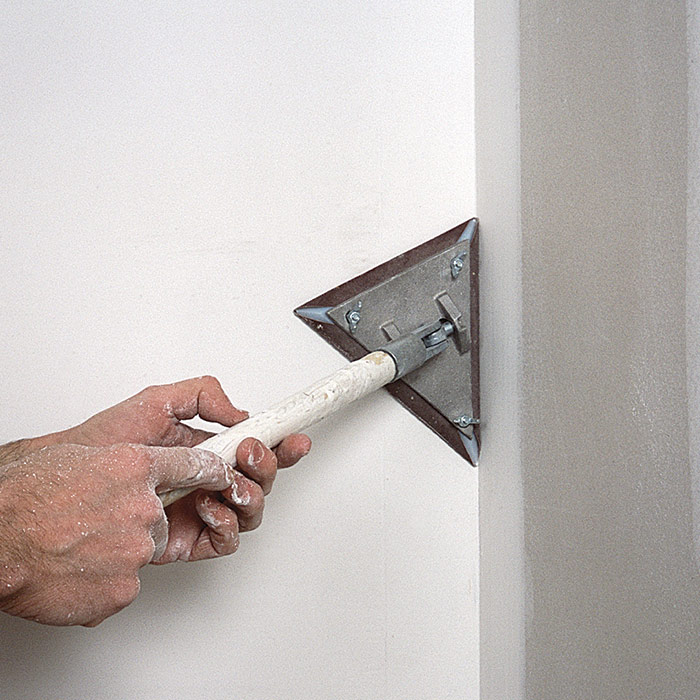
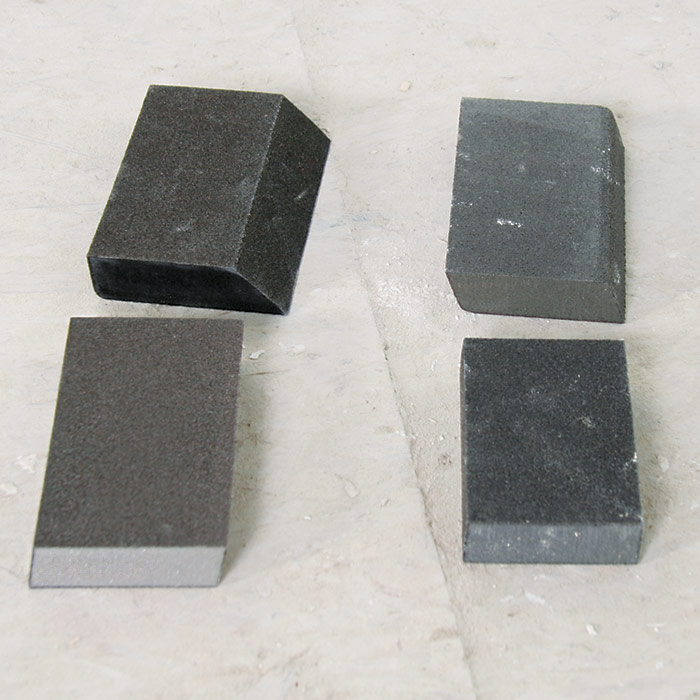
| WORK SMART: Use a triangle-shaped sander to get into tight spots. The thin edges clean up inside corners and the points get right into intersections. |
Make sure you remove or sand hardened chunks of joint compound from taped seams and corners wherever they butt up against the floor, a window, or a door. These areas must be smooth so the trim or casing can lie flat against the wall. Use the corner of a taping knife to clean out hardened compound from electrical boxes (be careful not to cut the wires!). A dry sanding sponge is still a sponge—though it cuts down on ridges, it may smooth areas rather than flatten them. In these cases, a slight bump will show after painting. Also use caution when you’re sanding bullnose corner beads with a sanding sponge—they can easily expose the raised edge along the bead.
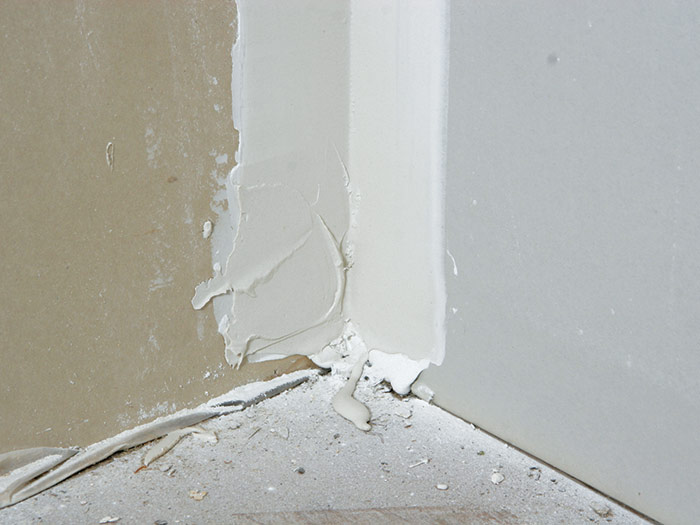
Corners can be delicate: When sanding bullnose corner beads, it’s easy to oversand and expose the beaded edge. A more rigid sander reduces this problem.As you work, don’t forget these final cautions and reminders:
- Take your time.
- Wear appropriate protection.
- Use appropriate sanders and grits for the situation.
- Be aware that different compounds sand differently.
- Always have good lighting that you move along with you as you sand.
- Try to find out what the final decoration will be for each critical area. You may need to bring the finish up to another level even at this late stage.
- Make sure you show respect for the trades that will follow.
Sanding a level 5 finish
When a thin film of compound has been applied over the entire surface to achieve a level 5 finish, there is usually very little sanding to do. Look the area over while shining a bright light on the surface. Where necessary, sand with an extra-fine-grit sandpaper. Don’t forget the reason a level 5 finish was applied in the first place—to equalize all the different textures and porosities created during the taping and sanding process. Even if you aren’t applying a level 5 finish, take great care to minimize all the slight differences, because you never really know what the final decoration will be or what kind of lighting might be installed in the future.
General cleanup
After you’ve finished sanding, you can begin cleaning up. I use a wet/dry vacuum cleaner for this task, making sure to vacuum (or brush) out all the electrical boxes and remove dust from around window and door frames and along floor edges against walls. It’s a real pain to have your brush or roller pick up dust or chunks of compound while painting, so do a thorough job.
In new construction, I recommend scraping hardened chunks of compound off the floor and then sweeping up the mess. A vacuum or a wet mop will pick up most of the remaining dust. If you’ve used drop cloths and plastic, carefully roll them up and shake them off outside. You’ll probably still need to vacuum the floor or carpet, especially around the edges.
How to Prevent YellowingAfter the drywall has been taped and sanded, don’t let it sit for too long before painting it. Timely painting is especially important when the surface will be exposed to direct sunlight for any length of time. Sunlight can cause the face paper to yellow or fade. If the face paper becomes too yellow, the color may bleed through slightly when painted; because the taped seams and fasteners will not bleed through, the finish will look streaked. If the face paper has turned yellow, seal the drywall with a good-quality latex stain-killing paint before applying a latex flat-finish prime coat. For bad cases use an oil- or alcohol-based stain blocker. 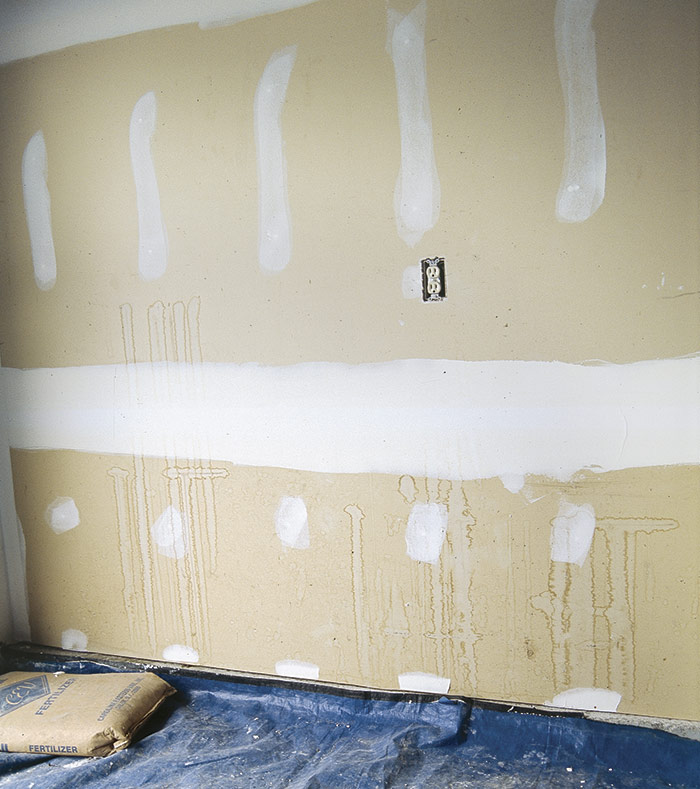 |
RELATED STORIES
