
Installing a Bathroom Fan
Whether you're mounting and wiring a fan in new construction or in a remodel, here's how.
Locating the Fan
There are three primary considerations when locating a bath fan.
First, place the fan where it can expel moisture effectively—ideally, near the shower, where most of the moisture is generated.
Second, locate the fan so that its duct run is as short as possible and minimizes cutouts in the blocking or framing members—especially rafters. Vent the ductwork from the fan out the roof or through a gable-end wall. Avoid sidewall vents because moist air expelled by them could be drawn up into the attic by soffit vents in roof overhangs. If you must vent through a soffit, a good way to do that is with a fixture called the EZ Soffit Vent.
Third, locate roof vents away from problem areas such as skylight and valley flashing. Water usually dams up on the uphill side of a skylight, creating a leak-prone area that must be carefully flashed. Typically, skylight flashing consists of two pieces: a base flashing and a counterflashing that goes over it. Locate a roof vent near skylight flashing and you’re inviting trouble. Valley flashing, on the other hand, may consist of a single broad piece of metal or elastomeric material folded up the middle. But because this flashing is located where roof planes converge, it channels an enormous amount of water during rainy seasons. So keep things simple: Locate roof vents away from obstructions in the roof or concentrations of water. Don’t put a roof vent near an operable window, either.
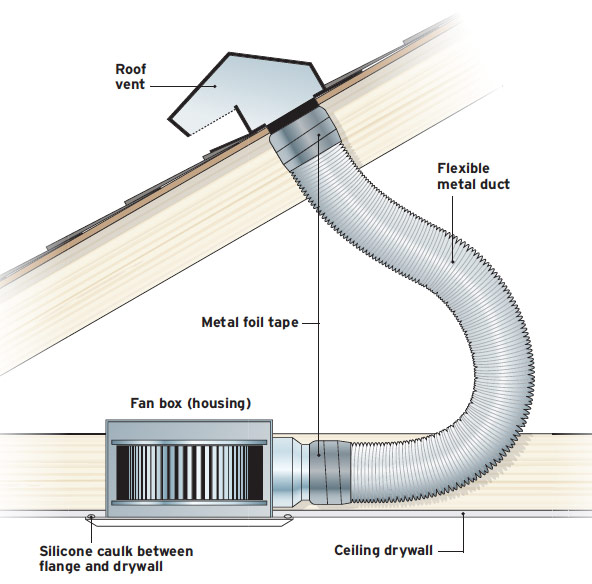
Venting a Bathroom Fan
To keep moisture from leaking into the attic, apply silicone caulk between the fan box flanges and the ceiling drywall. Use metal foil tape to ensure airtight joints where ducting attaches to fan and vent takeoffs.
Installing a Roof Vent
In the installation shown in the photos below, there was enough clearance around the exploratory hole and there happened to be a roofer on site, so the crew decided to install the roof vent first. (Roof vents vary; the model shown has a round stack and a weatherproof cap.)
Go onto the roof and find the 1⁄4-in. exploratory hole drilled while locating the fan. The hole represents the center of the vent hole you’ll need to cut.
| PRO TIP: Before you cut a hole in the ceiling, be sure there are no obstructions along the way. Tentatively locate the fan and use a 1⁄4-in. extension bit to drill along the proposed duct path. You’ll also want to drill an exploratory hole up through the roofing. |
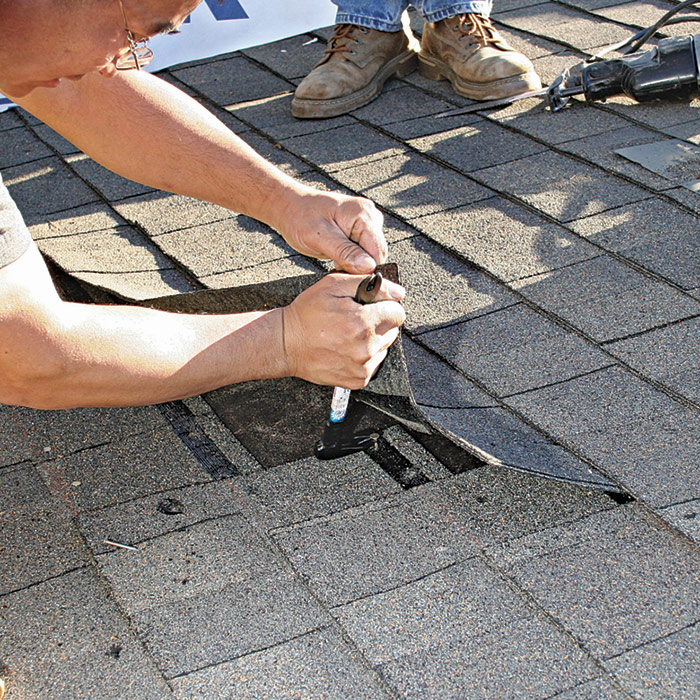
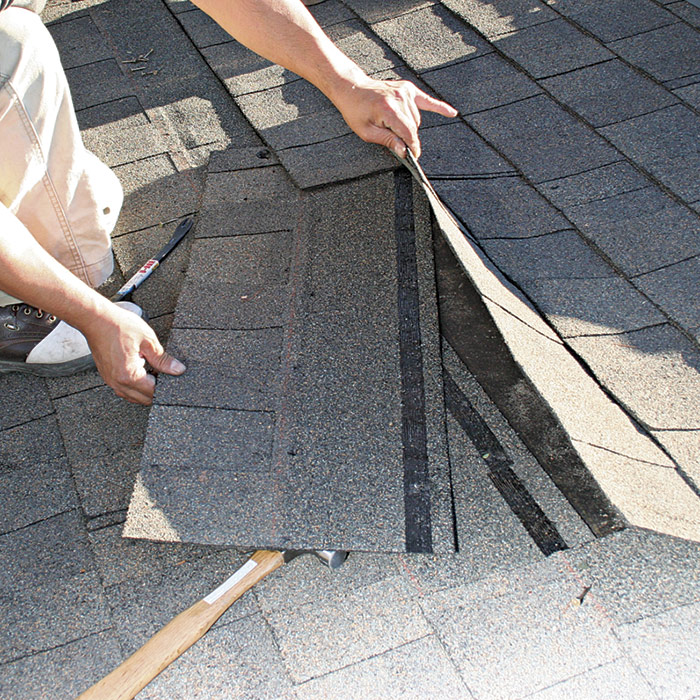
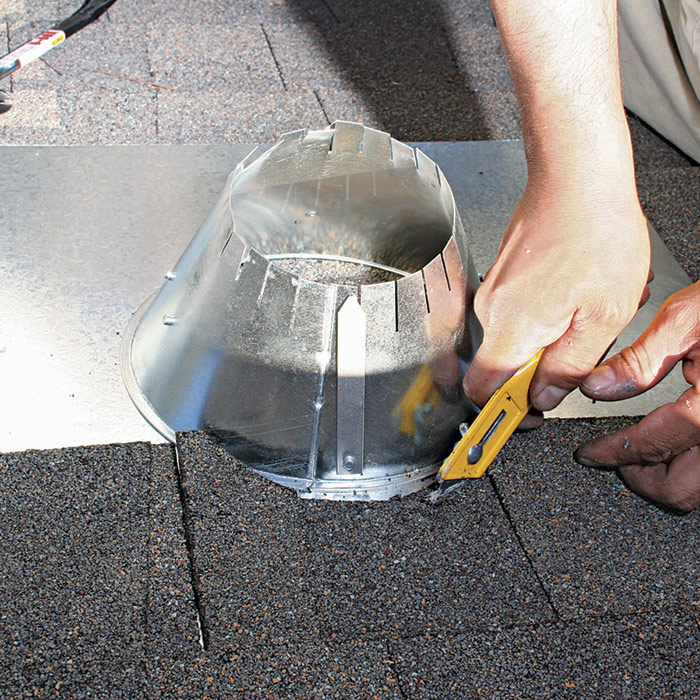
Most ducting and roof-vent takeoffs are 4 in. diameter, so sketch that circle onto the roof. If the circle would cut into the tabs of any shingle—roughly the bottom half of a shingle strip—use a shingle ripper or a cat’s paw to remove the nails holding those shingles in place before cutting the vent hole 1. Be gentle when removing shingles so you can reuse them 2.
 |
 |
 |
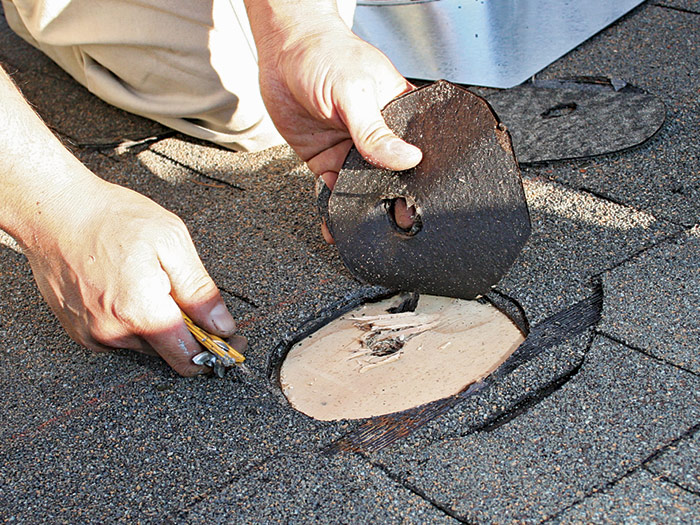
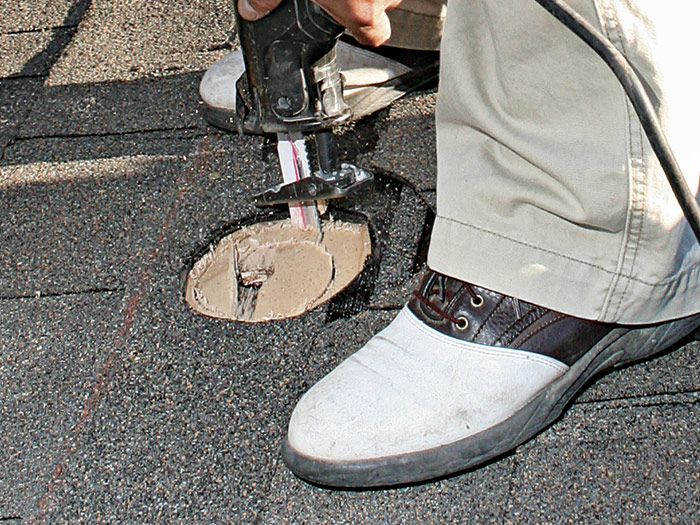
Slide the upper flange of the roof vent under the shingle courses above and use a utility knife to trim its arc onto the shingles above 3, then cut out the vent’s circle into any remaining shingles and the roofing paper 4. Next, use a reciprocating saw to cut through the sheathing 5.
 |
 |
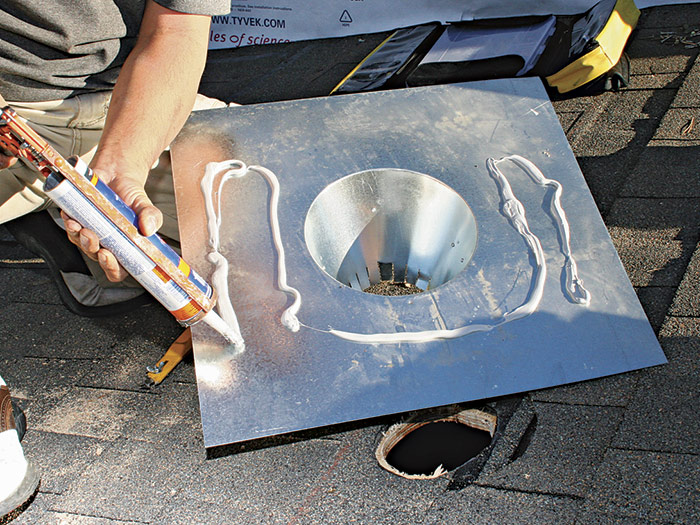
If the roof pitch is 4:12 or greater, it usually isn’t necessary to caulk the vent edges. Here, a 2:12 pitch required caulking to forestall leaks 6. Carefully lift the shingle course above the vent and nail the two corners of the vent’s upper flange into place 7. Do not nail the lower corners of the vent: those nails would be exposed to weather and could leak. Cut and replace removed shingles and renail them.
 |
 |
| PRO TIP: Keeping fan-expelled moisture out of attics and wall cavities is crucial, and the only way to do so is to create airtight connections: Caulk the fan housing to the ceiling and seal each duct joint with aluminum foil tape, not fabric duct tape. |
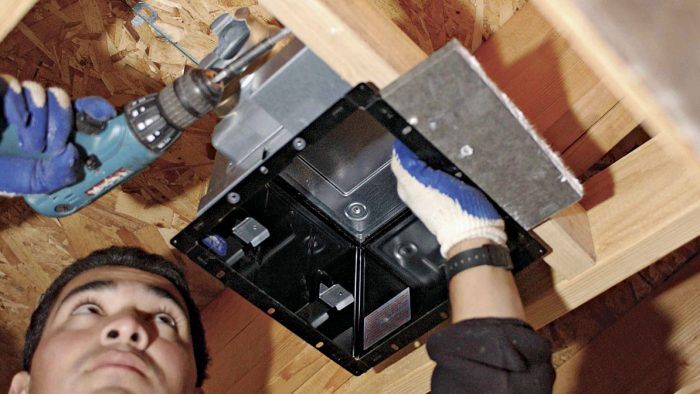
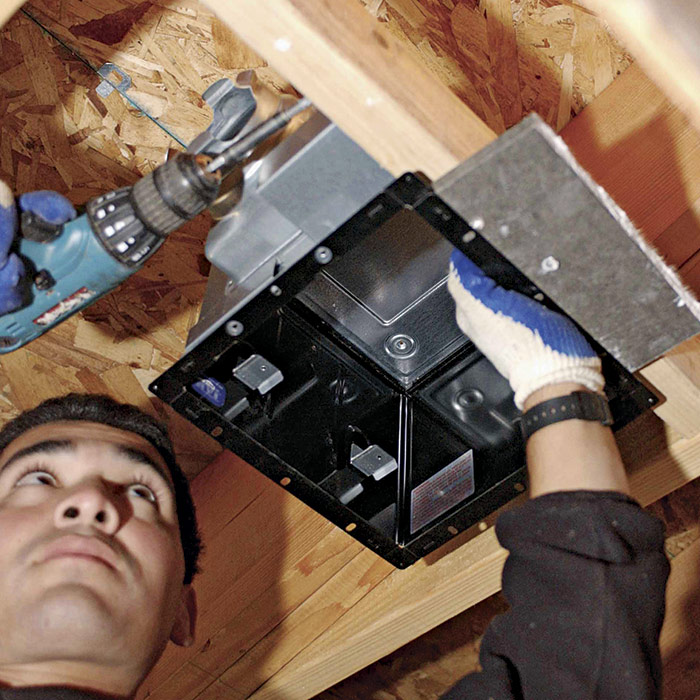
Mounting a Fan Box
If bathroom framing is exposed, mounting the fan is pretty straightforward. If you remove the fan assembly from the fan box, the box will be lighter and easier to hold in place one-handed while you use your other hand to screw the unit to the ceiling joists. Most fans have expandable brackets which extend between joists spaced 16 in. on-center (o.c.). But you should always screw at least one side of the fan box to a joist, to ensure that it’s anchored securely. For ceiling joist (or rafter) spacing greater than 16 in. o.c., it’s a good idea to add blocking 1.
If the fan-box flange mounts flush to the underside of the ceiling, use a piece of drywall scrap to gauge the depth of the unit relative to the finished ceiling 2. Regardless of whether the box flange sits above or below the ceiling drywall, caulk the flange with polyurethane sealant to create an airtight seal between the two materials. If you removed the fan assembly earlier, reinstall it now.
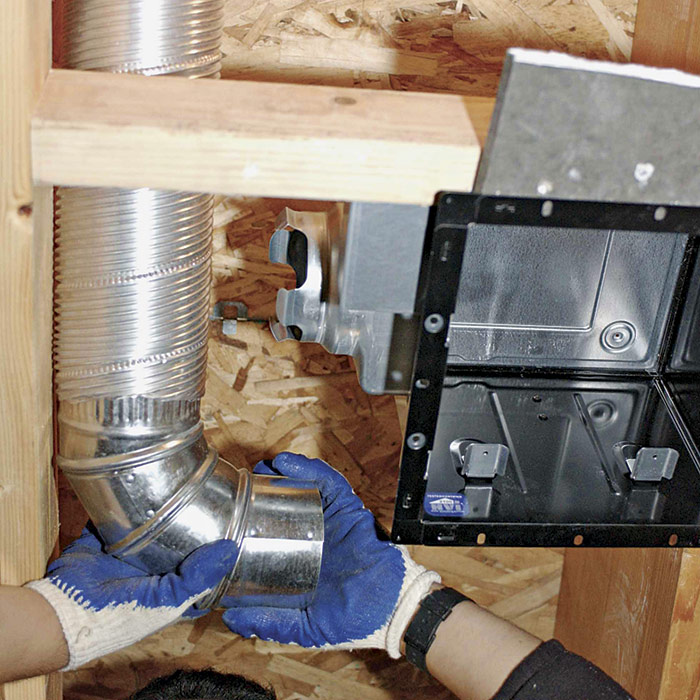
Keep duct runs as short as possible to reduce air resistance. Slide the lower end of the flexible duct to the fan’s exhaust port 3 and seal the joint with metal duct tape, then attach the other end to the roof vent takeoff. Or, if you haven’t yet cut the hole in the roof, hold the free end of the duct to the underside of the roof sheathing and trace its outline onto the surface.
 |
 |
 |
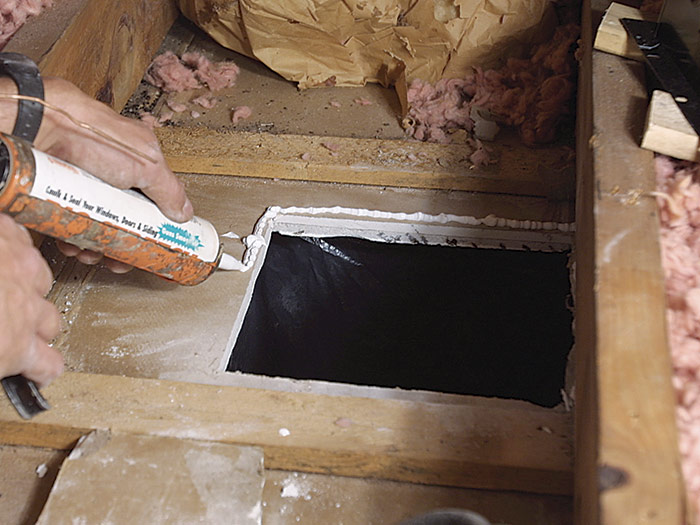
Retrofitting a Bathroom FanIf you are remodeling or installing a bath fan and the finished ceiling is already in place, begin by creating a cardboard template of the fan housing. Mark the approximate position of the fan by driving a screw or nail through the ceiling and then go up into the space above the bathroom and find the marker. If there is an insulated attic above, take along a dustpan to shovel loose insulation out of the way and be sure to wear a dust mask and gloves. After you’ve located the marker, place the fan template next to the nearest joist and trace around it. Most fan boxes mount to ceiling joists. If the fan box has an adjustable mounting bar, you have more latitude in placing the fan. Use a jab saw or reciprocating saw to cut out the opening. To keep the drywall cutout from falling to the floor below, take a piece of scrap wood slightly longer than the cutout and screw it to the drywall. Before placing the fan box on top of the ceiling drywall, caulk around the perimeter of the opening to create an airtight bond to the box flange 1. Once the box is wired and the ceiling has been painted, install the trim piece to cover any gaps around the fan opening 2.
If there’s an existing ceiling light in the bathroom, a fan-and-light combination unit may simplify your remodel. If you want the fan and light to operate at the same time, you can reuse the 2-wire cable that’s presently controlling the light switch. Another option is to install a fan/light with a built-in occupancy sensor. The light is controlled by the switch on the existing 2-wire cable, and the fan turns on or off automatically when someone comes into the room. |

Wiring a Bathroom Fan
Before making any connections in the fan’s junction box, make sure the power is off. Follow the wiring diagrams provided by the fan manufacturer. In general, it’s easier if the incoming power runs through a switch box first; then you don’t have to try to splice the switch legs in the fan junction box—junction boxes inside fan housings tend to be cramped and may not be rated for the additional wires. Bathroom fans should also have GFCI protection if installed in a shower whose ceilings are 8 ft. or less above the finish floor.
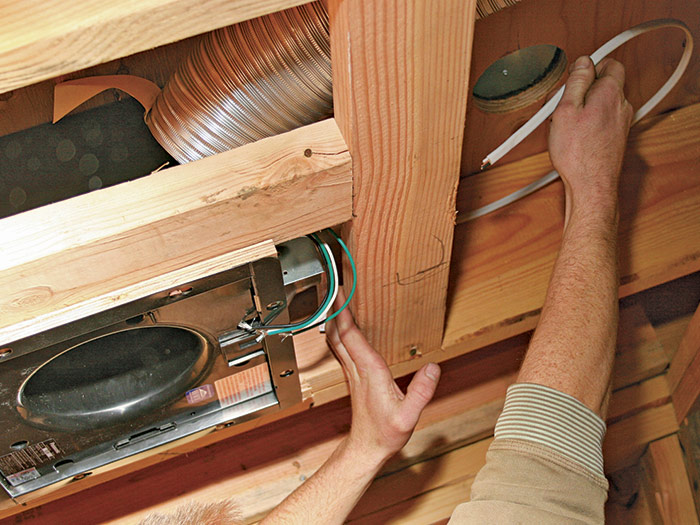
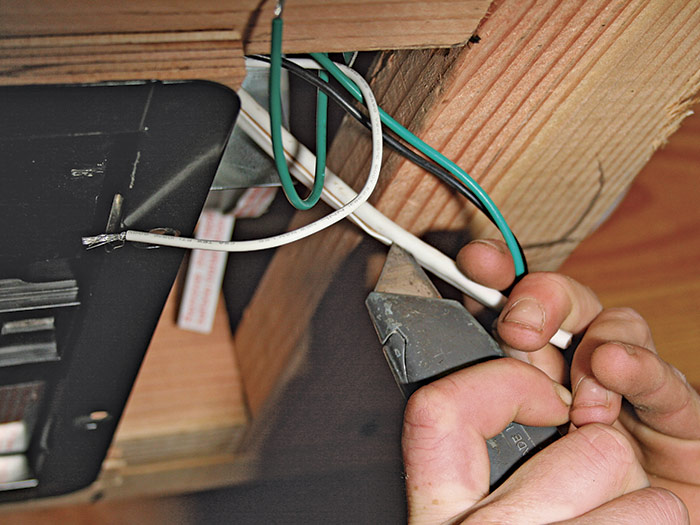
If the duct space is tight, it’s usually best to wire the fan box before installing the duct. When running cable to the fan box, allow a generous loop of cable, just in case. As with light fixtures and receptacles, staple the cable within 1 ft. of the fan box 1. Insert a cable connector into a junction box knockout, feed the cable through it, and strip the cable sheathing 2.
 |
 |
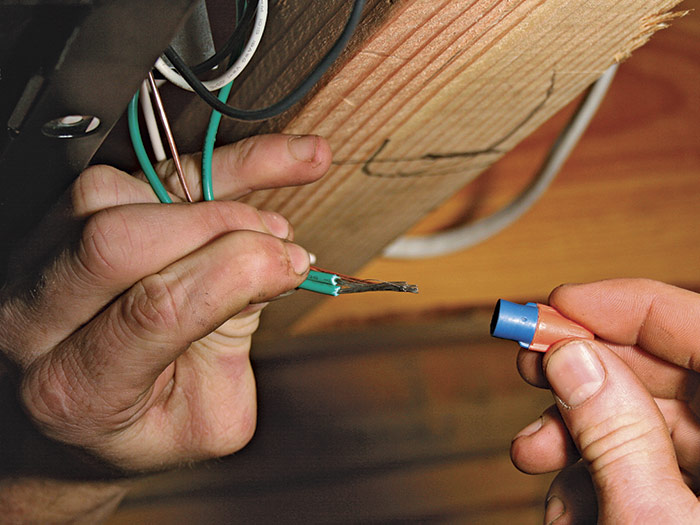
Using wire connectors, first splice the incoming ground wire to the fixture ground 3. (If the fixture lead wires are stranded, extend them slightly beyond the solid wire so that the wire connector will engage them first.) Splice the neutral wires and then the hot wires. If the light and fan are wired separately, there will be two sets of hot wires.
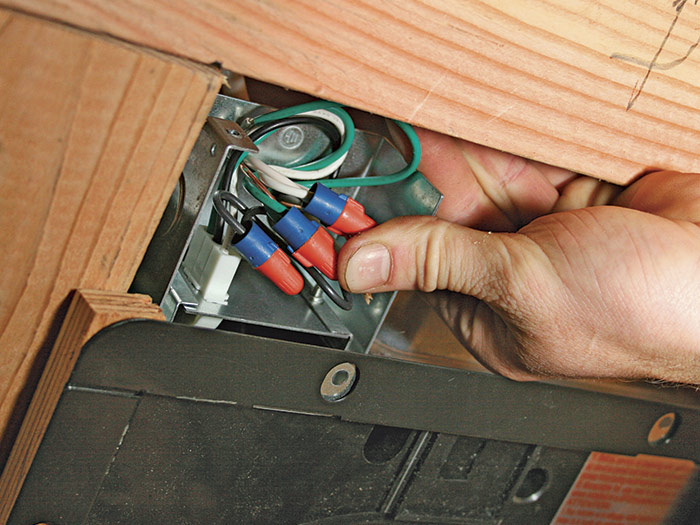
Tug each wire group gently to be sure the splices are secure. When all groups are spliced, carefully fold the wires into the fan junction box and cover the box 4.
 |
 |

Excerpted from Wiring Complete, 3rd Edition (The Taunton Press, 2017) by Michael Litchfield and Michael McAlister
Available in the Taunton Store and at Amazon.com.
