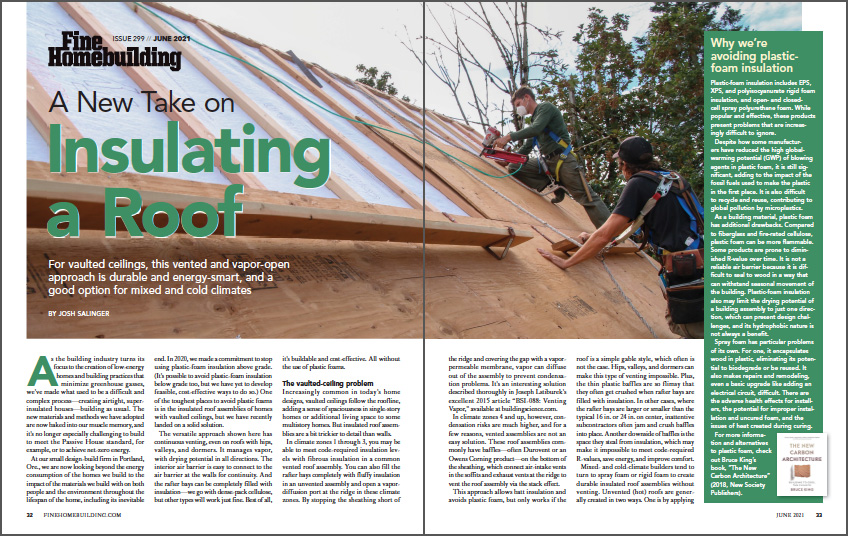
A New Take on Insulating a Roof
For vaulted ceilings, this vented and vapor-open approach is durable and energy-smart, and a good option for houses in mixed and cold climates.
Synopsis: Josh Salinger’s design-build firm made a commitment to avoid using plastic-foam insulation above grade. But one of the toughest places to avoid foam is in the insulated roof assemblies of homes with vaulted ceilings. Salinger describes his solution to avoiding plastic foam in these locations by creating vent channels that follow the rooflines with dense-pack cellulose in the entire rafter bay. The article includes an illustration of the assembly and photographs of the construction and installation.
As the building industry turns its focus to the creation of low-energy homes and building practices that minimize greenhouse gasses, we’ve made what used to be a difficult and complex process—creating airtight, superinsulated houses—building as usual. The new materials and methods we have adopted are now baked into our muscle memory, and it’s no longer especially challenging to build to meet the Passive House standard, for example, or to achieve net-zero energy.
At our small design-build firm in Portland, Ore., we are now looking beyond the energy consumption of the homes we build to the impact of the materials we build with on both people and the environment throughout the lifespan of the home, including its inevitable end. In 2020, we made a commitment to stop using plastic-foam insulation above grade. (It’s possible to avoid plastic-foam insulation below grade too, but we have yet to develop feasible, cost-effective ways to do so.) One of the toughest places to avoid plastic foams is in the insulated roof assemblies of homes with vaulted ceilings, but we have recently landed on a solid solution.
The versatile approach shown here has continuous venting, even on roofs with hips, valleys, and dormers. It manages vapor, with drying potential in all directions. The interior air barrier is easy to connect to the air barrier at the walls for continuity. And the rafter bays can be completely filled with insulation—we go with dense-pack cellulose, but other types will work just fine. Best of all, it’s buildable and cost-effective. All without the use of plastic foams.
The vaulted-ceiling problem
Increasingly common in today’s home designs, vaulted ceilings follow the roofline, adding a sense of spaciousness in single-story homes or additional living space to some multistory homes. But insulated roof assemblies are a bit trickier to detail than walls.
In climate zones 1 through 3, you may be able to meet code-required insulation levels with fibrous insulation in a common vented roof assembly. You can also fill the rafter bays completely with fluffy insulation in an unvented assembly and open a vapor-diffusion port at the ridge in these climate zones. By stopping the sheathing short of the ridge and covering the gap with a vapor-permeable membrane, vapor can diffuse out of the assembly to prevent condensation problems. It’s an interesting solution described thoroughly in Joseph Lstiburek’s excellent 2015 article “BSI-088: Venting Vapor,” available at buildingscience.com.
In climate zones 4 and up, however, condensation risks are much higher, and for a few reasons, vented assemblies are not an easy solution. These roof assemblies commonly have baffles—often Durovent or an Owens Corning product—on the bottom of the sheathing, which connect air-intake vents in the soffits and exhaust vents at the ridge to vent the roof assembly via the stack effect.
Why we’re avoiding plastic-foam insulation
Despite how some manufacturers have reduced the high global-warming potential (GWP) of blowing agents in plastic foam, it is still significant, adding to the impact of the fossil fuels used to make the plastic in the first place. It is also difficult to recycle and reuse, contributing to global pollution by microplastics. As a building material, plastic foam has additional drawbacks. Compared to fiberglass and fire-rated cellulose, plastic foam can be more flammable. Some products are prone to diminished R-value over time. It is not a reliable air barrier because it is difficult to seal to wood in a way that can withstand seasonal movement of the building. Plastic-foam insulation also may limit the drying potential of a building assembly to just one direction, which can present design challenges, and its hydrophobic nature is not always a benefit. Spray foam has particular problems of its own. For one, it encapsulates wood in plastic, eliminating its potential to biodegrade or be reused. It also makes repairs and remodeling, even a basic upgrade like adding an electrical circuit, difficult. There are the adverse health effects for installers, the potential for improper installation and uncured foam, and the issues of heat created during curing. For more information and alternatives to plastic foam, check out Bruce King’s book, “The New Carbon Architecture” (2018, New Society Publishers). |

This approach allows batt insulation and avoids plastic foam, but only works if the roof is a simple gable style, which often is not the case. Hips, valleys, and dormers can make this type of venting impossible. Plus, the thin plastic baffles are so flimsy that they often get crushed when rafter bays are filled with insulation. In other cases, where the rafter bays are larger or smaller than the typical 16 in. or 24 in. on center, inattentive subcontractors often jam and crush baffles into place. Another downside of baffles is the space they steal from insulation, which may make it impossible to meet code-required R-values, save energy, and improve comfort.

Mixed- and cold-climate builders tend to turn to spray foam or rigid foam to create durable insulated roof assemblies without venting. Unvented (hot) roofs are generally created in two ways. One is by applying closed-cell spray foam to the bottom side of the roof sheathing to at least a minimum R-value that meets code and prevents condensation, and therefore the potential for mold and rot. Alternatively, rigid foam such as EPS, XPS, or foil-faced polyiso can be applied to the top of the sheathing, which prevents condensation on the underside by keeping the sheathing warm.
These unvented assemblies can certainly work, but they have limited drying potential and require plastic-foam insulation. Our goal was to design a solution that had the durability of a vented assembly without the environmental cost of plastic foam.
A design-build solution
One of the benefits of working at a design-build firm are the frequent meetings between the architecture and build teams. They are where we find solutions that work on paper and in the field—like this foam-free assembly for vaulted roofs. Here’s the basic anatomy.
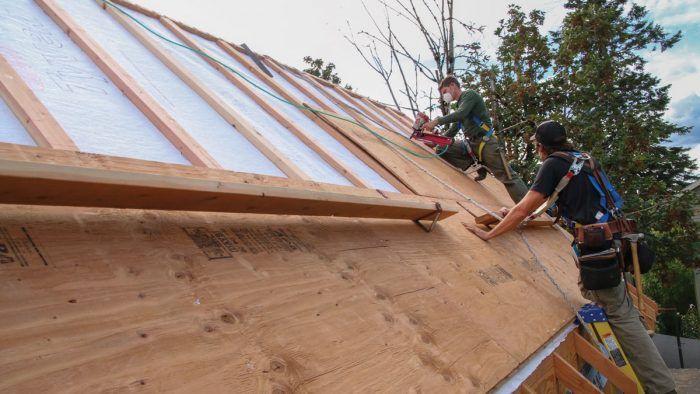
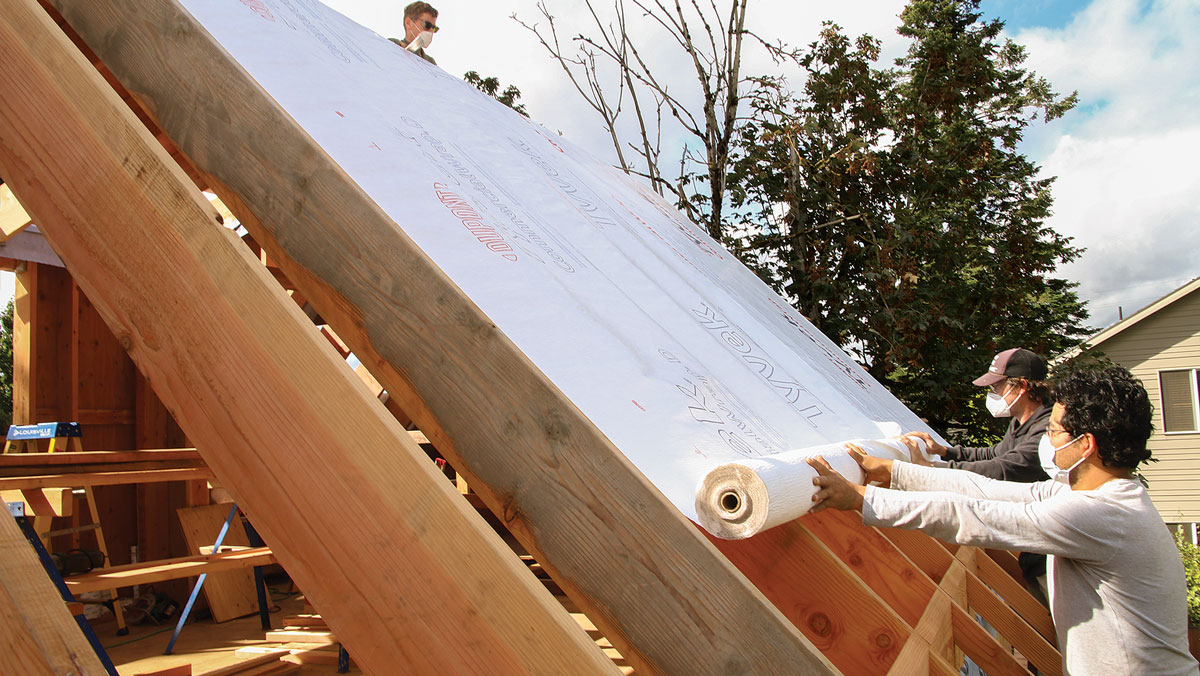
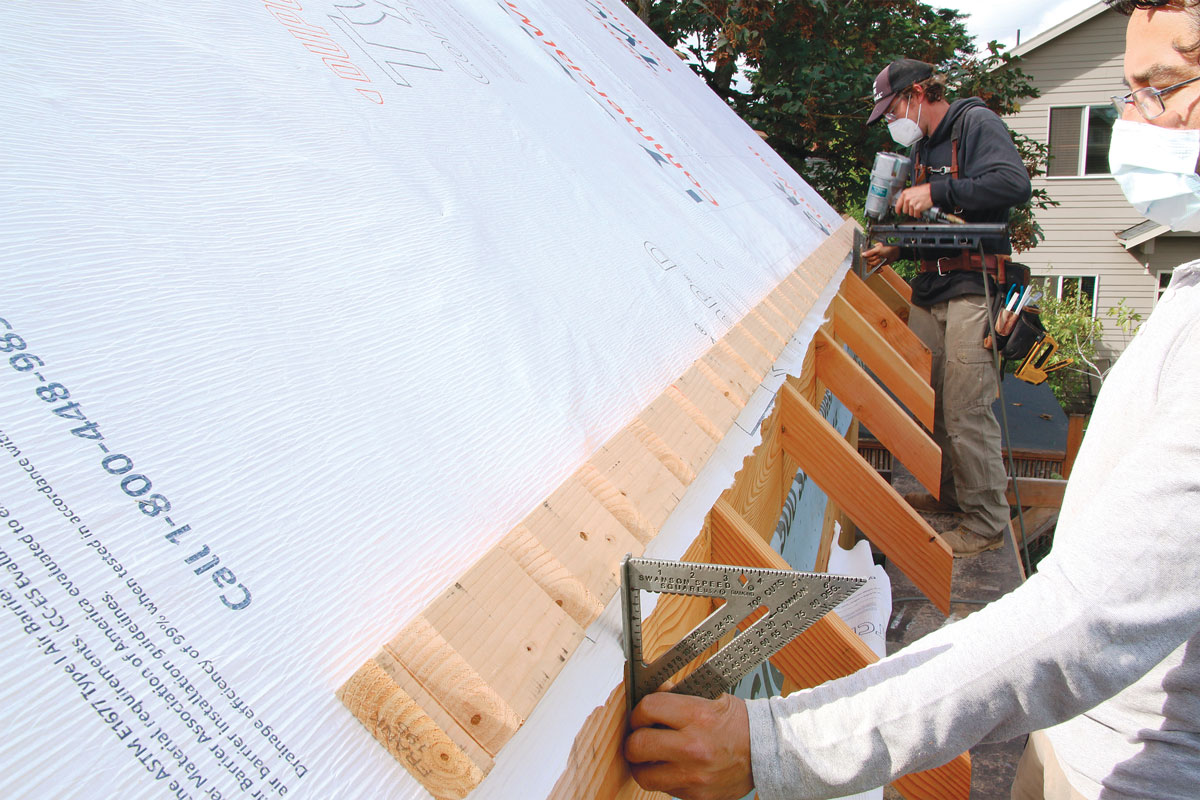
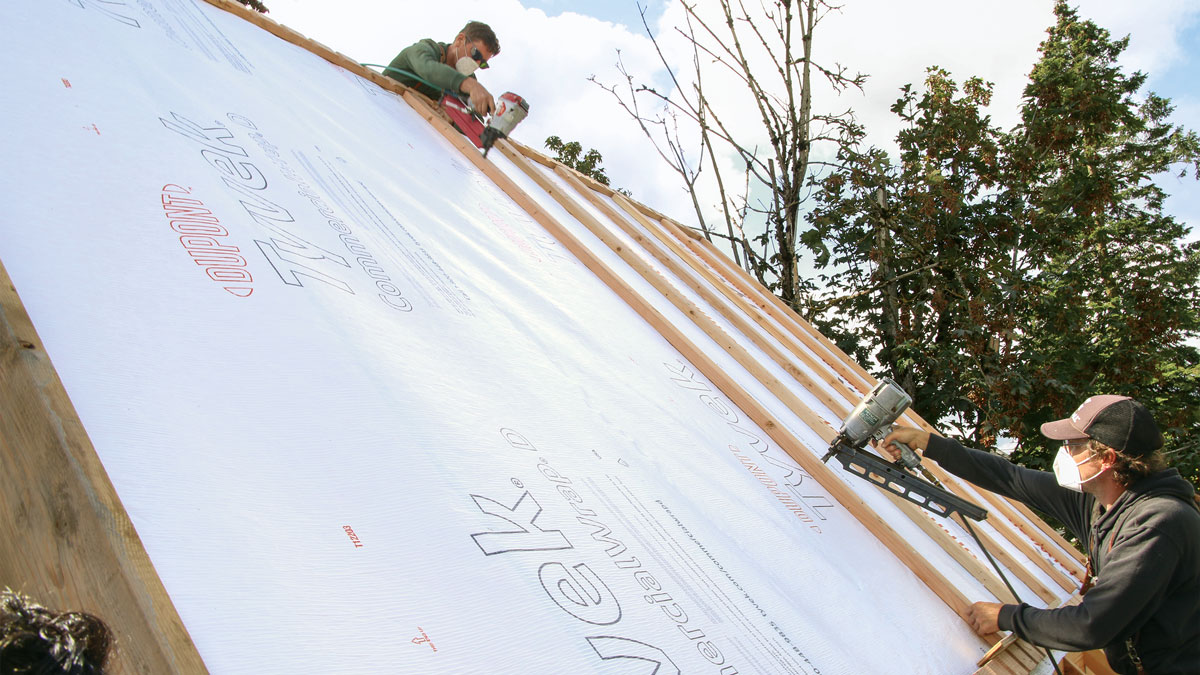
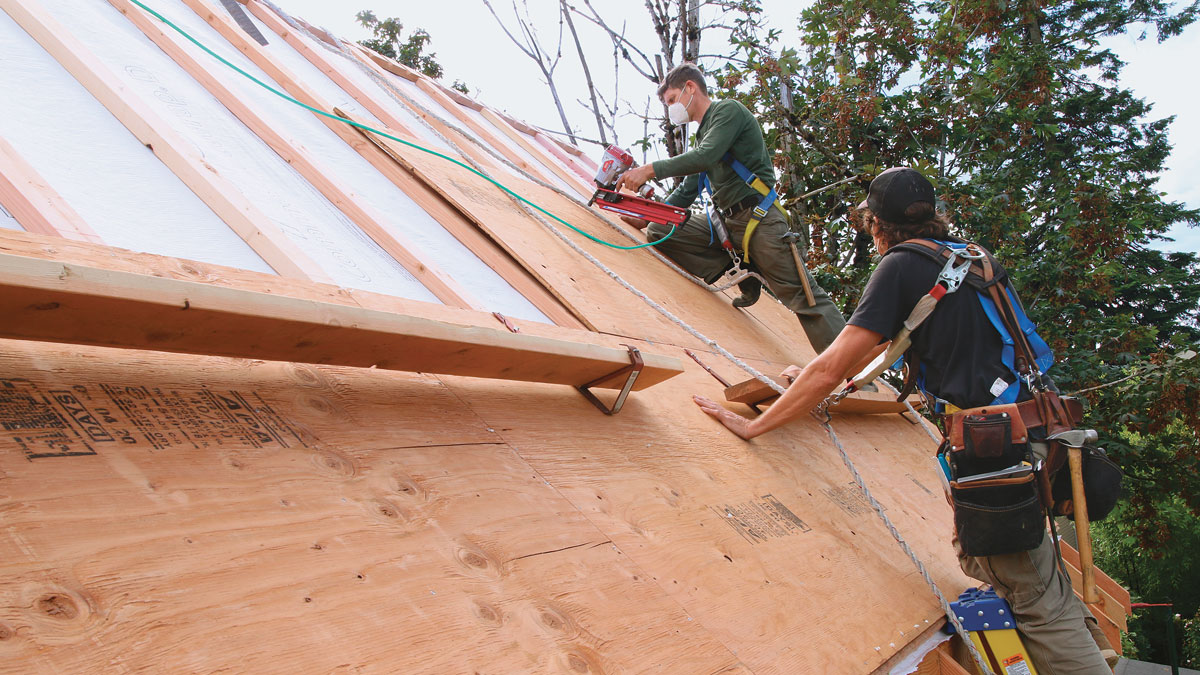
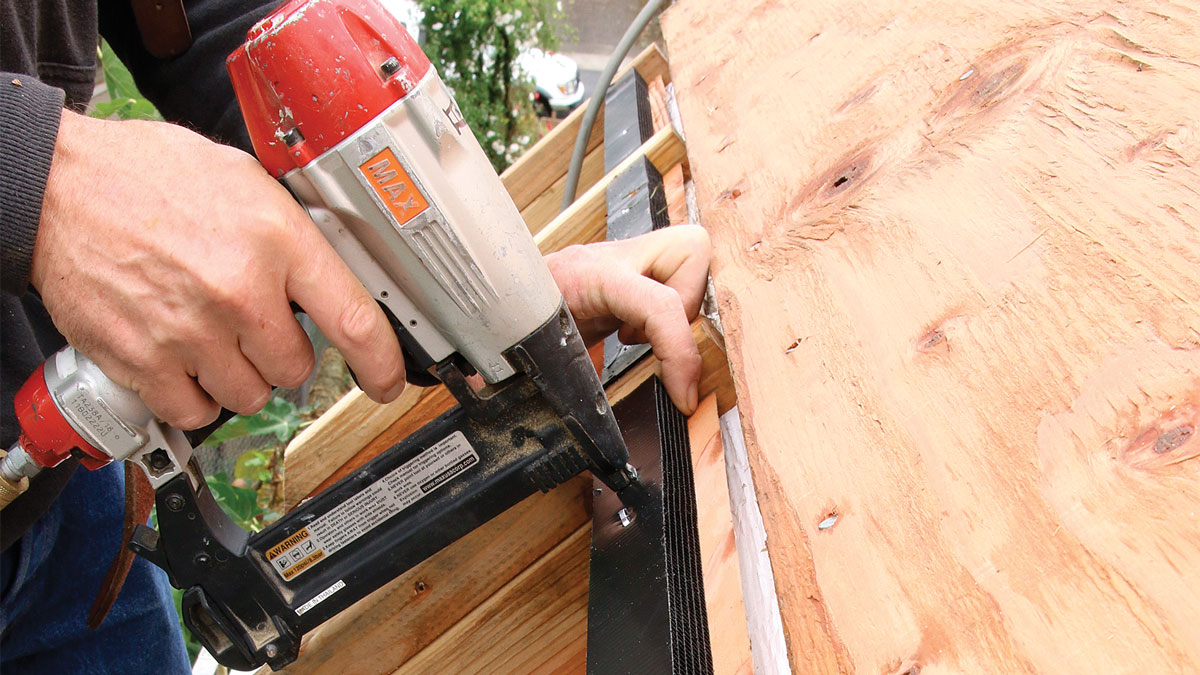
After the roof is framed but before sheathing is installed, we staple a layer of a vapor-open water-resistive barrier (WRB), like the Tyvek Commercial Wrap used on this project, to the top of the roof rafters. Next, we nail flat 2×4 strapping along each rafter to act as spacers. To attach the sheathing at the eave and ridge, we install notched 2x4s perpendicular to the rafters, allowing air to pass through. On this project we used Cor-A-Vent soffit strips to keep insects out of the vent chambers, but we plan to move the notched strapping lower and wrap it with screen in the future as an easier way to accomplish the same goal.
With these details, when the sheathing goes on, we end up with durable and effective vent cavities, connected to the exterior with vents at the soffit and ridge and connected to each other at hips and valleys. You might be wondering why we don’t use 2x2s above the rafters—we tried that early on, but the narrow boards ended up being chewed up by nails and staples. Laid flat, 2x4s make a much better nailer. The WRB not only acts as the insulation netting at the top of the roof rafters, but it keeps the vent chambers clear and allows the insulated rafter bays to dry to the exterior.
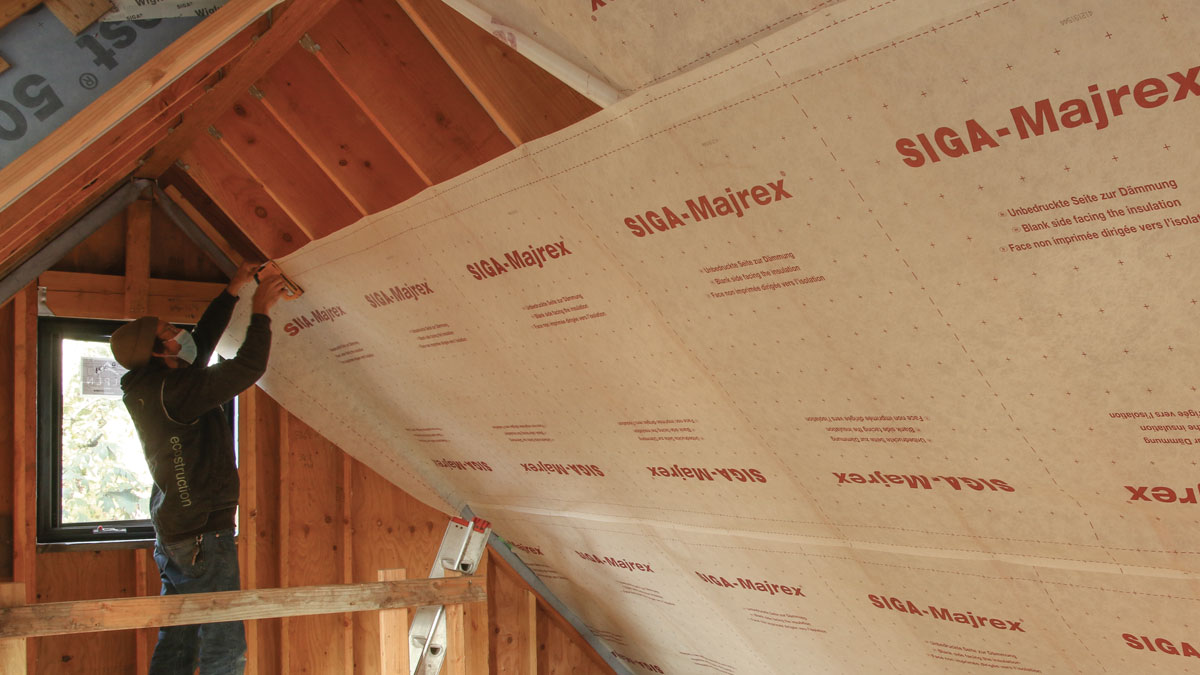
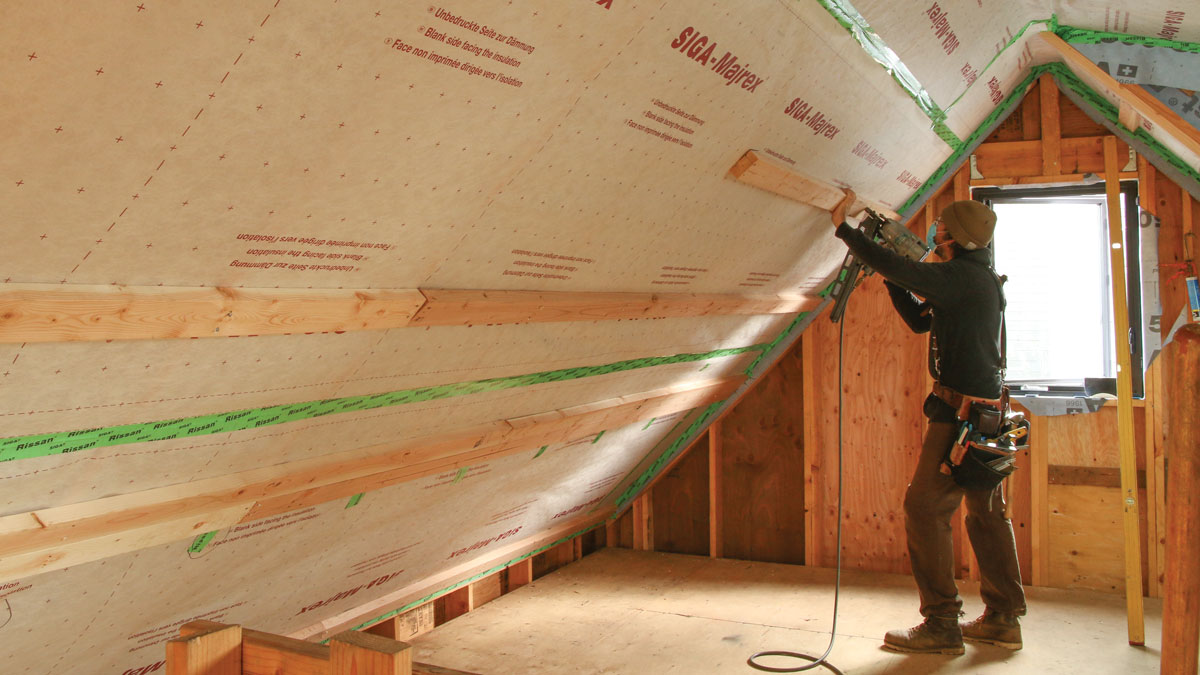
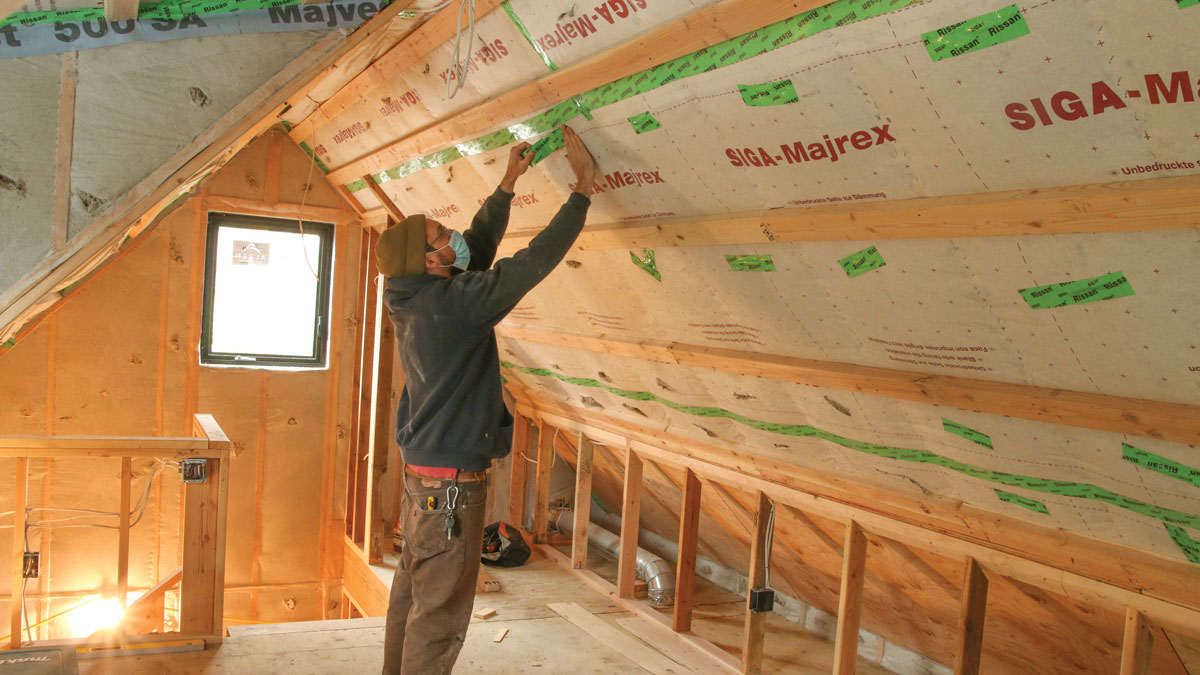
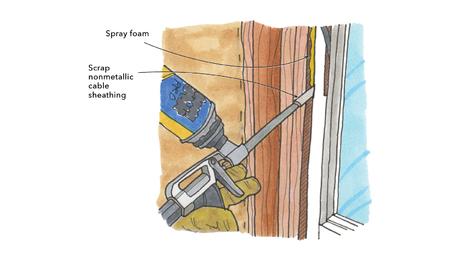
On the bottom, or interior, side of the rafters, we install a variable-perm vapor retarder—such as Siga Majrex or ProClima Intello—which manages moisture and acts as the primary air barrier. Below this membrane goes another set of flat 2x4s, nailed on perpendicular to the rafters. The reason for this lower strapping is twofold. First, the manufacturer requires it to keep the vapor-retarder membrane attached to the rafters when it is used as netting for insulation. Second, the strapping creates a shallow service cavity behind the drywall, where we can install junction boxes and electric circuits without penetrating the air barrier. And because the membrane is used as the insulation netting at the bottom of the rafters, we make sure our insulation contractor deletes the netting and its install from their bid, helping us recoup some of the extra labor and material costs.
Drying in both directions
Moisture tends to build up in roof assemblies. Inside the home, showers, cooking, breathing, house plants, seasonal changes, and air leakage all add humidity, not to mention the moisture released from new construction materials. Outside, seasons and conditions are in constant flux. Our vented roof assembly is vapor-open, meaning built-up moisture can dry to the inside or outside. This gives it the greatest potential for drying out and avoiding degradation, mold, and rot.
Starting at the top, the vent chambers manage condensation under the sheathing via airflow from the soffit to the ridge. Vapor will always move from areas of more concentration to less, so, should the interior of the home be more humid than the surrounding environment, or if the assembly is wet, the built-up water vapor will drive toward the vent cavity, diffuse through the WRB, and escape via the roof vent.
Stick–framed vent channelsTo create robust vent channels, first install a water-resistive barrier over the rafters, then 2×4 strapping and sheathing.
Roll out the WRB. A 10-ft.-wide roll of water-resistive barrier works perfectly with 24-in. rafter spacing. The team rolls it down or up, whichever is easier, and attaches it with staples.
Horizontals go on first. One row of horizontal 2×4 nailers—with a series of V-notches cut in them to allow air to pass through—is installed at the ridge, and another at the eave.
Verticals next. A 2×4 runs above each rafter, spaced slightly up from the lower horizontal strapping, to allow air to move from bay to bay.
Sheathing completes the channels. Roof sheathing is fastened as usual, creating a deck where roofers won’t encounter any uncommon details.
Insect-proof soffit vents. Cor-A-Vent S-400 soffit strips block insects and debris. At the 2×4 strapping that continues along the rafter tails, Breckenridge plywood will finish off the open-soffit design. |

The reason this assembly works for all types of roof architecture is because the venting chamber is above the rafters. This allows air movement over hips, through valleys, and around dormers. These details block the flow of air and make venting difficult in the more common scenario of having the vent channels within the rafter bays. To accomplish this where one roof area intersects another—such as the shed roof and gable roof on the project featured here—we simply leave space in the grid of 2×4 strapping to allow for air to pass from one set of vent chambers to the other. These small spaces help improve flow throughout the assembly. Roofing code includes a table that calculates the openings needed to properly vent cavities of any given square footage. We used those to engineer this assembly, and we crunch the numbers for each specific roof.
On the bottom of the rafters, a variable-perm membrane is the assembly’s vapor-control layer. The permeance of a variable-perm, or “smart,” vapor retarder modulates based on humidity. As opposed to a vapor retarder that maintains a consistent permeance throughout the seasons, a smart vapor retarder responds to them. During colder, dryer conditions, when condensation risk is high, this material allows less vapor to pass. During warmer, more humid conditions, when drying is the goal, the material allows more vapor to pass.
Another key piece of the assembly that manages moisture is the dense-pack cellulose insulation. As opposed to fiberglass, which is hydrophobic and sheds water, cellulose is hydrophilic, taking on and releasing moisture over time, further mitigating the risk of large swings in humidity. Known as hygric buffering, this builds even more resilience into the system. That said, the assembly could still be effective with another form of blown-in insulation, including fiberglass.
Continuous air-sealing
Much more water is deposited in a building assembly through air movement than vapor diffusion—by a few orders of magnitude, in fact. For example, over the course of one year, a 1-in. hole in drywall can deposit as much as 30 quarts of water into the assembly through air leakage. Compare that to the 1⁄3 cup of water vapor that may diffuse through a 4×8 sheet of the same material in the same time frame.
To prevent air leaks from wreaking havoc on our roof structure and the home’s overall energy performance, the vapor retarder used in this assembly is taped at the seams and penetrations, and connected continuously to the air barrier where roof meets walls. We do this by placing a strip of WRB—in this case self-adhering Siga Majvest 500 SA—over the top plate prior to installation of the rafters, and then connecting that to both the vapor-permeable barrier under the rafters and the WRB on the exterior wall. It adds about an hour of labor to the build schedule for a typical home, but its impact on performance and comfort is well worth the effort.
With this air-sealing setup, you can’t use the usual H2.5A hurricane ties from Simpson Strong-Tie for the wall-to-rafter connection without the air-sealing-origami nightmare we’ve learned to avoid. We use truss screws instead, driving them up through the top plate and into the rafters. We specify this to the structural engineer at the design phase of the project. The truss screws install faster and easier than the hurricane ties anyway, so they’re a net time-saver for our team, and the air-seal is much more effective. With this air-barrier strategy, we’ve had no trouble hitting our air-sealing targets, which are generally well below 1 ACH50.
To date, our team has done this install on three homes. While we have the main steps dialed in, we continue learn new tricks and add efficiency. Although the approach involves some extra materials, doing things in a slightly different order, and taking a little more time, it all feels relatively quick and easy now. The new vaulted-roof assembly helps us meet our high-performance standards without using foam, delivering a win for our firm, our clients, and our kids.
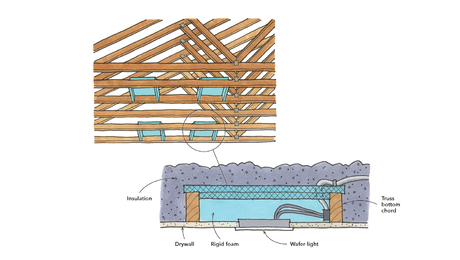
Air barrier and a service cavityBelow the rafters, the air barrier will contain the cellulose insulation, followed by strapping and drywall.
Vapor-permeable air barrier. The Siga Majrex is rolled out and cut on the floor, and then lifted up and installed perpendicular to the rafters.
Tape and strapping next. All of the seams are sealed with Siga Rissan tape designed for the Majrex membrane, including the flap at the bottom where the air barrier emerges from the top plate.
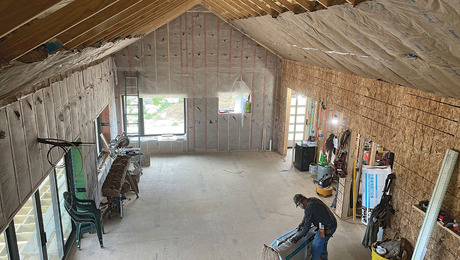
Ready for drywall. The insulation subs cut small slits in the air barrier to fill the bays top to bottom, the team circles back to tape them off, and the drywall subs move in. |
From Fine Homebuilding #299
To read the entire article, please click the View PDF button below.
RELATED LINKS
- Vapor: Pressure, Permeance, and Permeability
- Smart Vapor Retarders for Walls and Roofs
- Better Vented Roof Baffles
Fine Homebuilding Recommended Products
Fine Homebuilding receives a commission for items purchased through links on this site, including Amazon Associates and other affiliate advertising programs.
Foam Gun

Nitrile Work Gloves

Loctite Foamboard Adhesive


View Comments
This is an intriguing approach, and thanks for thinking through ways we can reduce the use of spray foam plastics in roof insulation.
Given the weight of the insulation that has to go into this space, have you been able to verify, for example through fiber camera inspection, that the gaps above the top membrane and below the bottom one are not getting blocked by the insulation causing the membranes to bulge out? I'd really like to see some pictures if so.
Great approach! The 2x under the drywall is a nice way to maintain the integrity of the air barrier. Curious if you have a solution for recessed cans in this assembly.
I really like this layout and design - Question: how do you deal with overhangs on the gable-end with this structure? i.e. with strapping over 2x12s running lengthwise - how best to create structural support to provide 18" + of gable-end overhang without jamming up the ventilation space in the near roof edge joist spaces?