
Applying Grout
Work the grout into the joints with a grout float, then remove the excess holding the float at an angle.

Grout only a small area at a time. Plan on working a space you can cover in 10 minutes: about 3 lin. ft. or less of a kitchen backsplash or 50 sq. ft. of a bathroom floor. As your experience grows, you can do larger areas, but in the beginning, pace yourself.
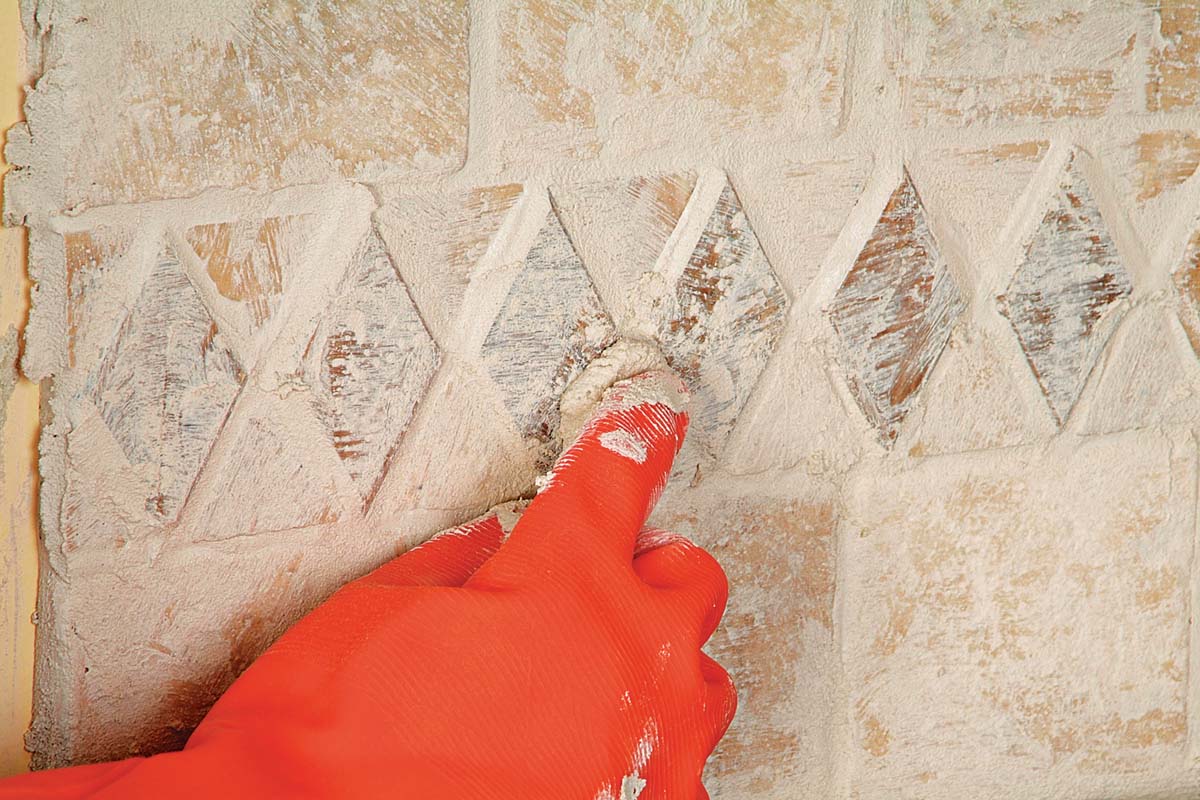
Start by putting a margin trowel full of grout mixture on your float 1 (or scoop it up with the float itself) and spread it across the tile. Hold the rubber part of the float at a low angle relative to the tile as you pack the grout into the joints. Move the float diagonally across the tile 2 and don’t be afraid to push the grout into those joints or to go over an area more than once. You can use either the long or the short end of the float to work grout into joints between trim tiles and at the edges of your tile installation 3.
At this point, don’t worry about how the grout joints look or about leaving excess grout behind. Just be sure that you have fully packed all joints, except the joints that will be caulked later.
After the joints in your work area are filled, clean the face of your grout float with a damp sponge. Now, angle the float at 45° relative to the face of the tile and sweep it diagonally across the surface to remove the excess grout 4. Move the float along diagonally to prevent its edge from denting or digging into the wet grout joints. Don’t be too fanatical, but the more grout you remove from the tile’s surface with the float, the easier your final wipe down will be.
 |
1. Margin trowels work well for scooping grout from the bucket to load the grout float. |
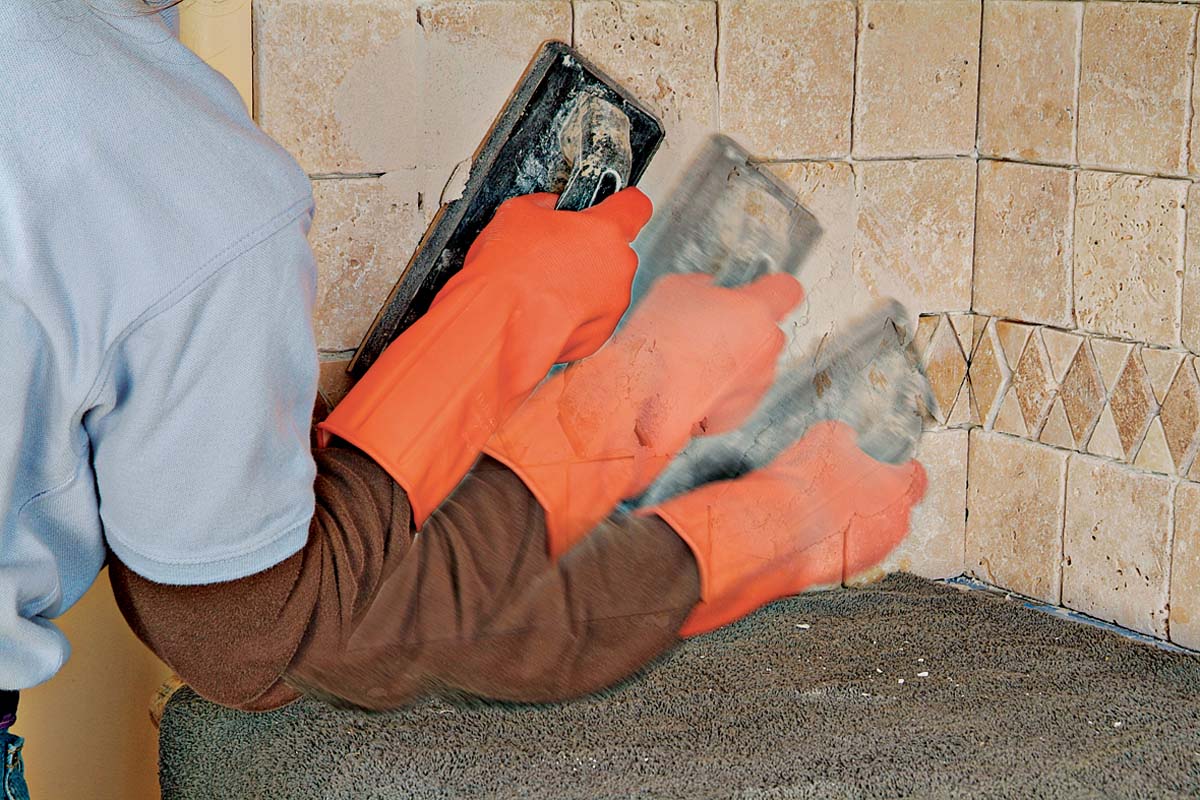 |
2. Spread grout firmly across the tile with the grout float. Use a low angle and fully pack the joints. |
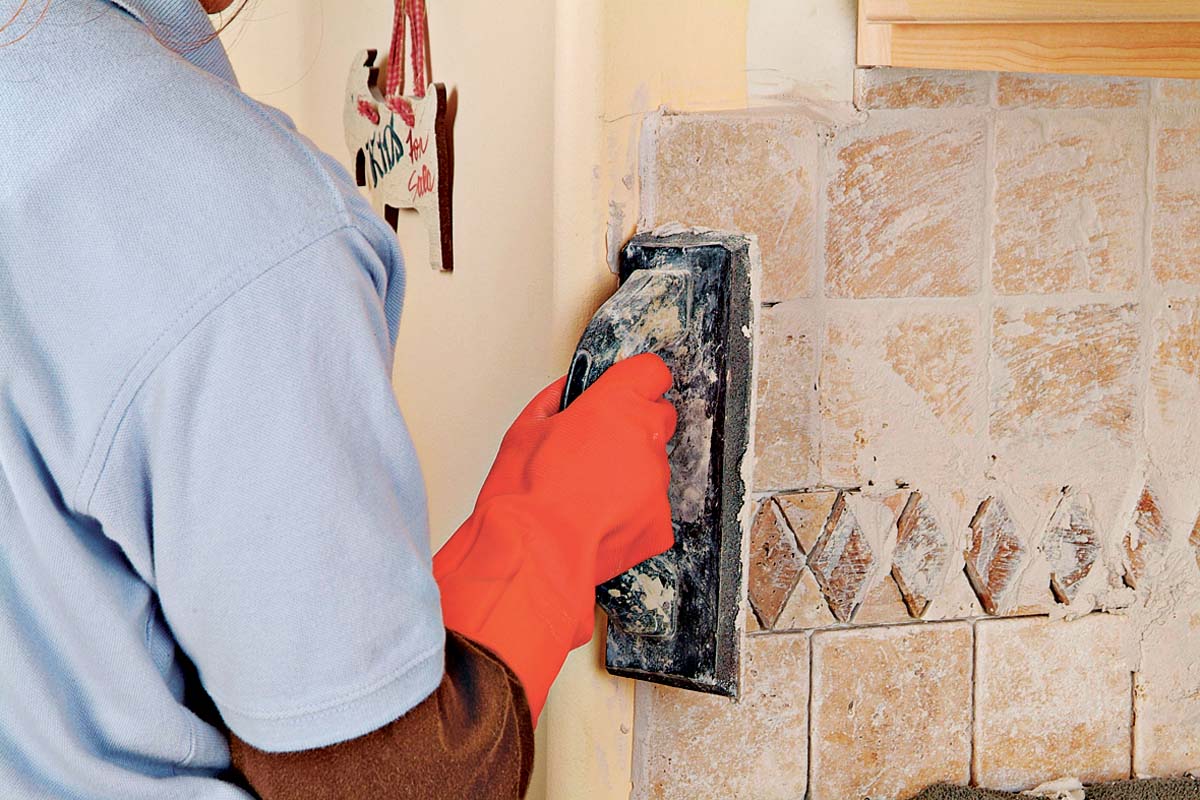 |
3. Be sure to fill the sides and the edges of tile with grout. |
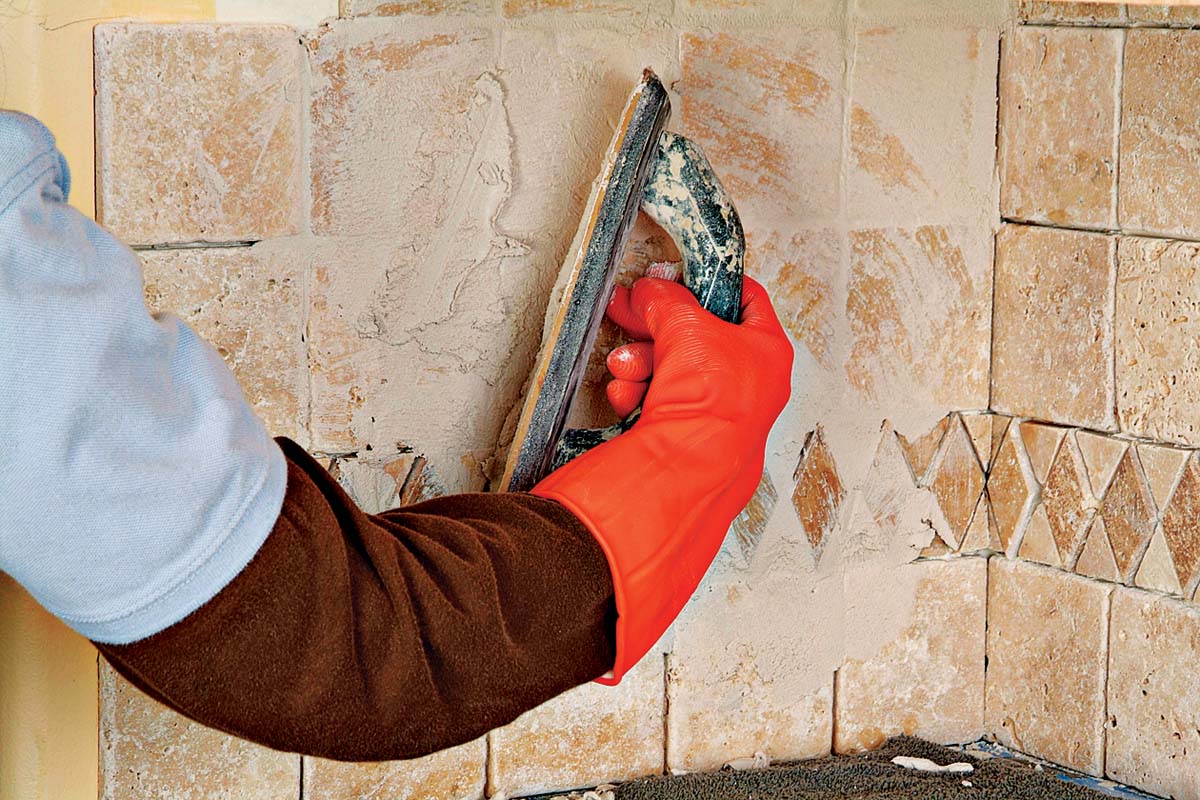 |
4. Remove excess grout by holding the rubber float at a sharp angle to the tile. Move diagonally to the joint. |
| Warning
Always wear work clothes and rubber gloves when you work with grout. The alkaline nature of this stuff severely dries skin and can even cause fingertips to bleed. |
Wipe Down
Once grout has been applied to the joints over a manageable area of your tile installation 1, you’re ready to wipe the excess from the face of the tiles and shape the joints. Shaping enhances the beauty of the tile by forming pleasing, uniform grout lines. It isn’t a difficult process, but it’s important to wipe down and shape at the right time: Act too soon, and you may wipe the grout right out of the joint; too late, and there’ll be lots of extra work removing hardened grout from the face of the tile. Waiting 15 minutes to 30 minutes after grouting is complete is usually about right for average ceramic tile in a 65°F to 75°F room. Watch for evidence of grout drying on the face of the tile or the grout turning a slightly lighter color. Also, try touching a grout joint lightly with the tip of your finger. It should be just firm, leaving only a slight impression. Wiping and shaping only a small area at a time makes it easier to gauge your timing as you work and discover how long each step takes. Your timing will improve as you move on to each new section.
To begin the wiping and shaping process, immerse a sponge in a bucket of cool, clean water. Squeeze the sponge out until it is just damp—no dripping water (remember, excess water is an enemy of grout). Begin with a light touch and start wiping the tile with a circular or diagonal motion. Do not wipe parallel to the joints as this will remove too much grout 2.
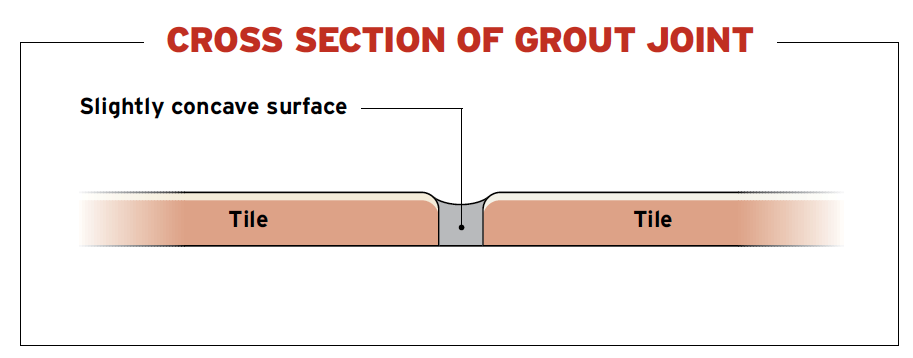
Rinse your sponge frequently, especially when you see its pores filling with grout. The idea is to clean the excess grout from the face of the tile and begin shaping the joints to make them look uniform; not too wide or too narrow. With most tiles, a slightly concave grout joint relative to the face of the tile is correct. If you find a void, hole, or indentation, fill it with a bit of grout 3.
 |
1. Grout joints should be filled and tile surfaces clean. |
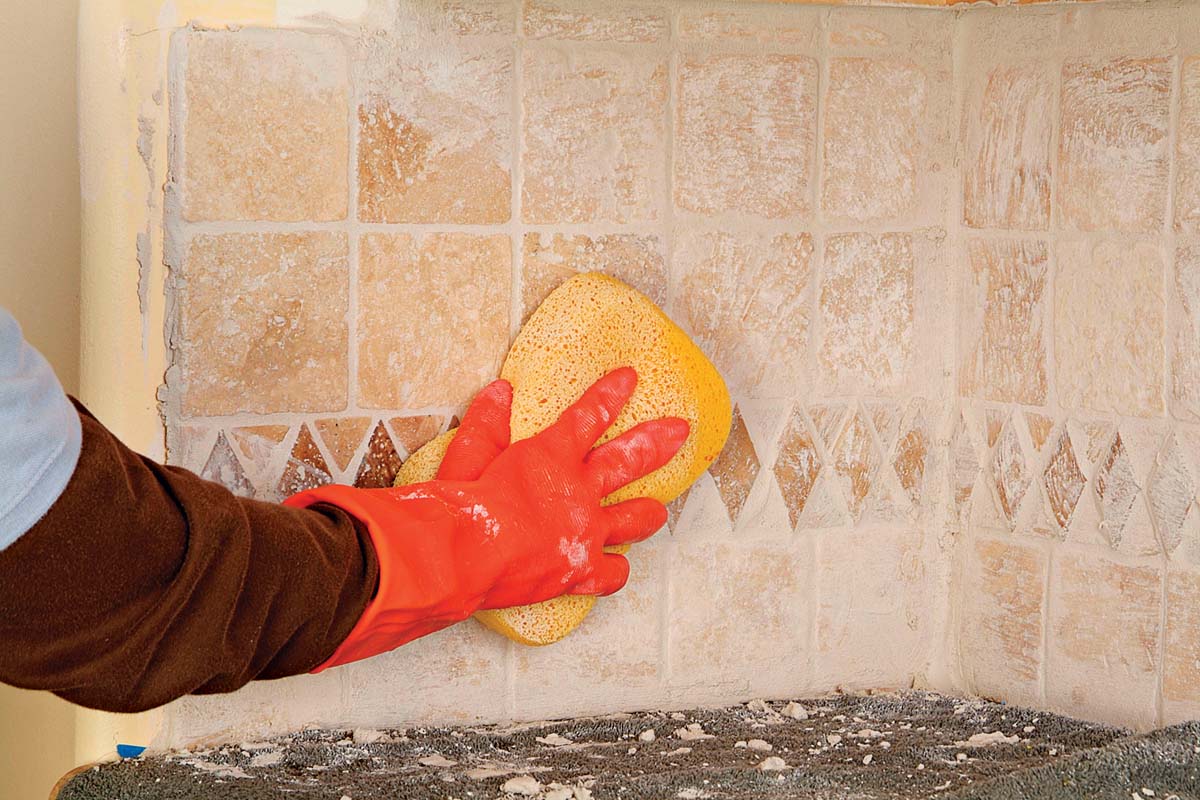 |
2. Wipe diagonally across tiles with a well-squeezed sponge to remove excess grout. |
 |
3. Check for areas of missing grout, especially around relief tiles. Fill with a fingertip full of grout. |
Joint Shaping
After you’ve grouted and wiped down one area, you’ll get a better sense of the timing required for the process. Continue grouting small, manageable areas of your tile installation, following a routine of applying grout, wiping down, shaping the joints, and then moving on to the next area. To save time, apply grout to the next area before wiping down the previous one. This gives the grout in the new section enough setup time, yet allows you to blend the joints of the freshly shaped grout with areas previously completed.
Once your entire installation has been grouted and shaped, check the corners and edges of the tile (for example, where backsplashes meet or the joint between the backsplash and the counter) 1 for pockets of excess grout and clean them out with your razor knife as necessary. You will caulk these areas later. Examine all walls and woodwork adjacent to the tile installation and wipe off any grout that has ended up on these surfaces 2. Wherever trim butts up to walls or cabinets, use a screwdriver or chisel to scrape the grout from the edge of the tiles making the grout flat and smooth 3. Run a dampened sponge or finger over these joints, to smooth them out 4. Once all the tile has been wiped and shaped, rinse your sponge, dampen it, and run it diagonally across the entire installation once again. With big tiles (8 in. sq. or larger), you may wipe just the face of each tile and leave the shaped grout joints alone. With smaller tiles, it may be too difficult to do this, so just wipe with a light touch. This time, the tile faces should look almost completely clean and the joints should be crisp and consistent. Don’t worry about leaving light grout residue on the faces of the tiles.
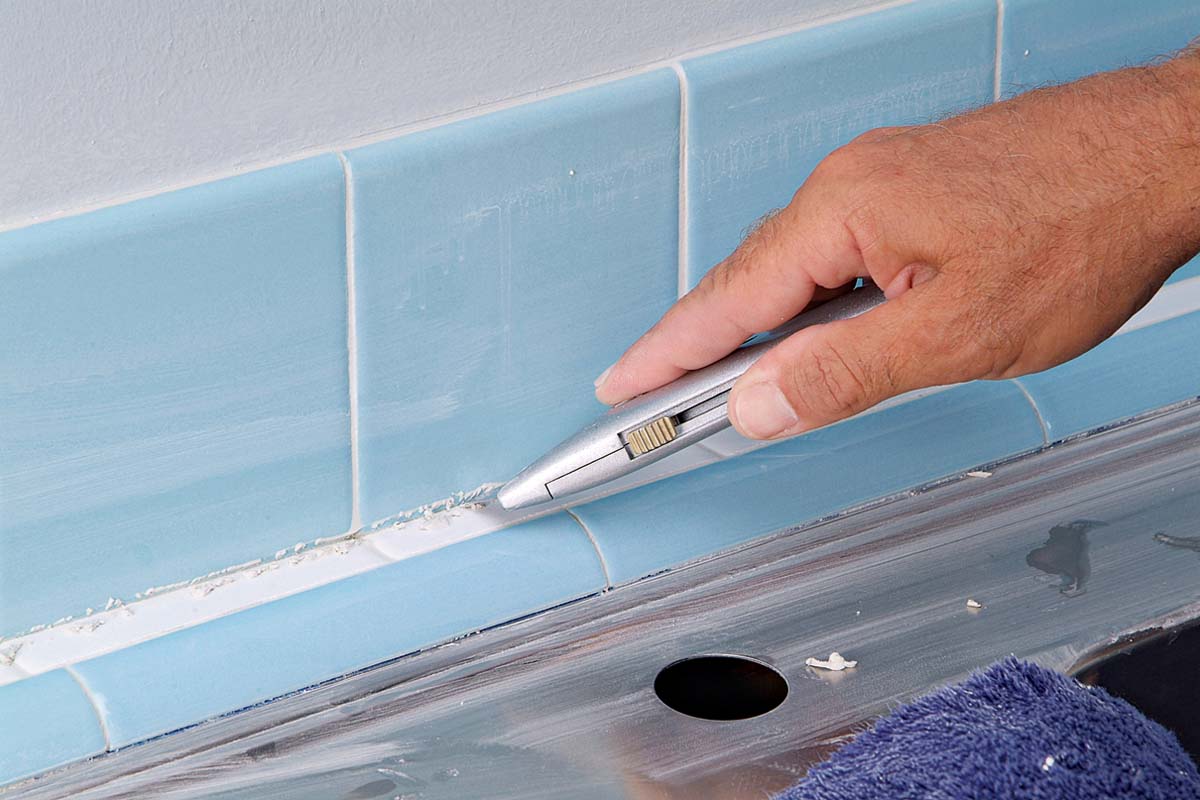 |
1. Clean any grout out from the joint between the backsplash and counter tiles with a utility knife. |
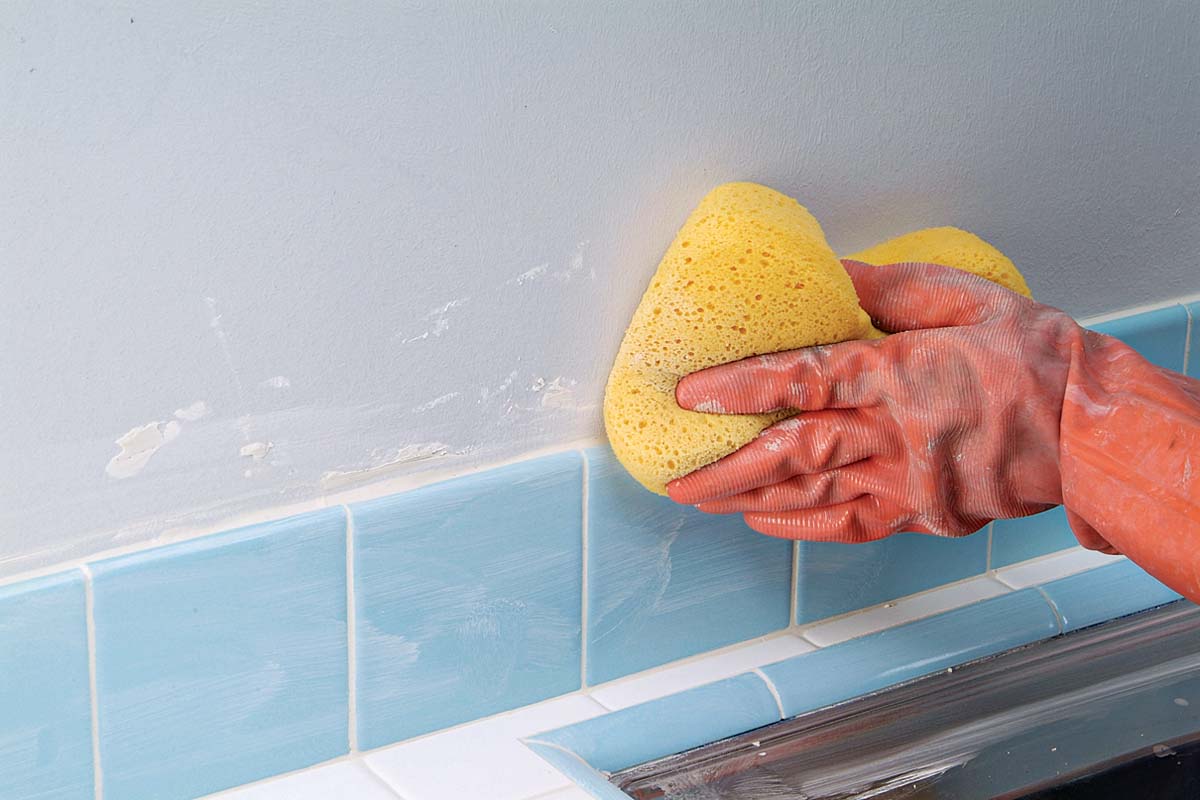 |
2. Sponge and smooth grout that may have collected in the joint on top of the tiles. Sponge excess grout off the walls. |
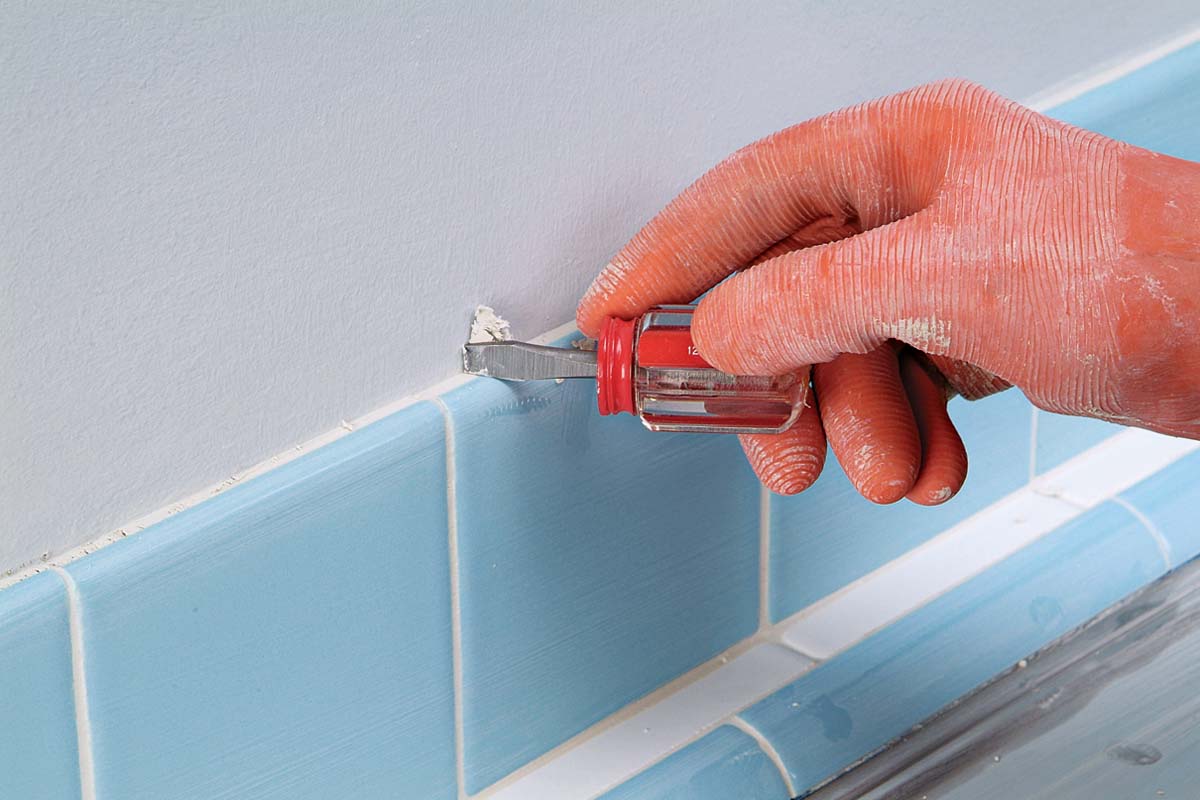 |
3. A screwdriver or chisel can be used to carve any excess grout from the top edge of tiles. |
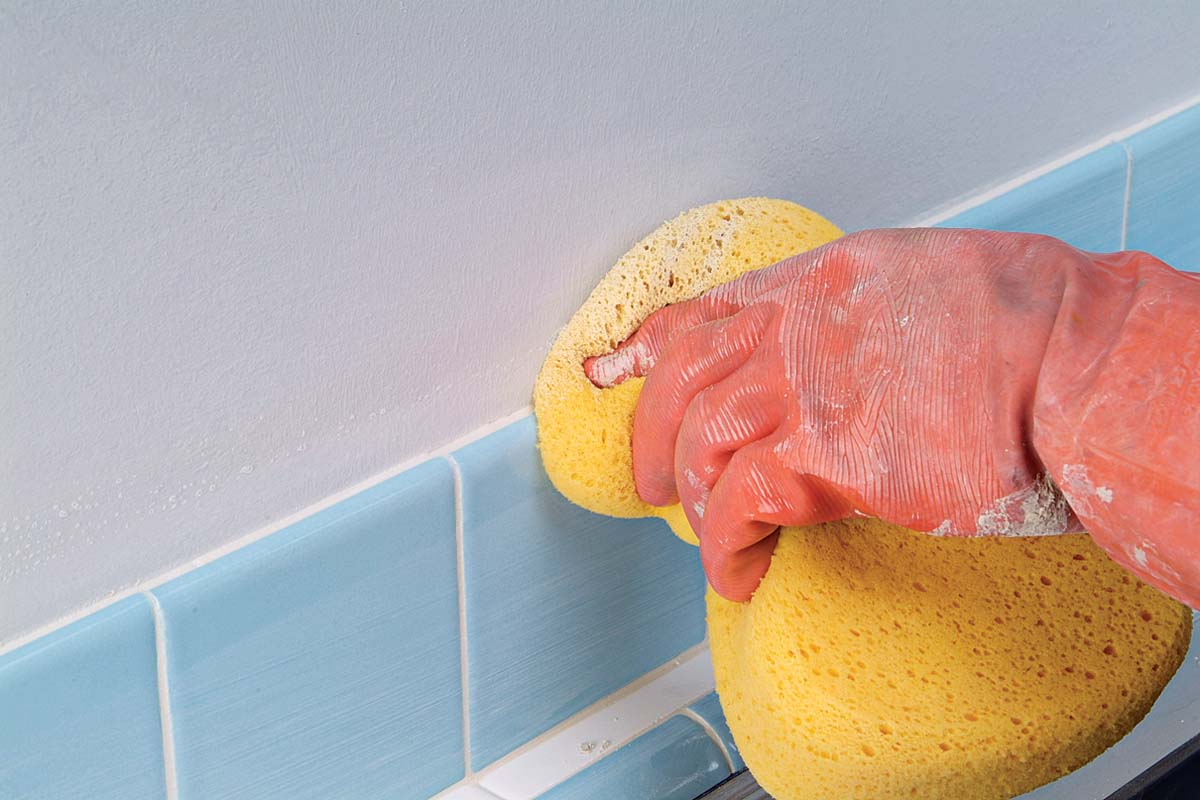 |
4. Sponge areas to make them smooth and for touch ups. |
Final Cleanup
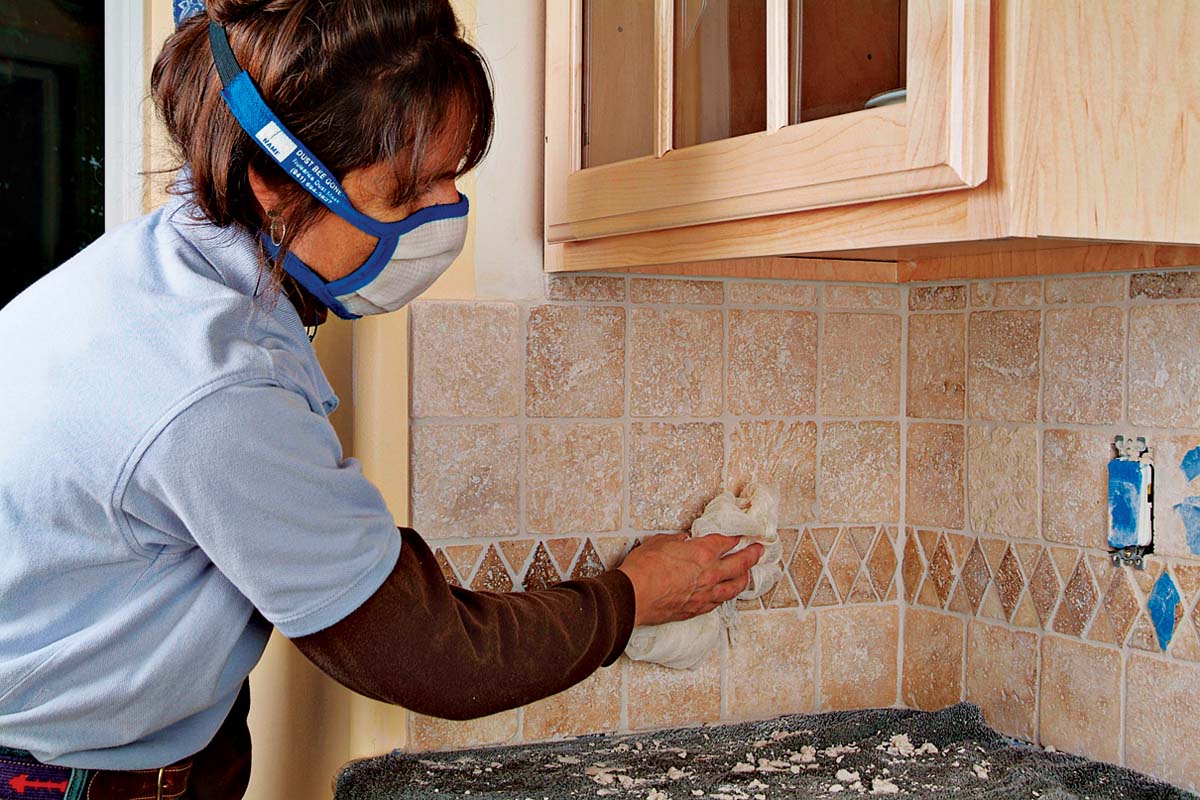
After the tile is clean, allow any grout residue on the tile surface to dry naturally, leaving a light film or haze. Depending on conditions, this may take from 10 minutes to up to 2 hours. If you’re polishing up a new floor, wide joints may stay somewhat wet and malleable for days after grouting. As much as possible, avoid walking on the joints when you polish. Polish or buff off the light grout haze with a dry cheesecloth or soft, lint-free white cloth 1.
Be sure to wear a dust mask or other breathing protection for this procedure as the silica dust that is kicked up is harmful to your lungs. Keep an eye out for small pinholes or imperfections in the grout and for joints you may have dented or dinged. If you spot one, touch it up with a dab of grout and polish it very lightly. Again, use a light touch overall and take care not to change the shape of the grout joints. The tile itself will return to its natural luster after wiping 2.
You must allow the grout joints to cure before the tile is ready for use. Curing is the chemical process during which grout gains strength and density. During curing, grout is vulnerable and porous. Full curing can take up to 6 months or more. But fortunately, most types of grout cure enough in 2 days to 3 days to make tile surfaces usable and floors ready to walk on.
It’s important to let the grout joints dry naturally, ideally at a moderate room temperature (64°F to 75°F). Do not attempt to artificially dry the tile with a fan, blow dryer, or portable heater. If you accelerate the drying process, the water that’s necessary for curing evaporates too quickly, resulting in weak or cracked grout joints.
If you have the time and patience, you can actually make your grout significantly stronger by keeping it moist for the first few days after application. Slowing the curing process this way makes a huge difference in the density and ease of future cleaning of the grout. Use a damp sponge or mop to moisten the joints once a day for 2 days or 3 days, starting 24 hours after you complete grouting. Use just enough water to darken the joint but do not leave standing water.
A successful grout job has even color and joints filled to the same depth 3.
 |
1. Remove any light grout haze from tile surface with a clean, dry cheesecloth. |
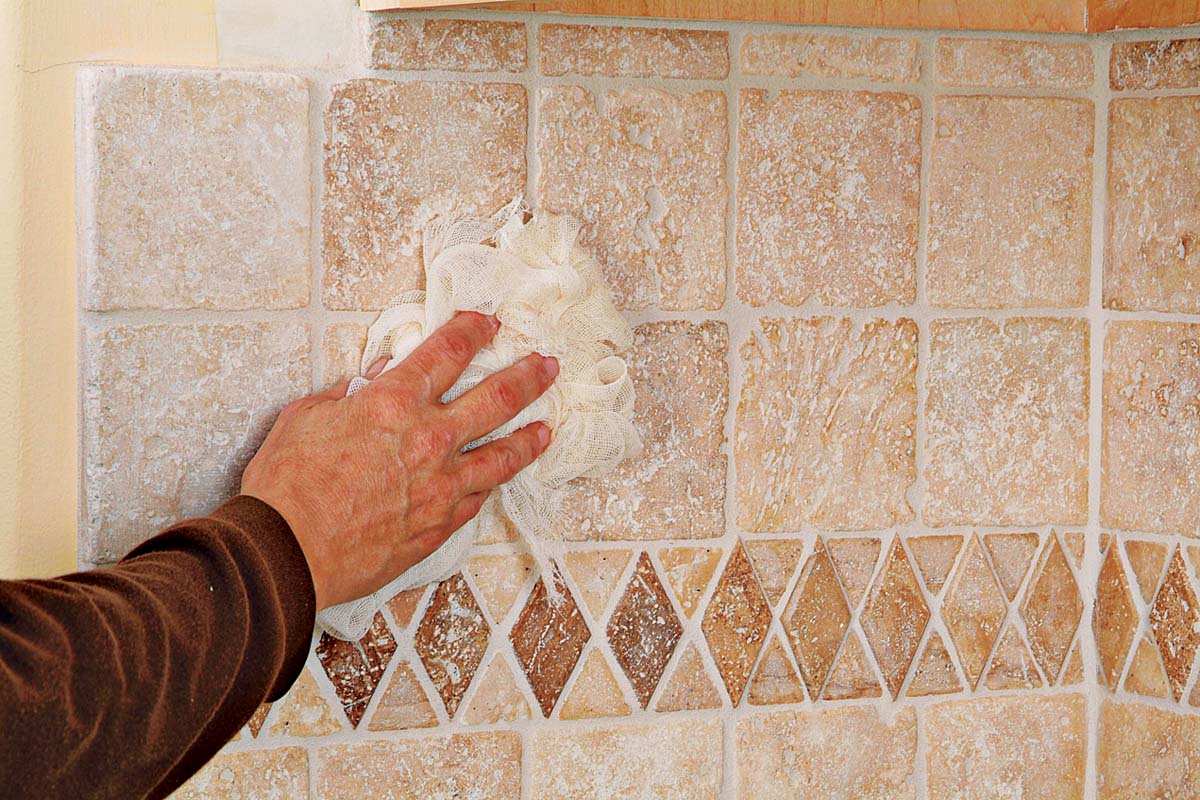 |
2. Polishing with cheesecloth restores the luster of the tile. |
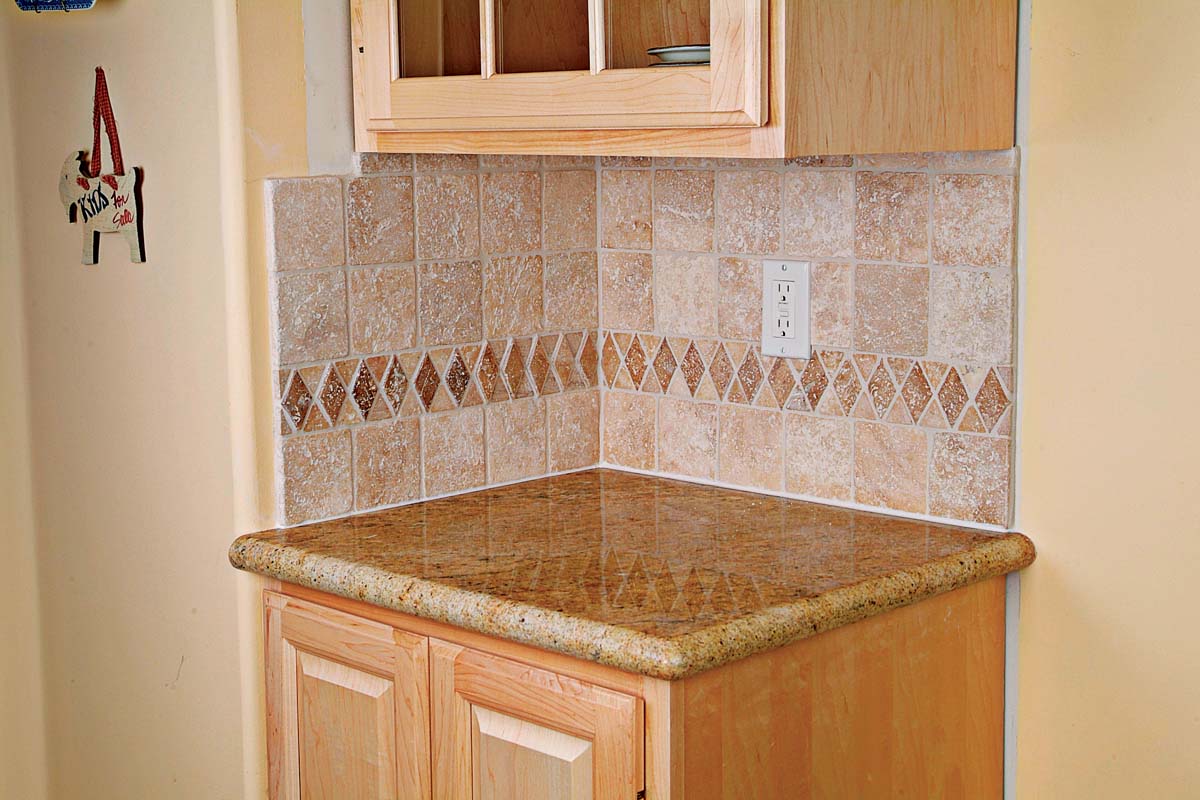 |
3. The finished installation. |
 Excerpted from Tiling Complete, 2nd Edition by Robin Nicholas and Michael Schweit.
Available in the Taunton Store and at Amazon.com.
