FHB Logo Facebook LinkedIn Email Pinterest Twitter X Instagram Tiktok YouTube Plus Icon Close Icon Navigation Search Icon Navigation Search Icon Arrow Down Icon Video Guide Icon Article Guide Icon Modal Close Icon Guide Search Icon Skip to content
Subscribe
Log In
  • How-To
  • Design
  • Tools & Materials
  • Restoration
  • Videos
  • Blogs
  • Forum
  • Magazine
  • Members
  • FHB House
  • Podcast
Log In

Fine Homebuilding Project Guides

Siding & Exterior Trim

Guide Home
  • Choosing Siding
  • Installing Siding
  • Choosing Exterior Trim
  • Installing Exterior Trim
  • Repairing Siding & Trim
How-To

Aluminum Fascia Fabrication and Installation

Get tips for using a sheet metal brake to fabricate and fit new fascia out of aluminum coil stock before installing vinyl siding.

By Andy Engel
  • X
  • facebook
  • linkedin
  • pinterest
  • email
  • add to favorites Log in or Sign up to save your favorite articles

When I install vinyl siding on a house, I use aluminum coil stock for the fascia, which, like the vinyl siding itself, is low maintenance. Before you can install the fascia, you first need to cut and bend the aluminum to fit.

Preparing the aluminum fascia

Start with the eaves fascia, cutting and bending as many sections of aluminum flashing as you need to cover it. In general, you’ll cut the flashing first, hem it (bend an edge completely back on itself to stiffen it and to avoid a visible cut edge), and then bend it to conform to whatever structural element it’s going to cover.

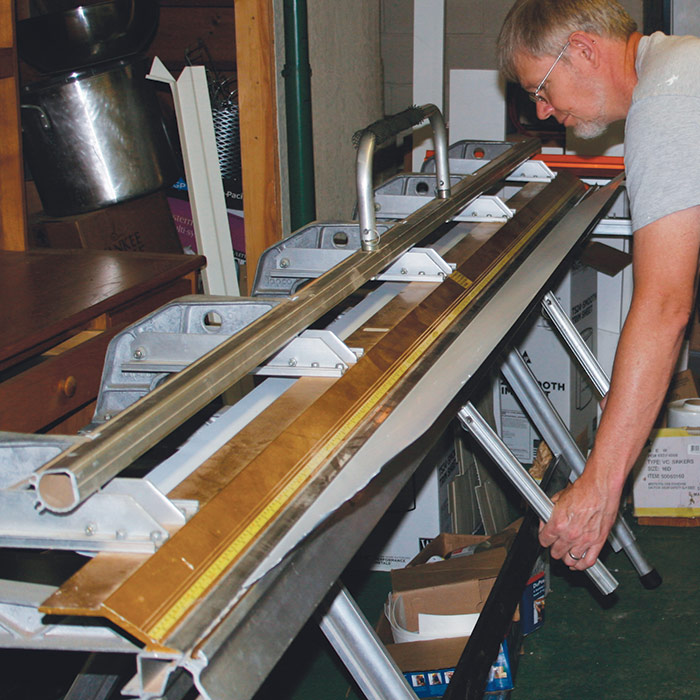
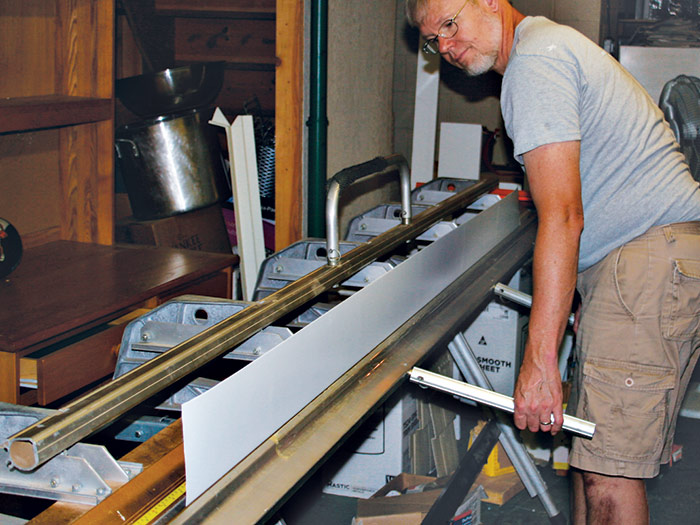
First, using snips, cut the flashing to a length that will fit the brake (see “Siding Brakes”). Cut as many pieces as you’ll need to cover the subfascia, and be sure the total length of the pieces will include any laps (about 2 in. each) and any extension over the ends of the fascia board.


siding-brakesSiding Brakes

Siding or aluminum brakes are essential tools for making crisp bends in finish aluminum. But they cost thousands of dollars, far more than makes sense for a DIYer. Fortunately, they can be rented.

Plan to bend all the metal for the job at one time so you can rent the tool for just a day. Bend up more than you need to allow for mistakes. Alternatively, you may be able to hire a contractor to handle this part of the job for you.

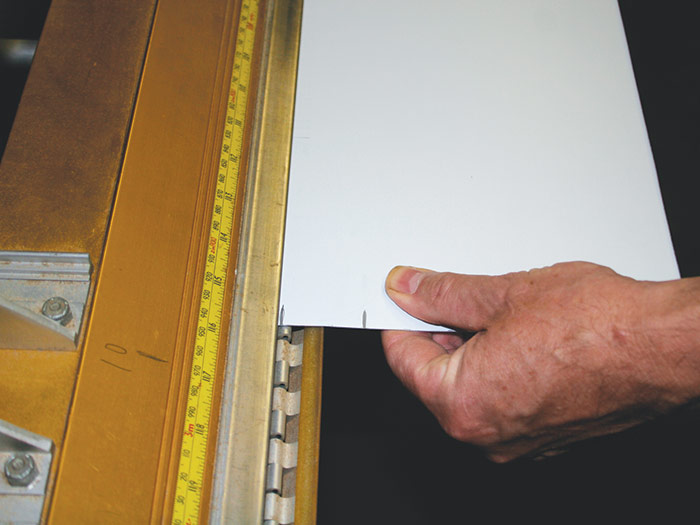
Using a pencil, mark the widths between bends, the width of the hem, and the overall width of the piece on each end of the stock. 1 For example, in this case I wanted the flashing to hide the bottom edge of the fascia, covering the thickness of its 2× stock and extending an additional 1 in. over the soffit-panel edges. I also wanted a 3⁄4-in. hem on that extension, to stiffen the flashing and present a finished edge. This meant that I needed to cut a piece 9 1⁄4 in. wide to start with (6 in. for the face of the fascia plus 1 in. slipped behind the drip edge, 2 1⁄2 in. for the thickness of the fascia board plus the extension over the soffit, and 3⁄4 in. for the hem). So, I marked each of these dimensions on the aluminum stock.

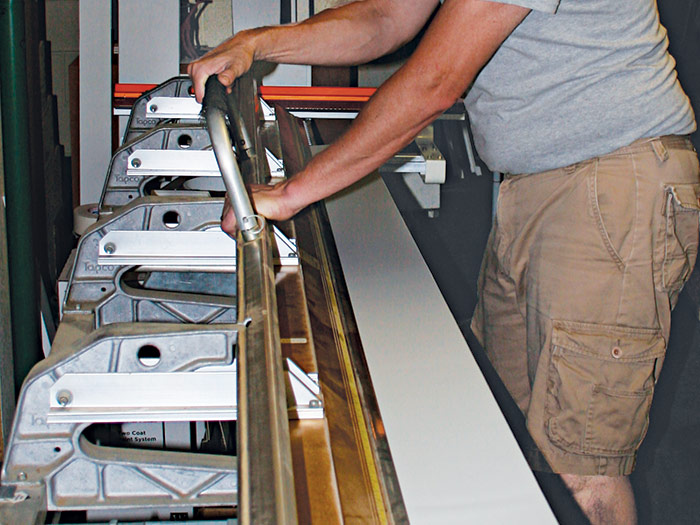
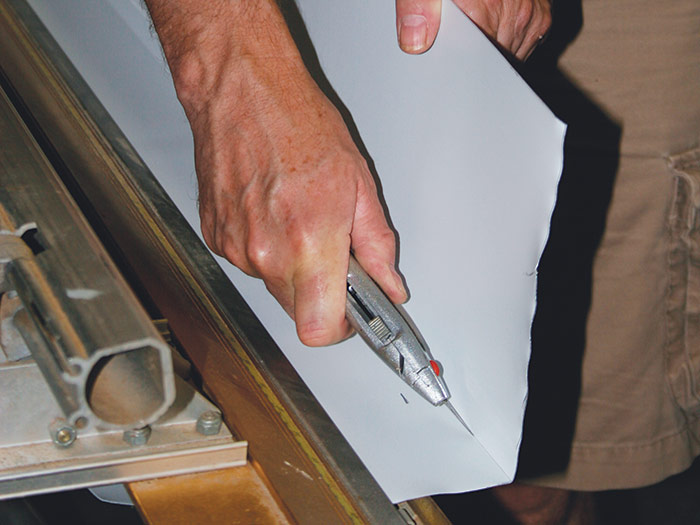
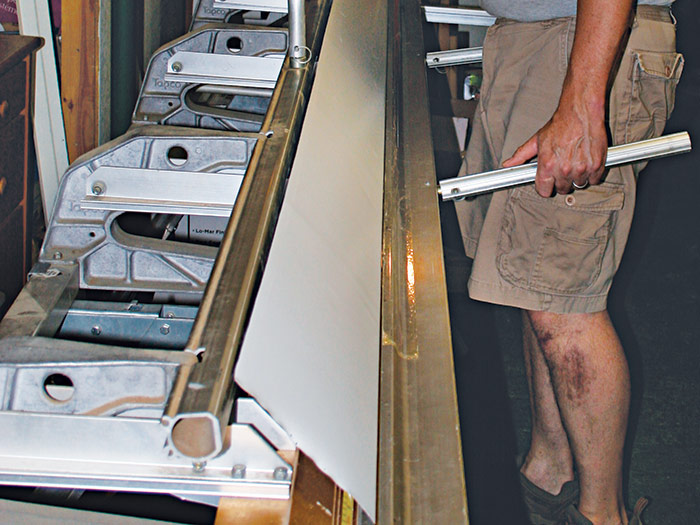
To cut the aluminum flashing, slip the metal into the brake, align the pencil marks with the jaws, and clamp it shut. 2 Grab both sides of the bending handle and raise it until the metal is bent at about 90 degrees. 3 Slip the metal out a couple of inches and clamp it again. Score the inside of the bend with a sharp knife once or twice, then reclamp it on your marks and bend it back and forth until it breaks. Some brakes have slitters that negate the need for this step (see “Cutting Coil Stock”).

Mark the bends and cuts in the aluminum
1) Mark the bends and cuts on both ends of the aluminum coil stock. For each bend or cut, line the marks up with the jaws of the brake.

clamp the jaws of the brake to grasp the sheet metal
2) When a pair of pencil marks is lined up properly, clamp the jaws of the brake on the metal.

pull the handles up
3) Whether you’re making a bend or a cut, grab the handles of the brake and pull them up to about 90 degrees.

Cutting Coil Stock

Reclamp and score the aluminum sheet metal
To cut coil stock, bend it, then pull it out of the jaws an inch or so. Reclamp and score the metal.

flexing aluminum sheet back and forth in the brake to cut it
After scoring the metal, flexing it back and forth should break it along the score. The edges will be sharp.


If you’re just putting a bend in the flashing, you can skip the scoring and rebending steps, of course.

To hem a flashing, bend the metal as far as the brake will go. That won’t fully bend the metal back on itself, however, so here’s what you do: release the clamp, take the metal out of the brake, and slip the hem bend under the jaws. Clamp the brake tightly to cinch the hem. With thicker metal, you may need to push the hem flatter with a hammer before clamping it in the brake.

WARNING: Be careful when working with sheet metal. The edges can be sharp, particularly the cut edges. Gloves are strongly recommended.


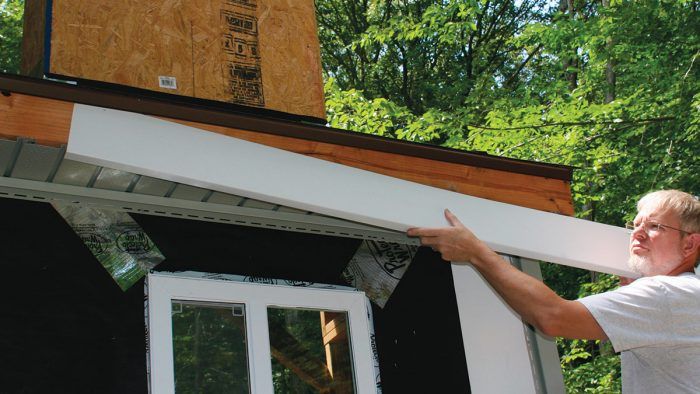
Installing aluminum fascia

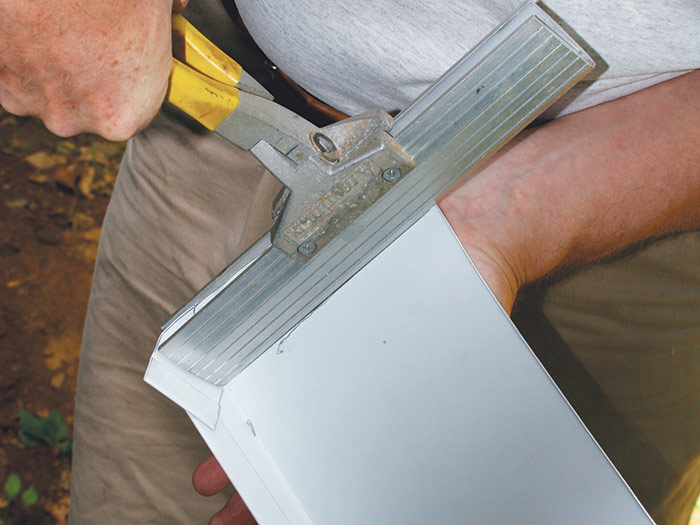
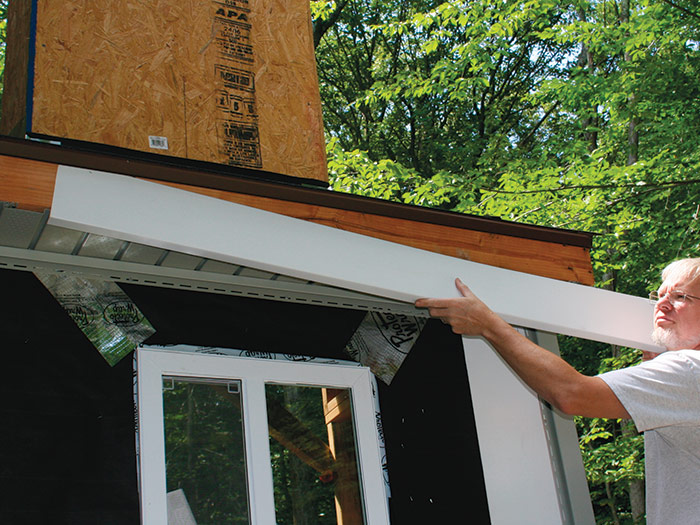
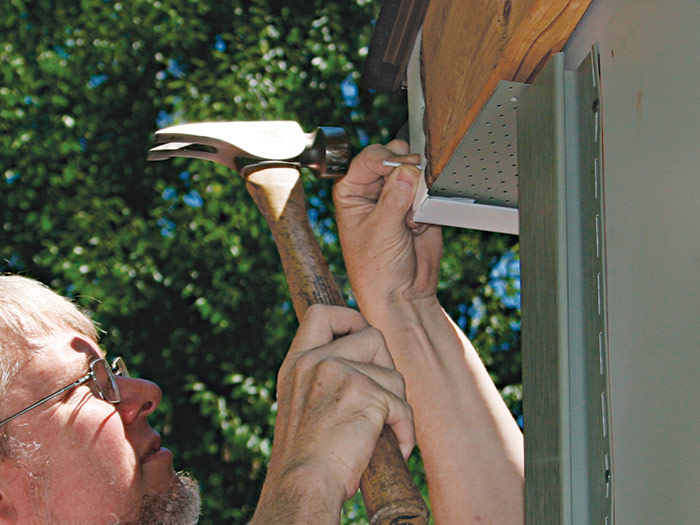
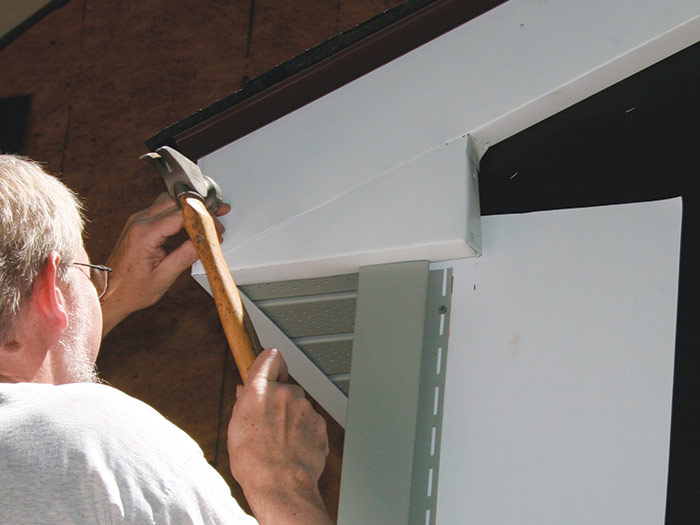
Snip the bend in the fascia that will cover the bottom of the subfascia about 1 in. from the end and use a hand bender to bend the flashing so it will wrap around the end of the subfascia board by about 1 in. 1 Slip the flashing under the drip edge and snug it to the subfascia. 2 Nail the bent end in place with 1-in. painted aluminum nails. 3 Then nail along the length of the aluminum about every 2 ft. Don’t use stainless-steel nails—they’ll corrode the aluminum coil stock. Lap neighboring panels by about 2 in., and consider the direction from which they’ll be viewed as you did with drip edge.

Bend a return in the end of the sheet metal
1) Bend a return in the end of the eaves fascia so it wraps the corner by 1 in. or so.

Slip the cut and formed piece of aluminum fascia
2) Slip the cut and formed piece of aluminum for the eaves fascia behind the drip edge.

Nail the returned end of the aluminum fascia
3) Nail the returned end of the eaves fascia to the subfascia. Nail the fascia to the eave with painted aluminum nails.

Coil Stock

Powder-coated aluminum coil stock is sold in rolls of varying lengths and widths. I usually buy 50 ft. by 2 ft., but it depends on what jobs are on the horizon. Don’t be tempted to open the top of the box and pull out the roll. It’s a lot easier to cut a slot along one of the box’s long corners and feed the coil out through there. That keeps the rest of the coil in the box where it’s safe. Alternatively, you can buy vinyl coil stock that bends much like the aluminum.


I treat the rake trim similarly, although in this case I lap the upper pieces over the lower ones to better drain water, even though that makes the seams more visible viewed from below—durability trumps aesthetics.

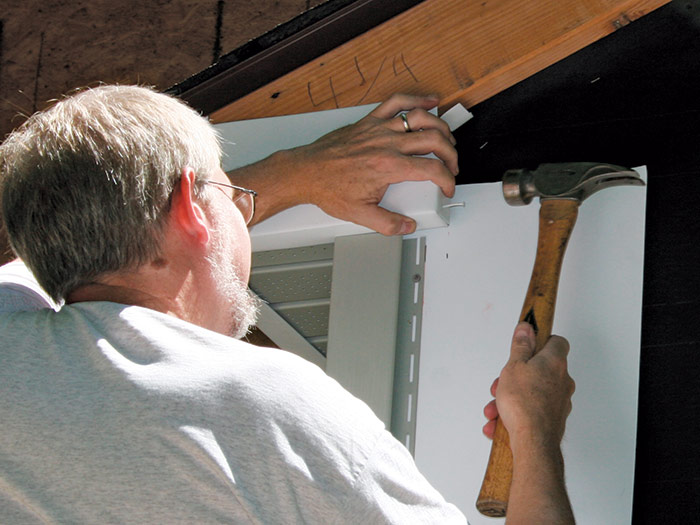
Bend a custom piece to fit around the cornice return or pork chop, wide enough that its upper edge will lap the gable subfascia by about 1 in. Snip the side corner of this piece to create a small tab that will bend on the gable subfascia. Nail your custom piece to the cornice return. 4

Cut and bend a custom piece of aluminum fascia
4) Cut and bend a custom piece to fit the cornice return, lapping the returned end of the eaves fascia. Nail it in place.

Bend the rake fascia to fit
5) Bend the rake fascia to fit. Hold it roughly in place and mark its bottom fold where it meets both sides of the cornice return.

Cut the bottom fold on aluminum fascia
6) Cut the bottom fold of the rake fascia on the marks you made and the fold line between them. Fit and nail the rake fascia.

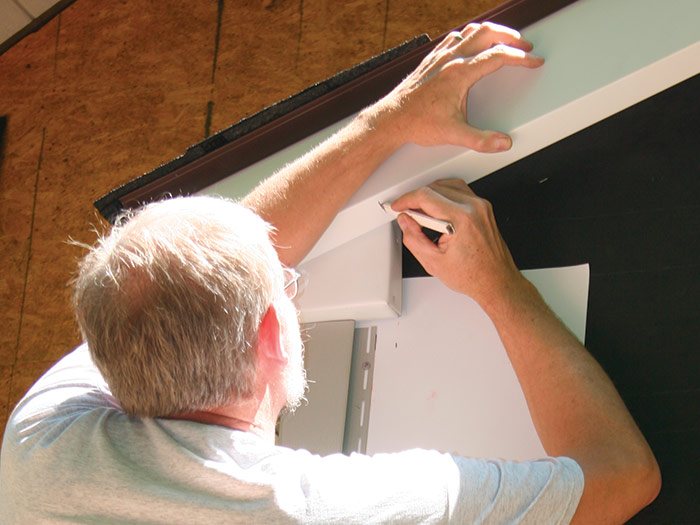
Cut and bend the rake fascia, if you haven’t done so already. Hold the gable fascia in place and mark the points where it meets both the gable return and the eaves fascia. 5 Cut away the bottom of the bend at your marks, leaving a tab of flashing that you’ll bend and nail on the end of the pork chop. You can cut the rake fascia about 1 in. long and bend it around the face of the eaves fascia as you install it or trim it flush with the eaves fascia—that’s an aesthetic choice I swing back and forth on. 6


Carpentry CompleteExcerpted from Carpentry Complete: Expert Advice from Start to Finish, by Andy Engel

Available at Amazon.com.


Previous: How to Install a Vinyl Soffit Next: Vinyl Siding Done Right

Guide

Siding & Exterior Trim

Chapter

Installing Siding

Sign up for eletters today and get the latest how-to from Fine Homebuilding, plus special offers.

Signing you up...

This site is protected by reCAPTCHA and the Google Privacy Policy and Terms of Service apply.
See all newsletters
See all newsletters

Log in or create an account to post a comment.

Sign up Log in

Become a member and get full access to FineHomebuilding.com

Siding & Exterior Trim

Siding & Exterior Trim

Trusted, comprehensive guidance from the pros for choosing, installing, and repairing siding and exterior trim

View Project Guide

View All Project Guides »

Become a member and get unlimited site access, including the Siding & Exterior Trim Project Guide.

Start Free Trial

Choosing Siding
  • Materials
  • Design Options
Installing Siding
  • Siding Basics
  • Lap Siding
  • Shingle Siding
  • Board & Batten
  • Fiber Cement and Composite Siding
  • Vinyl Siding
  • Masonry Claddings
Choosing Exterior Trim
  • Trim Materials
  • Trim Design
Installing Exterior Trim
  • Trim Basics
  • Roof Eaves Trim
  • Corner Boards
  • Corbels & Brackets
  • Window & Door Trim
Repairing Siding & Trim
  • Trim Repairs
  • Siding Repairs

Fine Home Building

Newsletter Sign-up

  • Fine Homebuilding

    Home building tips, offers, and expert advice in your inbox.

  • Green Building Advisor

    Building science and energy efficiency advice, plus special offers, in your inbox.

  • Old House Journal

    Repair, renovation, and restoration tips, plus special offers, in your inbox.

Signing you up...

This site is protected by reCAPTCHA and the Google Privacy Policy and Terms of Service apply.
See all newsletters

Follow

  • Fine Homebuilding

    Dig into cutting-edge approaches and decades of proven solutions with total access to our experts and tradespeople.

    Start Free Trial Now
    • Facebook
    • Instagram
    • X
    • LinkedIn
  • GBA Prime

    Get instant access to the latest developments in green building, research, and reports from the field.

    Start Free Trial Now
    • Facebook
    • YouTube
  • Old House Journal

    Learn how to restore, repair, update, and decorate your home.

    Subscribe Now
    • Facebook
    • Instagram
    • X

Membership & Magazine

  • Online Archive
  • Start Free Trial
  • Magazine Subscription
  • Magazine Renewal
  • Gift a Subscription
  • Customer Support
  • Privacy Preferences
  • About
  • Contact
  • Advertise
  • Careers
  • Terms of Use
  • Site Map
  • Do not sell or share my information
  • Privacy Policy
  • Accessibility
  • California Privacy Rights

© 2025 Active Interest Media. All rights reserved.

Fine Homebuilding receives a commission for items purchased through links on this site, including Amazon Associates and other affiliate advertising programs.

  • Home Group
  • Antique Trader
  • Arts & Crafts Homes
  • Bank Note Reporter
  • Cabin Life
  • Cuisine at Home
  • Fine Gardening
  • Fine Woodworking
  • Green Building Advisor
  • Garden Gate
  • Horticulture
  • Keep Craft Alive
  • Log Home Living
  • Military Trader/Vehicles
  • Numismatic News
  • Numismaster
  • Old Cars Weekly
  • Old House Journal
  • Period Homes
  • Popular Woodworking
  • Script
  • ShopNotes
  • Sports Collectors Digest
  • Threads
  • Timber Home Living
  • Traditional Building
  • Woodsmith
  • World Coin News
  • Writer's Digest
Active Interest Media logo
X
X
This is a dialog window which overlays the main content of the page. The modal window is a 'site map' of the most critical areas of the site. Pressing the Escape (ESC) button will close the modal and bring you back to where you were on the page.

Main Menu

  • How-To
  • Design
  • Tools & Materials
  • Video
  • Blogs
  • Forum
  • Project Guides
  • Reader Projects
  • Magazine
  • Members
  • FHB House

Podcasts

  • FHB Podcast
  • ProTalk

Webinars

  • Upcoming and On-Demand

Podcasts

  • FHB Podcast
  • ProTalk

Webinars

  • Upcoming and On-Demand

Popular Topics

  • Kitchens
  • Business
  • Bedrooms
  • Roofs
  • Architecture and Design
  • Green Building
  • Decks
  • Framing
  • Safety
  • Remodeling
  • Bathrooms
  • Windows
  • Tilework
  • Ceilings
  • HVAC

Magazine

  • Current Issue
  • Past Issues
  • Magazine Index
  • Subscribe
  • Online Archive
  • Author Guidelines

All Access

  • Member Home
  • Start Free Trial
  • Gift Membership

Online Learning

  • Courses
  • Project Guides
  • Reader Projects
  • Podcast

More

  • FHB Ambassadors
  • FHB House
  • Customer Support

Account

  • Log In
  • Join

Newsletter

Get home building tips, offers, and expert advice in your inbox

Signing you up...

This site is protected by reCAPTCHA and the Google Privacy Policy and Terms of Service apply.
See all newsletters
See all newsletters

Follow

  • X
  • YouTube
  • instagram
  • facebook
  • pinterest
  • Tiktok

Join All Access

Become a member and get instant access to thousands of videos, how-tos, tool reviews, and design features.

Start Your Free Trial

Subscribe

FHB Magazine

Start your subscription today and save up to 70%

Subscribe

We hope you’ve enjoyed your free articles. To keep reading, become a member today.

Get complete site access to expert advice, how-to videos, Code Check, and more, plus the print magazine.

Start your FREE trial

Already a member? Log in

Privacy Policy Update

We use cookies, pixels, script and other tracking technologies to analyze and improve our service, to improve and personalize content, and for advertising to you. We also share information about your use of our site with third-party social media, advertising and analytics partners. You can view our Privacy Policy here and our Terms of Use here.

Cookies

Analytics

These cookies help us track site metrics to improve our sites and provide a better user experience.

Advertising/Social Media

These cookies are used to serve advertisements aligned with your interests.

Essential

These cookies are required to provide basic functions like page navigation and access to secure areas of the website.

Delete My Data

Delete all cookies and associated data