
Foolproof Inset Cabinet Doors
With the right tools and techniques, there's no need to be afraid of these traditional doors.
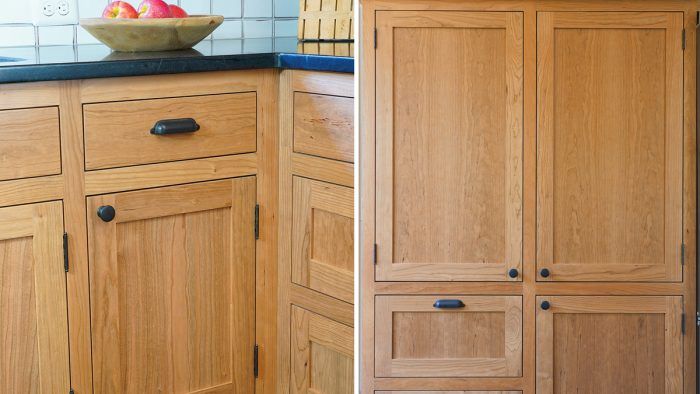
Synopsis: Inset doors offer a clean look for furniture or cabinets. Stefan Straka explains that when you mount a cabinet door with butt hinges, there are two tools that are key: a set of digital calipers and a track saw.
Whether you’re building a piece of furniture or a kitchen’s worth of cabinets, there’s no substitute for the clean look of inset doors with traditionally mortised butt hinges. Many of us approach our first set of these doors with trepidation, however. You’ve put a lot of time and effort into the project, and now you have one chance to fit each door with even reveals—the gaps between the door and the face frame.
The challenge with inset doors lies in the way they are boxed in on all sides, allowing your eye to pick up the slightest differences in the reveals. Things would be easier if you were fitting perfect rectangles into other perfect rectangles, but that often isn’t the case with custom cabinetry. Wood moves, face frames shift during glue-up, and uneven clamping pressure can leave doors slightly out of square. Using a butt hinge—with no adjustability—adds another level of difficulty, requiring that you trim and mount your door perfectly the first time.
Most of the door-fitting techniques I learned early on involved some combination of using a large sled on the tablesaw, educated guesswork for shimming the door on the sled, and carefully tuned hand planes. I was never satisfied with the process, and was always looking for a more streamlined and repeatable approach. The method I use now removes the guesswork and the many trips back and forth from the tablesaw or bench to creep up on the right reveal for each edge. It’s faster and relatively foolproof.
In this article, I’ll take you through the steps for mounting a door with butt hinges. There are two tools at the heart of my approach: a set of digital calipers and a track saw. The calipers help me size the wood shims I use to position the door in the opening and mark its edges, and the track saw makes clean, precise trim cuts at my pencil marks. If you don’t own a track saw, I hope this article helps convince you of its value. Compact and portable yet extremely accurate, it’s often the first tool I recommend to people asking for guidance when setting up shop.
Following the steps in this article will ensure that all your doors and drawers have consistent reveals around them, giving your cabinetry a very refined look. Another subtle detail I like is that the bottom door rails, which don’t get trimmed, end up slightly wider than the top ones.
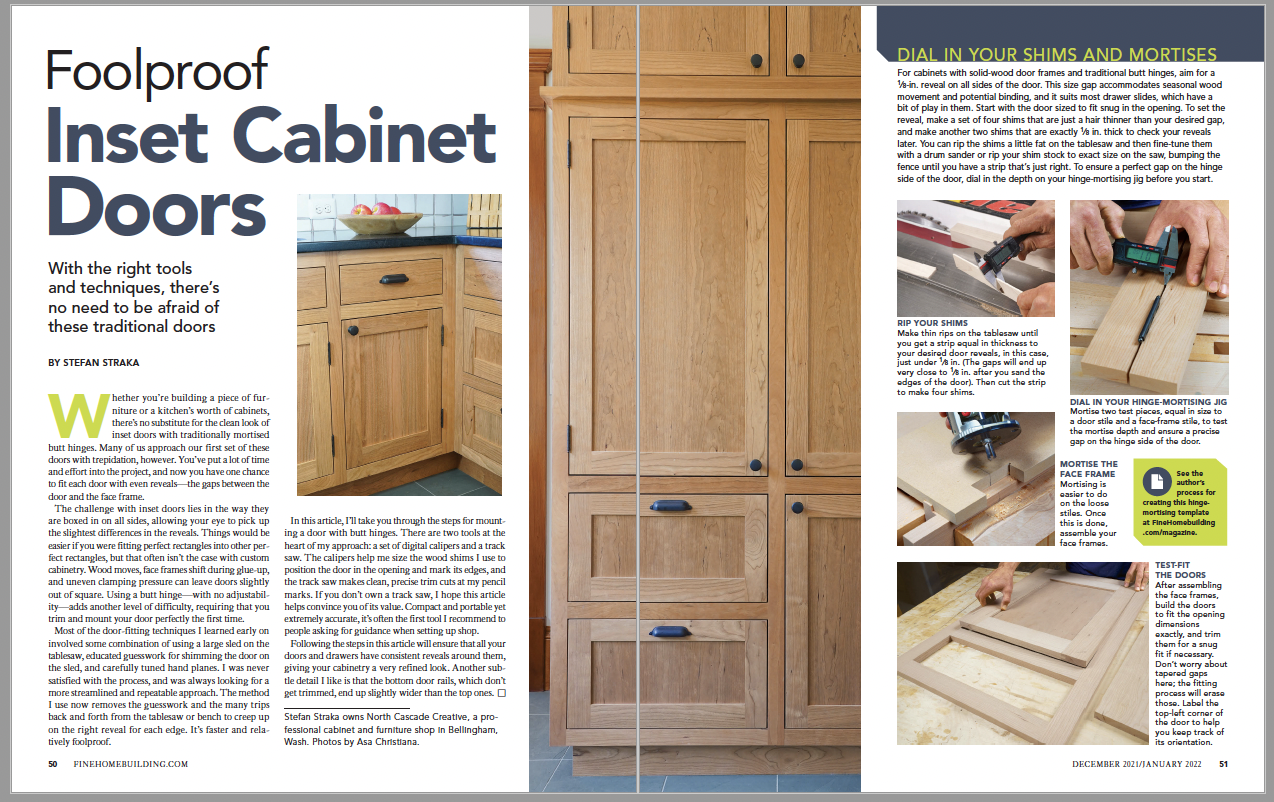
Dial in your shims and mortises
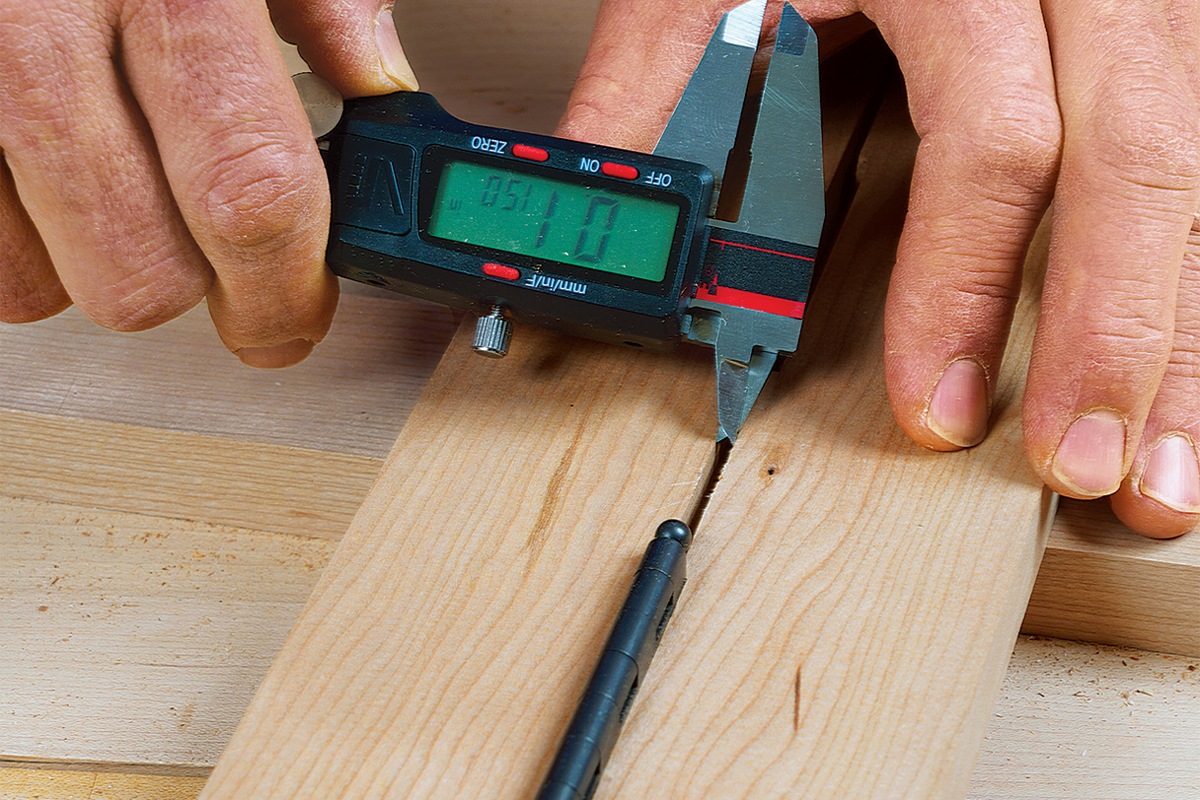
For cabinets with solid-wood door frames and traditional butt hinges, aim for a 1⁄8-in. reveal on all sides of the door. This size gap accommodates seasonal wood movement and potential binding, and it suits most drawer slides, which have a bit of play in them. Start with the door sized to fit snug in the opening. To set the reveal, make a set of four shims that are just a hair thinner than your desired gap, and make another two shims that are exactly 1⁄8 in. thick to check your reveals later. You can rip the shims a little fat on the tablesaw and then fine-tune them with a drum sander or rip your shim stock to exact size on the saw, bumping the fence until you have a strip that’s just right. To ensure a perfect gap on the hinge side of the door, dial in the depth on your hinge-mortising jig before you start.
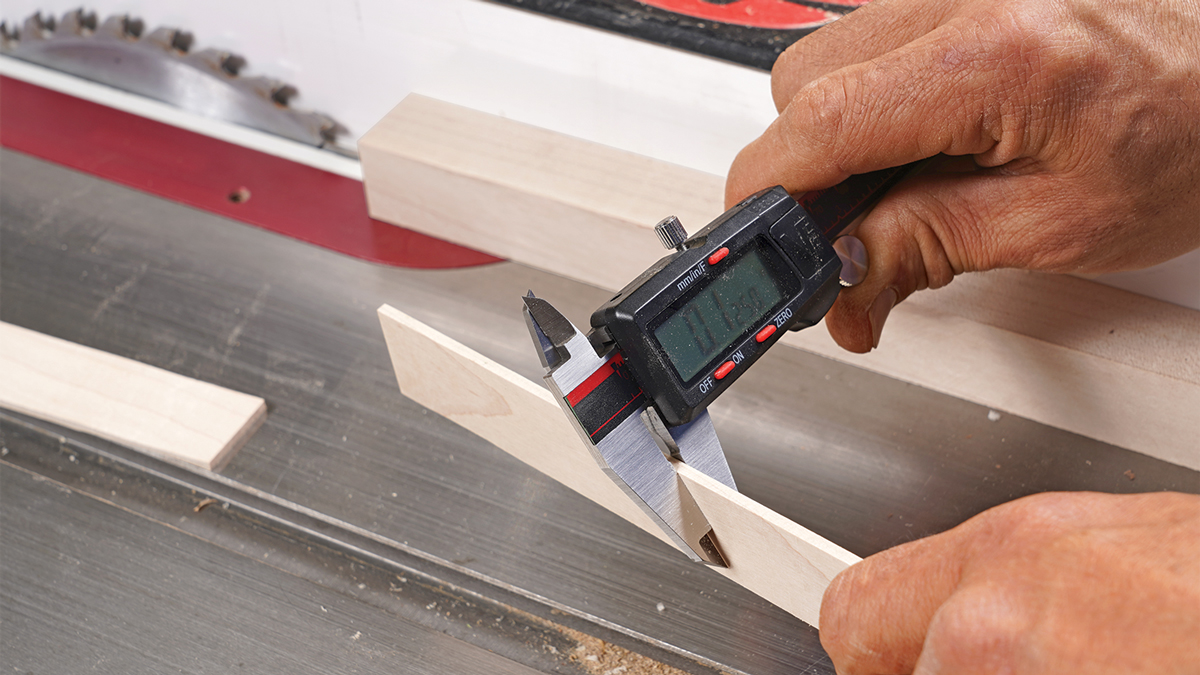
Rip your shims. Make thin rips on the tablesaw until you get a strip equal in thickness to your desired door reveals, in this case, just under 1⁄8 in. The gaps will end up very close to 1⁄8 in. after you sand the edges of the door).
Dial in your hinge-mortising jig. Mortise two test pieces, equal in size to a door stile and a face-frame stile, to test the mortise depth and ensure a precise gap on the hinge side of the door.
Mortise the face frame. Mortising is easier to do on the loose stiles. Once this is done, assemble your face frames.

Test-fit the doors. After assembling the face frames, build the doors to fit the opening dimensions exactly, and trim them for a snug fit if necessary. Don’t worry about tapered gaps here; the fitting process will erase those. Label the top-left corner of the door to help you keep track of its orientation.
Trim the top to fit the bottom
To begin, the doors need to be able to slide into their openings, but just barely. If you notice that the doors or face frames are slightly out of square at this point, leaving a tapered gap in one or two spots, rest assured that the 1⁄8-in. reveals will erase those. The purpose of this first cut along the top edge is actually to set the gap at the bottom edge, which won’t be trimmed at all. You’ll trim the top edge again later, to perfect its reveal.
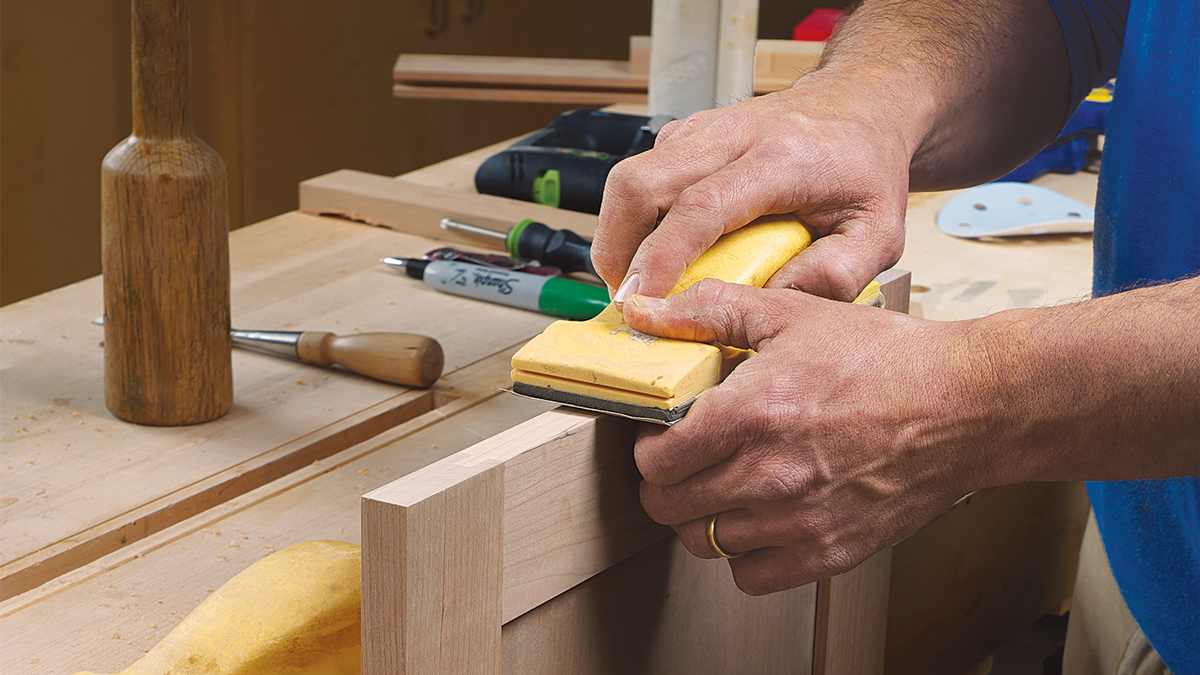
Sand the bottom. This is the last time you’ll want to remove any material from the bottom edge, so sand it through all but your final grit now.
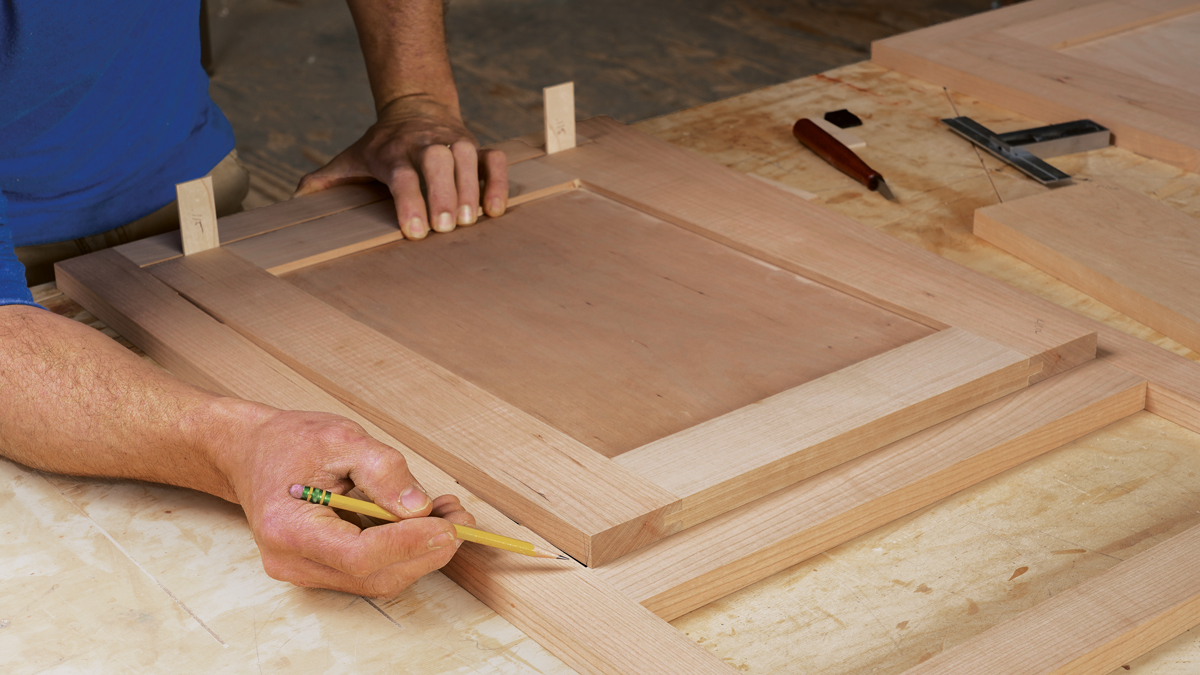
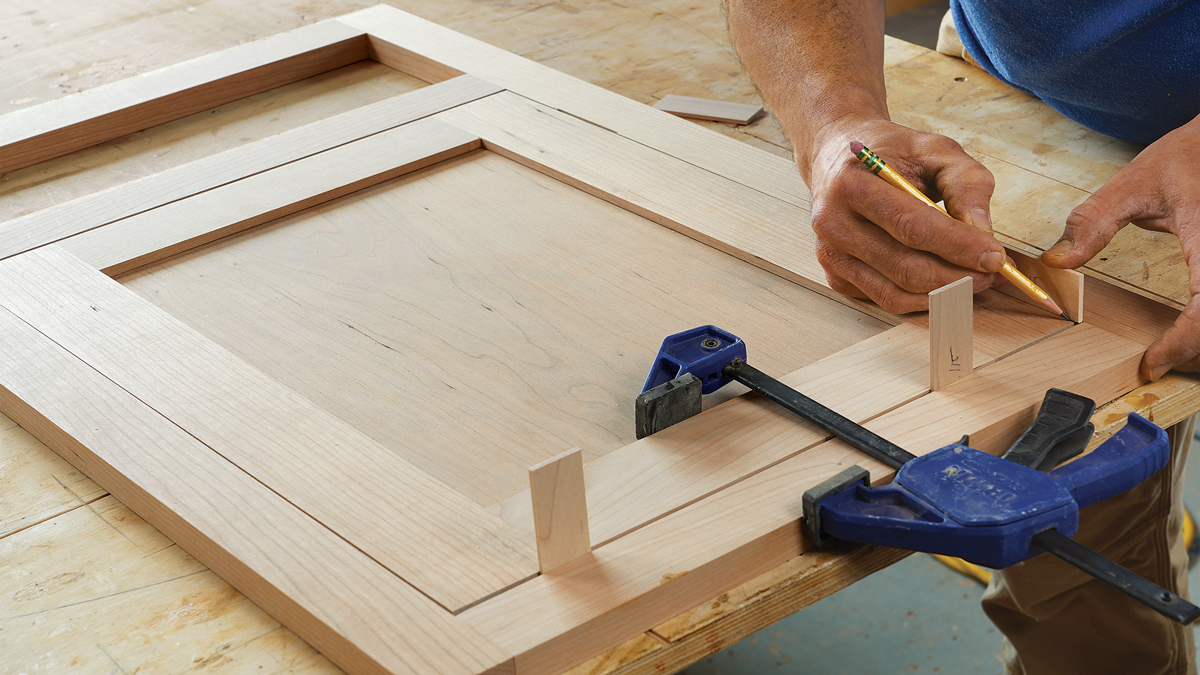
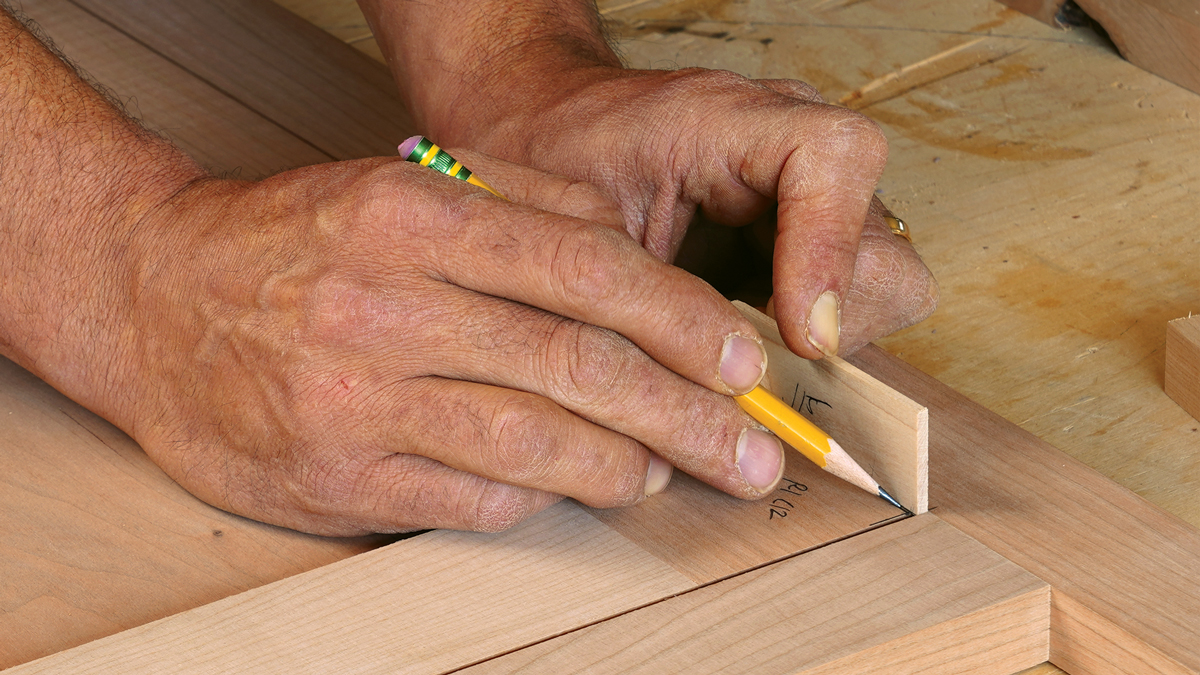
Mark the top edge. Set the shims at the bottom of the face-frame opening and place the door against them, with its top edge resting against the top of the face frame. Mark the top of the door where it hits the frame, and transfer those pencil marks onto the face of the door for trimming.
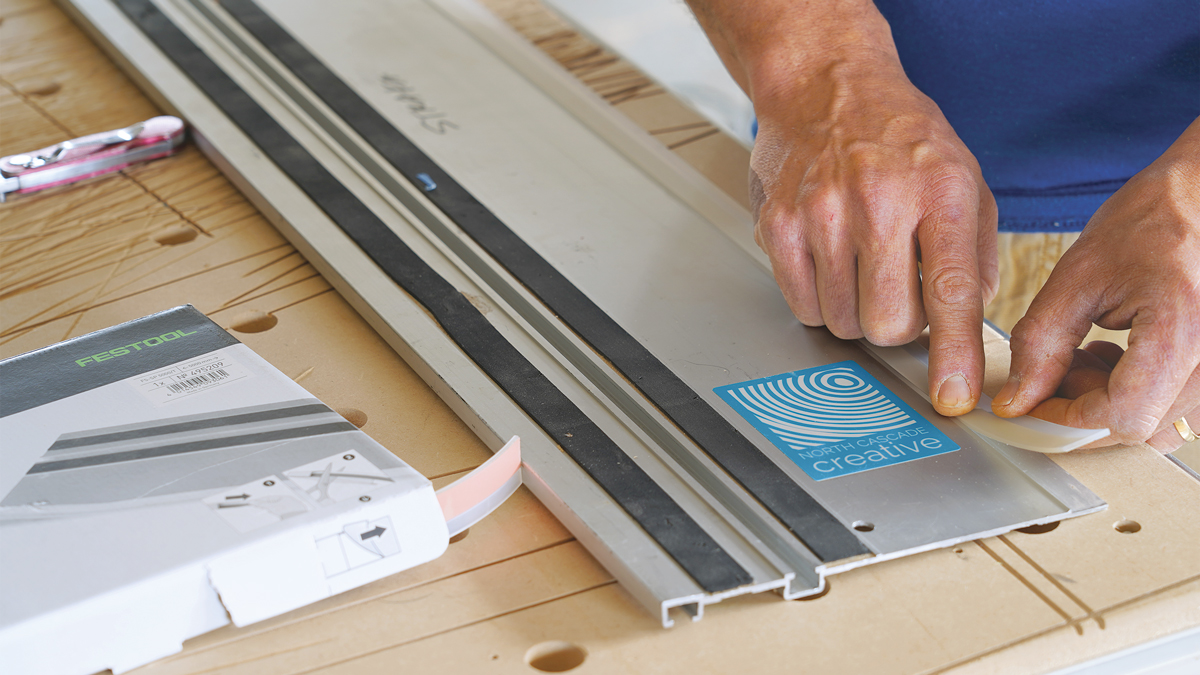
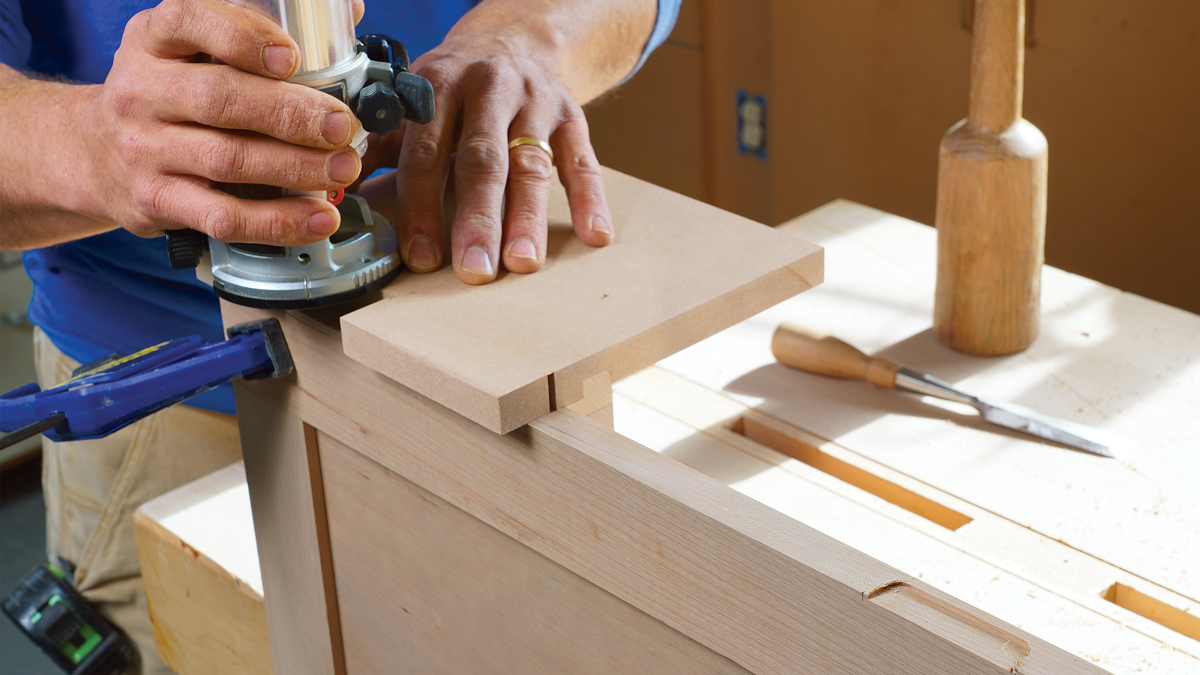
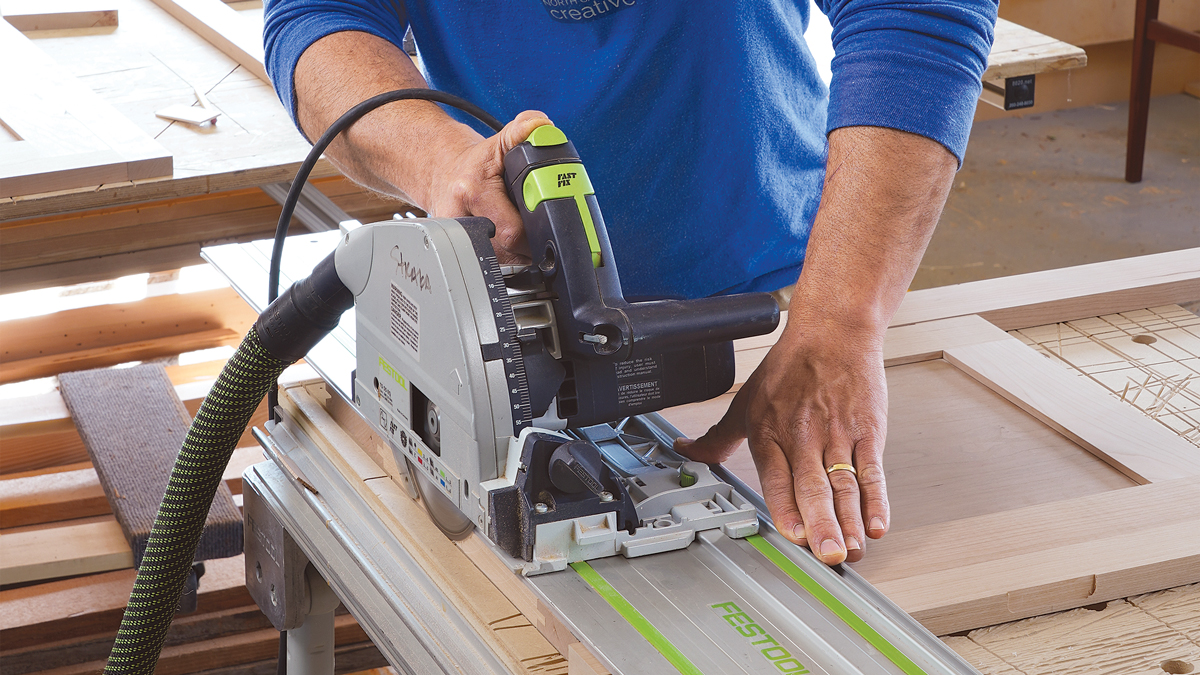
Tune up your track saw. Stick a new splinter guard on the edge of a track saw, and trim it with a fresh blade. This will make setup accurate and the saw cut cleanly.
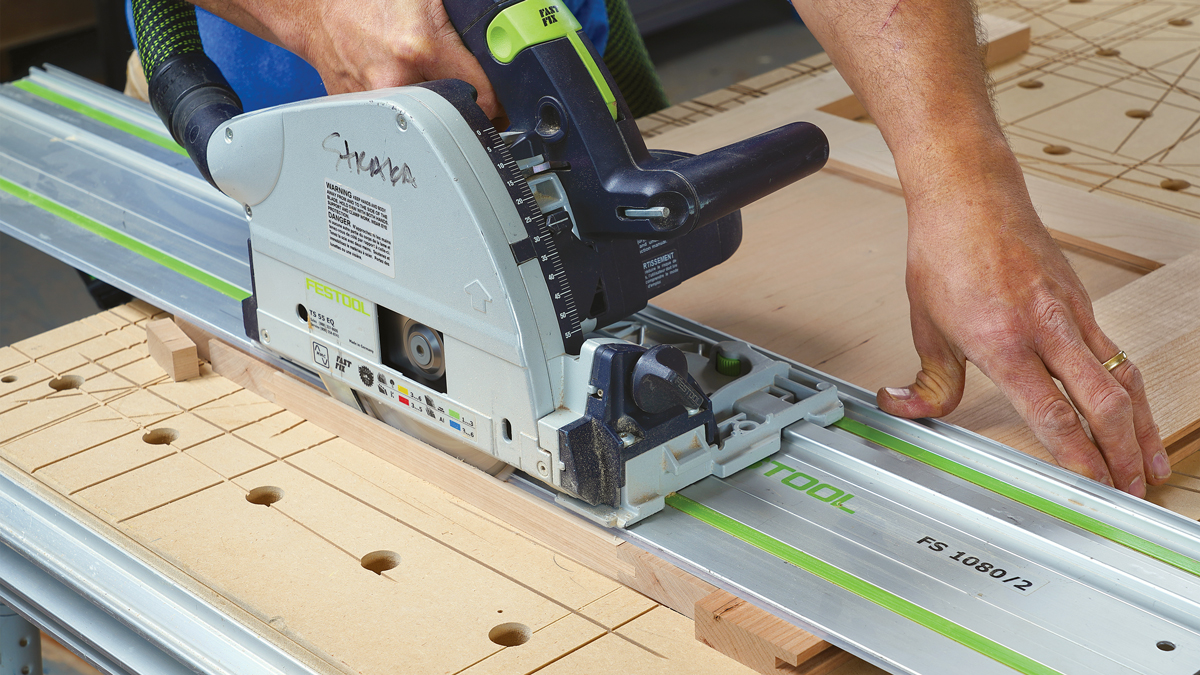
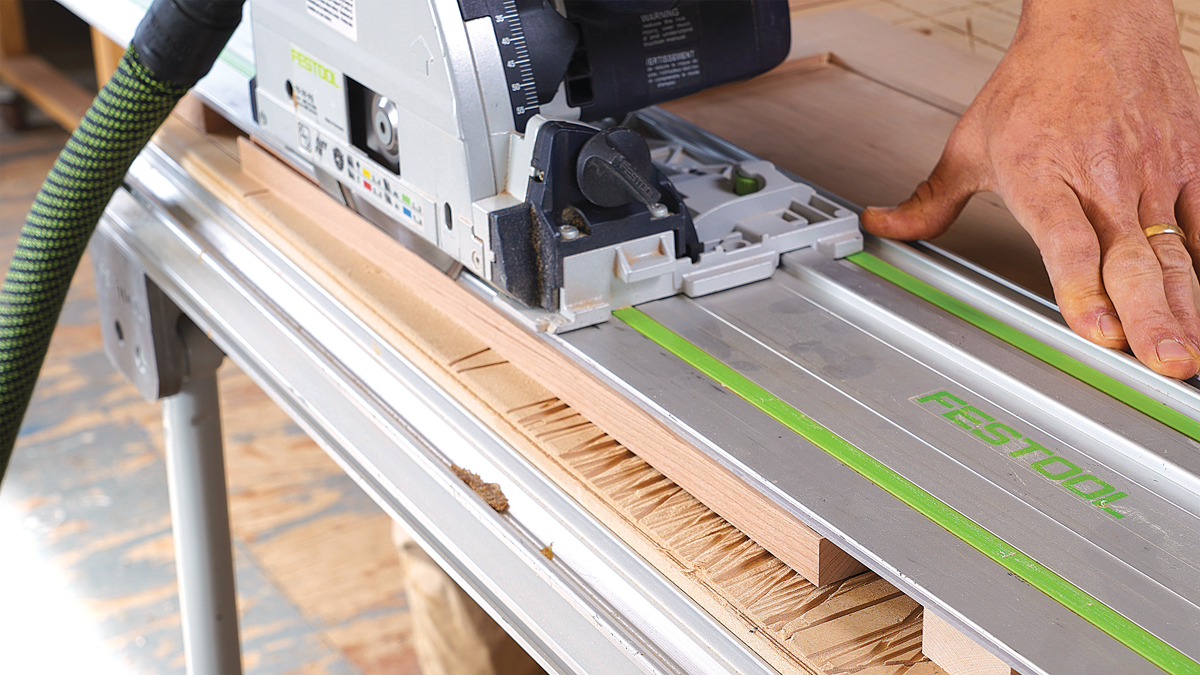
Make a smooth trim cut. For this cut, set up the track saw to just remove the pencil marks. Note the scrap boards (same thickness as the door) placed at the front and back edge. Those keep the track level at both ends of the cut, and prevent blowout at the back edge. Set the cutting depth of your saw at least 1⁄8 in. deeper than the door thickness, and make sure that it’s at full speed and full depth before you start the cut. For best results, cut all the way across in a single, steady push before retracting the saw.
Hinge side comes next
After each edge is trimmed, it is placed back in the opening and against one pair of shims to align it for marking the next edge, which is done using the other pair of identical shims. Place the door back in the opening against the bottom shims again. If it won’t fit you might have to trim some off one side or the other to correct an error in squareness.
 |
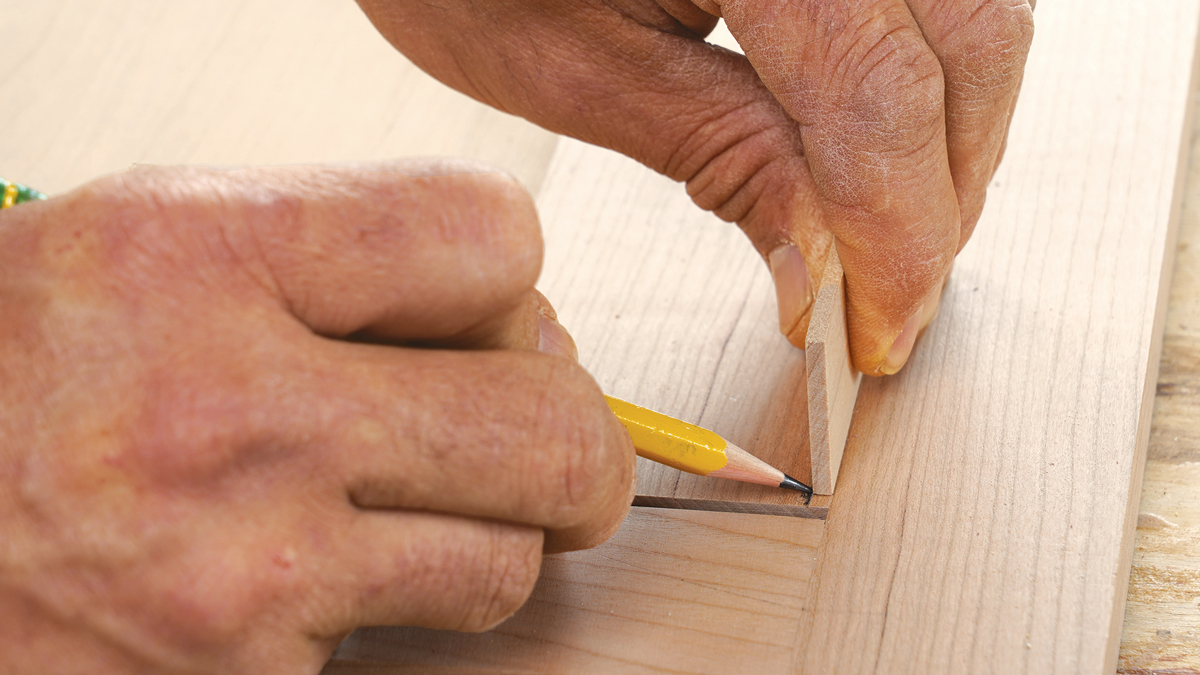 |
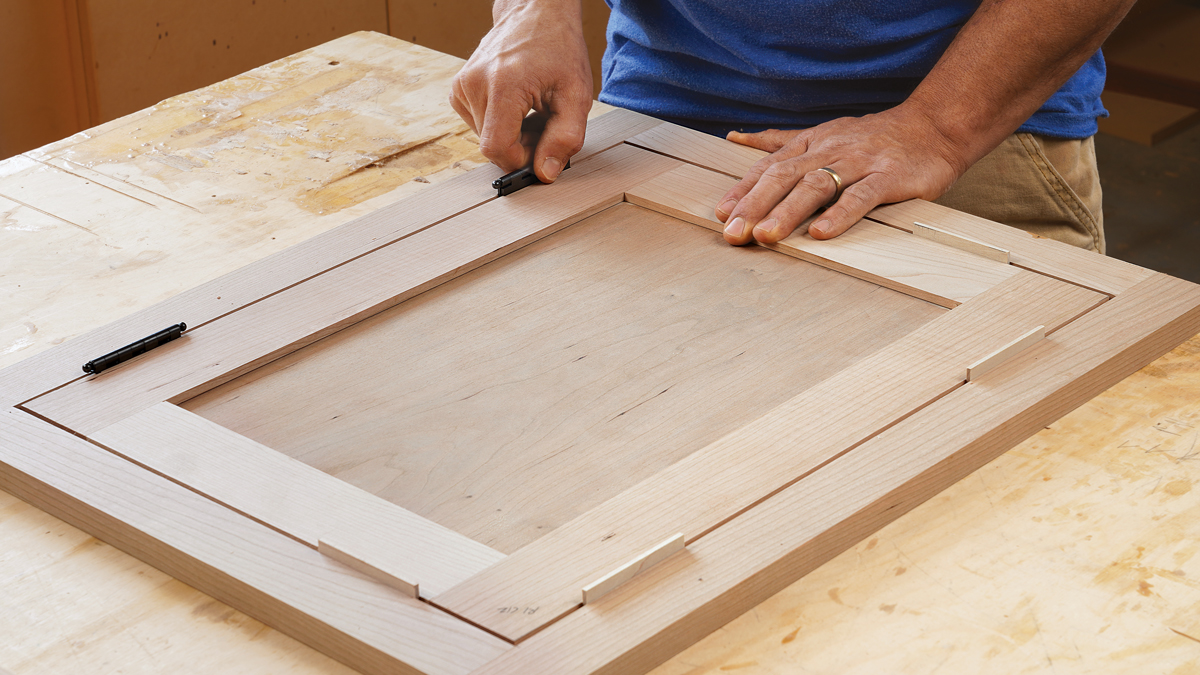
Mark the hinge side. With the door in the opening pressed firmly against the bottom shims and lightly against the strike side (opposite the hinges), place some of the same shim stock against the hinge edge of the face frame, and mark the hinge side. Align the shim visually with the edge of the face frame, and mark the door along the opposite side of the shim. Mark the top and bottom of the hinge edge with a sharp pencil line.
Trim the hinge edge of the door. This cut is in line with the grain, so you can push the extra support boards a little further away, to keep the track even more level. Try to split the lines with the splinter guard to ensure that you aren’t removing too much material.
Time to mortise the door
For mortised butt hinges, the next step is transferring the hinge locations from the face frame to the door, and routing the hinge mortises. Make sure you have not adjusted your router since you mortised the face frame. If you have, another test mortise is worth the extra time for a perfect hinge-side gap.
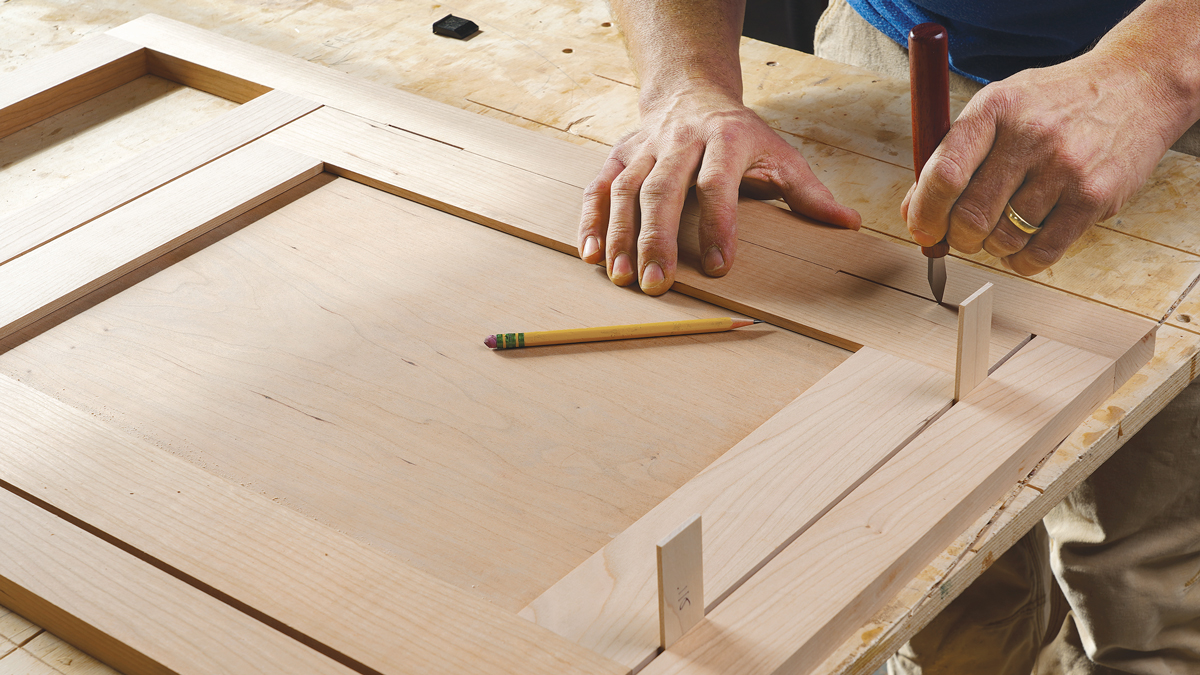
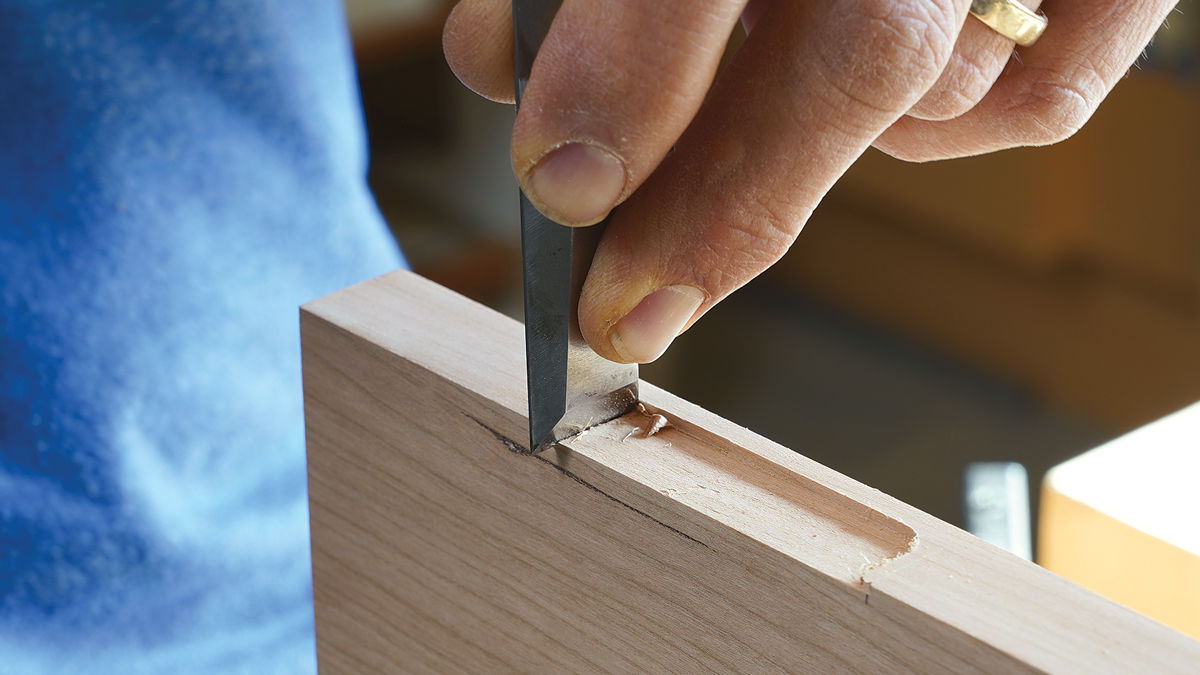
Mark the hinge locations. Sand the hinge side lightly and evenly to remove saw marks. Then place the door back in the opening, firmly against the bottom shims, and slide it against the hinge side. Using a sharp knife, transfer the mortise locations from the face frame to the door.
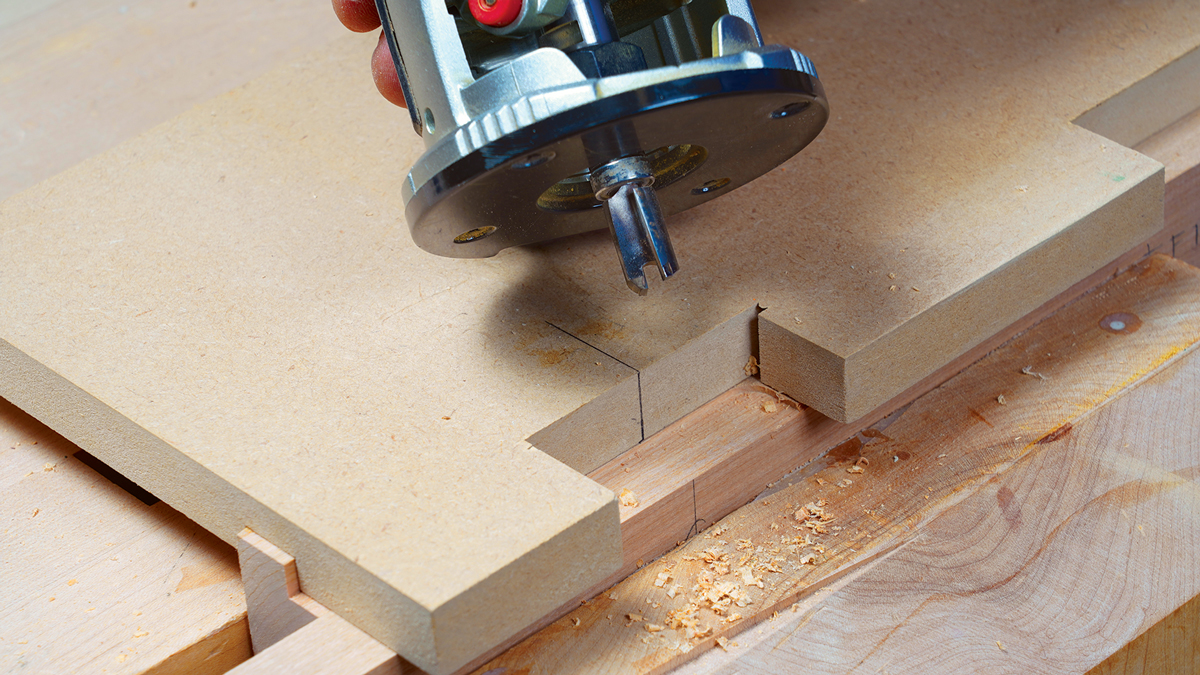
Rout the door mortises. To locate your router jig accurately on the knife lines, run a sharp pencil down each one to help it stand out.
Square the mortises. After routing, take a few moments to square the corners with a chisel.
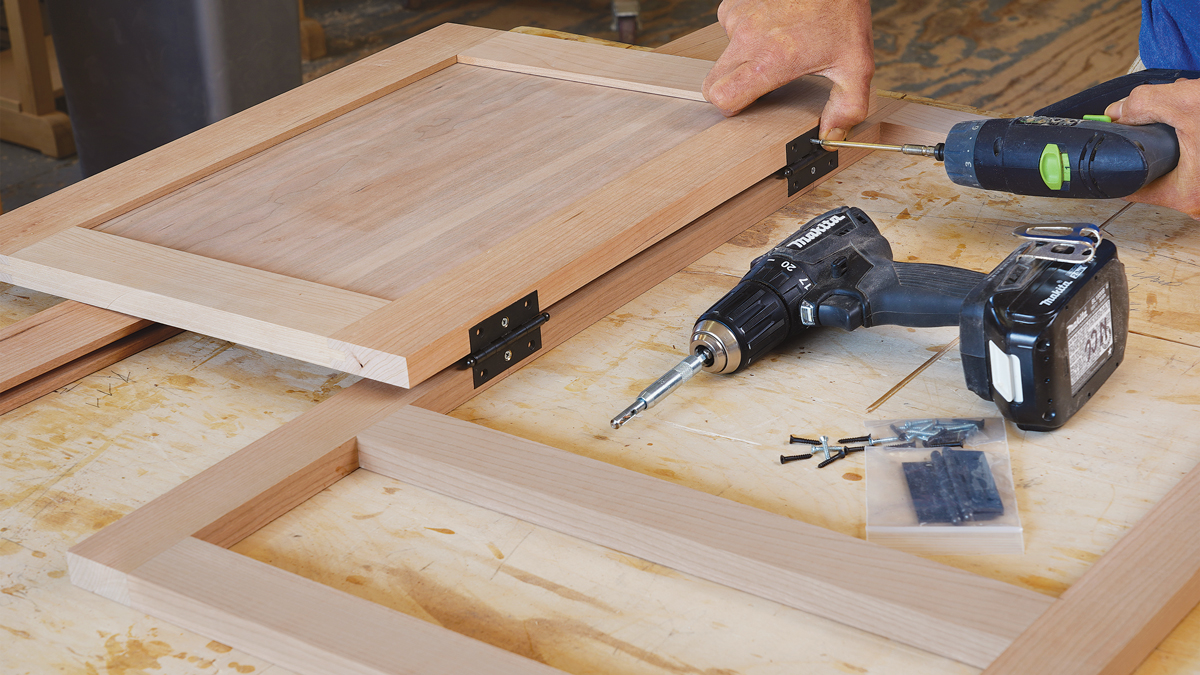
Test-fit the hinges. Set each side of each hinge into its mortise, use a self-centering bit to drill a single pilot hole for the center screw, and then attach the hinges temporarily with only the center screws. Set the clutch on your driver to the lowest torque setting to prevent stripping the screwheads or pilot holes.
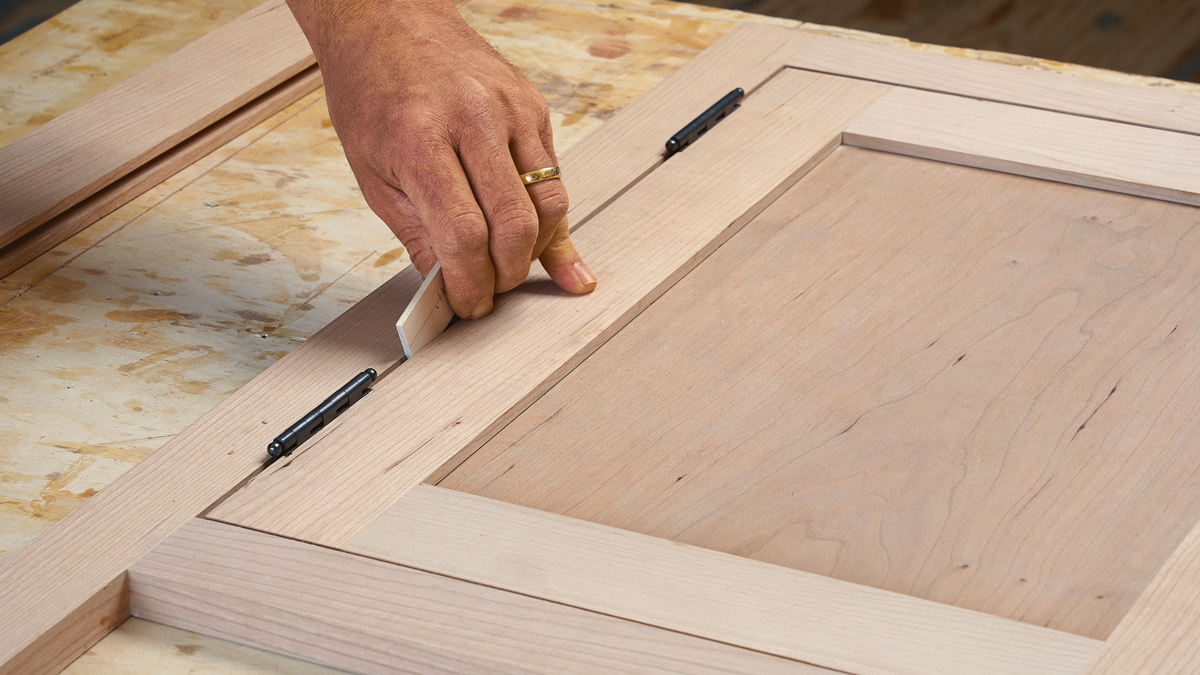
Check the gap. Use the set of shims milled to the full 1⁄8-in. thickness to inspect the hung door for even reveals on the hinge side and bottom edge. Misalignment along those edges indicates a problem with your router-jig setup. If the mortises are too shallow, rerout them. If too deep, use brass shim stock to shim out the hinge leaves as needed.
One step for the final edges
For individual doors like the one shown here, with the door mounted, you can now simply mark the strike side of the door and top edges at the same time to finish the process.
Mark the top side and strike side. Use the same shim-marking technique, being very careful to line up the outside of the shim with the inside of the face frame.
Final cuts. Set up your last two cuts just like before, with the edge of the track just splitting the lines, and scrap boards arranged to keep the track level and prevent blowout.
One last check. Slip the hinges and 1⁄8-in. shims into place to check the reveals. You can always take off another sliver if necessary. Now you can sand the last two edges to create the full 1⁄8-in. reveal.
Process for paired doors
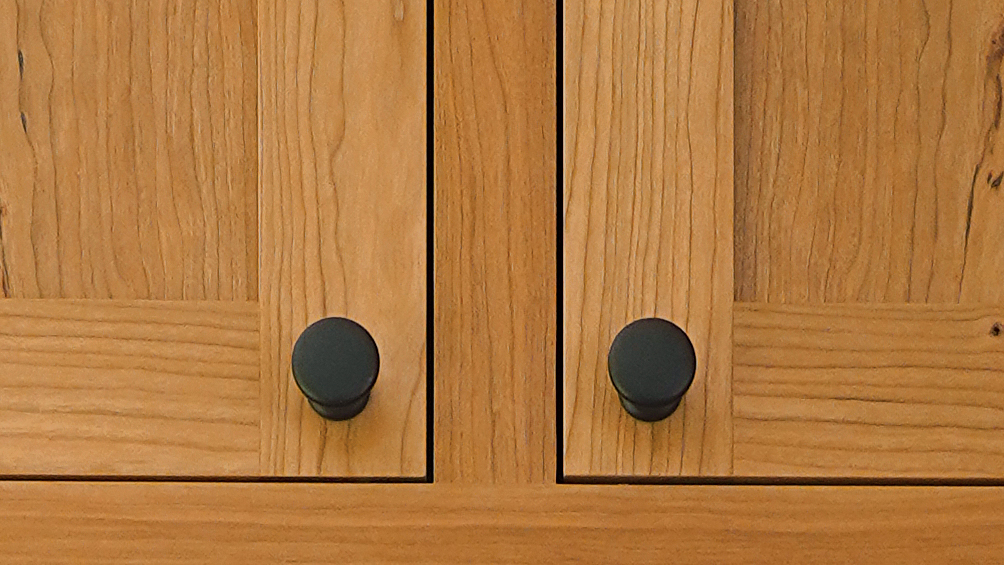
There is one situation where you need to adjust the above progression: paired doors. If you simply work all the way around one of the doors first with the usual process, you’ll end up removing the bulk of the strike-side material from just one door, leaving little to remove from the adjacent one. This will leave the strike-side stiles at different widths, which could be detectable by eye. To address this, I mark the center of the face-frame opening—top and bottom—and take both doors simultaneously through the hinge-mounting step. Then, keeping an eye on that center line, I trim off just enough of each one so the doors can close. Next, to create a perfect gap between the strike-side stiles, I center my marking shim on the face frame center line and mark both doors at the same time, top and bottom.
Stefan Straka owns North Cascade Creative, a professional cabinet and furniture shop in Bellingham, Wash. Photos by Asa Christiana.
To read the entire article, please click the View PDF button below.
RELATED LINKS
